WEEK 4
ELECTRONICS PRODUCTION
Make the Fab (tiny)ISP in-circuit programmer.
Which FabISP key: Andy's one
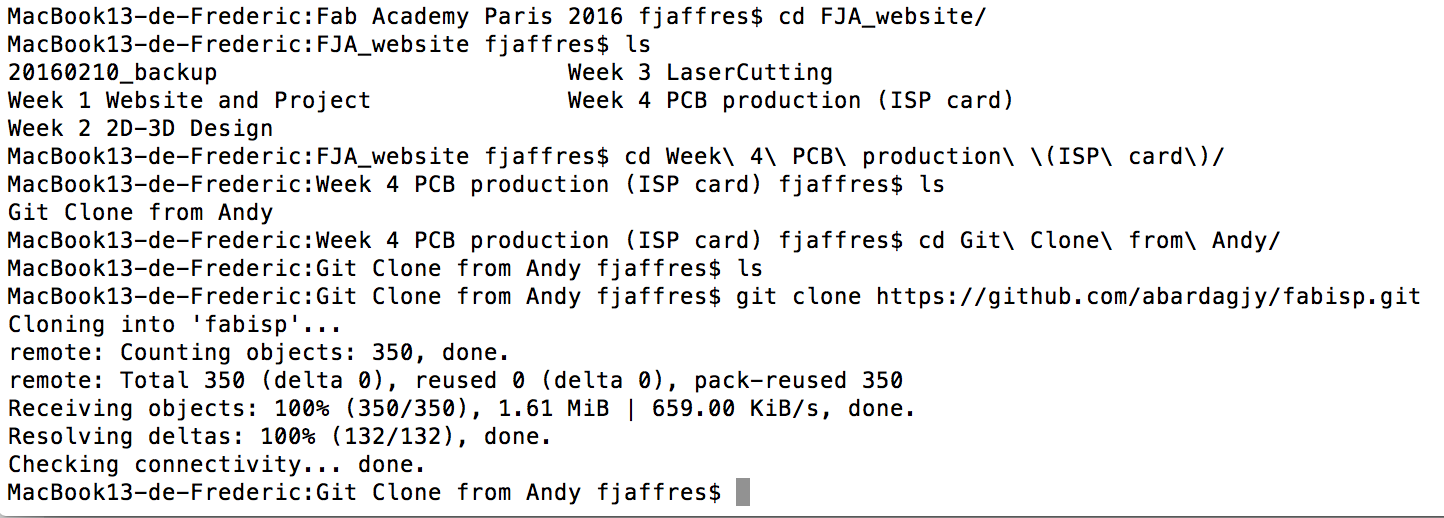
We decided with the team to go on the Andy's FabISP key.We went to Andy's repository on GitHub to get the last version of his key (v2.3), there we took the schema of the key (.png files).We transformed the .png files into .dxf files using Inkscape,then we opened them in VCarve Pro in order to build the final file (a G-code .tap file) compatible with our enormous CNC machin ;-)
Getting the source on Andy's repository:
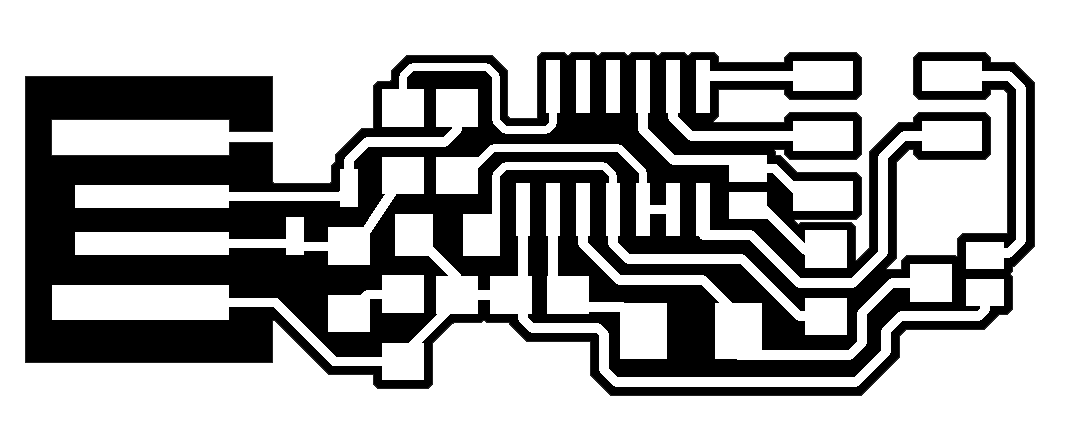
Andy's key schemas in .png:

Creating and preparing the board
|
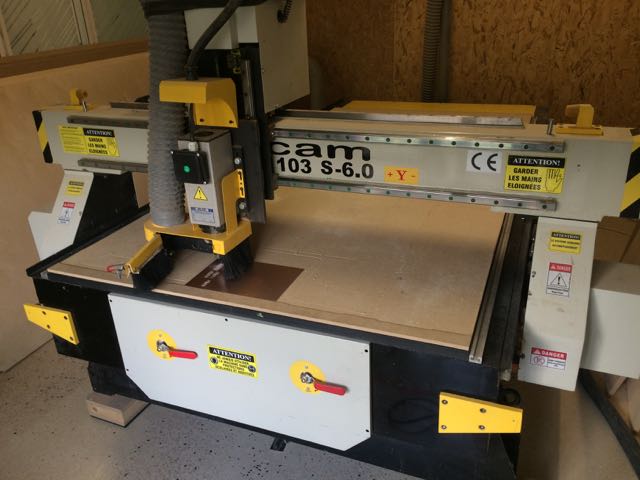
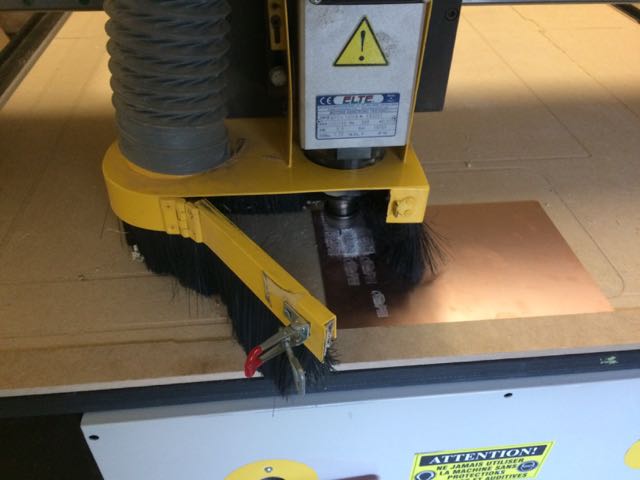
As we did not receive the desktop milling machine,We had to use the big CNC.
|
A long time to get it running,A lot of configuration, with some different milling cutters.But finally it runs
|
|
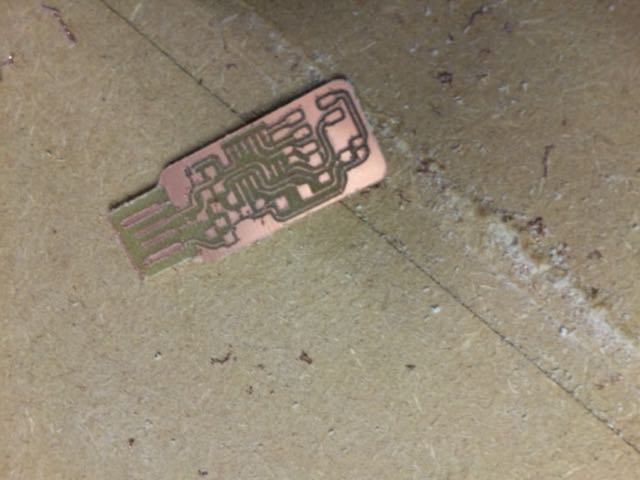
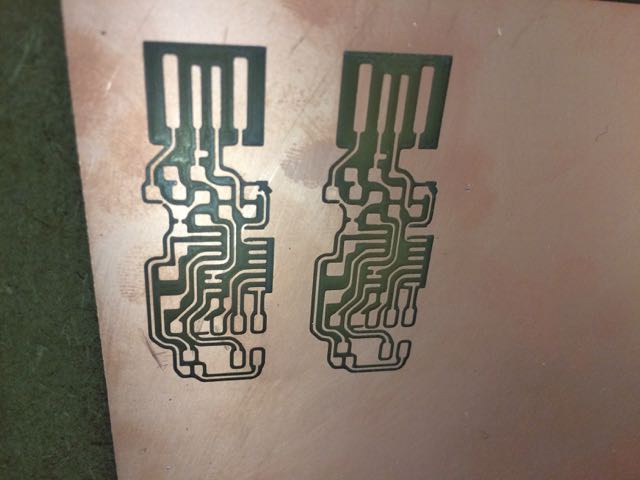
Here is the result, not so bad(for a PCB done with such a big CNC machine).
|
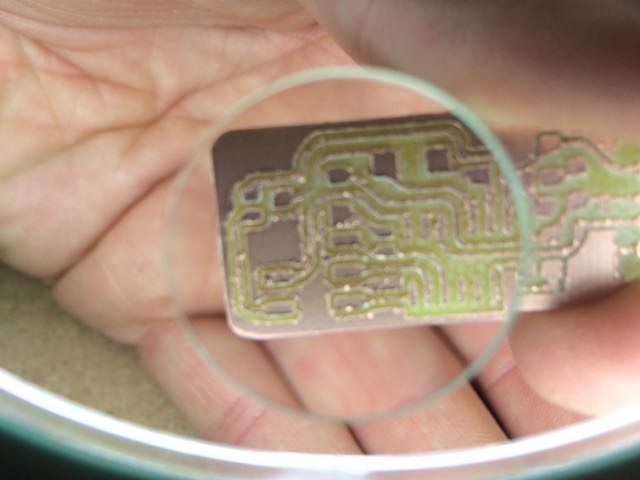
But using the magnifying glassIt is not so clean, and we need to manually arrange this...
|
|
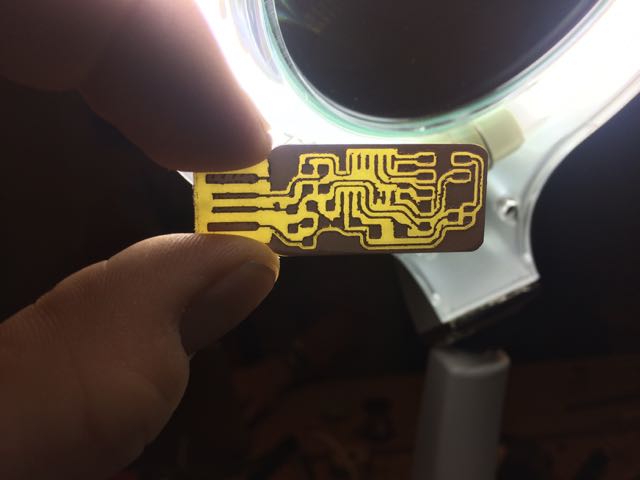
after some time, using sandpaper, and a cutter,the PCB is no more presentable.
|
connection are tested using a multimeterand holes are done for 2 componants that will require it.
|
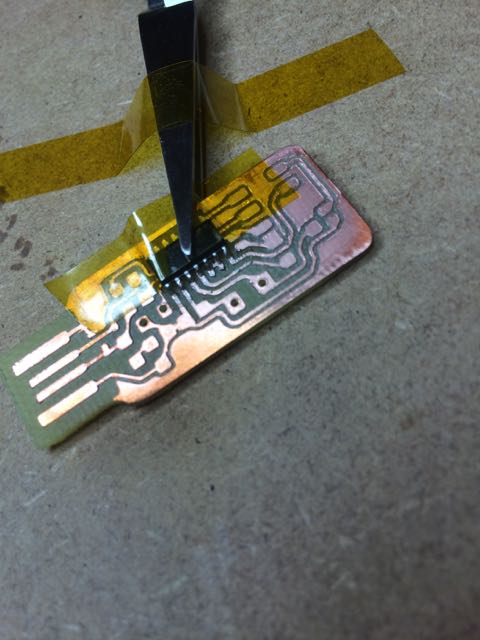
Starting soldering of components
|
Using some pliers and Kapton Tape in order to maintain the componant at its good position.
|
Using Solder Paste to do the soldering
|
|
Here is the resultIt looks clean
|
Here is our soldering installation
|
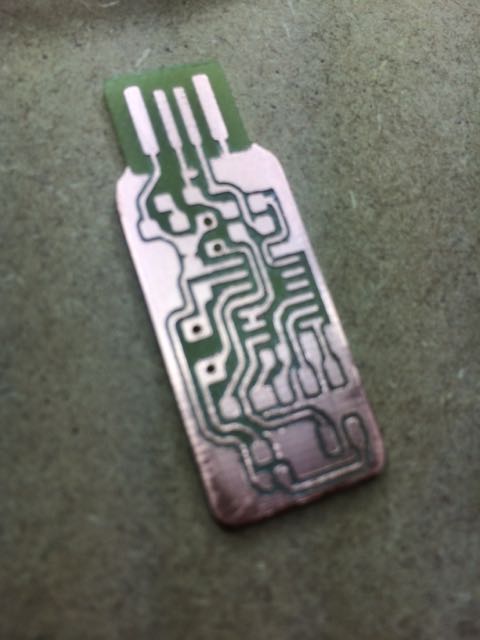
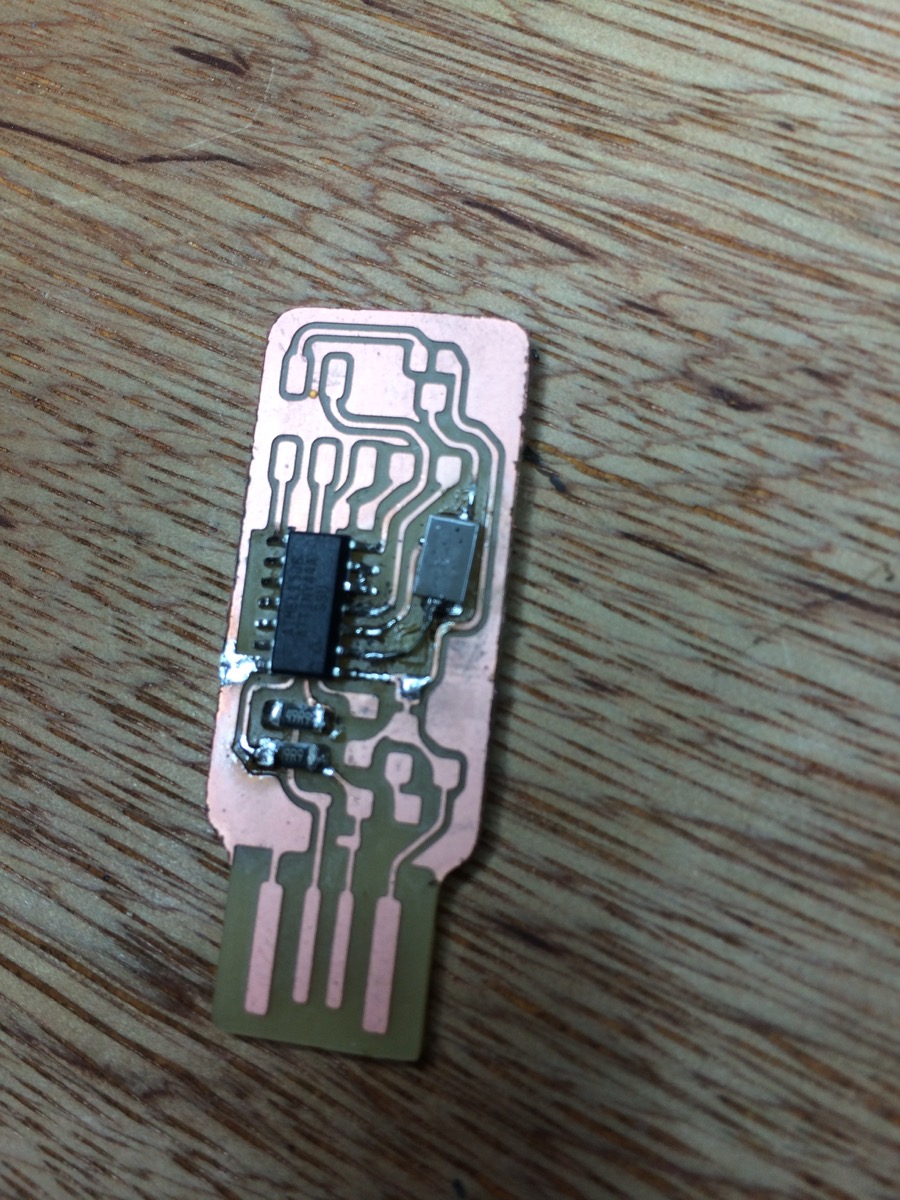
And around 08:00PM on tuesday we finally did some better board (using another PCB material), probably the good board to finalize my FabISP key!
Finalizing the soldering
|
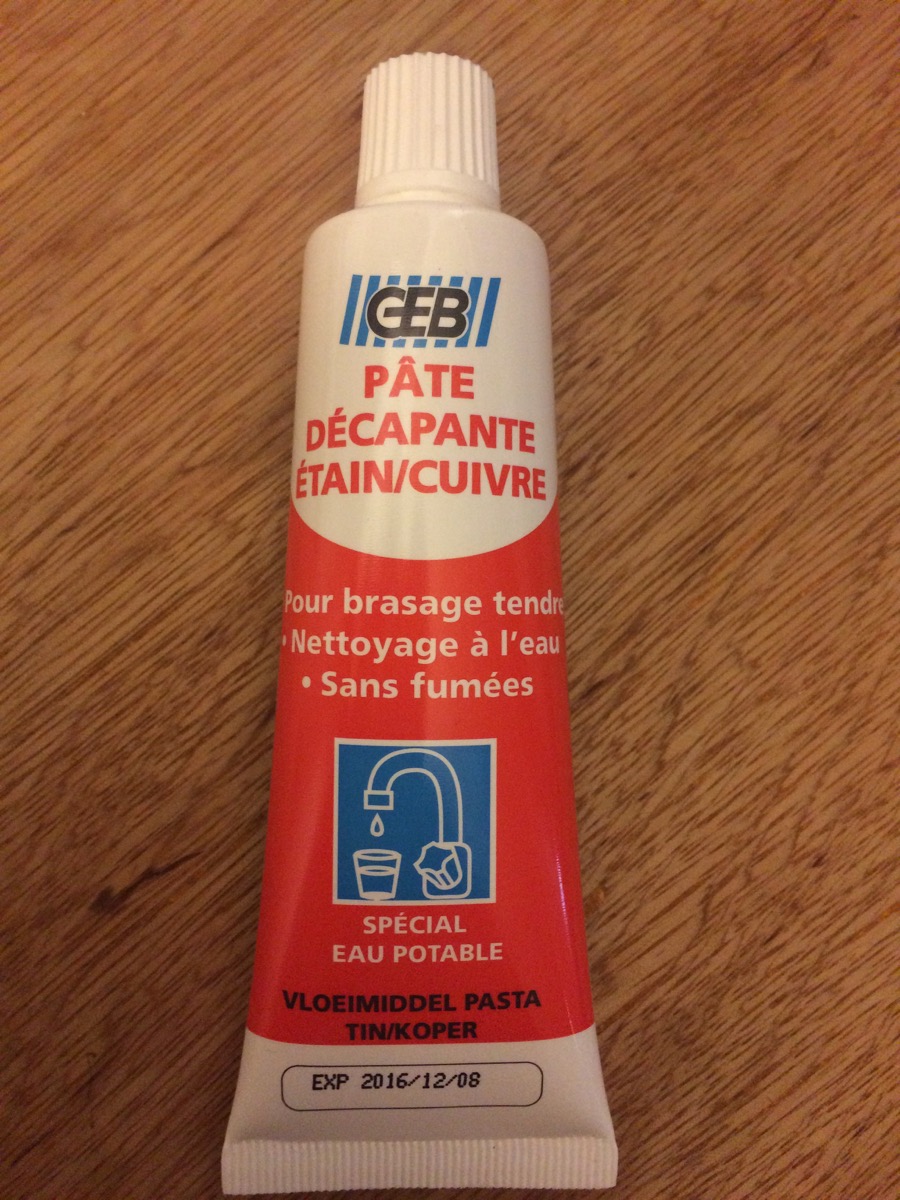
We use some Flux to simplify the solderingIt is really easier with it
|
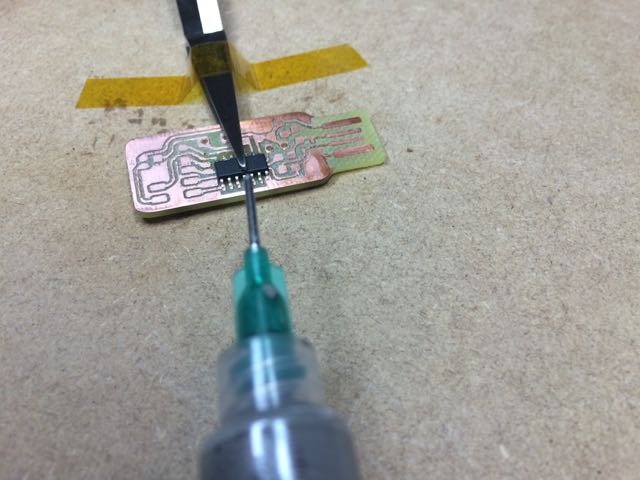
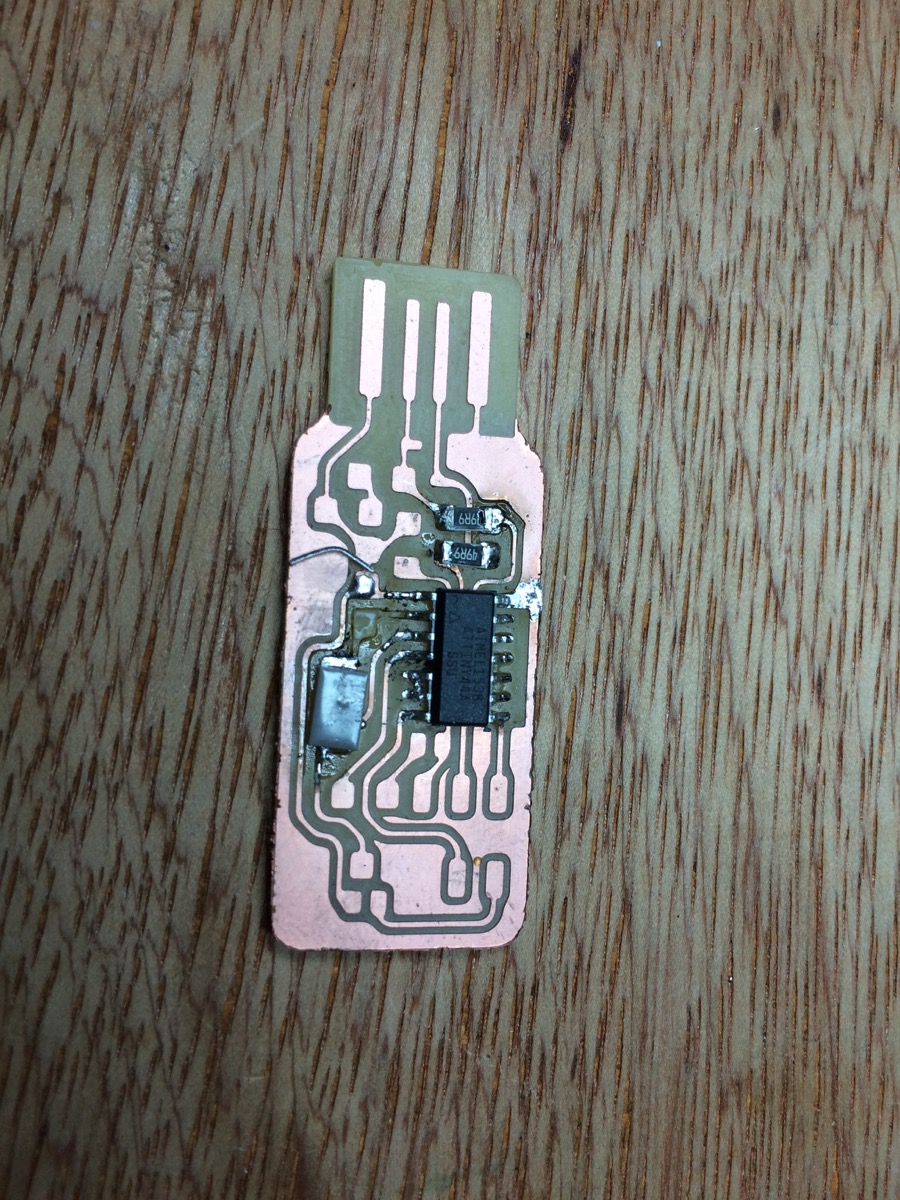
When I tried to unsolder a connection, I damaged my PCB, 1 trace was broken
|
|
I repaired it with a wireand I tested with the multimeter, every connection is ok after this reparationeven with the capacitor solder on it
|
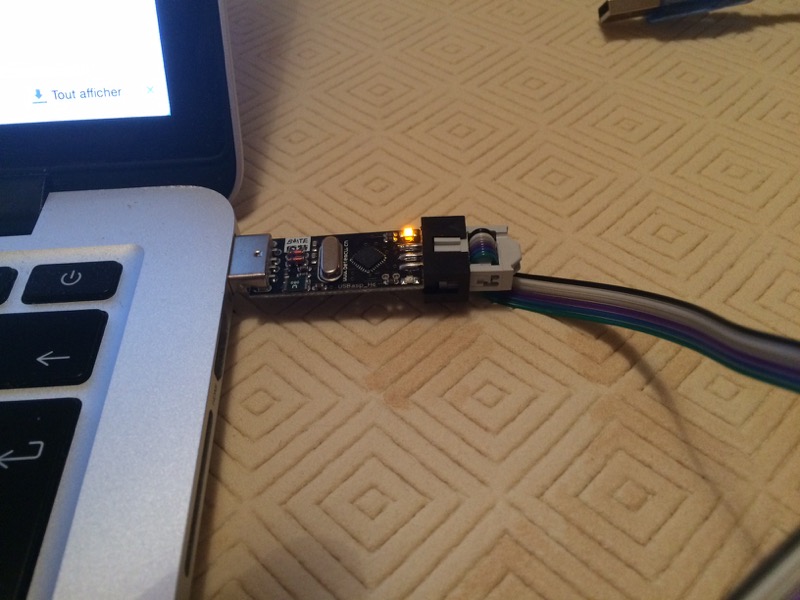
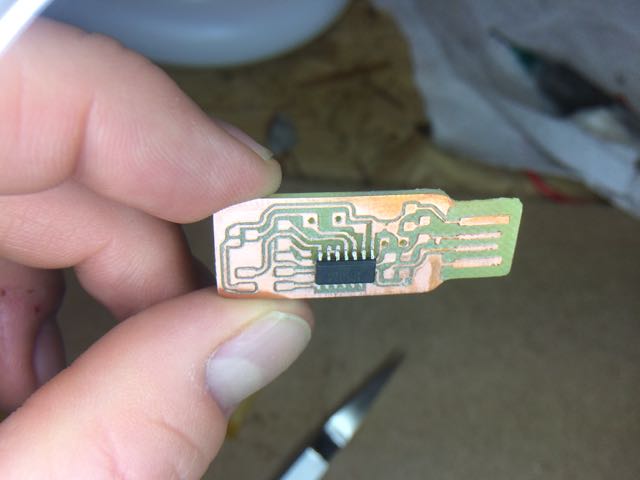
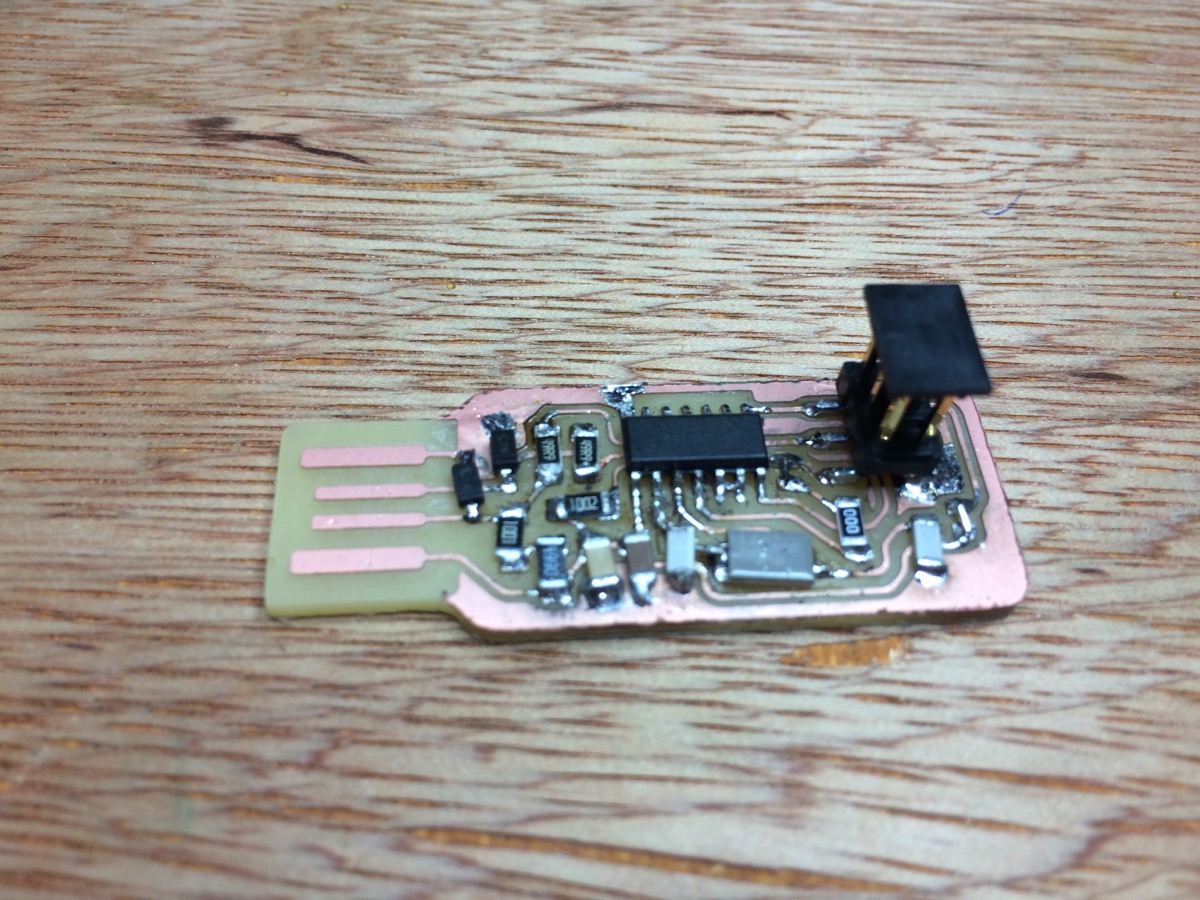
Here is my final FabISPnot so bad for a first soldering ;-)
|
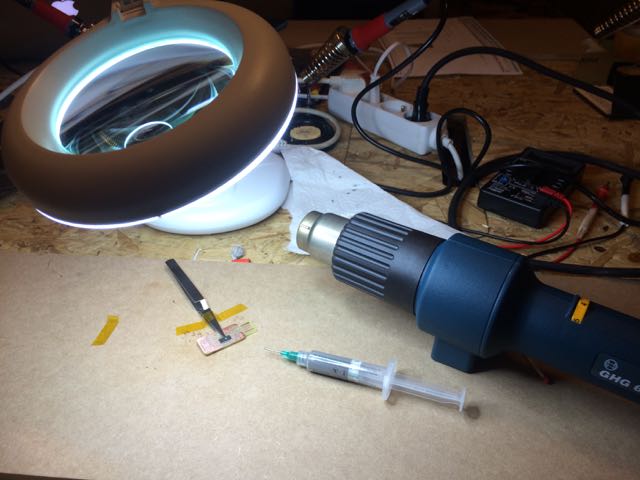
Now programming it
|
First, I tried to program my FabISP with an Arduino Uno, but it was a failure.
Then I decided to use a USBasp as a programmer.
As a first test, I tried to read the flash of the microcontroller of my FabISP,
this was working Ok, see the result here:
|
|
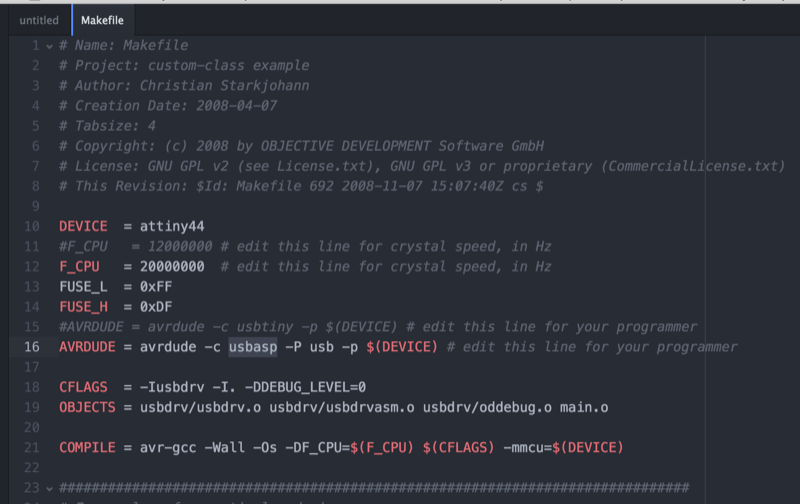
Secondly, I updated the Makefile.
In a very first time with the firmware from Andy's GIThub, but it gave errors (when doing "make hex" command)
Then I did it with the firmware from the Schedule page from the FabAcademy website
Here is the change done in the Makefile, to specify the USBasp as a programmer
|
|
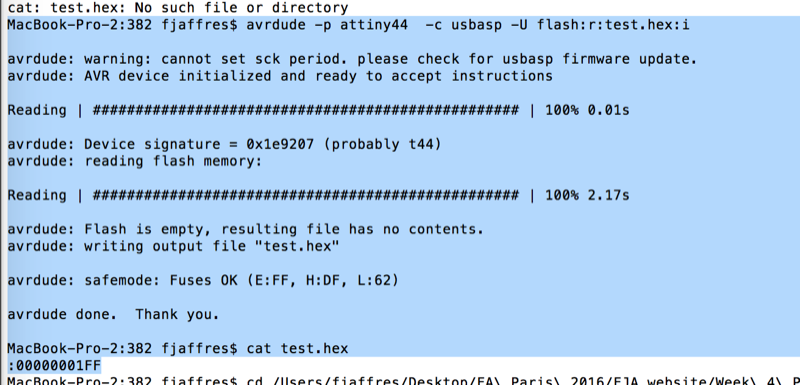
Here is my "make hex" command output:
test.hex file
|
|
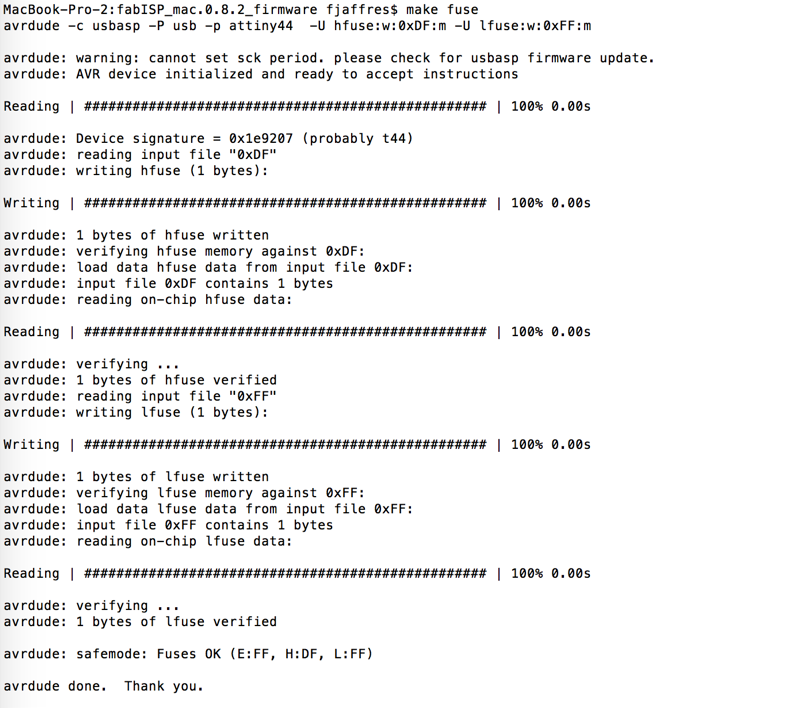
Here is my "make fuse" command output:
|
|
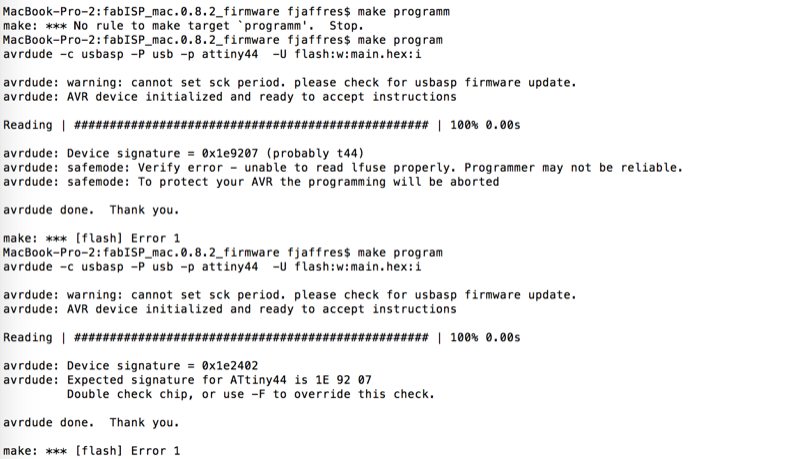
Here is my "make program" command first outputs.
Giving some errors (different error each time, like random)
Very probably because of not enough power!!
|
|
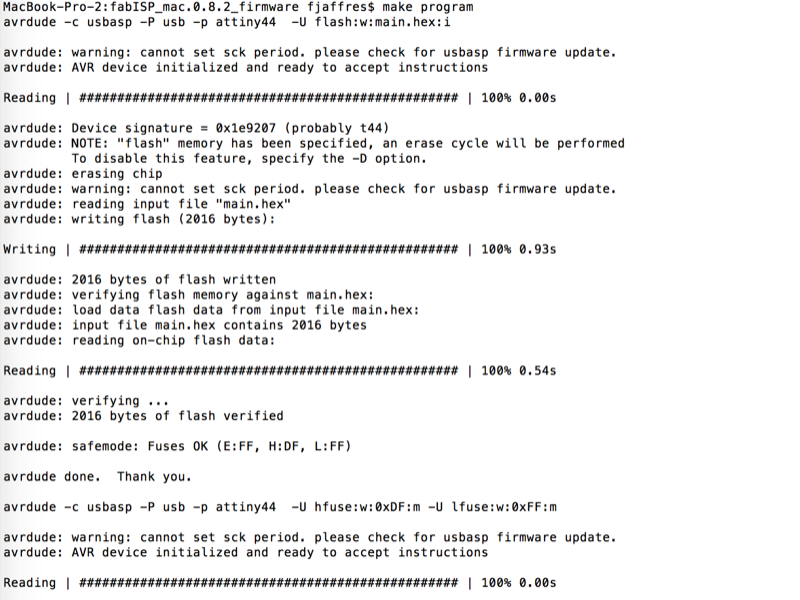
Here is my "make program" command output, after connecting the FabISP to a USB port to give some additional power
|
|
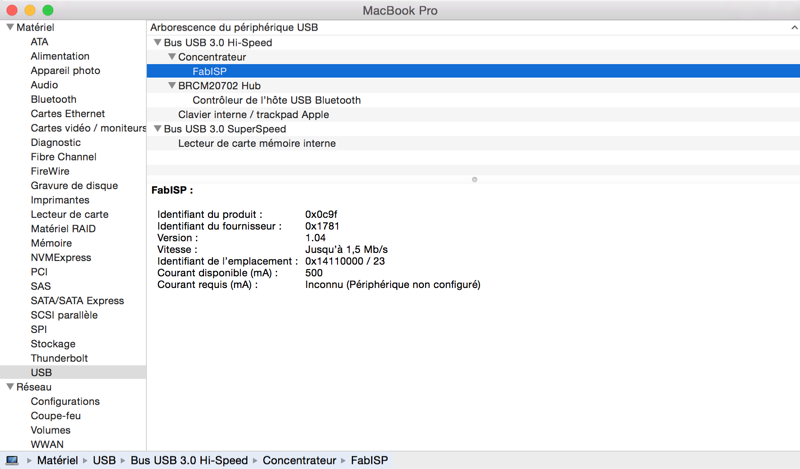
Here is my FabISP visible from my OS
ready to use !! :-)
after unsoldering the 2 jumpers
|
|
Here is the USBasp programmer:
|
|
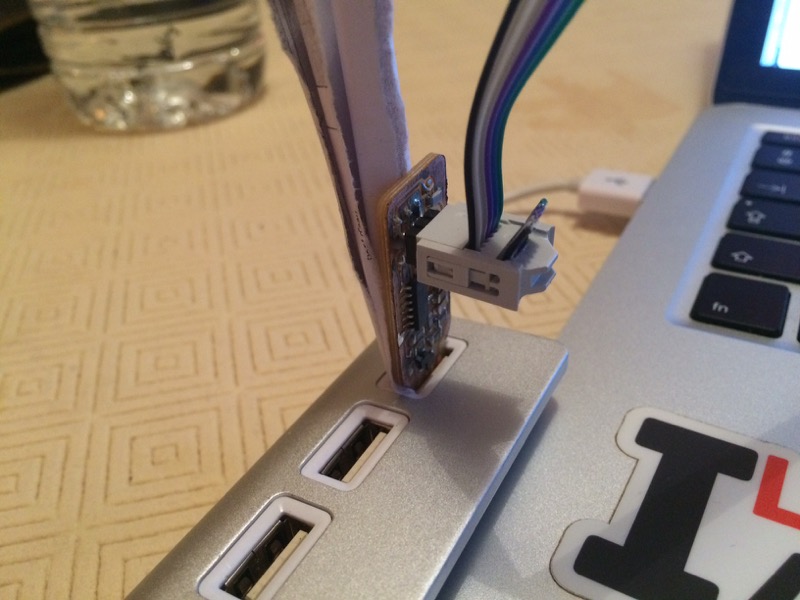
Here is my FabISP, connected to a USB concentrator, to give the extra power:
|