Cardboard Penholder
As first experiment with the lasercutter i've made a penholder with multiple layers of cardboard. I used an old graphic i've done several years ago.
Machine settings (GCC – Spirit GLS)
- Cardboard 5mm
- Speed: 15%
- Power: 100%
Lasercut file (Rhino)
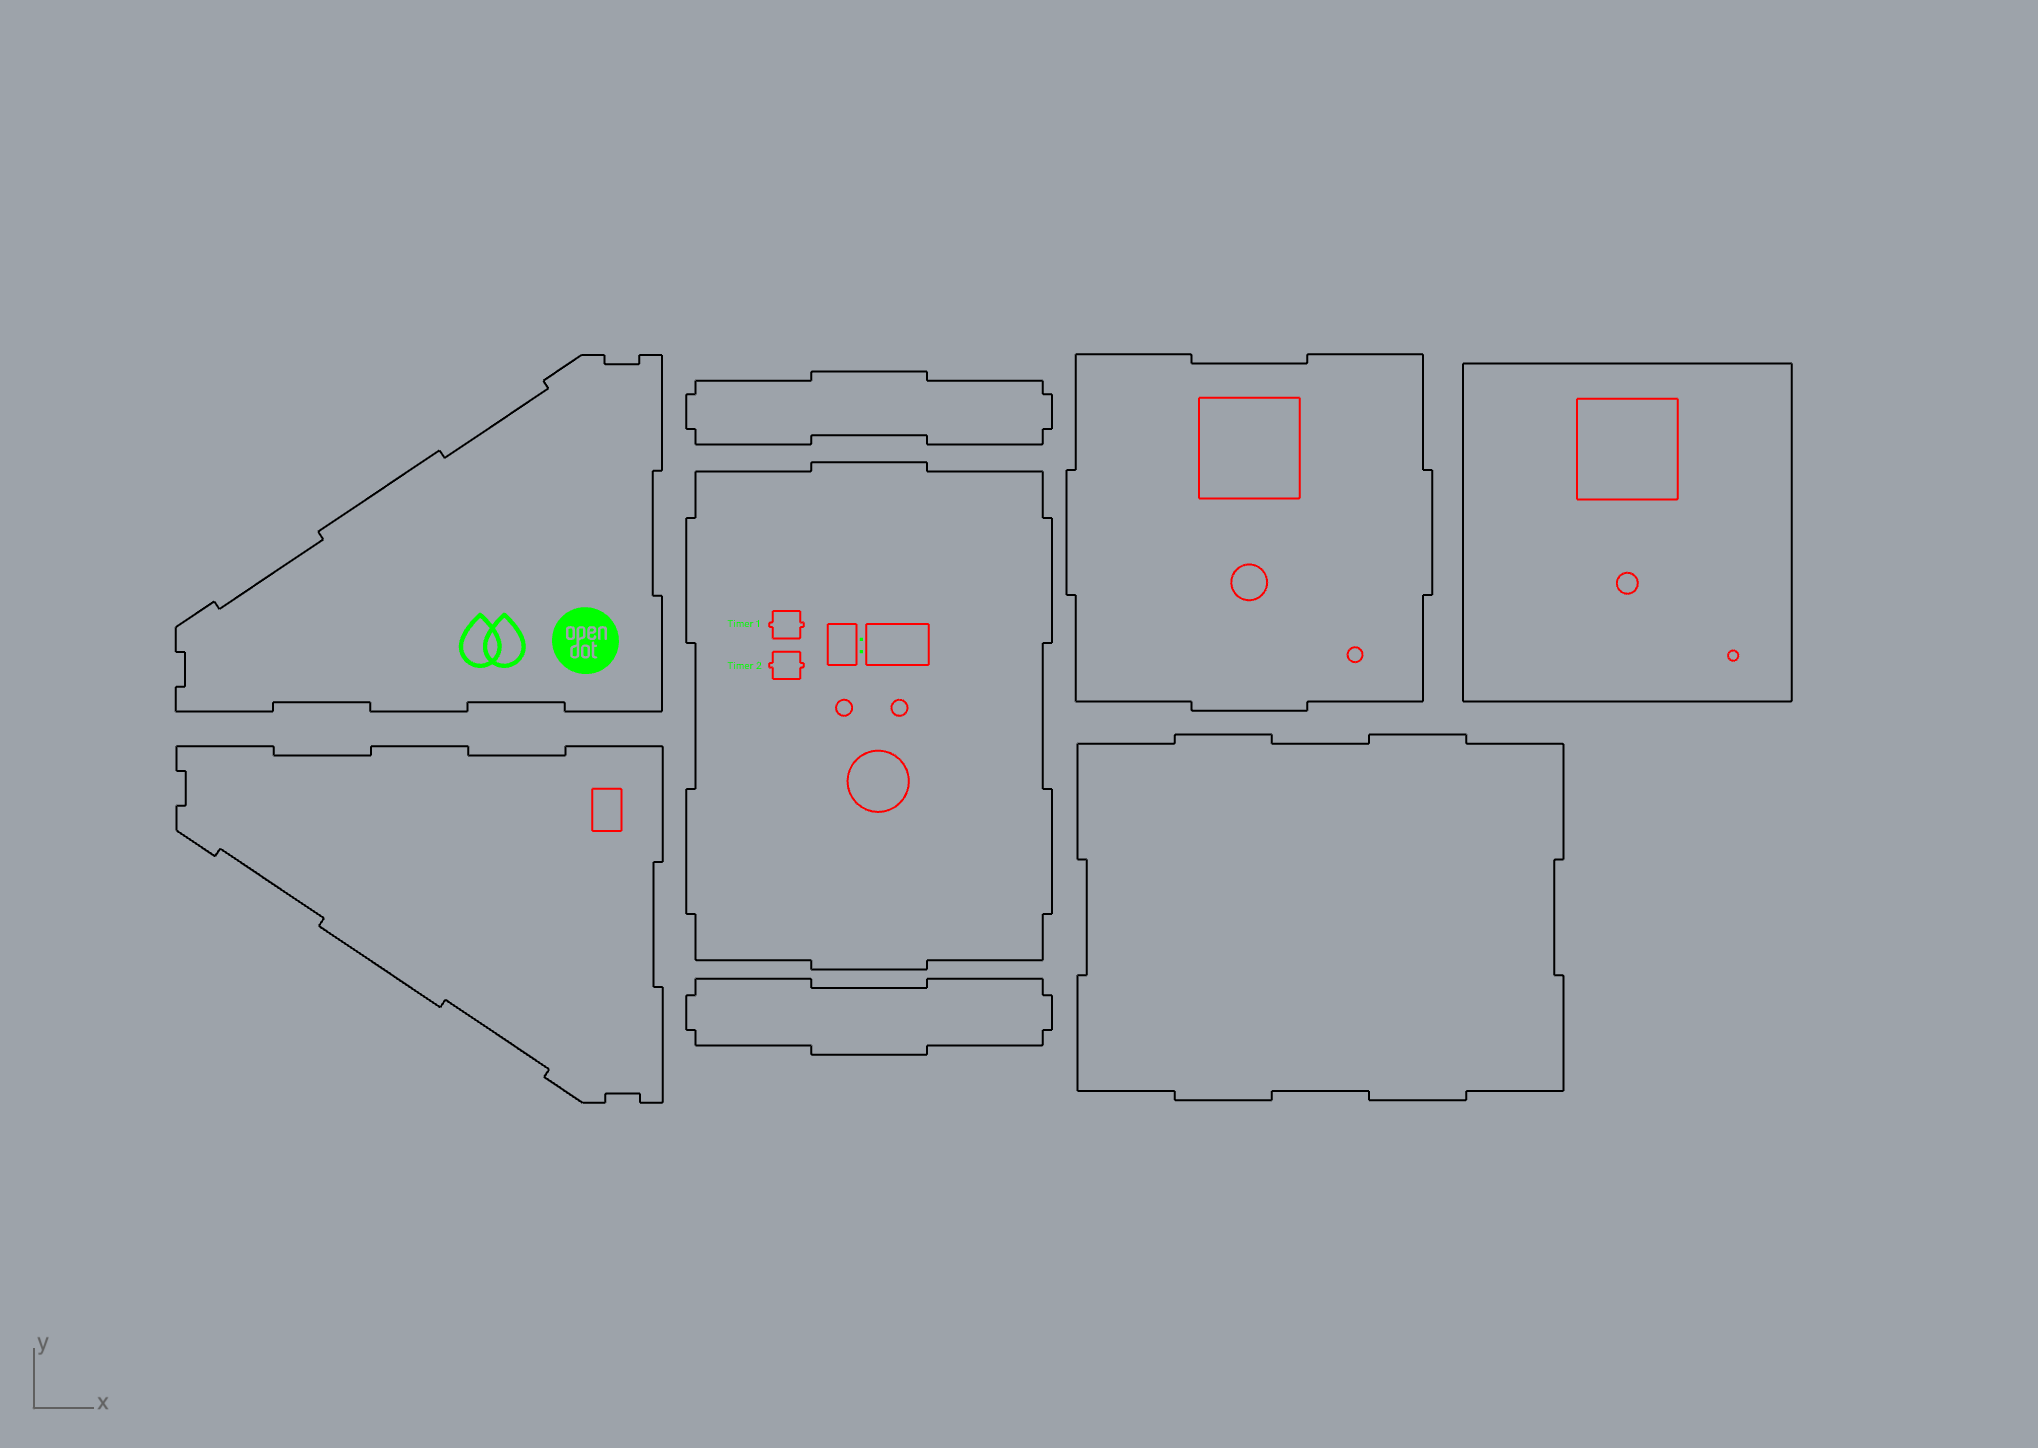
Lasercut file (dxf)
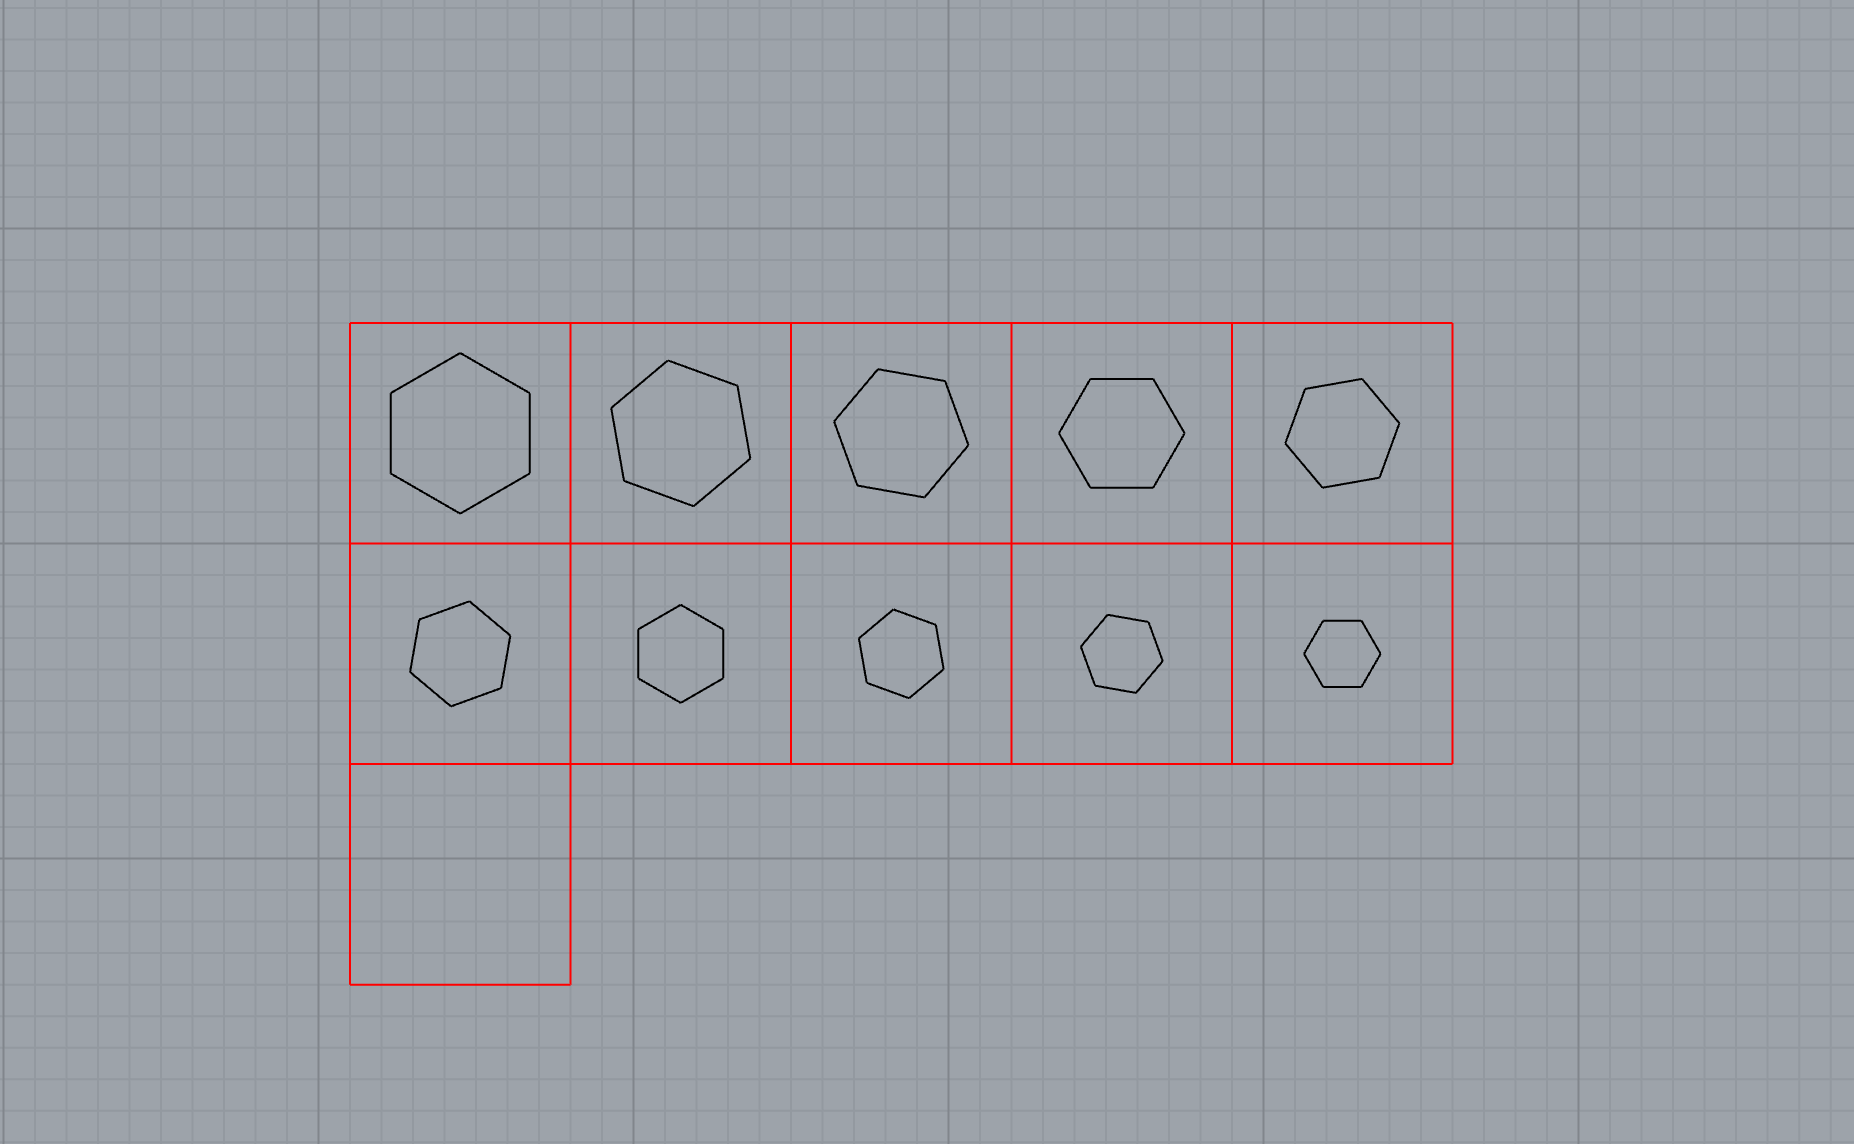 2 levels of cut: inner cuts on black (first one), outer cuts on red (second one)
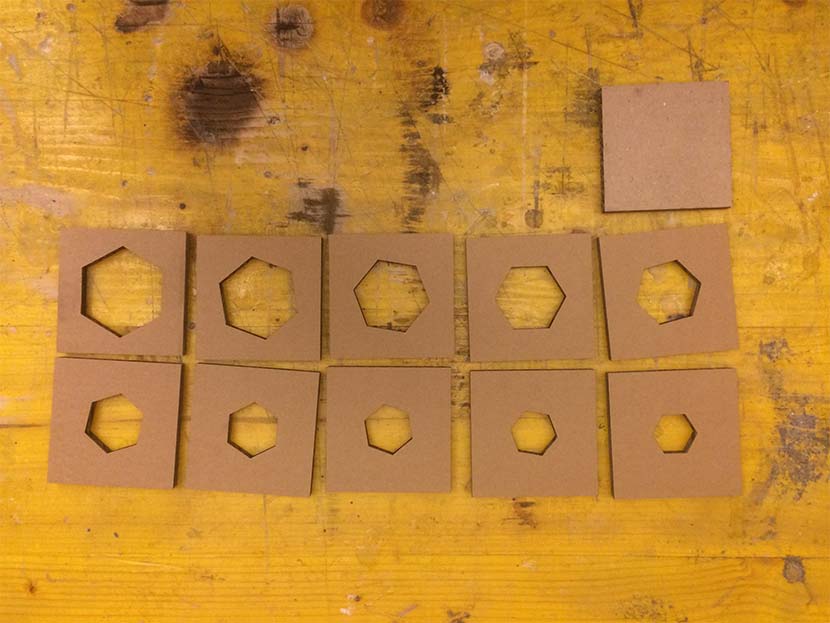
This is the results of the lasercutting:
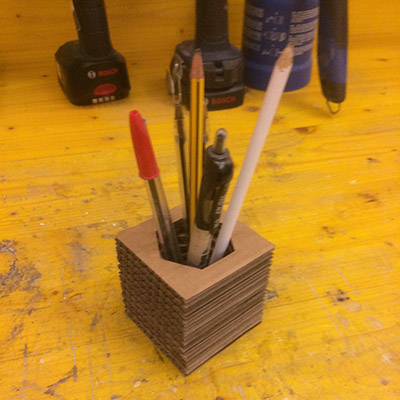
Then I've glued together each layer, and this is the result:

Electronic's case for final prj
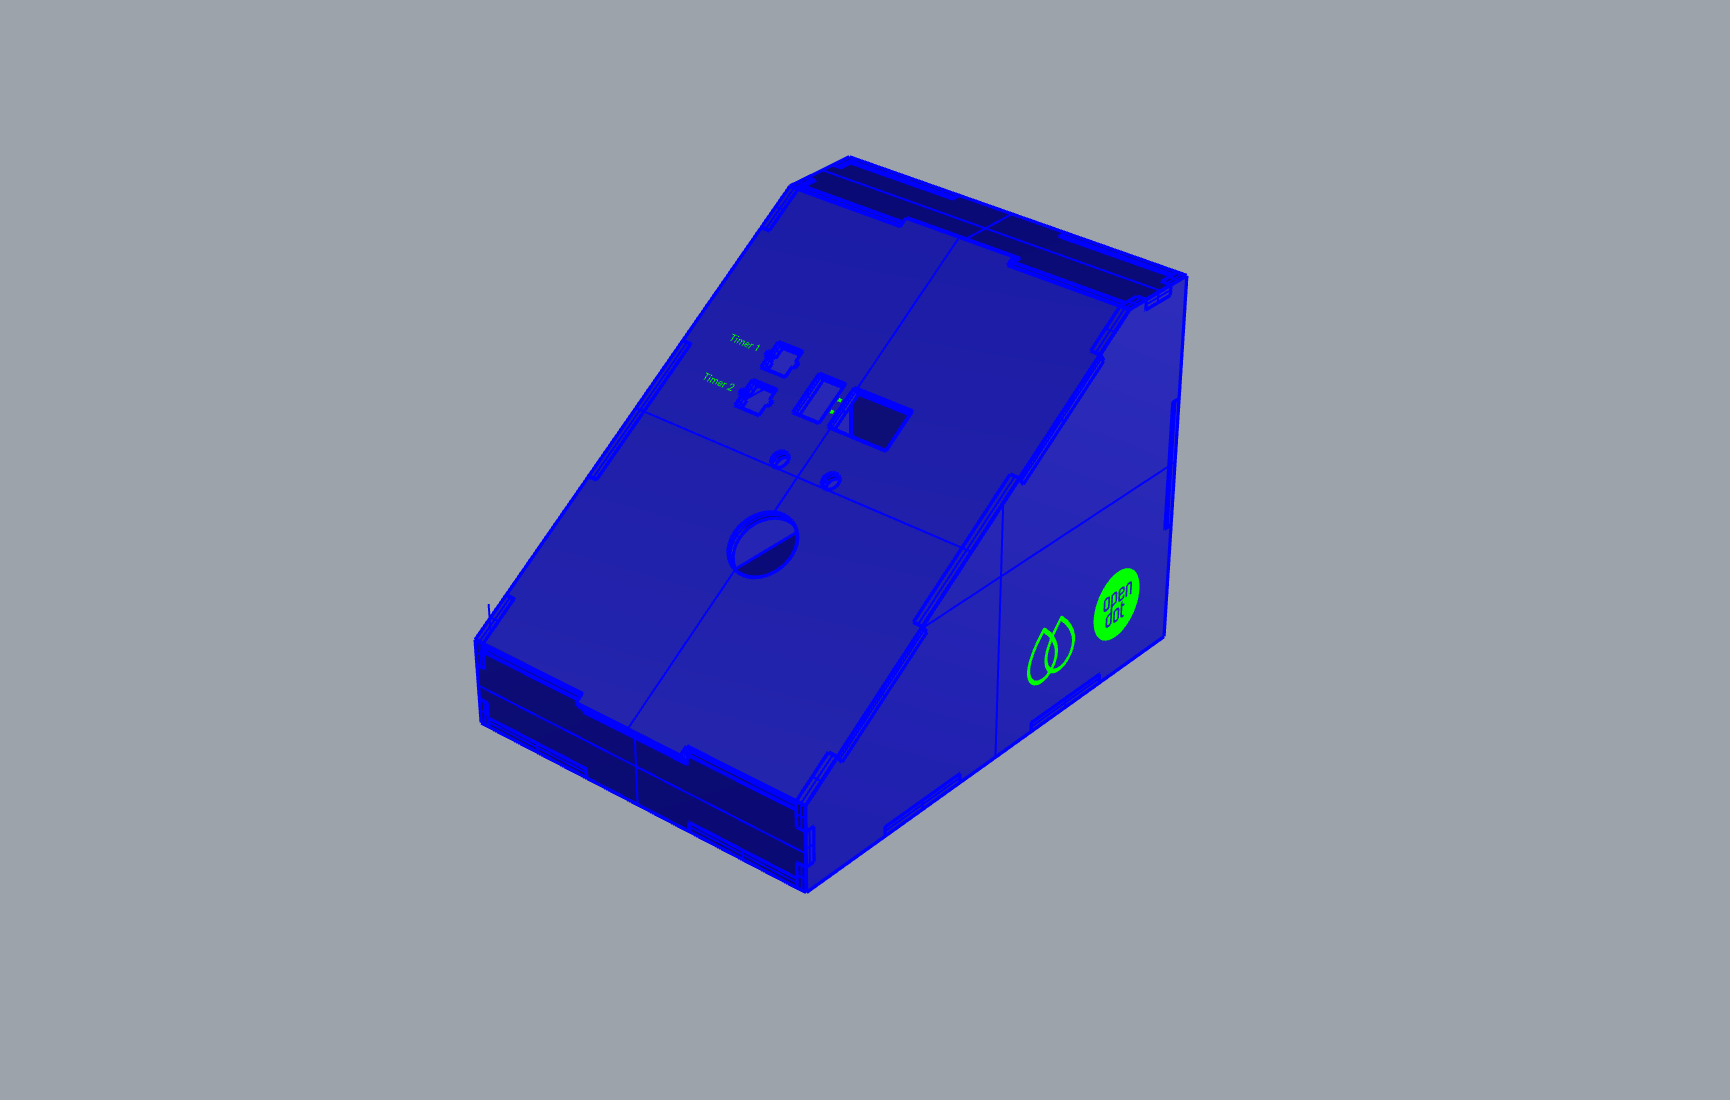
For the final project I've designed a case that will contain the electronics and will work as interface for the exposure unit; this case will have a plug and is linked to the exposure unit throug wires.
This case contains:
- The relays module
- The AC > DC power converter
- The timer/user interface board
- A power switch
- 3 x buttons
- 2 x potentiometers
- The seven segment displays board
- 1 x shuko socket for vacuum pump control (not implemented yet)
- The seven segment displays board
I've measured the size of these components and designed a case with a total size of 154 x 156 x 210 mm. I made a slanting top face in order to facilitate the user interface:
These are the settings I used for the cutting and engraving:
- Poplar plywood 4mm
- Cut Speed: 2.8%
- Cut Power: 100%
- -
- Engrave Speed: 100%
- Engrave Power: 60%
Lasercut file 4mm plywood (Rhino)
Lasercut file 4mm plywood (dxf)
After the cutting I've glued together all the parts (except the top face), and assembled all the components, and this is the result:
