Computer-controlled Machining
The assignment of the 7th week was “make something big”
i couldn't start with my final project pieces because i haven't determined them yet completely.
Our lab is running out of chairs, so… a chair it is!!
The assignment of the 7th week was “make something big”
i couldn't start with my final project pieces because i haven't determined them yet completely.
Our lab is running out of chairs, so… a chair it is!!
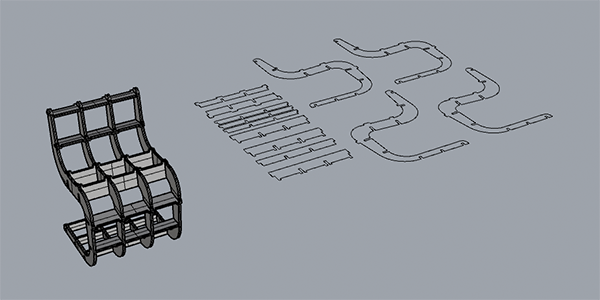
I first made a 3D model with Rhino to define the structure and the joints.
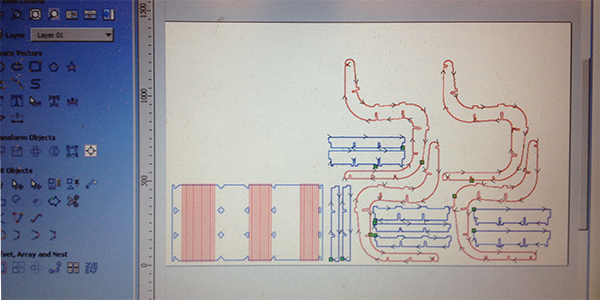
Thanks to the [Make2-D Drawing] command it is possible to convert a 3D model into a 2D vectors file.
At Opendot we have a [Shopbot] CNC milling machine driven by [Shopbot3] software, and [VCarvePro-ShopbotEdition] to generate the toolpaths.
This week we chose to realise our project with a 12mm poplar plywood.
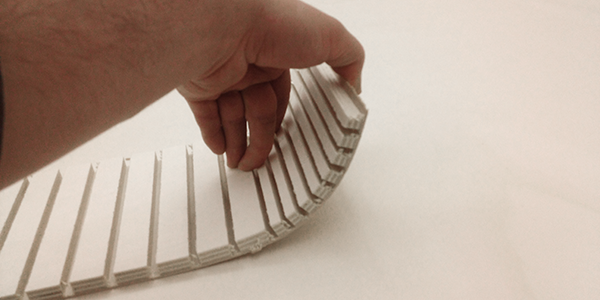
I decided to build a chair with a bended wood surface, thanks to some engraved lines below the sheet.
I run some tests to find out the right engraving depth which could allow this kind of wood to bend correctly.
Here below the steps i followed to mill my project:
- Make 3D model with Rhino and get the 2D vectors file from that (Make 2D- drawing)
Export the vectors as .dxf "2004 polylines" file.
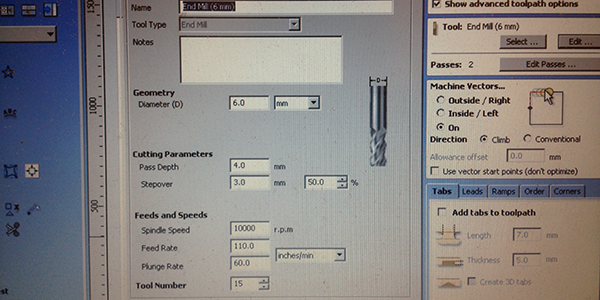
- Import the vectors file into VCarvePro and add “DogBone” of 3.05mm radius from fillet command.
(Because i used a 6mm End Mill)
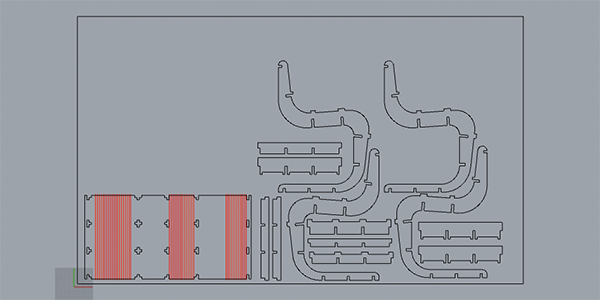
- Generate toolpaths for the vectors.
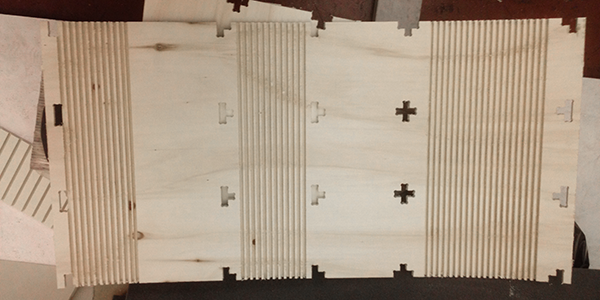
To get a bending surface I drew several parallel lines, and based on these lines the toolpaths were generated cutting on the vectors. Cutting Depth 10mm
All the pieces were defined from a polyline as boundary, so the "Machine Vectors" was calculated cutting outside the vectors. For this reason it is very important to export only closed polylines from rhino!!!
Cutting Depth 12.5mm (just to be sure to cut through the wood sheet)
The settings were the same for both paths:
Tool: End Mill, 6mm, downcut, 2flute
N. Passes: 2
Pass Depth: 6mm
Spindle Speed: 10000 r.p.m
Feed Rate: 110 Inches/min
Plunge Rate: 60 inches/min
Once the tool setting is done, it is very important to add some tabs.
With this kind of wood and with these cutting settings, it is better to use at least 3 tabs per piece, 7mm length and 5mm of Thickness.
Then, export the toolpaths in a shopbot file, open Shopbot3 software and start cutting.
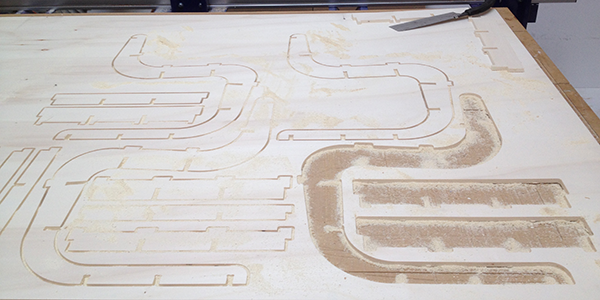
Result:
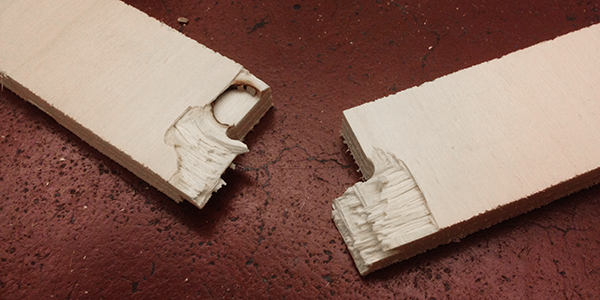
The cutting it's been fast and clean, most of the pieces did break when i tried to put them together. It’s been kind of unexpected, because during the first tests there hadn’t been any of this problems, so I focused my attention on the material, and even if it was the same kind of plywood, the two sheets were actually different: you can see the layers difference between the two sheets in the image.
There were 2 sheets of the same plywood, but probably bought from different places.
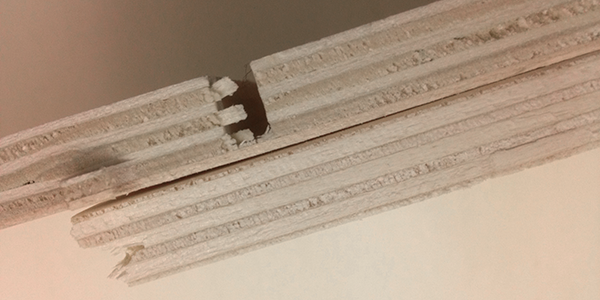
To achieve a good result with this kind of wood, i should increase the size of the pieces section to avoid them to break. Unfortunately i didn’t have enough time to cut the chair again, i will re-do it during the next weeks.
Here the final result. I've redesigned the structure and i've made several test with bended wood.
Unfortunately i didn't get good results, so i used the bended wood only in the horizontal surface. In the back of the chair, the radius was to small to bend the wood around it, so i used a planar surface.
Download the [3D file] here
Download the [cutting file] here
