Assignments
The assignments for week 17 was to propose a final project that integrates the range of units covered, answering:
What will it do?
My final project will be a hands-on two player racing game. Each player will have a remote with two buttons on it. The remotes will control and drive a stepper motor. When each player push the buttons on his remote, the stepper motor will move. The faster you push the buttons, the faster the motor goes. I will design and 3d print characters that will stick to a laser cut piece that will stick to the stepper motor. A thin plate will seperate the motors and the moving characters. (Mynd) I have decided to call the project FAB Sprint.
Who´s done what beforehand?
When i started Fab Academy my idea for the final project was to make some sort of synthesizer. My ideas have changed throughout the weeks but now i have made a final decision. The motor game idea came up in the machine week, which was a group week. I came up with the idea to make some sort of motor controlled game but the group ended up by doing a multitool cnc machine. That allowed me to continue developing the motor game idea. My concept now is very similar to my original idea.
What materials and components will be required? Where will they come from? How much will it cost?
I want the box itself to be a press-fit box. To have the project as cheap as possible i will most likely use birch wood for the box. I will use two stepper motors, the ones we received for the machine week. I will create the two remotes using a two button circuit i will make in the lab. It would be nice to 3d print cases around the circuits to make them look more like game remotes. I have to create two stepper motor driver boards, one for each motor. The components for the circuits should be available in the lab. My characters/figures will be 3d printed.
Stepper motor board components
| Components | From where? | Pieces | Price per piece | Total |
|---|---|---|---|---|
| Attiny44 Microcontroller | Fab Lab Inventory | x1 | 1.18$ | 1.18$ |
| H-Bridge A4953 | Fab Lab Inventory | x2 | 1.57$ | 3.14$ |
| Regulator 5V | Fab Lab Inventory | x1 | 0.32$ | 0.32$ |
| Capacitor 1μF | Fab Lab Inventory | x3 | 0.12$ | 0.36$ |
| Capacitor 10μF | Fab Lab Inventory | x2 | 0.27$ | 0.54$ |
| Resistor 10KΩ | Fab Lab Inventory | x1 | 0.01$ | 0.01$ |
| Resistor 0Ω | Fab Lab Inventory | x2 | ? | ? |
| FTDI pins | Fab Lab Inventory | x10 | ? | ? |
| FCI pins 2x3 | Fab Lab Inventory | x1 | ? | ? |
| FCI pins 2x2 | Fab Lab Inventory | x2 | ?30 | ? |
| Stepper Motor | Fab Lab Inventory | x2 | Around 30$ | 60$ |
The total cost for one stepper motor and one stepper motor board is around: 35.55 $
I need two motors and two boards so the total amount for that is: 71.1$
Button board components
| Components | From where? | Pieces | Price per piece | Total |
|---|---|---|---|---|
| Button SWITCH TACT SMD W-GND 160GF | Fab Lab Inventory | x1 | 0.74$$ | 1.48$ |
| FCI pins 2x2 | Fab Lab Inventory | x2 | ? | ? |
I need two button boards so the total amount is around 3$
Hall Sensor Board
| Components | From where? | Pieces | Price per piece | Total |
|---|---|---|---|---|
| Button SWITCH TACT SMD W-GND 160GF | Fab Lab Inventory | x1 | 0.74$$ | 0.74$ |
| IC SENSOR HALL EFFECT SOT23W | Fab Lab Inventory | x1 | 1.39$ | 1.39$ |
| FCI pins 2x3 | Fab Lab Inventory | x1 | ? | ? |
The total amount here is around 4.5$ 3$
Raw Material
| Material | From where? | Pieces | Price per piece | Total |
|---|---|---|---|---|
| Birch plywood 122x250:12mm plate | Húsasmiðjan | I used about ¼ of the plate | 19.5$ | 19.5$ |
| Plexi glass 600x300:3mm plate: | Fab Lab Inventory | 12 | 16$ | 16$ |
The raw material cost is about 36$
What parts and systems will be made?
I will go into more details into these topics on my final project page
Wooden press-fit box
I needed a case around the stepper motors and the boards
To include as many processes from the fab academy i decided to make a press-fit wooden box
I used the 3d program sketch up to design a birch wood press-fit box fo my final project
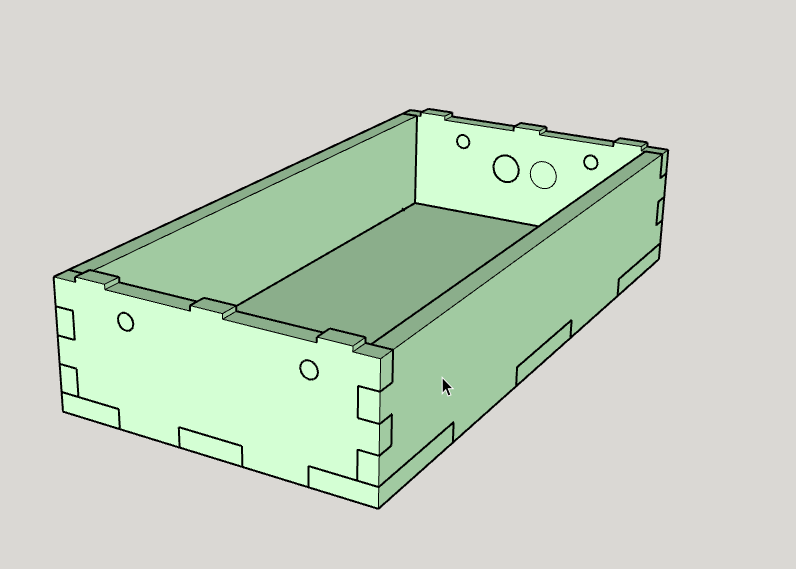
I then imported the file to VCarve Pro and used the Shopbot to cut the box out
Plexi glass plate and "character holder"
I needed a plate to put on top of the press-fit box
I started off by cutting out paper prototypes in the laser cutter and when i was happy with the size of the plate and the holes i was clear to cut out the plexi glass
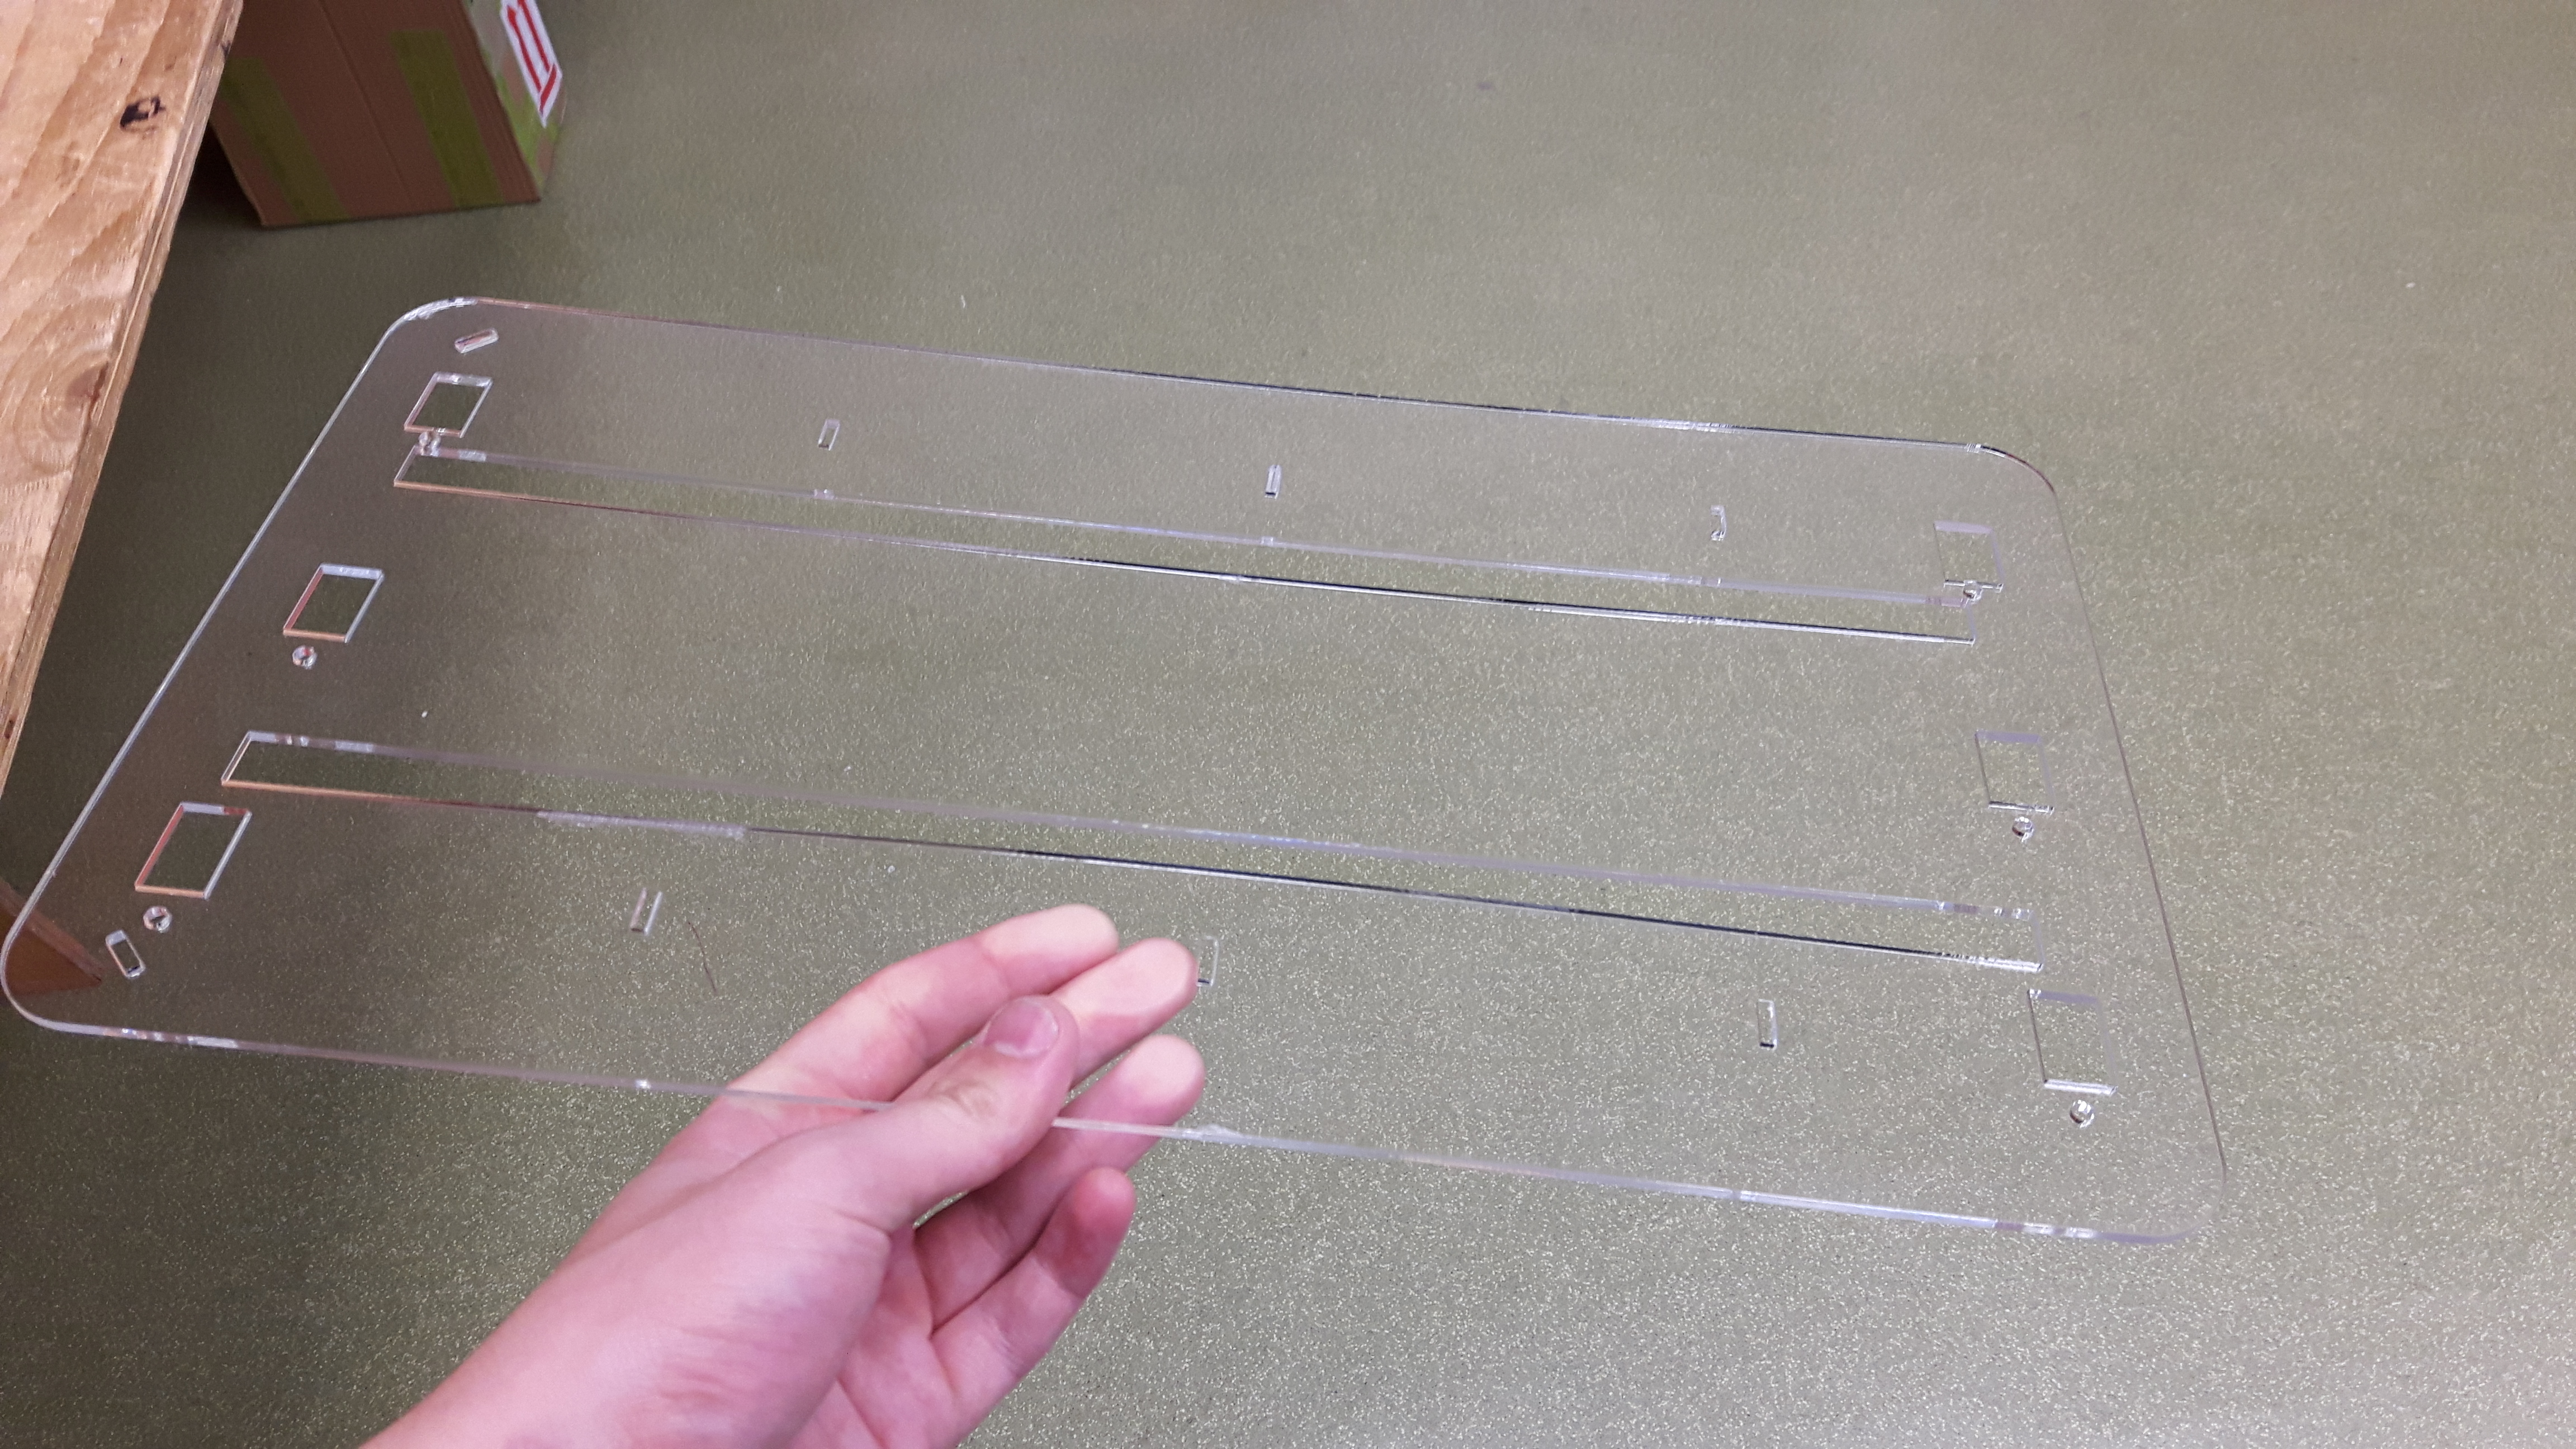
The 3d printed characters are supposed to stick up from the plexi glass plate.
I designed some kind of stand for the 3d printed character to stick onto.
I will go into more details on my final project page
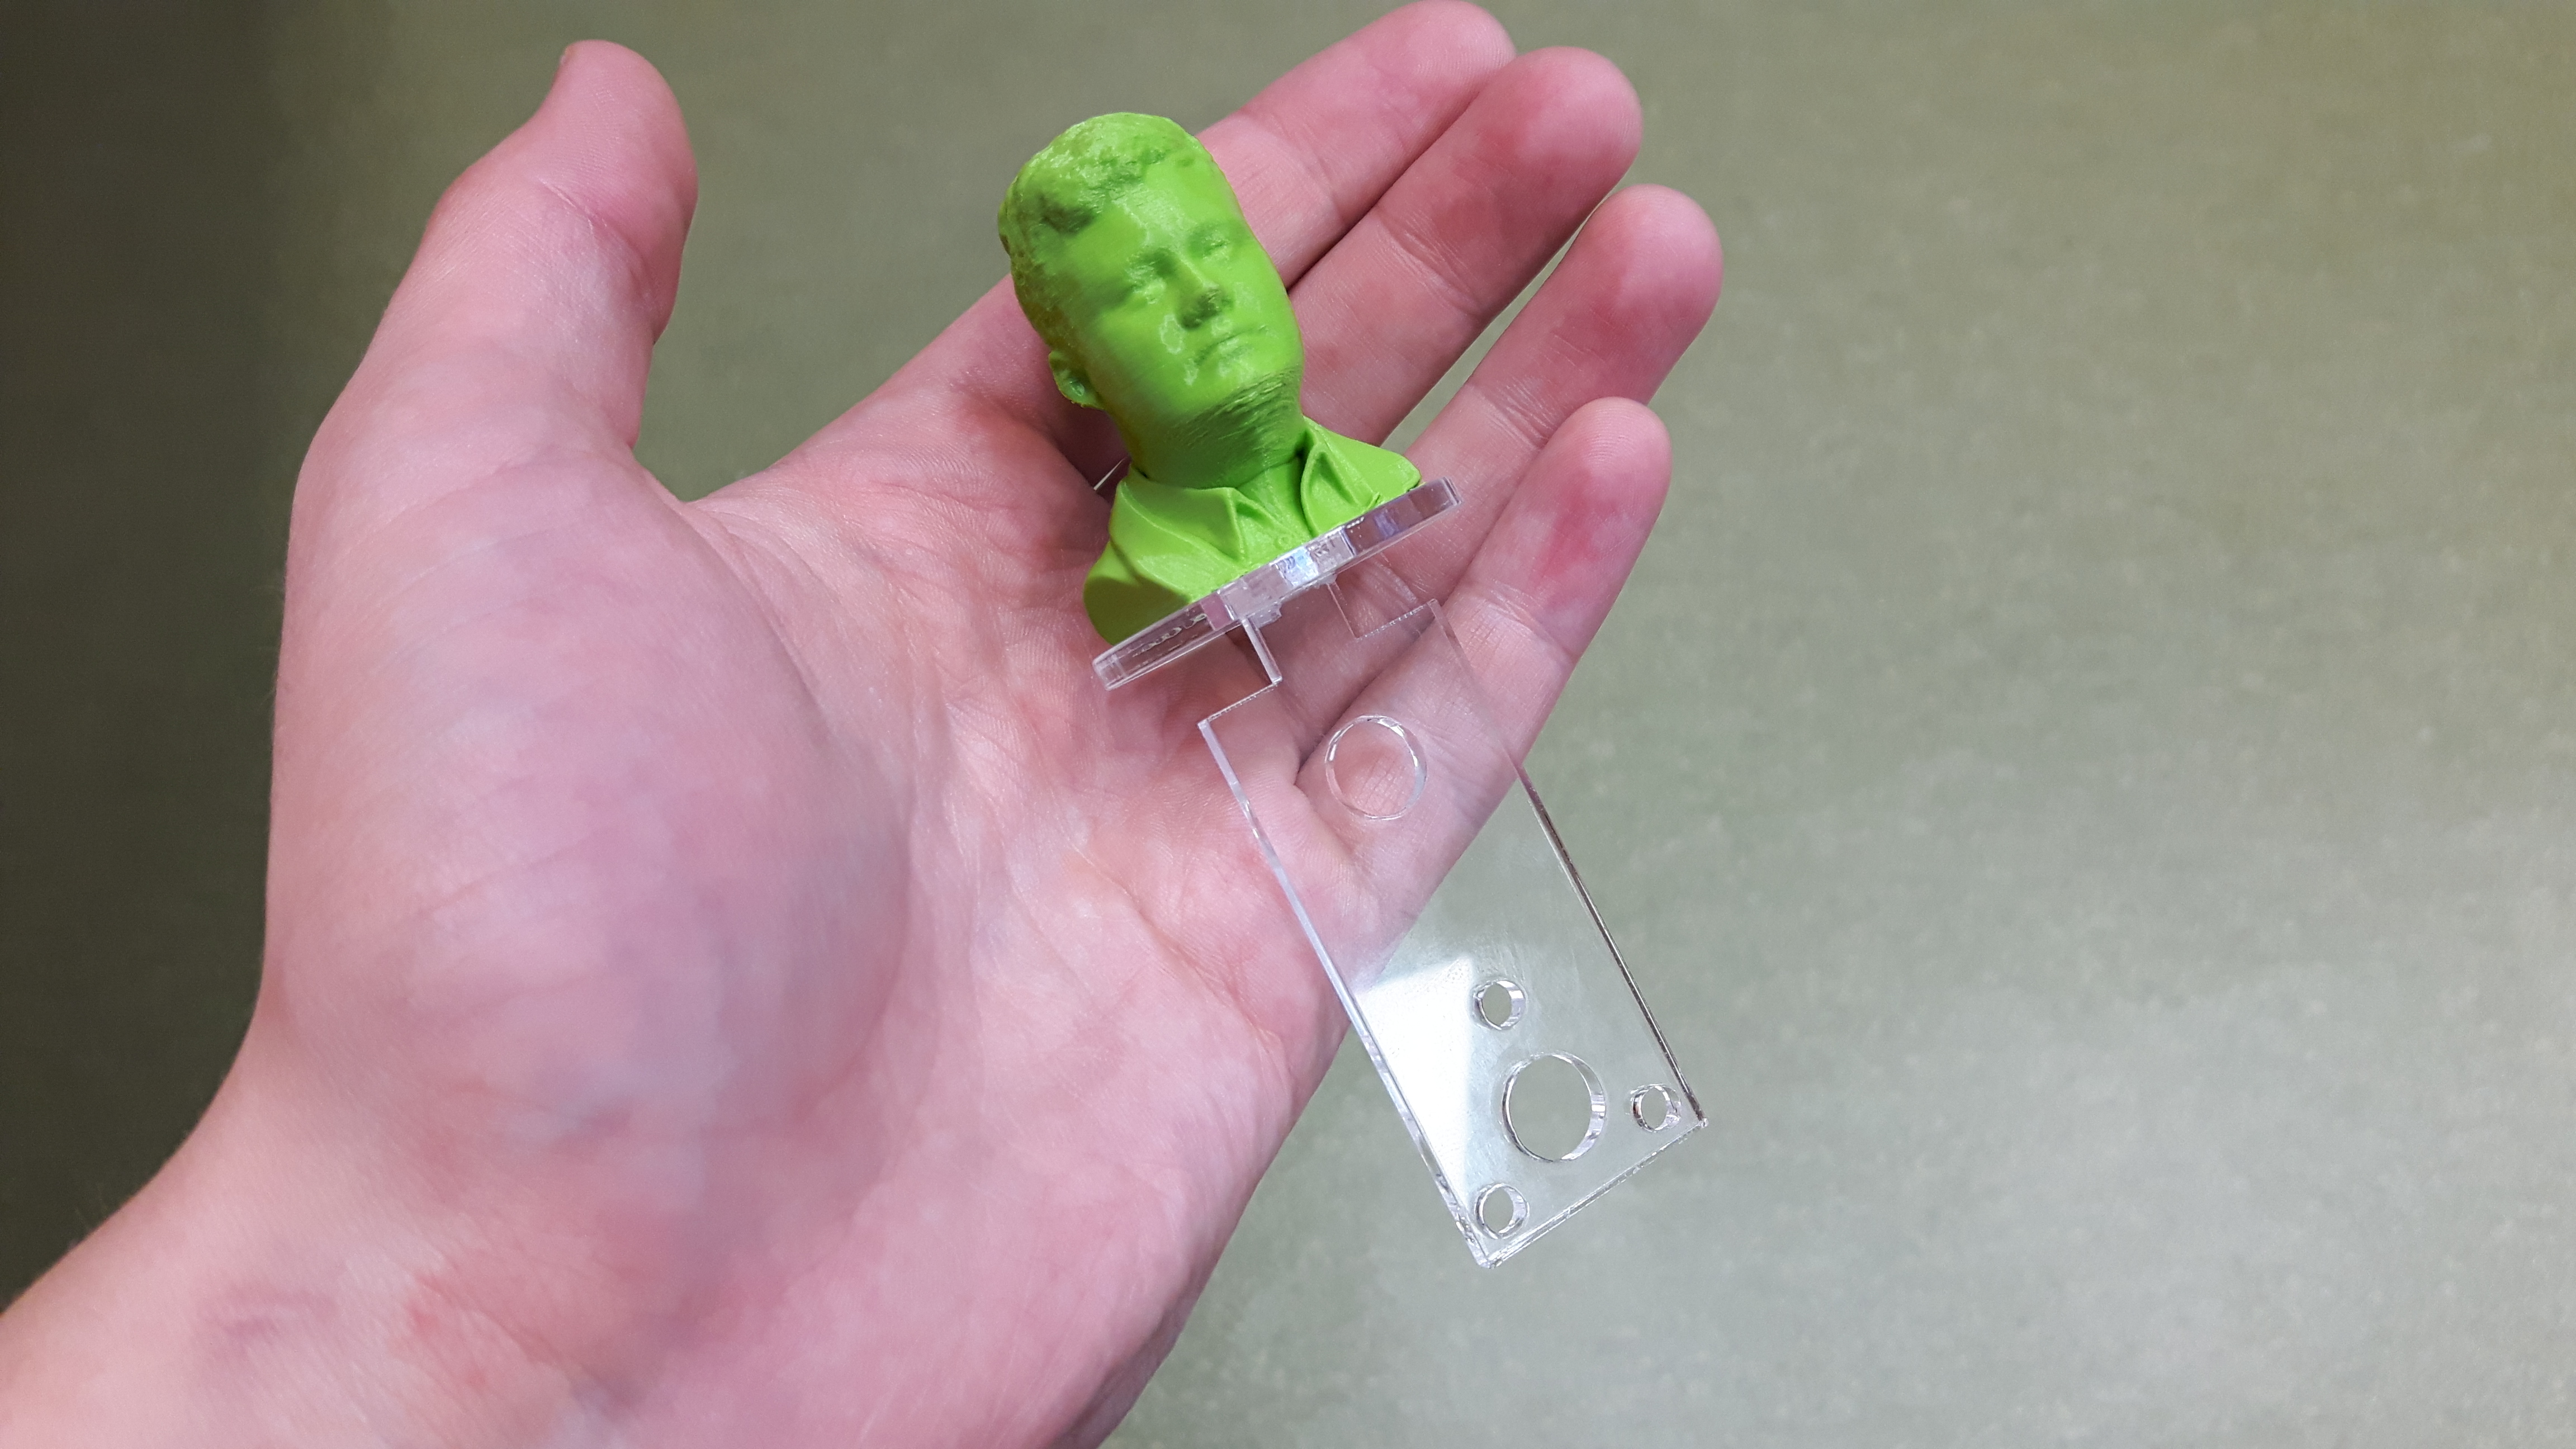
3d printed characters
I decided to use the 3d scan of my friends face from the 3d scanning and printing week
I printed two of them in different colors

Electronics boards
I made two boards for each stepper motor
One button board and one motor driver board for each motor
I will go into more details on the boards on the final project on my final project page
What processes will be used?
3d design, scanning and printing
I used the 3d scan from the 3d scanning and printing week
Computer-controlled cutting
The plexi glass plate and the character holder was cut out in the laser cutter
Computer-controlled machining
The press-fit box was cut out in the shopbot
Electronics design, input and output devices
I designed my own circuits using input and output devices
What tasks need to be completed?
This is written after i have finished my final project so all the tasks are completed now
It would be nice though to 3d print some casing around the button circuits to shield the components on the board
What questions need to be answered?
Will this project be entertaining and be a good example of a doable fab lab project for people starting out in fab labs
What is the schedule?
-24.May-14.June: Final Project development
15.June: Final Project presentation
How will it be evaluated?
I want my final project to be up for showing in Fab Lab Vestmannaeyjar and let people try it out
I will consider the project to be a success if people find it entertaining to play with and also if they want to make their own version of it