Assignment
- Test the design rules for your printer(s) (group project).
- Design and 3D print an object (small, few cm) that could not be made subtractively.
- 3D scan an object (and optionally print it).
- Identify the advantages and limitations of 3D printing and scanning technology.
- Apply design methods and production processes to show your understanding.
Tasks:
- Described what you learned by testing the 3D printers.
- Shown how you designed and made your object and explained why it could not be made subtractively.
- Scanned an object.
- Outlined problems and how you fixed them. Included your design files and 'hero shot' photos of the scan and the final object.
Test the design rules for our 3D printer
3D printing, also known as additive manufacturing (AM), refers to various processes used to synthesize a three-dimensional object. In 3D printing, successive layers of material are formed under computer control to create an object. These objects can be of almost any shape or geometry and are produced from a 3D model or other electronic data source. We have two 3D printer in our FAB Lab one is Dimension SST 1200es and Ultimaker 2, two printers works on FDM technique. In FAB Academy 2016 we use the Ultimaker 2 printer. First we test our ultimaker is working fine, we downloaded the test file (stl) from the link thingiverse.com and tested.
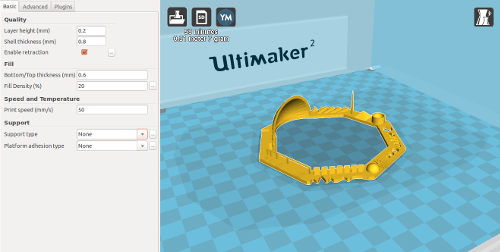
The download STL file opened in Cura software, This software to convert from STL to G-code. The G-code automatically saved in mounded SD card. Then tried to print it on our printer with the following settings.
- layer height "0.2"
- Shell Thickness "0.8"
- bottom/top thickness "0.6"
- fill density (%) "20"
- Print speed "50"
- support type "None"
- platform adhesion type "None"
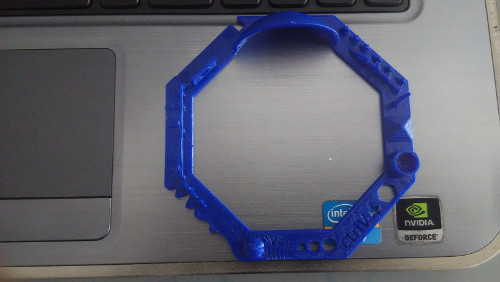
The print finished product is :
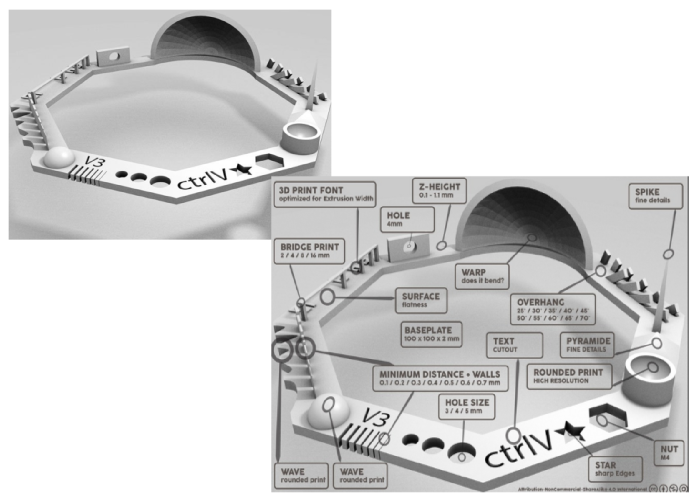
- Nut, Size M4 Nut should fit perfectly: good
- Wave, rounded print: good
- Star, Sharp Edges: good
- Name, Complex Shapes: good
- Holes, Size 3, 4, 5 mm: good
- Minimal Distance: 0.1, 0.2, 0.3, 0.4, 0.5, 0.6, 0.7 mm: 0.5 mm was the minimum gap that was clearly visible
- Z height: 0.1, 0.2, 0.3, 0.4, 0.5, 0.6, 0.7, 0.8, 0.9, 1.0, 1.1 mm 0.1, 0.2, 0.33, 0.44 and 0.5 mm are visible.
- Wall Thickness: 0.1, 0.2, 0.3, 0.4, 0.5, 0.6, 0.7 mm from 0.3 mm to 0.7 mm gap was clearly visible
- Bridge Print: 2, 4, 8, 16 mm: good
- Sphere, Rounded Print 4.8mm height: good
- Sphere Mix, 7 mm height: good
- Pyramid, 7 mm height: good
- Overhang: 25, 30, 35, 40, 45, 50, 55, 60, 65, 70°: good
- Warp, does it bend?: good
- 3D Print Font, optimized for 3D printing: good
- Surface, Flatness: good
- Size, 100 x 100mm x 23.83 (10mm width): good
- Spike, minimum Layer Time, 21 mm height from Bottom (include Baseplate): good
- Hole in Wall, 4 mm diameter, check for proper print: good
- Raft Test, raft should be just under the model:
- Retract Travel, check retract settings for longer travel:
Download Test File
Design and 3D print an object
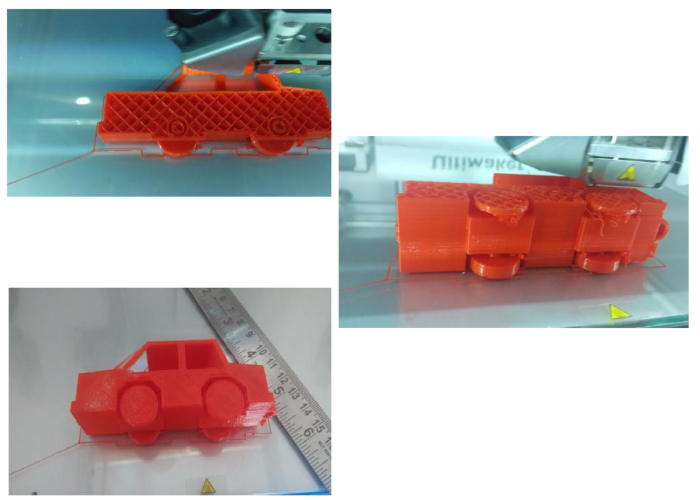
In FAB Academy 2016 week 5 I am going to designed a 3D model, it could not be made subtractively,So I planned to design a small toy car with rotatable wheels using Rhinoceros Software.
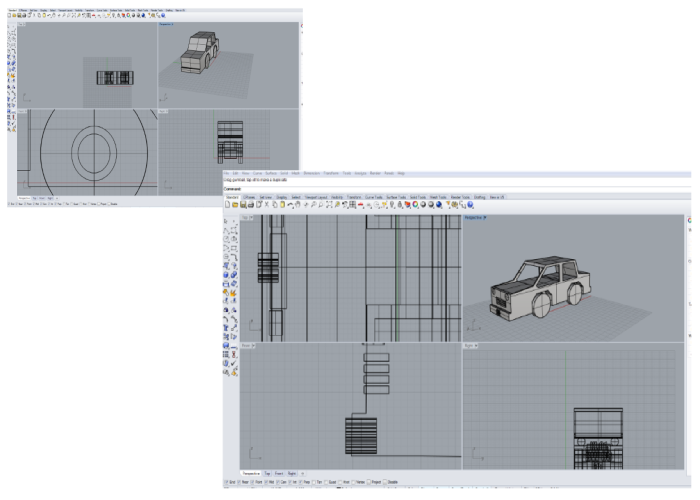
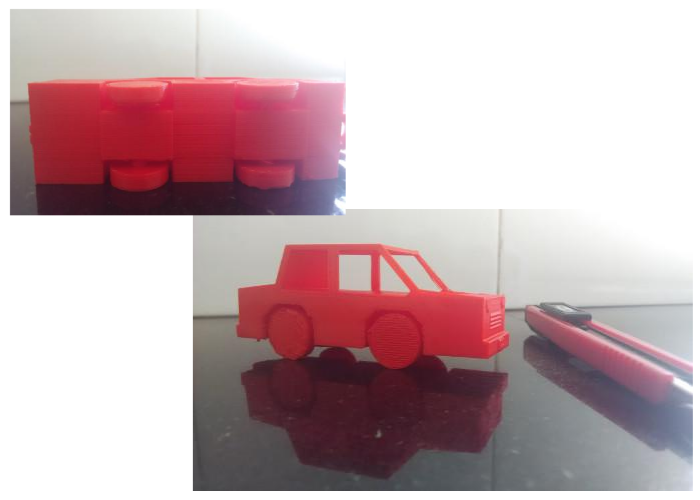
After completion of "Toy Car" design save as to .stl file. That STL file open in cura software convert from STL to G-code. started to print it on Ultimaker 2 printer with the following settings.
- layer height "0.2"
- Shell Thickness "0.8"
- bottom/top thickness "0.6"
- fill density (%) "20"
- Print speed "50"
- support type "Touching buildplate"
- platform adhesion type "None"
Download My Car Design Files
3D scanning an object
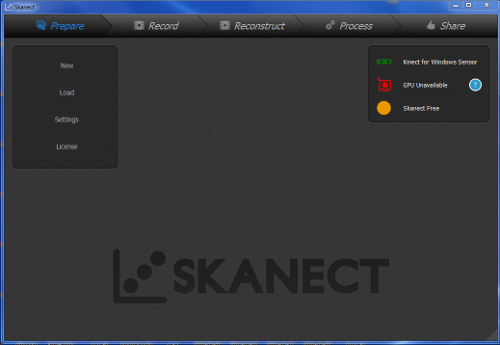
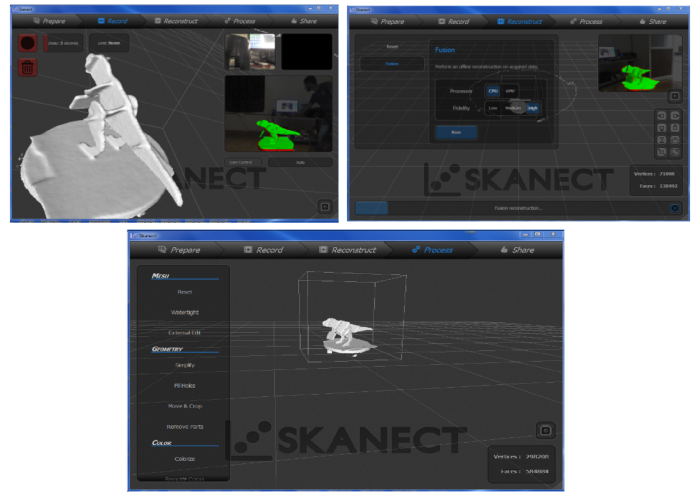
With Skanect, capturing a full color 3D model of an object, a person or a room has never been so easy and affordable. Skanect transforms our Structure Sensor, Microsoft Kinect or Asus Xtion camera into 3D scanner able to create 3D meshes out of real scenes in a few minutes. Here we using scanning sensor is Microsoft Kinect.
I plan to scan my press-fit job in FAB Academy 2016 "small dinosaurs model".

First we open the Skanect software and check the Microsoft Kinect sensor is detected. If the sensor is detected, then go to record.
Start to record and the sensor move to 360 degree.
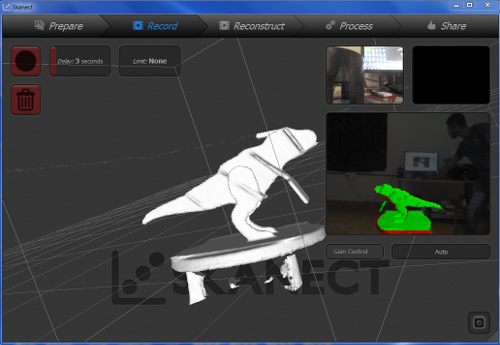
Finish the scan then to reconstruct the file and fusion the file in high fidelity.
Last we export the file in .stl format and millimeters scale.
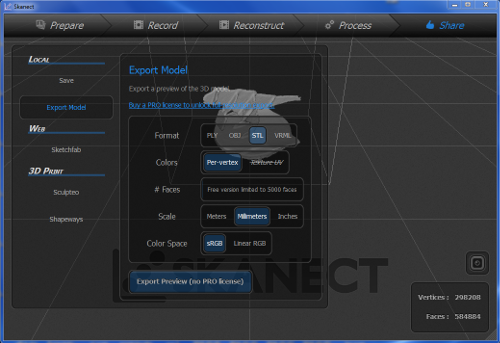
Download the Scaned File.
Dinosaurs model Scaned STL file