Assignment
- Design a 3D mould, machine it, and cast parts from it.
- Design appropriate objects within the limitations of 3 axis machining
- Demonstrate workflows used in mould design, construction and casting
- Explained how you made your files for machining
- Shown how you made your mould and cast the parts
- Described problems and how you fixed them
- Included your design files and 'hero shot' photos of the mould and the final object
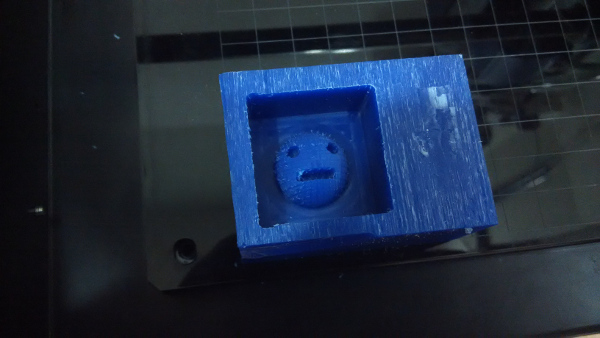
This week's assignment is to built a 3D design and make that design mold. I thought to make something special for my wife. So I planned to make "Smile chocolate" as she likes chocolate very much.
Milling in Wax Block: Every dimension minus 10mm. That is, height, depth, etc. Take care of the maximum depth you can go while designing according to the size of the milling bit. The parameter in Fab Modules is clearance which take account of the mill length.
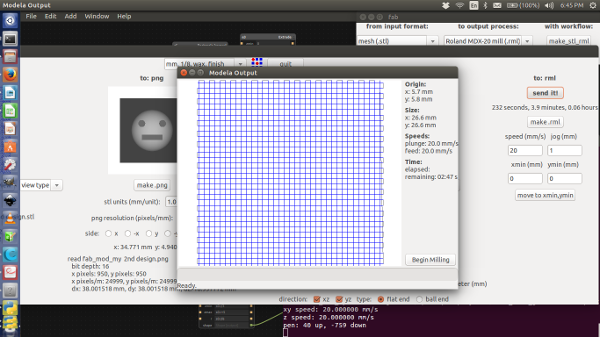
We didn't get time to mill as we got stuck in Laser cutting the Modella base. But covered all everything needed to be done in the software side. Important points to be noted are.
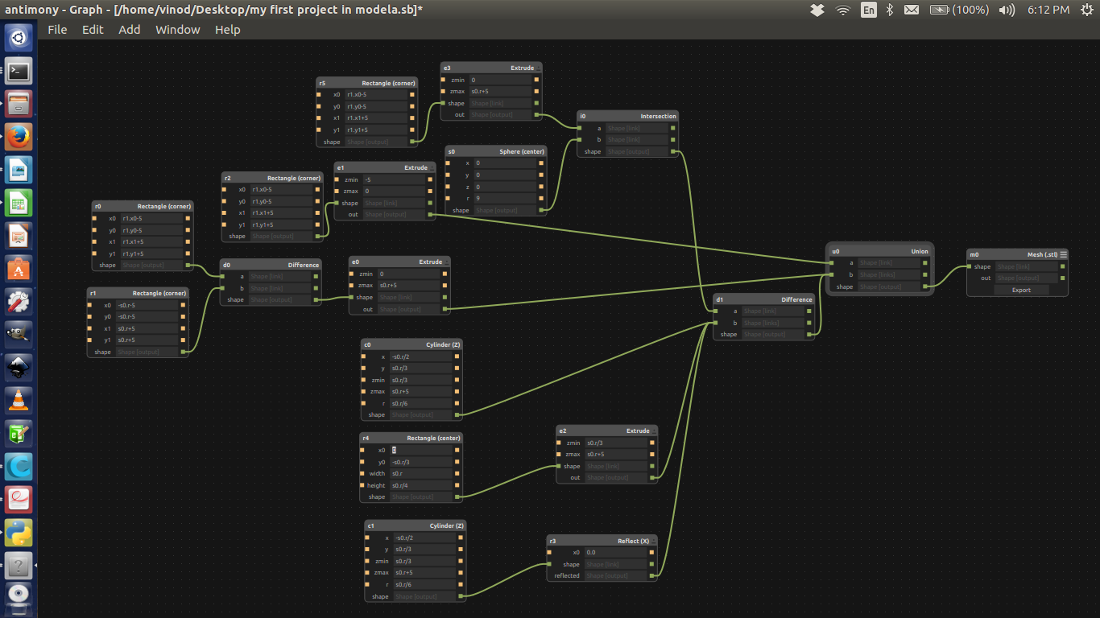
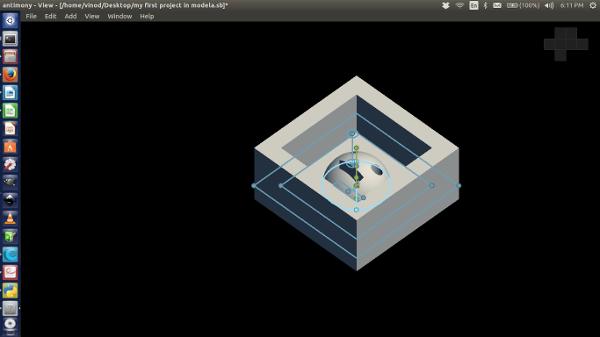
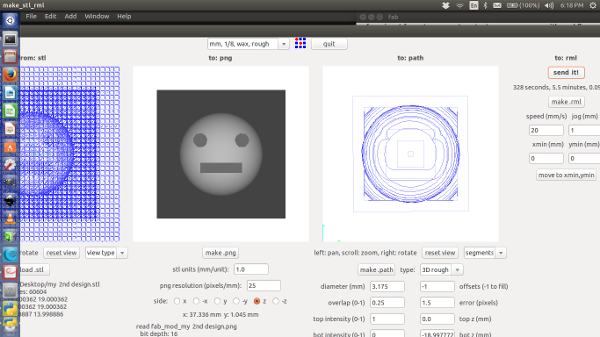
Design from Antimony has to be exported as heightmap, which is basically .png file.
Later came to notice that exporting as .png had some bad effects on the cut, so better export as .stl and use that in fabmodules.
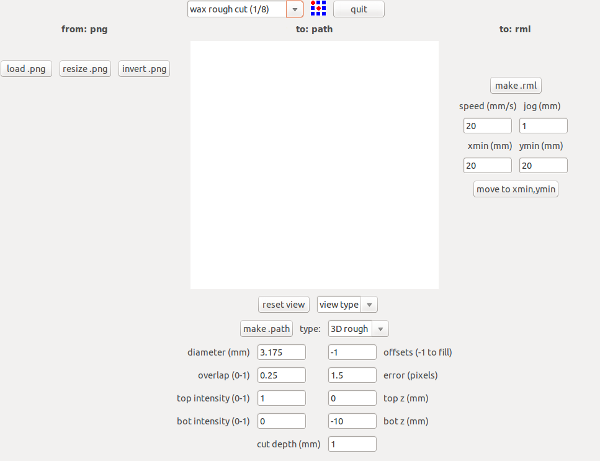
Open fabmodules and give input as .png/.stl and select the Modella as machine.
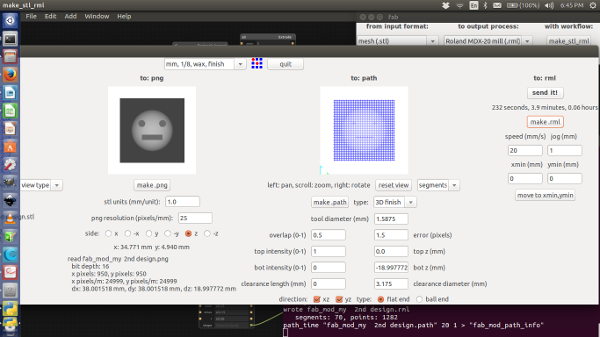
Afterwards select the exported file and select initially the cut as rough cut and after finishing the rough cut, we can do the final cut.
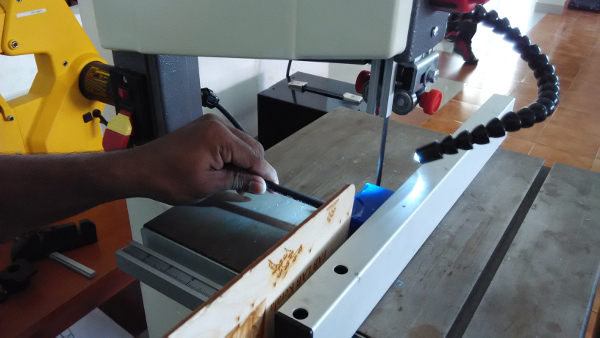
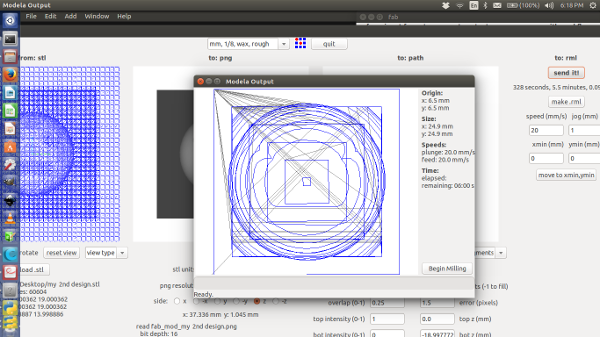
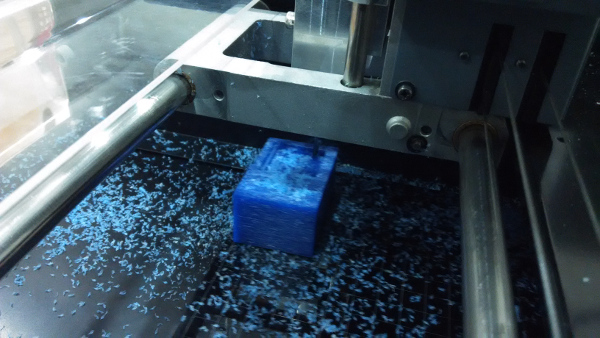
This fig. Shows that me going to mill my 3D model in a wax block. I identified the useful part in the used wax block, that area I cut using band saw.
Mold making
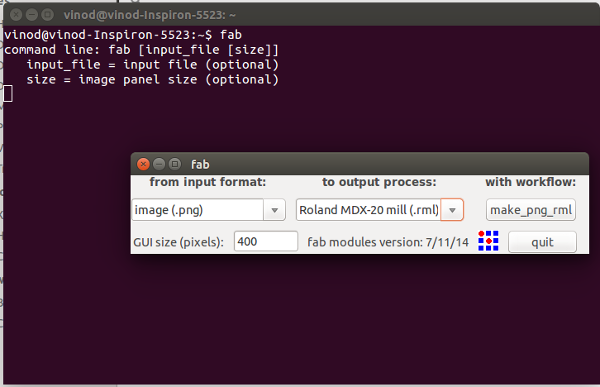
Next I give the design file to the fab modules (mill the wax). Open the Terminal.
type:
"fab" - Enter
Select the i/p format (.png file)
Select the o/p process (Roland MDX-20 mill(.rml))
Select the workflow (program)
Setting values in fabmodules is as follows
Give the right dia od the bit we are using.
Give the overlap as .5 rather than .25 which loads as default.
Look if there is any disparity in the dimensions of the one you choose the origin according to the placement of your wax block.
Make .rml and send it to the modella.
Click the "load.png" button and select our project work(.png).
Click the "make.rml" button and the project job send it to the Roland MDX-20 mill.
When the milling is over, collect all the milled out wax so that we can use it to make another usable wax block.
In pre Fab Academy Mr.Luciano explained the good practices to be followed while molding and casting. He introduced us to different kind of materials used for making molds. Taught us the difference between a positive and a negative mold, what is a counter mold etc.
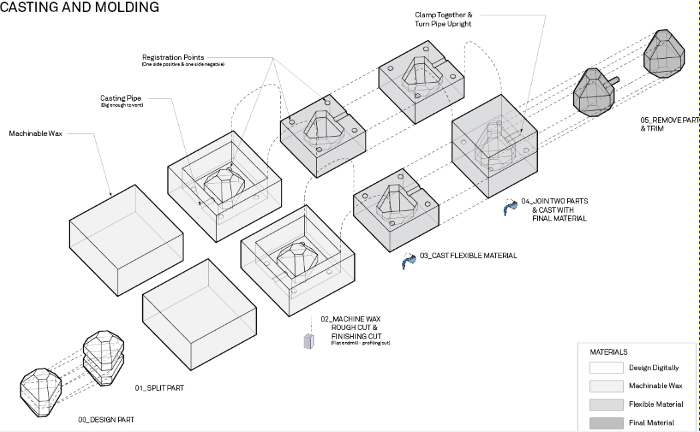
The design should give 5mm clearance in all directions for forming a sturdy mold also the walls of the should have 5-10 degree slope. After discussing with our remote instructor we started the actual mold making process. We took the chemical for mixing, weighed them and mixed them properly. But as the humidity is very high there were chances of having the chemicals turn unusable. We also used a color die for learning the process. Then we poured it into the milled wax and left it for setting.
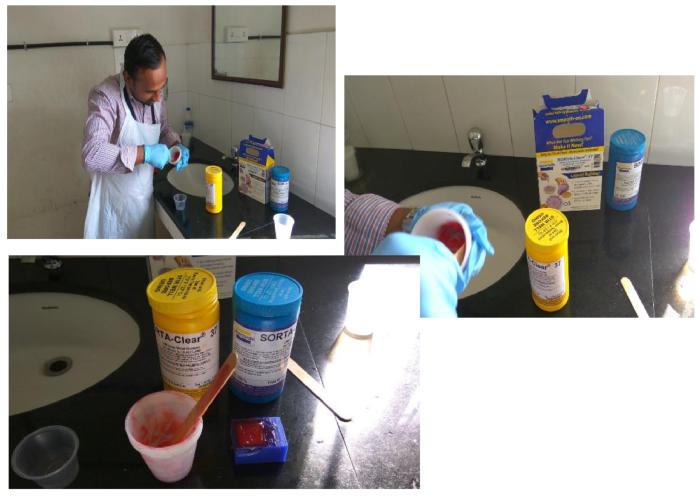
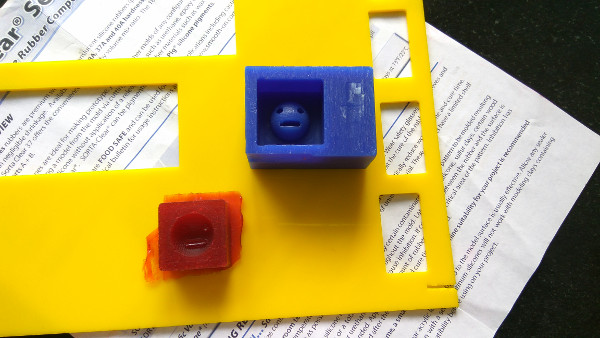
I used SORTA - Clear 37 as negative molding material. SORTA-Clear Series rubbers are premium water white translucent silicone rubbers (platinum catalyst) which cure at room temperature with negligible shrinkage and feature high tensile and tear strength. Materials such as urethane, epoxy or polyester resins can be cast into SORTA-Clear silicone without application of a release agent. Other materials such as wax and low melt metal alloys can also be cast into SORTA-Clear. It mix ratio by volume is 1A:1B or mix ratio by weight is 1A:1B.SORTA-Clear silicones are suitable for making molds for baking, casting ice, butter or chocolate and other applications used to produce food.

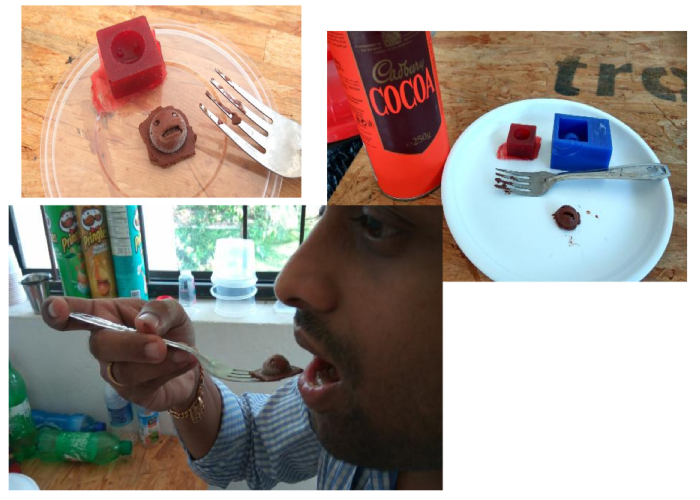
Part Casting
Here I used casting material is COCOA powder. I take 2-3 teaspoons COCOA powder and 3 teaspoons boiled water. Mix the powder and boiled water together and we will get a COCOA paste. Fill the cocoa paste in to the mold slowly. After filling we keep the mold in a refrigerator, after two hours, we can take the mold and separate the chocolate smile.
At last I got my chocolate smile.
Download My Smile Design files :