In Fab Academy it is important to document our progress and make it visible to the entire world through our website. In our first week our task is to plan and develop a final project and upload the details in a personel website. I'm very much eager to do it because it helps me to explore new platforms in website designing. I'll try to include every bit of information about the project with documents in my website. Please go through it and let me know if you have any suggestions.
Assignments
This week's assignments include:Learning Outcomes:
- Use web development tools, make personal website
- Learning Git from tutorials
- Document steps for uploading file to archive and Push to class archive
- Describe about yourself
- Describe about the project with a sketch
My Website
Related to creating a web page, I'm not from a programming platform. But with my little knowledge and keen to study a new platform I will try my level best. Moreover I'm concentrating on conveying my project deatails than website look. For creating a website the main hurdle is choosing the best web development language for our website, it's important to remember that there is no single best language. Instead, a web developer will choose the option that best suits our project, based on the specific functionality or features you want.
Basic web development languages
HTML and CSS are the two most basic web development languages, and are used to build nearly all webpages on the Internet.
HTMLHTML is the standardized markup language that structures and formats content on the web. Page elements like the titles, headings, text and links are included in the HTML document. It is one of the core technologies in use on the Internet and serves as the backbone of all webpages.
CSSCSS (Cascading Style Sheets) is a style-sheet language that basically allows web developers to "set it and forget it." Paired with HTML, CSS allows a programmer to define the look and format of multiple webpages at once; elements like color, layout and fonts are specified in one file that's kept separate from the core code of the webpage. Nowadays there are more powerfull languages like:
- Java
- Python
- CSS
- PHP
- Ruby
- C++
- C Language
As a beginner I started studying about html and started to make a simple website using html. The steps shown below is a simple gif representation, its a pure coding and the explanantion of this will make this assignment bigger. If anybody wants to learn more about html you can check with the link shown below.
Some websites I found helpful to learn:
Let me start, inorder to make a html website first make a new folder and create a New note pad, save as to name.html. Open the note pad using gedit and type the comment as shown below.
gedit is the default text editor of the GNOME desktop environment and part of the GNOME Core Applications. Designed as a general-purpose text editor, gedit emphasizes simplicity and ease of use, with a clean and simple GUI, according to the philosophy of the GNOME project. It includes tools for editing source code and structured text such as markup languages.
Then I started to create a new web page for My Fab Academy 2016 as shown in gif file. Next I understand how to insert a web link, video (Youtube),GIF file, Heading, font color & styles. You can see my website gedit version as shown below :
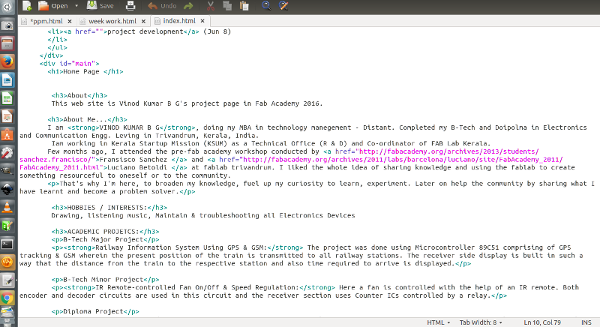
View my Source Code:
Download my Source Code:
Website Development
Creating Github Repositories
GIT is the most accomplished distributed version control system. It helps us to manage our own project localy using a version control tool or if we want to modify a code that is located in a remote central GIT repository.
Installing and Configuring Git.$sudo apt-get install git The next step is to specify your username and email address to your GIT repository using "git config" as shown below.
git config --global user.name "username"
git config --global user.email email@email.com
$ git config --listCreate a repository in Github for personal website
Head over to GitHub and create a new repository named username.github.io, where username is your username (or organization name) on GitHub. If the first part of the repository doesn't exactly match your username, it won't work, so make sure to get it right.
Clone the created repo to our PC.
My site is checked in to the Trivandrum repo, you can clone it: git@git.fabacademy.org:fabacademy2016/fablabtrivandrum.git, and look at the source in students/Vinod directory.
git clone "your_repository_link" Now we have to register on the github. github and sign up for the free account. Give an username or email ID and password.
For our personal webpage we need to create a folder namely "students" in the repository. Next open the "students" folder creat another folder with our student id as the folder name (my student id is 403). Open the folder and create a new document "index.html" and add our website HTML codes. Now we need to push this to the github repository.
Pull, Add, commit, and push your changes:
$ git pull
# For local repo updations
$ git add --all
#adding files
$ git commit -m "Initial commit"
#Adding Comments
$ git push -u origin master
# pushing
SSH keys are used to identify computers, it helps in pushing easy without passwords. Before creating one we need to check for existing SSH key. For that type the code below in terminal.
ls -al ~/.ssh
# Lists the files in your .ssh directory, if they exist
With Terminal still open, copy and paste the text below. Don't forget to change the email address to your login email id for github.
ssh-keygen -t rsa -b 4096 -C "your_email@example.com"
Go with the default settings, skip paraphrase. I added a paraphrase which made my SSH configuring that not adding any advantage. So I created new ssh key without paraphrase and then configured it to github.
Ensure ssh-agent is enabled:
# start the ssh-agent in the background
eval "$(ssh-agent -s)"
# Agent pid 59566
ssh-add ~/.ssh/id_rsa
Copy the SSH key to your clipboard. For that type the following code in terminal. This will install xclip first and then copies the key to clipboard.
$ sudo apt-get install xclip
# Downloads and installs xclip.

xclip -sel clip < ~/.ssh/id_rsa.pub
# For copying  the contents of the id_rsa.pub file to clipboard
Now login to github account from browser, navigate to account settings by click on profile photo and clicking on Settings.
On the left settings sidebar, click SSH keys.
Click Add SSH key.Github is configured using ssh. Now we can push to your rep very easily.
Problem Faced
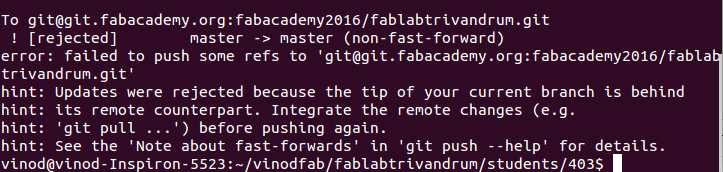
One simple error happened in this week during the updation of my document in git is as shown below. Due to this error I can't push my document in github.
~$ git pull
~$ git add --all
~$ git commit -m "week"
~$ git push
Solution to the problem
I analysed that once we pulled the documentation, before my next push, by chance if any others pulled there documentation then some conflicts will be there. So inorder to avoid that I pulled my documentation once again and then pushed. This time my documents get successfully pushed. Thanks for the hint.
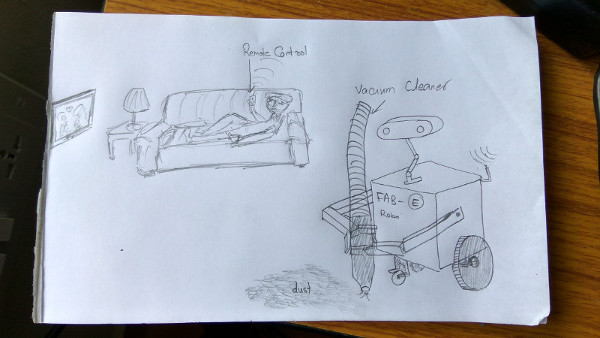
Final Project Abstract : RF-Based Small Wall-E Robot
In Fab Academy as a part of curriculam we have to do a final project. So I decided to make a small cleaning robot which is usefull to our lab also. I made a sketch of it. This is a dual-mode robot that can be operated manually using an RF-based remote control and can also move automatically by sensing the obstacles using some sensors. The robot has some inbuilt intelligence to avoid obstacles by changing its path. It can be further modified for applications like automatic vacuum cleaner then using vacuum cleaner we can automatically clean the floor, or we can direct it using the RF remote while sitting on the sofa.
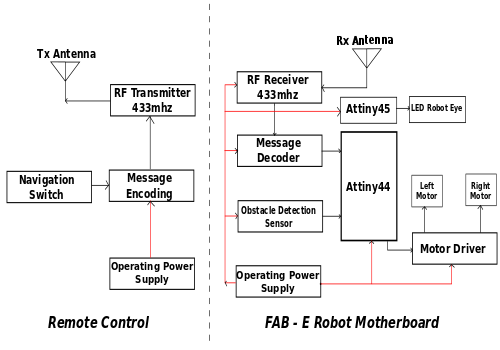
The block diagram for ATtiny-based dual-mode robot. When a button is pressed in the remote, the corresponding code is transmitted through RF transmitter. At the receiver end, this transmitted signal is received and decoded. The MCU unit compares the received code and drives the motors corresponding to the code received. Obstacle detectors detect any object in the way and intimate the microcontroller.