Week 12 Assignment: Design a 3D Mold, machine it, and cast parts from it.
Go back HOME
Molding and Casting was an interesting foray into the world of subtractive manufacturing! Other than milling (PCBs) and machining (using the ShopBot) we had not really experienced any different kind of subtractive manufacturing that did not involve "cutting". Personally, this week, for me was an eye opener to SOFT TOOLING.
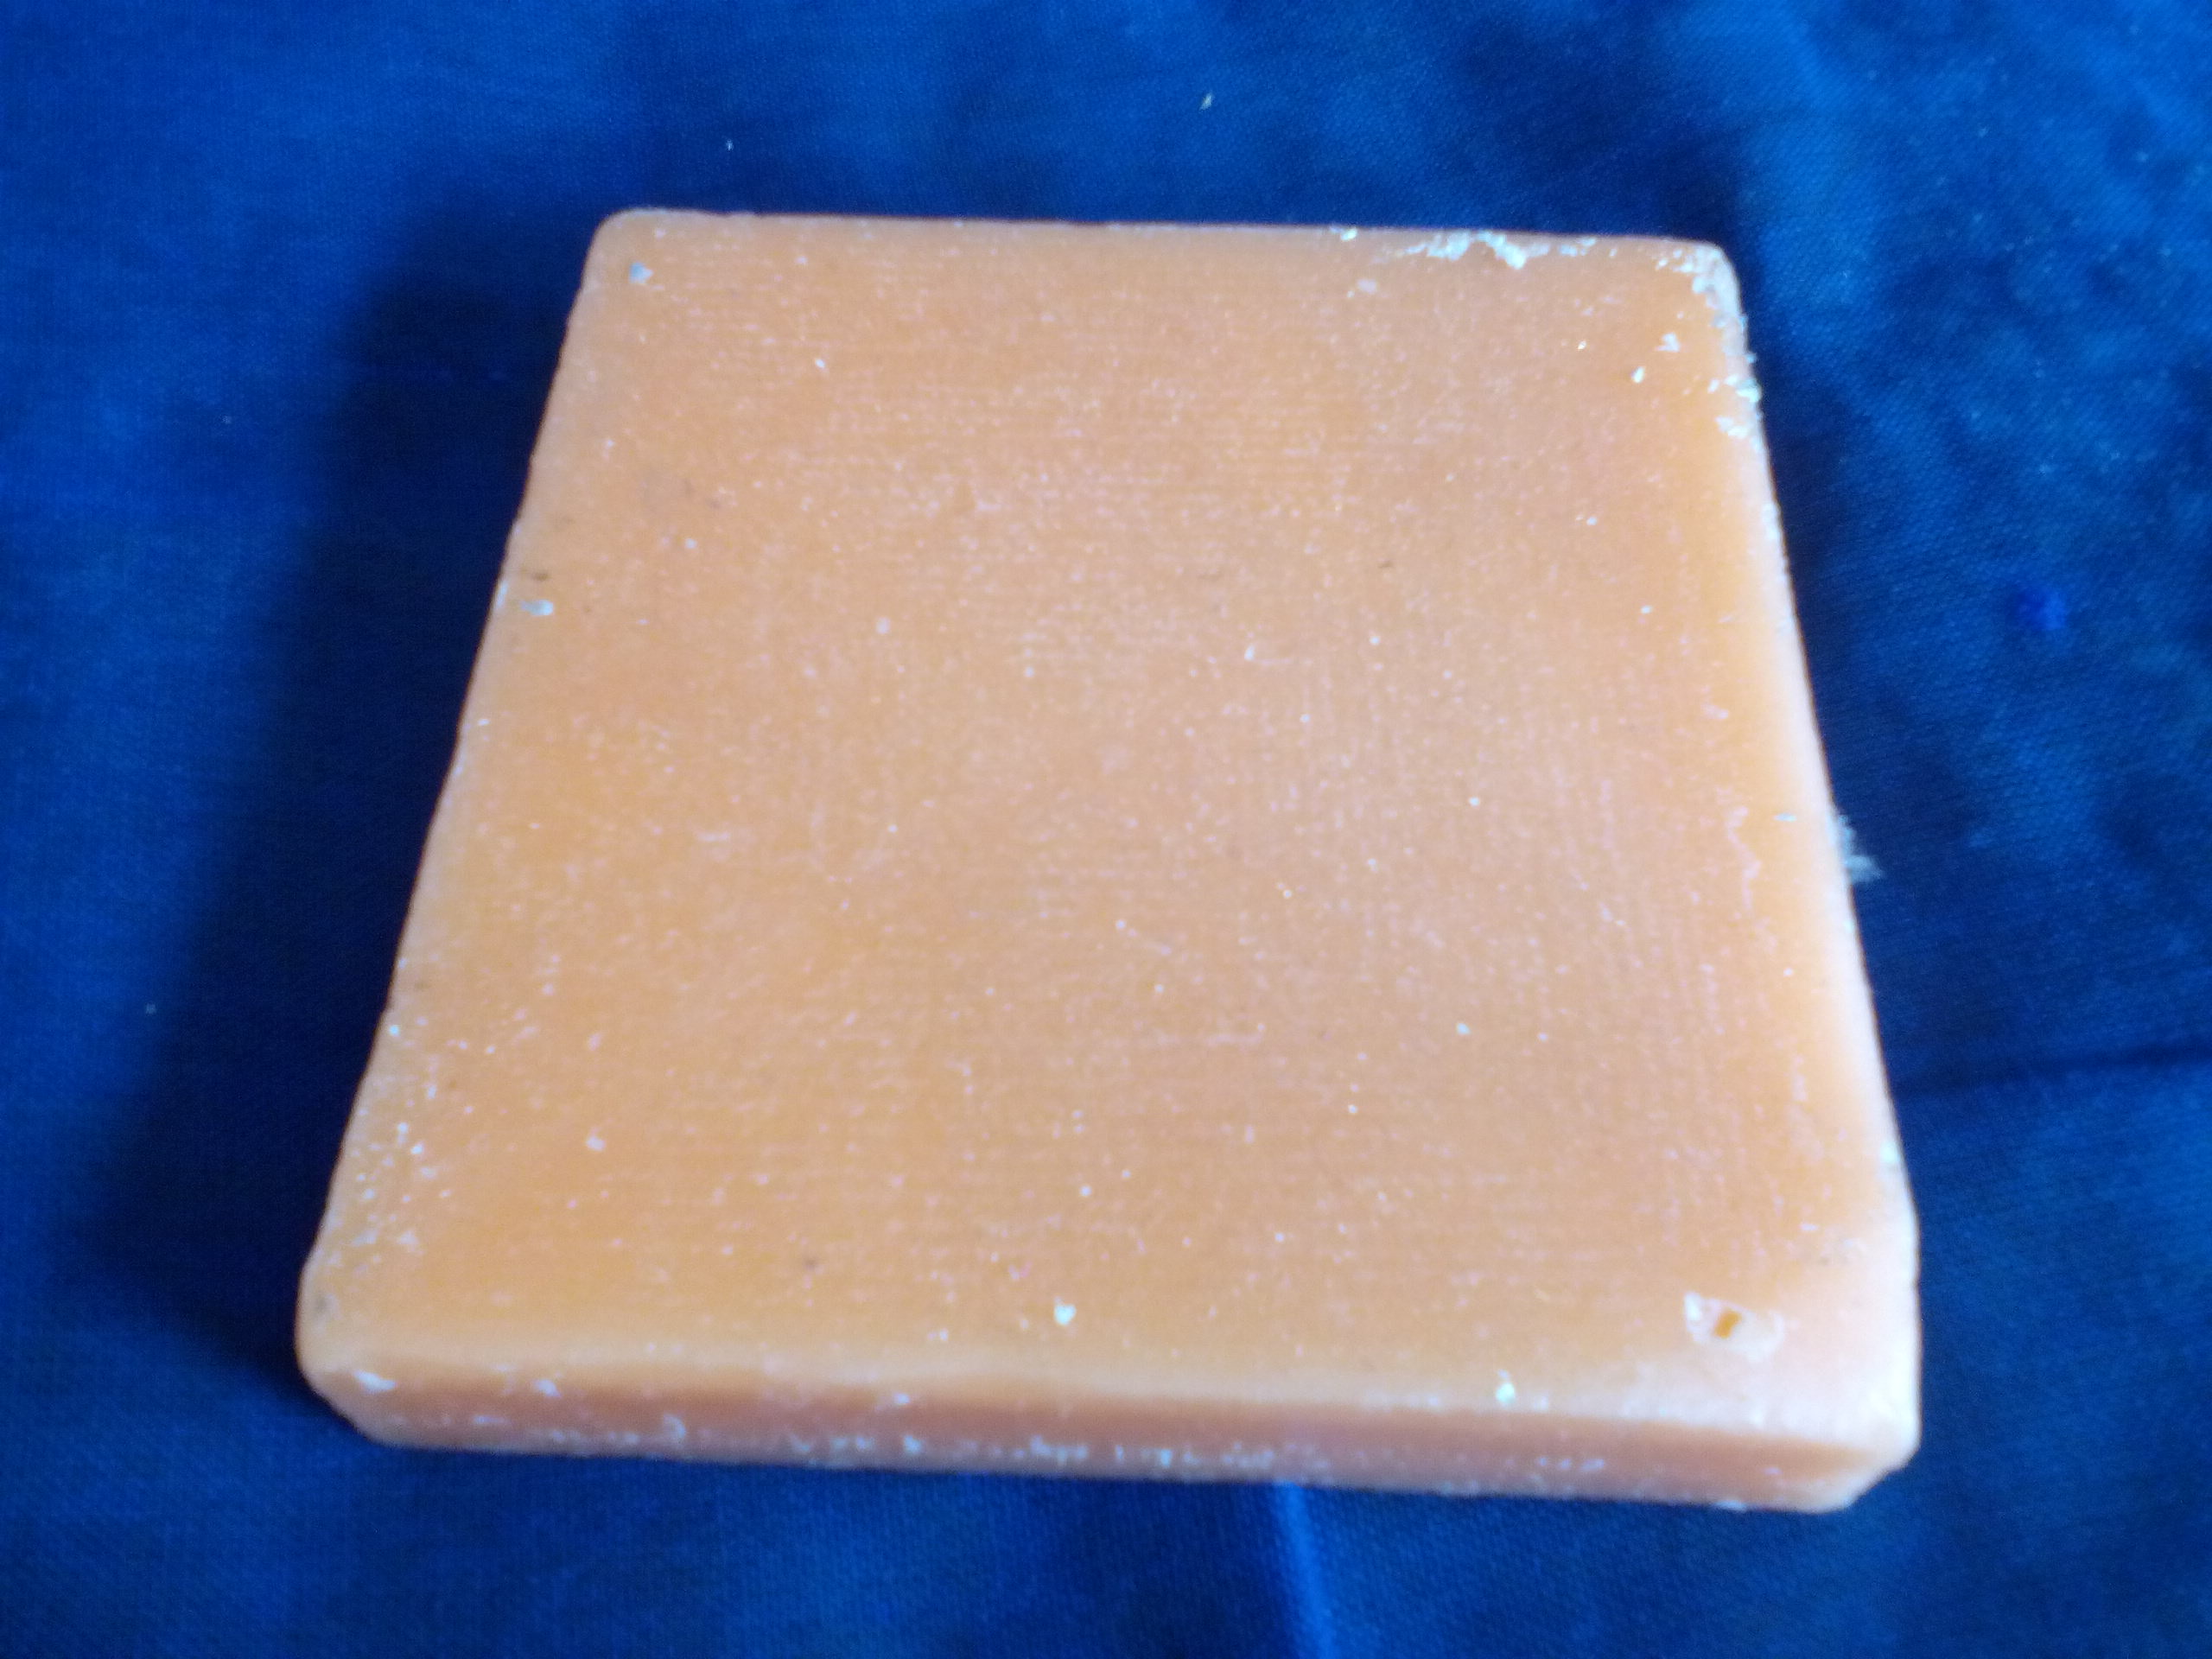
I used a block of Machine Wax I had purchased from a specialty store in the local industrial goods market in Trivandrum.

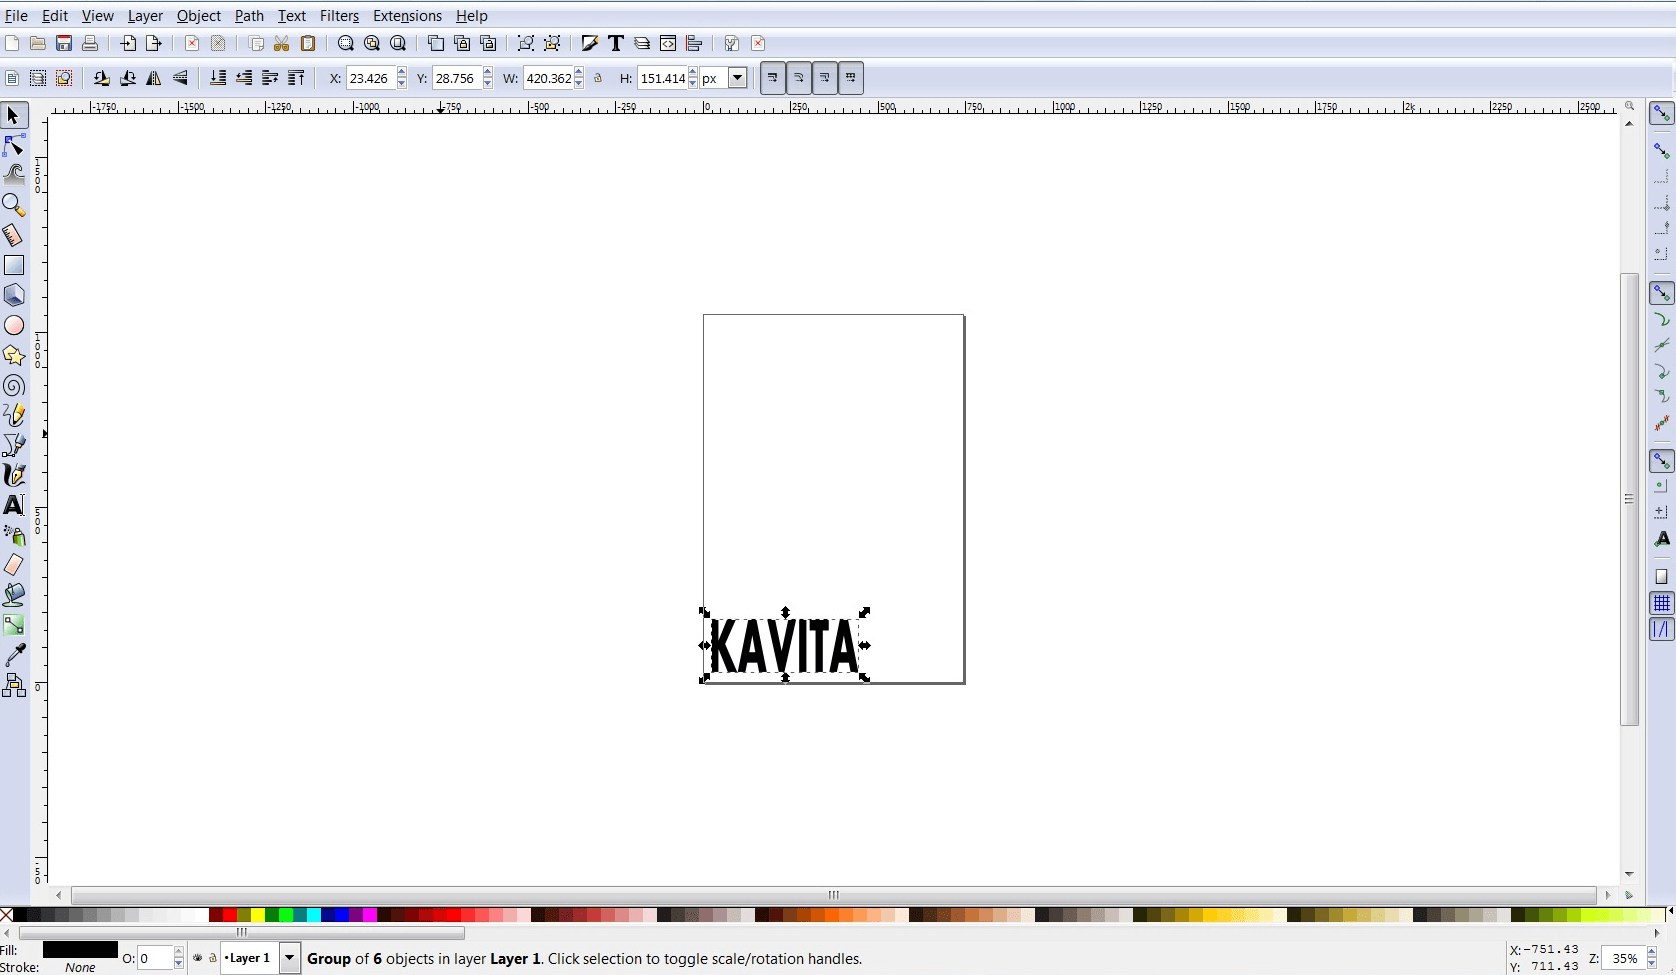
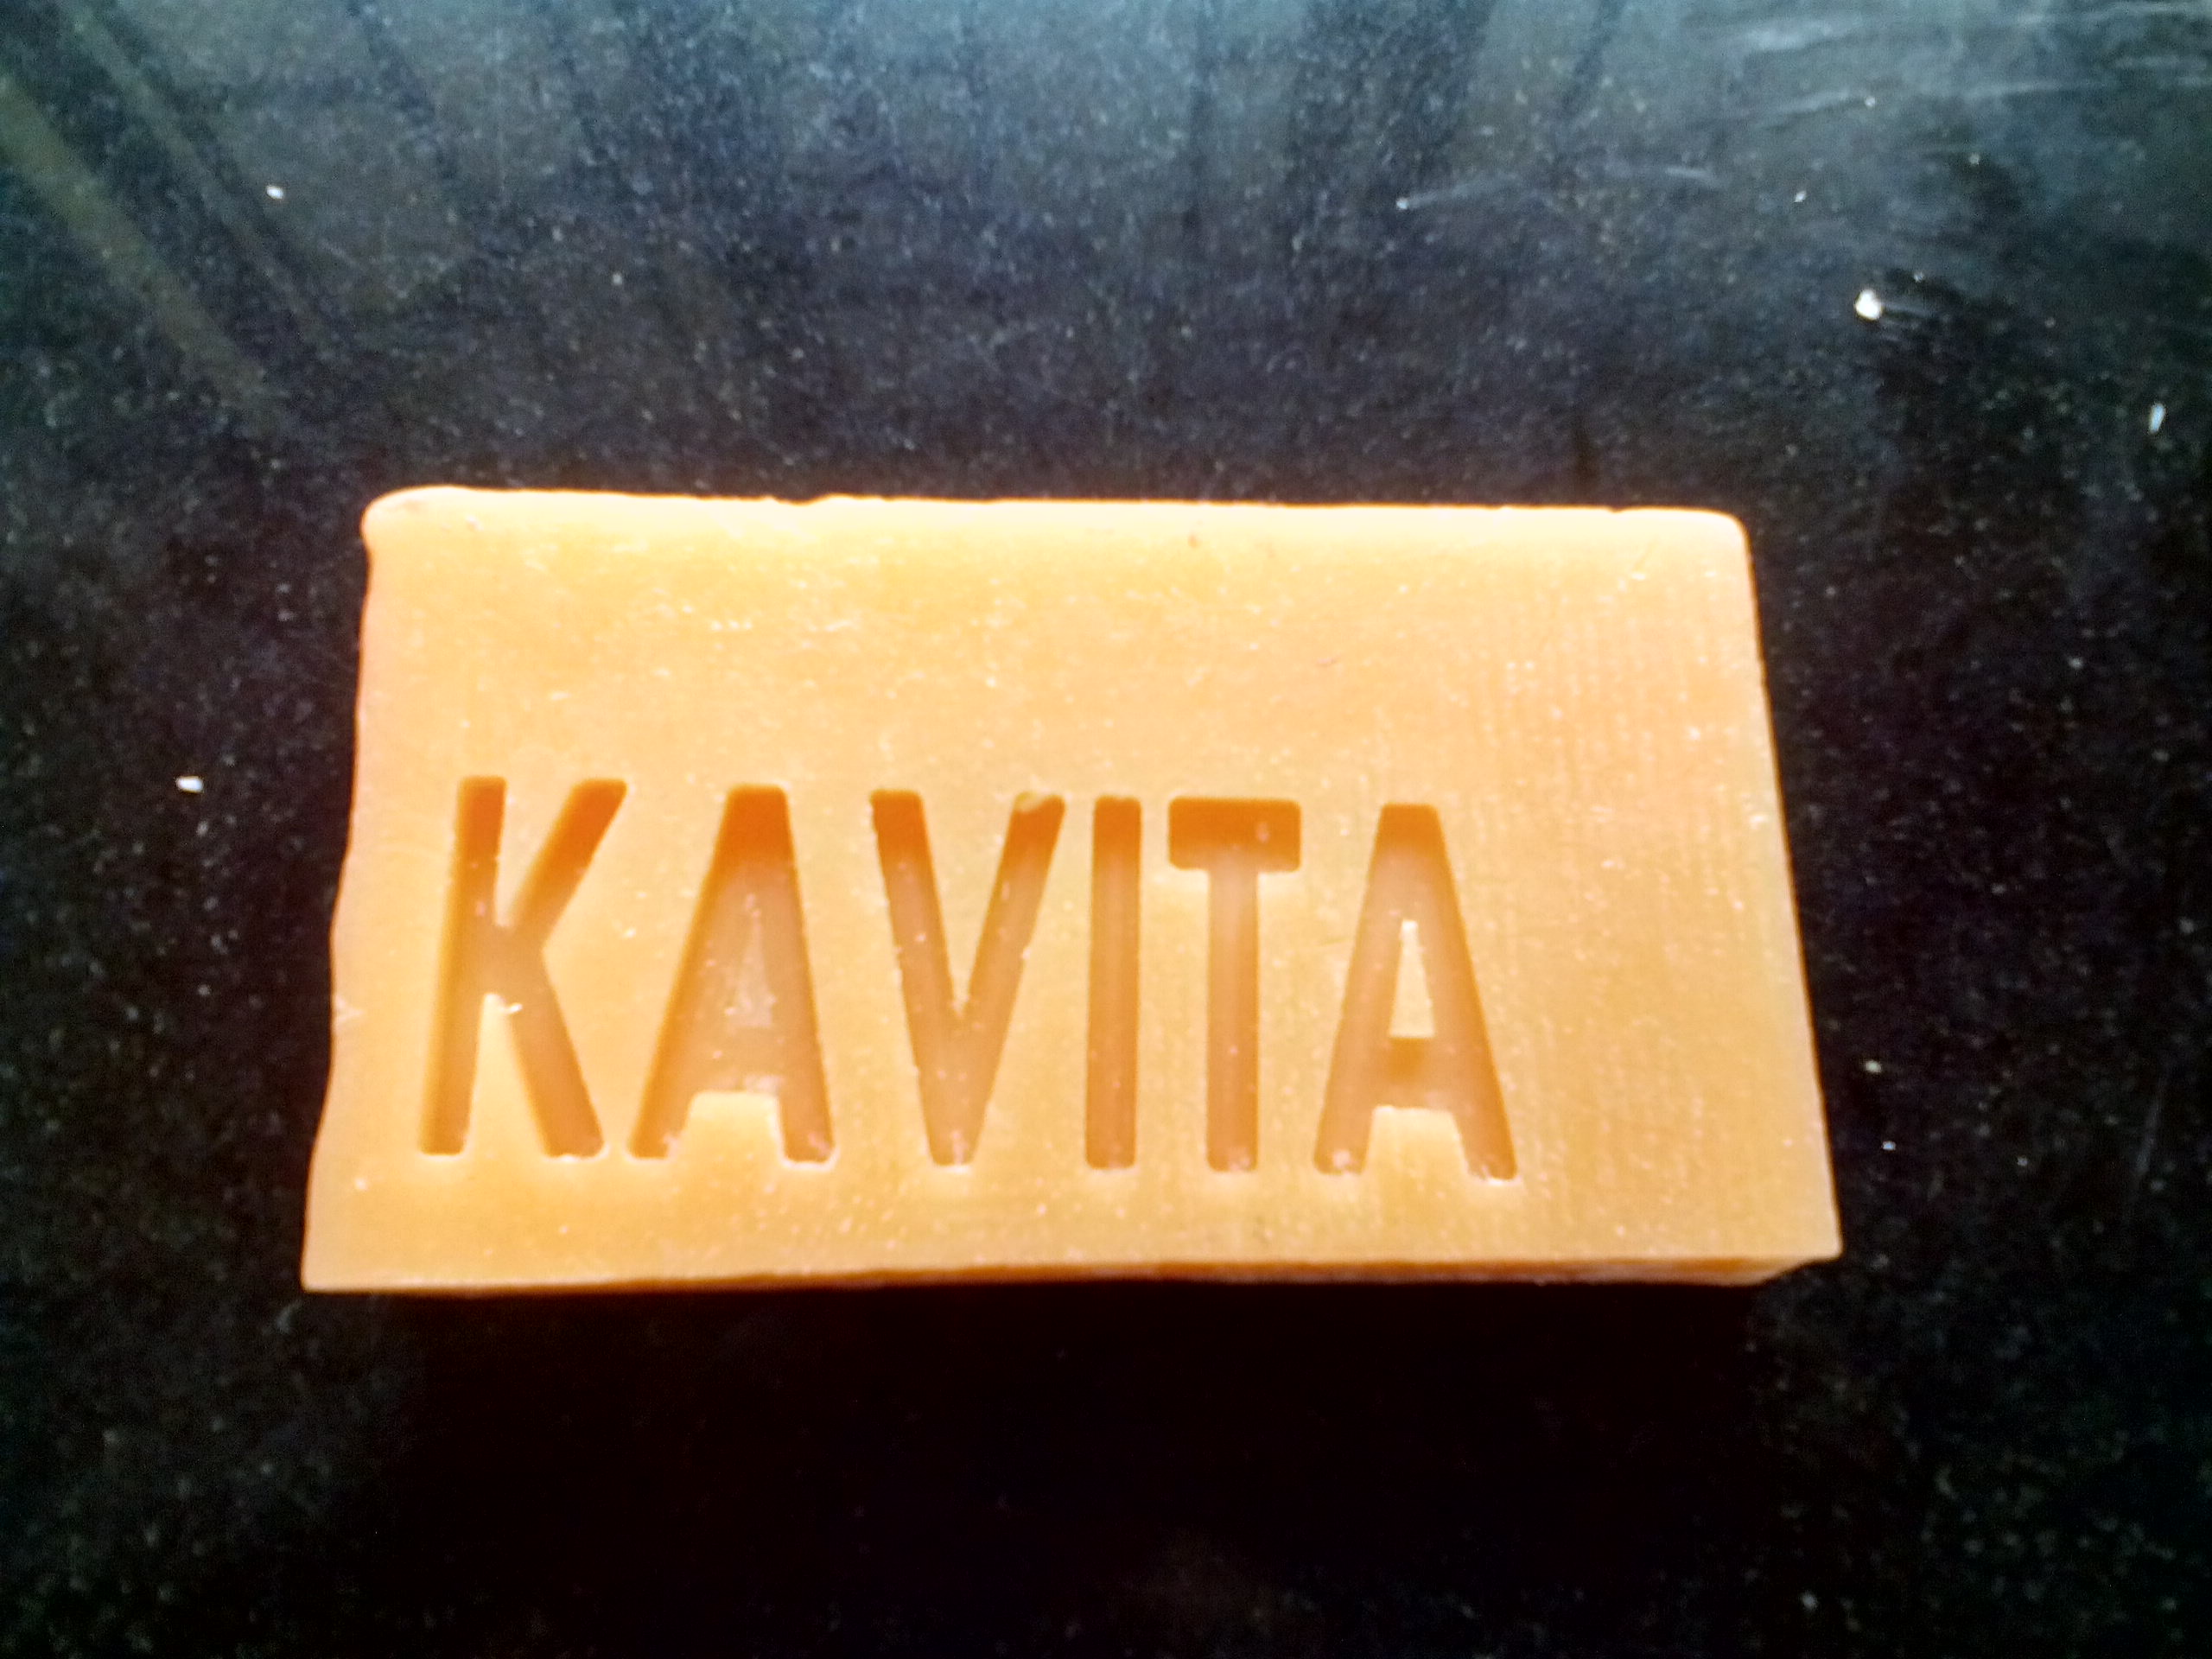
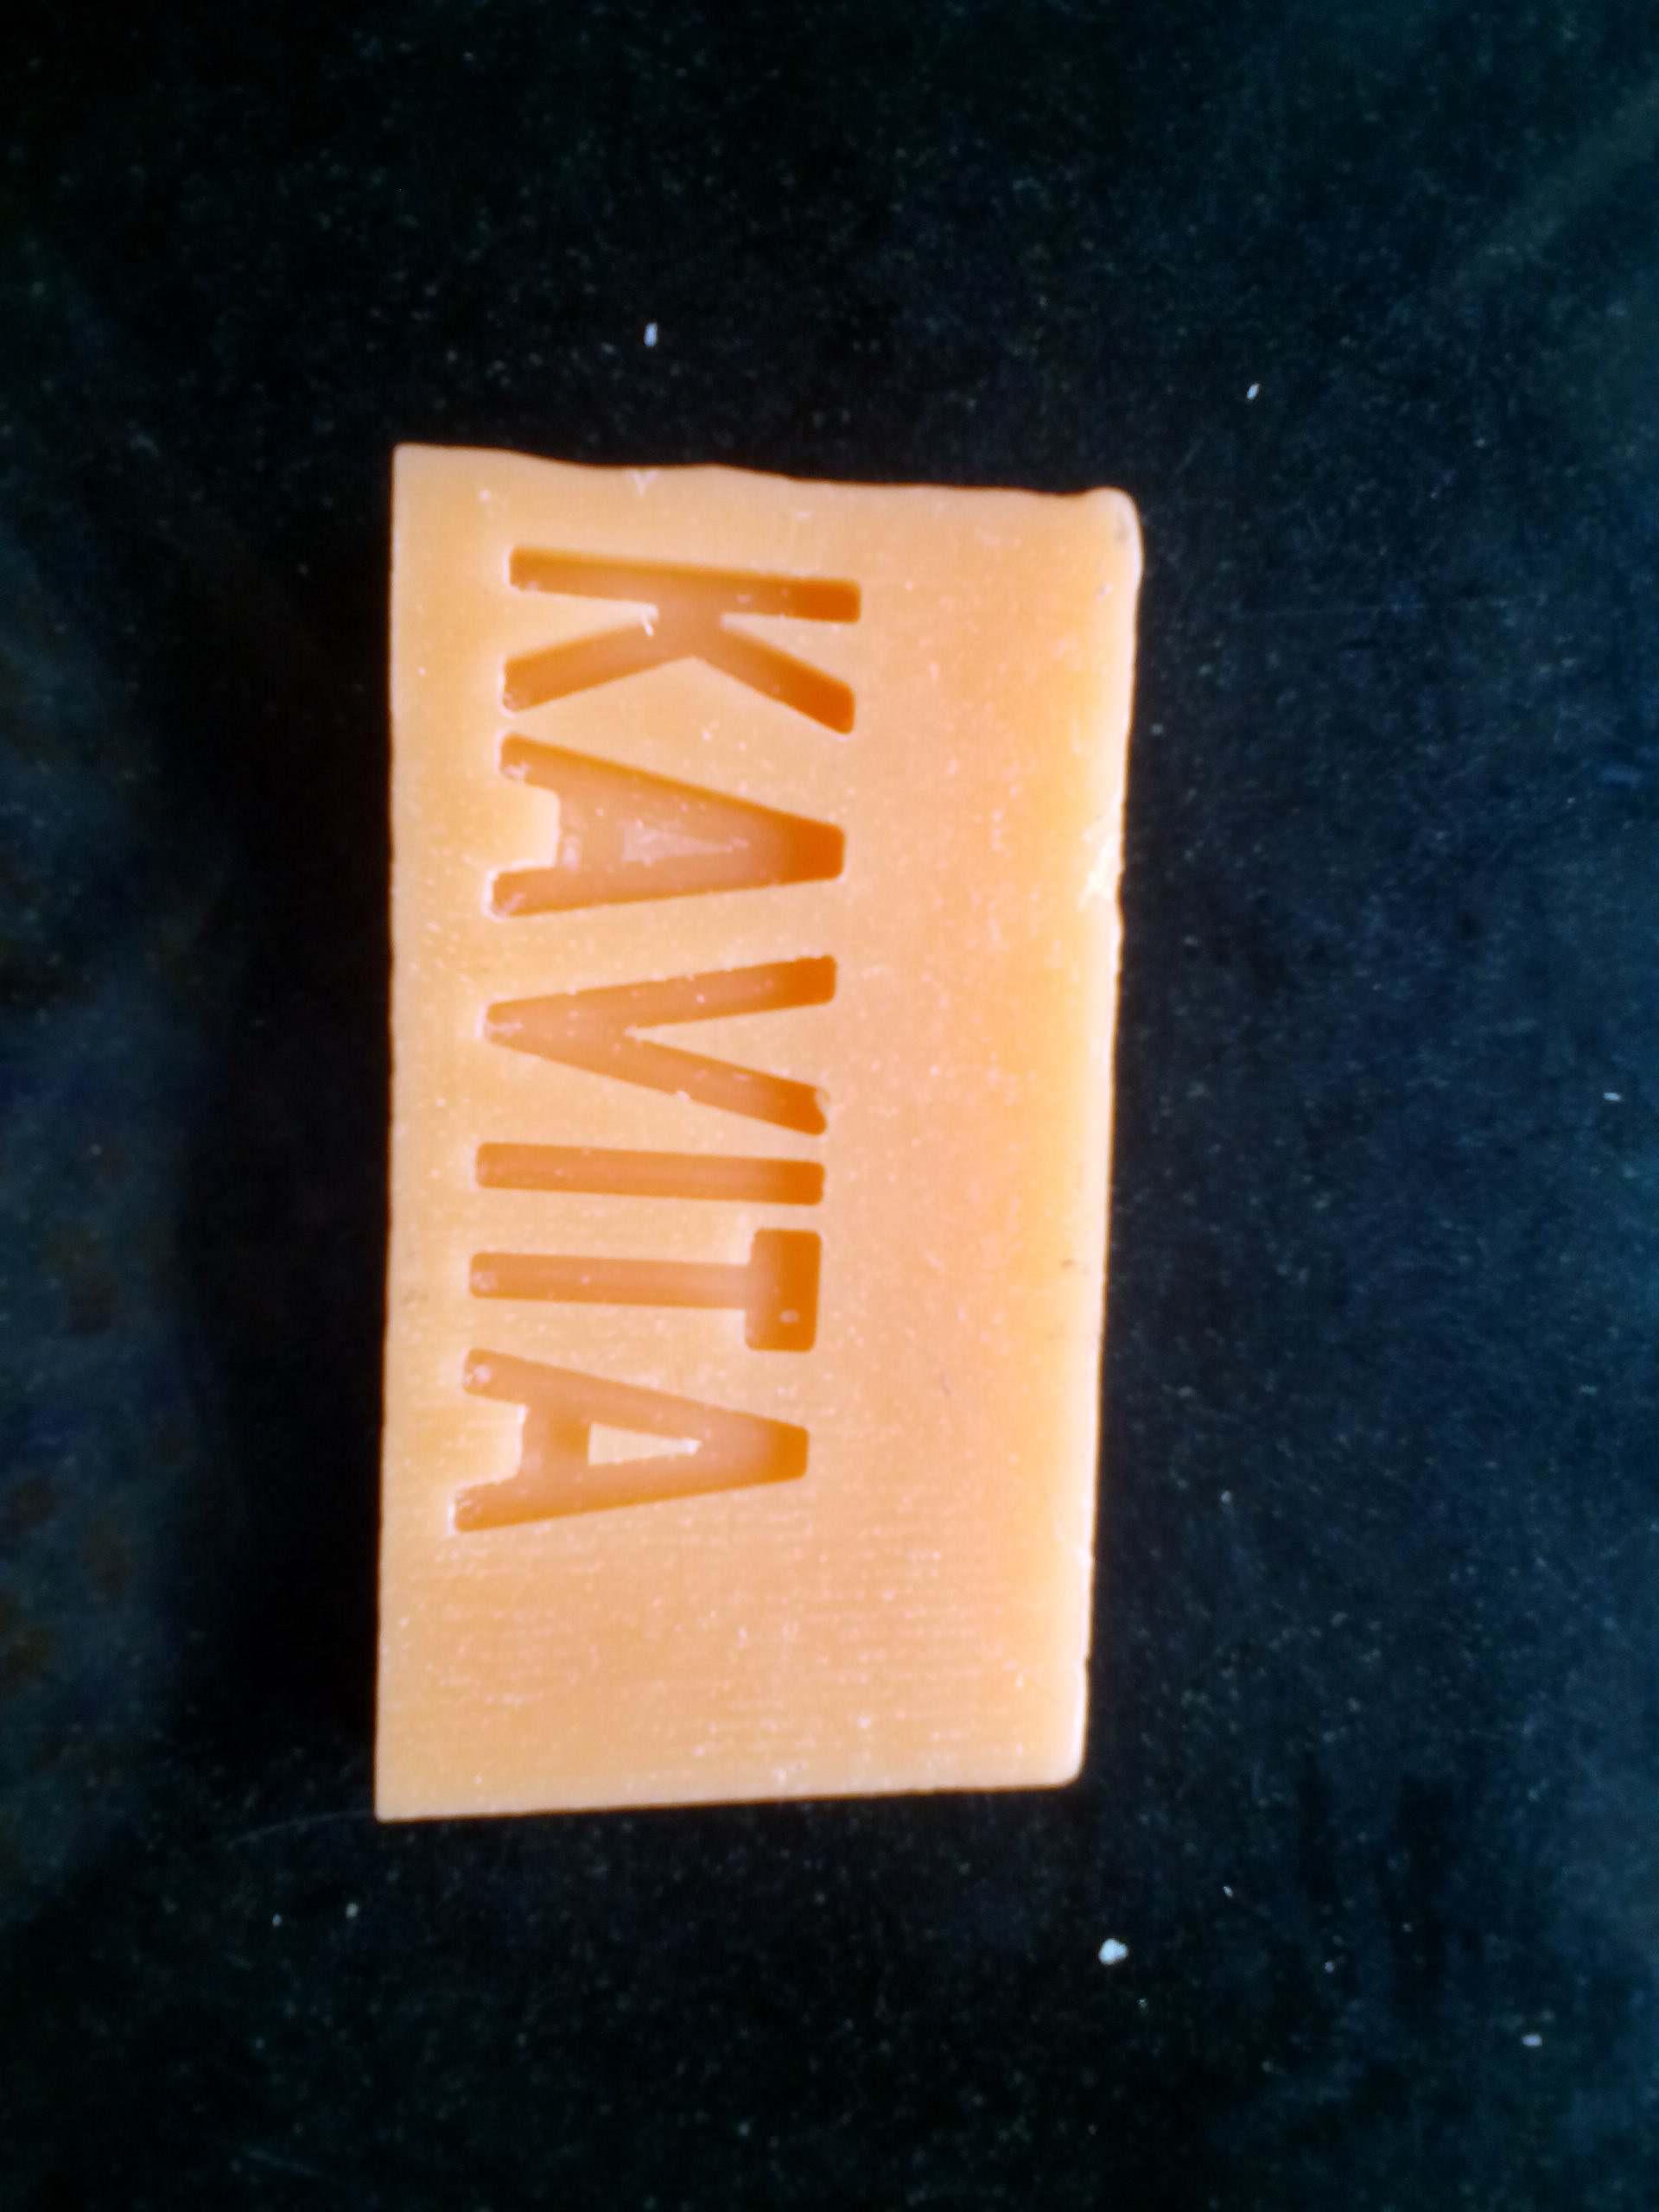
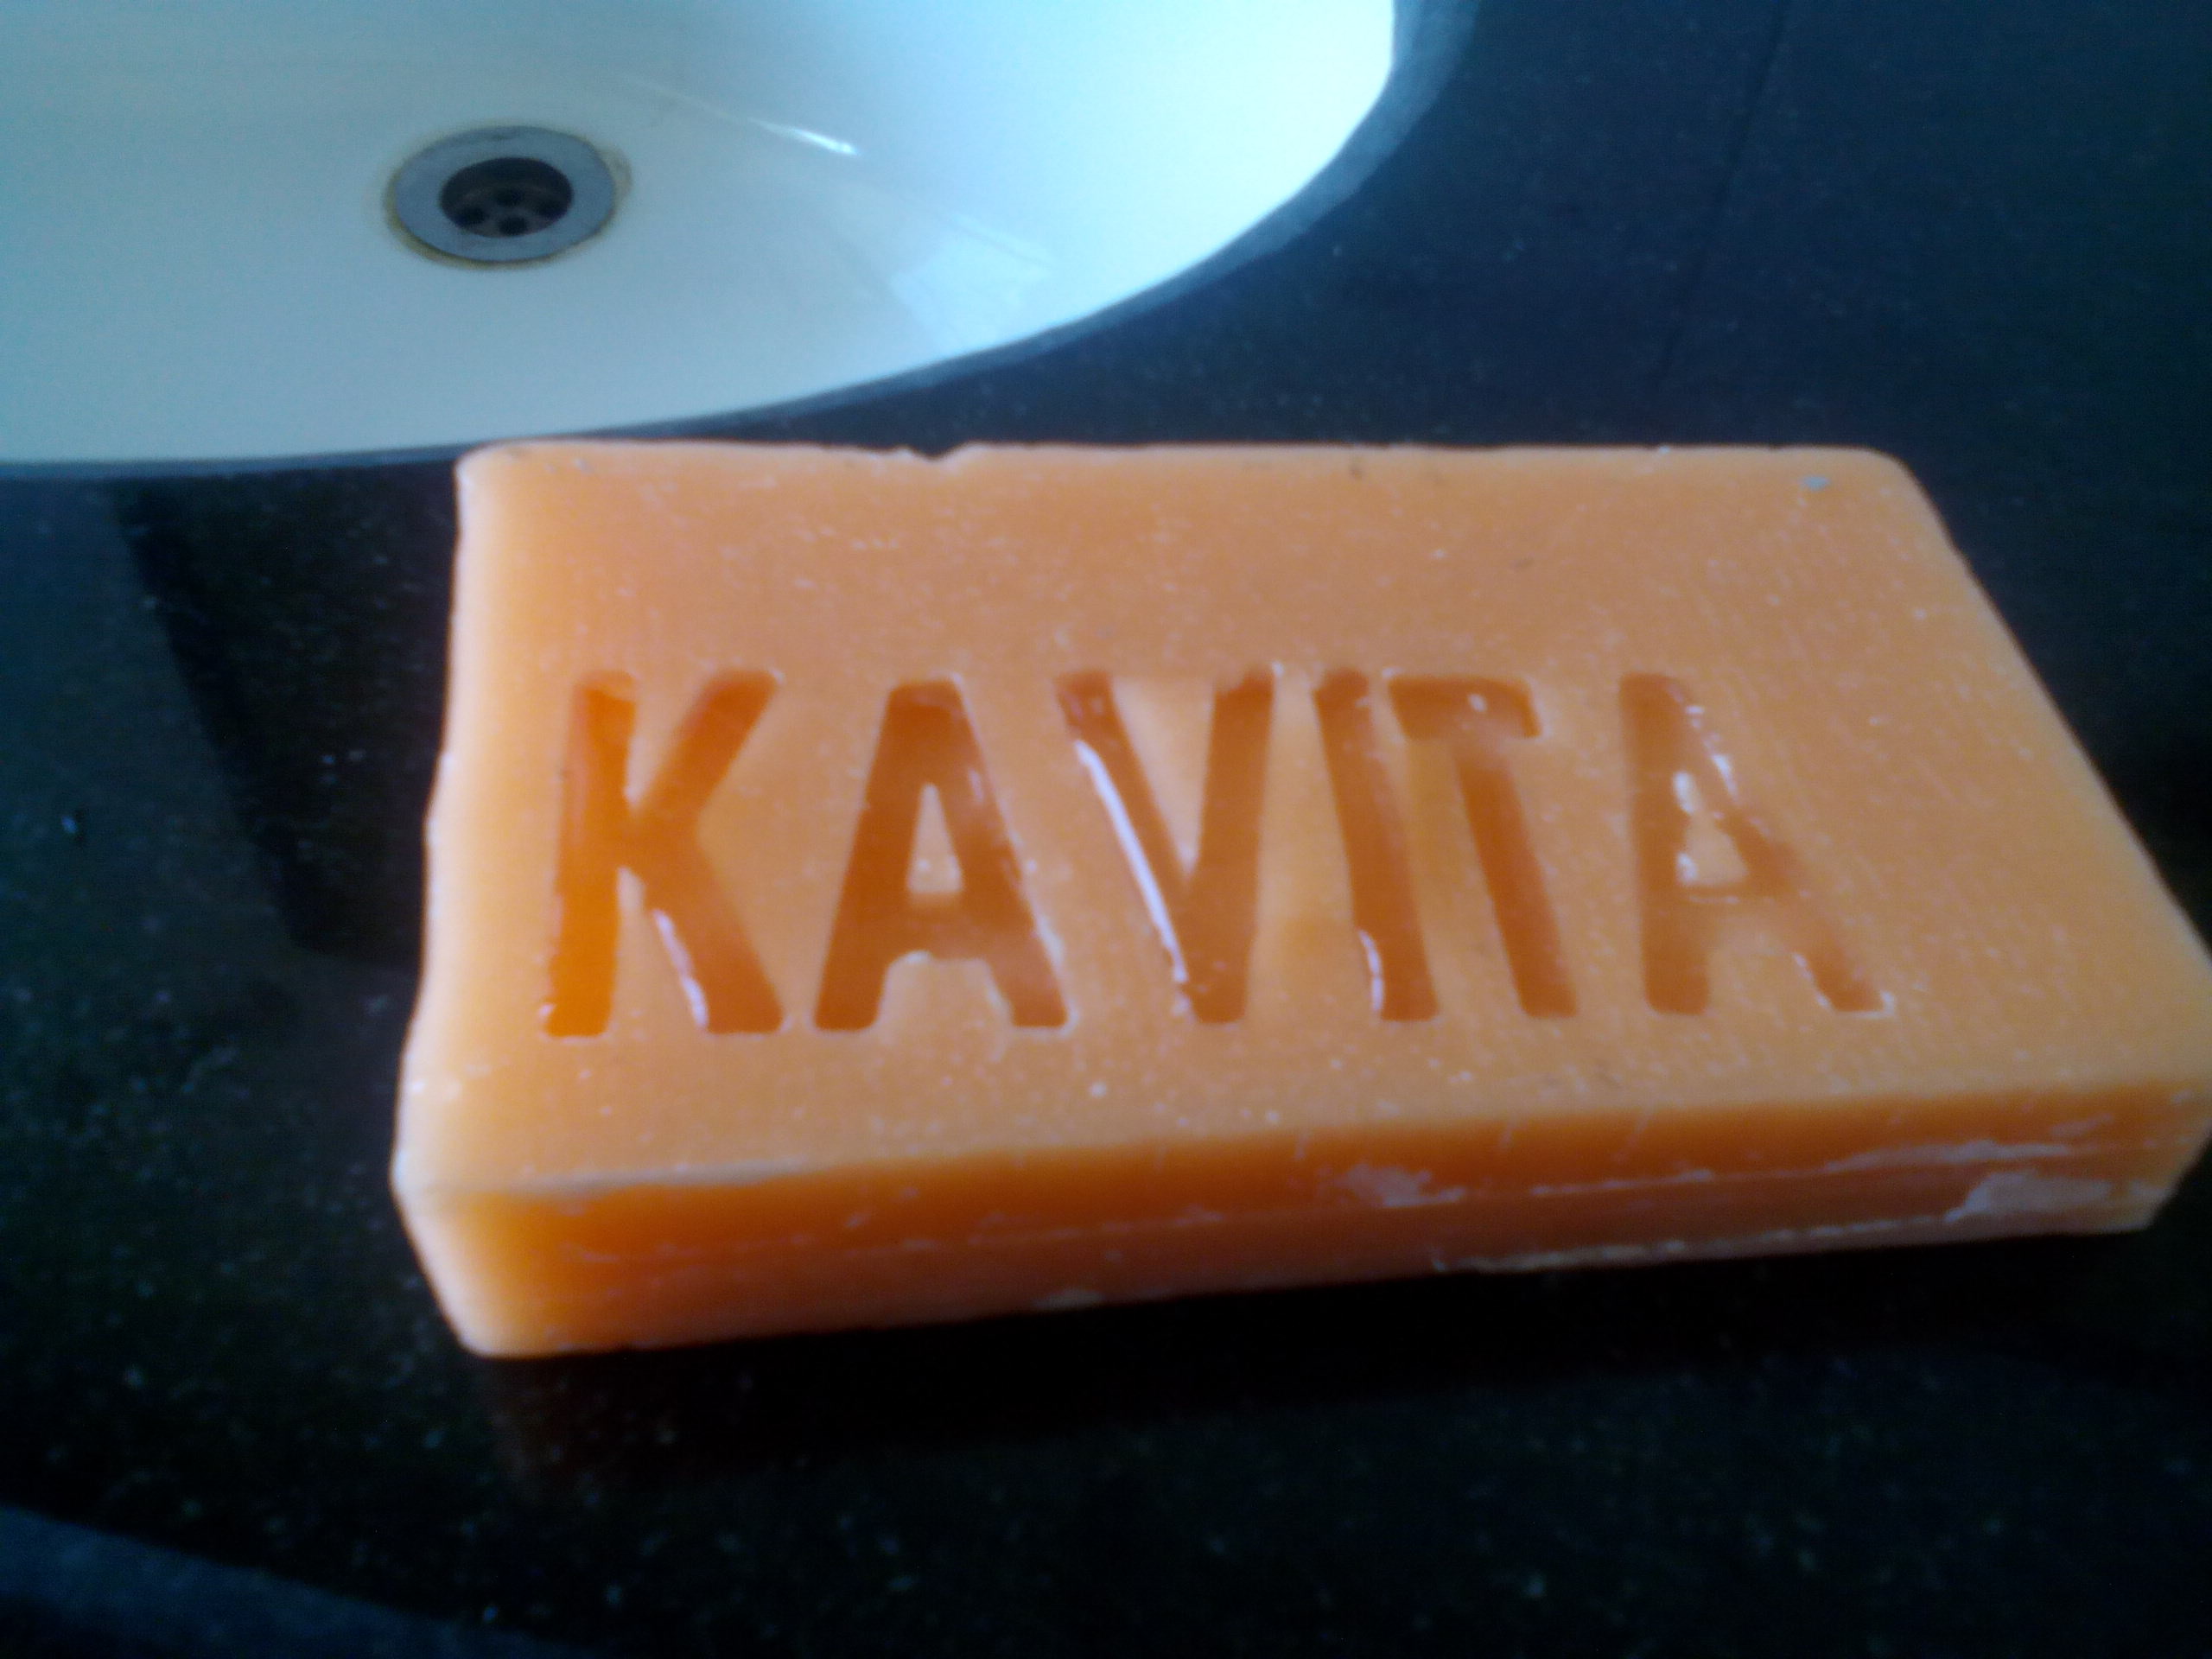
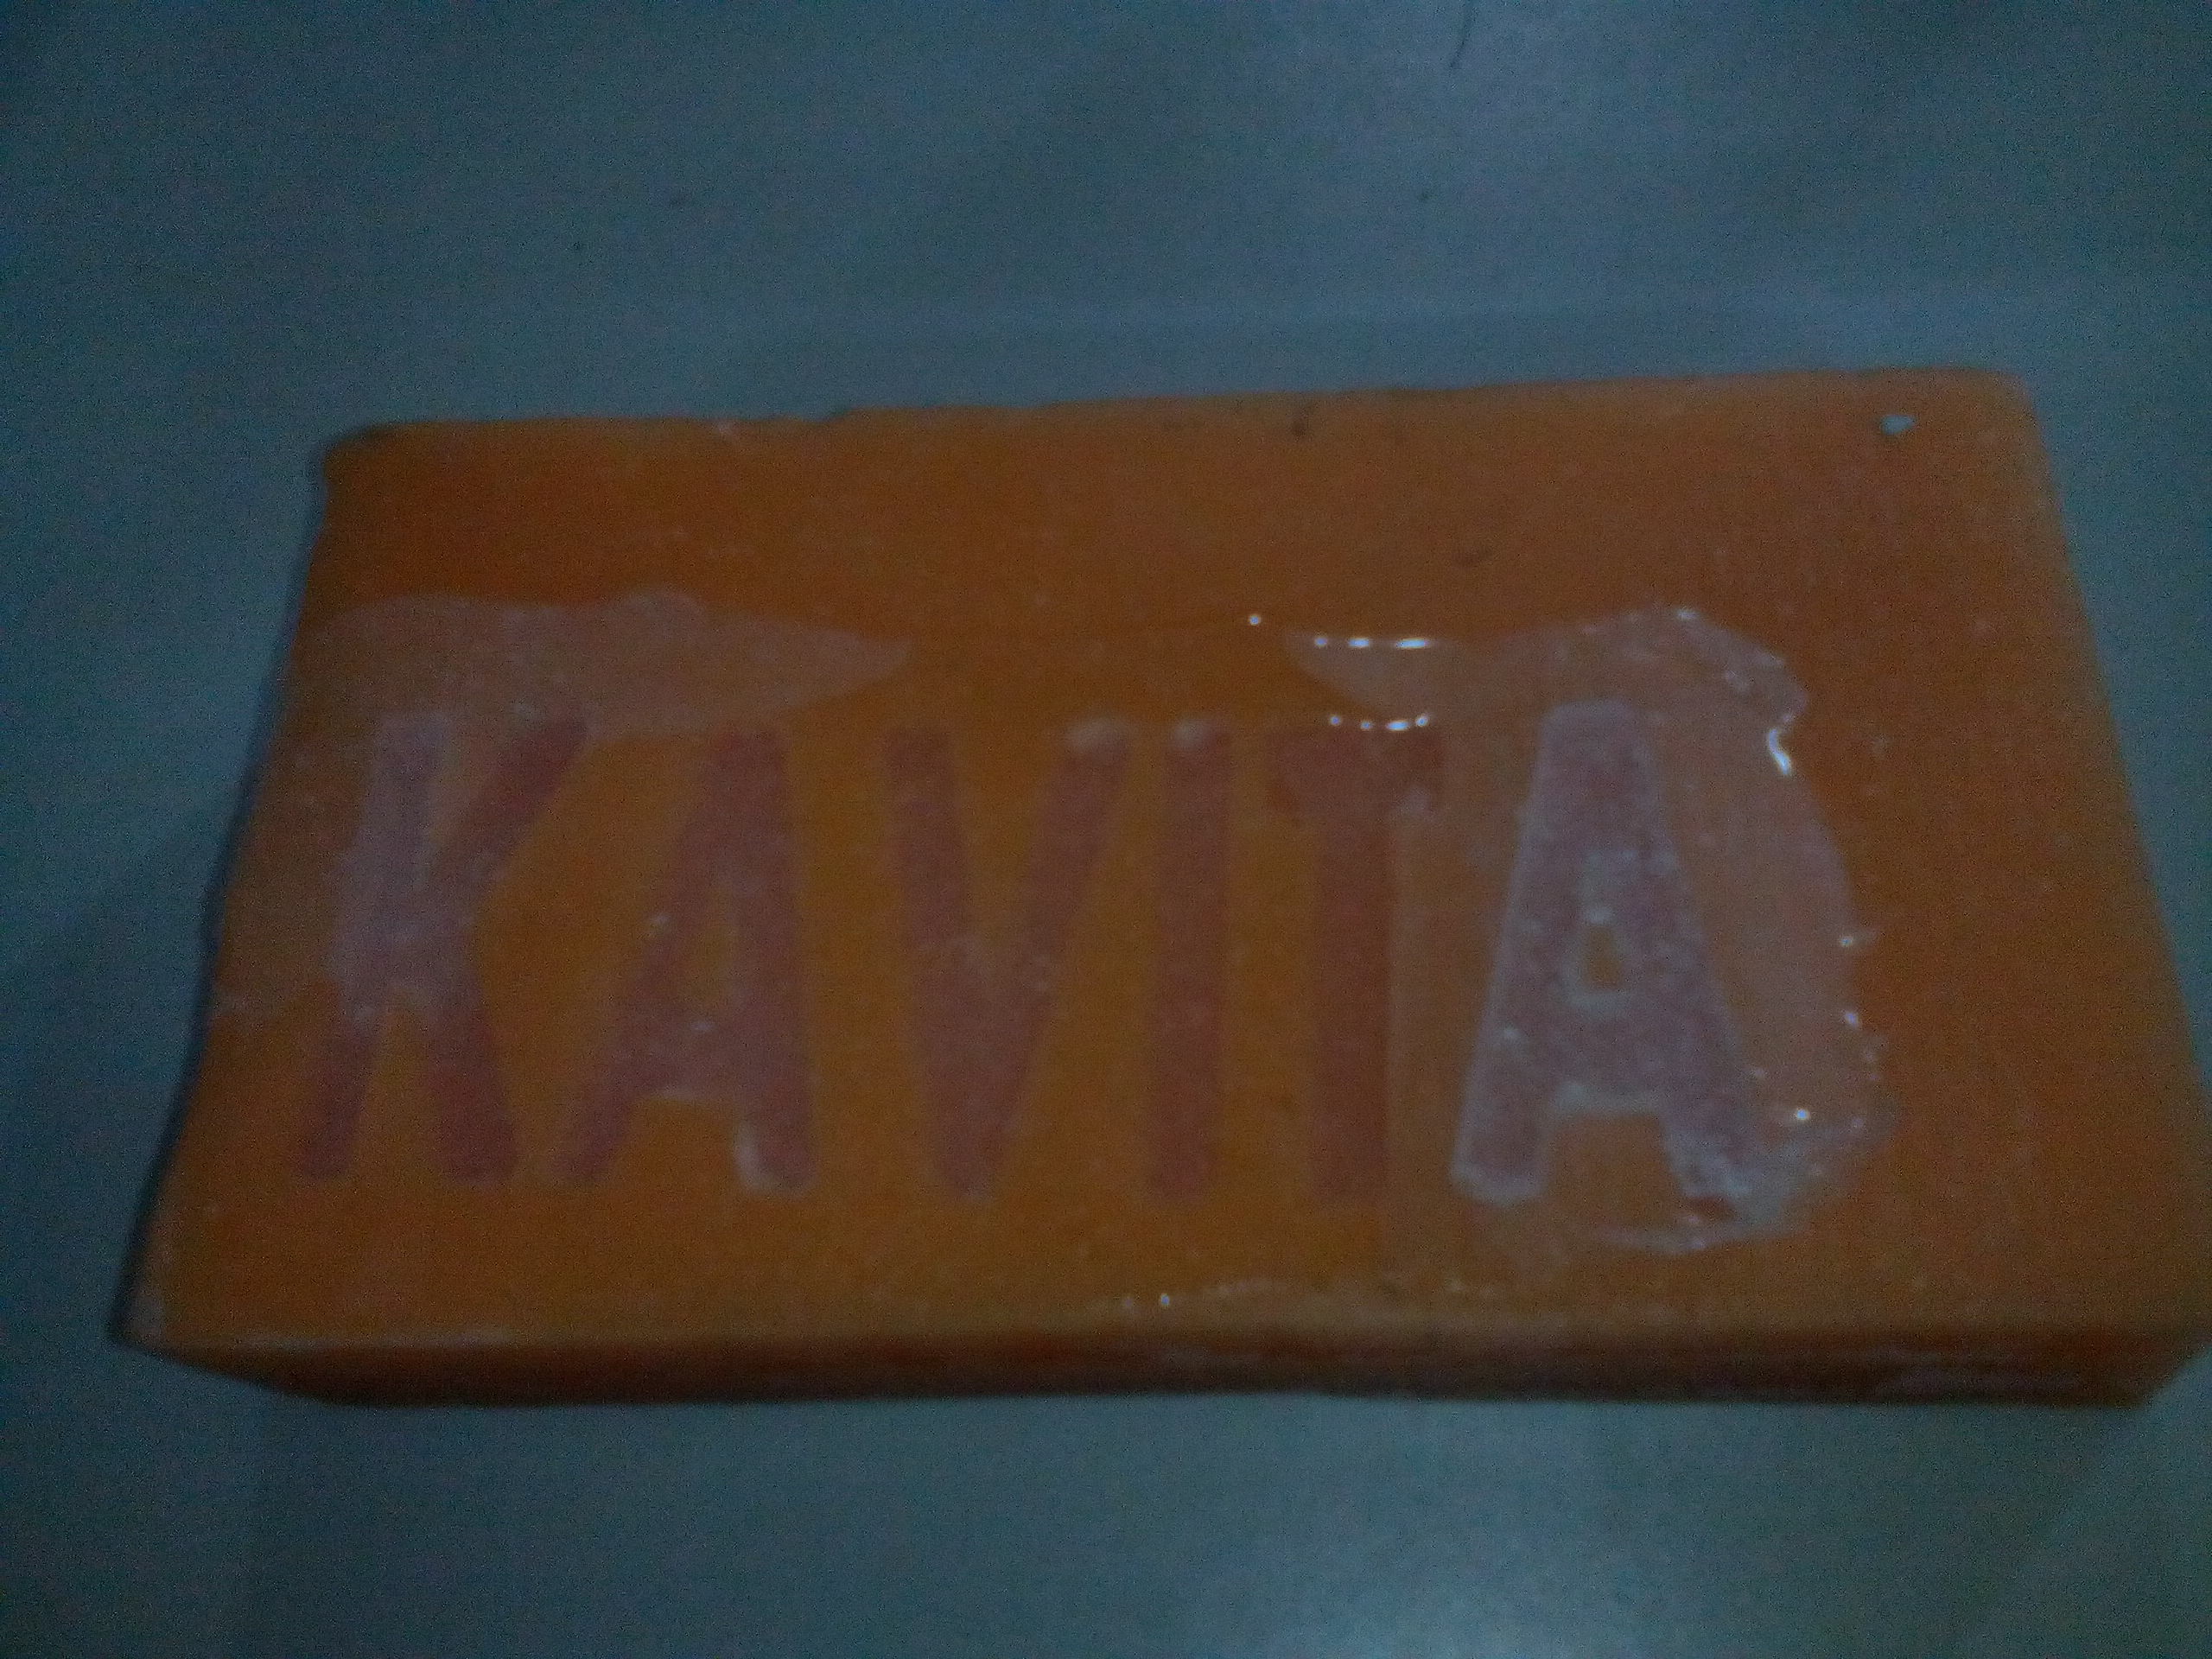
I decided to carve out the letters of my name in capitals and create a multiple-part 3D mold, as opposed to a uniform-object style design. I used Inkscape to create the Vector (.svg) file:
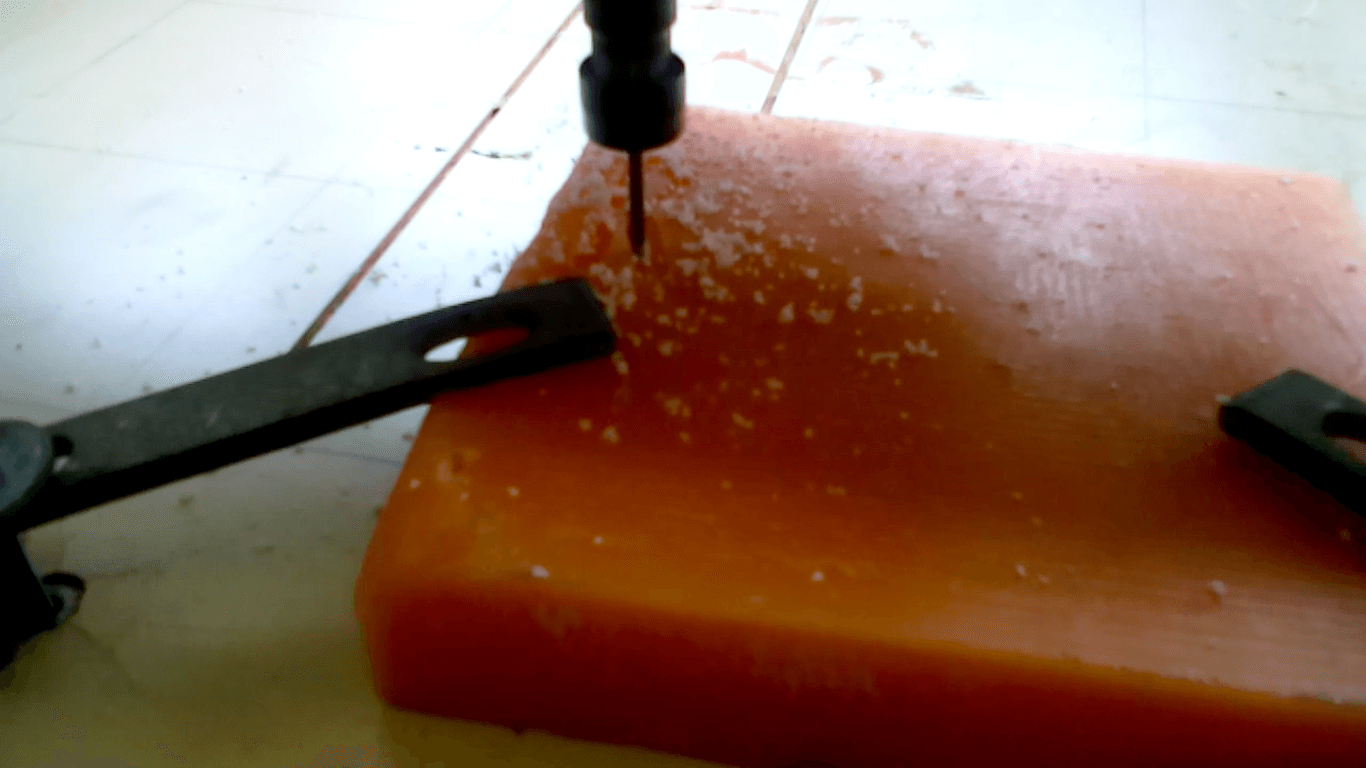
A few days ago, I had visited a new makerspace in the city, and was interested in checking out some of the equipment they had recently acquired! As most of the members were Mechanical Designers, a lot of their kit included CNC machines :) I gained permission to see if I could machine my 3D mold using the wax I had recently purchased for this assignment. I used a large format 800mm x 800mm CNC Mill gantry system (which they had at their space) to machine my design on the machinable wax:

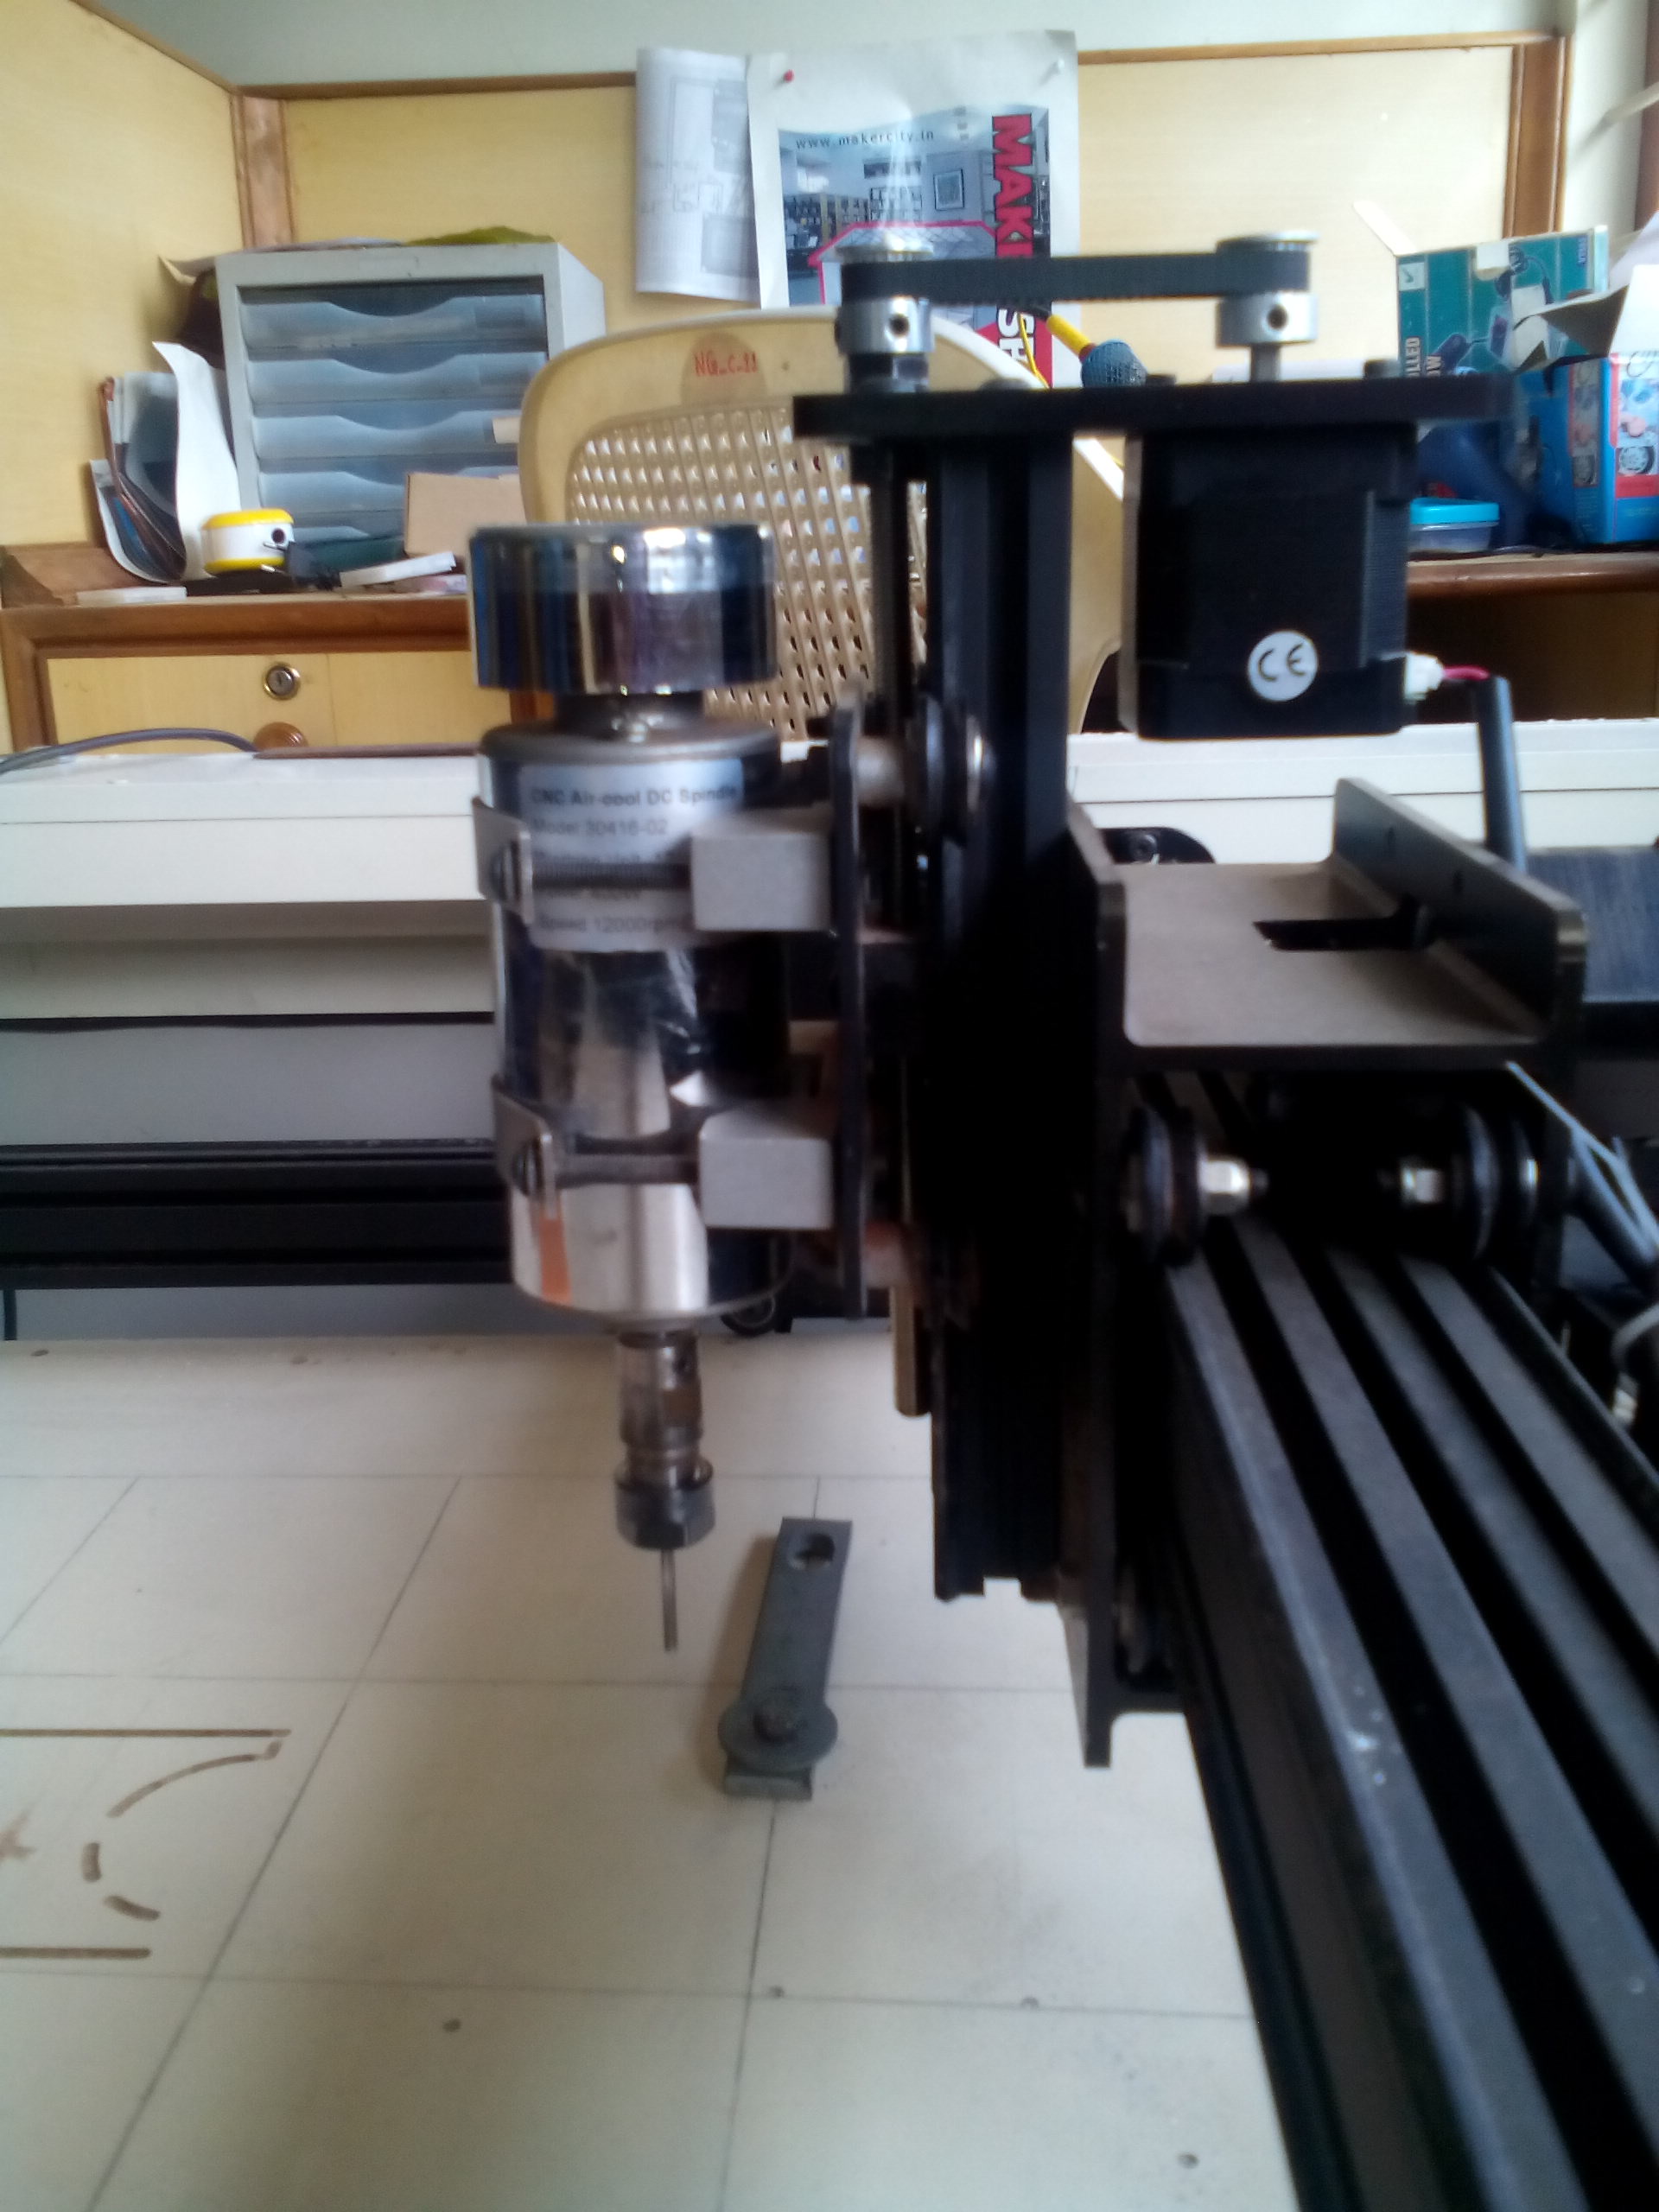
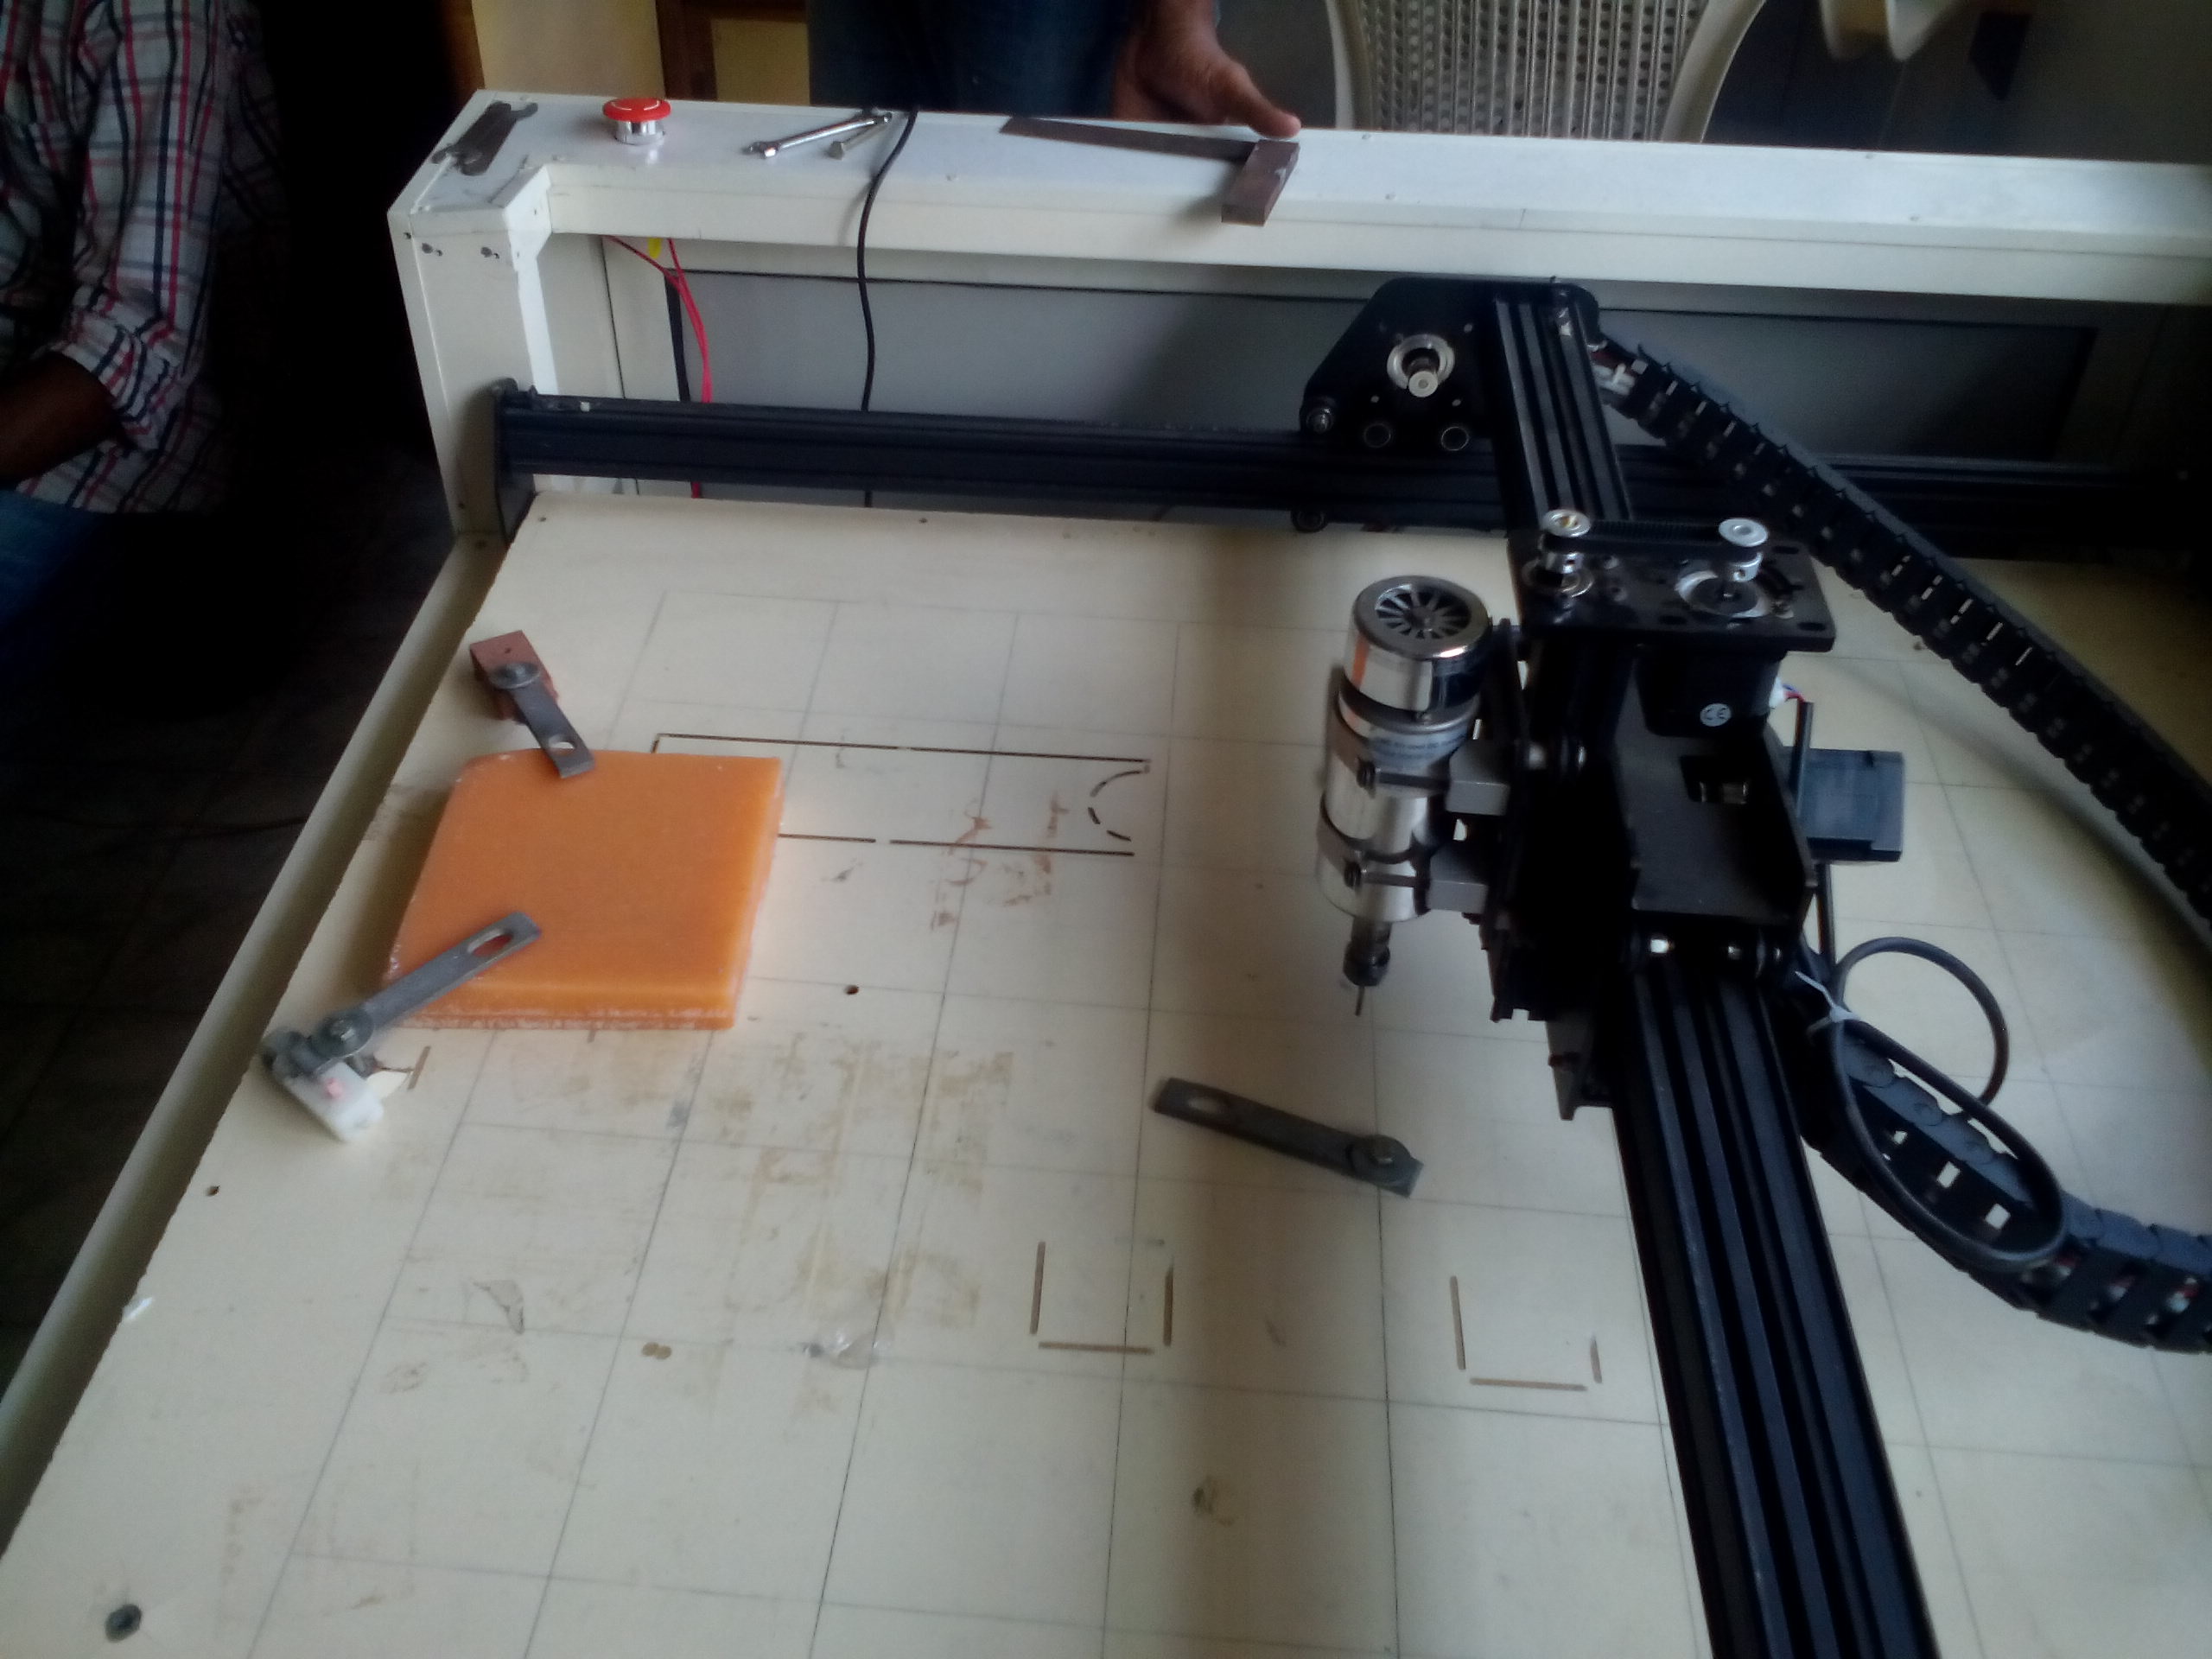
For this assignment, I wanted to see how easy or difficult it would be to try an approach different from what I would have used at our Fab Lab. I imported the Vector .svg file of my design into an open source, cloud-based software package called Easel. Easel allowed me to convert the .svg successfully into G-Codes which the CNC mill I was using could understand. I then used Universal G-Code Centre to program the CNC machine and oriented the End Effector to align at the top of my Machinable Wax block:


With a little bit of assistance from my new Mechanical Designer friends (at the Makerspace) I used the following settings for the CNC Mill in order to successfully carve the letters of my name according to my Vector graphics file:
- Fill Depth = 8mm
- Feed Rate = 1016 mm/min
- Depth per pass = 1.6mm
- Bit Size = 0.125 inch 2-flute
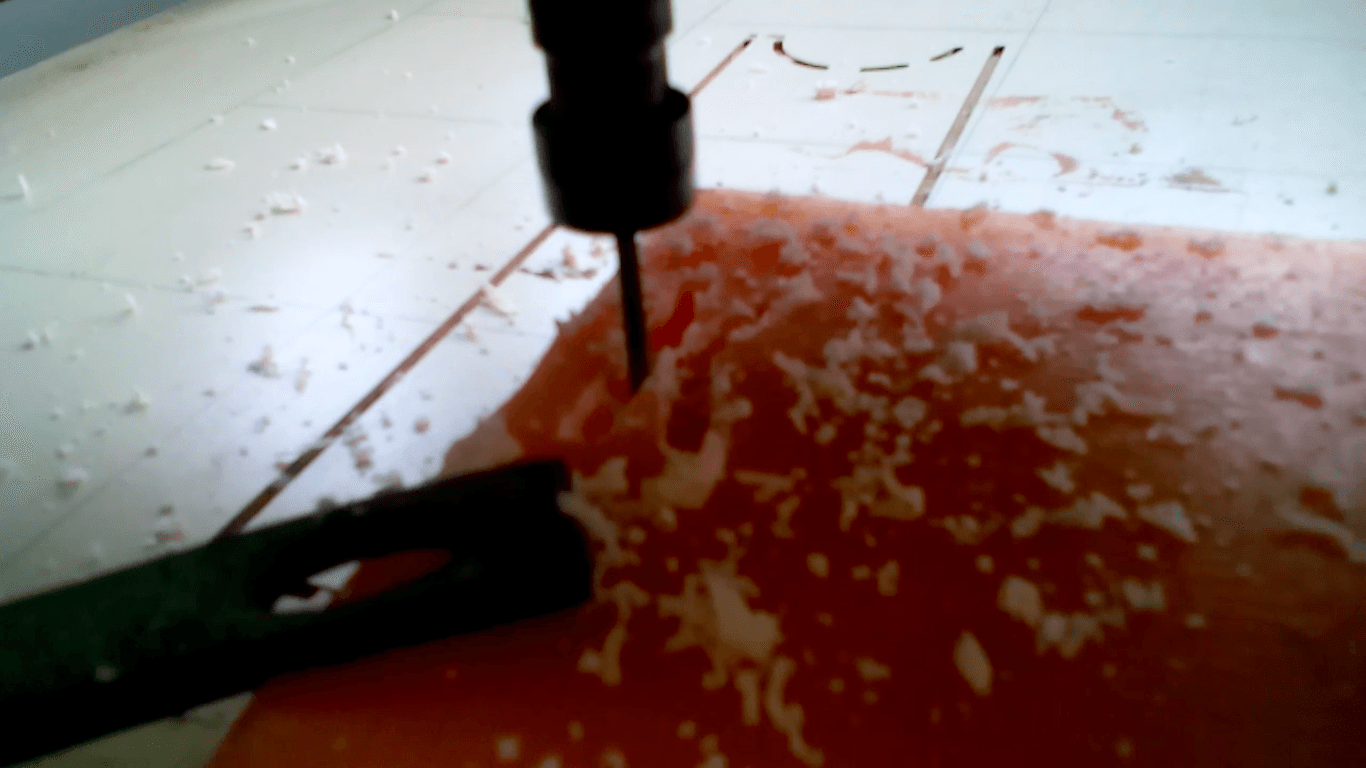
After milling the wax, and dusting off the shavings, the only task I had ahead of me was Casting :) I used the Fab Lab's supply of Smooth On Liquid Plastic to create an (almost) transparent flexible mold of my name. I followed the steps below to determine (tentatively) the volume of material I would need so as to minimize wastage as much as possible.


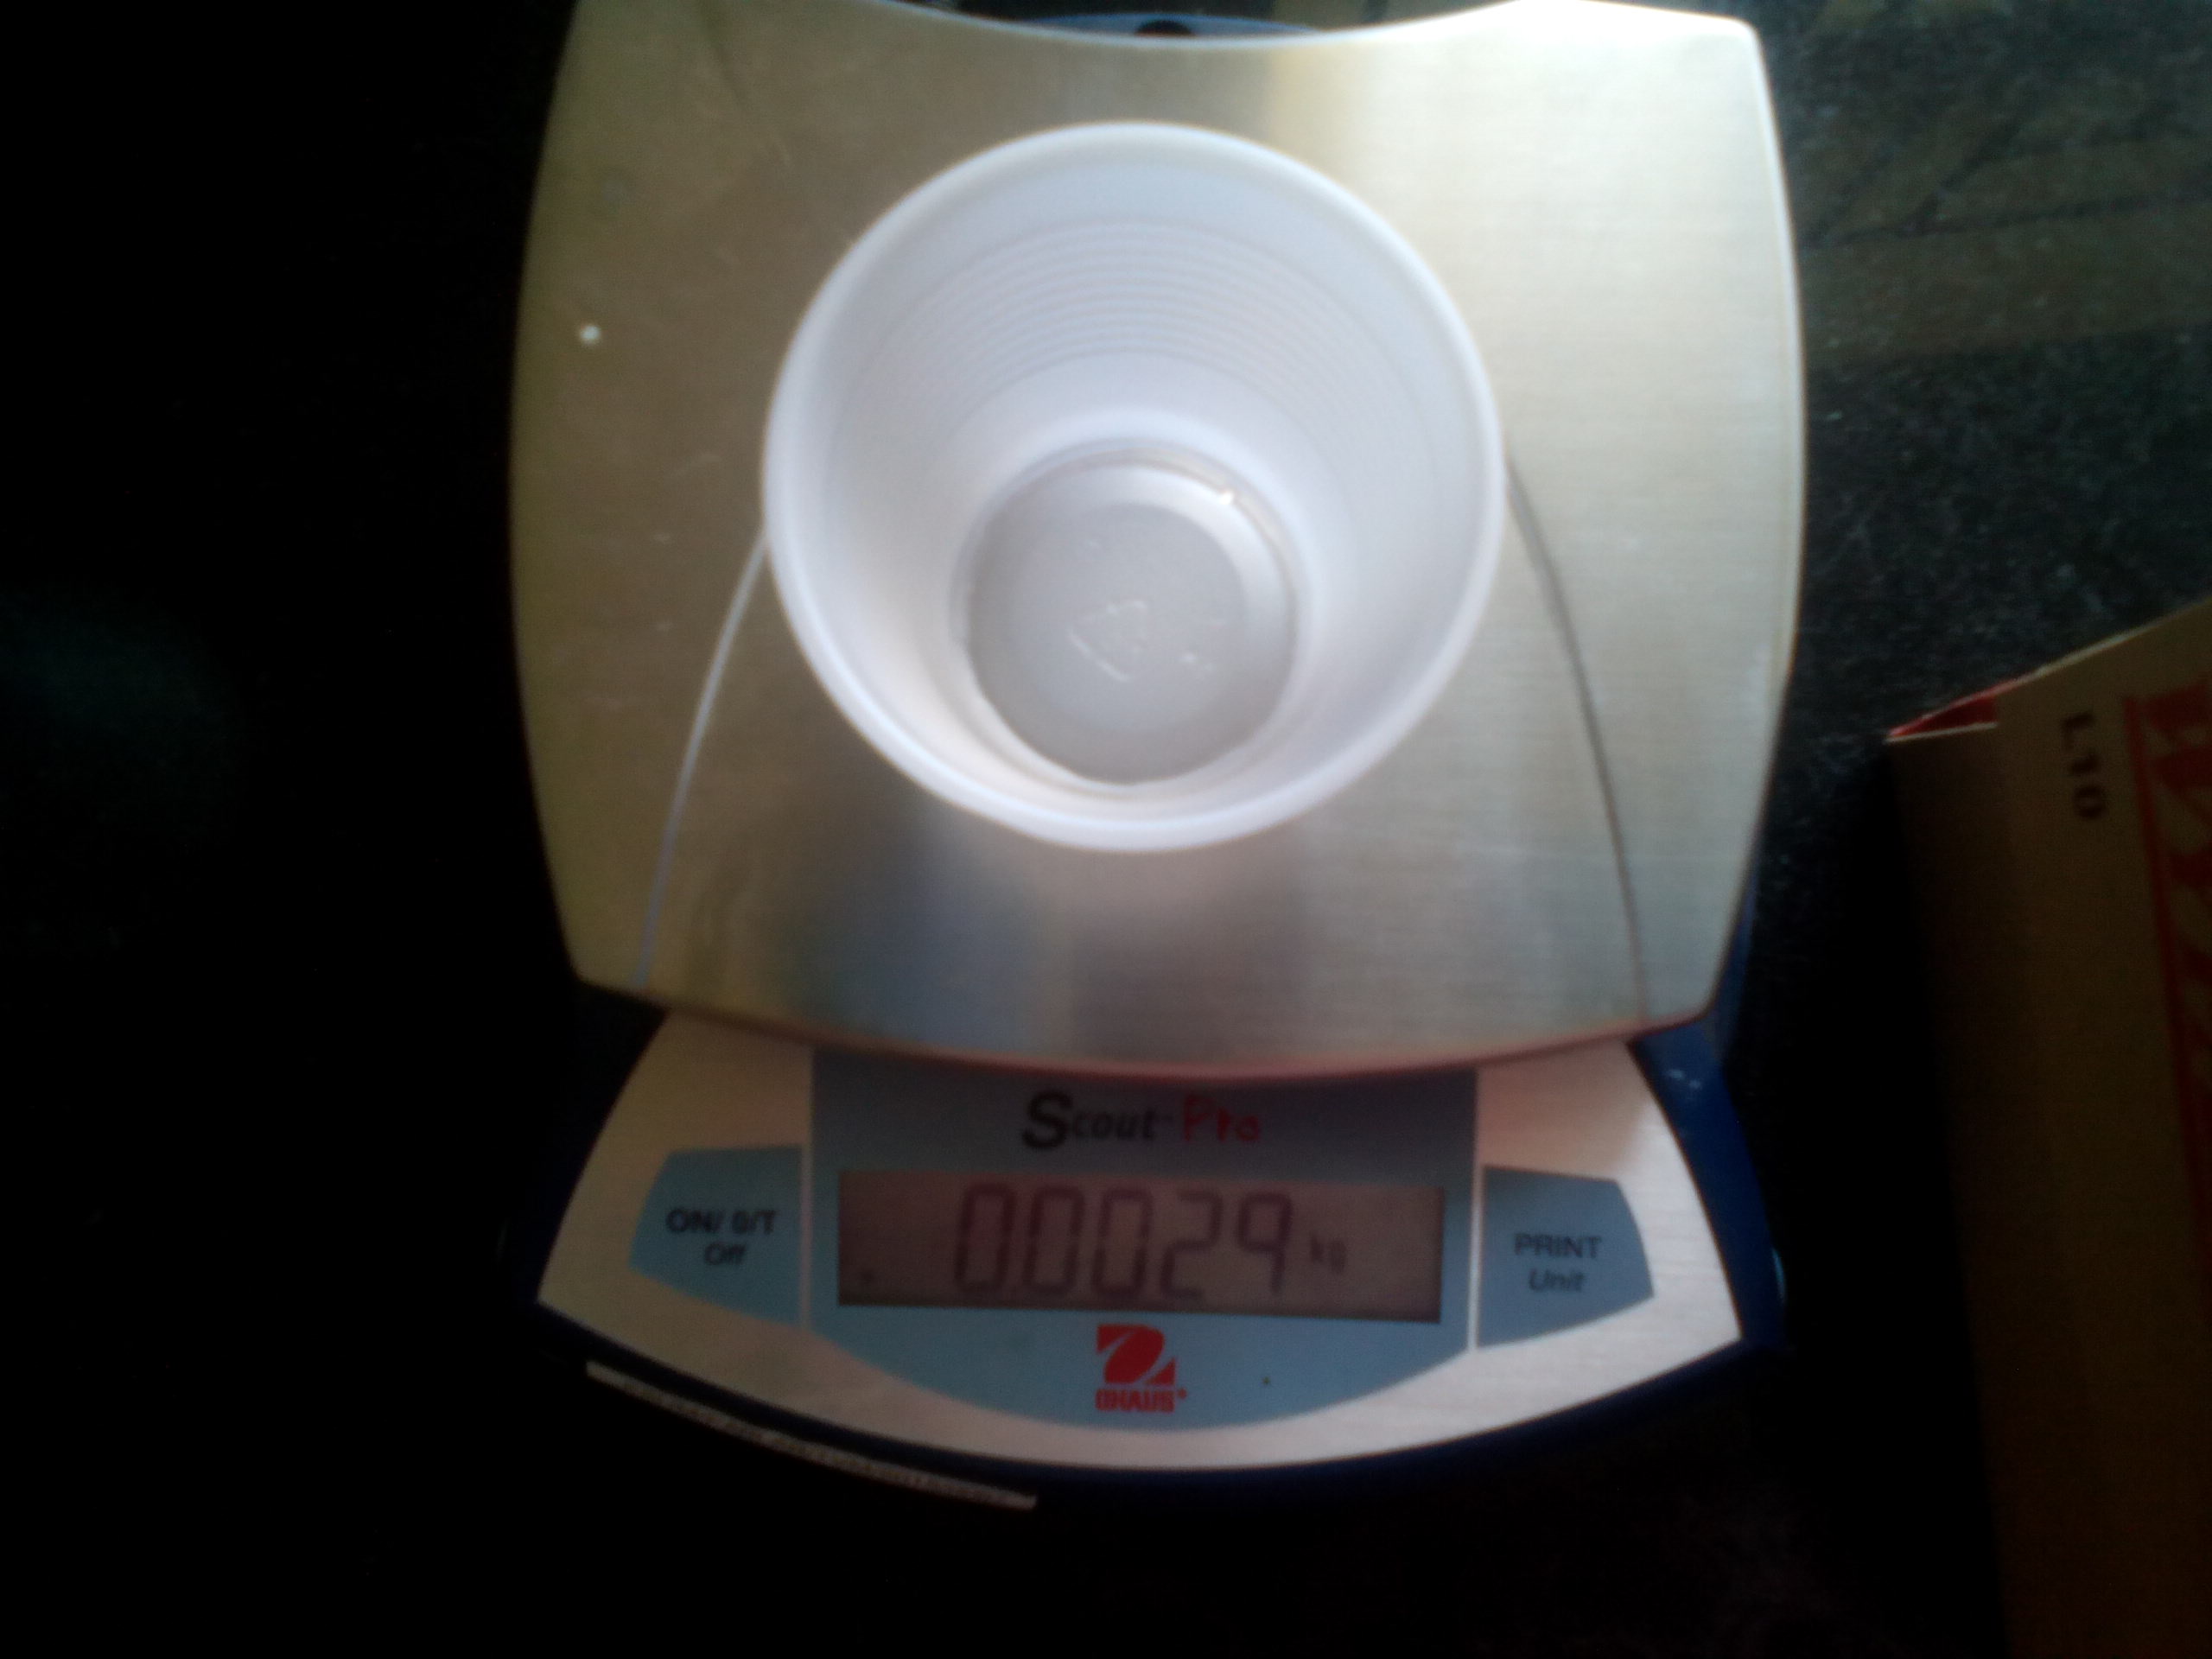
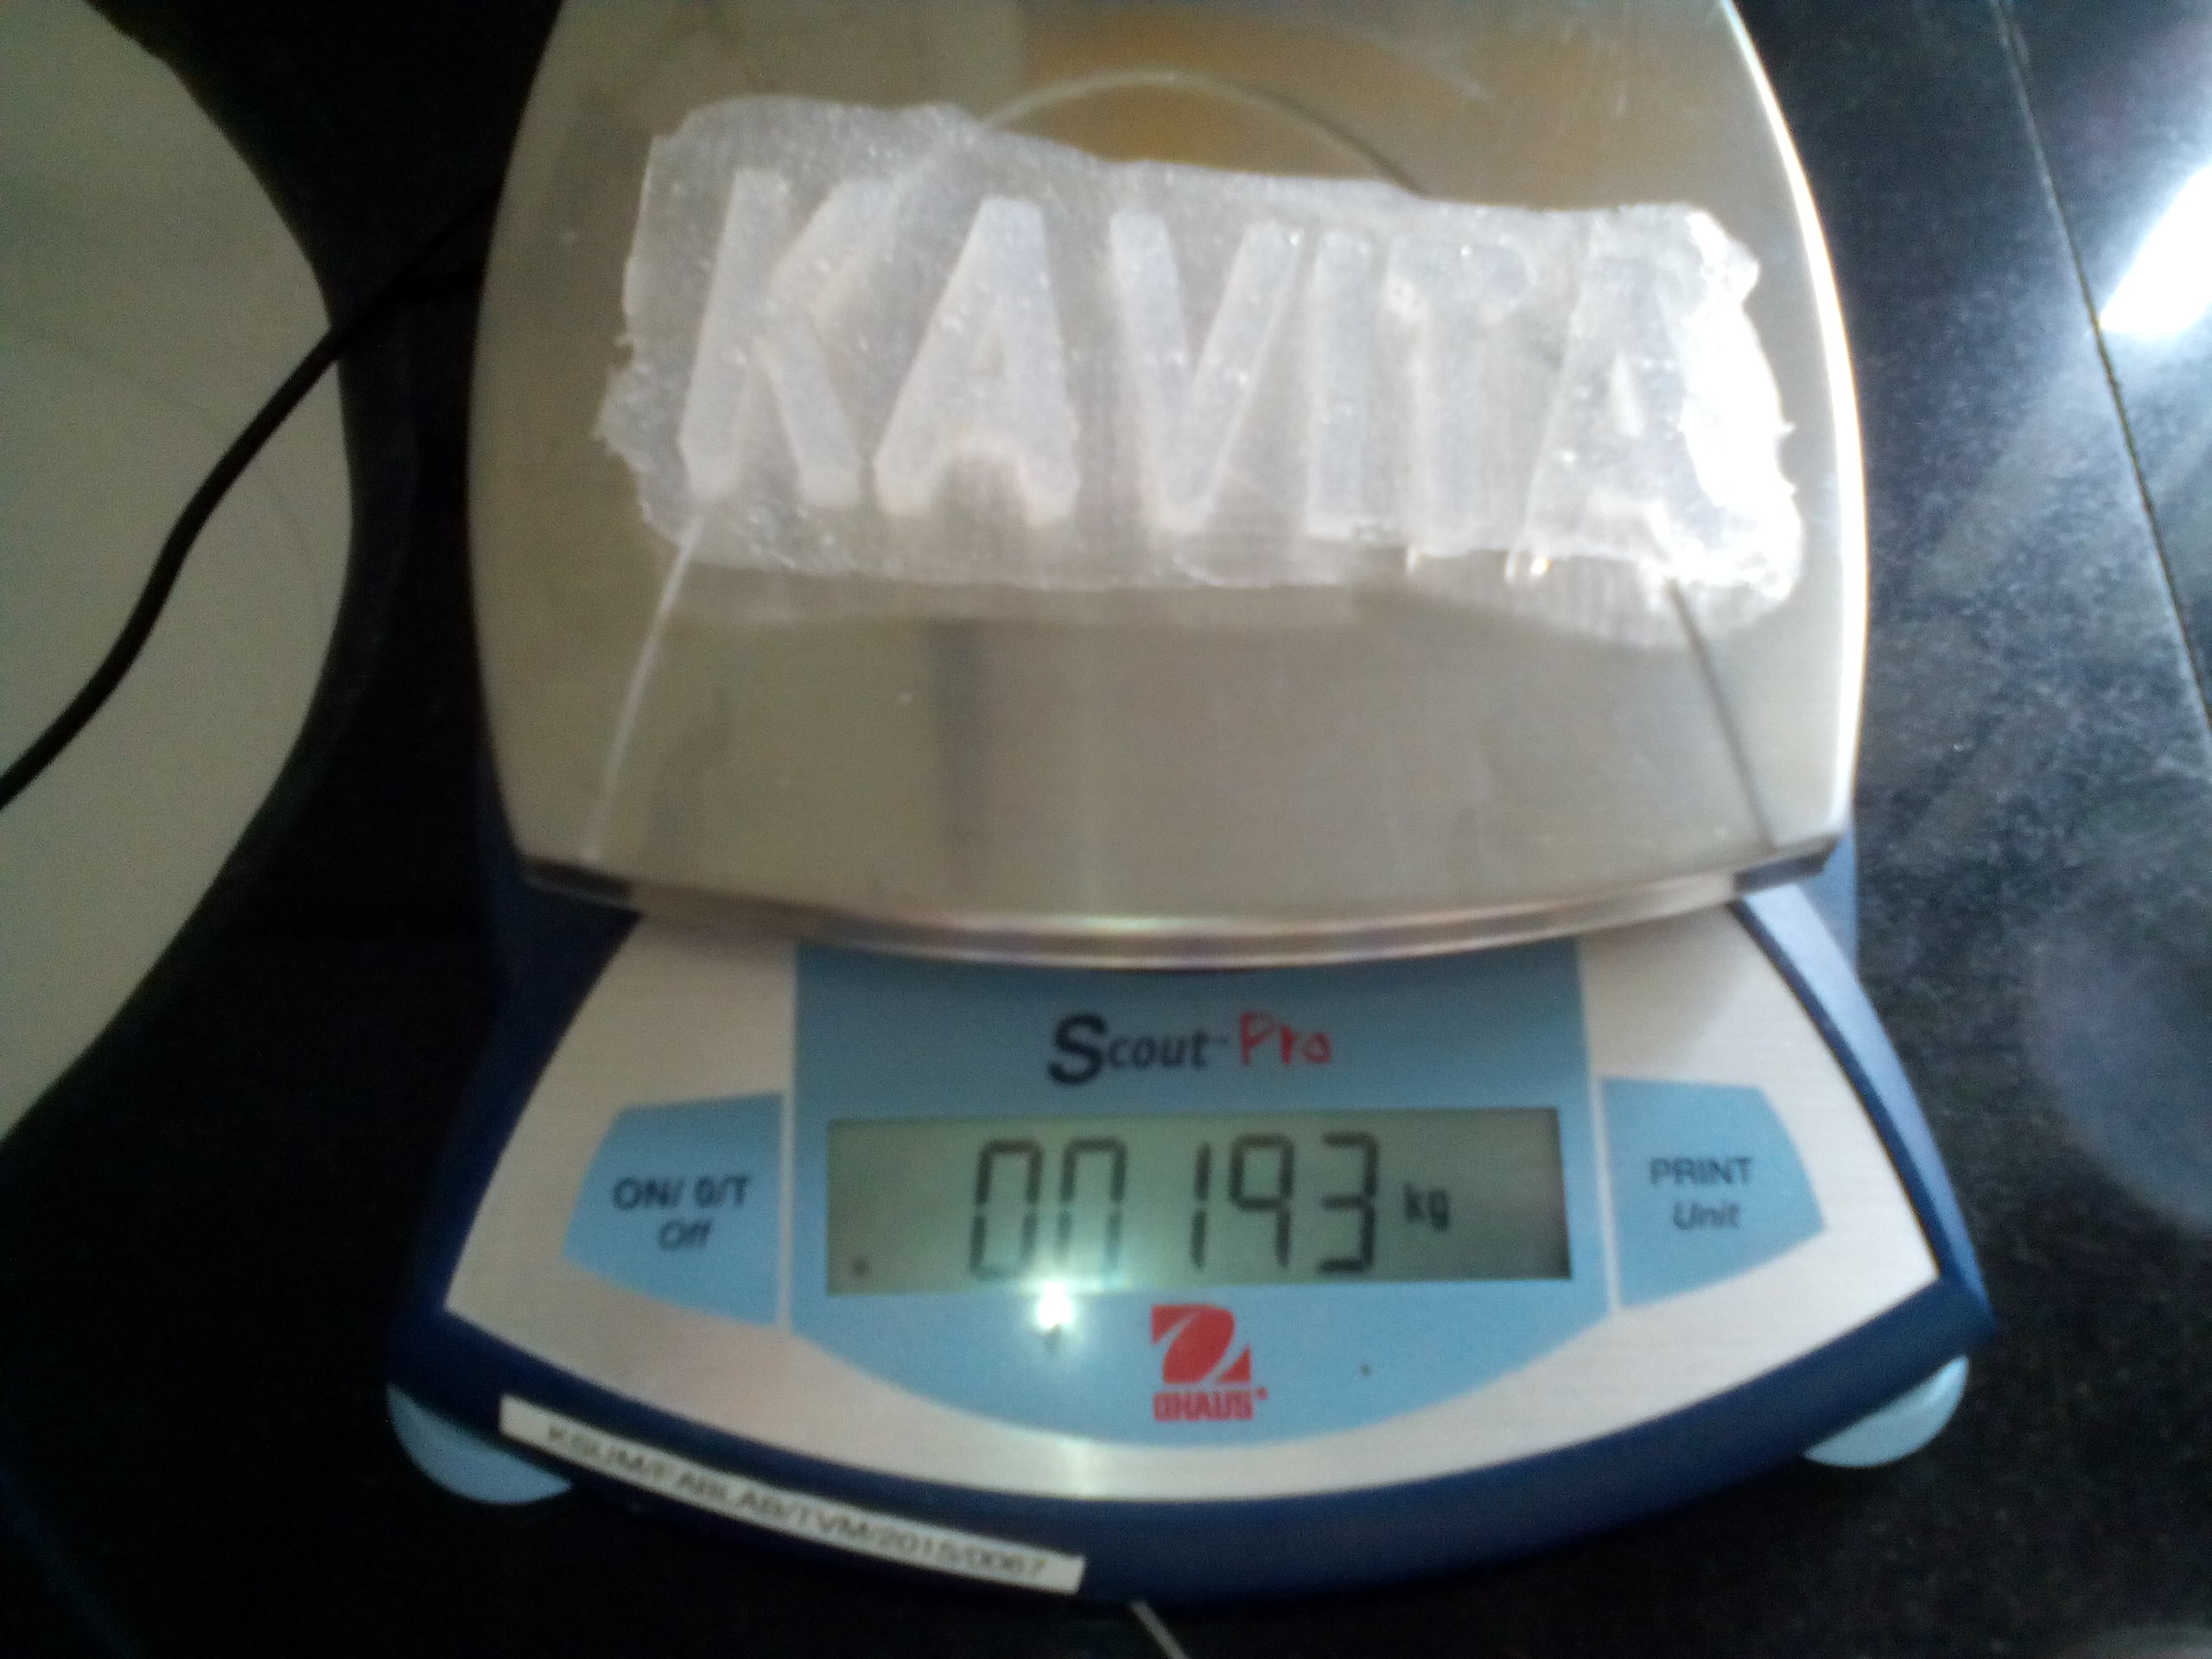
STEP 1: Measuring Volume
I decided to approximate how much liquid plastic I'd need by first using water to fill the hard mold. I then weighed an empty cup I was planning to use to pour the water from the mold into, followed by weighing the cup with the water collected back from the hard mold.

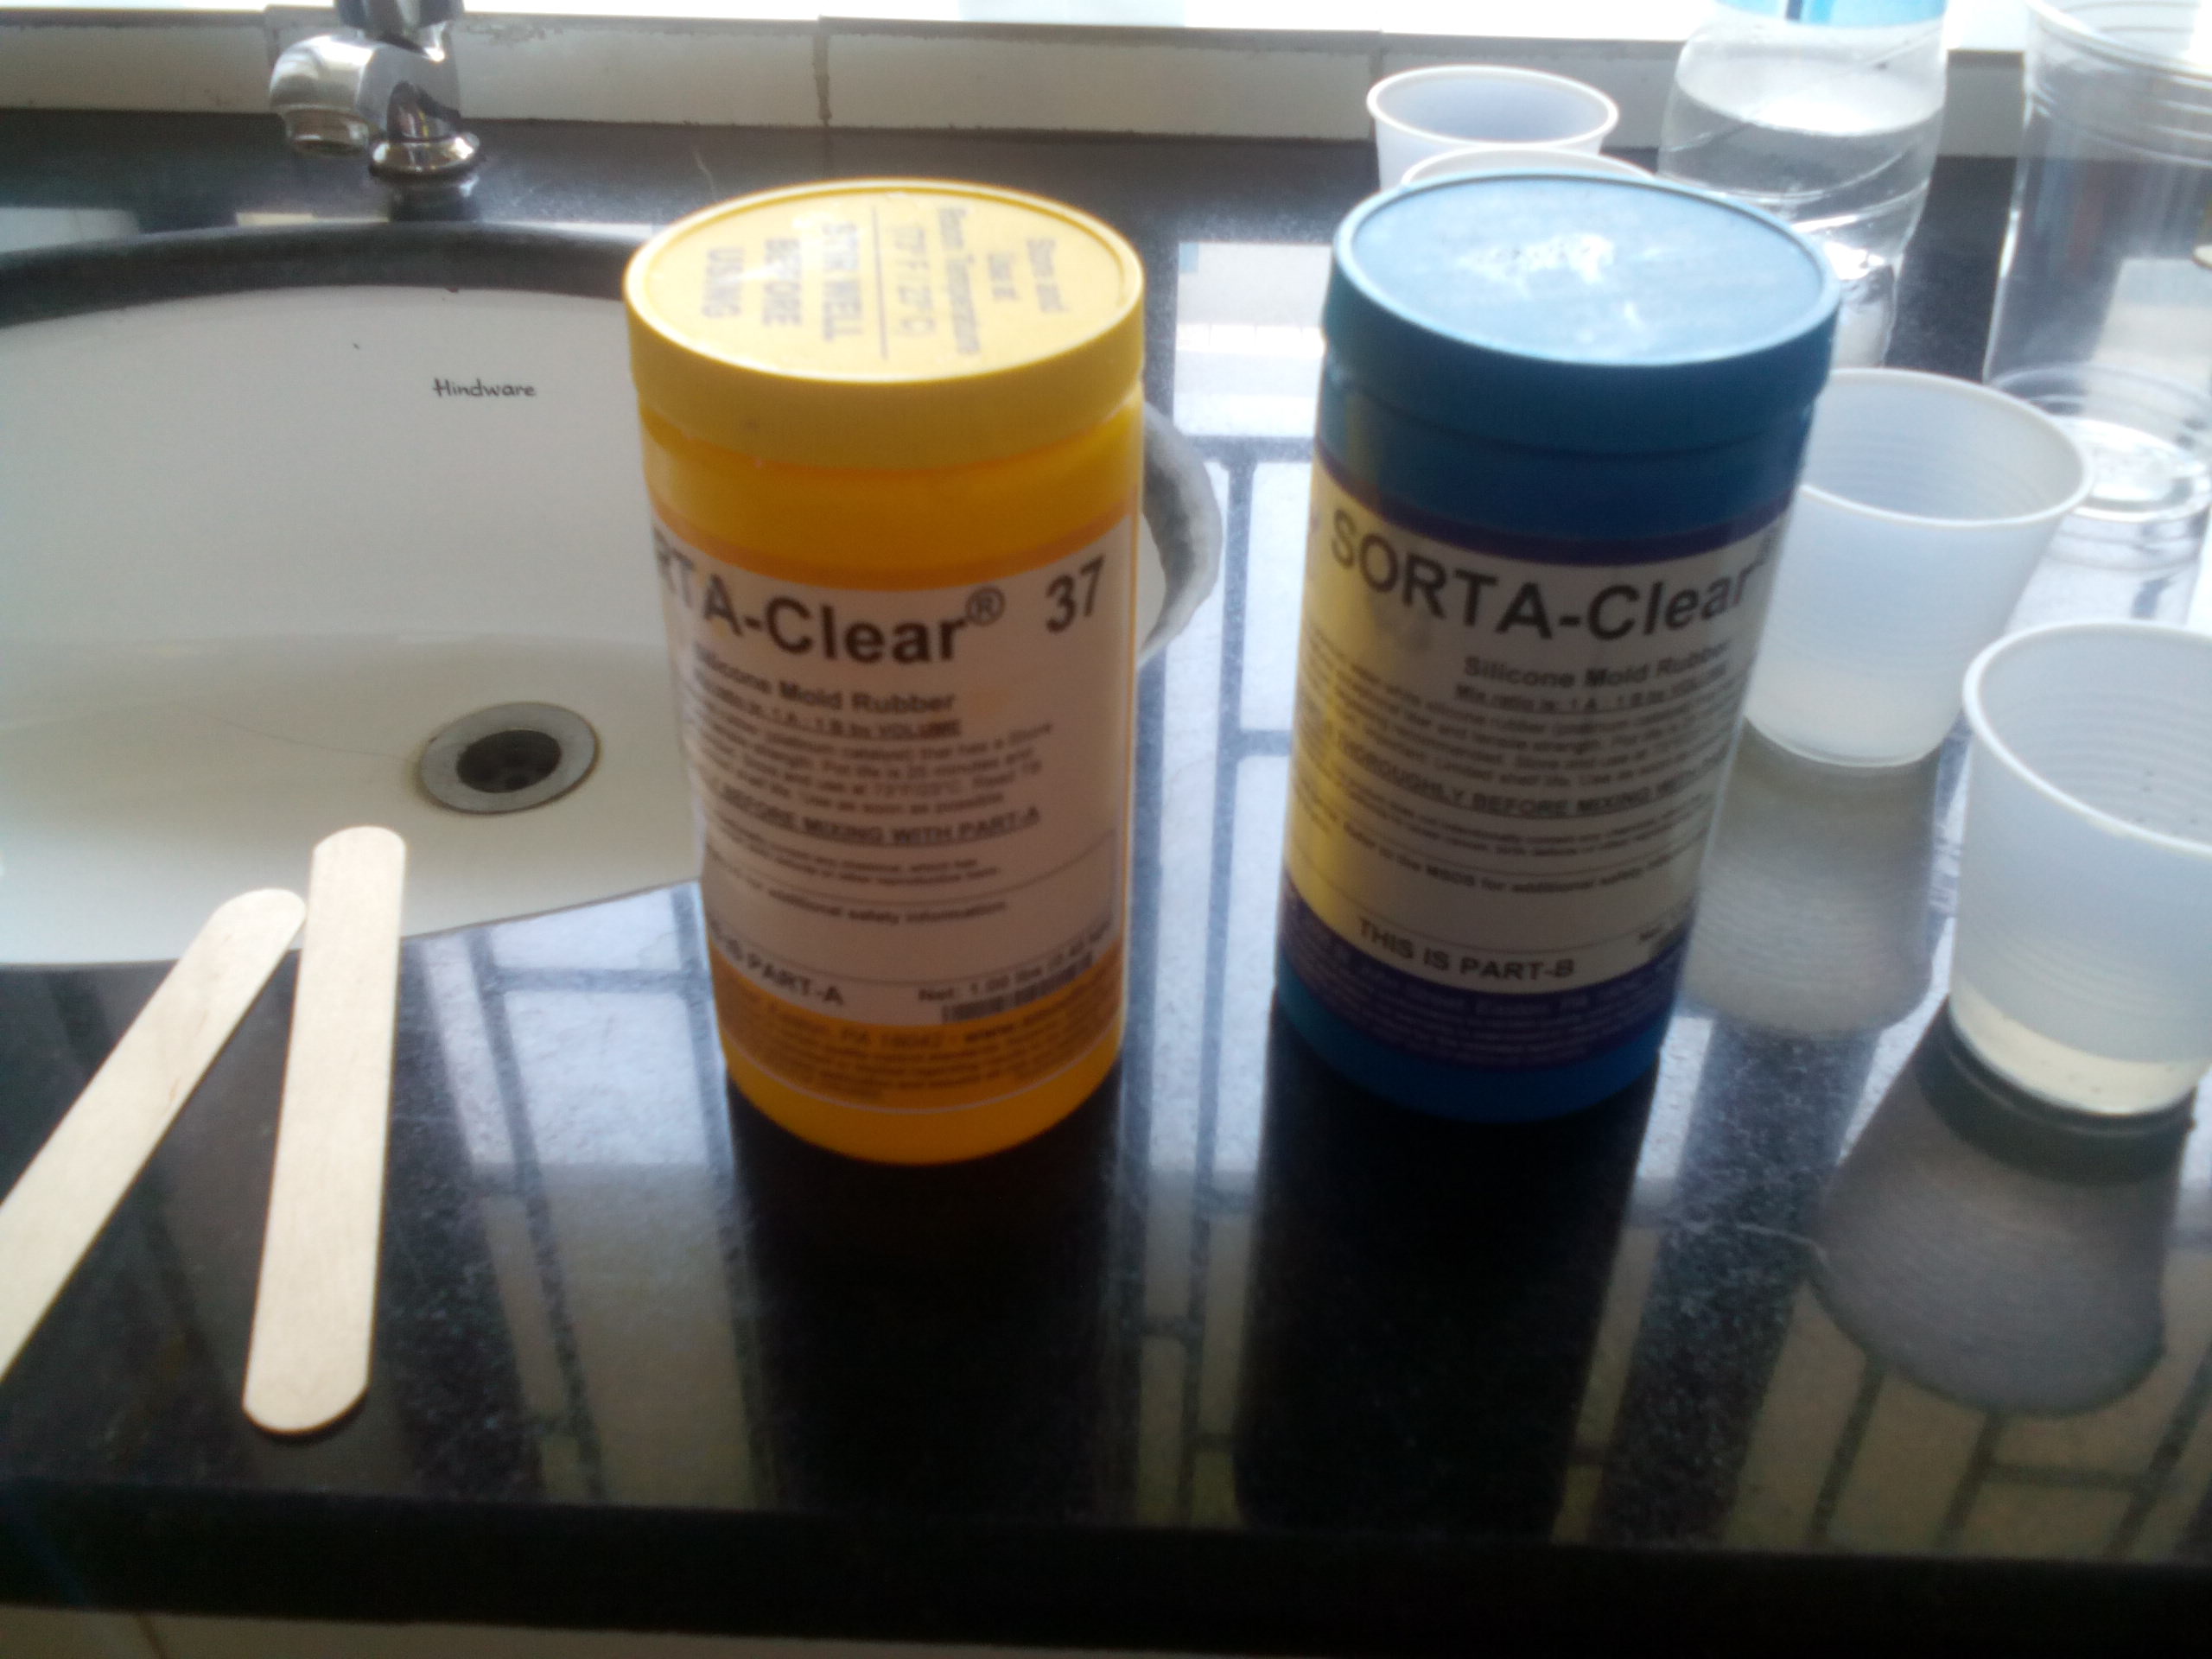
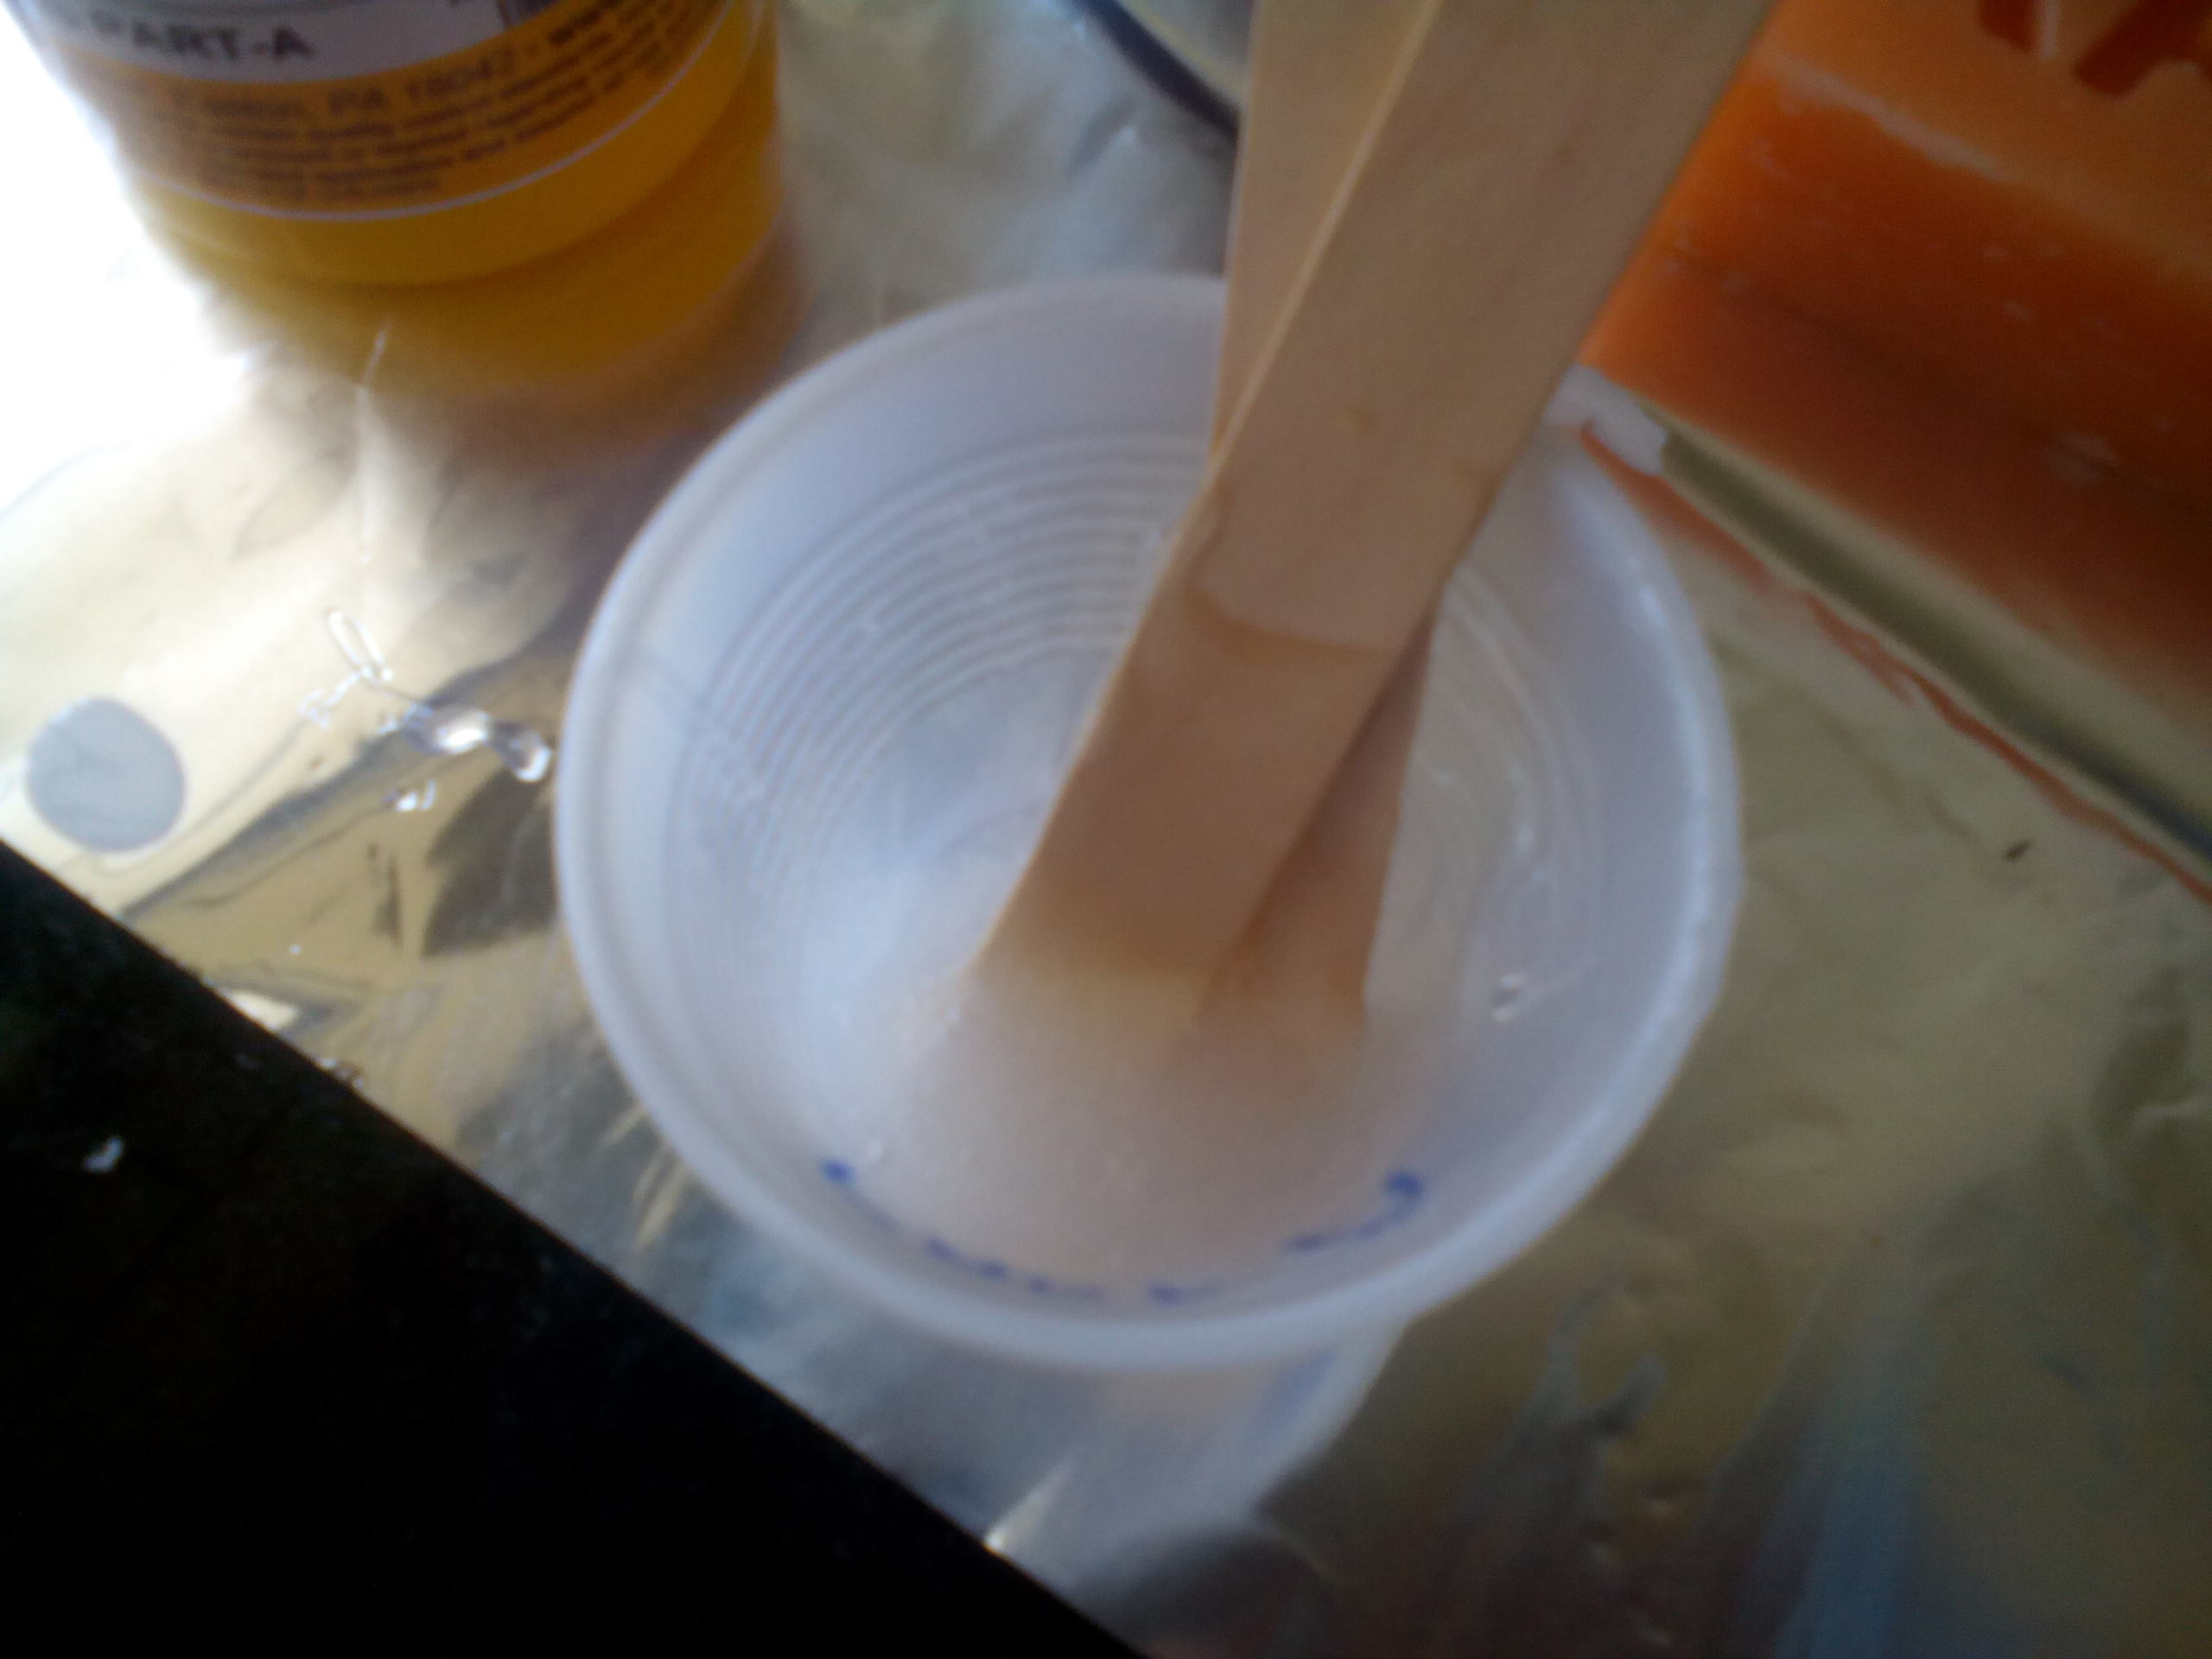
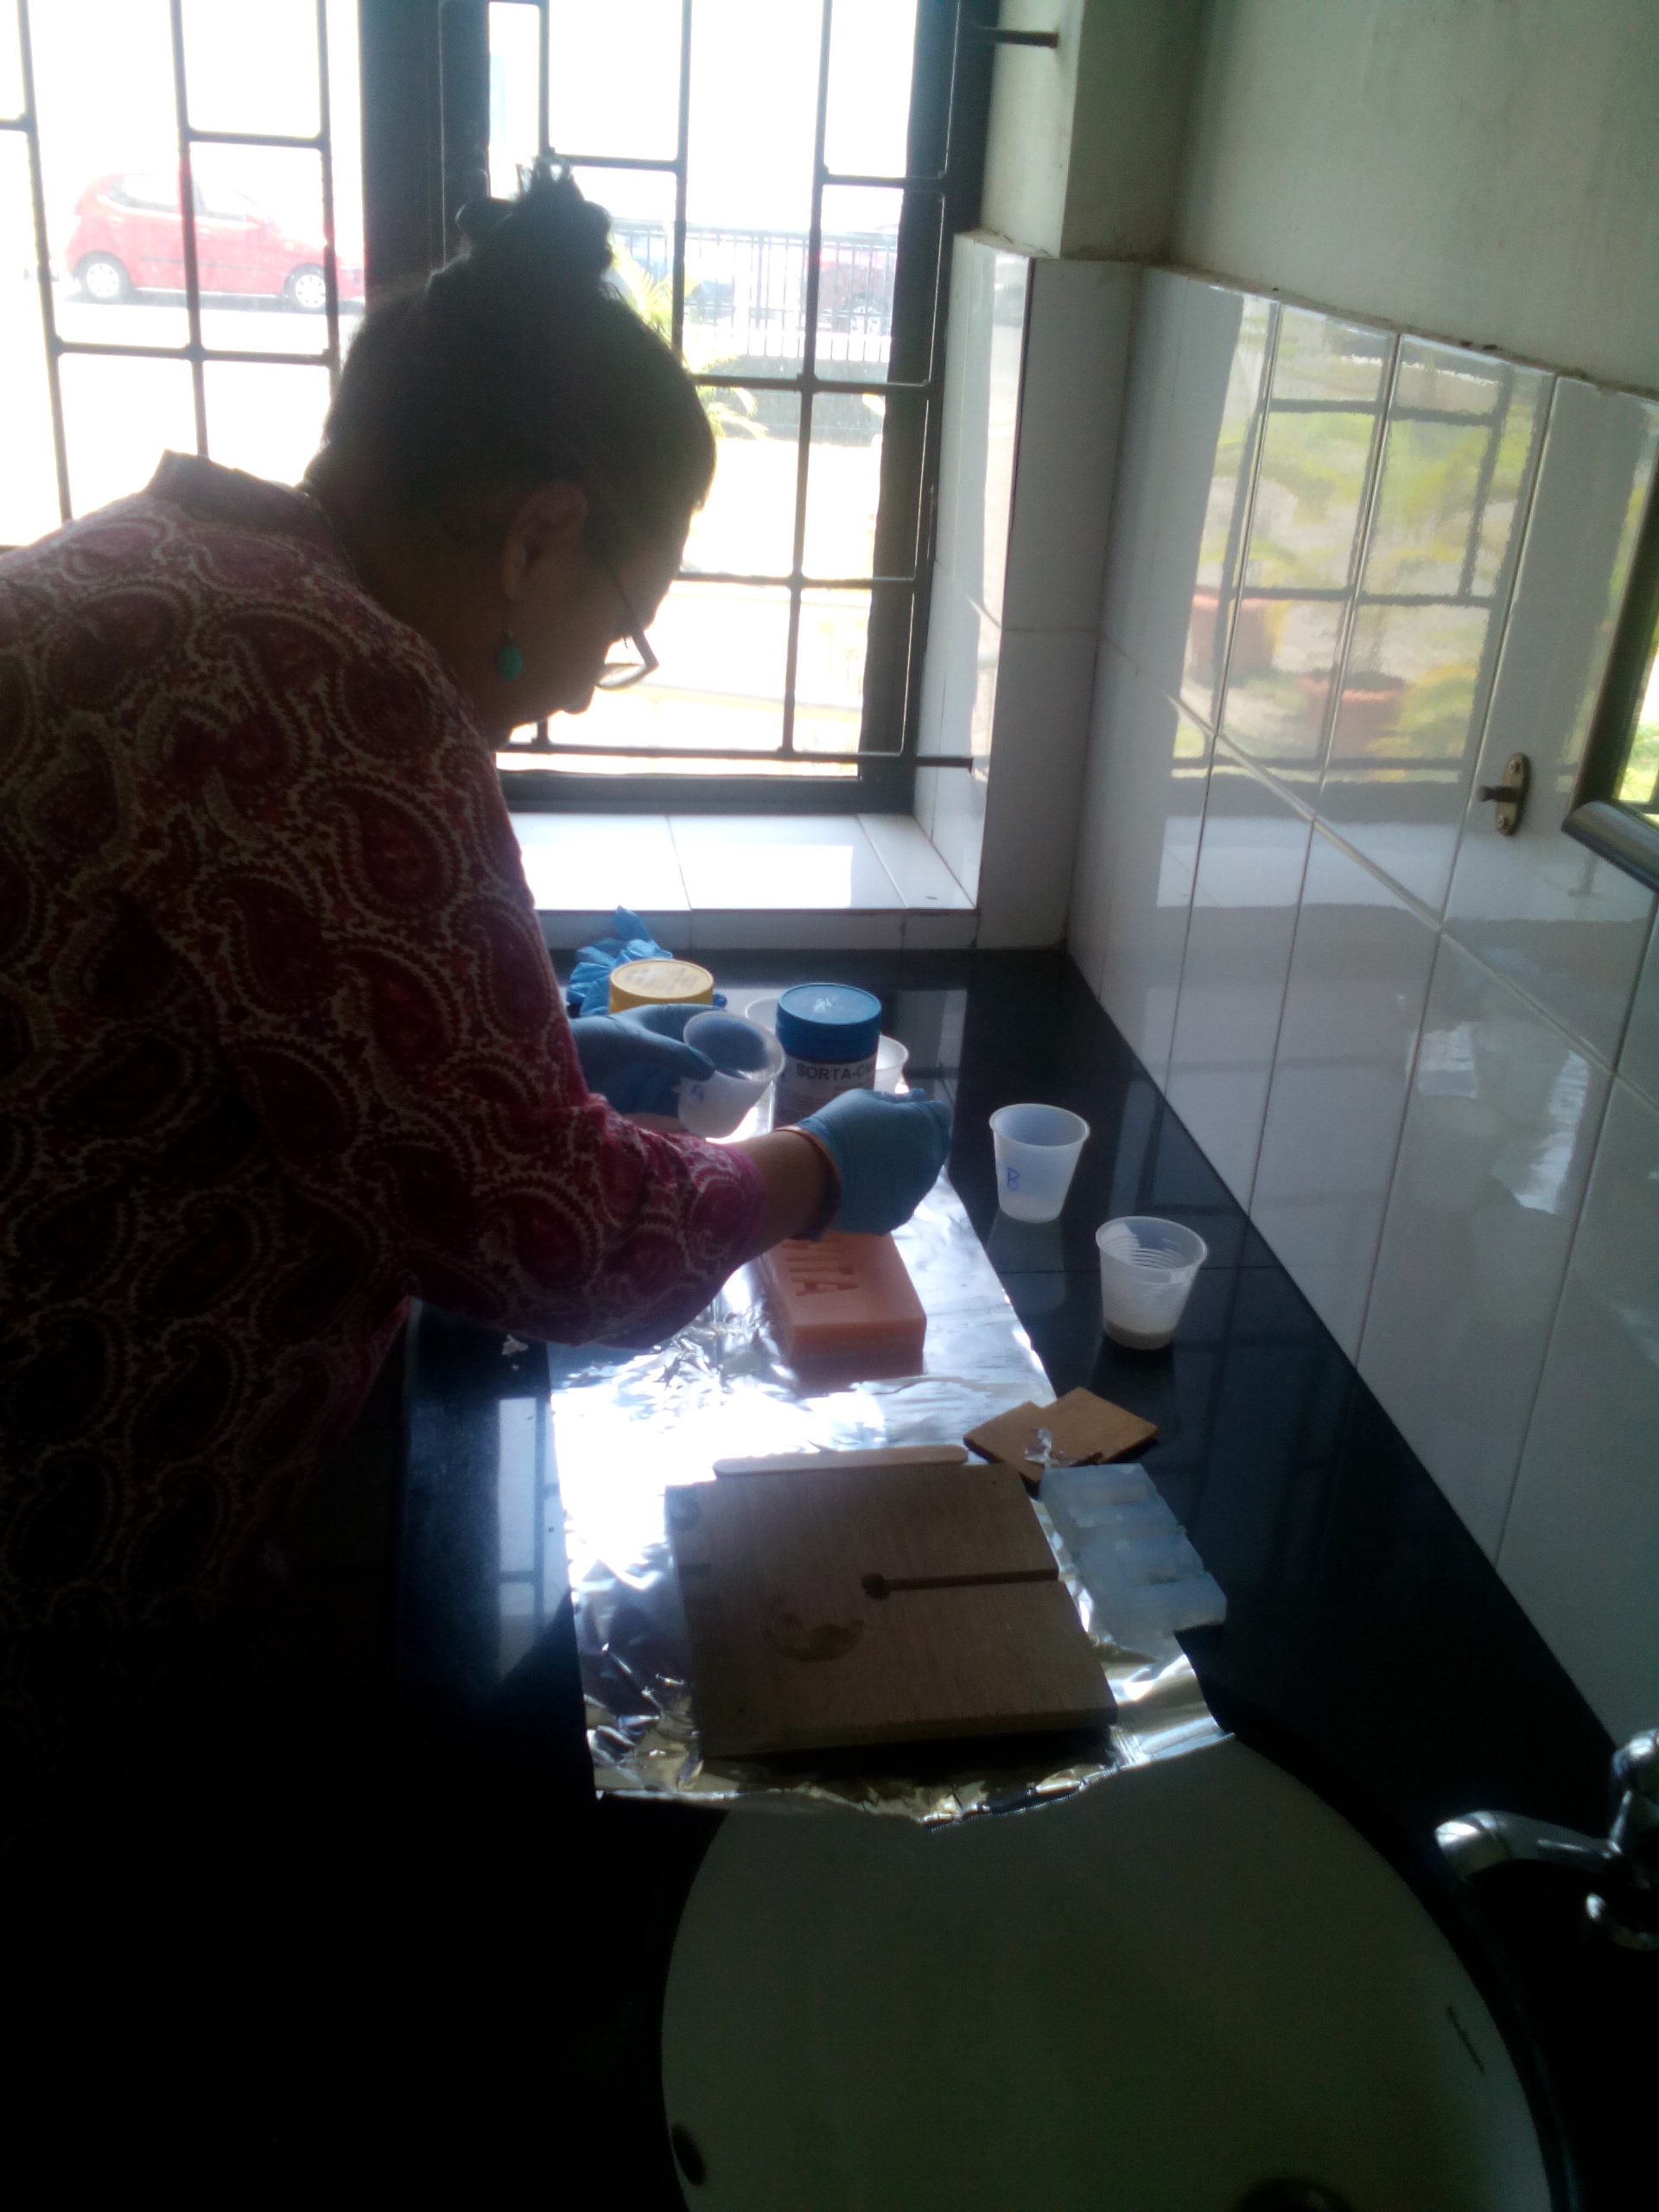
STEP 2: Combining Part A and Part B, Casting the Mold
Using the visual reference from how much water had been used to approximate the volume of the casting liquid within the Hard Mold, I carefully mixed Part's A and B of Smooth On's Liquid Plastic polymer (having used separate tongue depressers to access each Part), and applied it onto the Hard Mold using the tongue depresser:


STEP 3: Mold Release
Having waited over 4 hours for the casting liquid to set (in fact I left the Mold to dry overnight!) I examined the hardened cast and attempted to release it from the mold
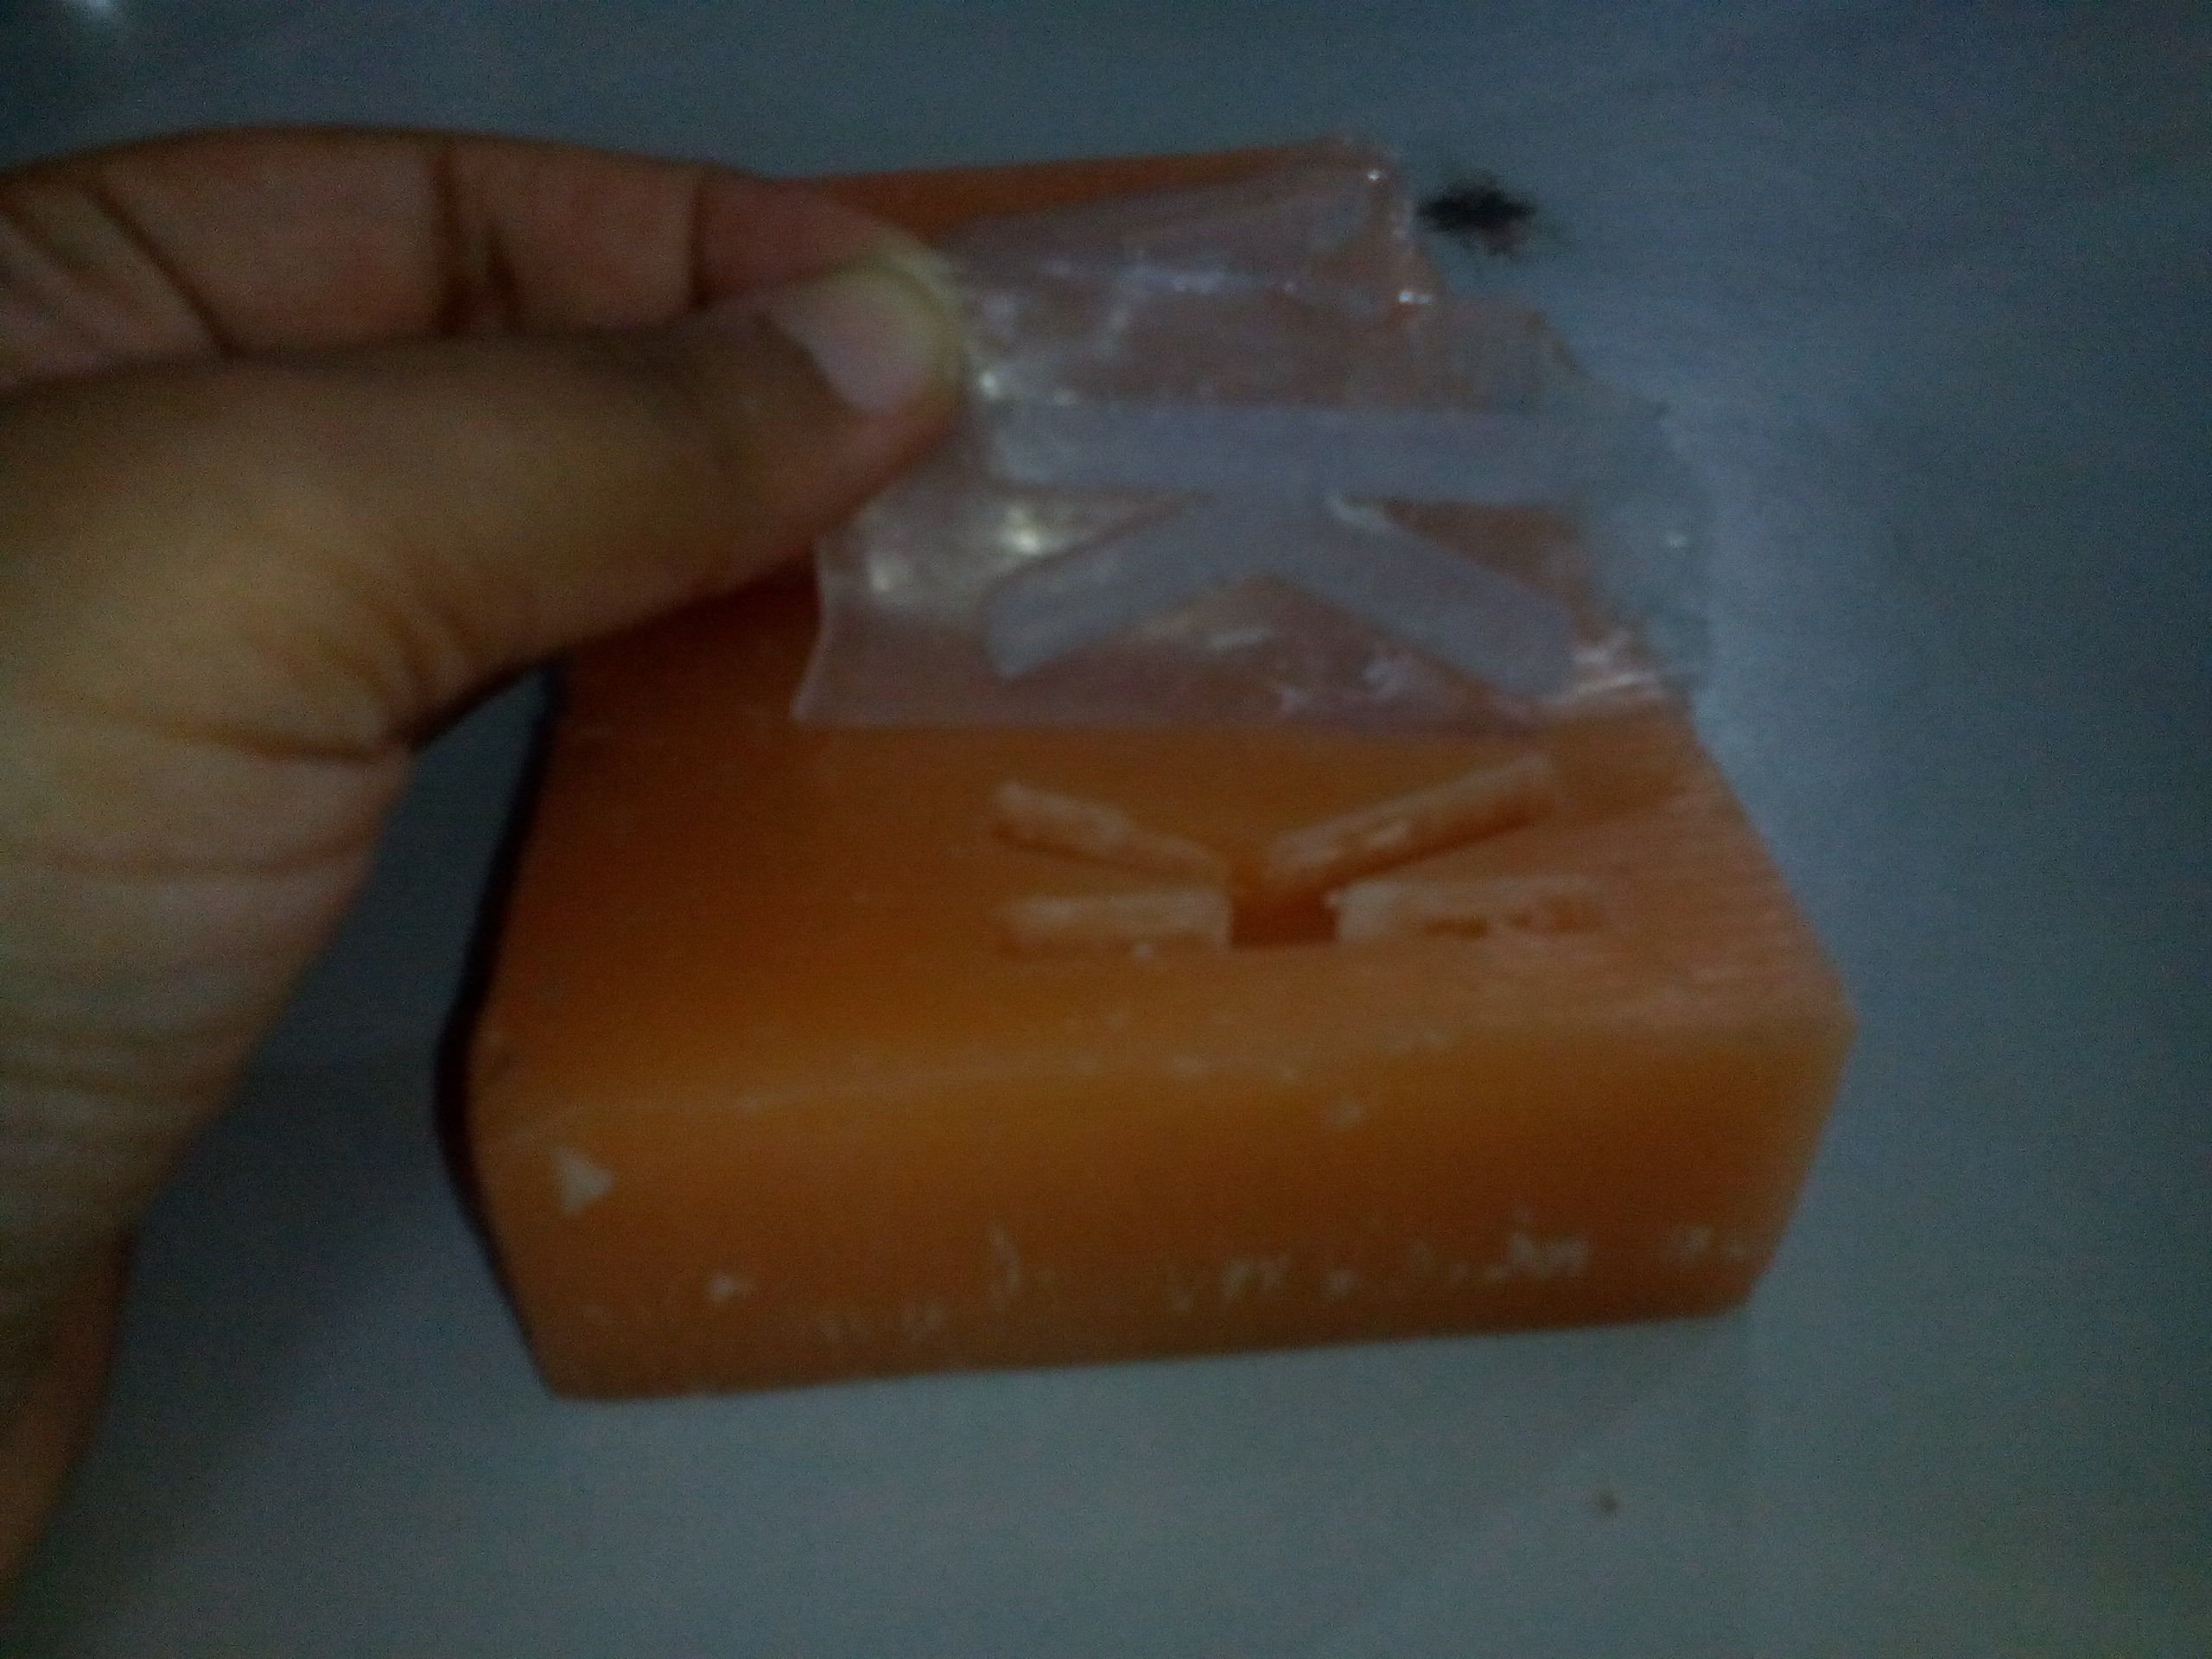

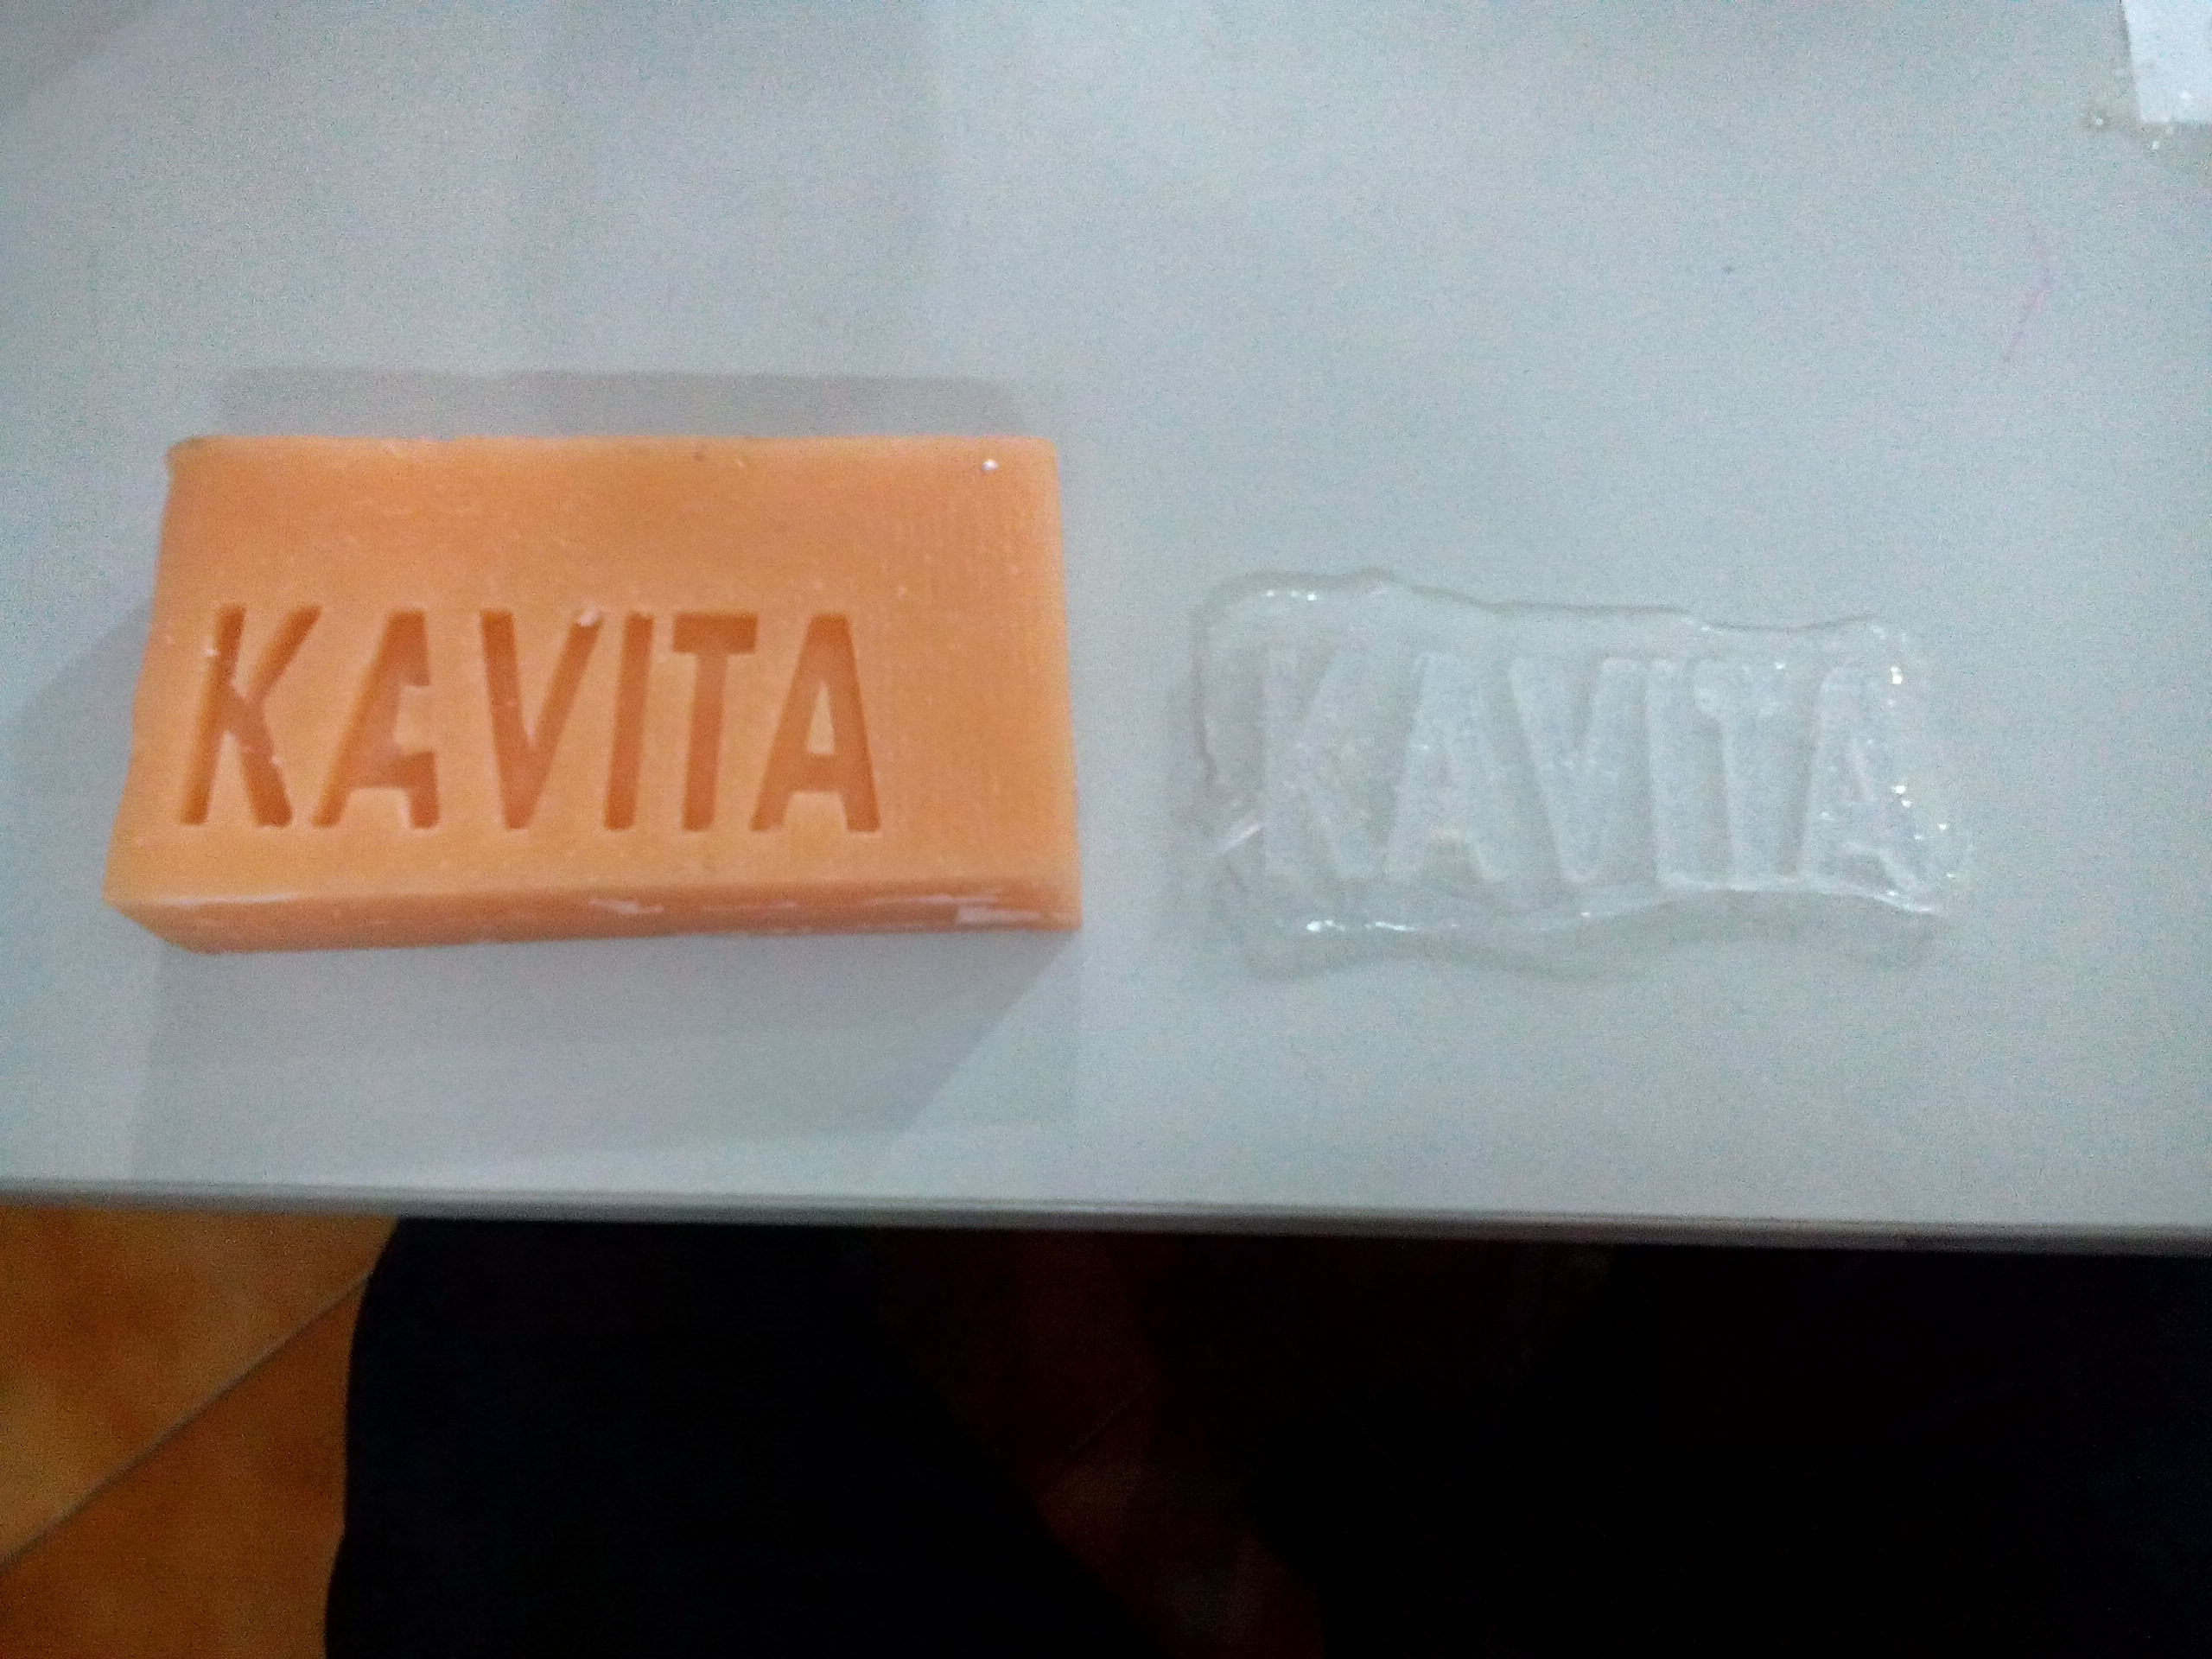
Conclusion: Despite a small section of the hard mold's wax that had come off during the release process, the flexible cast looked pretty good!


Please find the files I used to Machine my mold --> Kavita.svg
Go back HOME