Week 8:Embedded Programming
Assignment
Read a microcontroller data sheet and program an ATtiny board in different Embedded programming techniques is used.
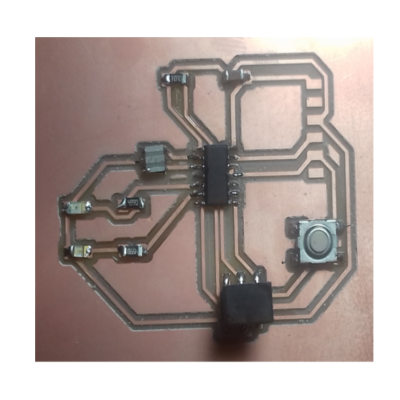
For the programming purpose I already done a board in my week6 assignment, and I check it once again the board is working or not; it’s fine.Here is my board
Reading Data Sheet
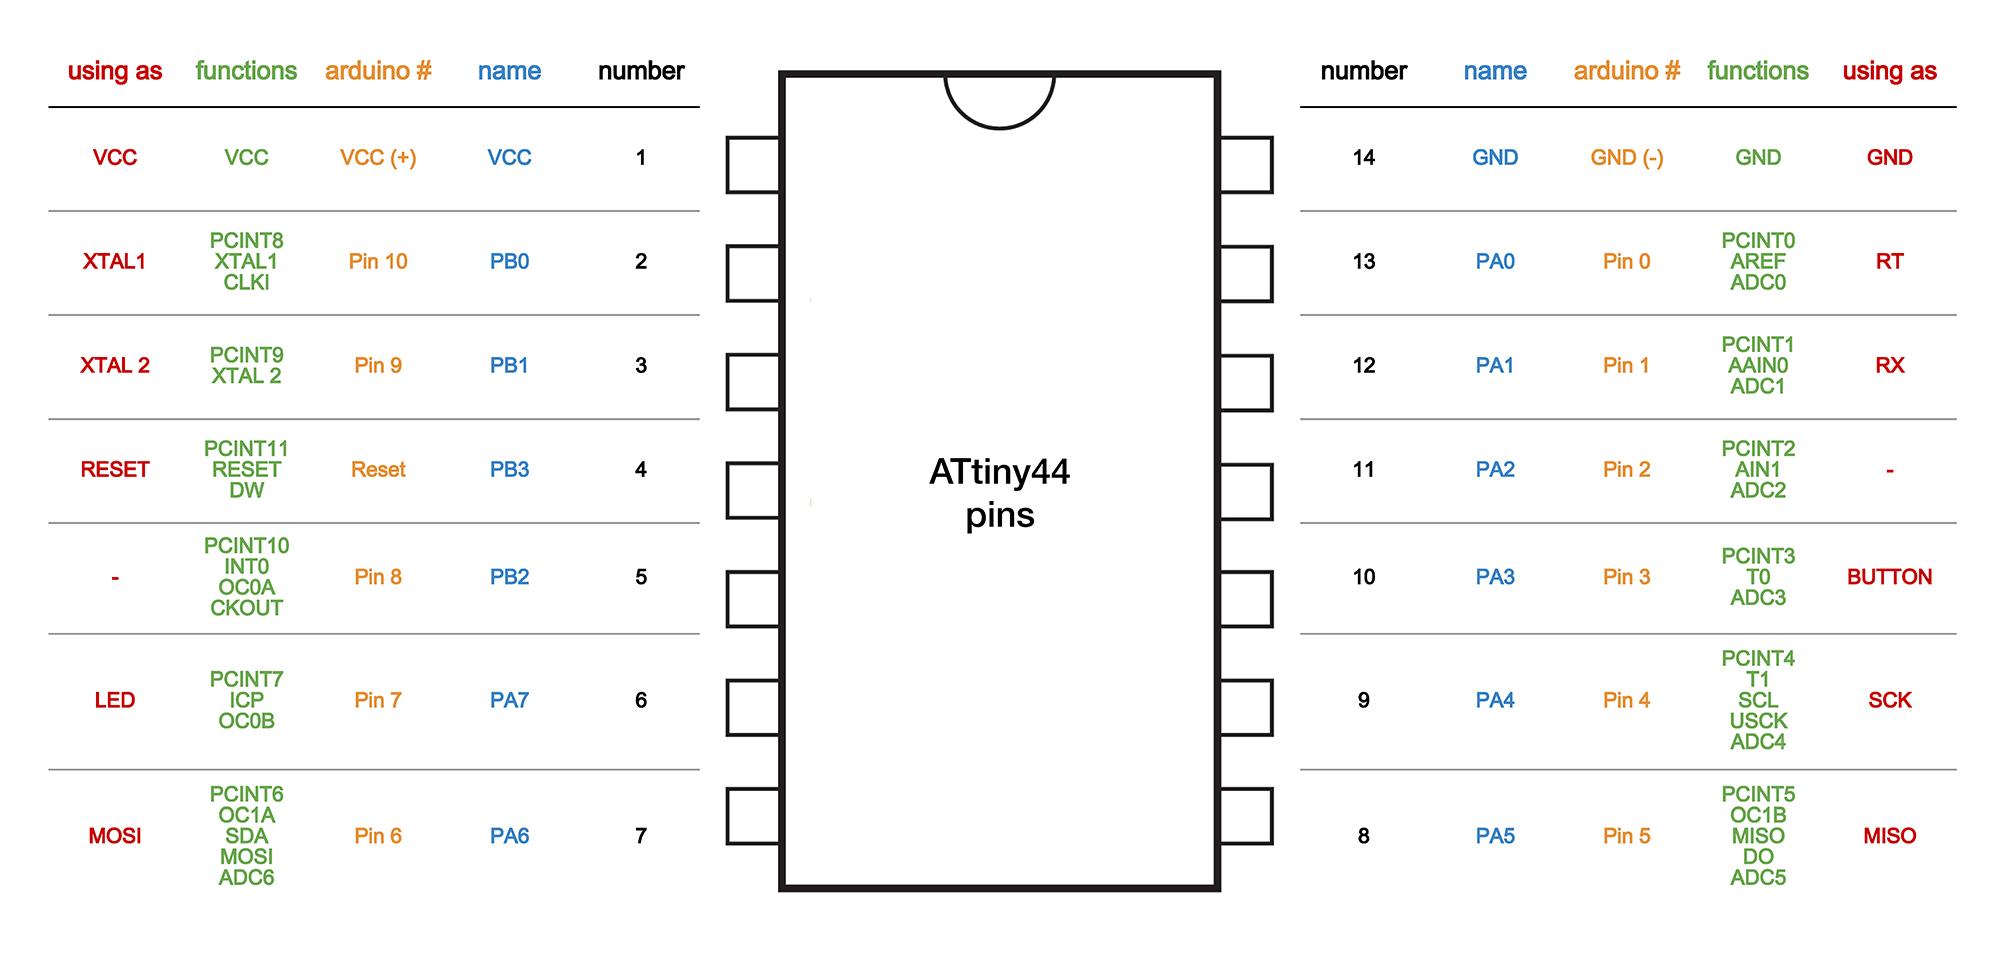
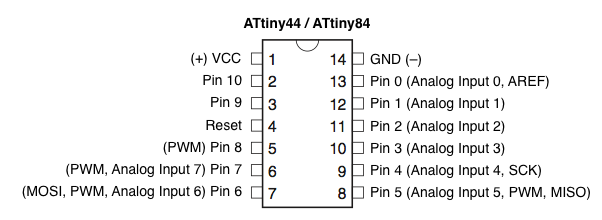
The whole data sheet is repeating the pin configuration when we are programming the microcontroller we must keep the pin configuration. Otherwise, we can not get the out. I am all ready to explain the detail of microcontroller data sheet in week6.
pin configuration of ATtiny44
What is programming or burning a microcontroller?
programming or burning a microcontroller means to transfer the program from a compiler to microcontroller the program of a microcontroller is generally written c or assembling language finally the compiler generate a hex file which contains the machine language instruction understandable by a microcontroller.
How to program a microcontroller
For the programming, we need A programmer is a hardware device with dedicated software which reads the content of the hex file stored on the PC or the laptop and transfers it to the microcontroller to be burned. I am already done the programmer in week4
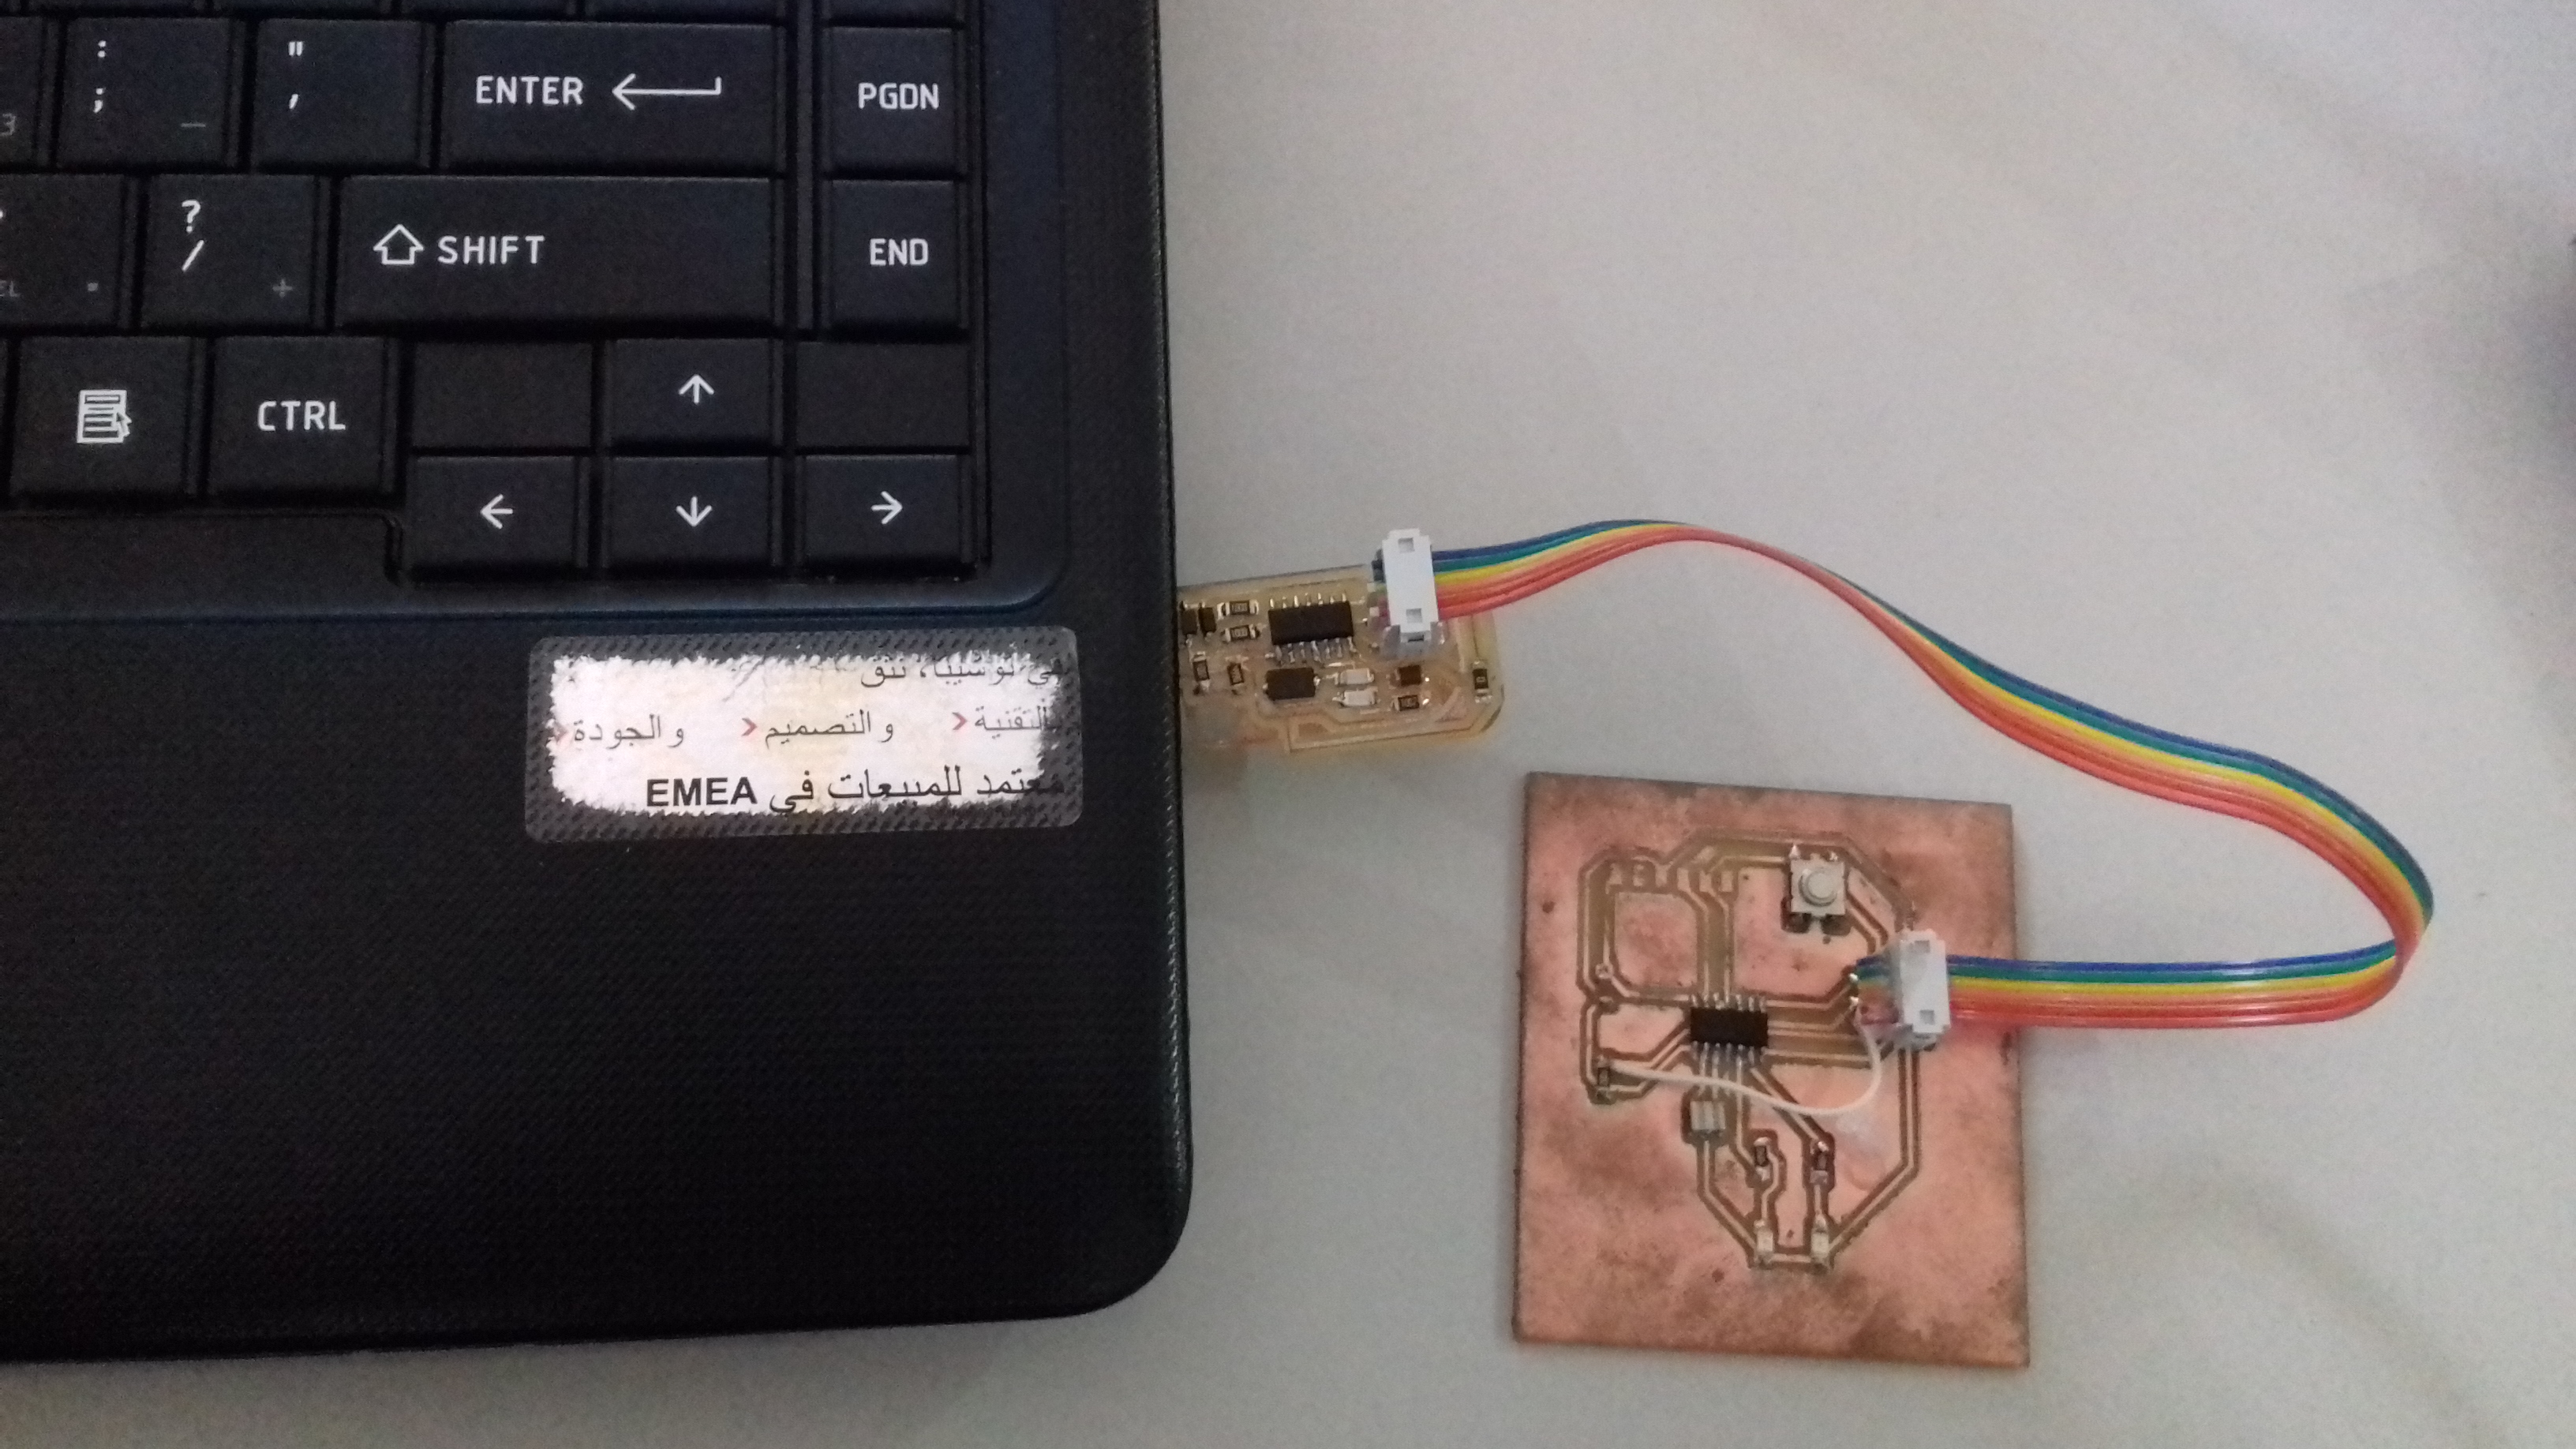
how to conect the programmer and a microcontroller?
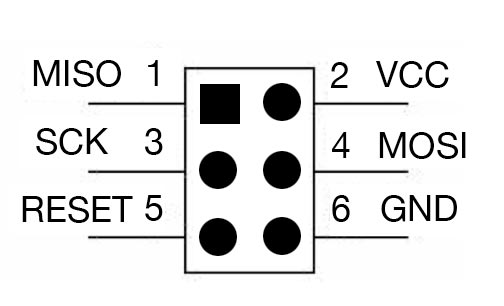
In here six pin isp cable is used to connected the microcontroller and programmer
pin structure of 6 pin isp
then I start to the program
program the board
For the programming First, i download the Arduino IDE. For the programming ATtiny, we want to add the ATtiny board manager for that I referred this instructions,and it added successfully
In here ATtiny44 is used in the hello board for that I am select
tools->board->ATtiny
tools->processor->ATtiny44
tools->clock->20mhz(external)
tools->programmer->USBtinyISB
In here I am connecting two led and a switch into the ATtiny44, for the programming purpose we want to understand in where we connected the led and switch pin into the attiy44, for that I have referred the schematic diagram.
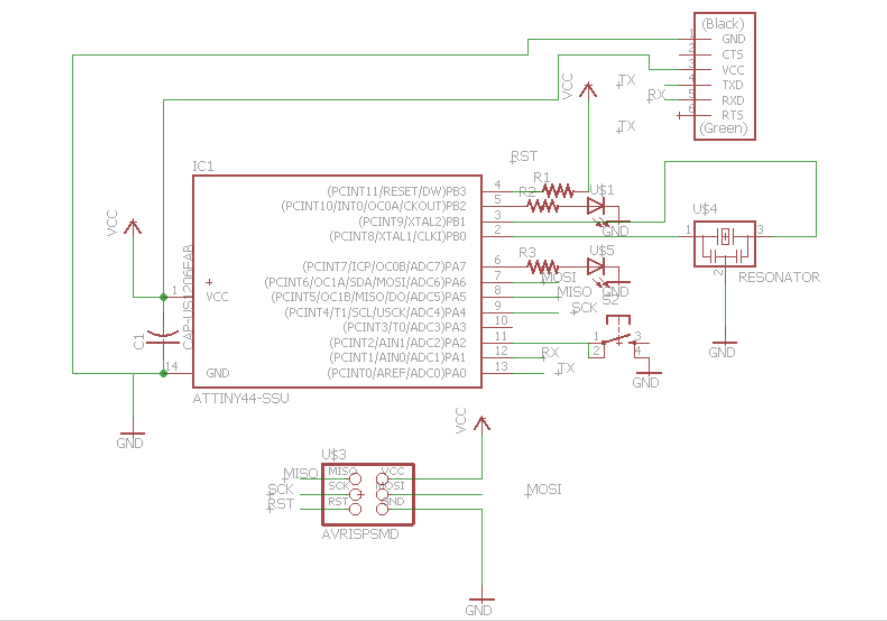
when I programming Arduino I am so confused where I am connected the led to the Attiny44 pin,I am programmed in my schematic diagram pin wase, but I did not get the out, then I refer the pin diagram of ATiny44 I have to understand where I do the mistake.
Aurdino blinkig program
  /*
  Blinking led

  Muhammed safwan
  FabAcademy 2016 Student
  Fablab Trivandrum*/

  void setup()
  {
    // initialize digital pin 13 as an output.
    pinMode(7, OUTPUT);
    pinMode(8, OUTPUT);
  }
  // the loop function runs over and over again forever
  void loop()
  {
    digitalWrite(7, HIGH);   // turn the LED on (HIGH is the voltage level)
    delay(50);              // wait for 50 second
    digitalWrite(7, LOW);    // turn the LED off by making the voltage LOW
    delay(50); // wait for 50 second
    digitalWrite(7, HIGH);   // turn the LED on (HIGH is the voltage level)
    delay(50);              // wait for 50 second
    digitalWrite(7, LOW);    // turn the LED off by making the voltage LOW
    delay(50);
    digitalWrite(8, HIGH);   // turn the LED on (HIGH is the voltage level)
    delay(50);              // wait for 50 second
    digitalWrite(8, LOW);    // turn the LED off by making the voltage LOW
    delay(50); // wait for a second
    digitalWrite(8, HIGH);   // turn the LED on (HIGH is the voltage level)
    delay(50);              // wait for 50 second
    digitalWrite(8, LOW);    // turn the LED off by making the voltage LOW
    delay(50);
  }
Aurdino LED and SWITCH program
 	void setup() {
   	// initialize digital pin 13 as an output.
   	pinMode(7, OUTPUT);
    	pinMode(8, OUTPUT);
    	pinMode(2,INPUT);

 	}

 	// the loop function runs over and over again forever
 	void loop() {
   	if(digitalRead(2) == LOW)
   	{
   	digitalWrite(7, HIGH);   // turn the LED on (HIGH is the voltage level)
   	delay(50);              // wait for 50 second
   	digitalWrite(7, LOW);    // turn the LED off by making the voltage LOW
   	delay(50); // wait for 50 second
   	digitalWrite(7, HIGH);   // turn the LED on (HIGH is the voltage level)
   	delay(50);              // wait for 50 second
   	digitalWrite(7, LOW);    // turn the LED off by making the voltage LOW
   	delay(50);
     	digitalWrite(8, HIGH);   // turn the LED on (HIGH is the voltage level)
   	delay(50);              // wait for 50 second
   	digitalWrite(8, LOW);    // turn the LED off by making the voltage LOW
   	delay(50); // wait for 50 second
   	digitalWrite(8, HIGH);   // turn the LED on (HIGH is the voltage level)
   	delay(50);              // wait for 50 second
   	digitalWrite(8, LOW);    // turn the LED off by making the voltage LOW
   	delay(50);
   	}
   	else
   	{
      	digitalWrite(7,LOW);
      	digitalWrite(8,LOW);
        }
        }