Assignement
write an application that interfaces with an input &/or output device that you made
What i am going to do
I want to send data from my ATtiny to a Mobile Application
How to Interface
I reserched about diffrent Interfacing Techniques like Serial,Wifi,Bluetooth etc .. finally i decided to interface with Bluetooth Module.
Bluetooth Module (HC-05)
I am using HC-05 Bluetooth Module ,it is a commonly used bluetooth module .
HC-05: 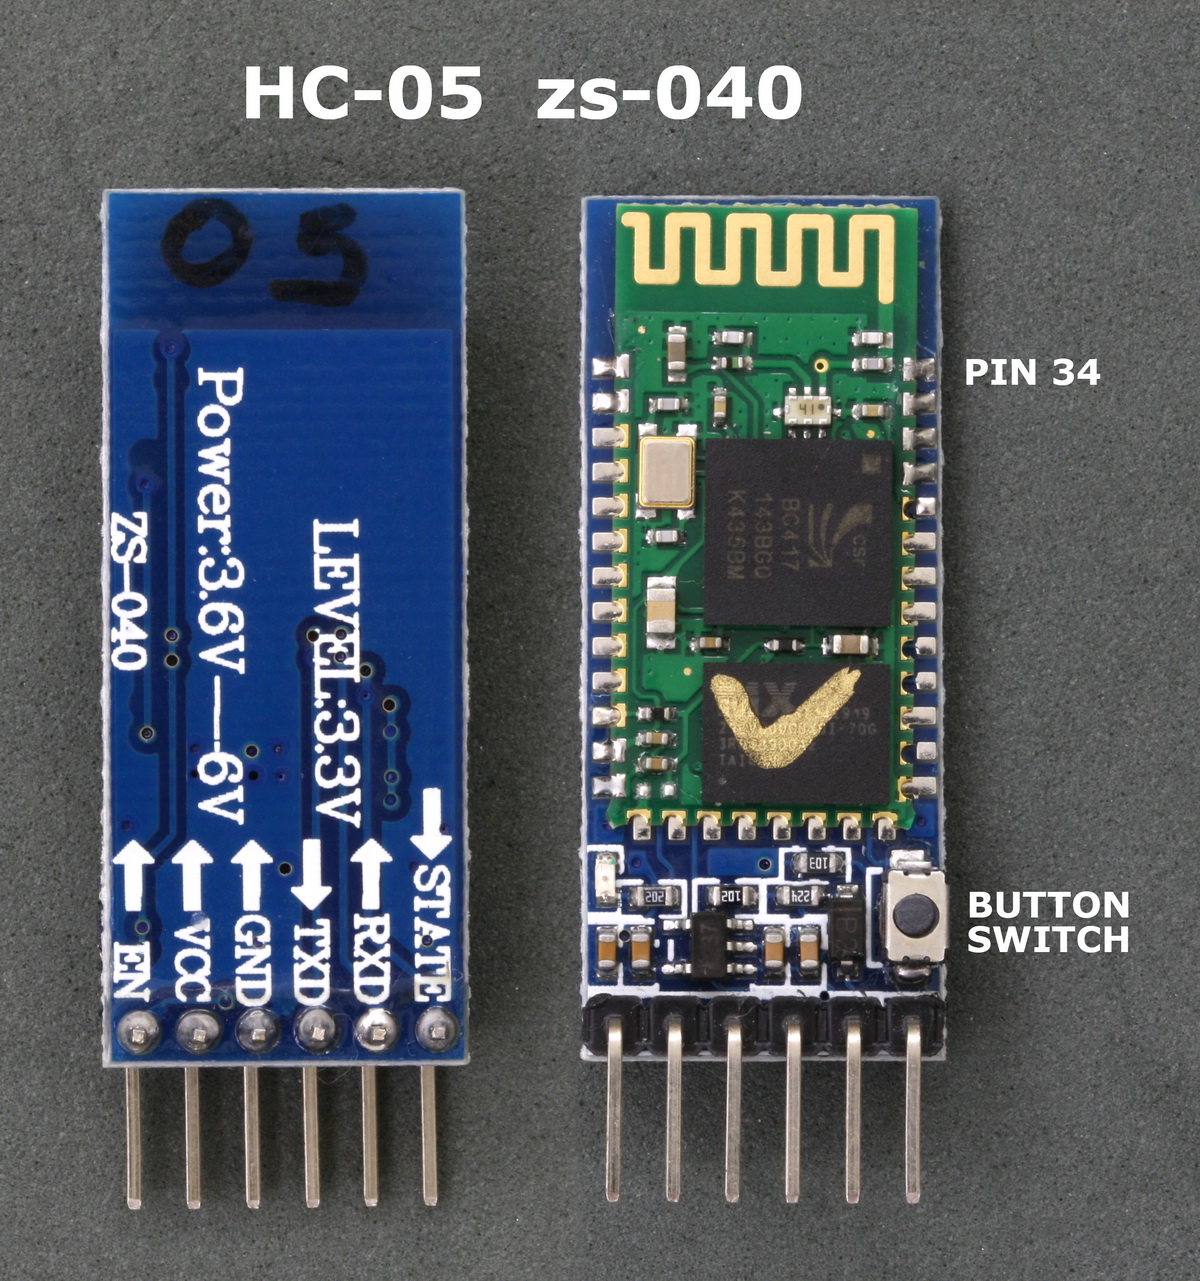
Features of Bluetooth
-2.4GHz ISM Band Frequency
-Short Range
-Low Power
Piconets (Master/Slave)
Piconets: 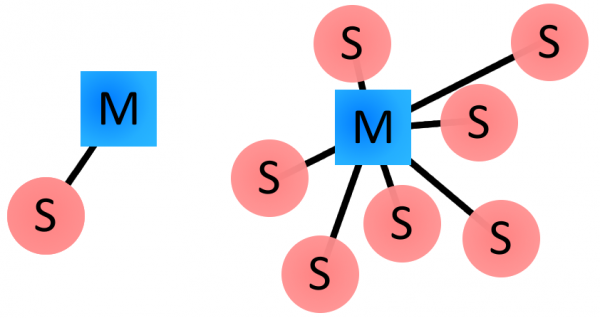
Master/slave model to control when and where devices can send data. In this model, a single master device can be connected to up to seven different slave devices. Any slave device in the piconet can only be connected to a single master.
Bluetooth Addresses and Names
Every single Bluetooth device has a unique 48-bit address in the form of a 12-digit hexadecimal value,24 Most Significant Bit represent manufacturer and remaining is the Address .
Power Class
Three Power Classes available in bluettoth depending up on the power .
| Class Number | Power (dBm) | Max Output Power (mW) | Max Range |
|---|---|---|---|
| Class 1 | 20 dBm | 100 mw | 100m |
| Class 2 | 4 dBm | 2.5mw | 10m |
| Class 3 | 0 dBm | 1mw | 10cm |
Bluetooth Low Energy Vs Classic Bluetooth
I am hearing the word BLE many times i want to know about whats the diffrence between BLE and Normal Bluetooth .
BLE vs Classic Bluetooth: 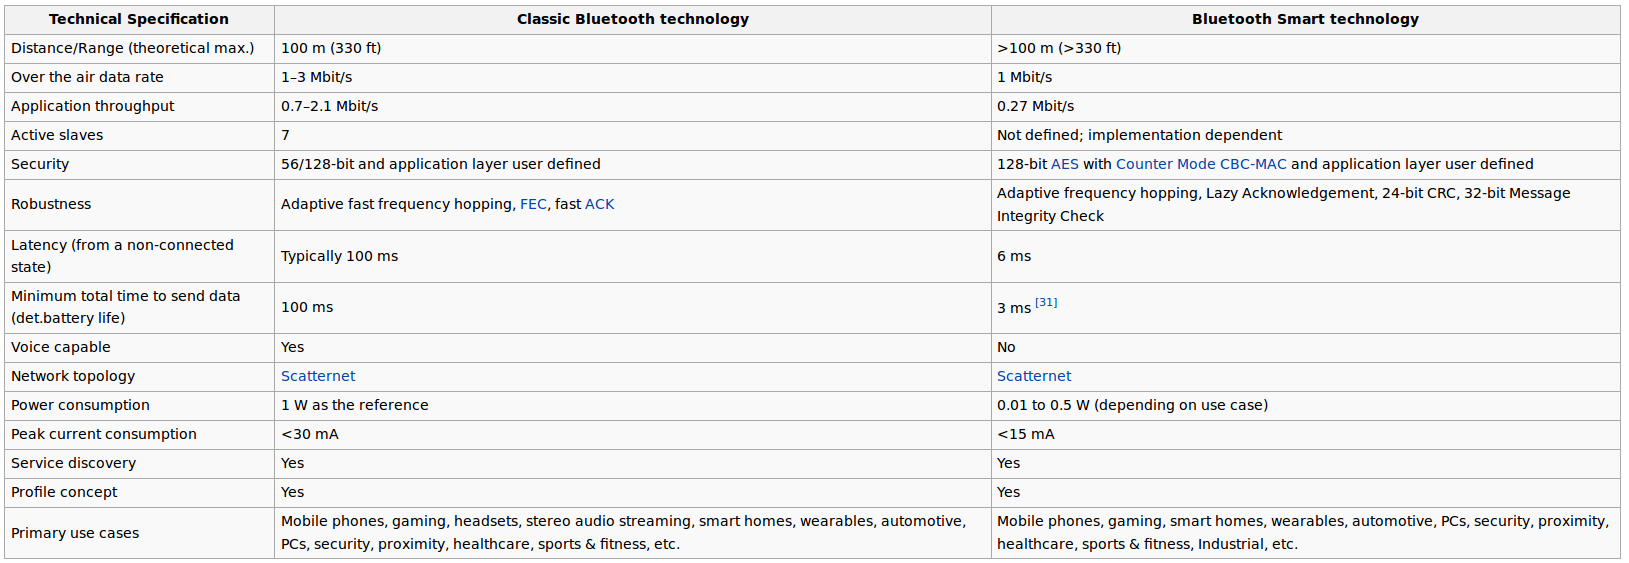 Source : https://en.wikipedia.org/wiki/Bluetooth_low_energy
HC-05 Connection with ATtiny45
I am using ATtiny45 Microcontroller for this application , and using Pins(PB0,PB1) for Tx and Rx ,Bluetooth Module have 6 Pins , now we are using only 4 Pins.
VCC(3.3 -6V) -Pin 8 of ATtiny45
GND -Pin 4 of ATtiny45
TX -Pin PB1 of ATtiny45
RX -Pin PB2 of ATtiny45

I added 2 extra IO pins in ATtiny45 Board to interface I/O devices .

I used my output devices board instead of an LED .
Completed 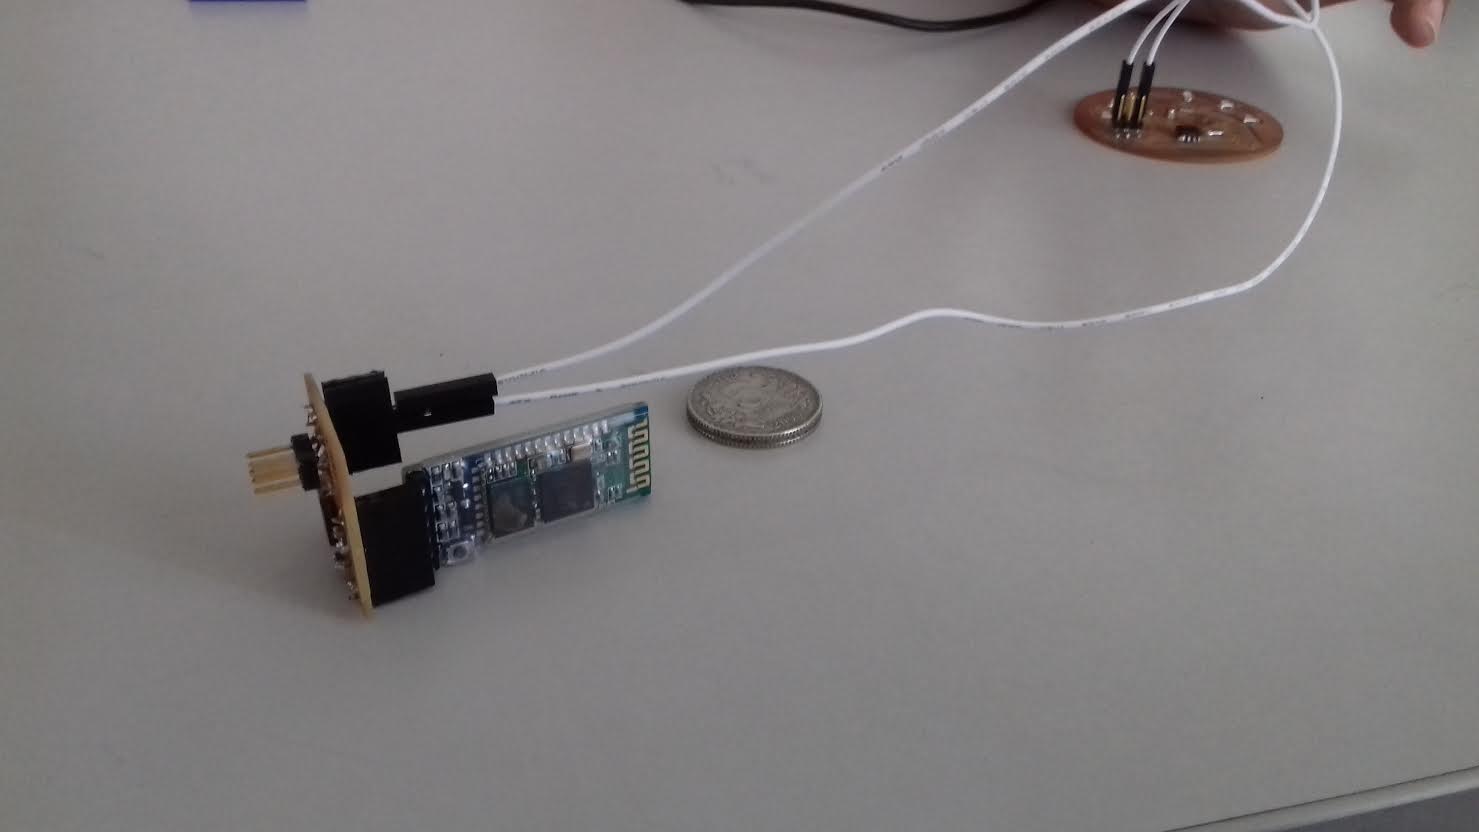
Programming in Arduino IDE
   /*
   ATtiny45 Interfacing to Mobile App Using Bluetooth
   By
   Muhammed Jaseel P
   FabAcademy 2016 Student
   Fablab Trivandrum
   */
   #include <SoftwareSerial.h>
   #define RxD 1
   #define TxD 2
   #define DEBUG_ENABLED  1
   SoftwareSerial blueToothSerial(RxD,TxD);
   int state = 0;
   int led = 3;  // LED1 Pin
   void setup() {
       pinMode(led, OUTPUT);
     blueToothSerial.begin(9600);
   }
   void loop()
   {
   if(blueToothSerial.available() > 0){
    state = blueToothSerial.read();
   if(state == 1)
   {
     digitalWrite(led,HIGH);
     blueToothSerial.write("LED ON");
        }
   else if(state ==0)
   {
      digitalWrite(led,LOW);
     blueToothSerial.write("LED OFF");
   }
   }
How to Develop a Mobile App?
I have prior experience in diffrent Mobile App development technologies thats why i have a confusion to choose one ,
App Development Technologies
1)Native
Windows -Visual Studio C#/HTML5
2)Cross Platform
3)Others
- finally i selected MIT App Inventor because I already have experience on all the following platforms except MIT App Inventor .

This is a nice tool for app development beginers , it have lot of limitations but it really helpfull for beginers especially kids.
UI Design in App Inventor
I followed this tutorial to understand basics of app inventor
This is the UI i designed for my App
Bluetooth Control App UI : 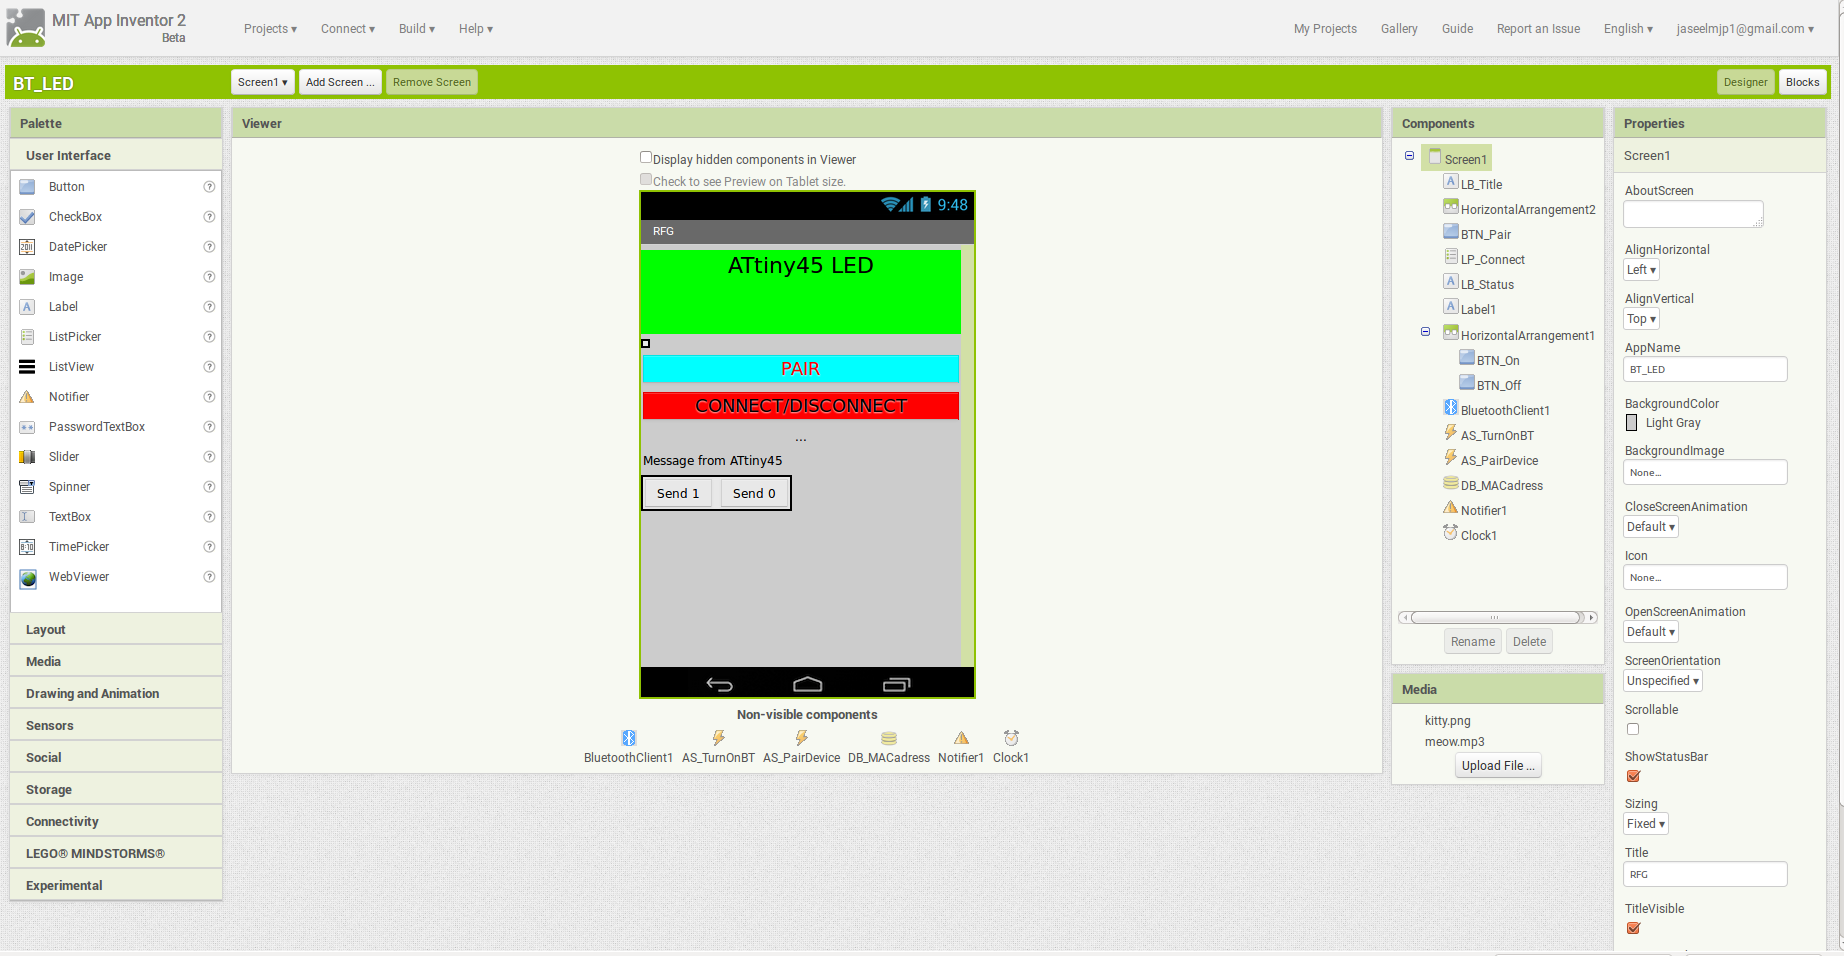
Coding
App Inventor Using a Visual Programming Language similar to scratch Ohhh… Not similar, it exact scratch now iam relaized scratch also from MIT .
This the Code I Used .
Coding : 
App(.apk) Installing
App Inventor have diffrent options to install(.apk), in Menu Bar Build>APP(QR Code / Save to Computer) then u can manullay install this apk in android mobile.
I pulished my app in MIT App Inventor Gallery http://ai2.appinventor.mit.edu/#6348508754083840 you will get both source code and apk file from that link , you can also download .apk file from here
App Screenshot : 
Working Video
I used my charlieplexing Circuit as Output device in this circuit for checking values from App. ATtiny also send LED Status to App.
I used blueToothSerial.read(); and blueToothSerial.write(); commads for sending and recieving
New Things I Learned
Learned to create simple mobile apps using MIT App Inventor .