Project
My FabAcademy Project Diary
I started thinking about my Fab Project at the starting of my Fab Academy , i got many ideas and completed literature survey of some of them .
1.A Portable CNC Machine (We done a CNC plotter during our Machine Designing Weeks Group Project thats why i want to to do something diffrent )
2.Pedometer -(I planned to do this pedometer bracelet , i discussed with my Remote tutor and my collegues after series of literature survey finally i droped this project)
This is my Third Project Idea .
Cloud Pot - Connected Flower Pot
Electronic Flower/Plant Pot is not a new thing but i want to make a New One for my Fab Academy Project , It is really new? Most of the available electronics pots using bluetoth for communication it is limited in Range, i am planning to use IoT for my Pot thats why user can monitor and control Cloud Pot from anywhere in the world using theier smartphones or laptops.
Cloud Pot - Connected Plant Pot
- T his is a Connected Flower/Plant Pot for urben Gardening and Indoor farming, My aim is want to make something interesting for my Fab Academy Project same time it should be suitable for my final project .Also I am planning to make this project as a Open Source Plant Monitoring Platform.
-
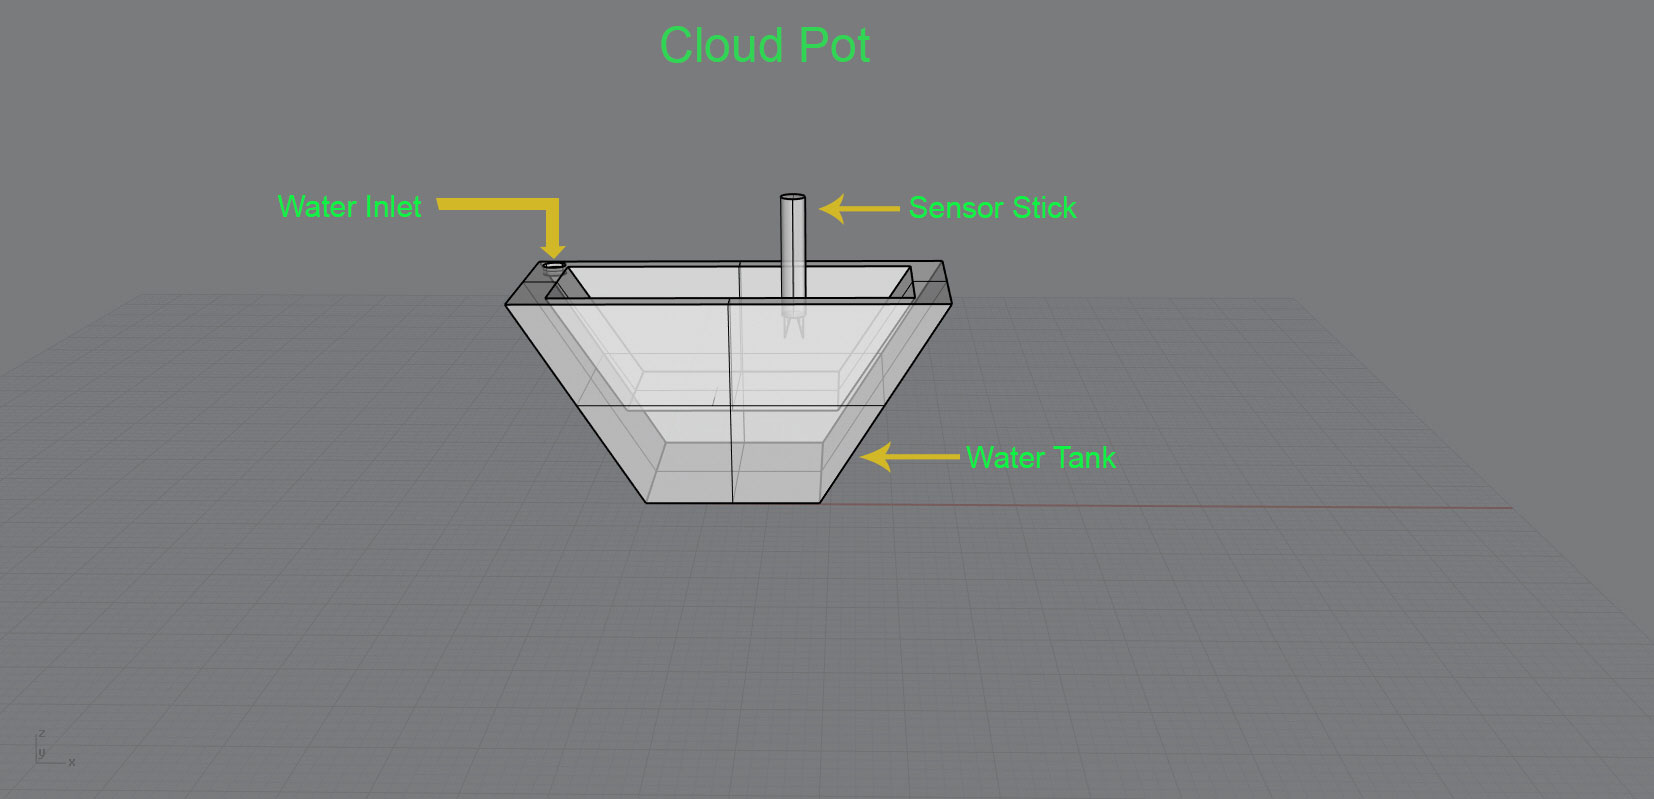
Features of Cloud Pot
-Acess from anywhere
-Inbuilt Water Tank (1.5 L Capacity)
-Automatic Watering
-Compact
-Open Source
Why I Selected this Project as my Fab Academy Project
1)I can Effectively Use diffrent digital fabrication techniques in this project.
2)I want to experience IoT and Cloud.
3)More Electronics Part - I love It
4)It satisfies Fab Academy Project Criterias
5)I Love Farming
6)I can easily demonstrate this project with others
Parts of Cloud Pot
1)Pot
2)Sensor Stick
3)IoT Interface
4)Cloud + Mobile
Digital Fabrication Process Involved
1)Laser Cutting -For Fabricating Pot Structure in Acrylic Sheet
2)Electronics Production - Sensor Stick Hardware and Wifi Module
3)3D printing - Case of Sensor Stick
4)Interfacing+Networking - IoT
5)Shopbot(optional) - making a stand for pot in plywood
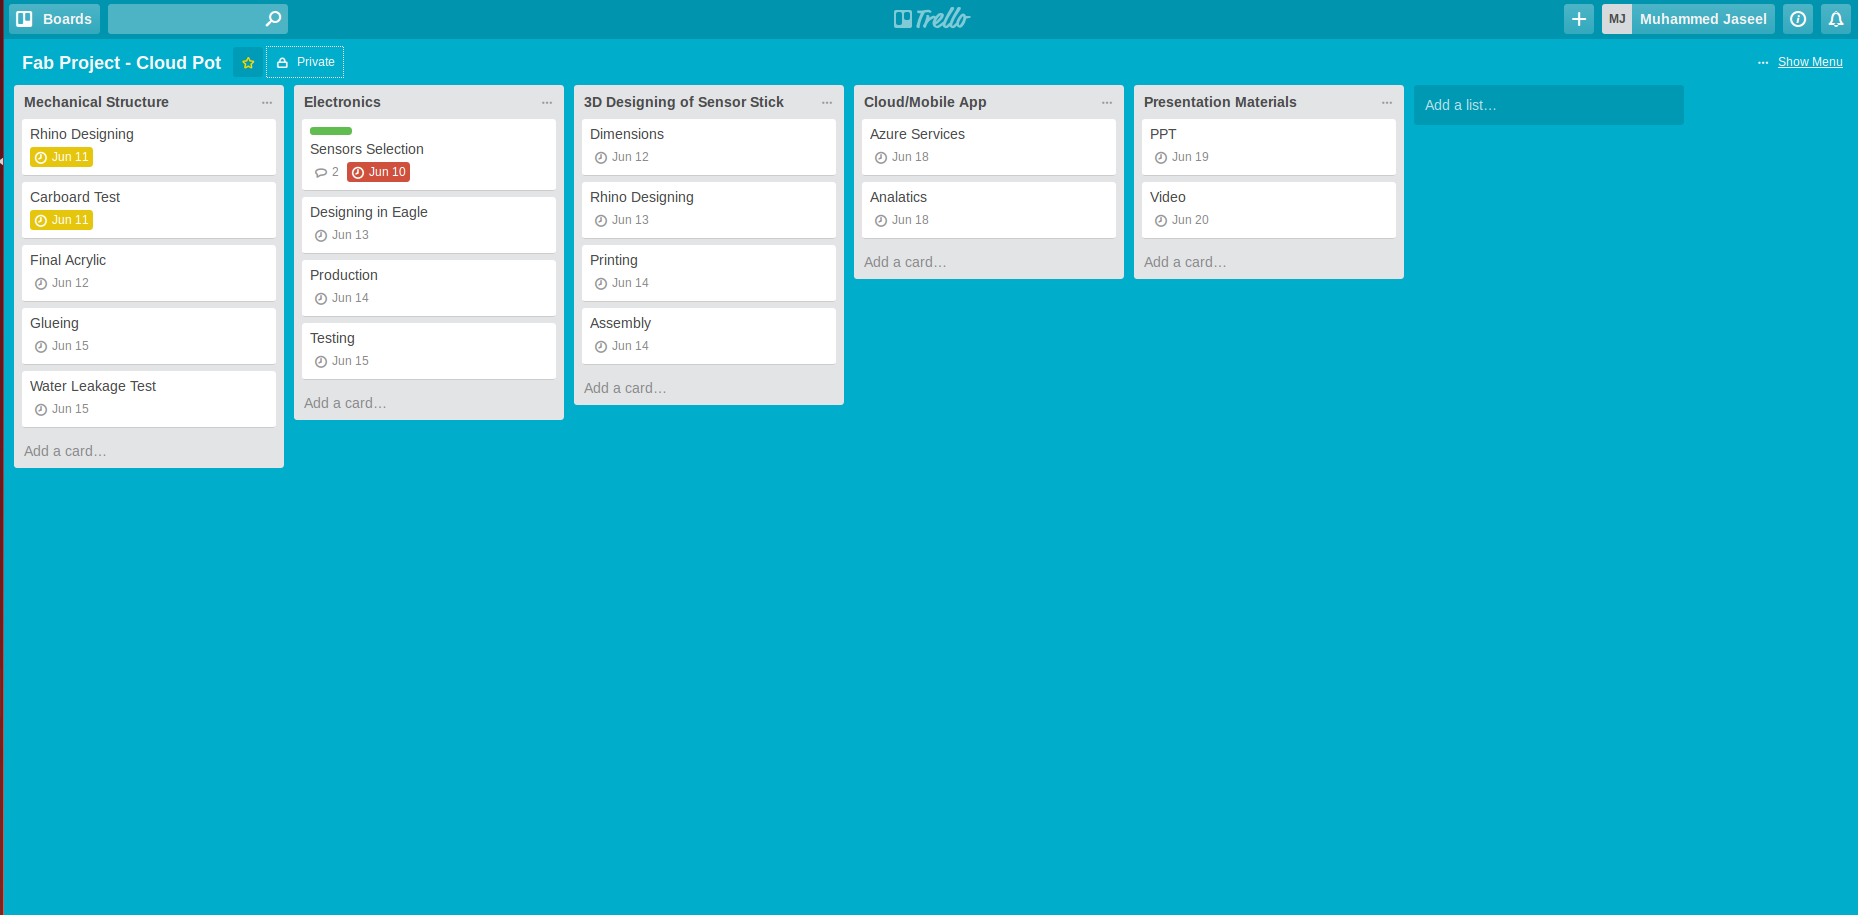
My Project Planning
- I used Trello for my final project Planning this is the plan i made.
Day 1 :
- I developed a clear idea about sensor part and mechanical structure of entire project. I drew a sketch in paper then designed in Rhino .
-

and i studied about different sensors and finally decided the following sensors.
Sensors :
1)Moisture Sensor
2)Sunlight - Phototransistor from Fab Inventory
3)Temperature - LM35 Temperature Sensor
Day 2:
Started with Electronics Design in Eagle, I am planned to make main controller borad first then sensor boards , a question may arise why you not including all components in single board ? why you are using diffrent boards for each sensors? Because I am sensing Temperature ,Loght, Moisture all parameters from outside of enclousoure thats why i need to put all sensors in surface of 3D printed enclousoure for that i need little long wires.
The Problem is when iam using wires there is a chance of interferance with sensor values for that i need to cover all sensor wires properly.
- :

-
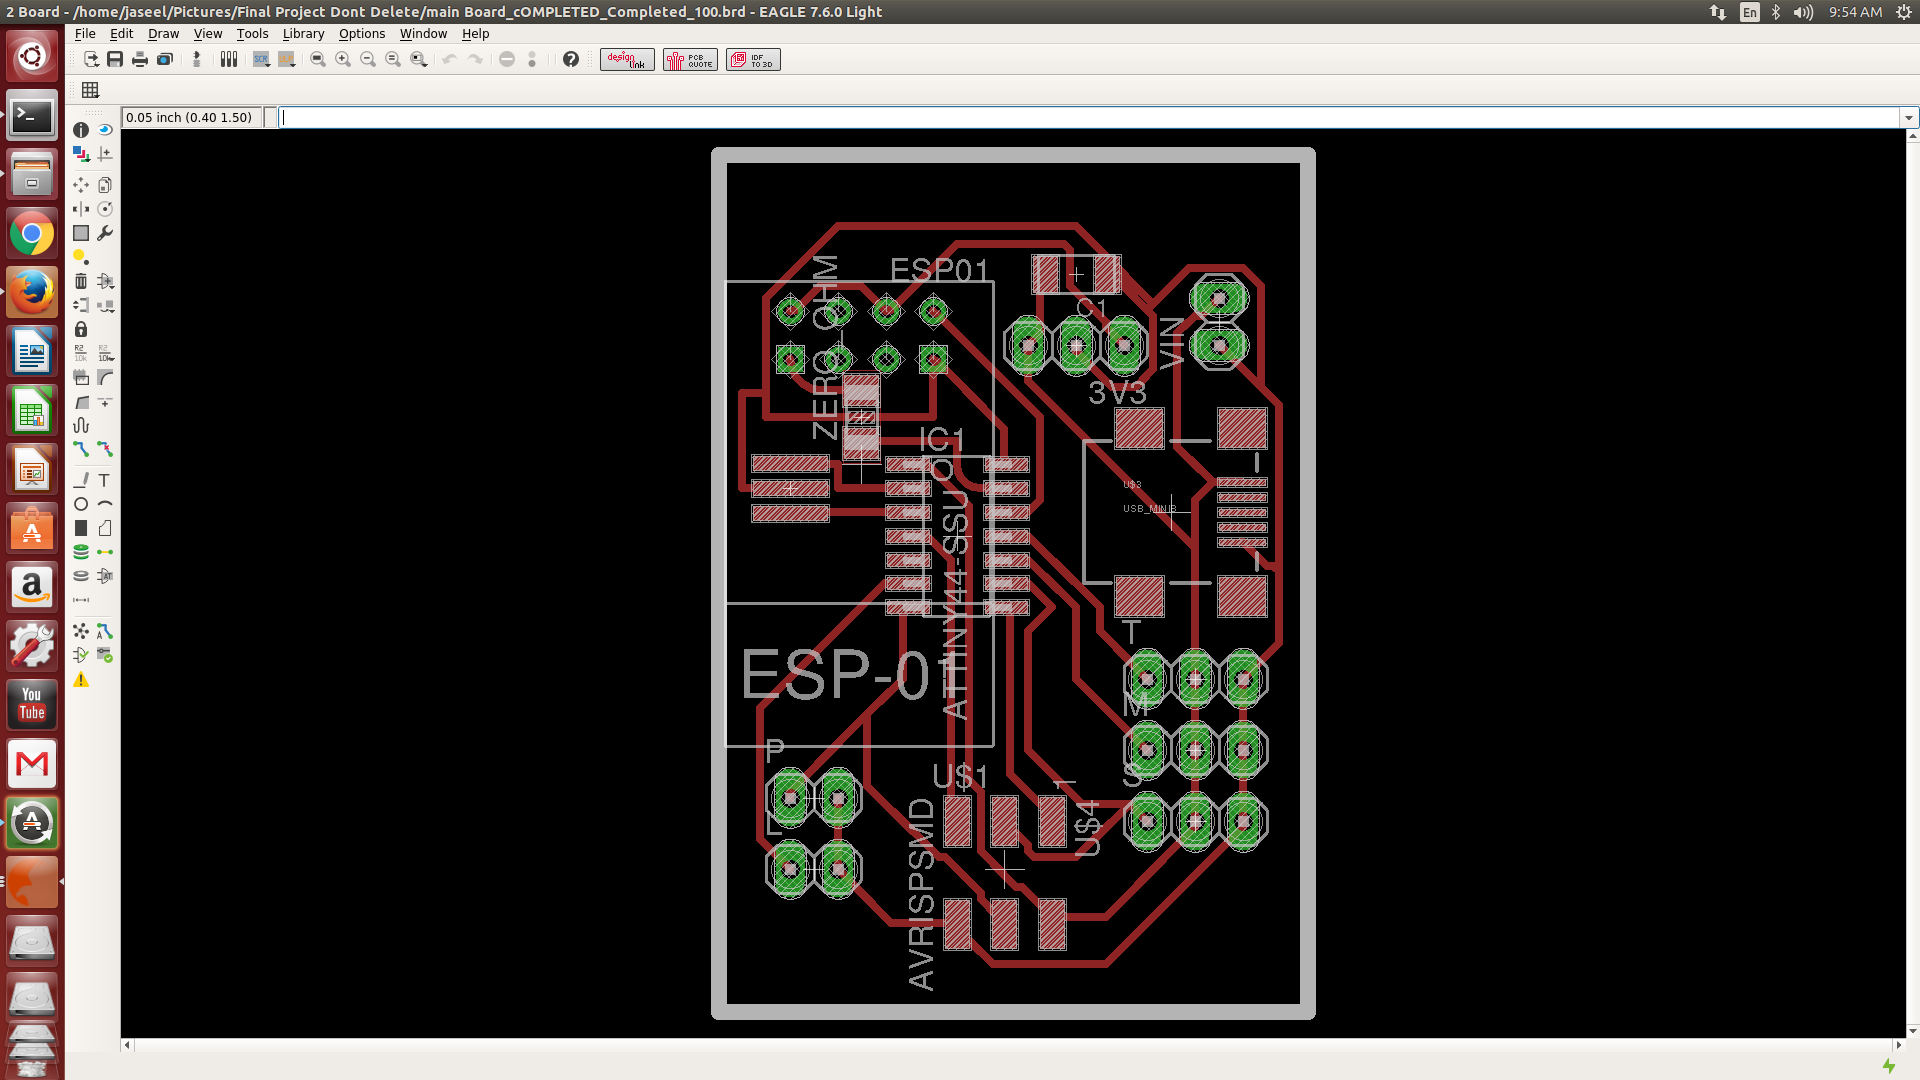
- Milled Board

Light Sensor Module Also I Completed Light Sensor Part .
- :

-
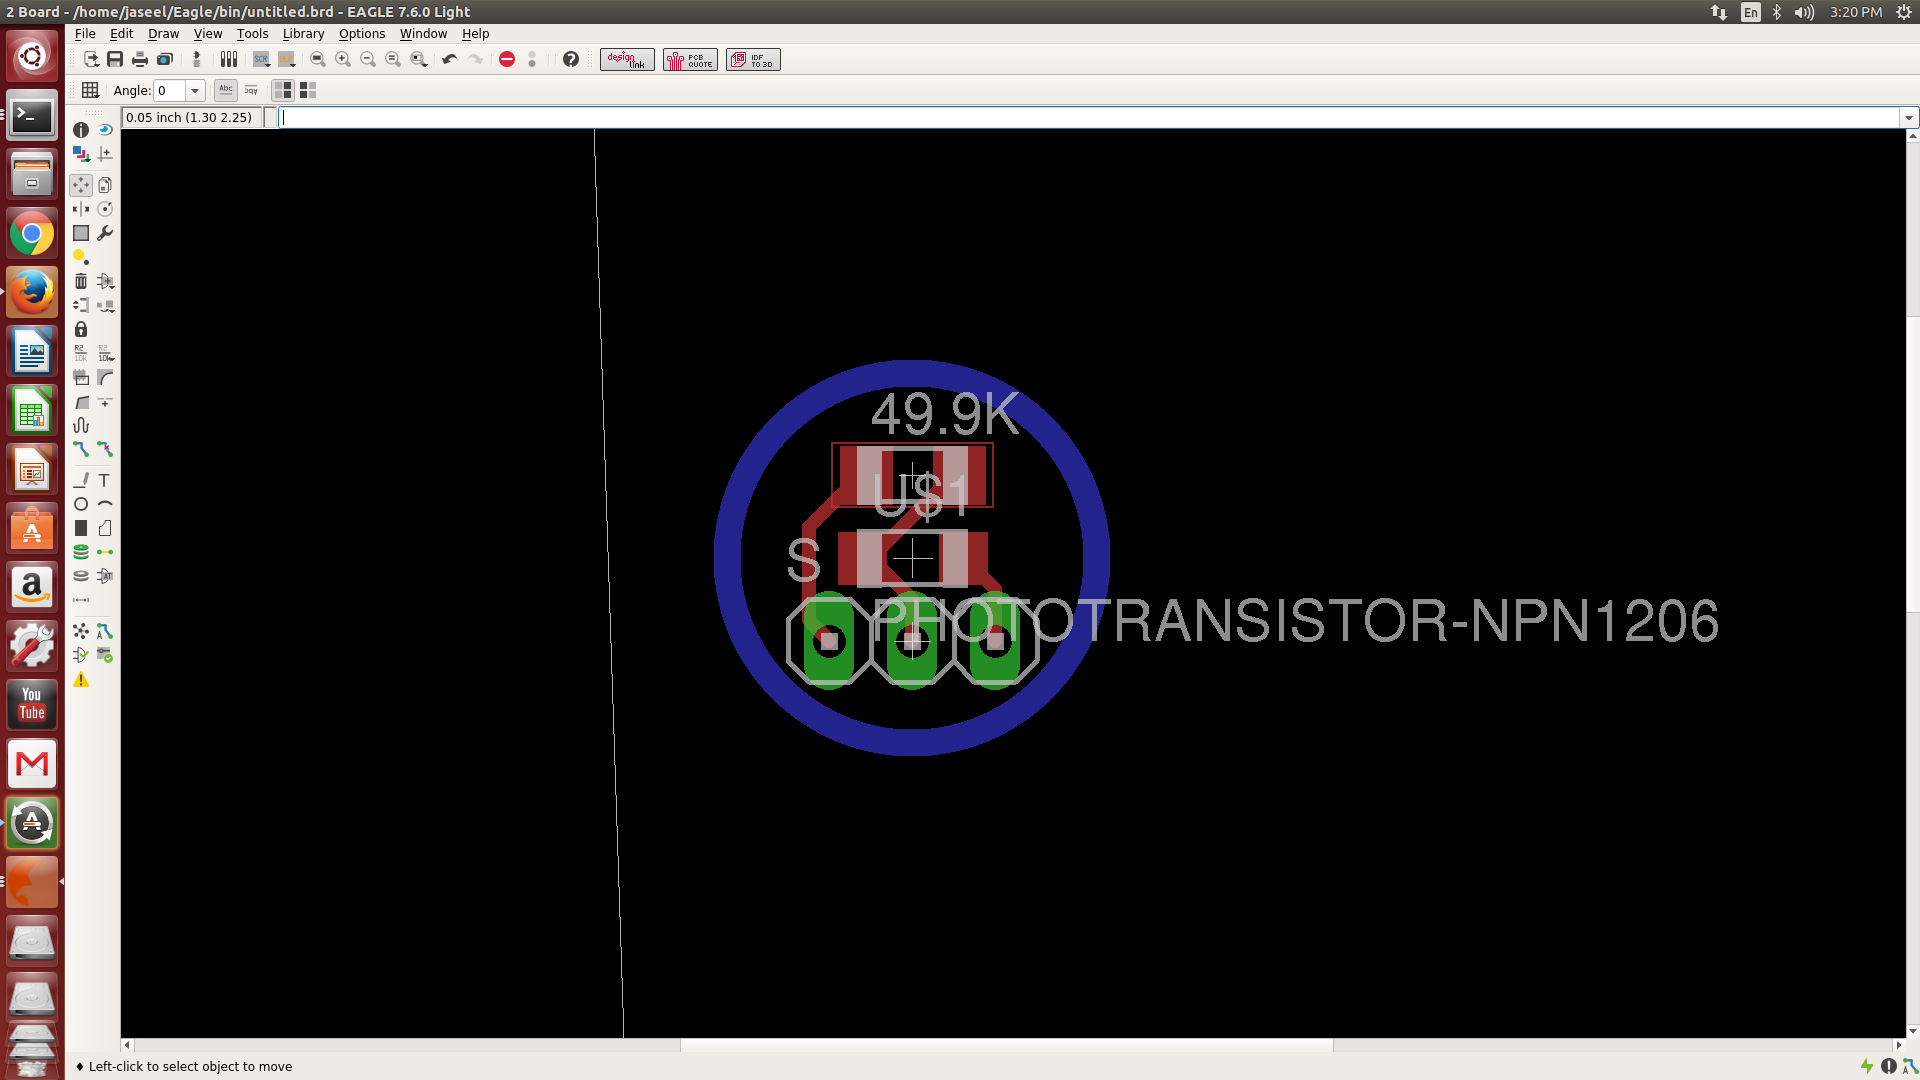
- Milled Board
Day 3
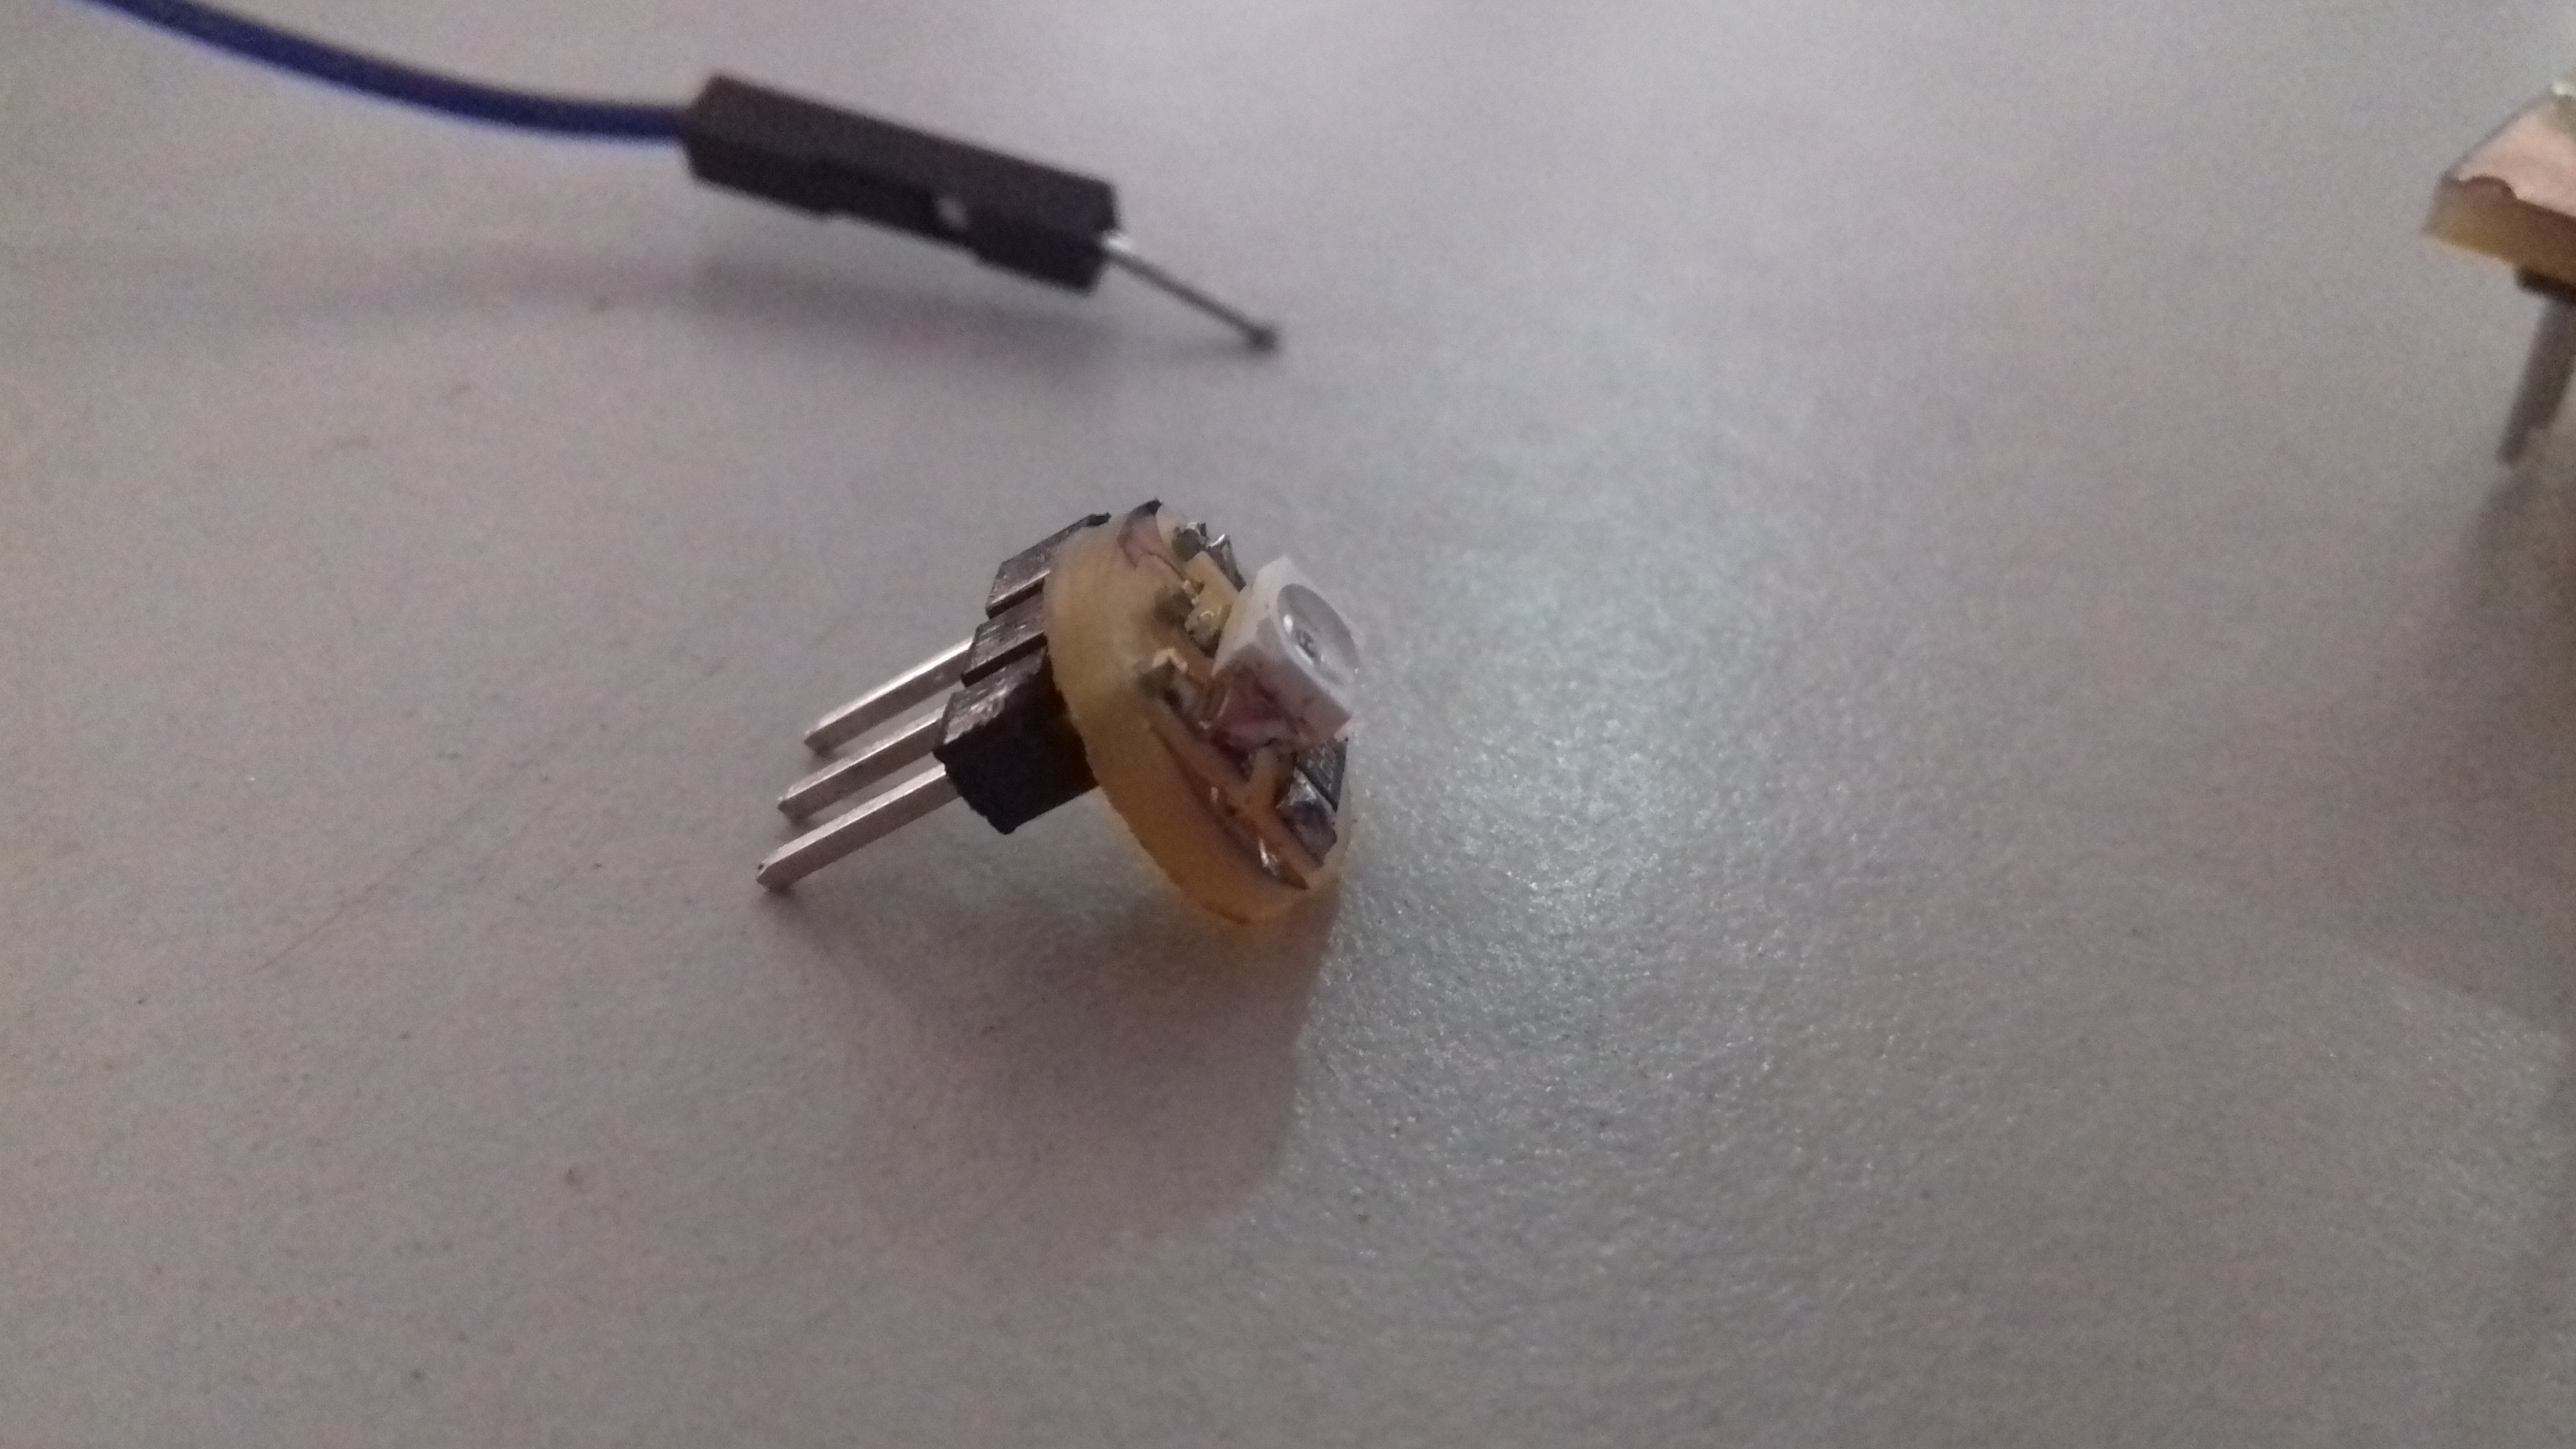
I run a test program in Controller board it works fine all pins are ok. Now i need to check ESP8266 Wifi Module . First time i am using this I need to learn more to make it happen.
- ESP8266

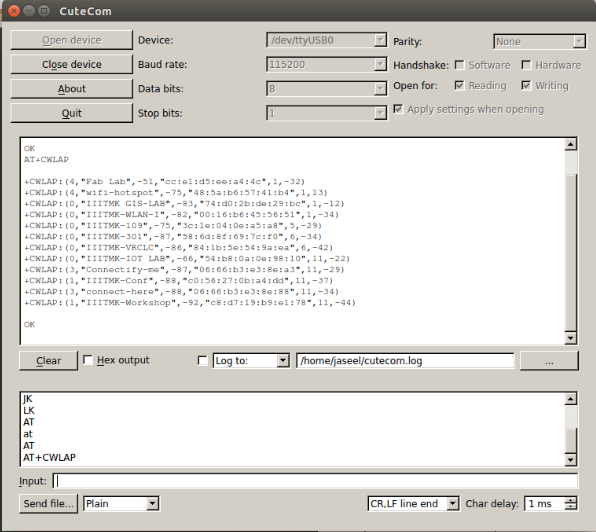
How To Test ESP
I need to Test this Module first for that i connected ESP8266 with 3.3V FTDI Cable ,ESP 8266 works only in 3.3Volts. I used Cute Com Software for sending and recieving data through serial from ESP8266. ESP8266 works based on AT Commands , What is AT commands ? Introduction to AT Commands PDF
AT commands are instructions used to control a modem. AT is the abbreviation of ATtention. Every command line starts with “AT” or “at”. That’s why modem commands are called AT commands,AT commands set is divided into: Basic AT commands, WiFi related AT commands, TCP / IP AT commands.
I refered ESP8266 AT Commands from Neils Lecture .
For Example
    To Test ESP8266 Works Correctly
    Command(AT) -> Response(OK)
- I refered ESP8266 AT Commands from Neils Lecture .

Day 4
Local Server for Testing
I created a local UDP server in my machine for testing the communication with ESP8266 you can refer Local Server using Python from Here
Initially I faced many errors finally i solved all errors with the help of my cloegues Yadu and Vishnu(http://archive.fabacademy.org/archives/2016/fablabtrivandrum/students/400/index.html)
Completed Tasks(18/06/2016)
-Literature Survey of Sensors
-ESP8266 Testing with a UDP Server
-Circuit Design
-Interfacing Sensors with ESP8266
-Streaming Data into Cloud
-Visualaisation of data in Web Page
-3D Designing and Printing Sensor Stick
-2D Designing and Laser Cutting of Pot
Remaining Tasks (22/06/2016)
-Modular Design
Poster and Video of Project
