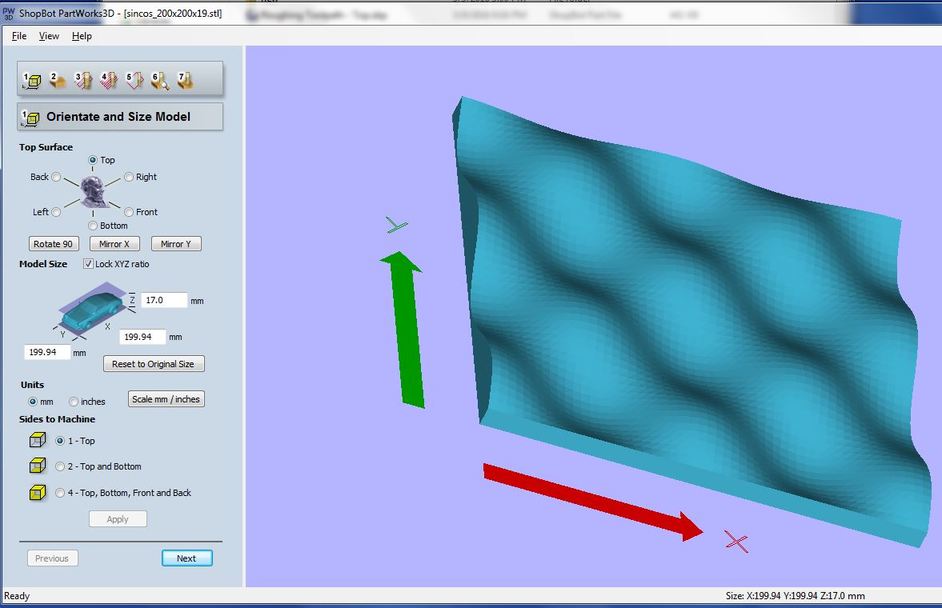
Process
http://www.thingiverse.com/thing:24897
Resized to 200mmx200mmx19.
Dowload stl
Partworks was used for generating tool path.
I thought it'll too thinly layed for 19mm, so I scaled the stl down to 17mm again. Set zero settings.
Setting for Roughing, 1/4 straight, twin flute, upcuting tool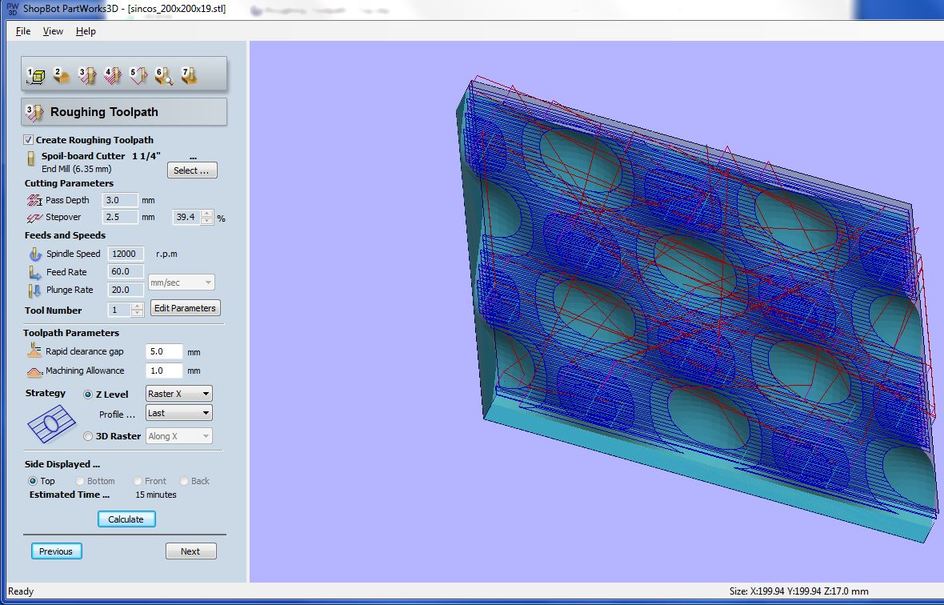
Setting for finishing, using 1/4th ball nose, upcutting, super fast milling.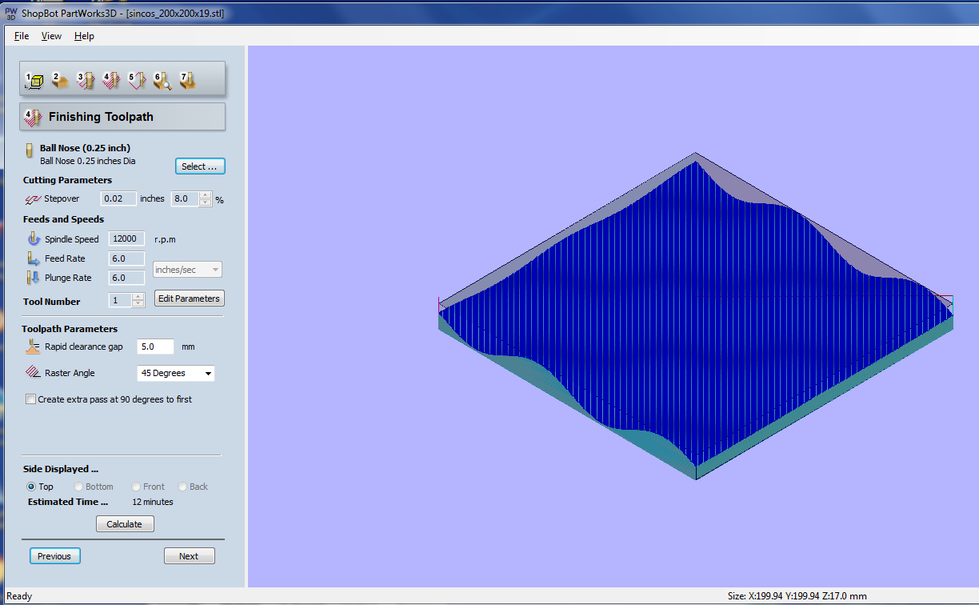
Rough cut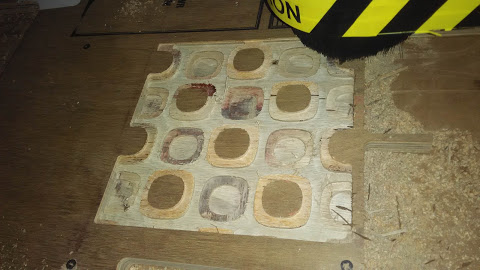
Finishing cut
In progress
The 12000 RPM was making a lot of noise, so I paused it and changed rpm to 15000 which didnt help. 13000 RPM woked smoother.
Finished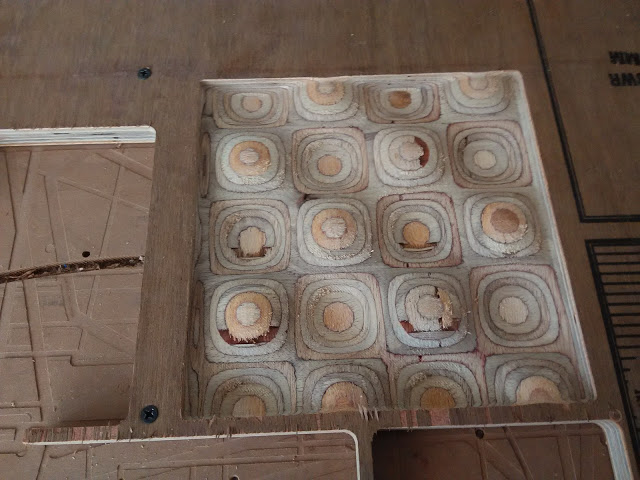
Cutout

Problems
I was expecting this and wasnt surprised. Bu the damage wasnt very bad. The plywood was decent.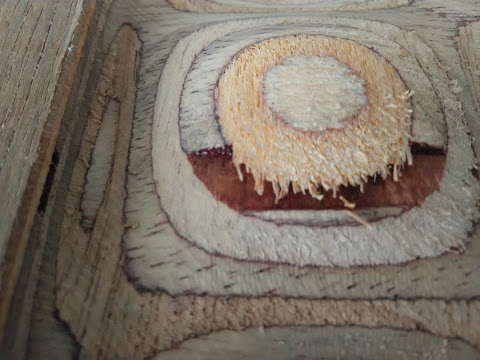
I'm not gonna bother too much about it now, But these can be filled in with commonly available epoxy putty is anyone to get it perfect.
Release Agent
Food film was not around so I used a the apron polythelene plastic sheet for release agent.
Fabric
Nisha joined to help me out in the process. Composites is defenitely a two man job. We used natural fabric which came with fablab inventory.
Marking- giving enough clearance for the cloth to conform to the shape.

Cutting-
I rolled it over a blank cutout of same dimensions and cut at the diagonal edges. I got 6 pieces from this.
Nisha helping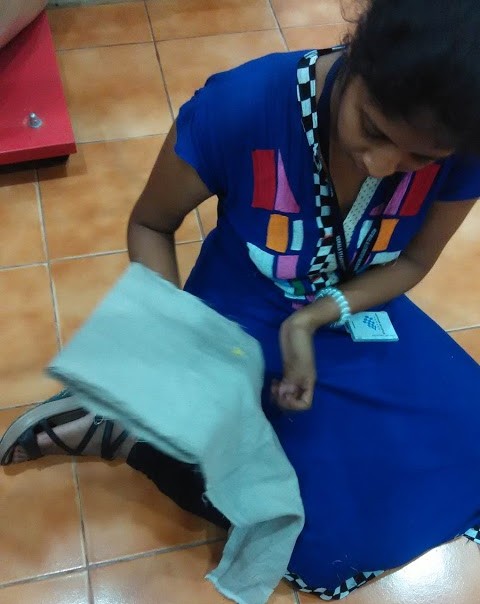
All cut
Made reliefs for better comliance to the mold structure.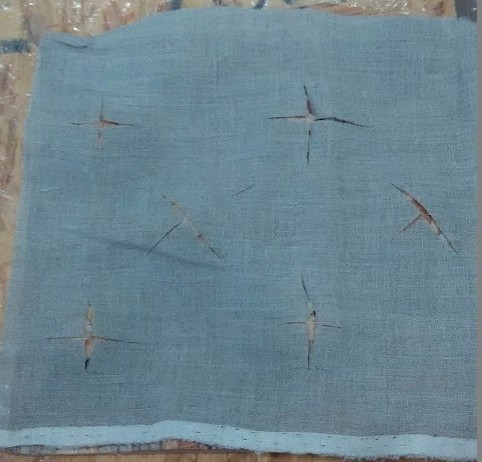
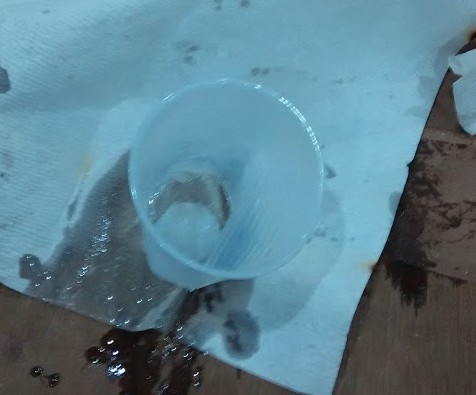
I didnt do much logical calculation regarding the volume of resin required, thought half glas would be sufficient.
Test cast
I had a silicone mold lying around and I used it to cast epoxy to check its potency.
Problem
The epoxy cast which I checked next day was rubbery. Environmental condition here in Kerala are hot and humid. It also rained bringing down temperature and increasing the humidity.
The other and most encountered reason was wrong mixing ratio. I mixed 10.9 g of resin and 5.2 g of harndner for 2:1 ratio recommended by the manufacturers. There was 0.5g less of hardner for this mixture. I was thinking 0.5 g less of hardner wont make big difference.
Prepareng resin
I prepared about half a glass of resin.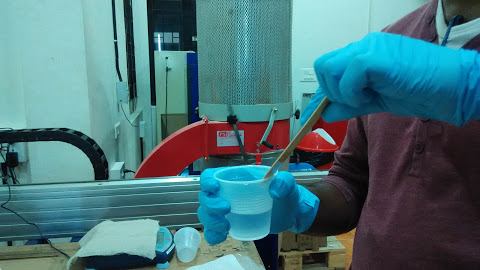
Dipping the fabric
half the glass was kind of was sufficient, and was a little too perfect, I could have prepared more resin.

Heating
The instructions said that when heated to 65 degree celcius, the resin sets in 30 mins. I wanted to give this a try, so I put the dipped fabric in plastic glass and put it in the reflow oven at 150 farenheit for 7 mins. At 65 c the plastic doesnt get affected.
Assumption was - the reaction will be slow and take 30mins to progress slowly, so keeping it 7 mins in oven wouldnt make it non workable and give me enough time to set it and put it in vacuum bag and aplly vacuum.
But what happened was that an exothermic reaction took place, heated up enough and melted the plastic container and residual resin leaked out.
The setup
I first placed the polythilene shett on the mold and applied the 3 dipped fabric on the sheet and folded the sheet. On top of this goes the breather sheet. Since the resin had started setting the fabric was a mess and whle process messed up. I placed these on top of a wodden planck and placed them inside the vacuum bag, sealed them and applied vaccum.
Application of Vacuum
I used these vacuum bags for the process. There a screw systen on the lid- yo uopen it and the air can be sucked out and we screw it tight and the valave closes, trapping the content in vaccum.
I made an 3D printed attachement to use shopvac with the vaccum bag.

Download antimony file
Download stl
The vaccum applied didnt seem enough.
The structure mightve needed a 2 part mold, the vaccum bag wasnt able to wrap the contours tightly enough. In fact the vaccum bag wasnt able to hold the tightness for long time too. It wasnt perfect.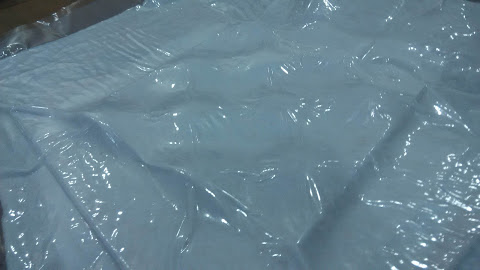
I eventually took the whole setup apart and let whatever mess it was set in open air.
The final ouput.

The material set soft. But After I heated it again in oven at 65 celcius and 10 mins it became relatively hard.
So I came to a realisation that the vaccuum bagging system we bought were not nearly as good as we wanted. I proceeded to find alternate ways of compressing the pattern or do an open mold.
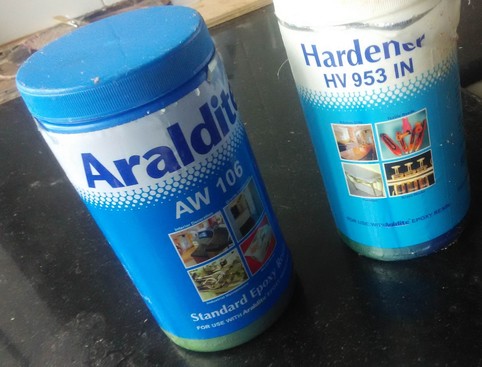
The resin we purchased online did not come with any material or safety datasheet which was a cause of concern further even though mixed in right proportion the epoxy set in the consistency of a rubber. We did not have enough epoxy and time to experiment so I chose to do an open mold with the epoxy adhesive resin.
The adhesive resin is not meant for casting purpose but is not very harmful for us to use even with bare hands. It has honey like consistency, it will be hard to soak the cloth inside it.
I made quick design with tinkercad online. What I loved about it is that it comes up with a random and lovable name for your project for you. I think it is being developed so that even school children could use it with relative ease, so a lot of features provided having been provided young kids in mind.
Using primitives and many other interesting form you create a basic form of what you want and then there’s a ruler feature which when you add allows each and every feature of the object you select to be dimensioned.
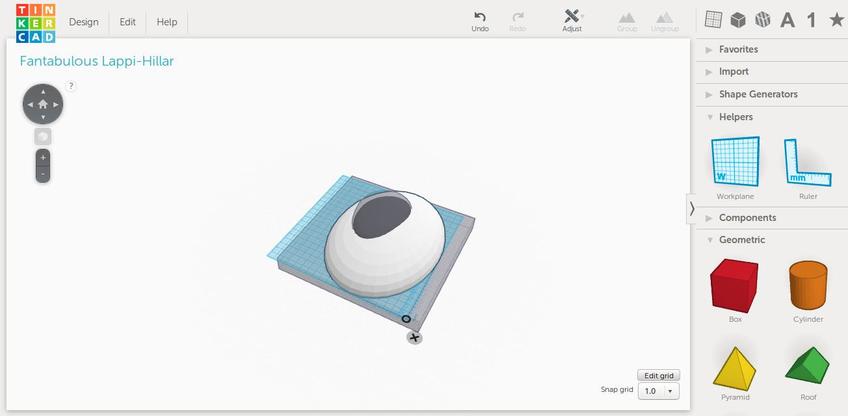
I proceed to create a bowl to my liking and size and downloaded the fantabulous_lappi-hillar file, cool name, I’m almost as excited as a kid to receive it.
You can find the design here
This time around I decided to do a laser cut mold. I used the 123D make software in windows to create plans for stacked slices for my model. Stacked slices wont give a smooth curve and my idea is that a curve formed by the compositing layers and the edges of stacked slices should be interesting an form and wanted to try it out.
I do not have a screenshot of it but here’s how it looks
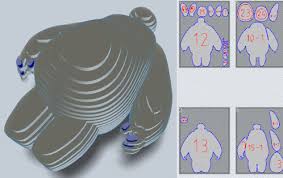
source
Process
* Load model
* Create a custom material and page property to be used- I used page widh and height as 600x 300 and thickness as 4mm(for cardboard).
* Choose the slicing method(mong, interlocked , slices etc), chosse stacked slices. Orient the slicing direction according to your liking and something that is practical.
* Place dowel position - choose 3mm size dowels. This will generate the holes though which you can pierce a 3m shaft to position the slices- I used the long 3.175mm endmill to position slices and later glue them and take out the endmills
* Download the plans generated. I chose dxf format.
* Clean the dxf, you have color each element according to laser setting for cutting and engraving. Thankfully in draftsight you can access different layers of dxf and manipulate them.
* Cut in laser.
* Assemble the mold.

I wrapped the mold with food film. Then I cut the lenin in small squares approximately 50mmx50mm. I cut the jute fabric also in small squares. My object is a complex structure that cant be precisely formed or wont give good results when unwrapped hence I follow this approach. I will soak each fabric in the resin and lay them by hand on the mold. The adhesive is stick and it sticks to the mold- though it sticks to the gloves more. After this I layed another covering of the cut jute fabric and finally with the lenin.
Then I prepared the resin. The resin was to be mixed 1:1 in volume ratio with the hardner.
It took some effort soaking the resin in the fabric, but the small size helped. I had to sqeeze the jute and resin together by hand.
The resin takes 12hrs to set in 25 degrees celcius and as the temperature increases the setting time decreases. The composite set to a decent hardness when left for 6hrs.
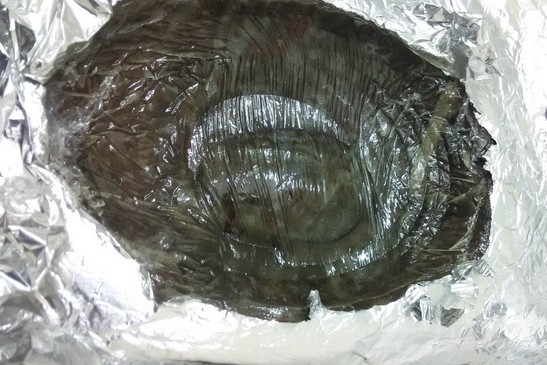
I took out the mold from the composite.
This is how the composite looks.
Inner surface
Outer surface

After cutting with scroll saw the finished product-
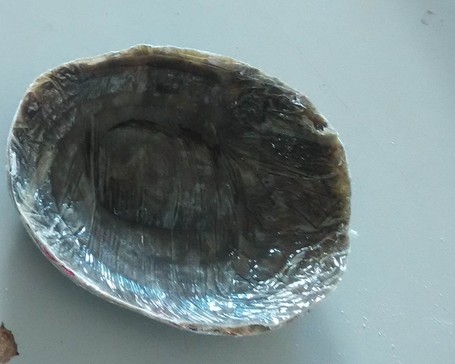
The composite came pretty good with exceptional toughness.

Standing on one leg on my composite