
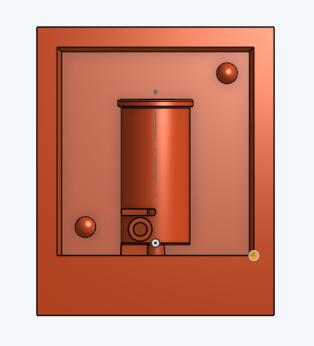

I have used a draft angle of 5 degrees, sperical impressions and protusions for alligning silicone mold.
This is a design of a pulley that is going to be attached to a stepper motor with 5 mm dia shaft.
Capstan1 - Part Studio 1 by puneethrj on Sketchfab
I'll attempt to create a mold for it in silicone and cast it in polyurethane plastic. I will be following the following workflow.
Sticking by Ubuntu Onshape was the only decent option to design. Once I had the part designed I began creating the cavity around it which would be the wax mold.
I have used a draft angle of 5 degrees, sperical impressions and protusions for alligning silicone mold.
Peg design
You would think to, get a silicone cast of the this you'd just have to create a cavity in the wax and fill it with silicone and let it set. The matter is not as simple as that. This is a long thin feature, the modela doesnt have tools that have long length and thin profile.
Since we dont have that option readily there are a couple of ways I thought this could be achieved.
I could 3D print the peg and use a release agent such as vaseline on the peg for easy removal from the cast.
I could mill the peg in wax and break the wax of later.
I tried 3d printed peg, and machine oil as release agent and eneded up with a mess.
This brings me to a 3d option- 3D printing a mold for silicone and I think this option would works great.
Once I exported each model out n stl format. I used cura to roate and orient the models. And I also joined them together using cura.
This was more of a accidental discovery- using cura to combbine two stl files. I dont know how to reorient a stl file in fab module so I use cura and while I was doing it I discovered that I could just place the stls side by side and connected and could save the combined model as a new stl file. While trying to do this you need one of the models to be deliberately placed outside the print area. Or else two models would try to repel each other and occupy a space which avoids interference when one model is created after the other.

I used this stl file for my final milling. I could now mill both at one go in a single wax block. Of course I could have done this using Onshape if I was thinking about it when I was designing.
I proceeded to generate height map of the stl file from fabmodules. For this You have to choose input file format as stl and output as png. I used this png file for further processing.
I placed the wax using the white, thicker double sided tape on to the roland bed. I used the settings as follows


The final mold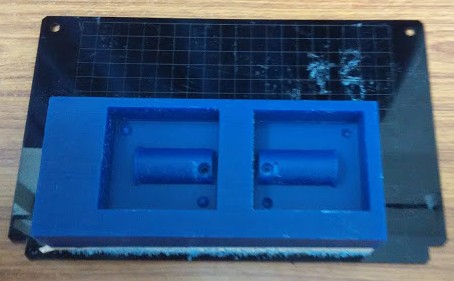
I brushed and blew away the dust embeded in the narrow part and the mold was now ready for casting.
We have Smooth On- Sorta Clear 37, a food safe silicone resin. They have two parts, Part-A and Part-B which are to be mixed and poured within an interval known as pot-time before it starts setting and is not workable anymore.
To know how much volume of the resin I need I poured some water inside the cavity until fills up and poured it back in an empty cup. This gives me the volume of the cavity and exact volume of resin I need in measure of level of the cup. Wax being hydrophobic, it is very easy to remove water from it, so that it doesnt interfere or cause problem when resin is poured.
Since Sorta clear uses 1A:1B by volume for mixing it means that half volume measured in the cup, of each part should make the mixture.
This can give you a good idea about the consumable you are gonna use. Silicone resin is very viscous and I usually use more than what the measured level so that the wastage due to viscosity and mixing etc is compensated.
Once I got the required quantity in to the cups and mixed them together thoroughly, I began applying them on the mold.
I first took very little quantity of silicone, on a twig and started applying it on the hard to reach corners and holes. Once I was satisfied with the fill in these hard areas from one side and little by little. Then I began to pour it into the mold in large quantity. I tried to follow the advice to allow only a hin stream of resin to flow so that the bubbles pop on the way down but it was harder in practice. To achieve the thin stream i had to pour it from great height, and due to momentum the liquid acted like non newtonian liquid and started pilling as solid and these could create more bubble.
Also while being too careful of the way i pur and trying to do everything perfect I ran out of time and the silicone began to set quickly and had become far less viscous by the time I was finished with one cavity. I had to now hurry up and manage with this material and You'll see it didnt turn out that good in second cavity.
Cast removal
After 2 hours when the silicone set to a rubber. The silicone could be easily separated from the hard wax. I was a little concerned about the narrow edges. The silicone could get stuck and torn, nothing of the sort happened. The silicone rubbber has a blueish tint may be because of some minute wax material embedding. But overall it was an excelent cast.
The difference between carefully poured first mold and partially failed second.
Peg
Initially I tried 3d printing the 3d part of the mold, the peg by 3d printing.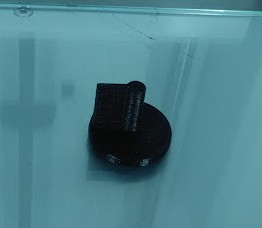
Fully assembled mold.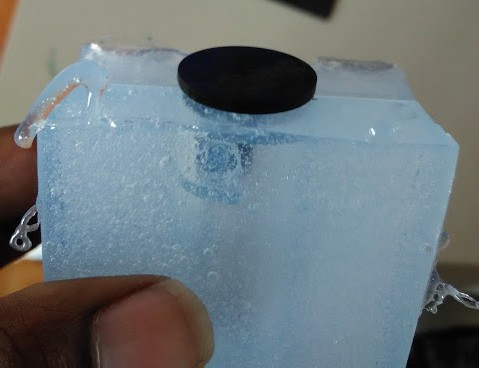
The idea is that I'll put together part1 and part2 of the mold and sandwich them then I pour-in the plastic resin and the plug the opening with the peg and let small amount of the resin overflow and flash over.
We use smooth cast 305 in fablab here. It has two parts which are to be mixed 1:1 by volume or 100A:90B by weight.
Setting Up the mold
To distribut force I sandwiched the two halves of the silicone mold in between two cardboard sheets and used
the clamps to hold them together. Later I found that this is not really a great way to go about it. The cavity gets compressed easily distorting the shape.I should have used rubber band on the three thicker contacting sides of the mold, around the cavity.
Not adviced.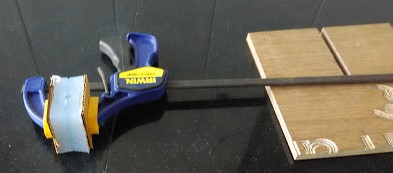
I mixed the resin and poured it into the cavity and plugged it with the 3d printed peg and waited for it to set.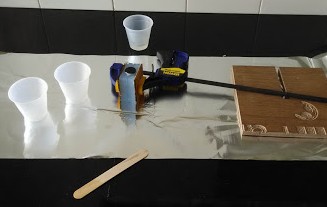
Casted removal
Afer half an hour and exothermic reaction I separated the mold.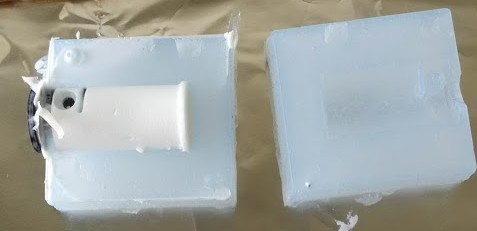
The final cast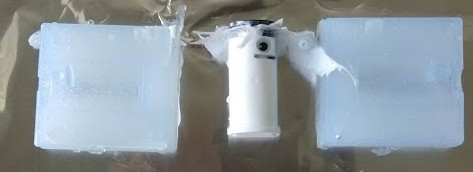
You might not be able to ake it in the picture but the cast isnt perfectly cyindrical and is distorted thanks to the compressed mold. But I am very happy with how the slot features and the holes and bores have come.
While trying to separate the peg and removing the flashings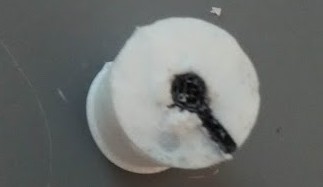
The peg has broken of and was strongly bond to plastic despite oiled surface.
And eventually.
the cast didnt survive the attempt to force remove the 3d printed part from it. I also drilled through the 3d printed plastic in order to remove it from the shaft area but its just a messy process with little returns.
I thought the oiled surface would some how be sufficient to act as release agent which was proved wrong. The 3d printed part also has a lot of groves the plastic can set into and might still cause a problem.
I could try to dissolve the 3d printed part using acetone or mineral thinner. I dont know how it would affect the polyurethane though.
Another option is that I try make 3d printed cast for silicone peg.
Yet another option is that I create a hollow 3d printed skin that is water tight but remains embedded in the plastic after it gets set and the excess part could be easily trimmed off. I could also make a 3d printed part which can slide out anf let the skin remain embeded.
I realised that thin poly urethane features are just not structurally rigid enough so I dont think polyurethane is a good plastic for this particular design. The same 3d printed part fares much better.
Downloads
You can get Onshape editable version of my design here
Download png heightmap of the mold