Fab Academy 2016
Home /W4
Electronics Production
For this assignment I have to produce a Fab ISP.
The FabISP is an in-system programmer for AVR microcontrollers, designed for production within a FabLab. It's based on the USBtiny and V-USB firmwares, which allow the ATtiny44 to perform USB communication in software. We choose FabISPkey 2.3 version (schematic and assembly drawing).
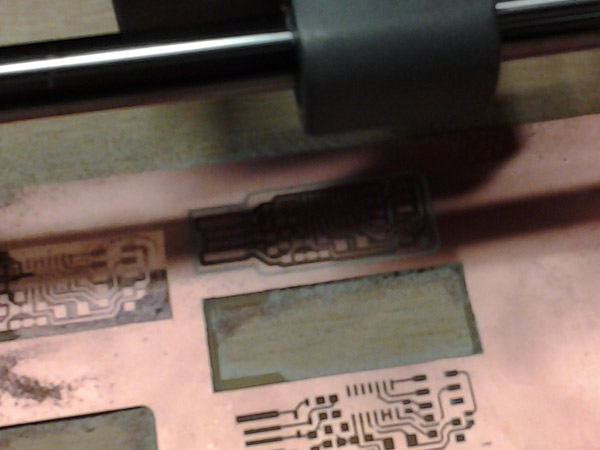
Milling the circuit
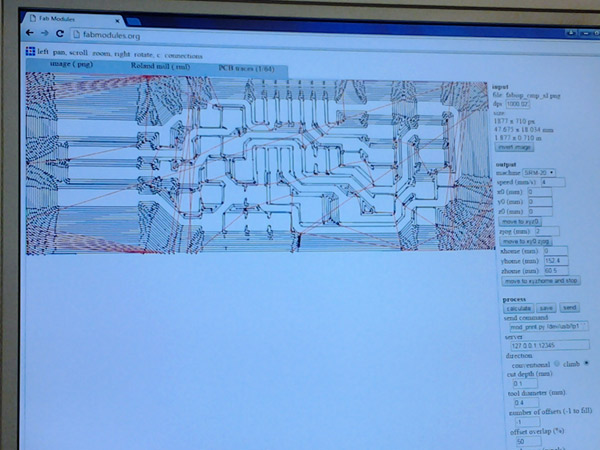
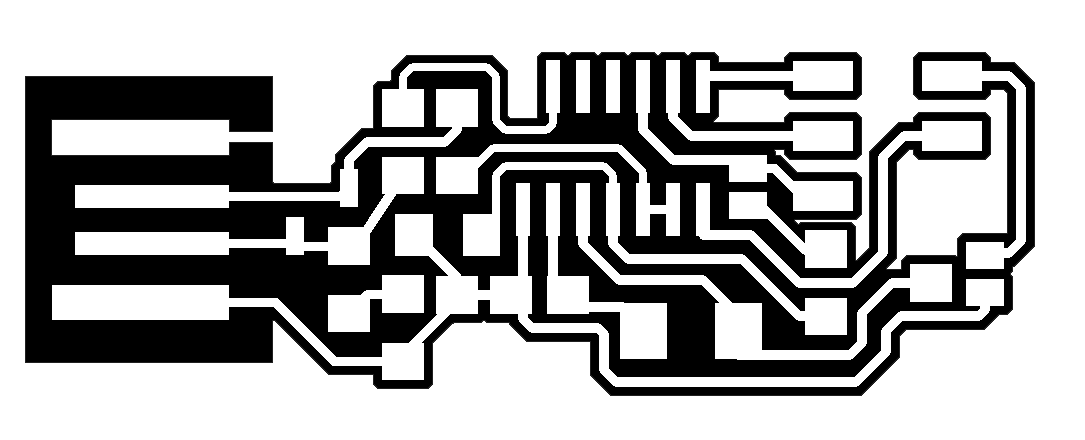
We used a Roland SRM-20 for milling the circuit and we have these images which represent the etching and the outline respectively.
Uploading the etching file to FabModules I prepare the first file (output file Roland mill format .rml and PCB trace 1/64).
After I selected the output machine (SRM-20) I changed the amount of offsets you want to give (I used -1 It did work slowly, but very precise).

I set x=0, y=0, z=0 because i've made the zero point manually from the Roland software.
Manually install the first drill bit (1/64 of an inch) which is used for etching only.
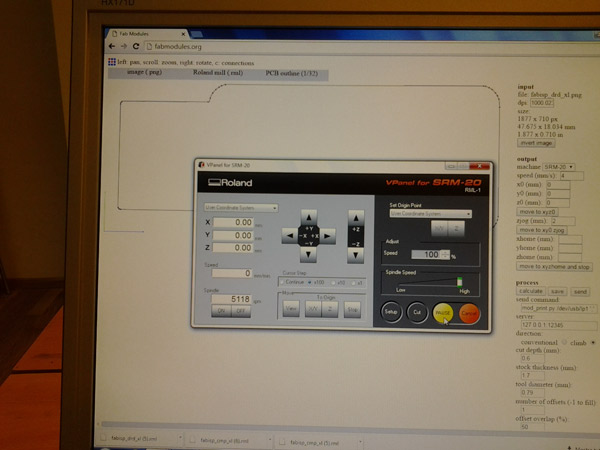
After I prepare the second file and keep the standard settings (Roland Mill, PCB outline 1/32) in the same way as before, mount the second drill bit (1/32 of an inch) which is used for cutting only.
The components
After I have to look at the schematic to write the list of components.

| Code | Description | Quantity |
| R1- R2 (812-1900) | 49.9 ohm | 2 |
| R3 (223-2265) | 1Kohm | 1 |
| R4 (223-2394) | 10Kohm | 1 |
| R5 (679-1768) | 0ohm | 1 |
| R6 (679-2171) | 499ohm | 1 |
| C1 - C2 (461-4063) | 10pF | 2 |
| C3 (723-6593) | 0.1μF | 1 |
| C4 (766-1062) | 1μF | 1 |
| D1 - D2 (687-8250) | 3.3V zener | 2 |
| XTAIL1 | 20Mhz | 1 |
| IC1 | ATtiny 45 microcontroller | 1 |
After soldering all components I have this circuit.

To program the FabISP ( the procedure is here) you have connected an Arduino Uno to our FabISP .
I have got an errore on the make-flash command.
Issues and Solutions
First the quartz had 4 pad on the bottom but only two were connected to the crystal ( the datasheet here).
I've then desoldered the quartz and i've soldered just the two pads using two wires.
The second thing was to find a way to use Arduino as ISP and the manual is at the link Arduino Official Documentation.
I've edited the Makefile by modifying the following lines:
#AVRDUDE = avrdude -c usbtiny -p $(DEVICE) # comment this line
AVRDUDE = avrdude -c arduino -b19200 -P /dev/ttyACM0 -p $(DEVICE)
to find the argument for the option -c i've used this link.
Then I've connected again the board with the arduino and this time all the procedure of make fuse ---> make flash went fine.