She really likes walking during rainy ugly days...
But she does not like to walk on dirty and dry grounds...
To be honest, Fab Snail does not like many things...like polluted air or muggy days...
She is not the only one who doesn't like all that, just like all the other snails...
The difference is that if Fab Snails is not happy, she can turns into a real stalker!
(Also on your mobile -.-)
So take care of Fab Snail, she is a good snail...
She is just different from the other snails!"
Weekly Assignment
The weekly assignment was:
- Design a 3D mould, machine it, and cast parts from it
Software and Hardware
The software that i've used this week are:
- Rhinoceros: used for designing the 3D mould
- Blender: used for designing the 3D mould
- Vectric Cut3D: used for milling the mould
- Modela player 4: used for milling the mould
http://fabacademy.org/archives/content/tutorials/General_Machine_Tutorials/Milling/ModelaPlayer4_tutorial_v2.html Concerning the hardware:
- Roland SRM20: CNC mill
- Shopbot: CNC mill
Design 3D mould
For this week, i've used two different machines, the Roland SRM20 and the Shopbot.
My purpose was to test and to explore the possibilities of the two machines (in terms of speed and resolution).
For this reason, i've used 4 different models:
- Hulk Bust - (Downloaded from thingiverse)
- Batarang - (Downloaded from thingiverse)
- Track - (I've designed it in solidworks and it is part of my final project)
- Big track - (I've designed it in solidworks and it should be part of my final project)
I've milled the first two models with the shopbot and the other two with the SRM20.
The workflow was basically the same for all the models:
- Design/Download the 3D (positive) model for the milling
- Use Cut3D or Modela Player to realize the toolpath for the machines
- Mill the (positive) shape in the machinable wax blocks
- Make the mould by using rubber material (we had Sorta Clear 37 and the OOMOO 25)
- Wait the cure time (different for each material)
- Use the rubber/silicon mould to create a resin piece
For the models milled with the Shopbot, i've used Cut3D with the following settings for the toolpaths:
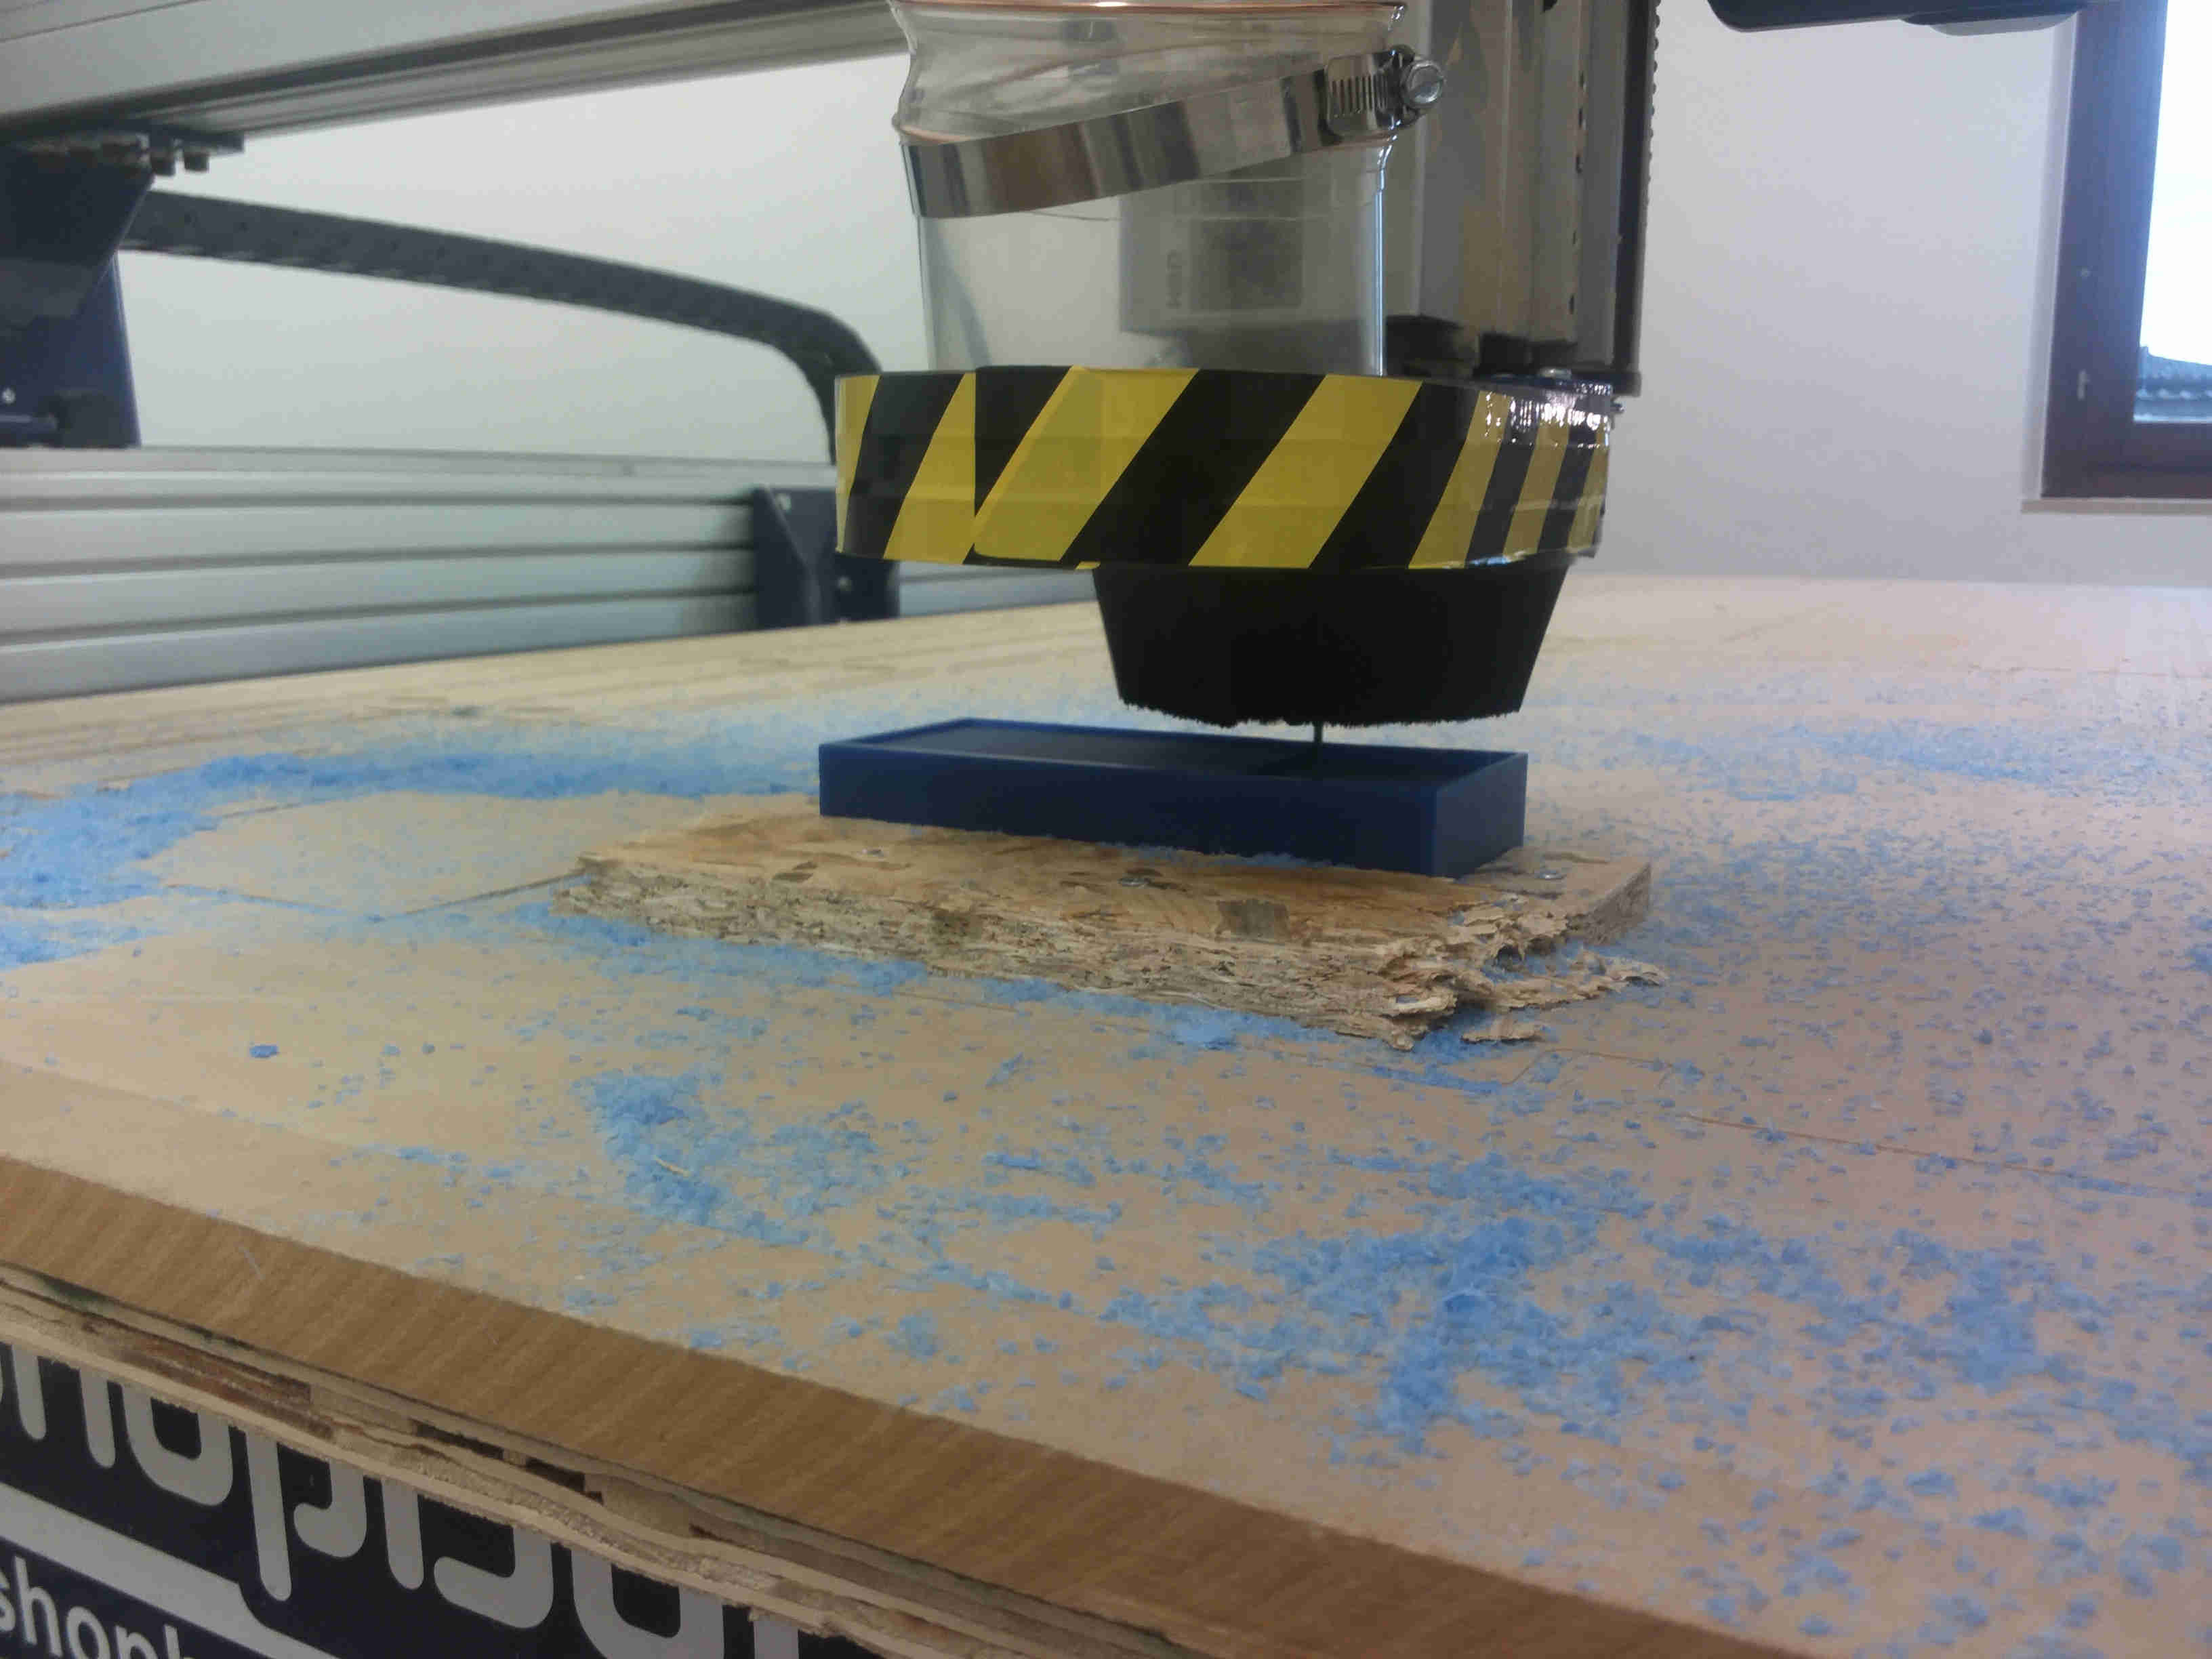
Then i've milled the models (i've fixed the wax block inbetween 4 pieces of wood fixed with screws on the shopbot plane) and used the OOMOO and/or the silicon to make the moulds
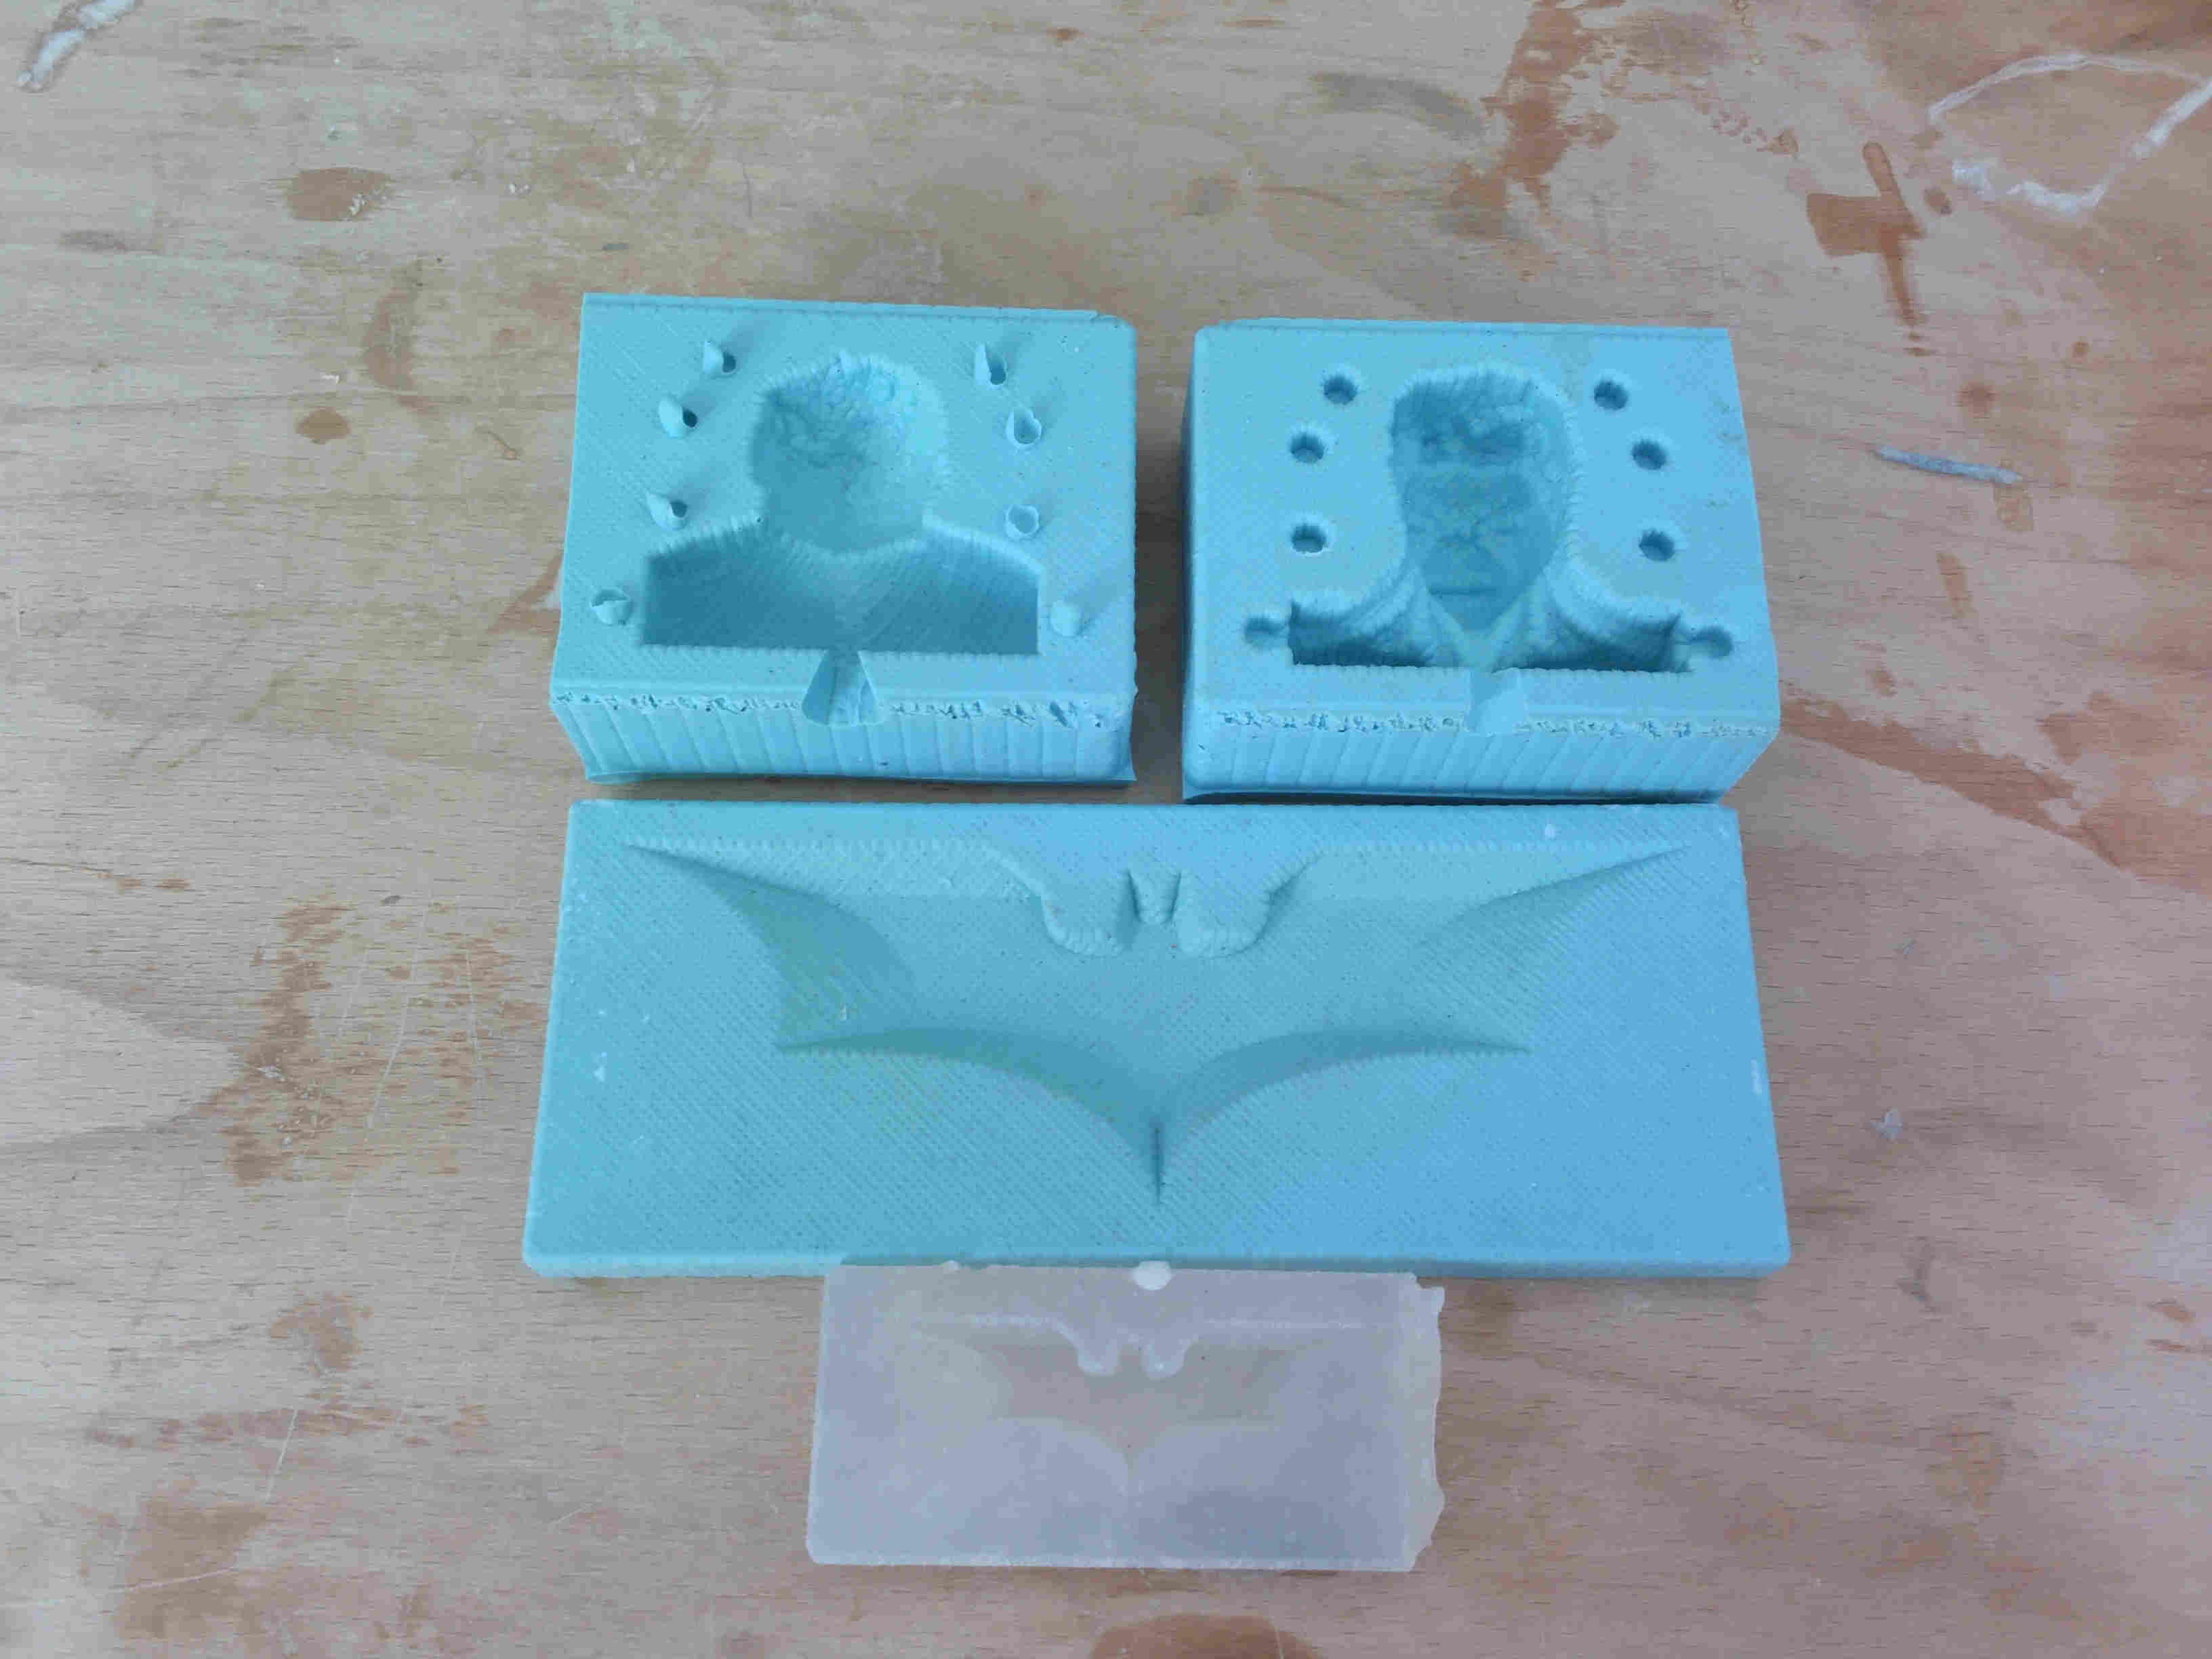

And theese are the results:
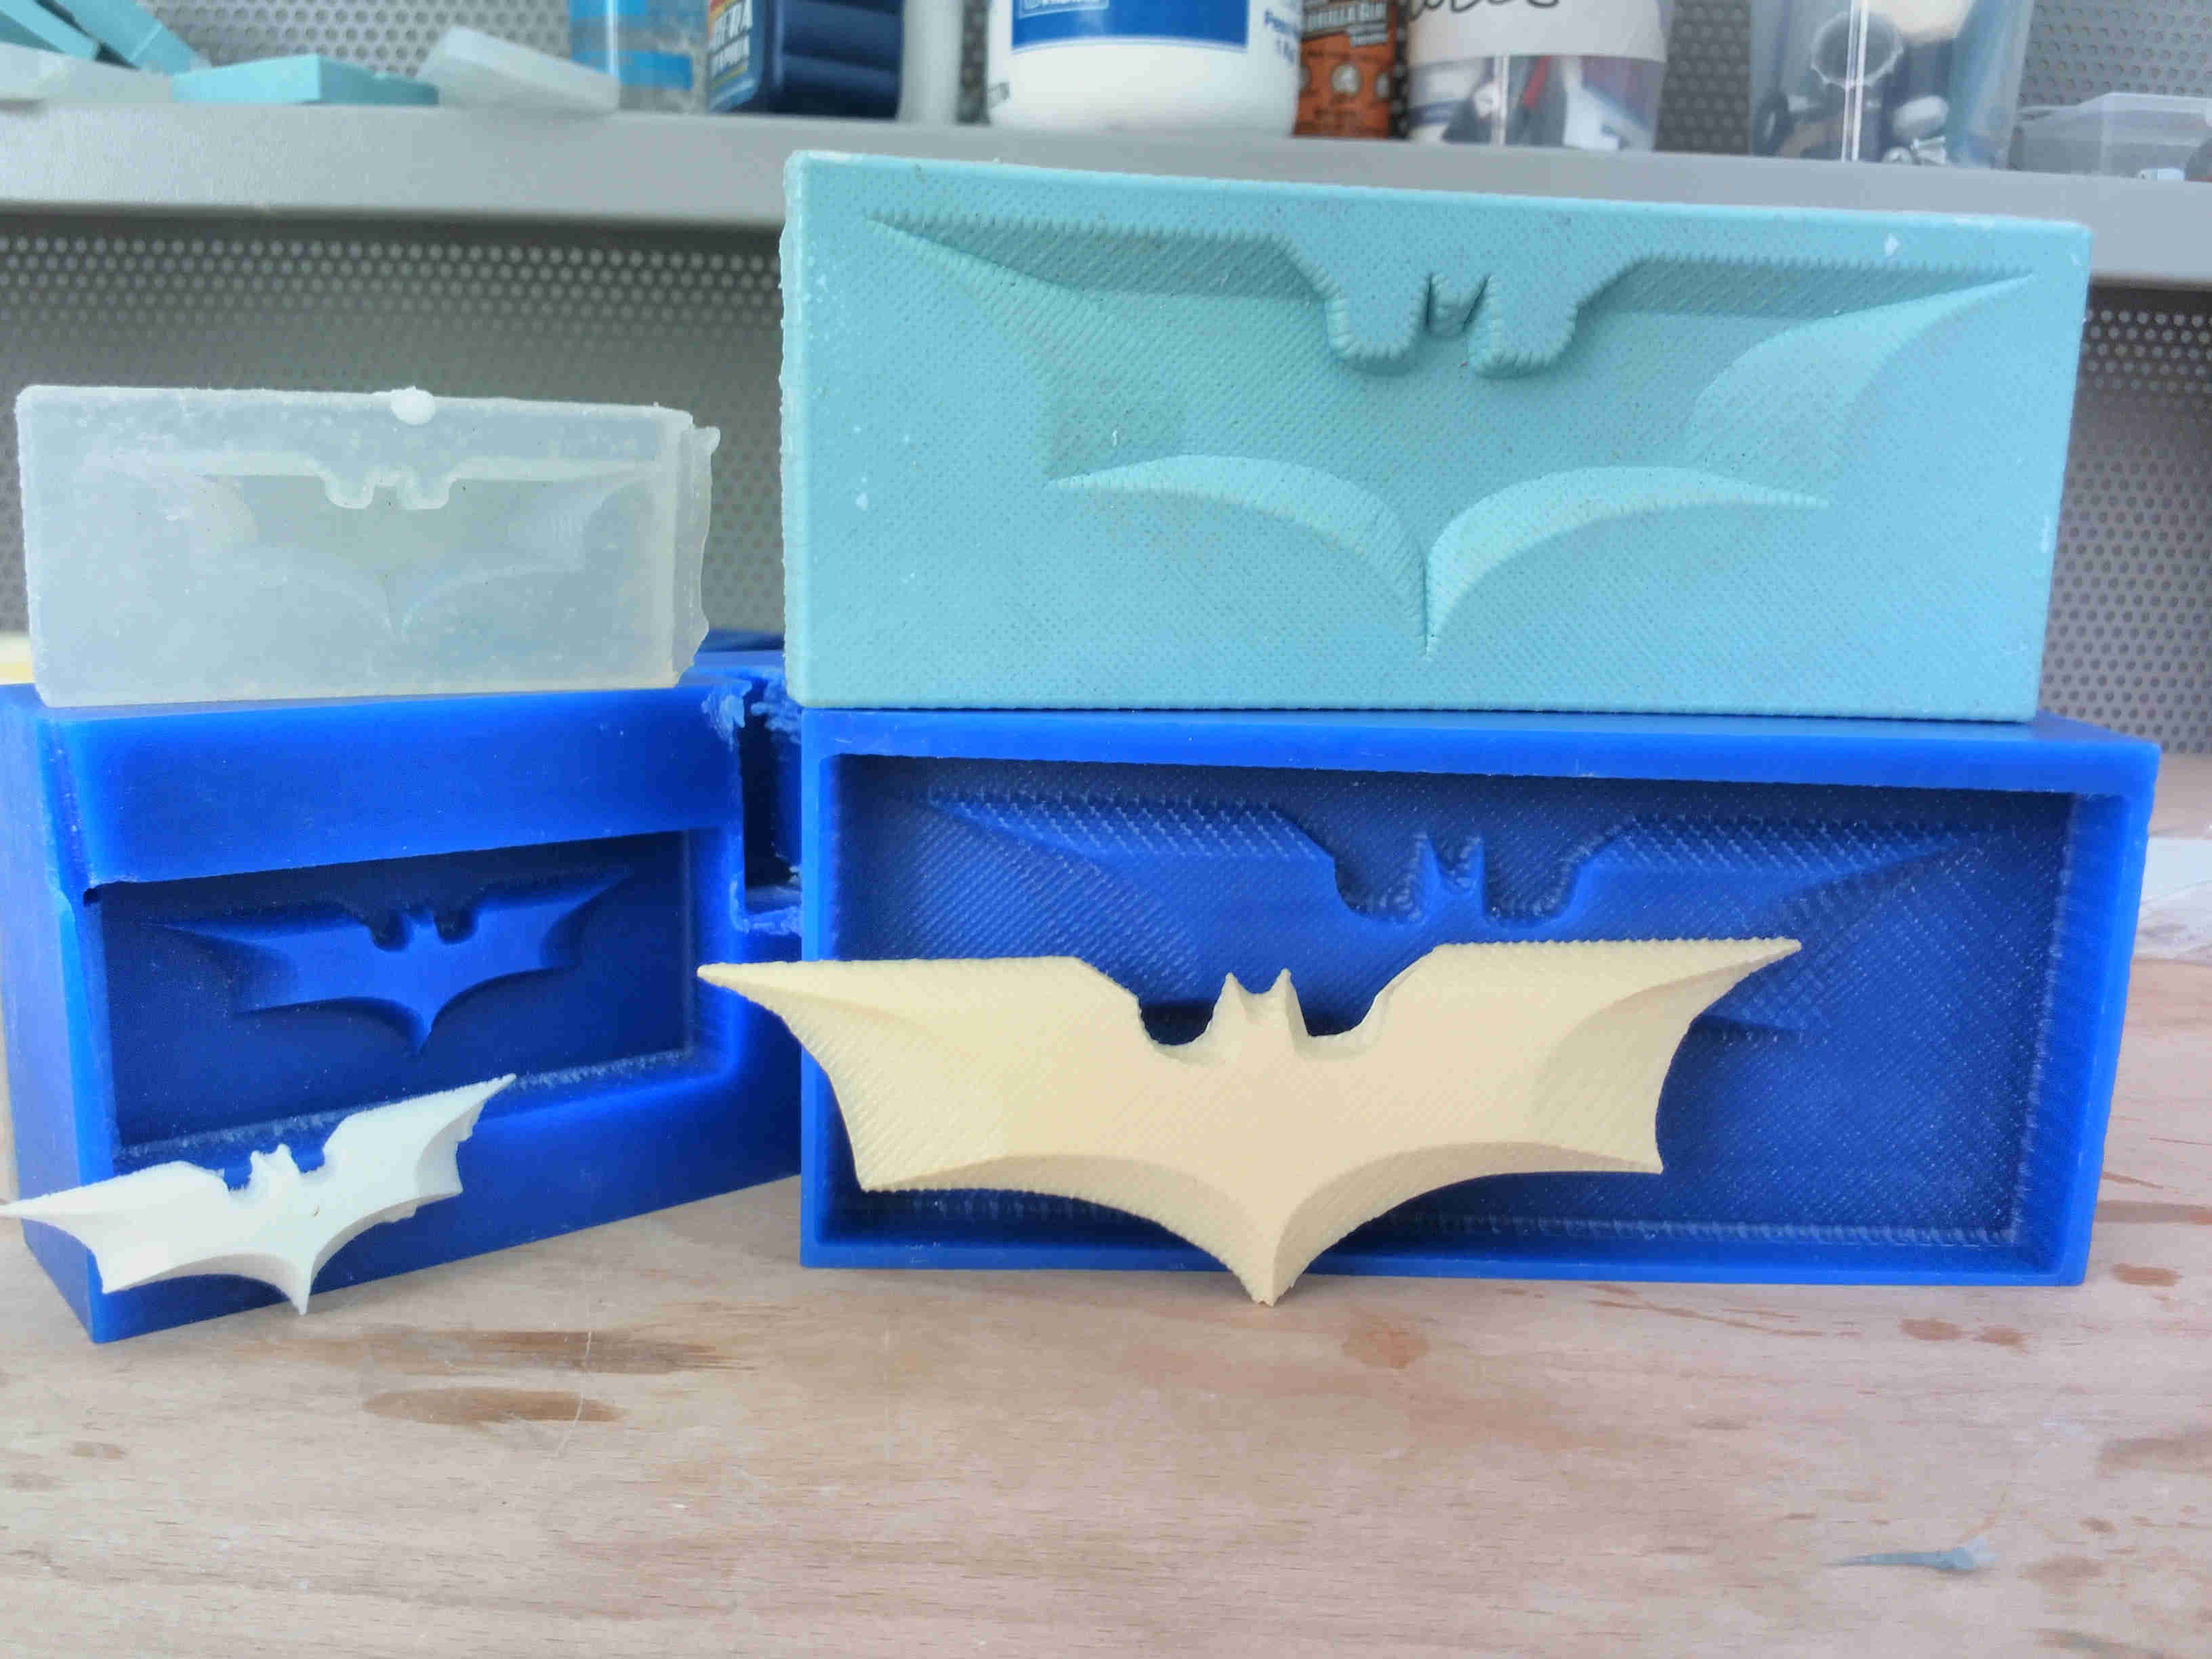
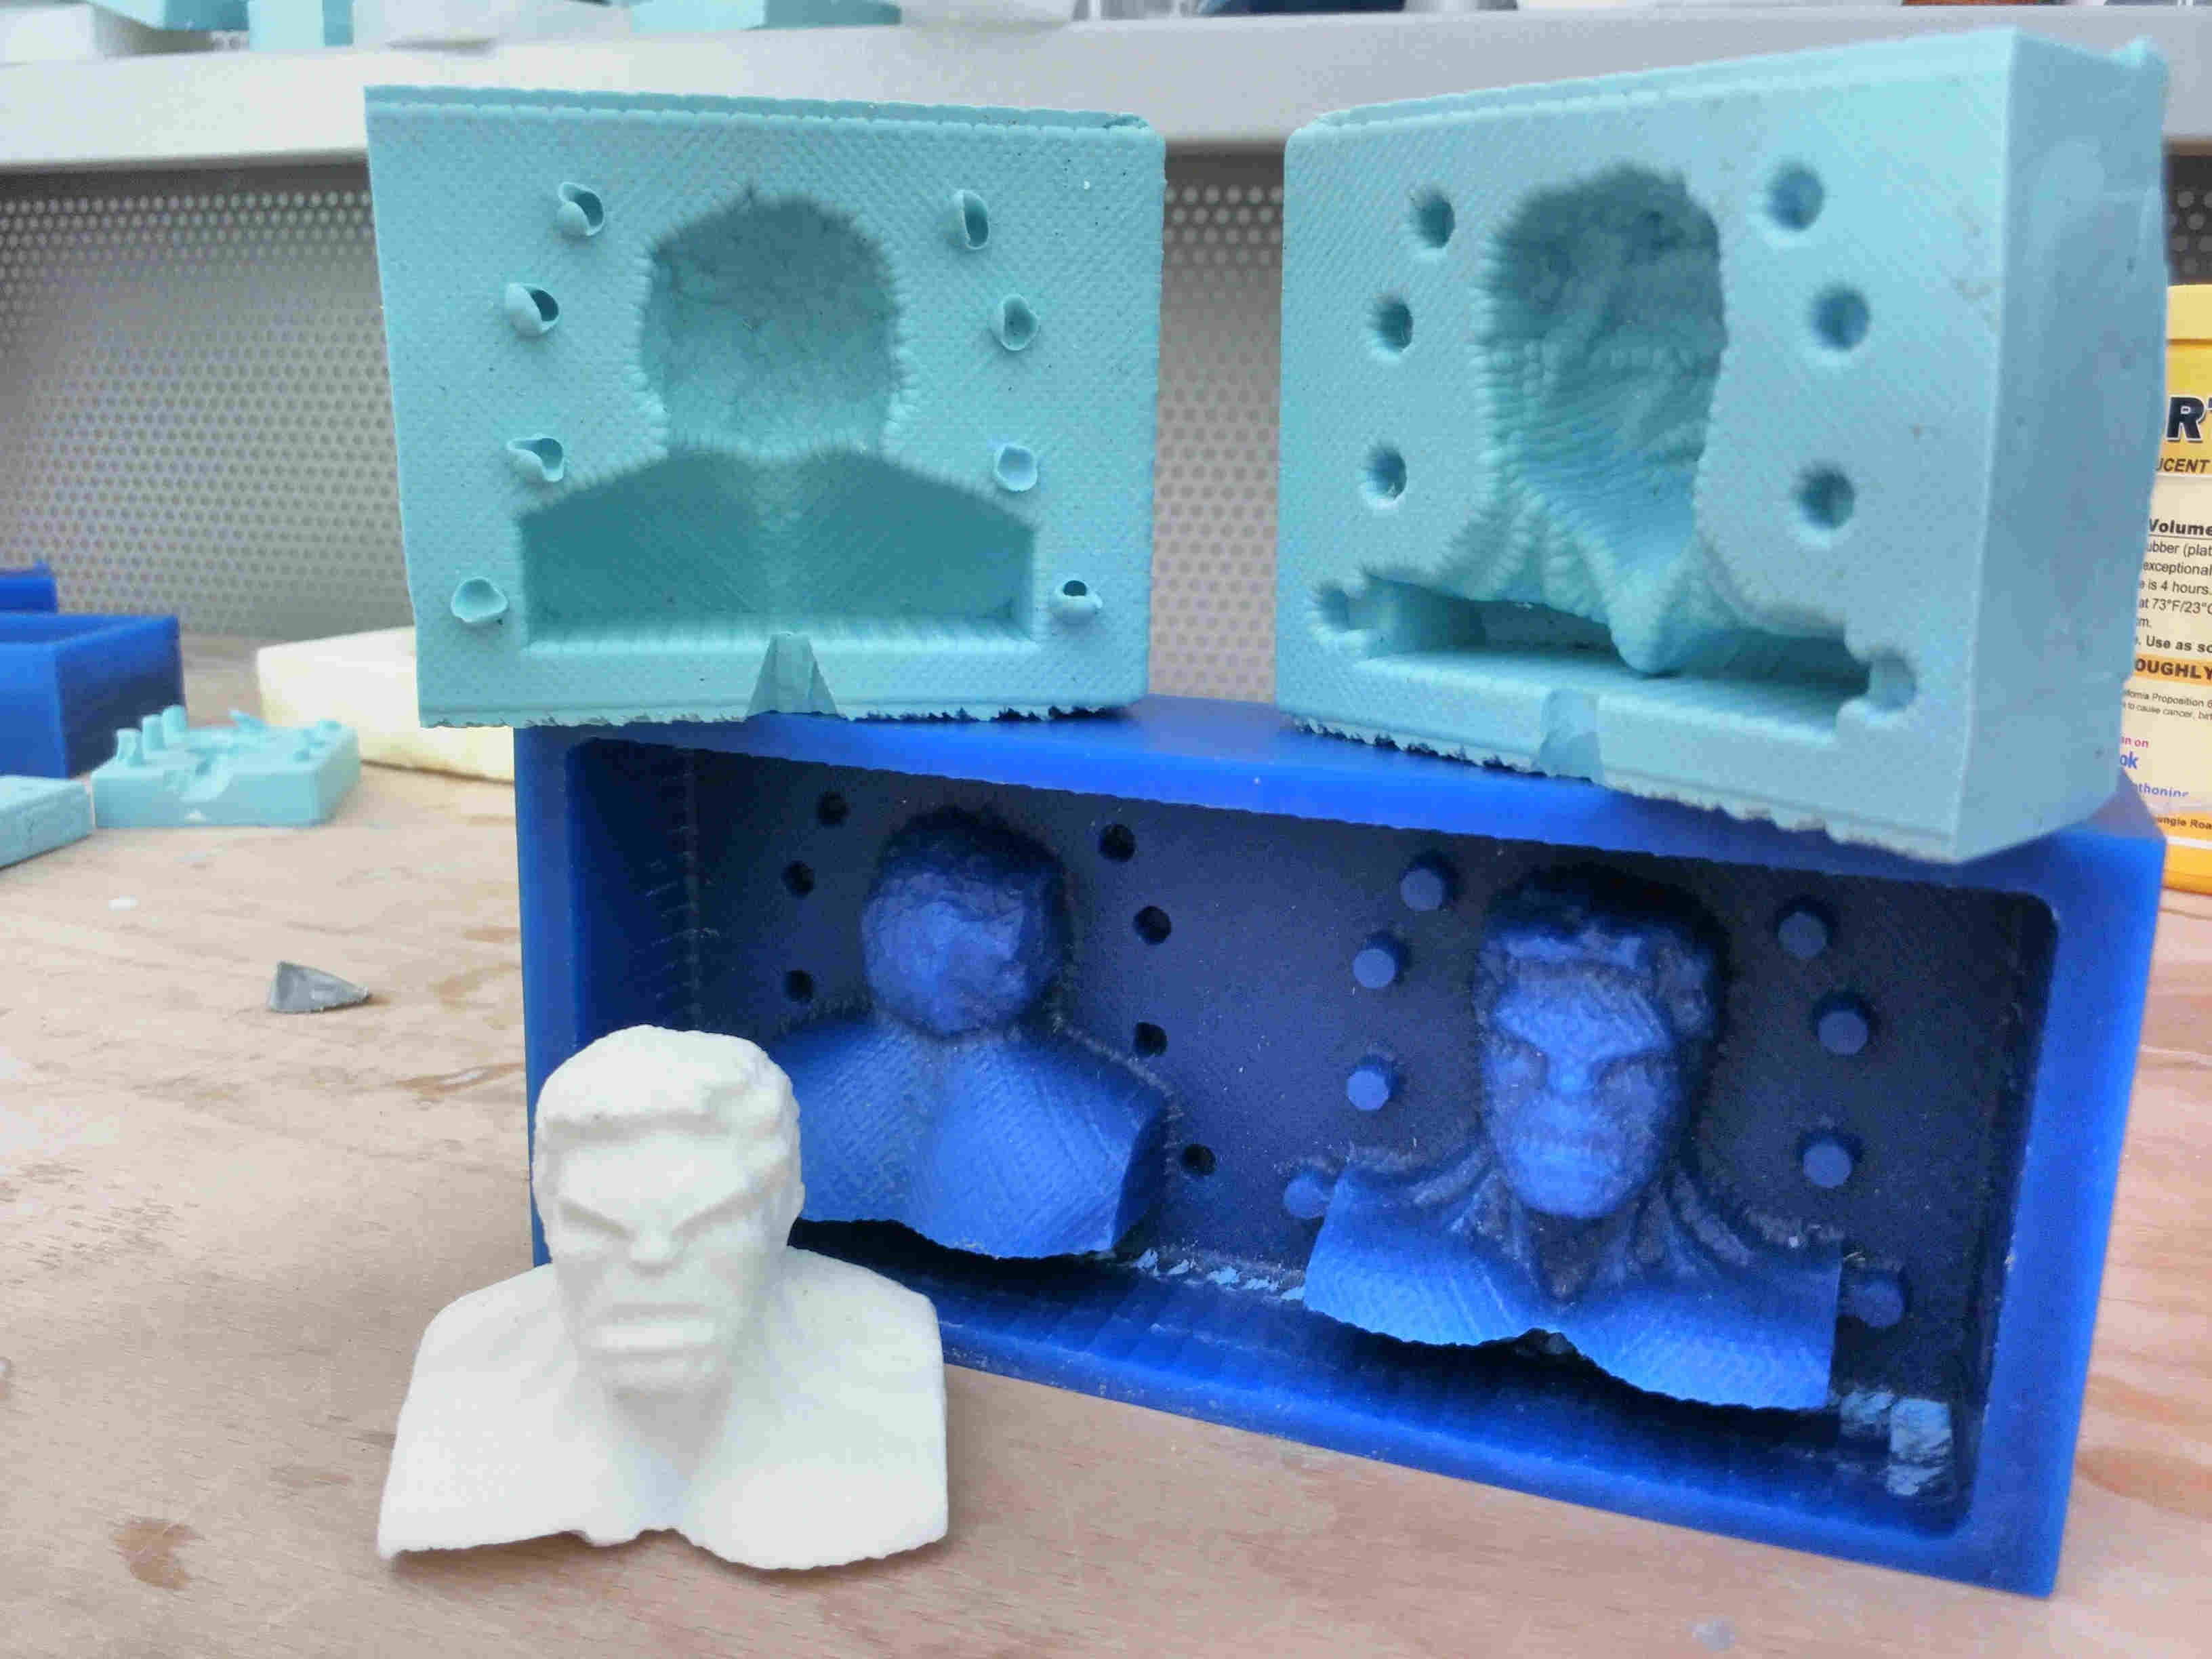
While the batarangs are good, the hulk is not really refined. As you can see, the surface is not really smooth because i've used mills that are too big for the model. I think that for this kind of precision milling operations, is way better to use the SRM20 both because of the tool diameters (we have smaller and mills for the SRM20) and for the precision.
By the way, it was really interesting to mill the wax with the shopbot because i start to feel more confortable in using this machine and i'm learning about the right settings to use the shopbot properly with different materials.
After the shopbot, i've used the roland to build the tracks of the wheels of my final project
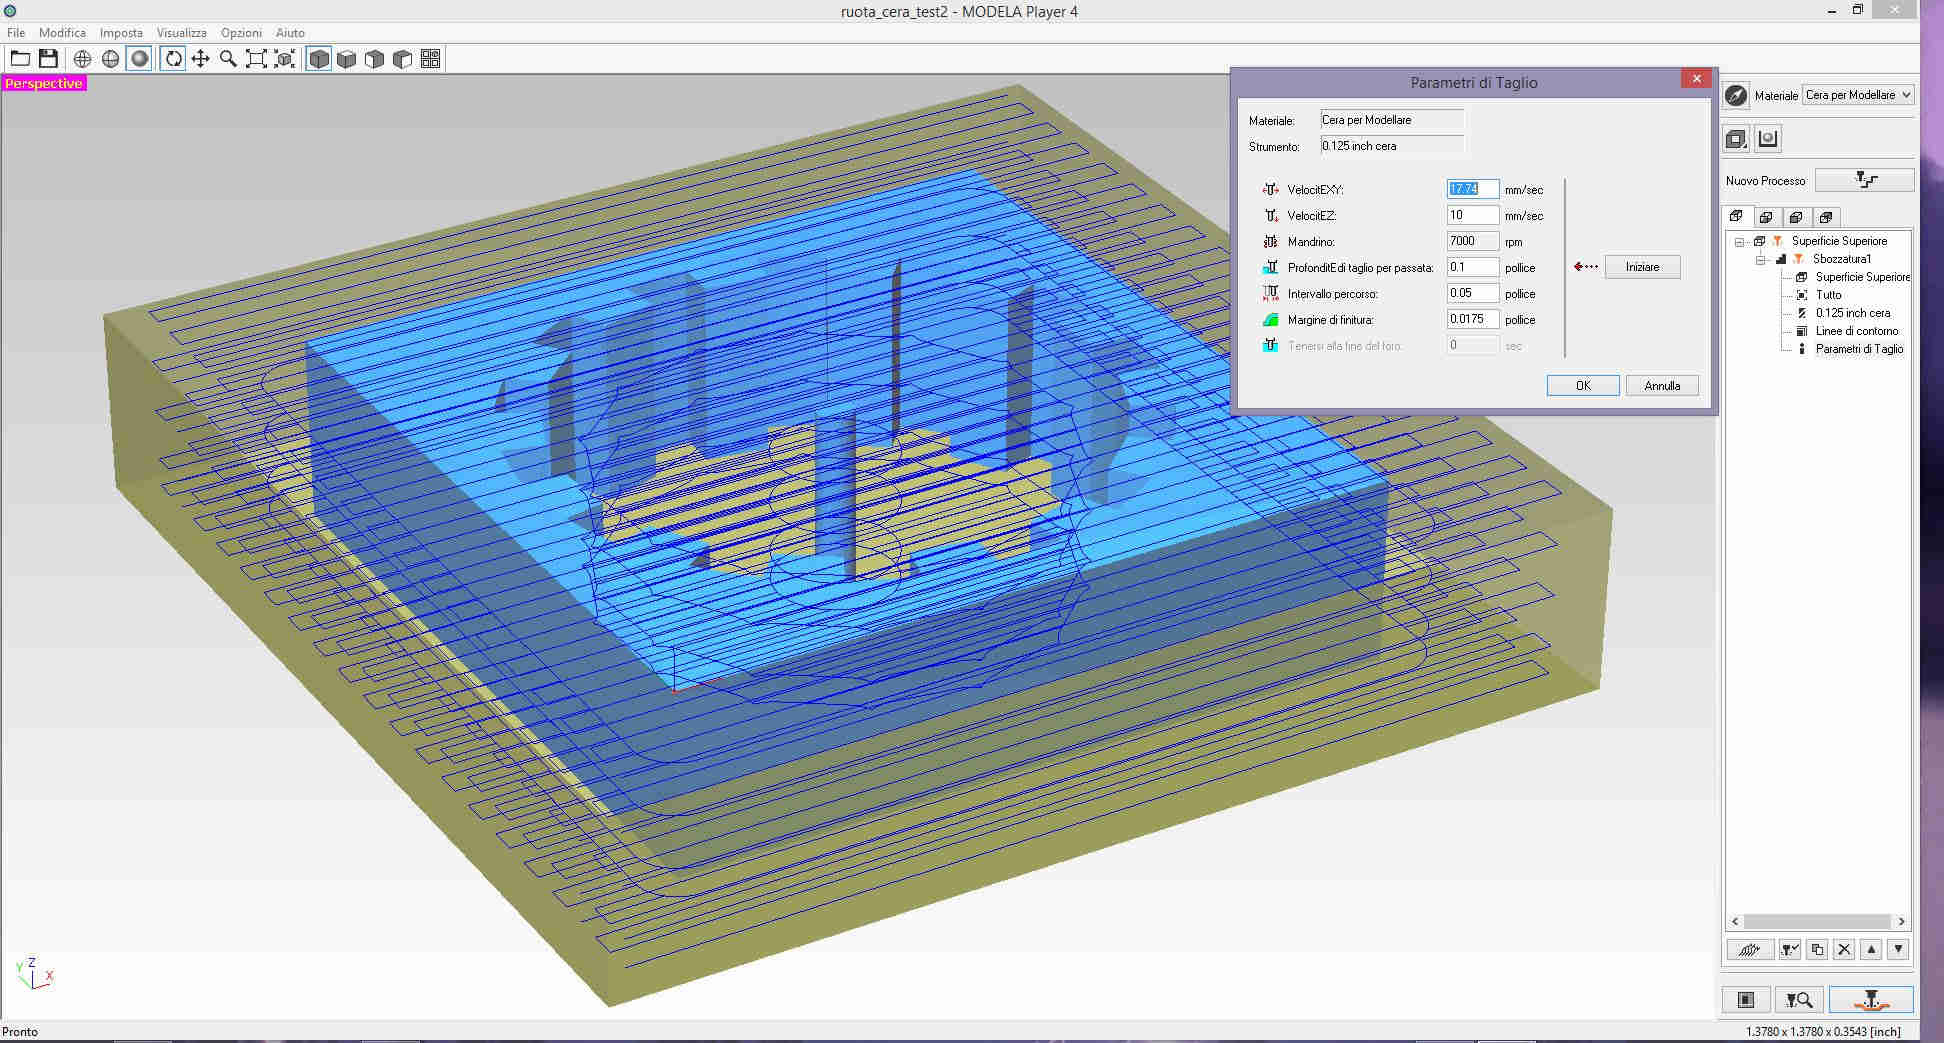
I've followed the same workflow used to mill with the shopbot but this time i've tried also the MODELA player 4 software for the SRM20.
I've found this nice tutorial in the FabAcademy archive which explain how to use the software.
By the way, these are the settings that i've used in the Modela for the rough toolpath:
and these for the finishing:
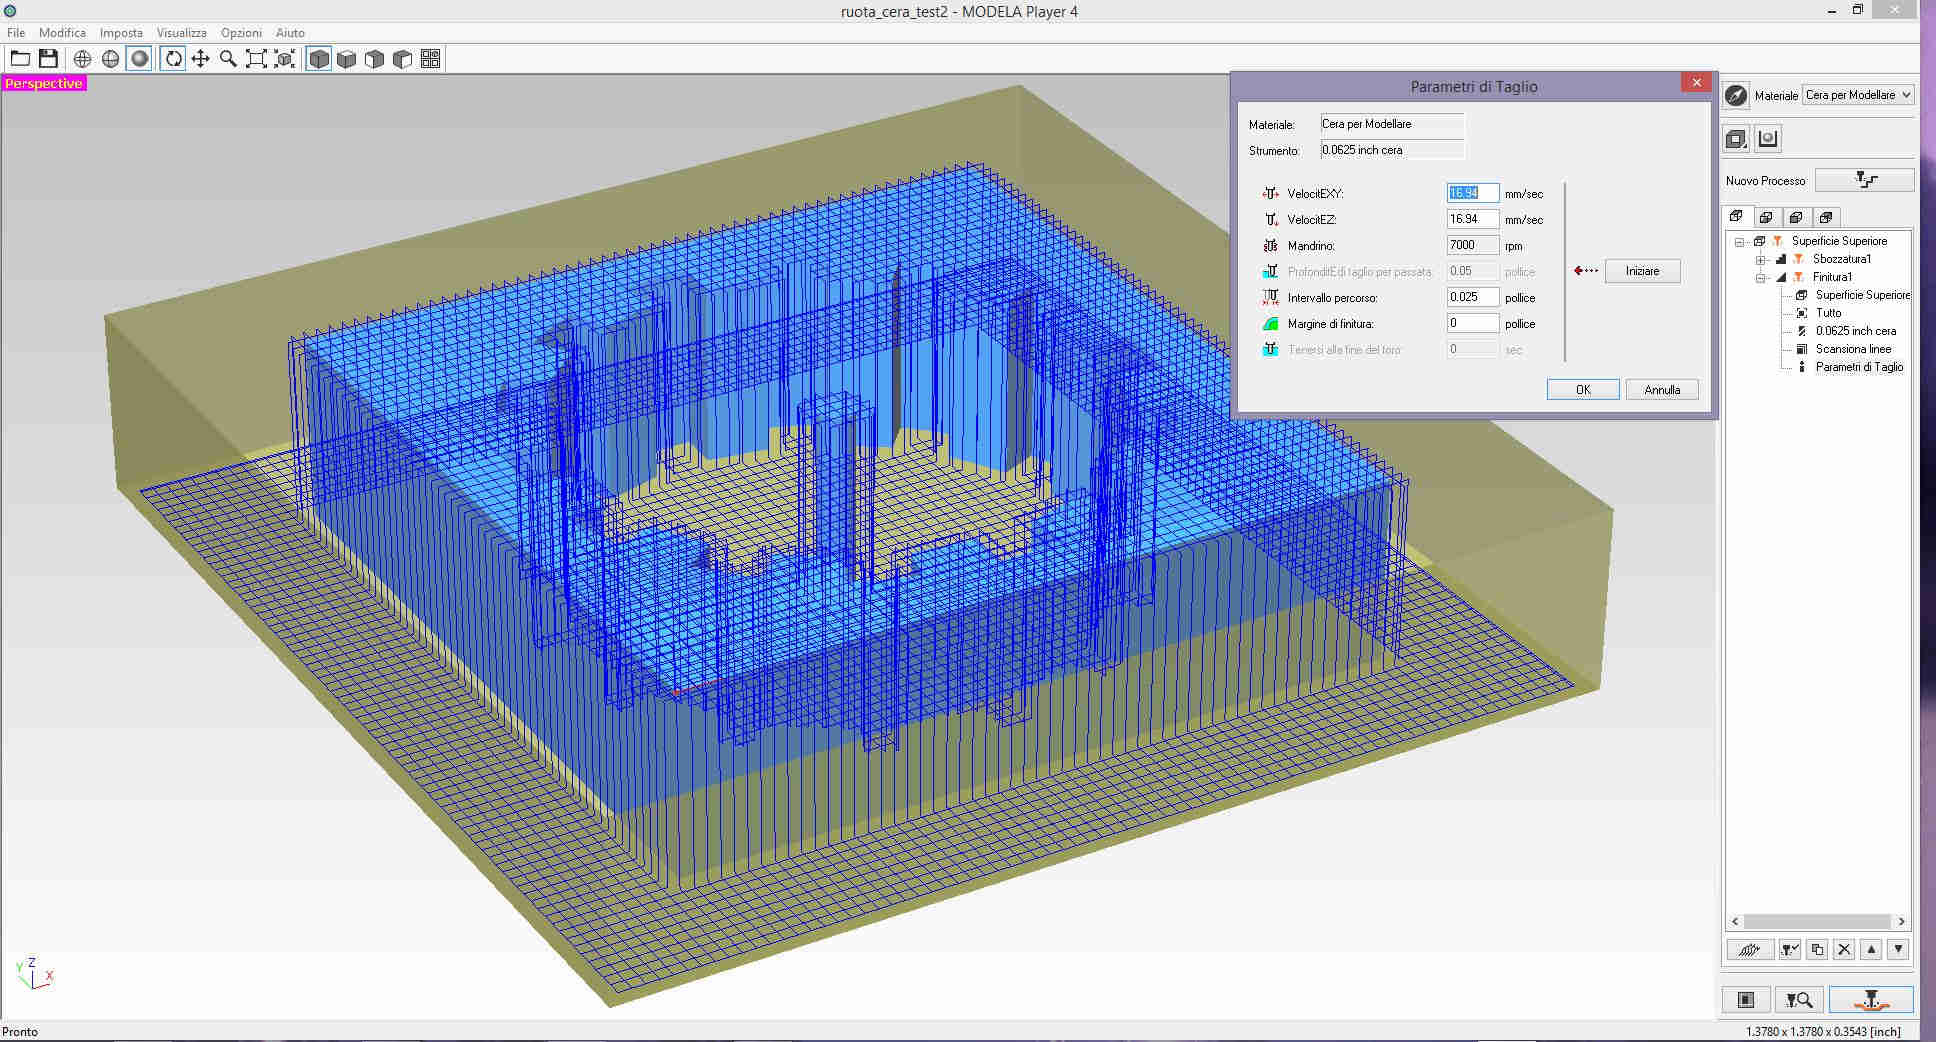
Then i've milled the model into the wax:
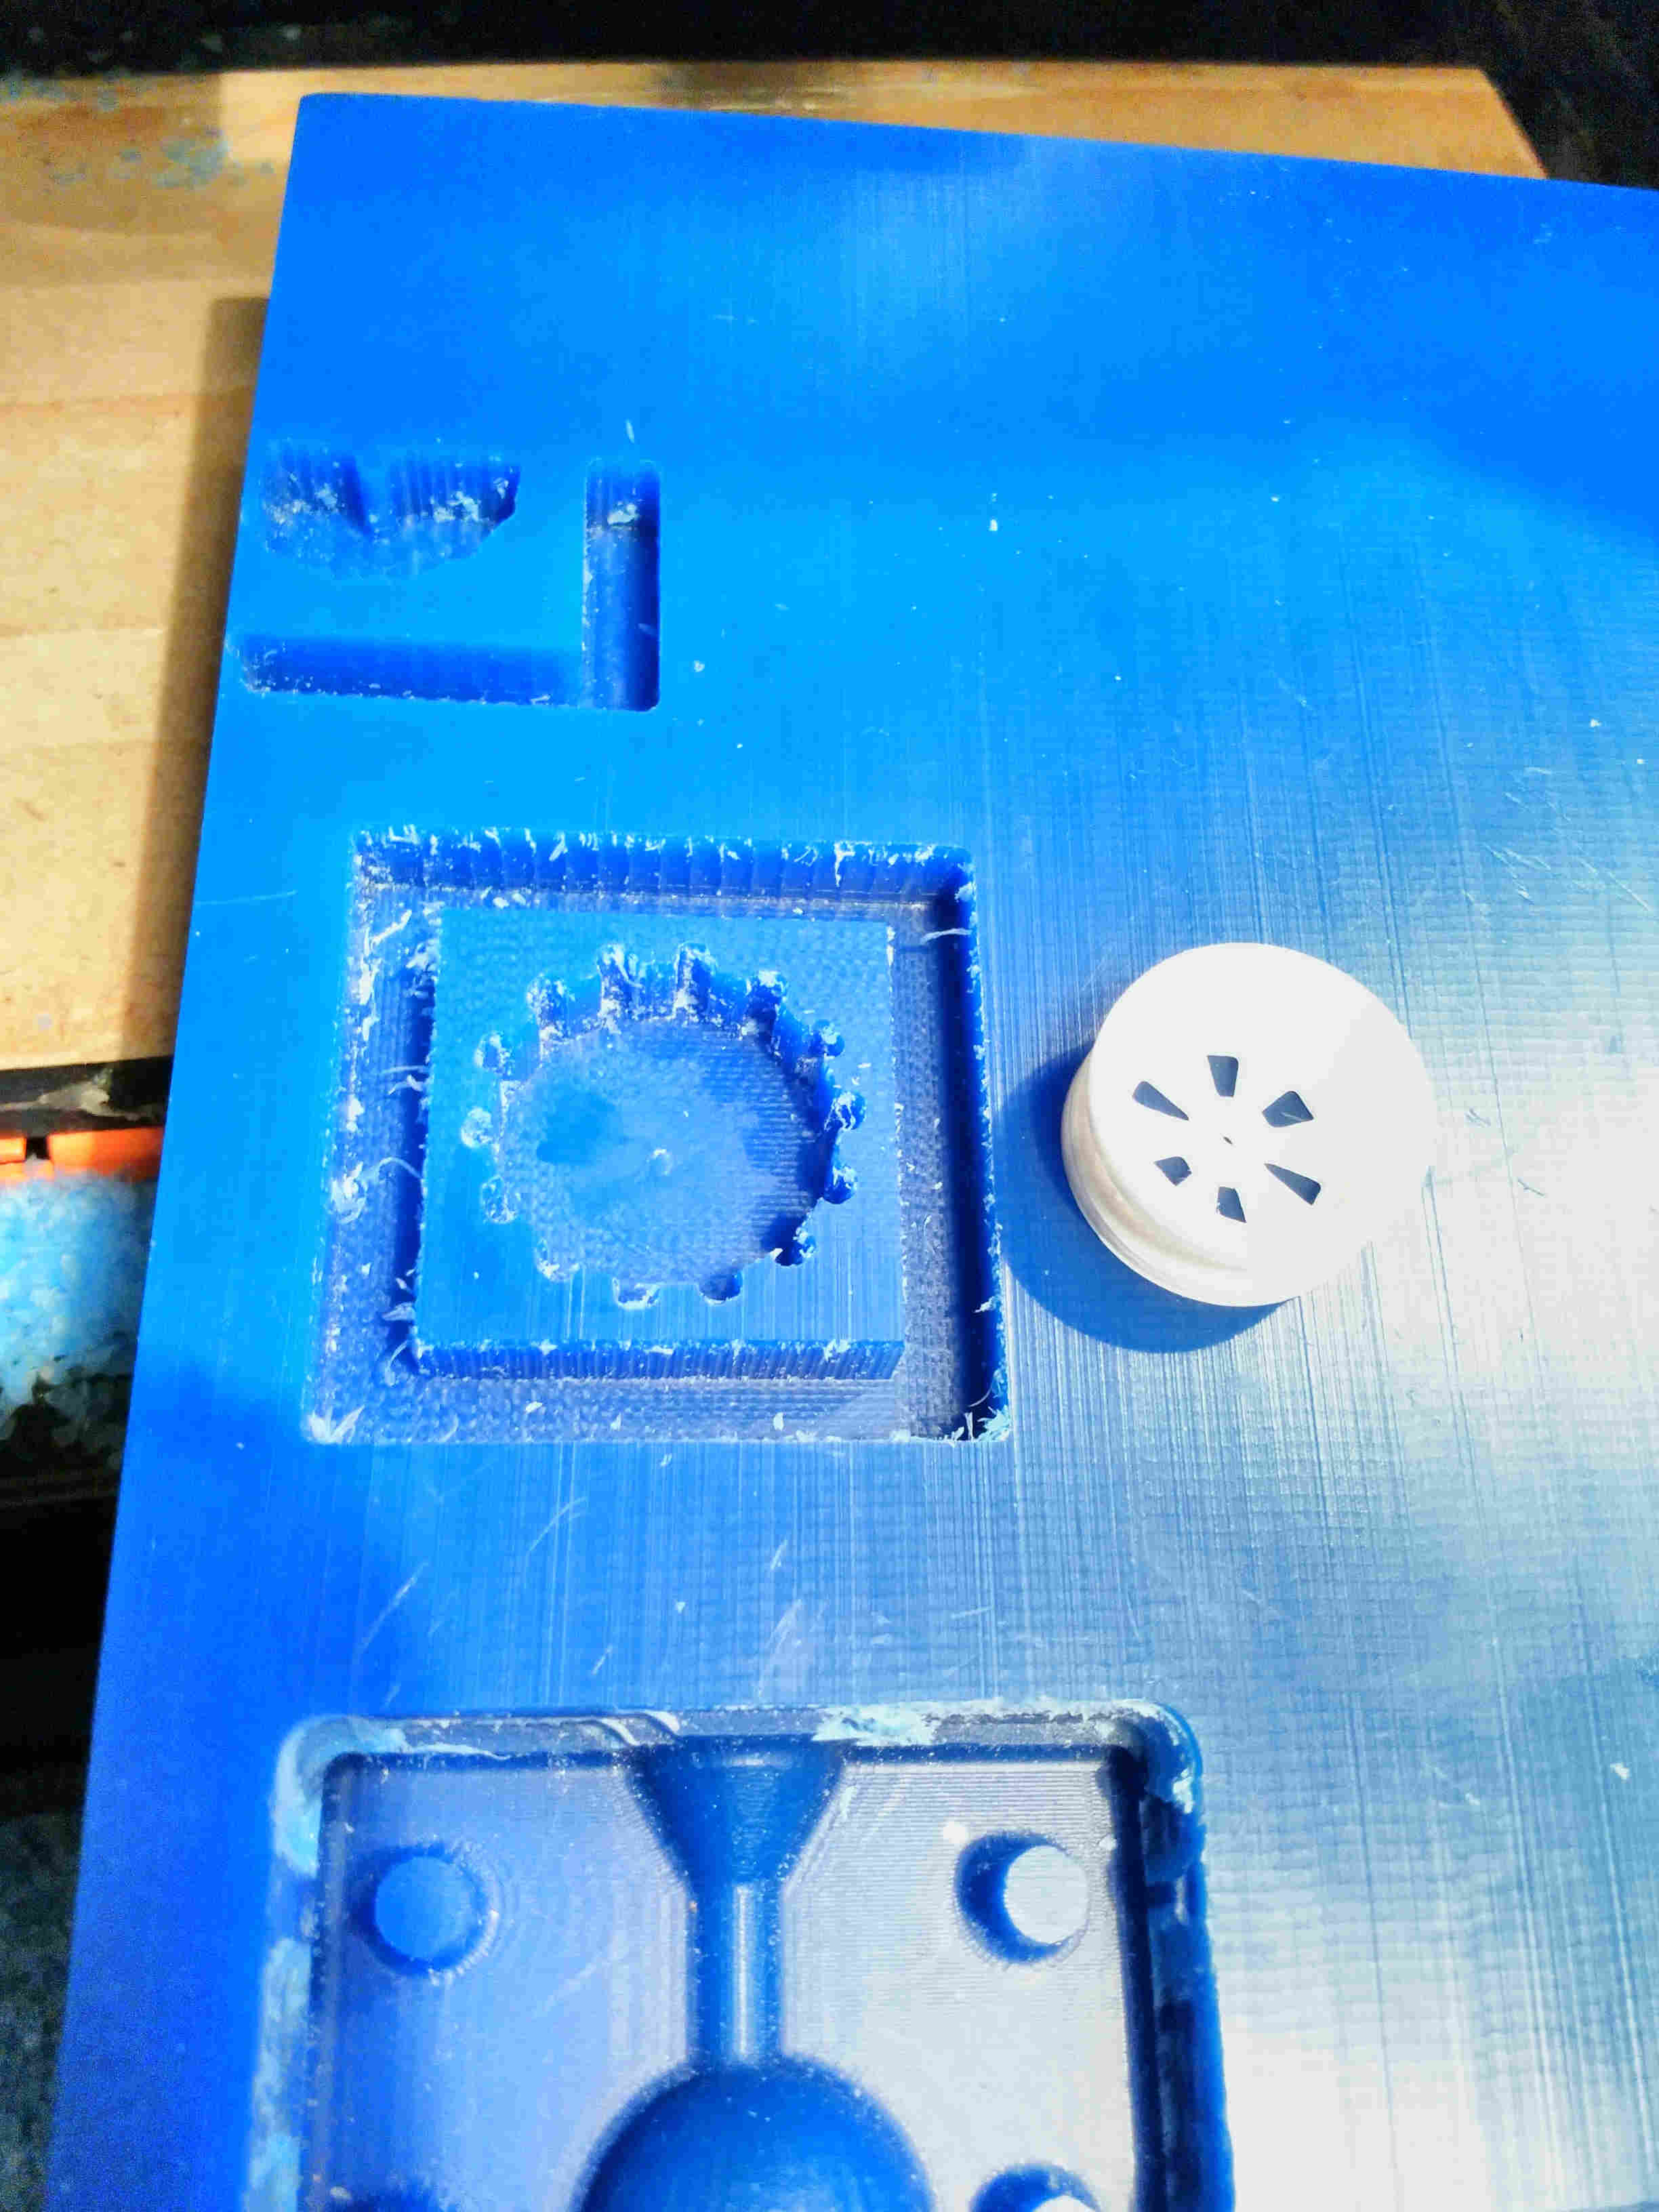
I've then designed and printed the wheel that i will use in my final project and putted that piece inside the wax mould. I've followed this procedure because, in the model of the wheel, i've an overhang in the middle to hold the track in place when it will be mounted on the wheel:
I've covered the holes in the wheel with tape and i've inserted the piece inside the block before putting the silicon inside.
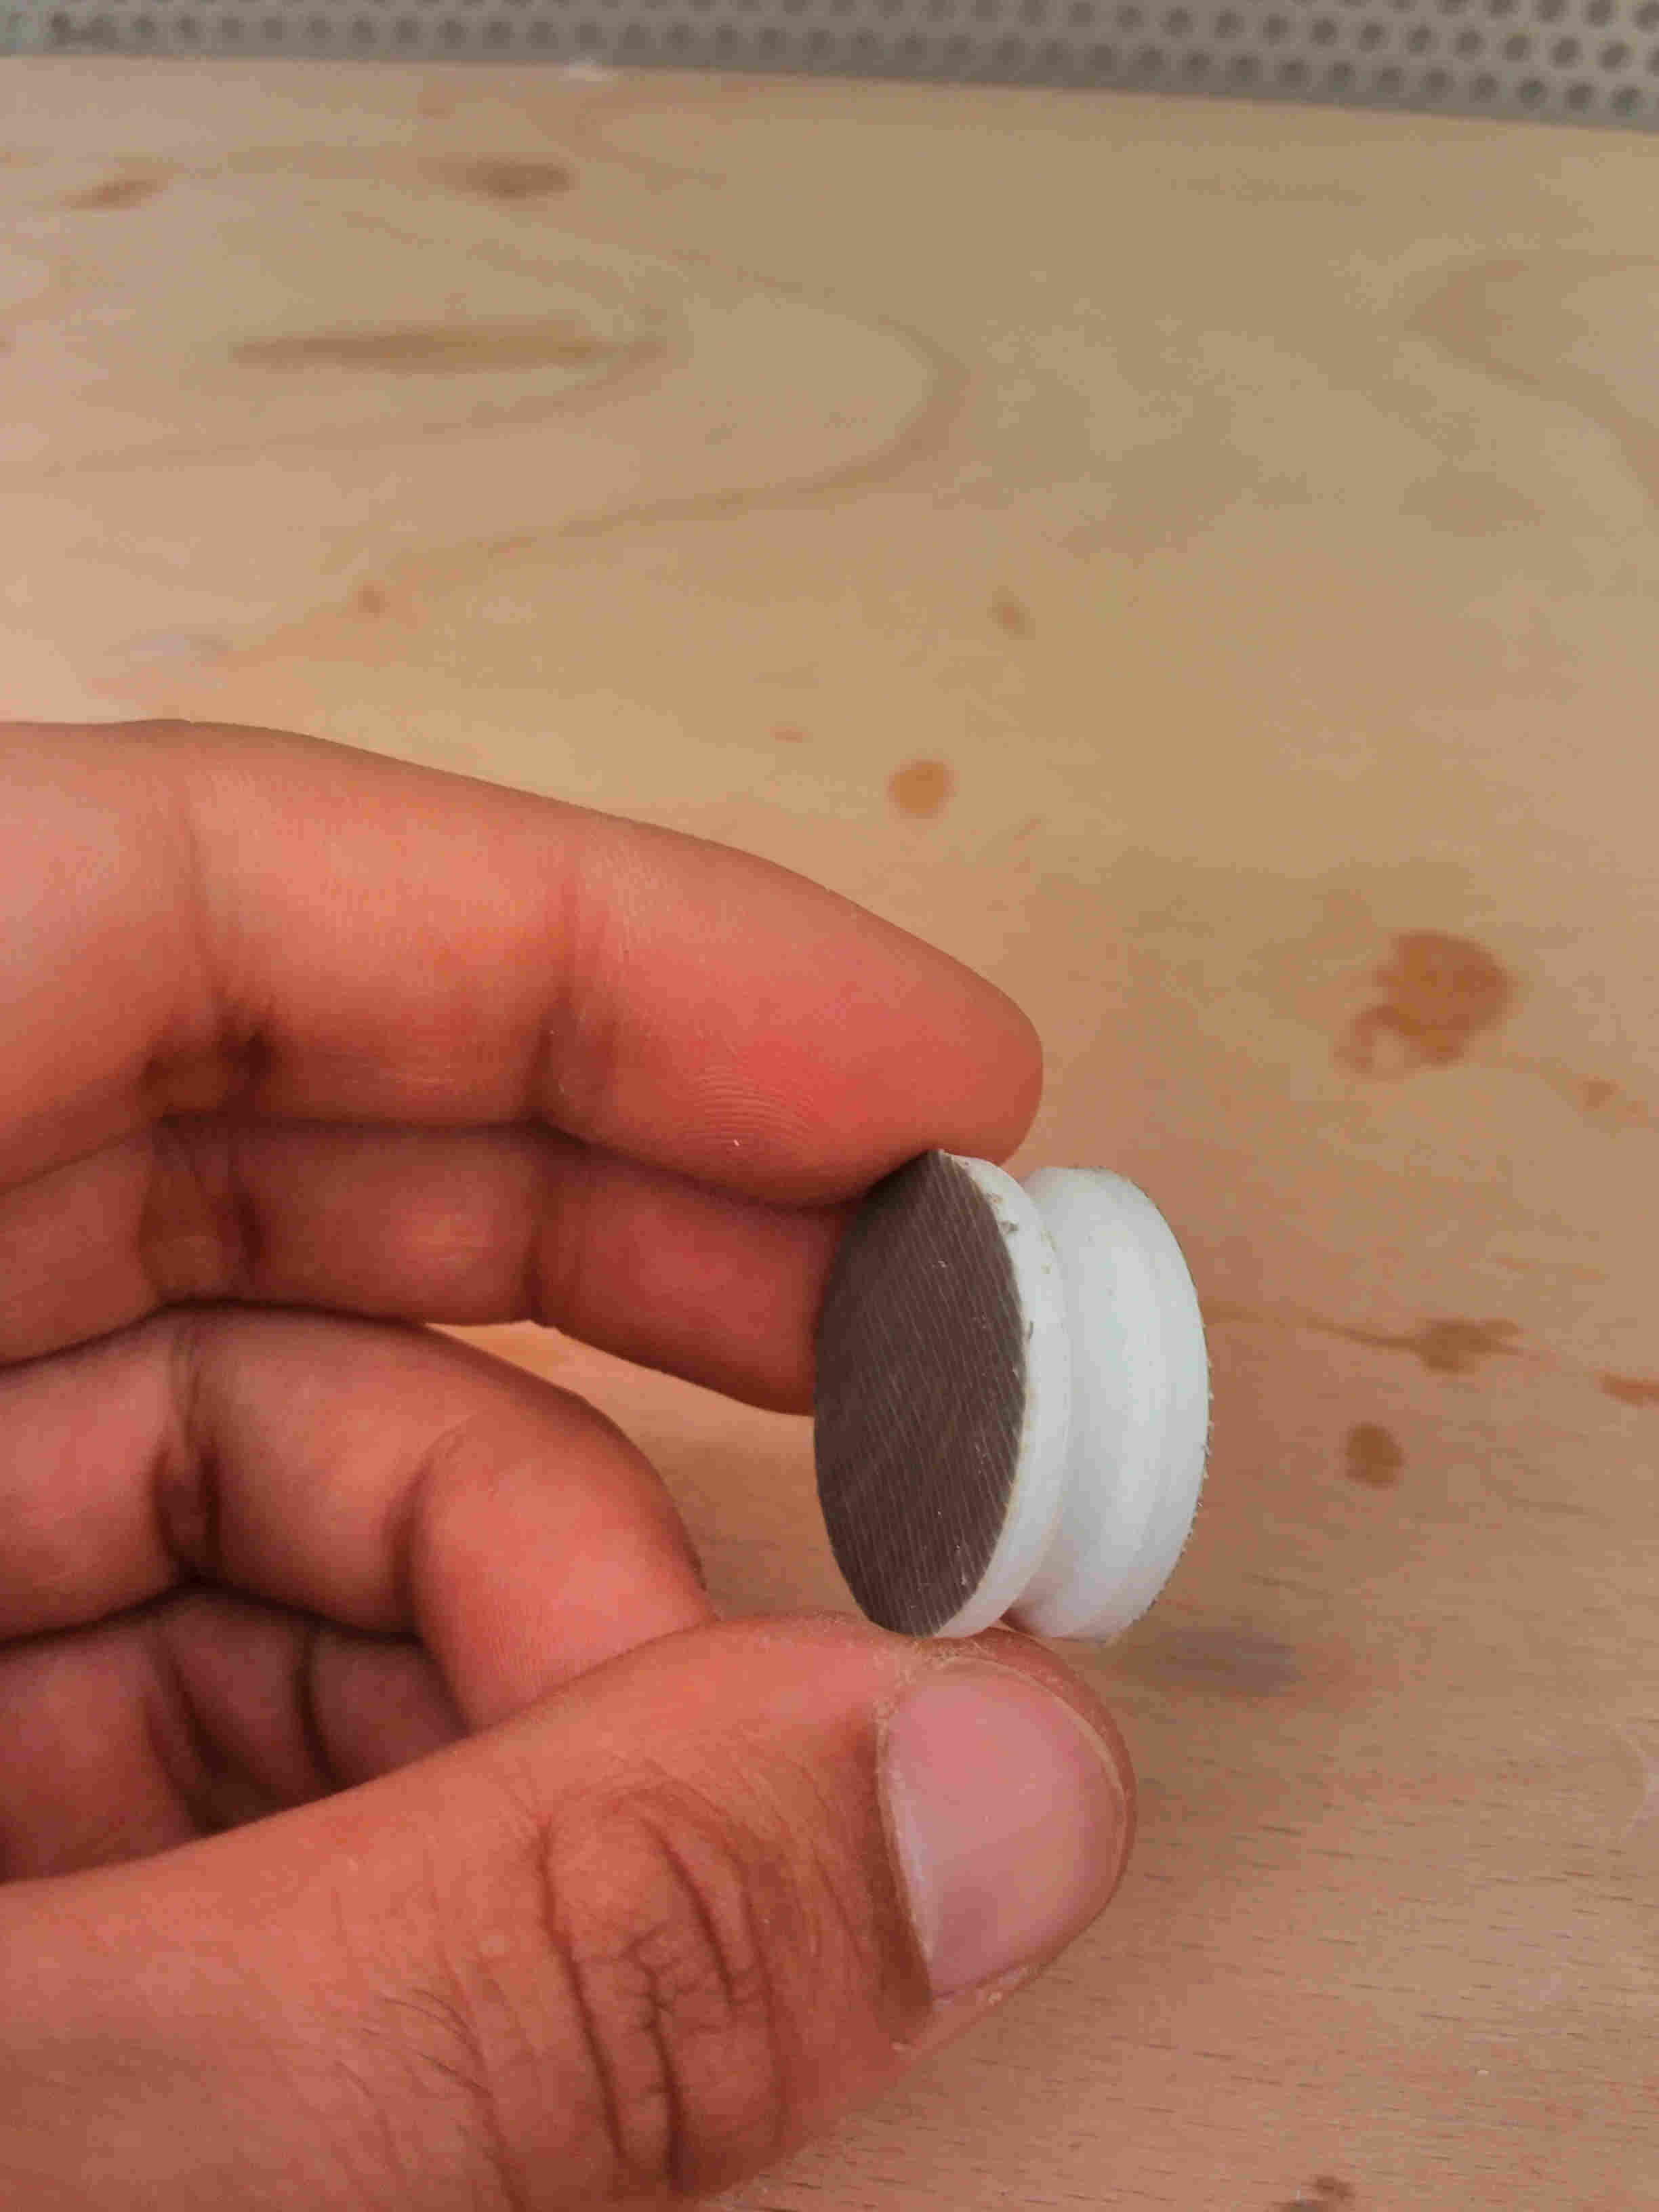
After 6 hour (the cure time for the material) i've removed the wheel from the wax, the tape from the wheel and i've cleaned with a cutter the model.
This is the final result:
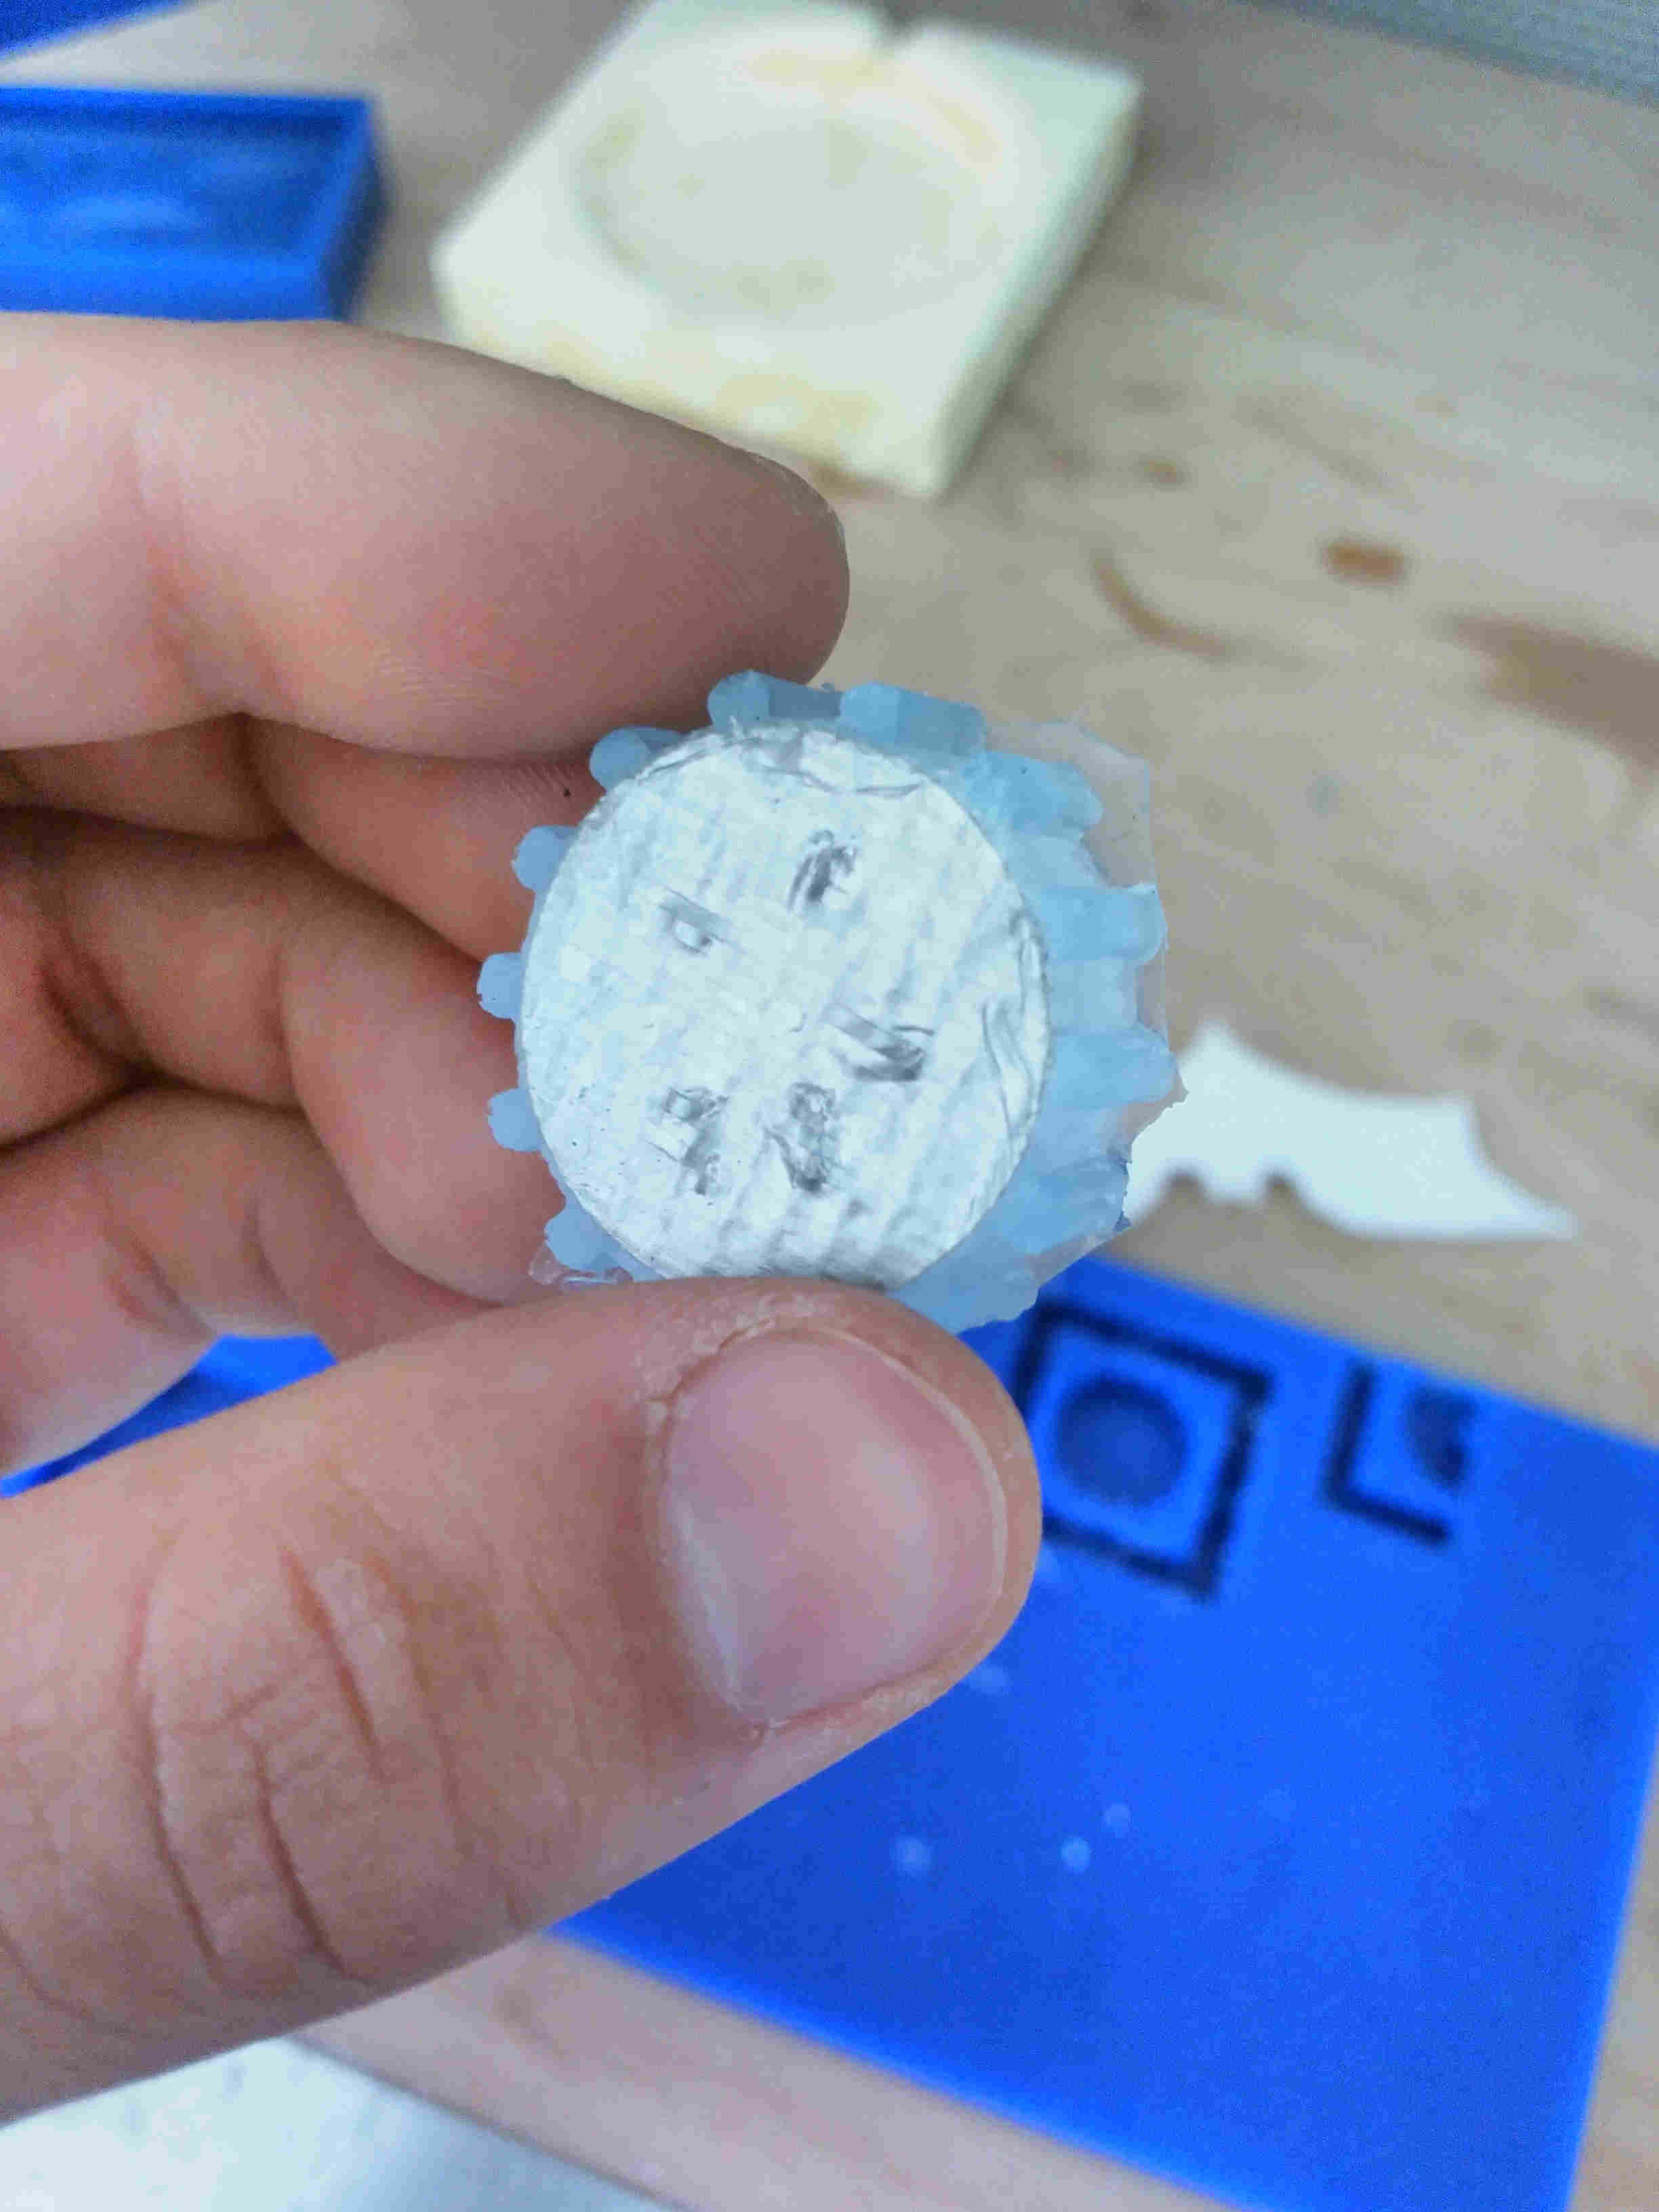
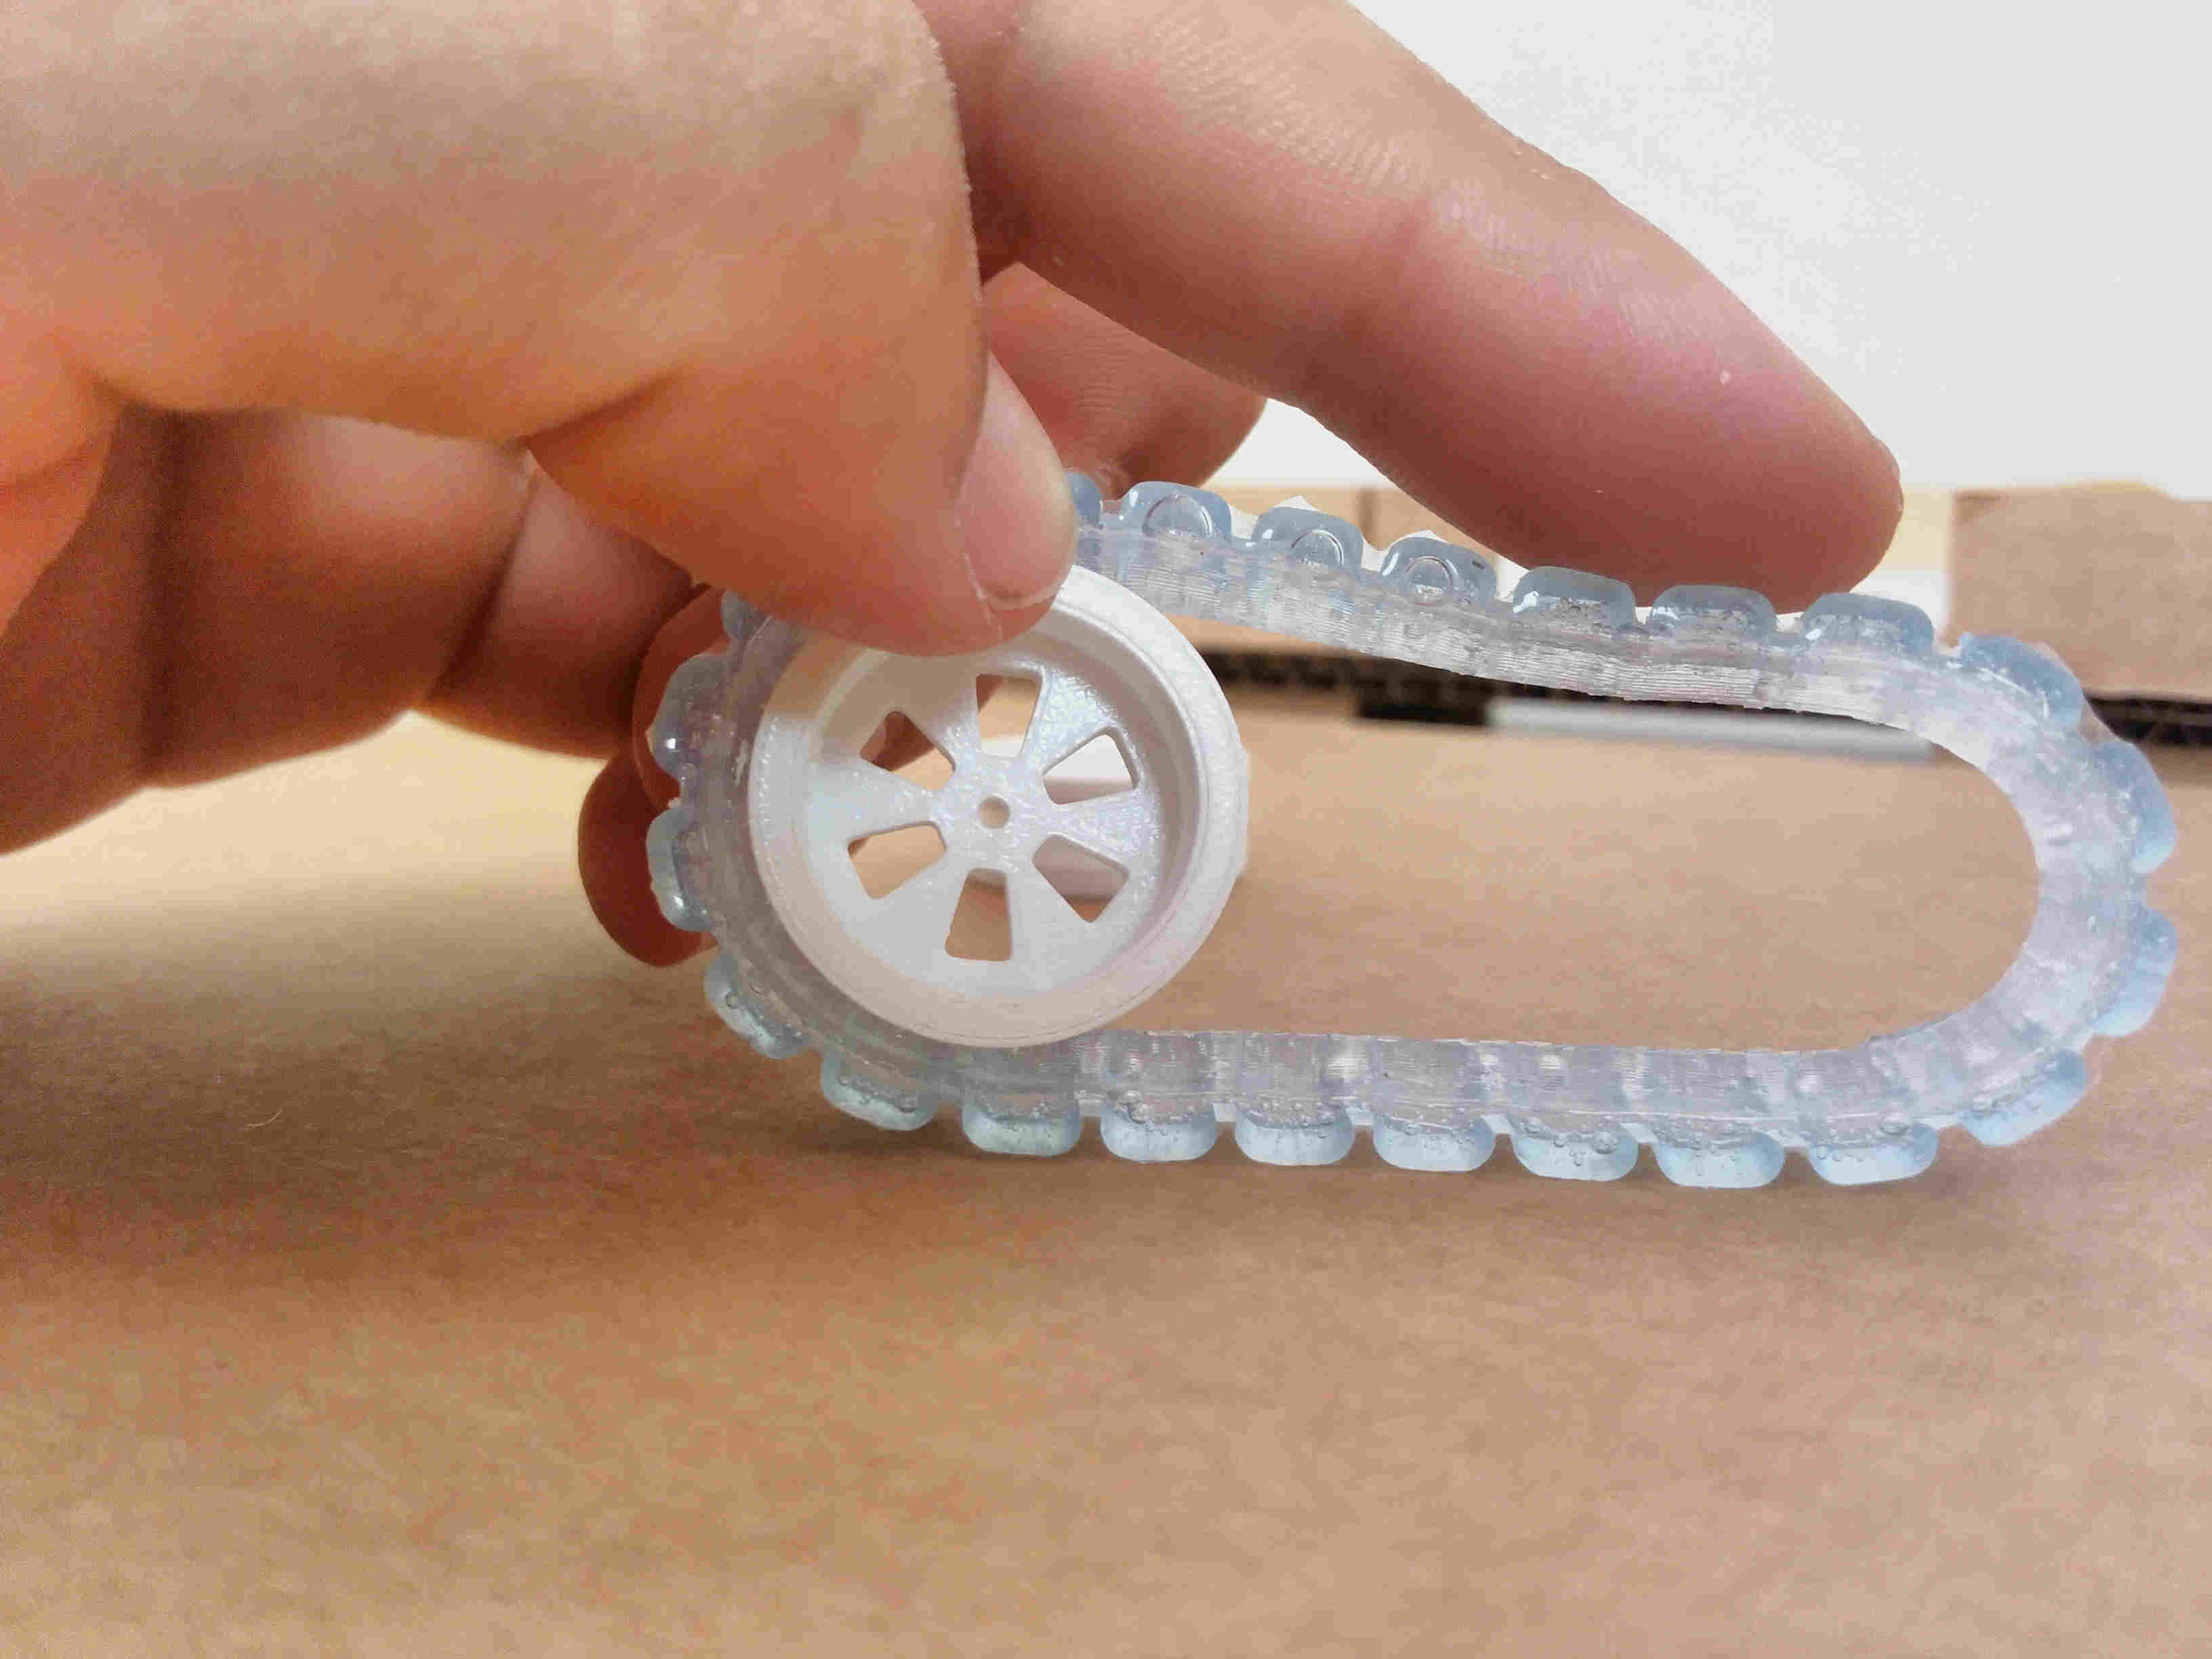
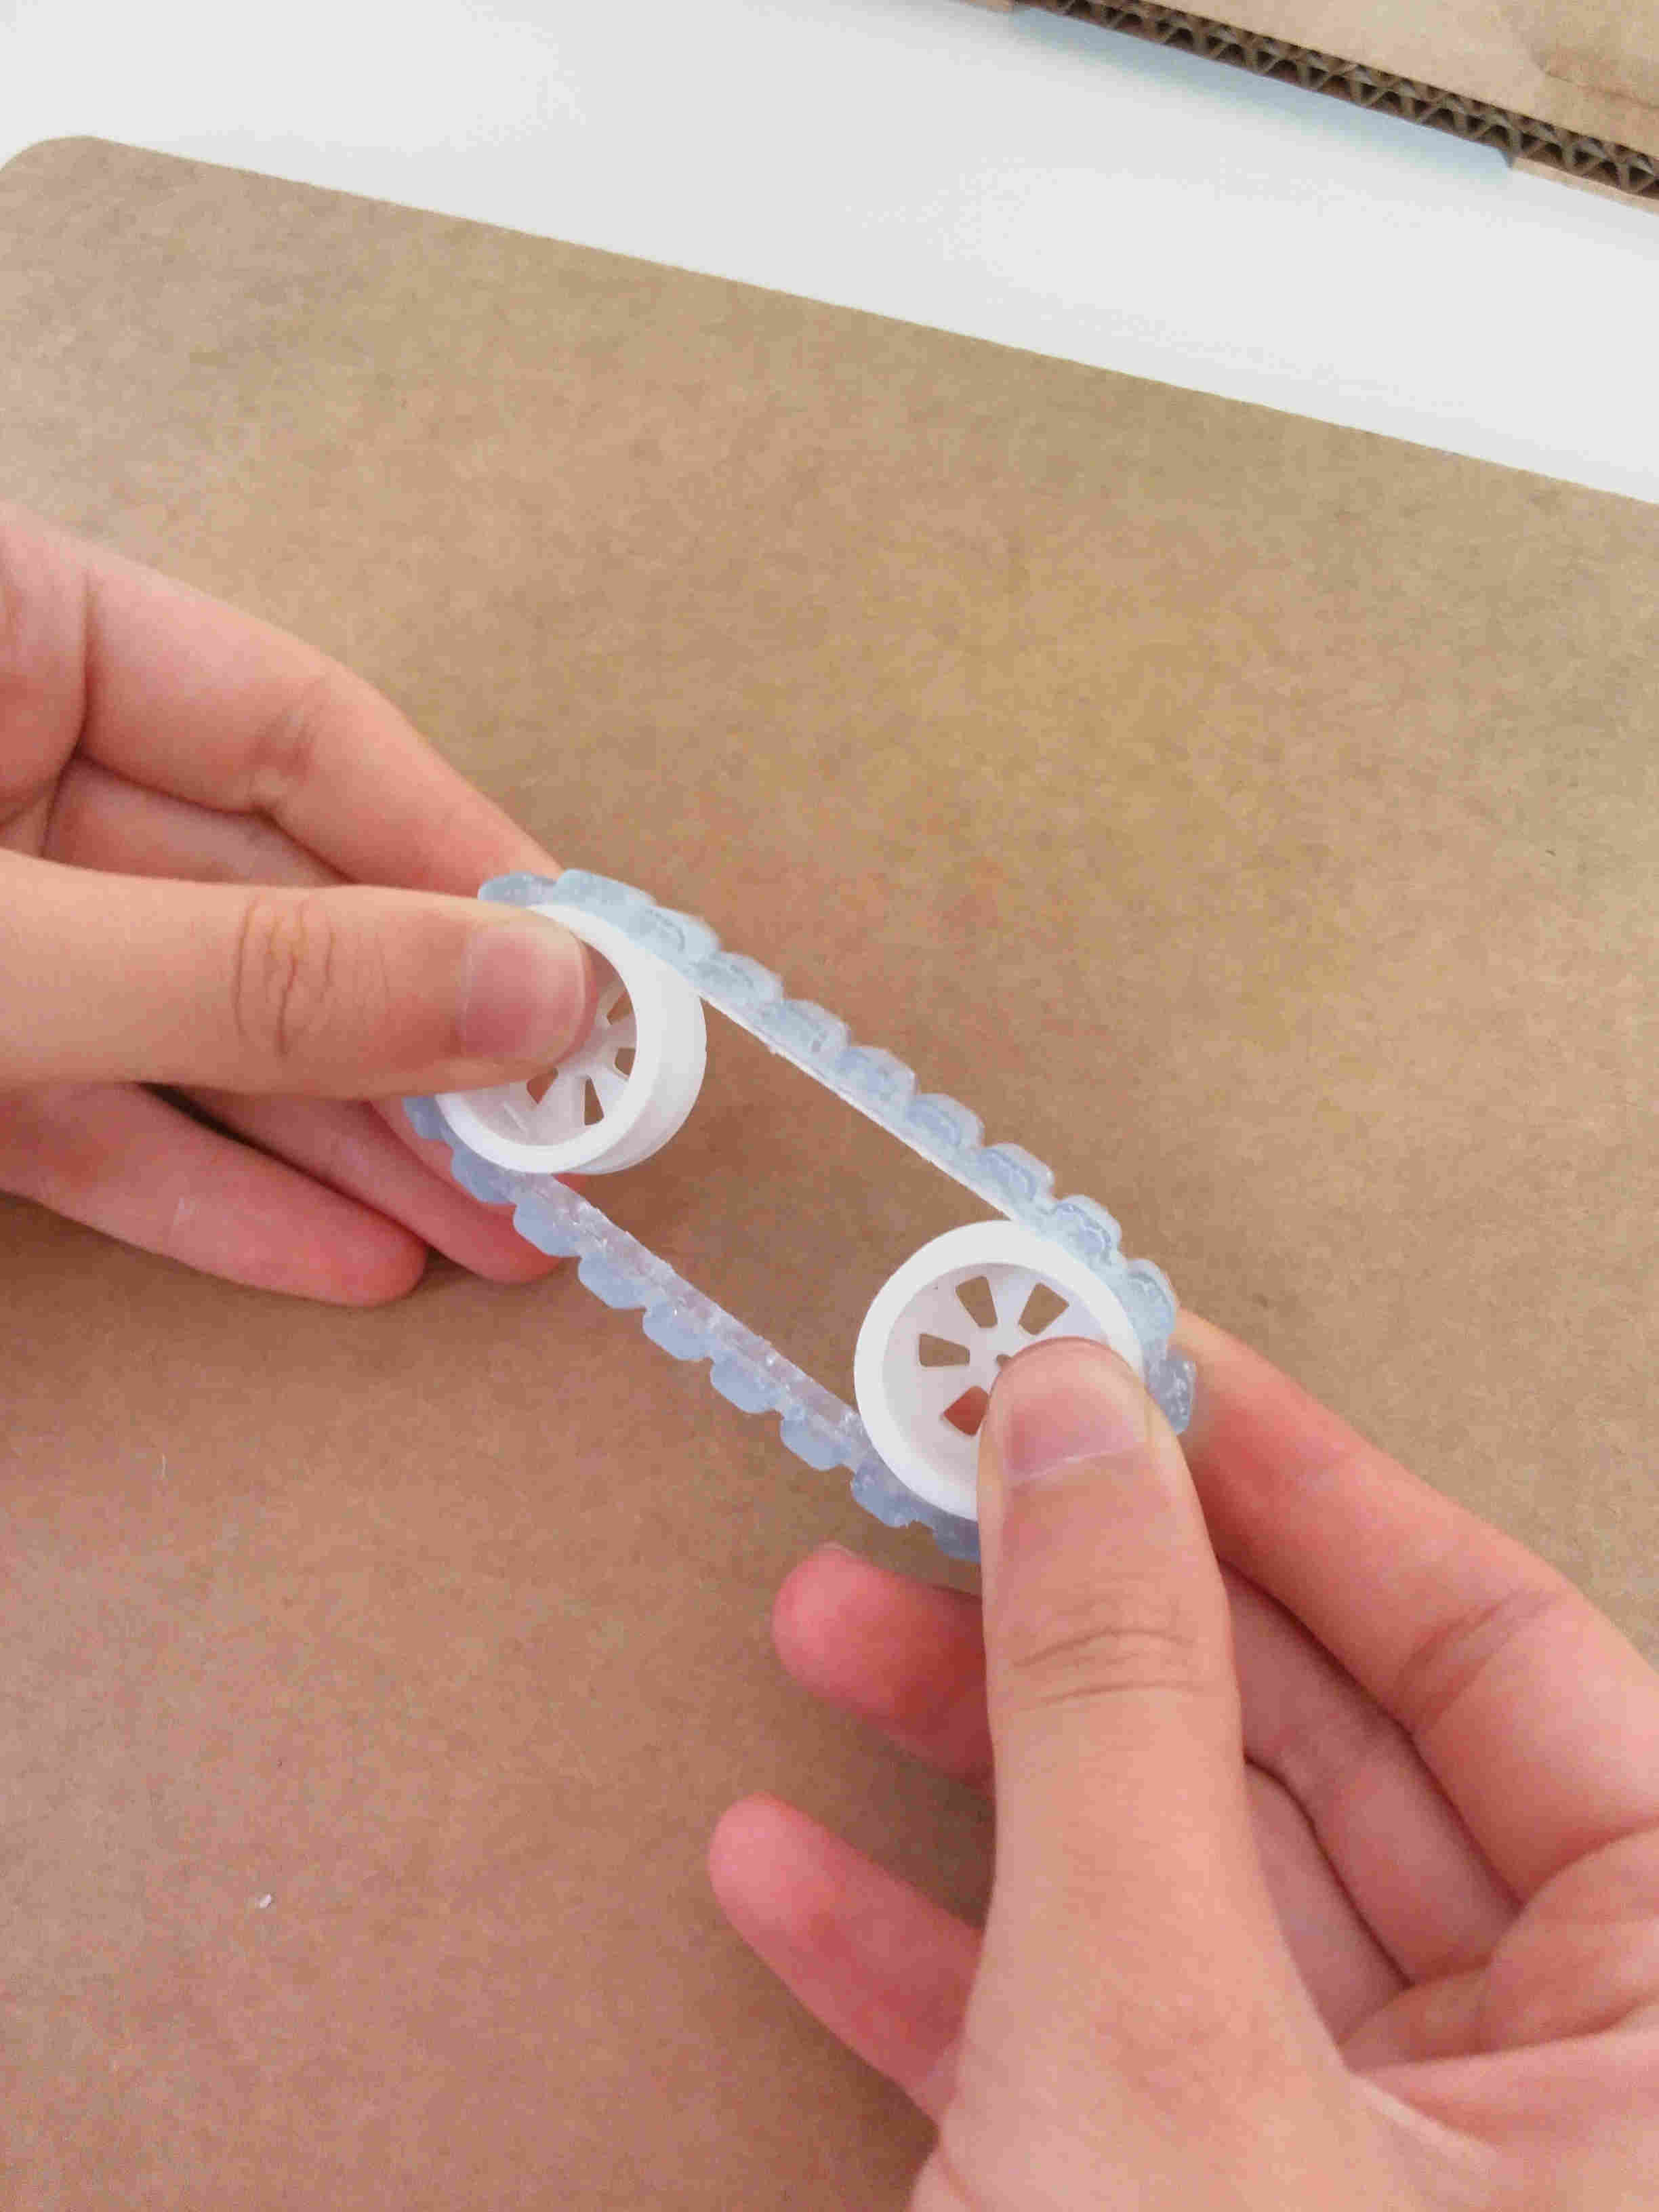
Due to the fact that i don't want to use 4 tracks in my final model (one for each wheel) but only one track per side, i've then tried to mill a bigger track to put in tension between two wheels.
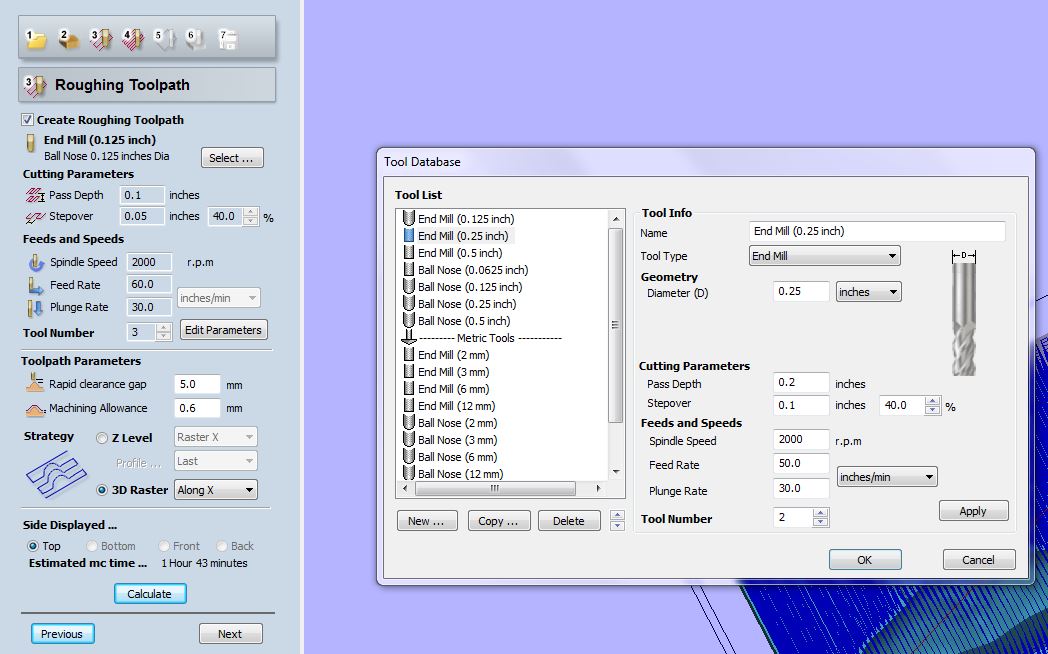
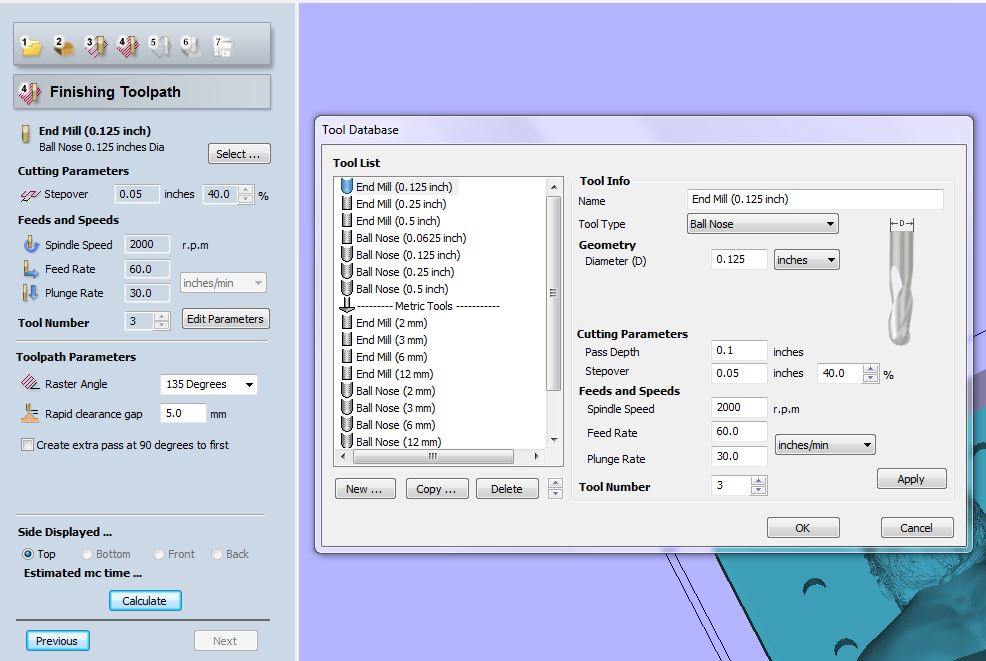
I've designed another model and this time i've used Cut3D to create the toolpaths. These are the settings:
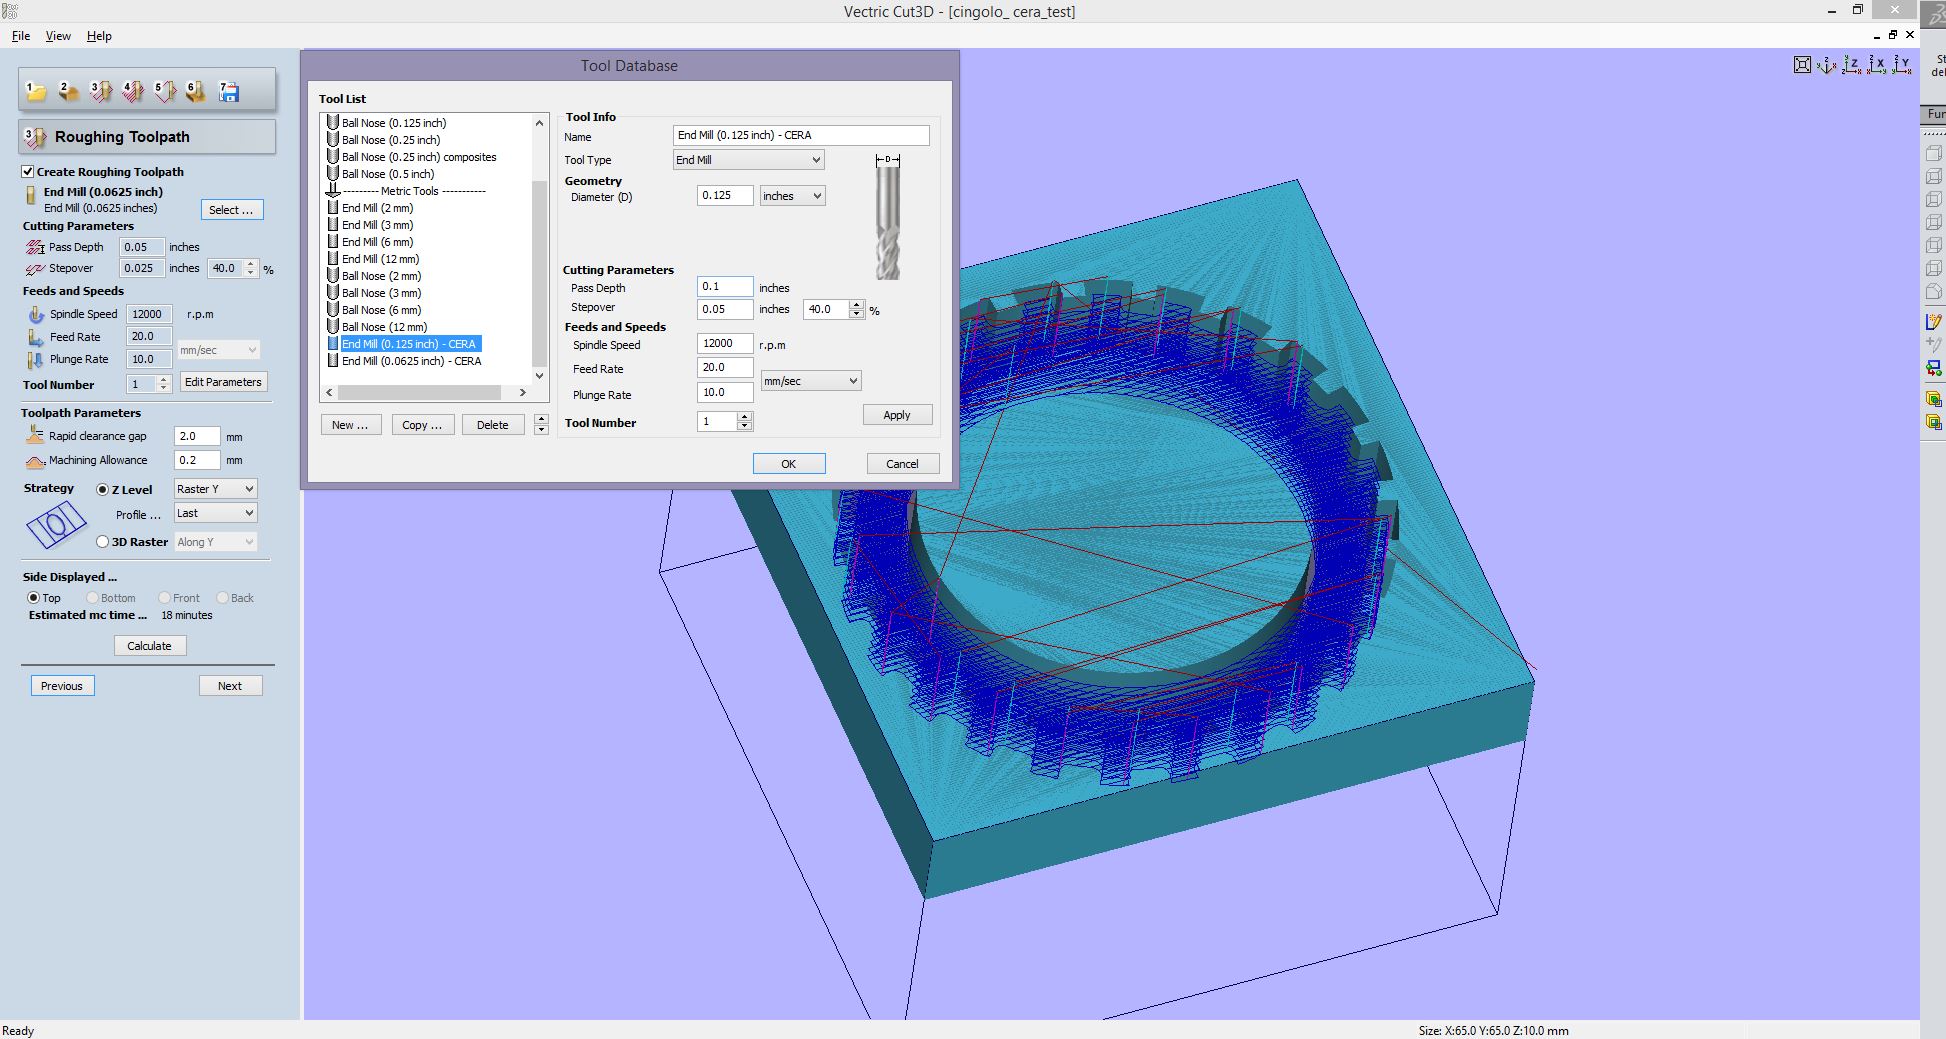
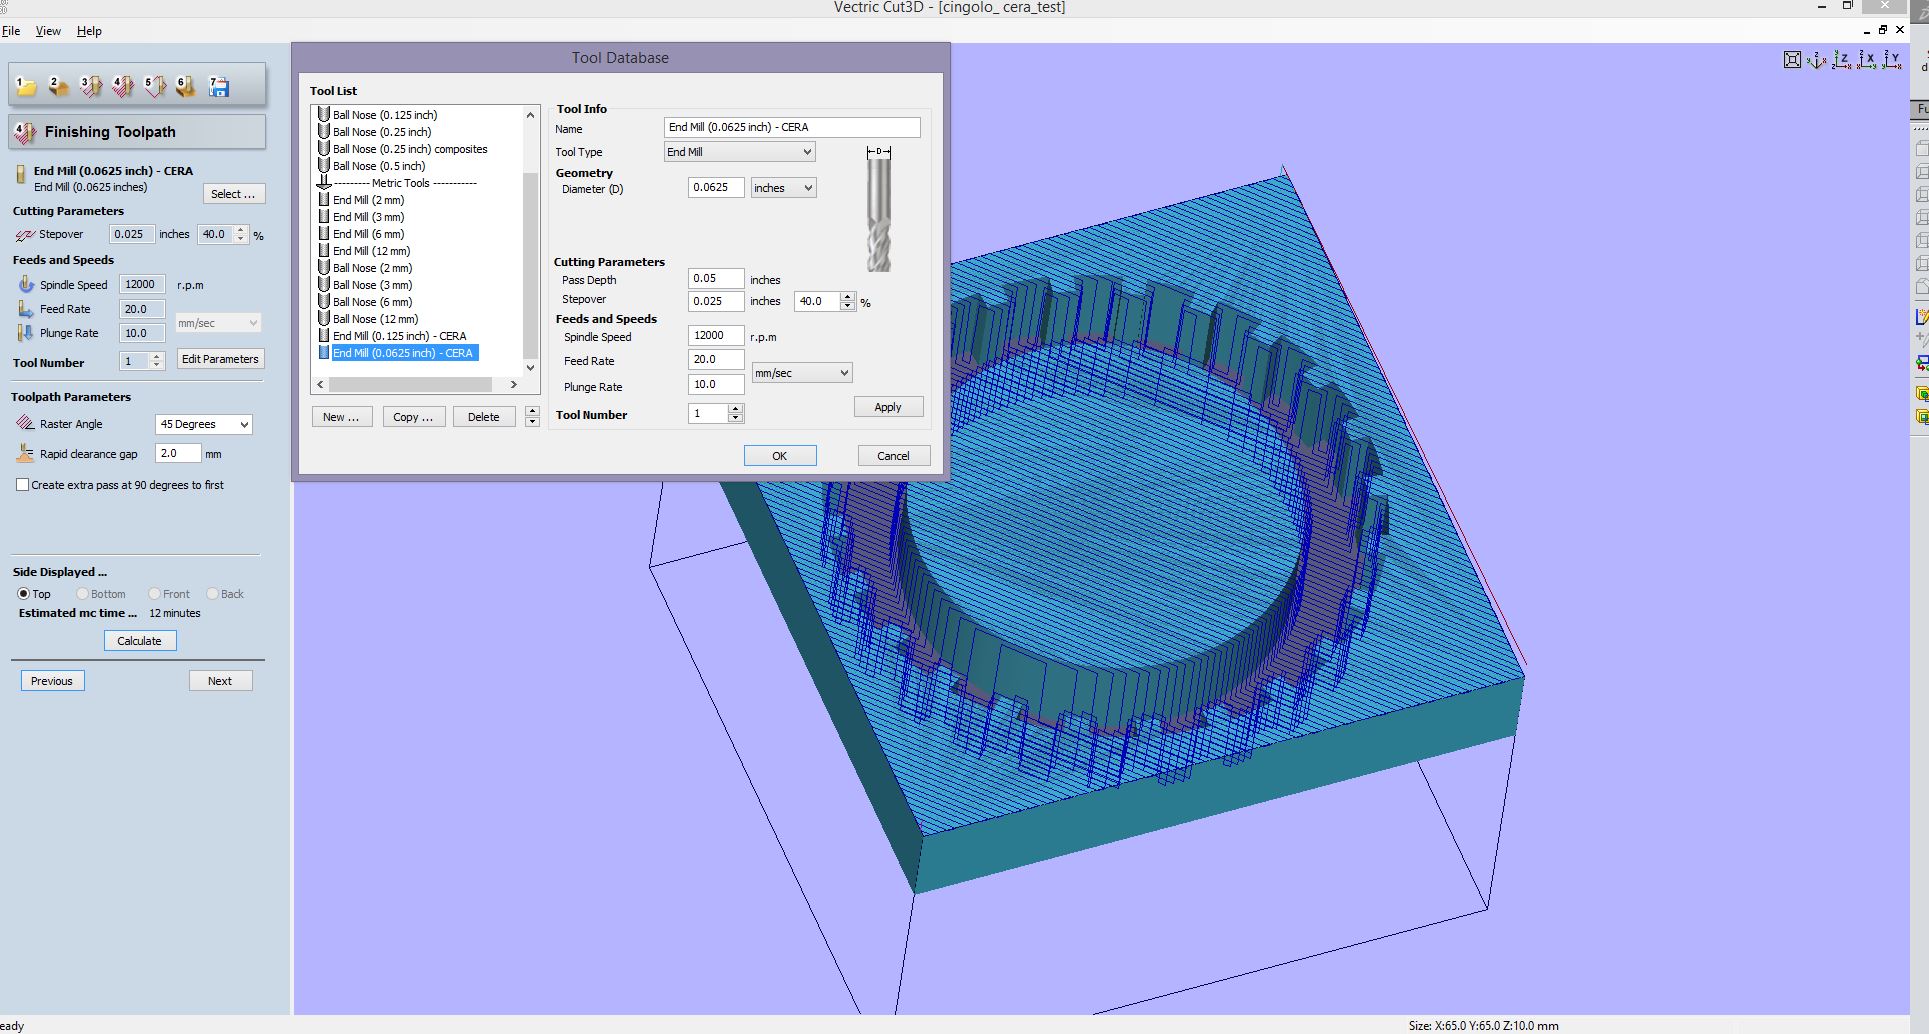
I've putted inside the mould this 3D printed ring designed to have the same overhang of the little wheels:
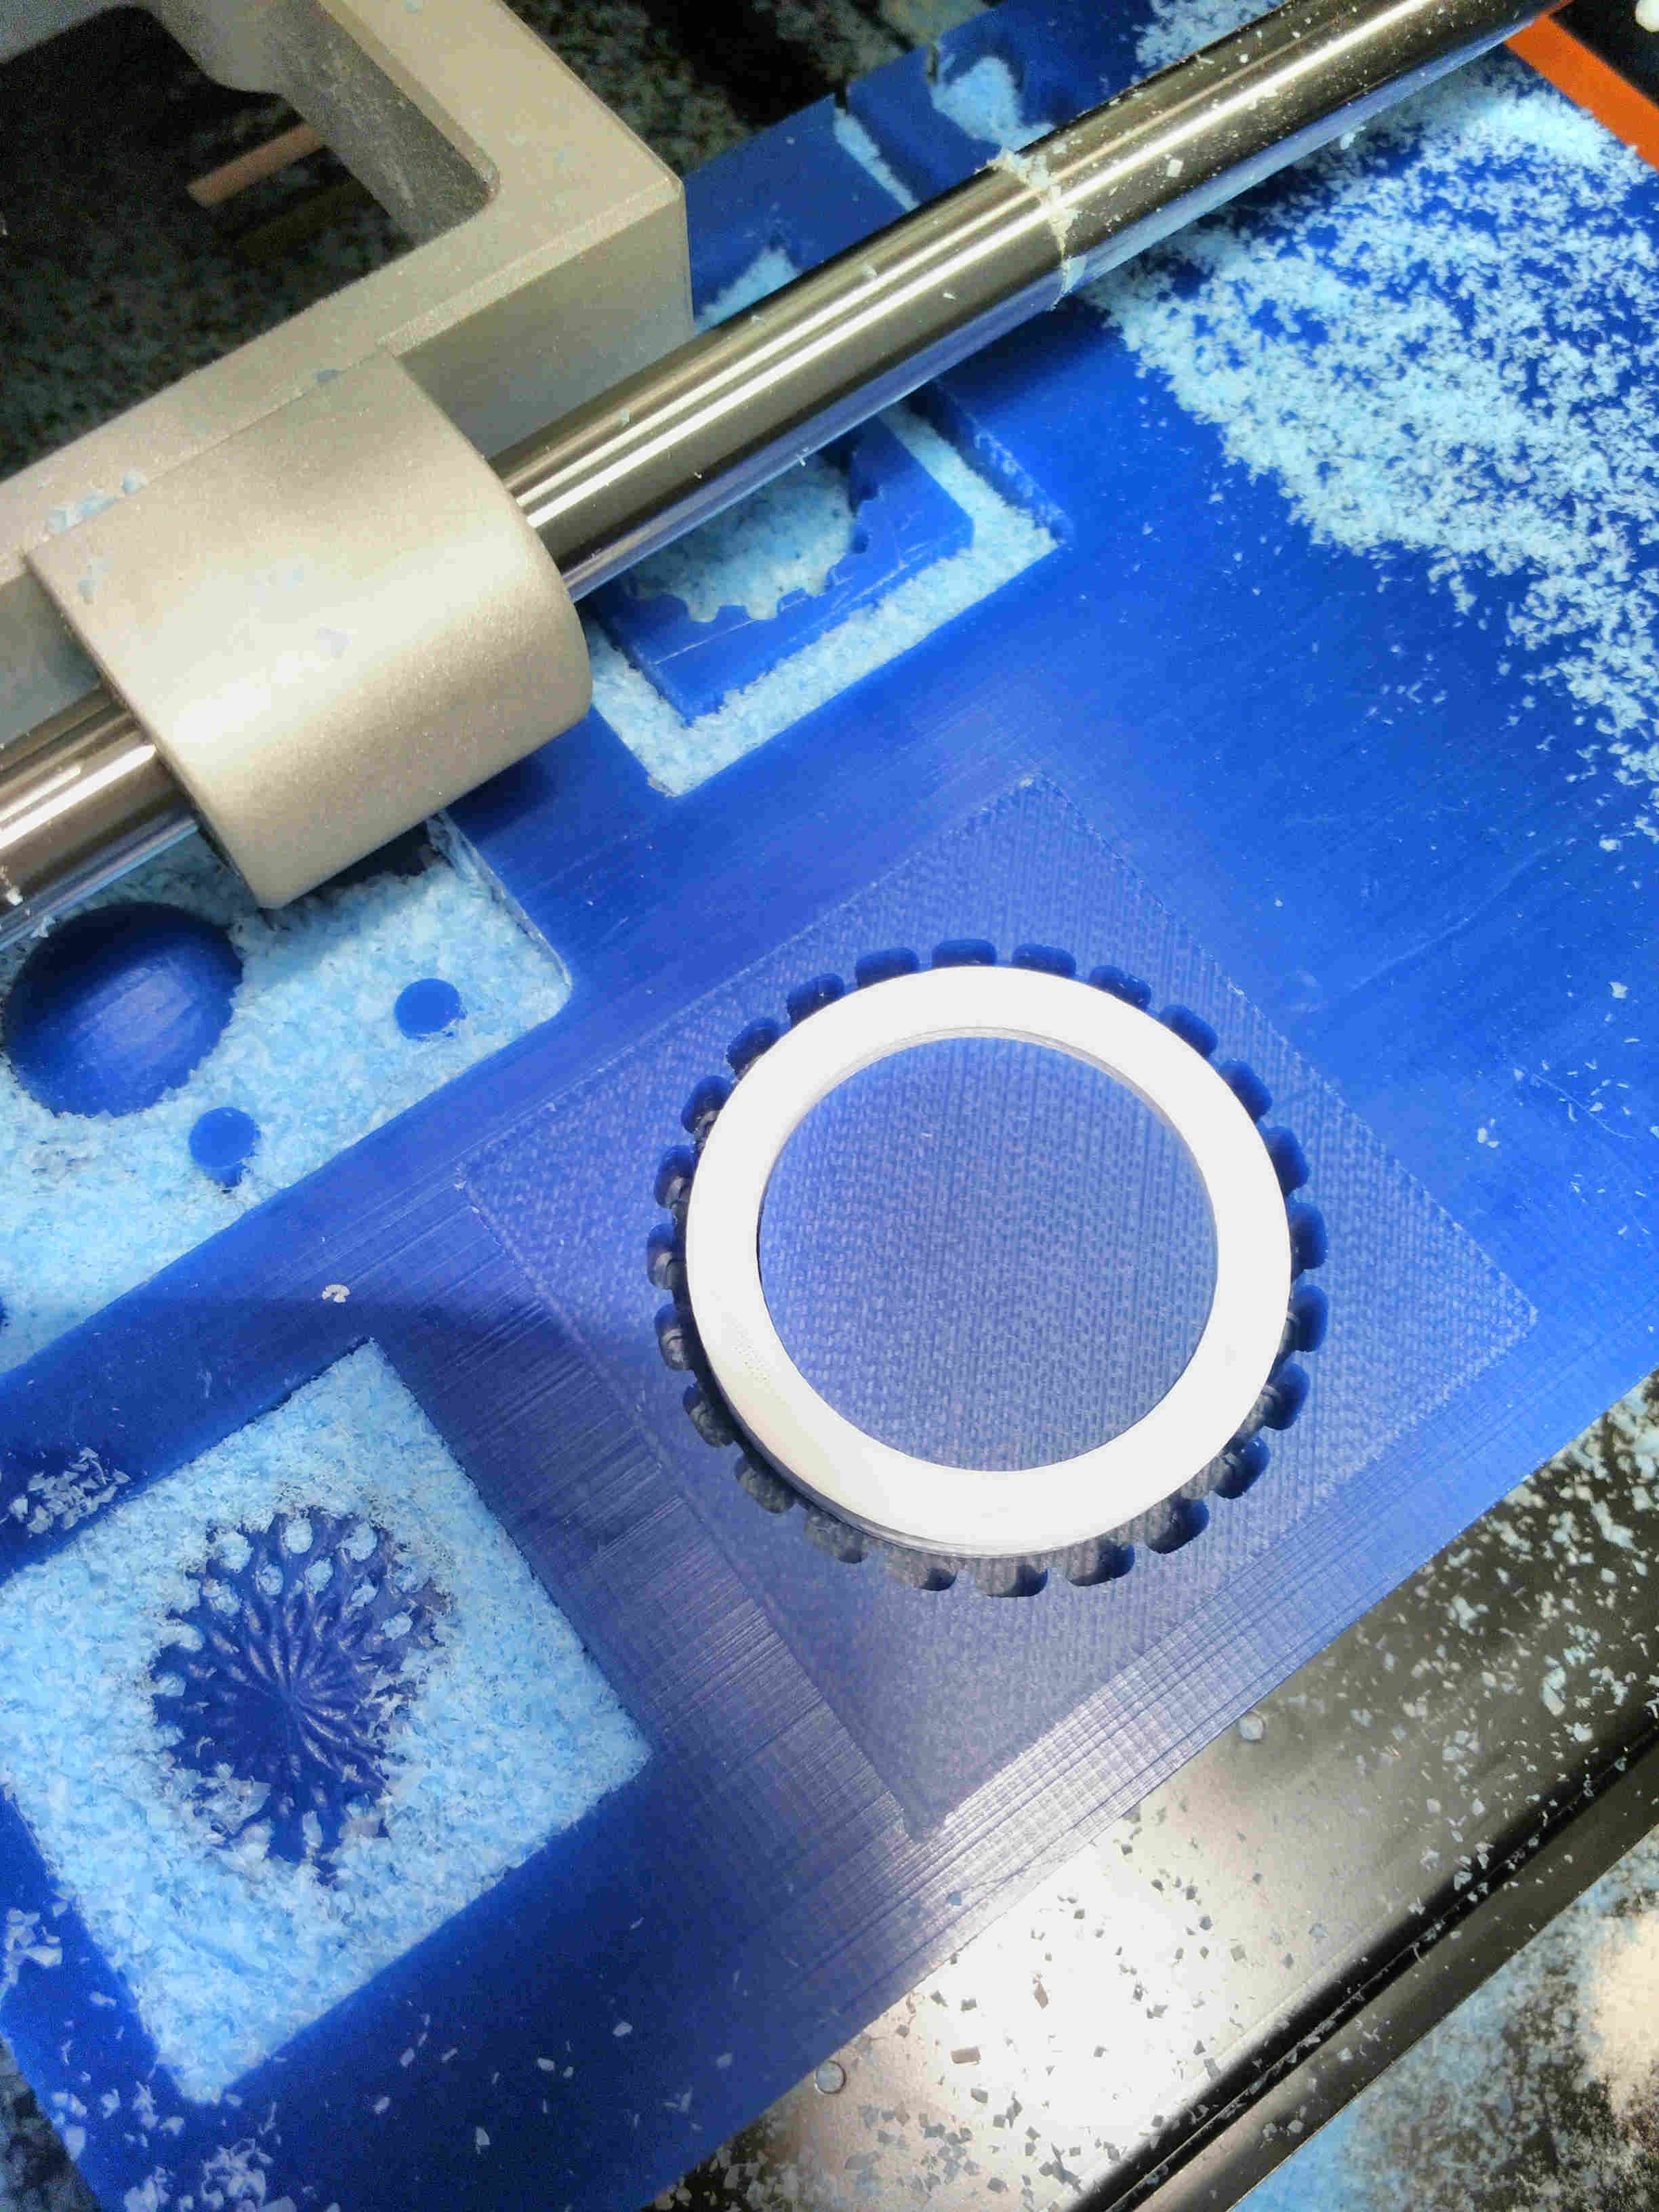
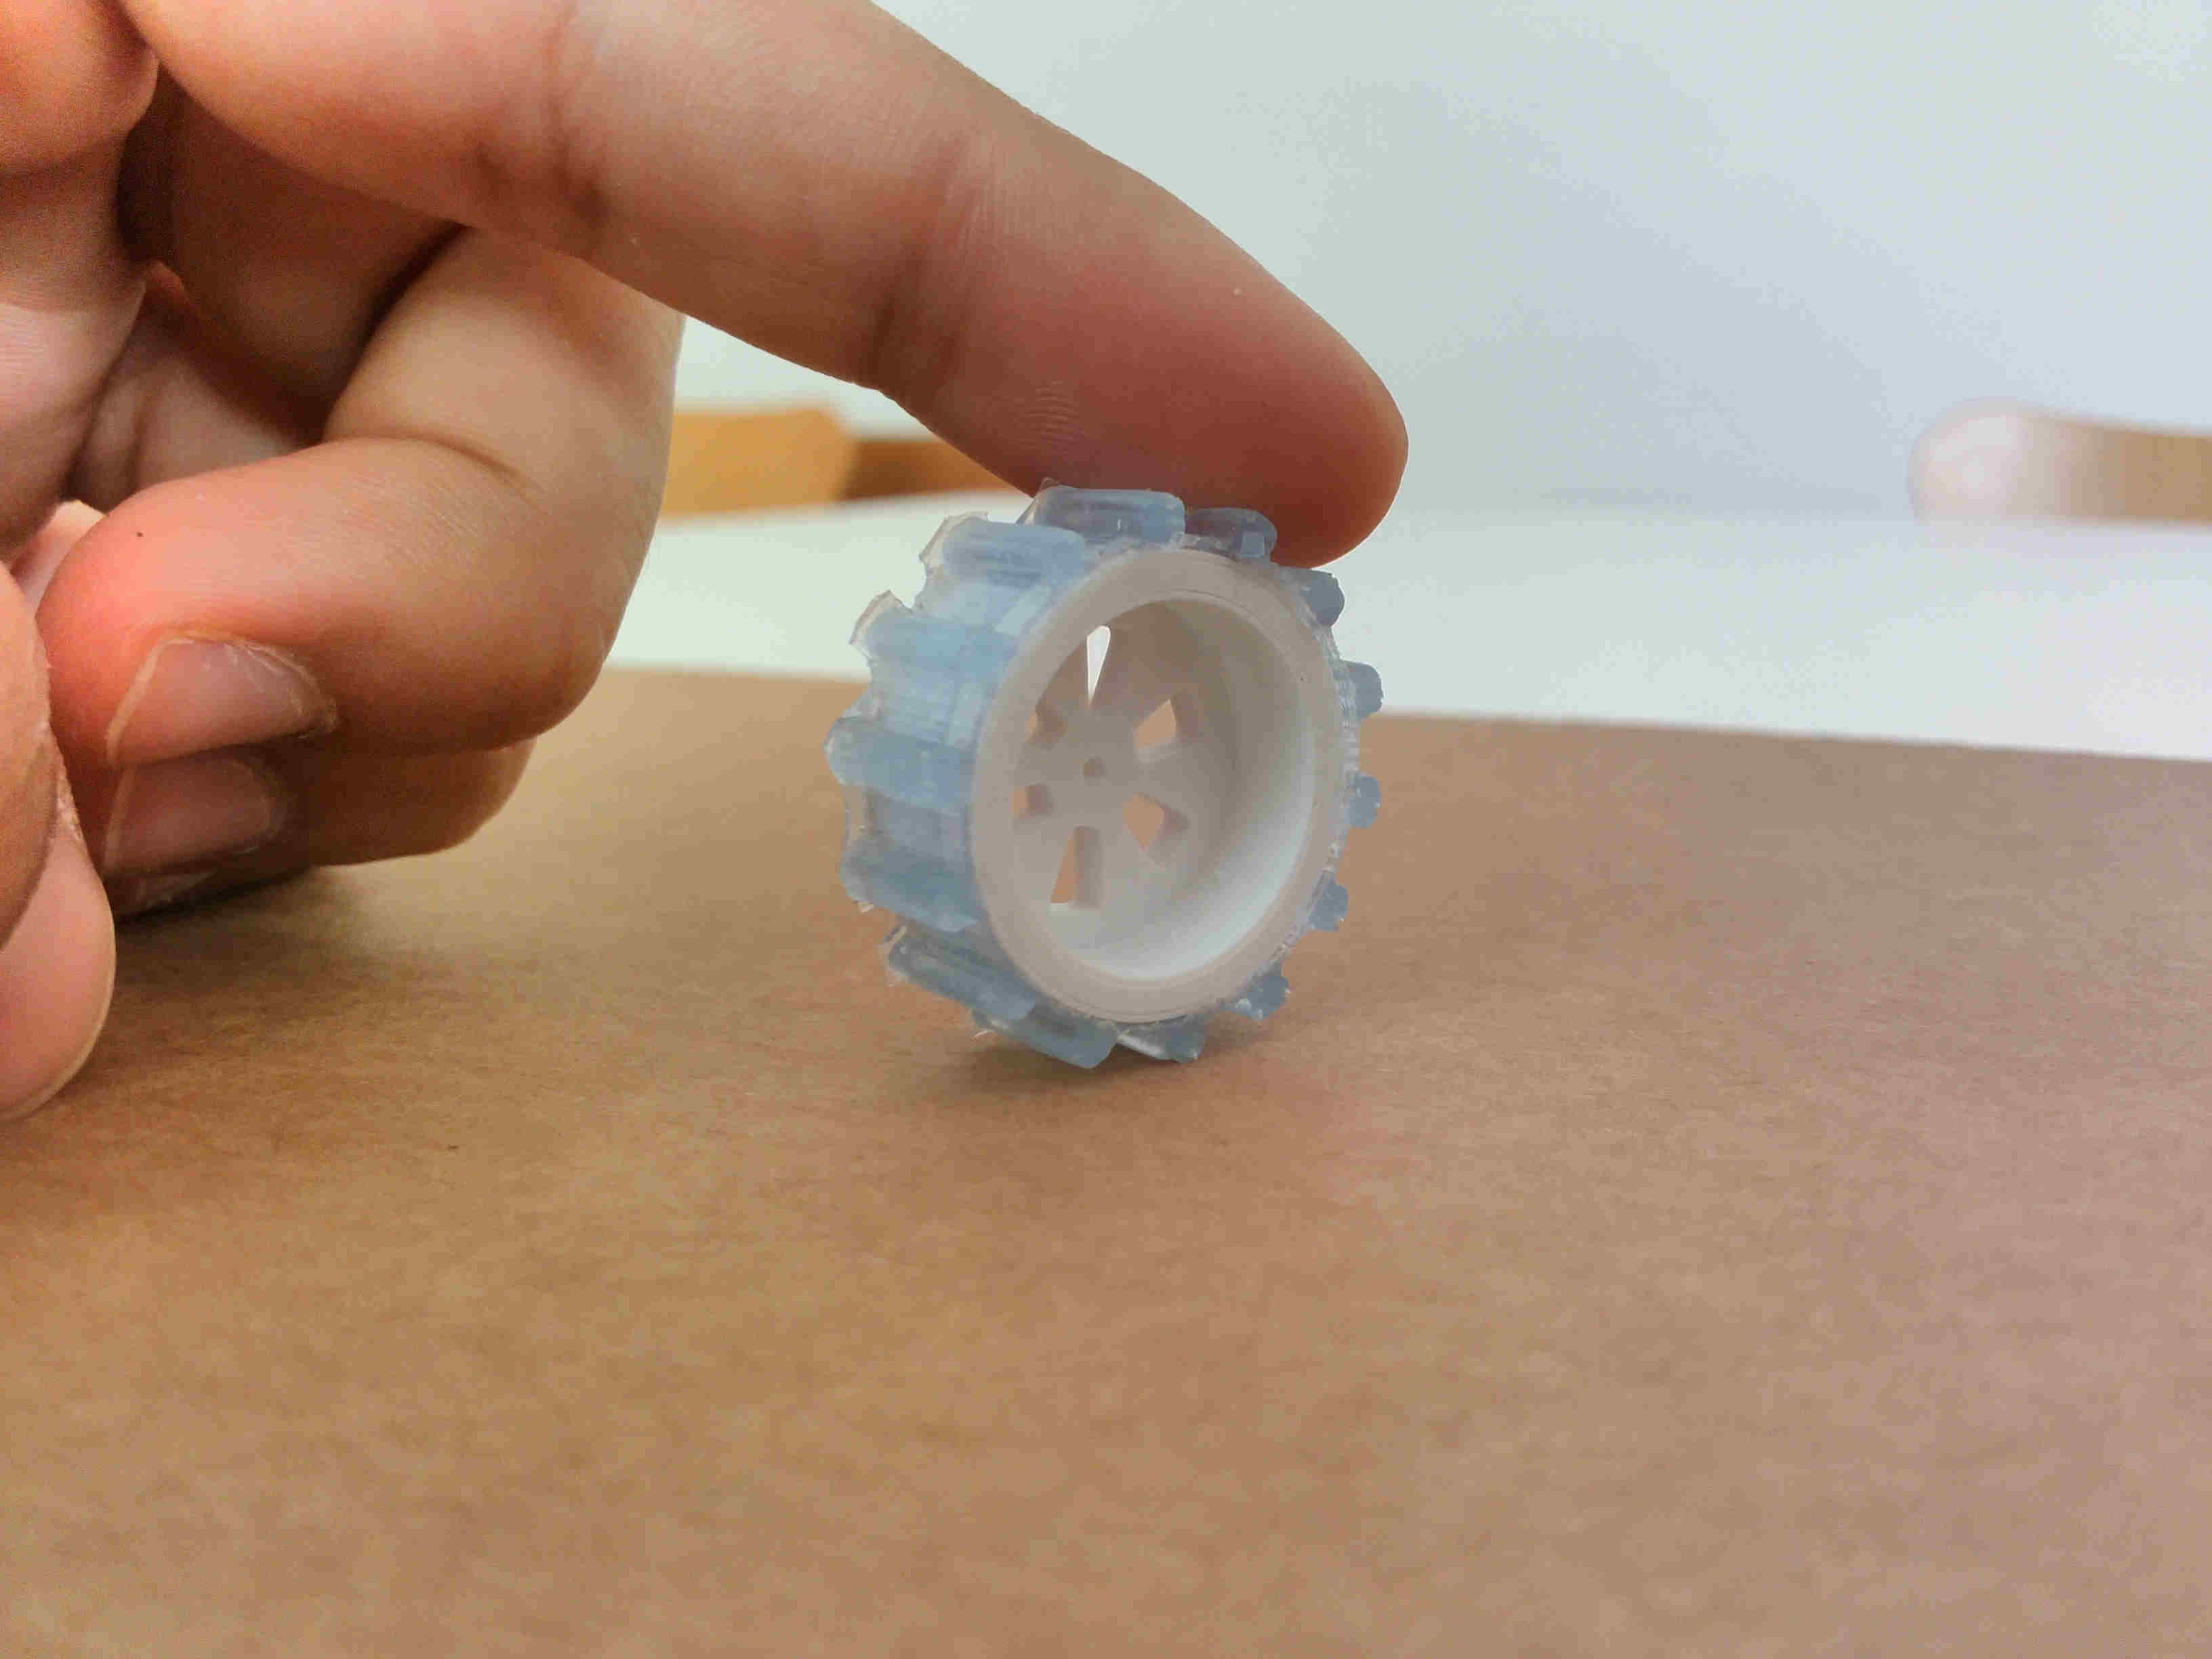
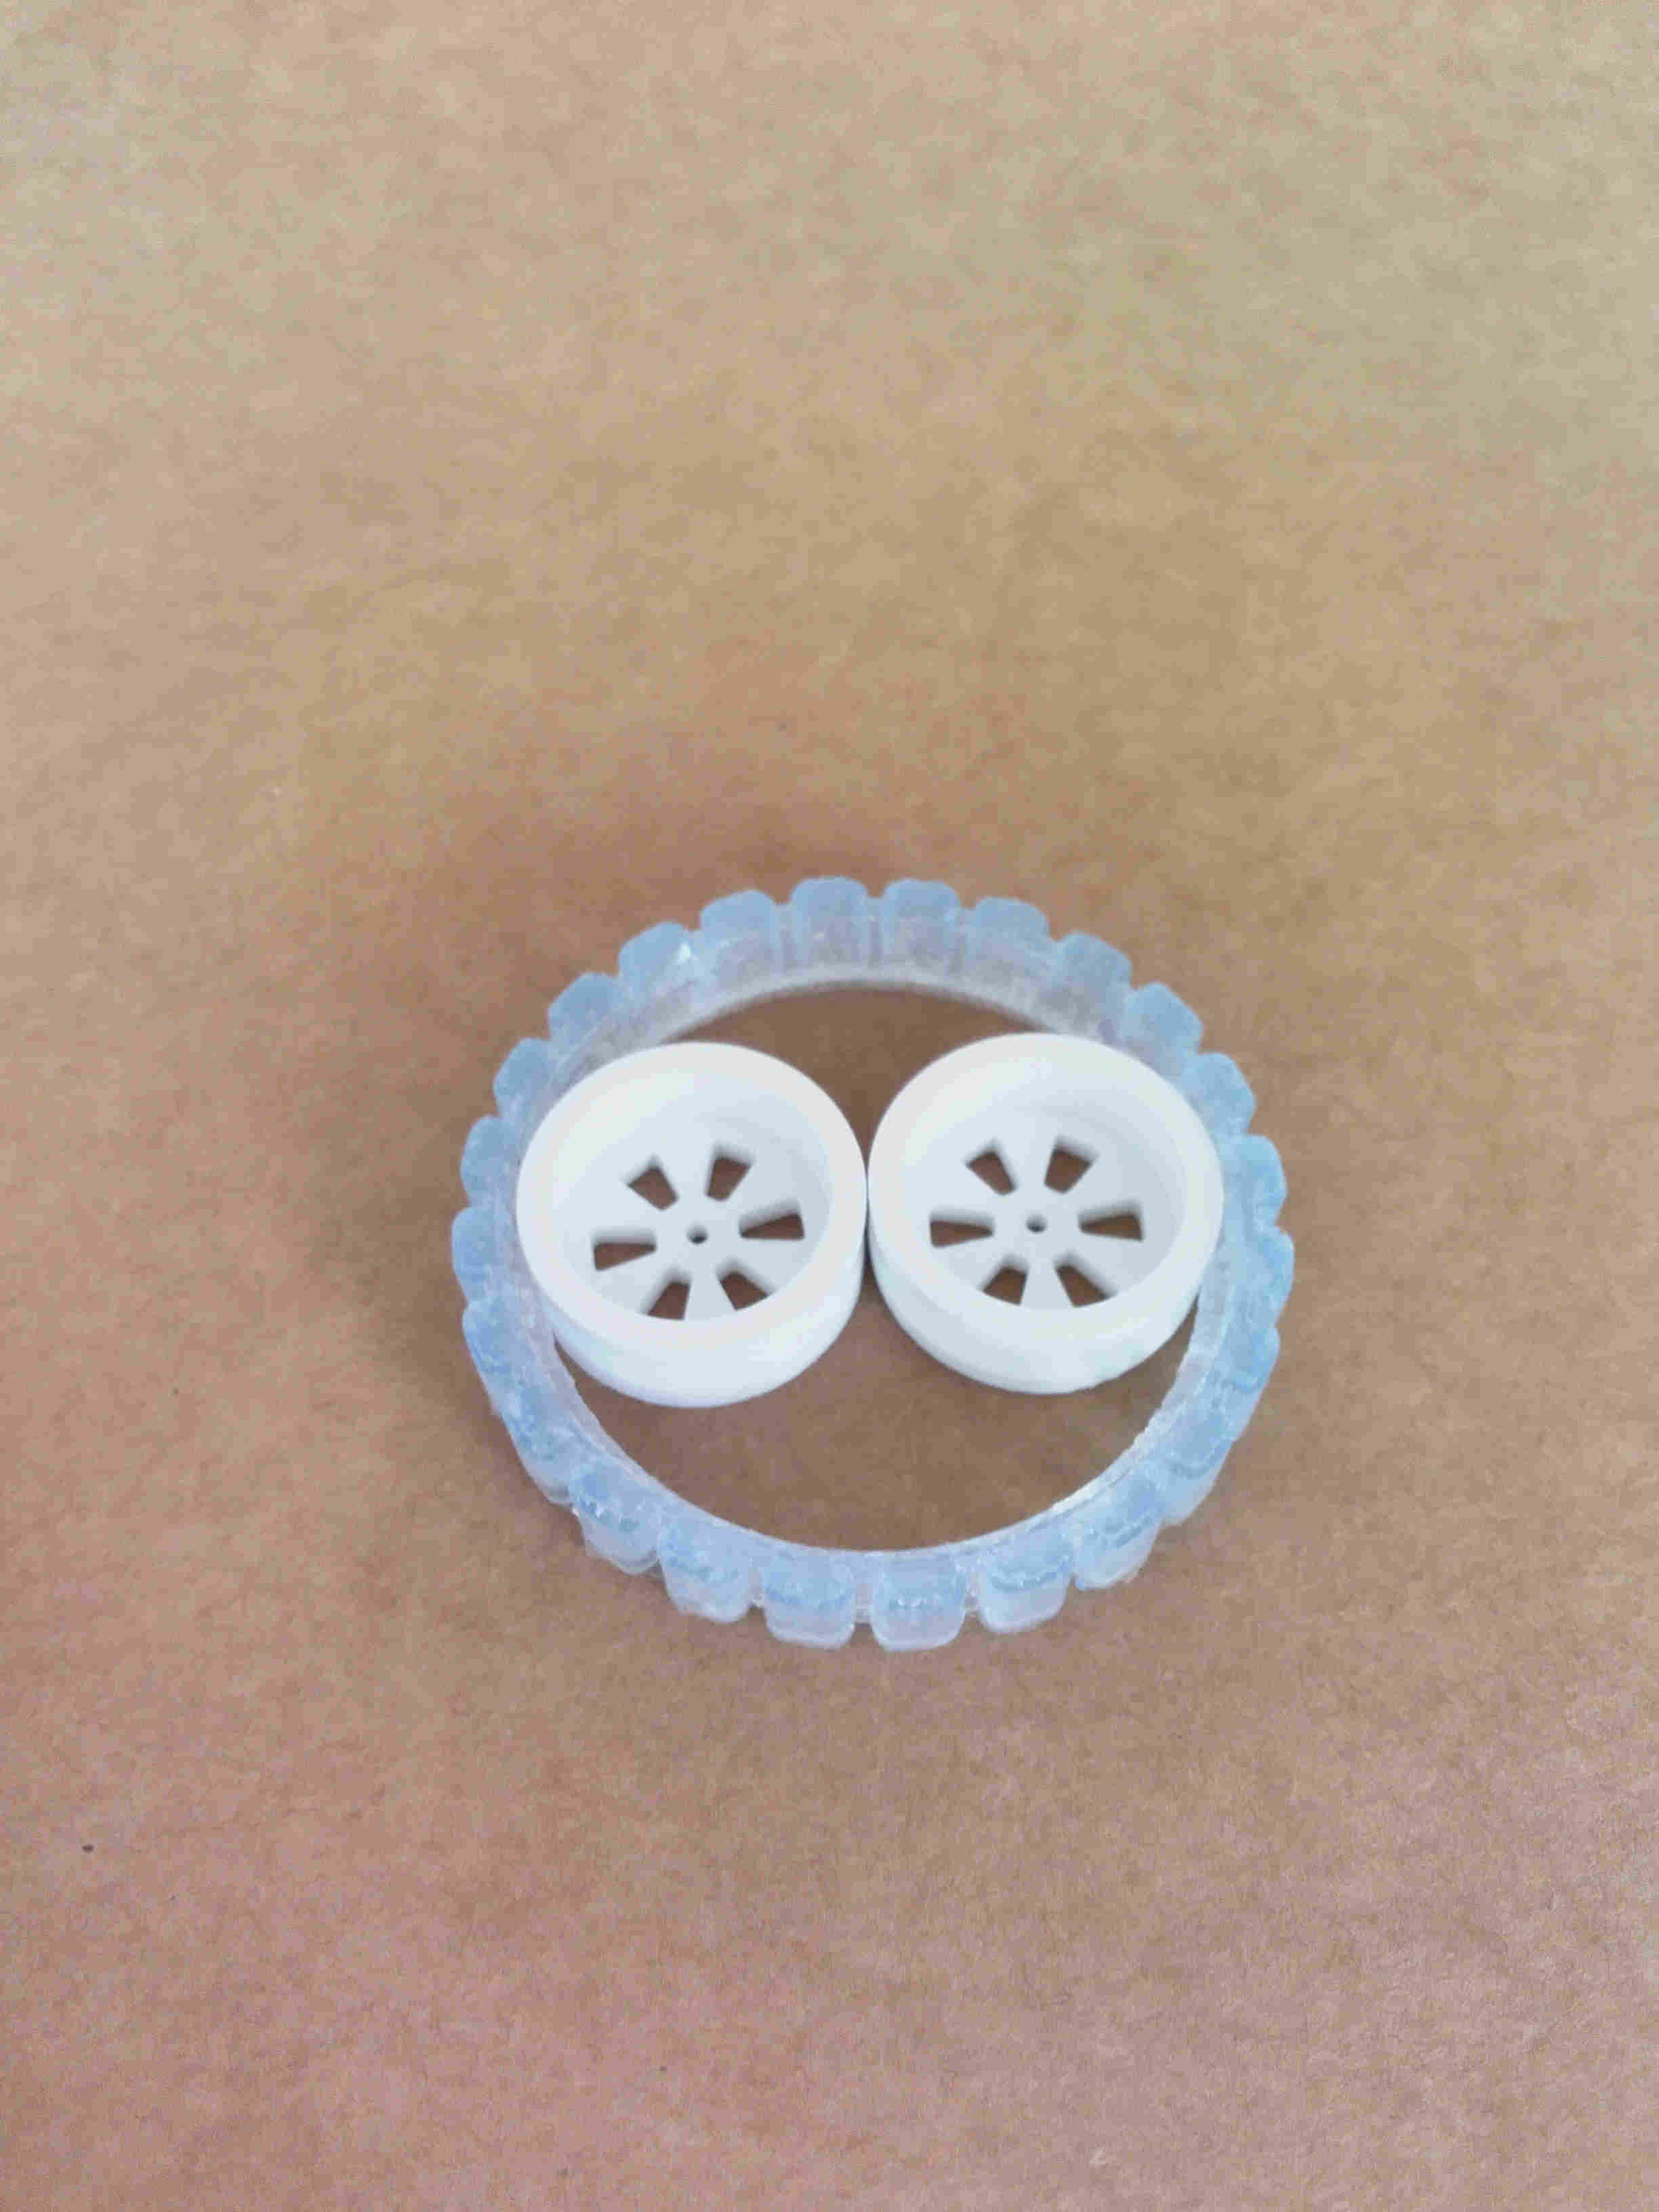
Then i've repeated the same procedure with the silicon and this is the final result:
Conclusions
This week was amazing. Making mould is, in my opinion, one of the best manufacturing process that i've learned. I think that
it offers a wide range of possibilities, much more than the 3D printing technique. By the way, the combination of these two techniques
can be really useful in order to design mechanical and functional pieces.
Morevoer, i came to the conclusion that for precision milling operations, the Roland SRM20 is much more suitable than the Shopbot
(but also much more slow).
I'm curious to experiment different material and resins as soon as i will have the time.