#Exercise_9/10
30/03/2016
Assignment
Mechanical and Machine DesignMake a machine, including the end effector, build the passive parts and operate it manually. Automate the machine, document the group project and your individual contribution.
Pluribot
the bubble wrap printer
For the assignment we have decided to design a CNC machine that automatically fill bubble wrap with fluorescent liquid. The idea is to combine pixel art, generative graphics with a mix of tonic water and gelatine in order to obtain a liquid to inject in the bubbles that become fluorescent with a wood light.
The final result could be a kind of modern stained glass, using a little bit of entropy resin to make the wrap rigid.
The my main task was the main design of mechanical structure, and a little tool that allow to produce the machine code usign Grasshopper.
Here the whole project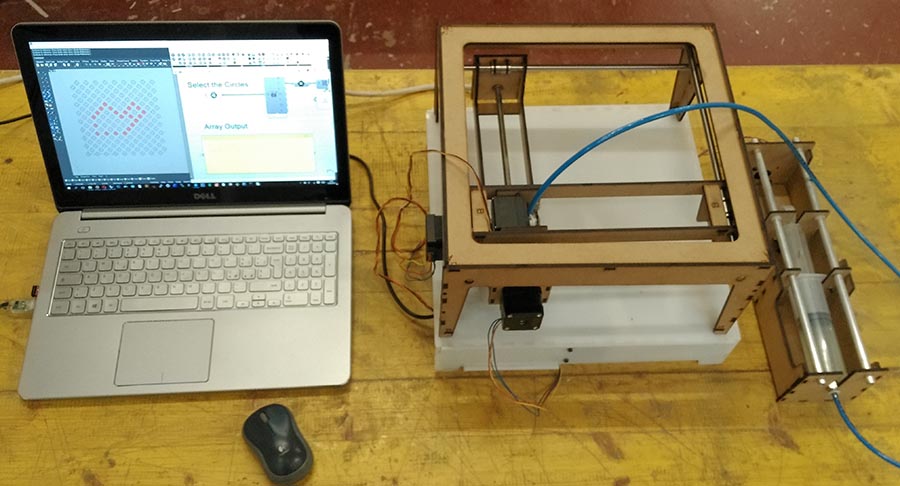
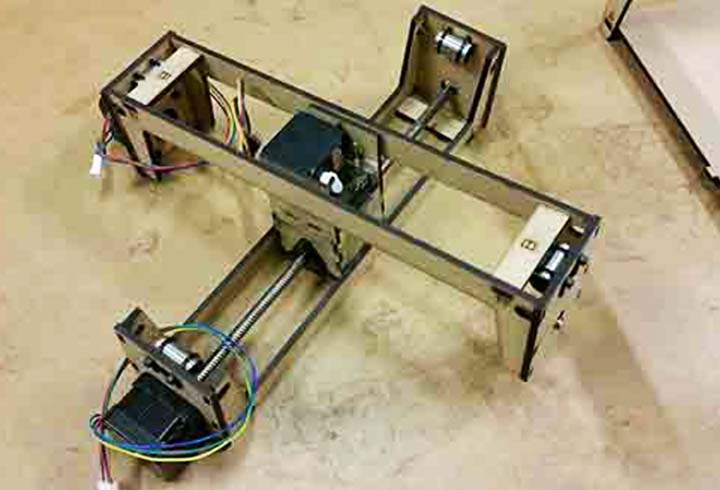
X/Y: In this system the extruder is placed in the intersection of the two axes; the ultimaker use a belt drive system, but in the MTM kit we have 3 lead screws stepper motors, so I have adapted the system to these components. The intersection of the axes makes the system rigid and very compact.
The axes slide on the side bars mounted on a 4mm MDF square frame. The linear rails we received in the kit were really awful and bended, so we used some 8mm smooth rods and the LM8UU linear bearings that we just have in the lab.
Assembling the whole structure was pretty easy, but you will need to follow the exact steps; so Pier has written a booklet of instructions like the Ikea one. When the assembly was complete, we tried to move manually the motors checking that bearings were sliding smoothly on the rails.
Printing area: 180mm X 180mm
Download here the source files:

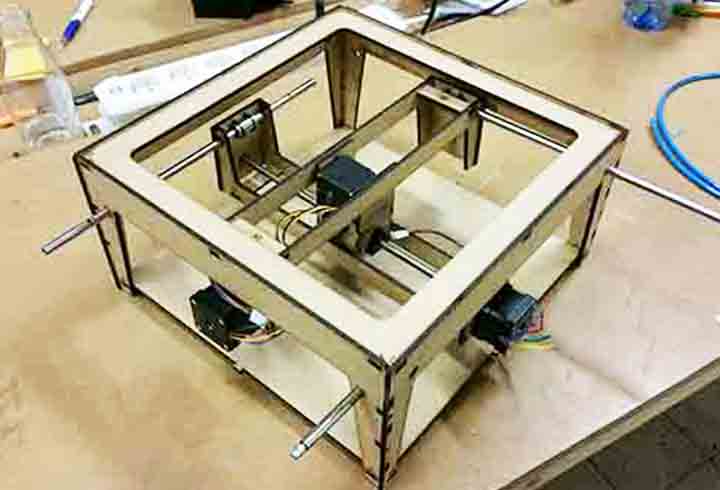
Needle Actuator: that was the most complex piece of the machine to design, and all toghether we decide to use a particular solution using a servo motor that push down a structure holding the needle, and on the use of springs to make the structure go up. The system follows the principle of the bowden tube, with an external syringe, that using the 3rd motor push the liquid through the needle inside the bubbles.
BOM:

Syringe push: to push the liquid inside the bubbles we use a syringe pushed from a simple mechanic system, that use a lead screws stepper motors moving an MDF frame along 2 rods; the syringe is connect to the neddle with a plastic pipe.
BOM:
The servo motor in action.
All the system in action.

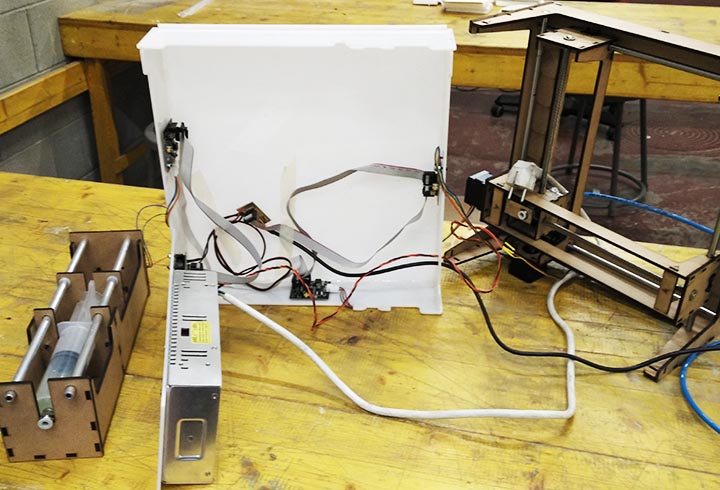
Base: to hold all the electronics we use a plexiglass box under the machine that allow to put inside all the gestalt node and the power supply and not to worry about possible drops of liquid.
BOM:

Interface to drawing: In order to make easy produce awesome bubble graphics, we have decided to produce a grasshopper scketch that will generate the array with the position for the Pluribot Machine. In the rhino canvas we have some circles that rapresent our wrap bubbles, by the right click of the mouse on the surface grasshopper component we must select the Set Multiple Surfaces; now we are going to select the desired circles in order to draw something and press Enter when finish. Now our Output will be the array that we need.
Mechanical: after a brief session of brainstorming, we have decide to use a system taking inspiration from the Ultimaker 3D Printer design.