#Exercise_12
13/04/2016
Assignment
Molding and CastingDesign a 3D mold, machine it, and cast parts from it.
Design and make a gear reduction and an Archimedean Screw mold
Source filesTools and materials
- CNC router
- 3D Printer
- Machinable Wax
- Paraffin
- Silicon rubber
- Rhinoceros CAD/CAM
- Modela Player4
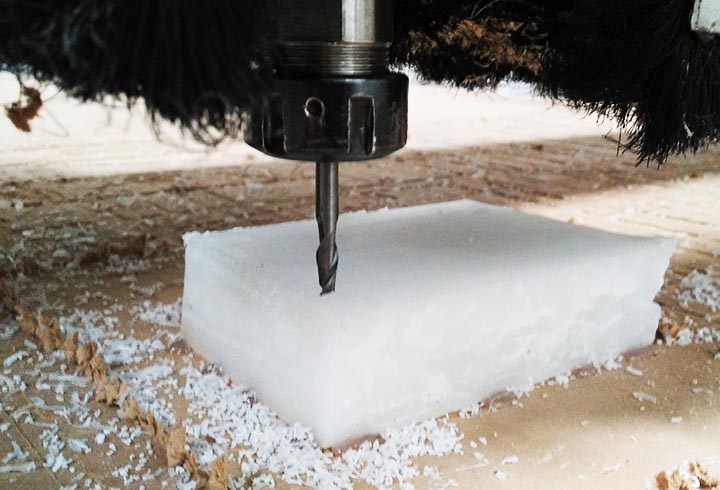
For the assignment I have decided to make some different experiments, the first one will be to make a silicon rubber gear reduction mold, using the Modela MDX40-A to machining a blue Machinable Wax. After I decided to experiment to machine the same piece using paraffin (less expensive and easy to find) instead of using the machinable wax. The second experiment was to produce a mold for a section of an Archimedean Screw, using a 3D Printer to solve the problem of the undercuts.
1rst step: import the .stl file in Modela Player4, the Roland MDX40-A software to generate the toolpath.
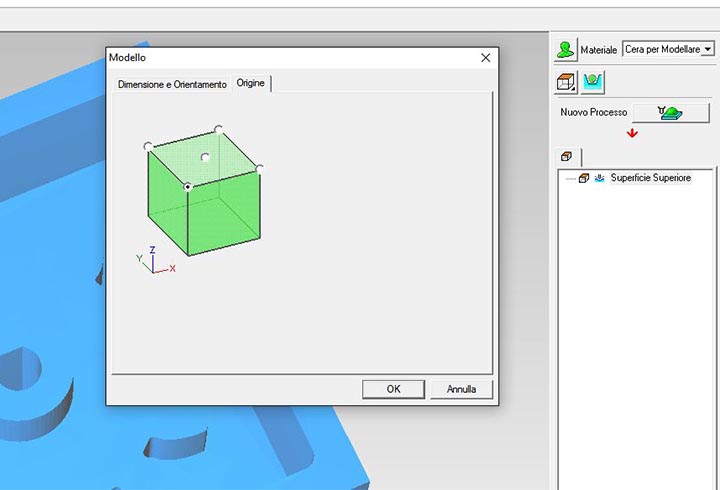
2nd step: set up the origin point on the stock.
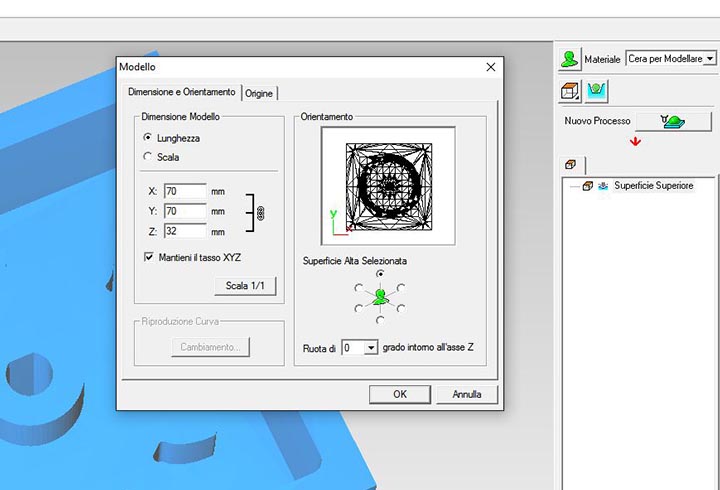
3rd step: set the face of the model that you want machine.
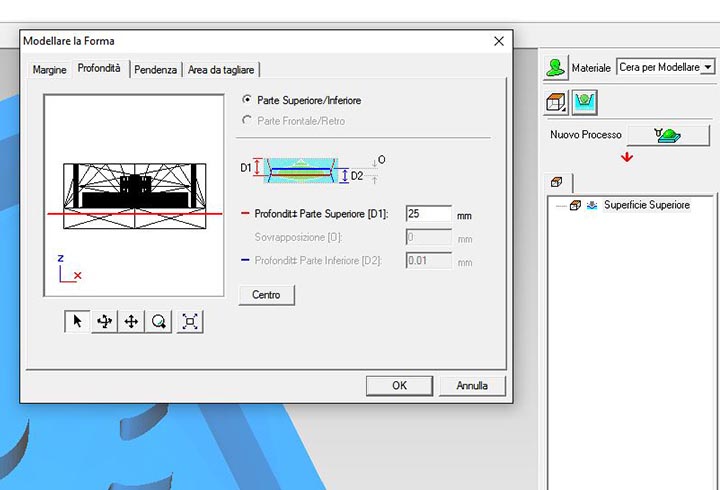
4th step: set the working depth if you want limit the machining.
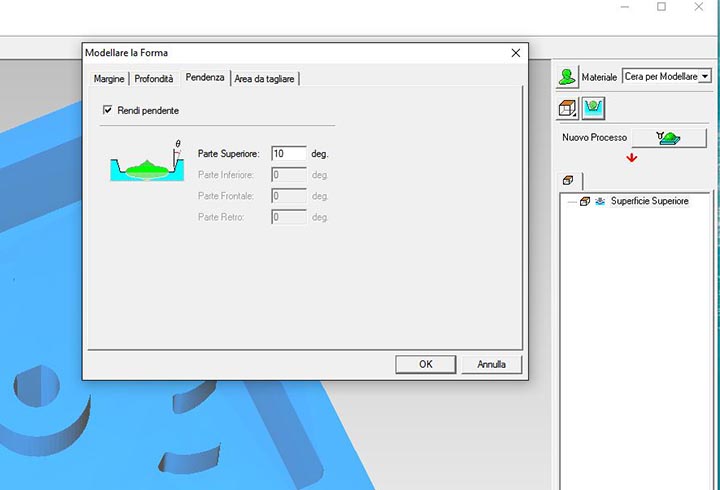
5th step: If needed we can have a slope angle of the wall.
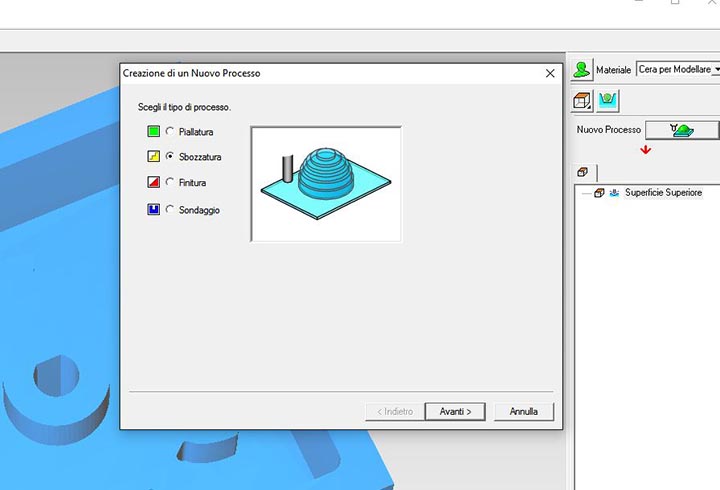
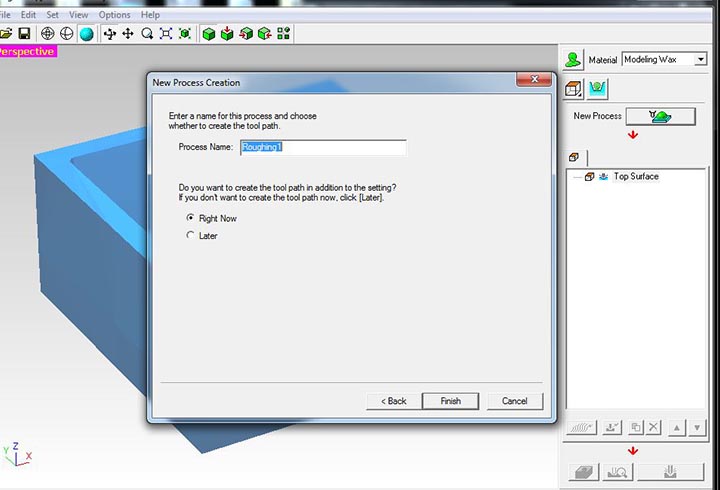
6th step: now we are going to set up the first processing; the machining will subdivided in two parts, one of roughing and the last one of finishing.

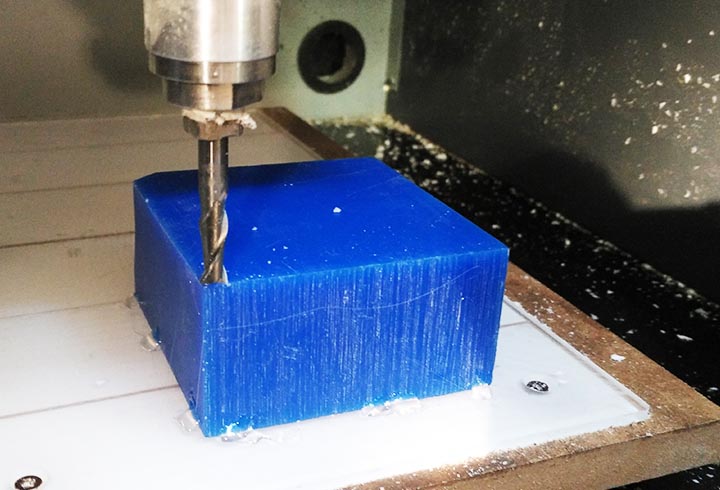
7th step: select the tool that you want to use, and the material, for the roughing I decided to use a 6mm 2 flutes helix end mill.
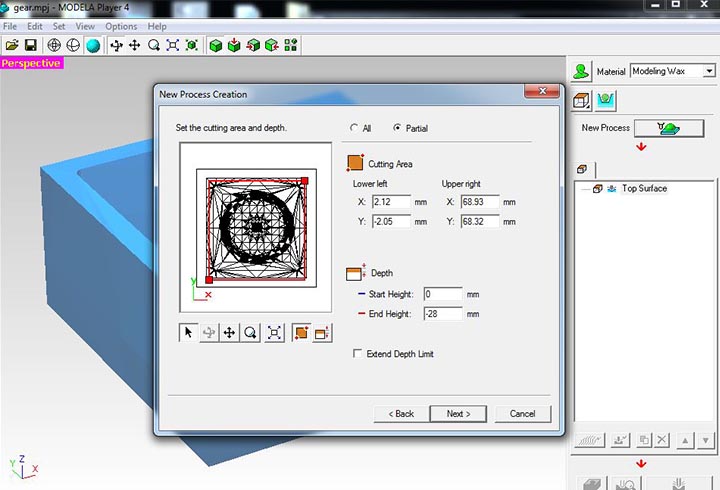
8th step: we can choose to work only a partial area of the model if needed.
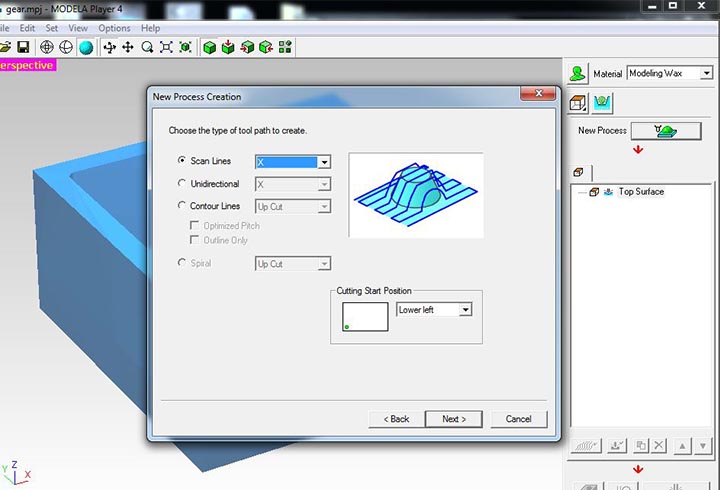
9th step: finally we must choose the strategy of roughing, in this case I have chose a scan line along X axes.
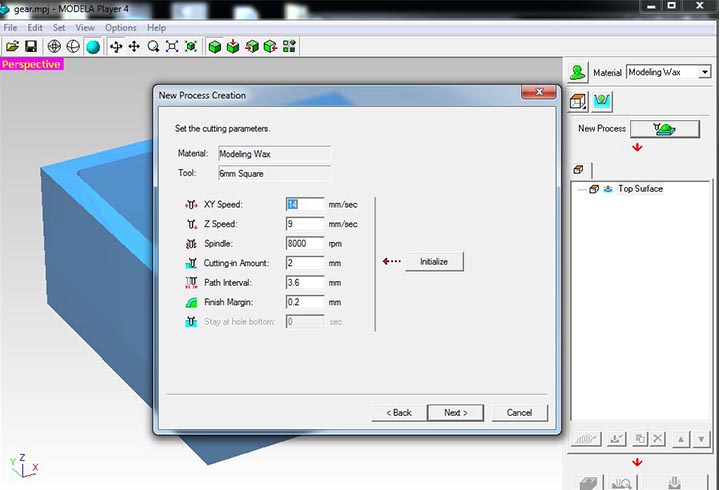
10th step: one of the best strengths of the Roland software, is that have a good quality of material parameters preset. So I need only to sharpen a little bit the parameters but they are almost okay!
11th step: now we are almost ready to start, we must only set up the 0 on the top face of the stock material in the left-down angle.
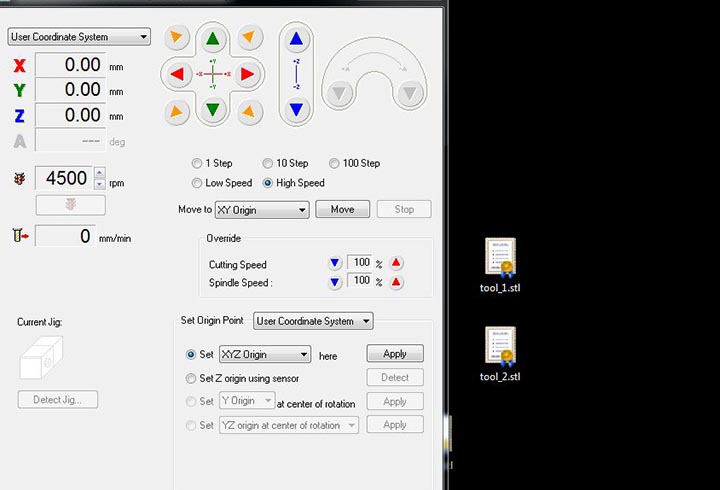
12th step: using Vpanel we can setup the 0.
13th step: we can execute the roughing.
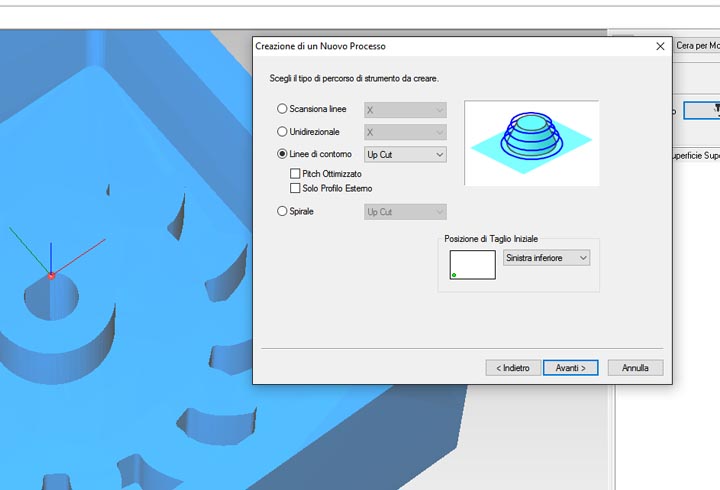
14th step: for the finishing I select a 2mm 2 flutes helix end mill and a contour lines strategy.
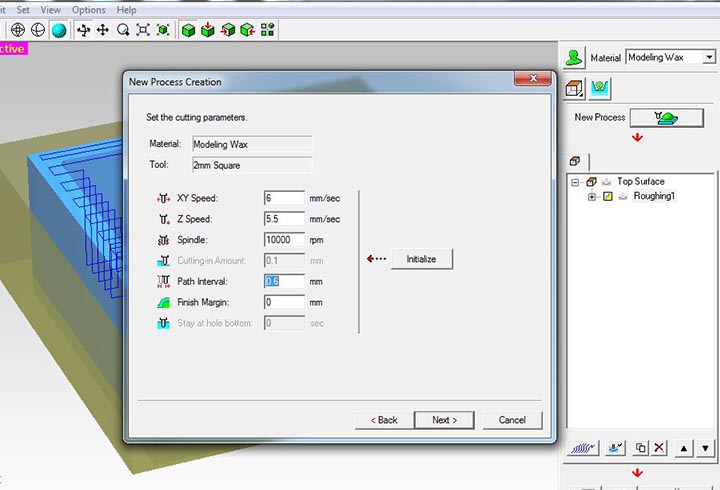
15th step: finalize the finishing parameters, based on the preset.
17th step: mount the 2mm end mill, set a new 0 and start the finishing.
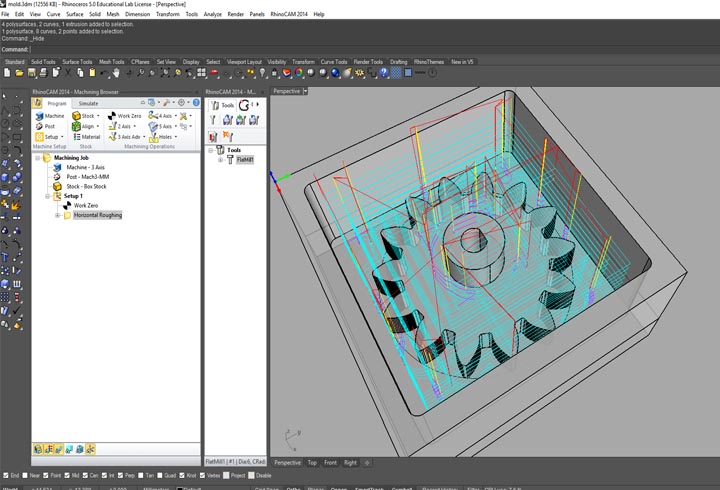
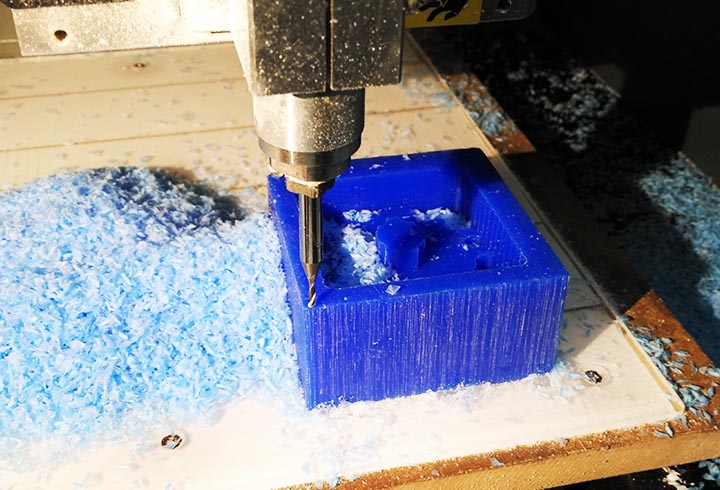
18th step: in the second part of the exercise I have milled the same part but with a different material, paraffin, that is less expensive and very available in different kind of shop. So I have decide to use the second milling machine that we have, a big cnc router and using rhinoCAM to generate the toolpath in order to experiment different software and possibility. In order to prepare the toolpath I have followed this rhinoCAM tutorial.
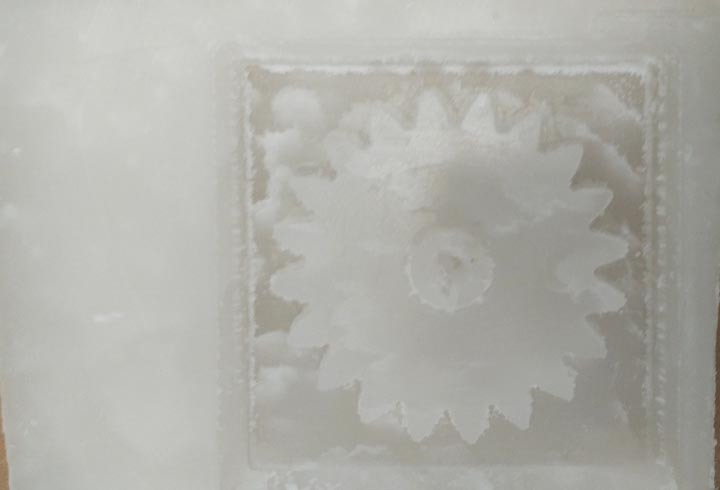
Results: the final results are very interesting, because the quality of the piece is very good! In order to mill the paraffin I used the same parameters used to mill the machinable wax that you can find in the 7th step.
Results: now we are ready to prepare the silicon in order to make the mold.
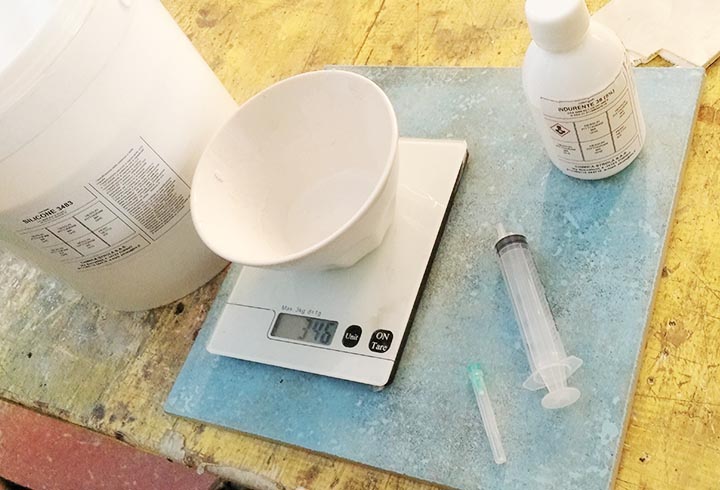
Silicon mix:in order to make the silicon mold, we need to mix the silicon with a 5% of hardener and mix all together very well.
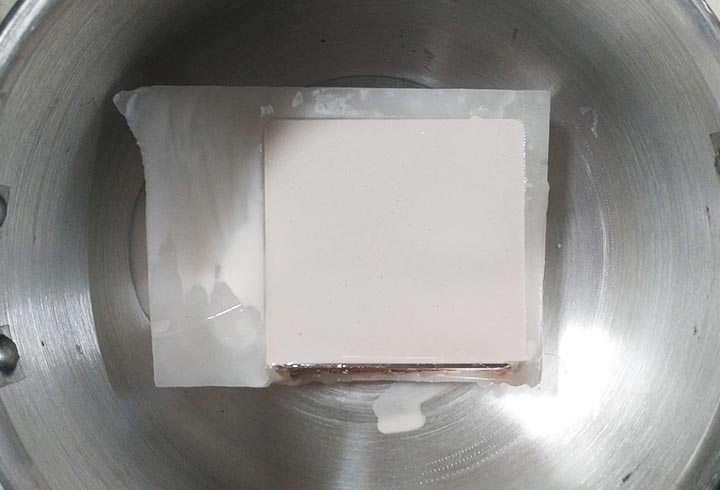
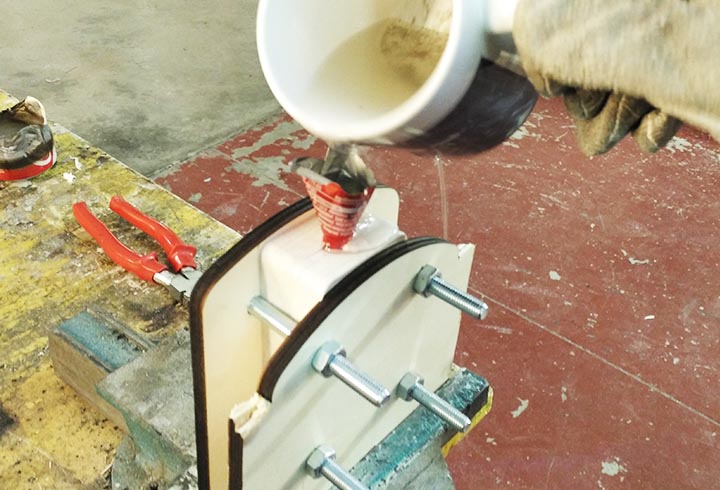
Pour the silicon mix in the paraffin.
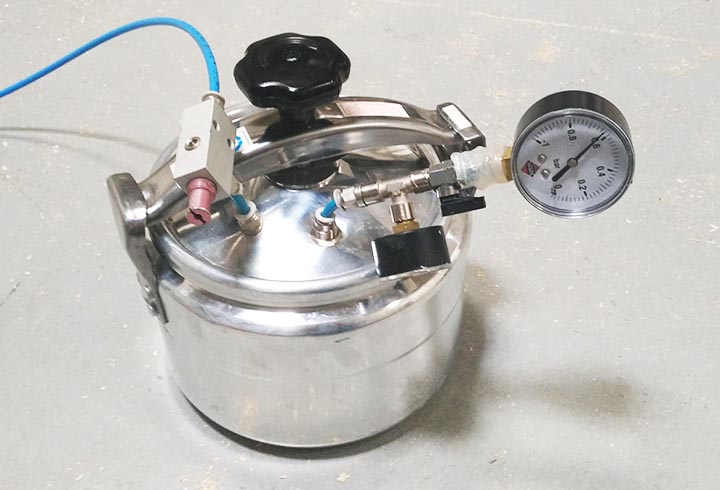
I have made a simple system with a pressure cooker and a Venturi vacuum pump, in order to remove the air bubbles. So I putted the mold inside at -0,6bar for 5 minutes and attached the cooker to the compressor.
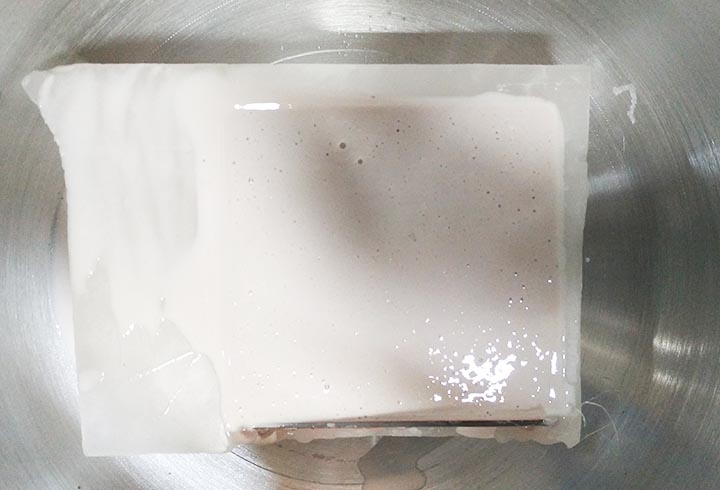
After 5 minutes, we can see all the bubbles on the top of silicon.
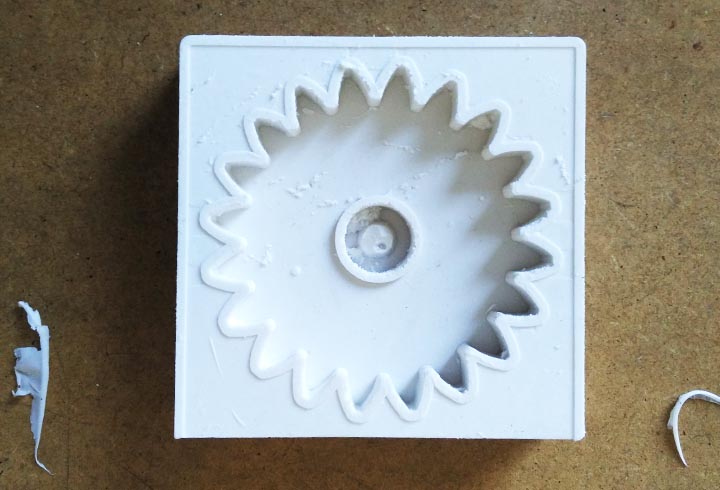
Casting: now with the silicon mold ready, we can casting the gear with different materials. The mold is not perfect, becaause I haven't clean very well the piece from the paraffin dust, but is good enough for some experiments.
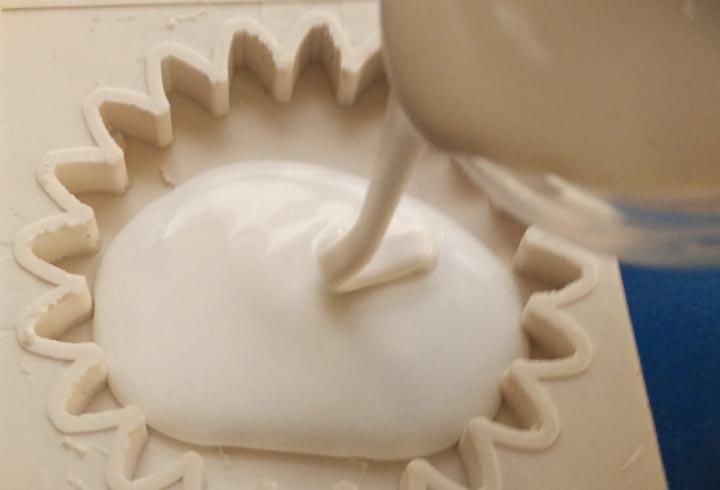
Casting: an example with plastic plaster.
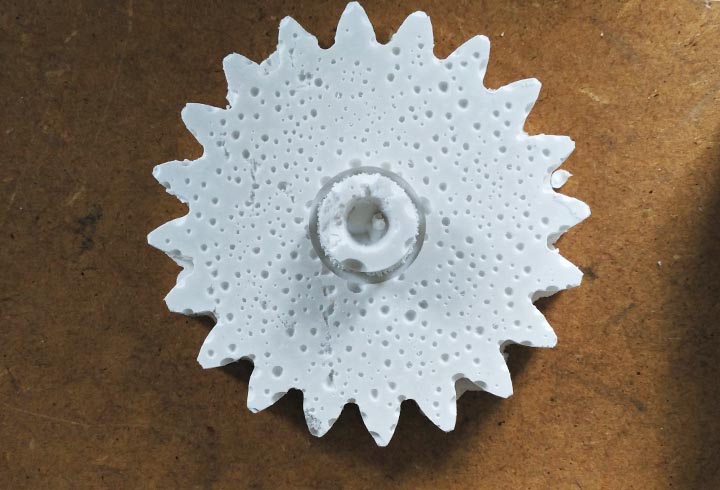
Casting: The result is not good, because I have used not enough water in the mix, obtaining a lot of bubbles.<.
Casting: the second time the piece is good enough.
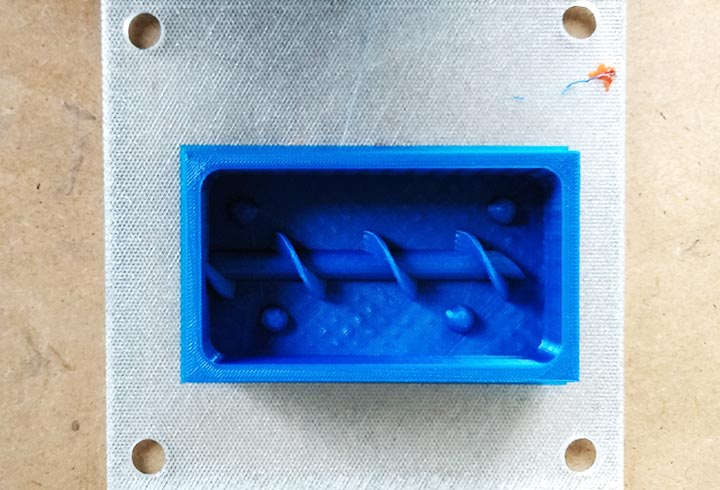
Archimedean Screw mold
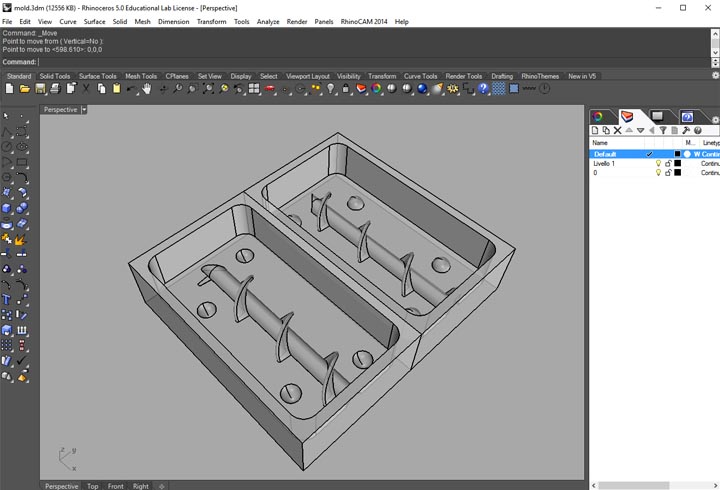
1rst step: for this geometry I decided to use a 3D printer in order to produce starting piece to mold, because I can't mill it without a 4th axes, that we don't have in the lab.
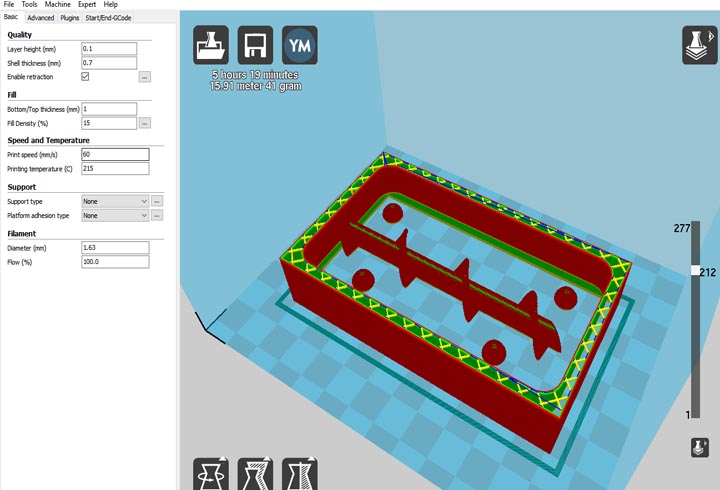
2nd step: I produced the gcode using Cura, I used a 0,1mm layer thickness in order to have a better result.
3rd step: I have printed the piece using a Materia 101 FDM 3D printer.
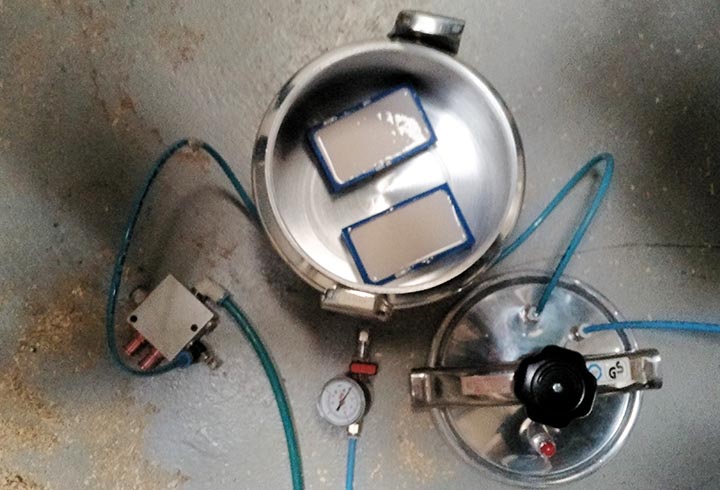
4th step: here I used the same proces sshown previously to remove the air bubbles.
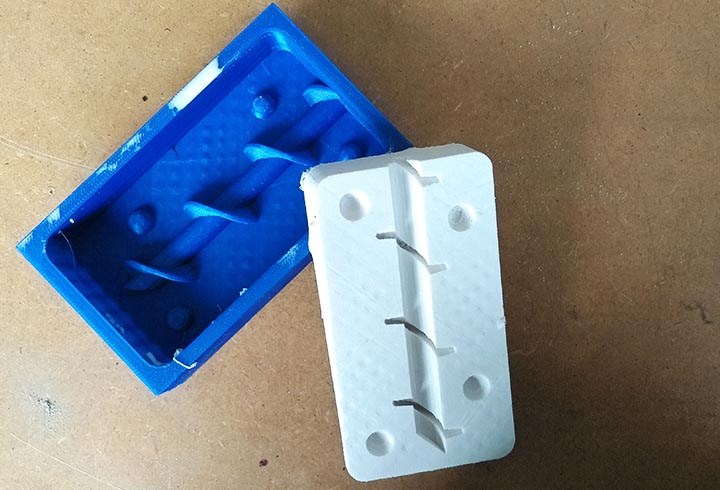
5th step: I used some vaseline to make easy to detach the silicon.
6th step: I prepared some paraffin to pour in the mold in order to make a piece that I will use for an alluminum casting.
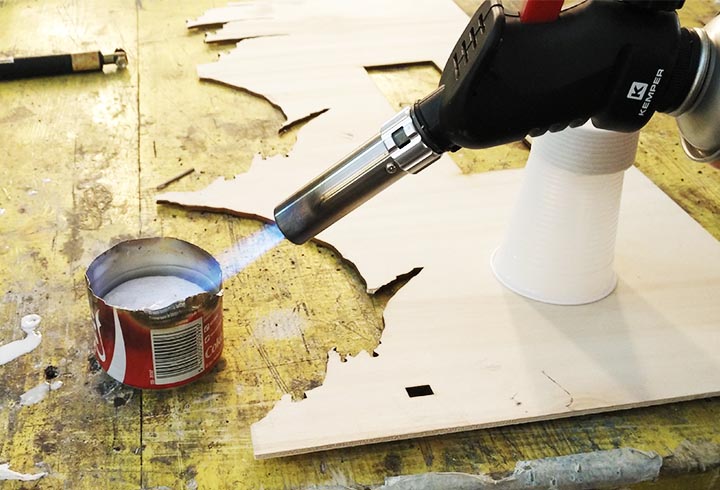
7th step: I put together the two parts of the mold using a couple of playwood scraps and pour inside the paraffin.

8th step: the resulting paraffin's piece is very well, but a little bit fragile.
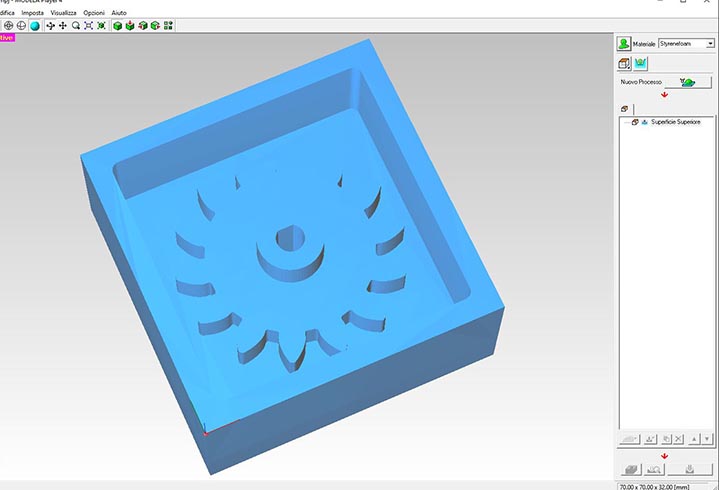
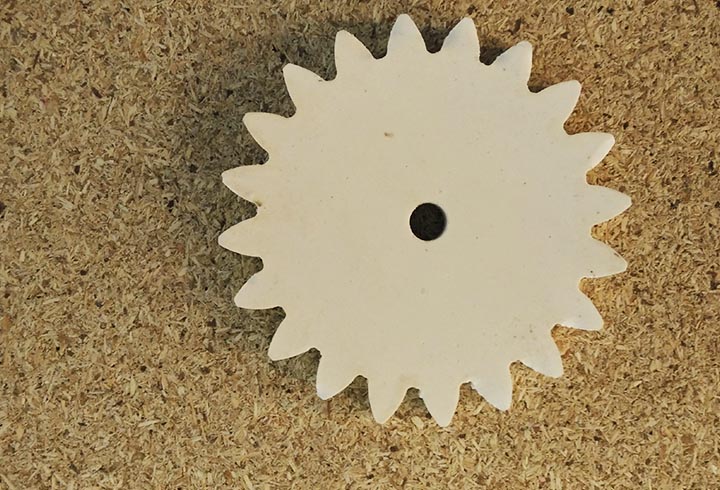
Gear moul design: the mold dimension is 70x70x32mm, 14 teeht and 52mm gear.