- Stefano Galbo
Beginner
Assignments
- Test the design rules for your printer(s)
- Design and 3D print a small object
- 3D scan an object
Test our printers
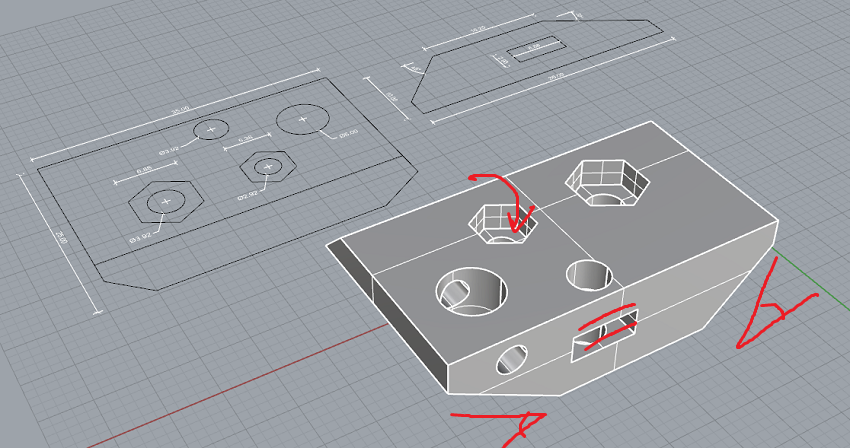
Our instructor Stefano Paradiso designed in Rhino a little object to test different rules, in particular accurancy of holes, precision of lenghts, finiture without supports of holes and acute angles (45° and 60°).
There are 3 principal rules for a good 3d printing:
Watertight: external surface must be closed everywhere, if you pour water, it must remain out of object.
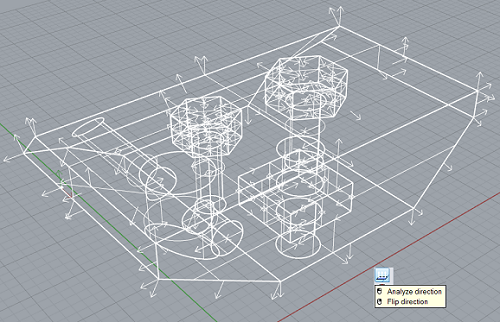
"Analyze direction" command: all normal lines must be in the same direction. In Rhino is quite simple if you pay attention while drawing, but it's better to check and flip direction of wrong ones.
In our object, all the normal lines go to outside.
Not too many mesh: at the moment we're working with nurbs, so perfect surfaces described by polynomials; but 3d printer needs to split these surfaces in triangles (called "mesh").
This switch from nurbs to mesh is very important, because it will influence speed and quality of printed object: if you set too many mesh, you get an object very detailed but file is very heavy and machine takes more time to elaborate and spend many hours to print it; if you set not enough mesh, you get a light file very fast to print, but you get an orrible object.
Our goal is to find a good average between quality and printing speed.
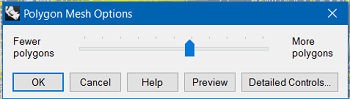
In this simple slider, we approxymately set 60%.
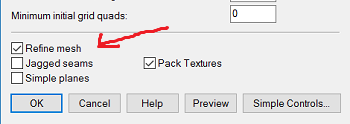
In detailed controls there is an useful option "Refine mesh": Rhino automatically uses many mesh when a particular definition is needed, and few mesh when it is not.
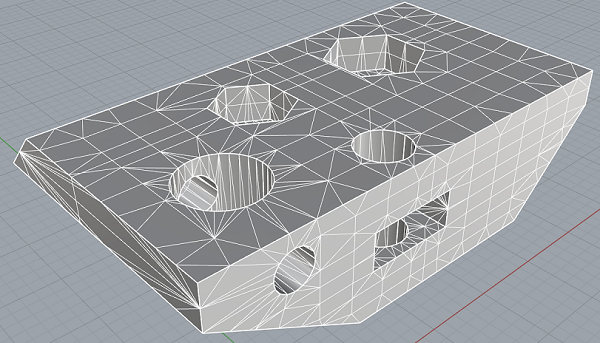
This is our mesh file, ready to be imported to a slicer program:
Cura
Now we open Cura, a slincing program that generates from .stl a Gcode to command 3d printer.
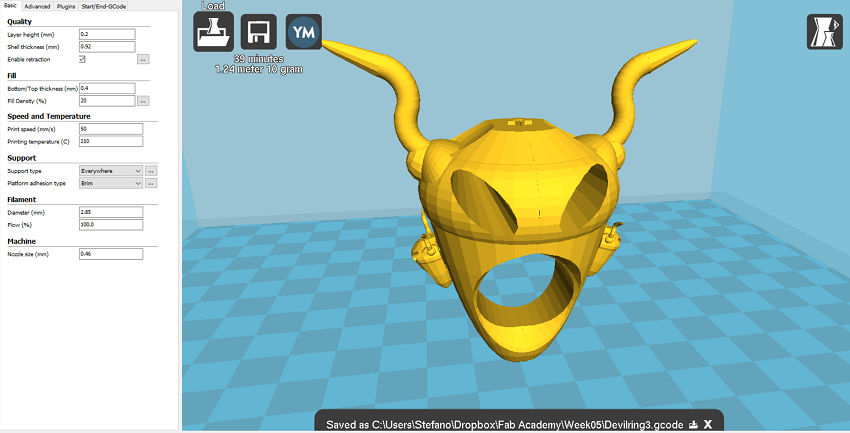
It's very user-friendly, with just a few parameters you can make big changes; here in particular parameters we analized:
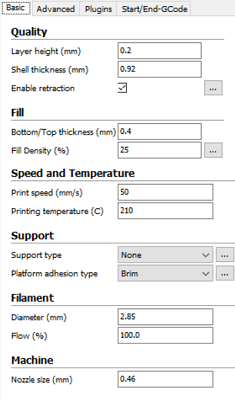
Layer height : probably the most important for quality. Generally a good average between speed and quality is 0,2 mm, obviously you can set a thinner value to improve quality.
Shell thickness : this value represents how many filament sections will make up the side walls, so it must be a multiple of nozzle diameter.
Fill density : between 20% and 25% you will get a solid object, saving time and filament; if you want a very strong object, you can set 50% or higher.
Printing temperature : it depends on the filament material, for our PLA 210° is good.
Support type : with our test we want to check 3d printer's limits, so we will set to "None" and see what 3d printer is able to make without supports. But generally, to reduce deformation of the final product, it's essential to set at least "Touching buildplane" (supports from floating parts of object up to the plate) or even "Everywhere" (supports also inside the object).
Platform adhesion type : we set "Brim", in order to make a thin layer around the object, to simplify removal of the final product.
In other settings (advanced or expert) you can change many many options, for example "Initial layer thickness" (usually a little bit higher than default value), "Skirt" (useful to clean extruder), "Spiralize the outer contour" (to avoid the problem of lateral scar).
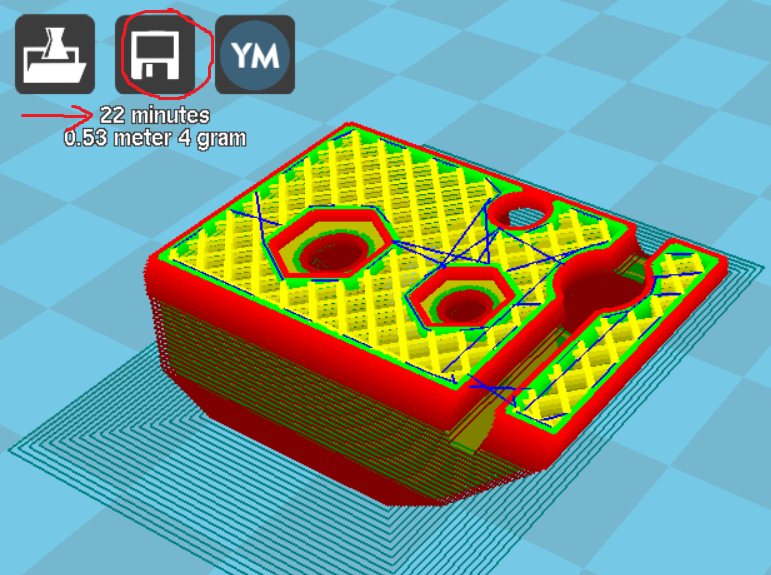
After setting all, we can see time required to print everything, and we can push Save icon to generate Gcode; we put this Gcode on an SD card and we switched to 3D printer.
Printing test
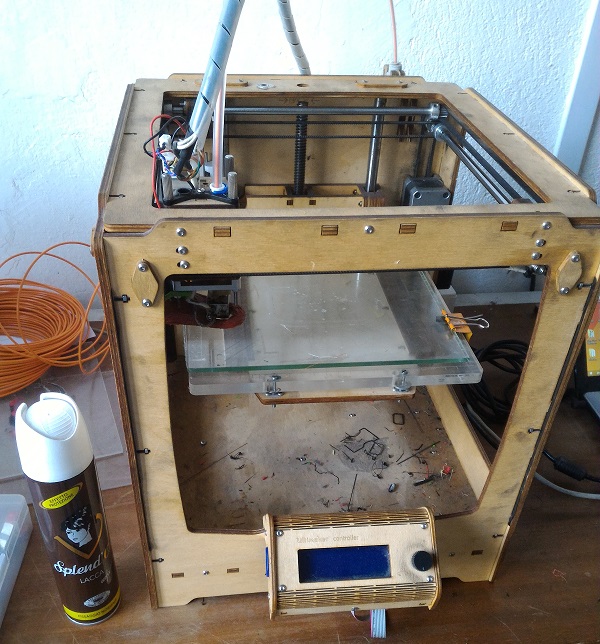
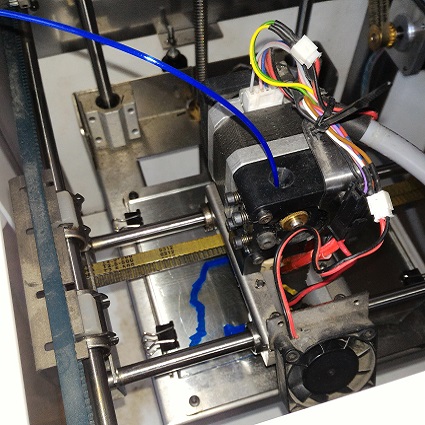
In FabLab Torino there is an Ultimaker Original.
First we cleaned the buildplate and the extruder, then we started heating procedure.
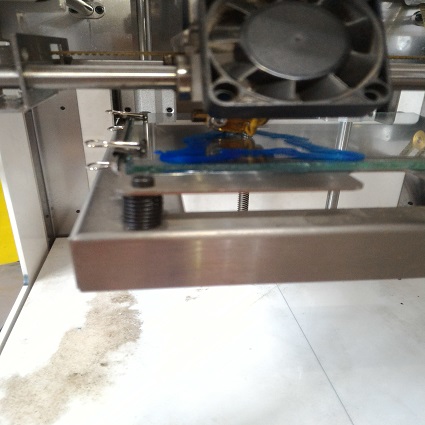
We had to do the most important operation for a good result, bed leveling; to do that, we moved the plate very near to the extruder, we put a feeler between them and we turned the screw until there was a bit of friction when we tried to remove the feeler from plate and extruder. At that time, we just had to repeat this operation in the other 2 corners with other screws, in order to set the same (average) distance from extruder to buildplate.
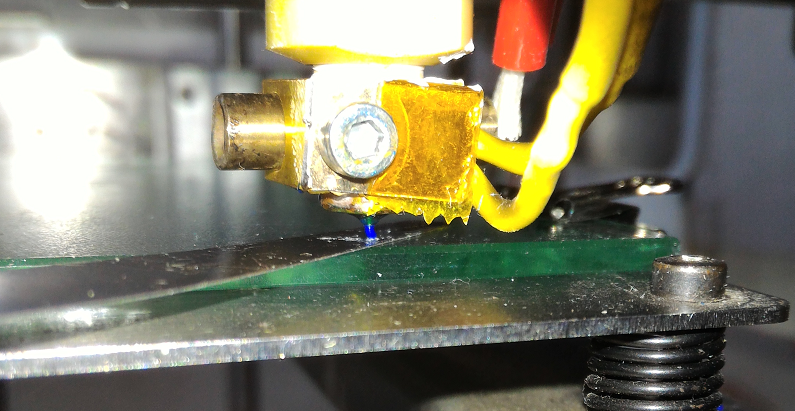
Finally we put on plate a bit of hair spray, so the product will not stick too much to the plate. We are ready to print!
After approximately 23 minutes, we had our final test! We was satisfied: good definition, good resistence, critical points ( as angles and holes) well done.
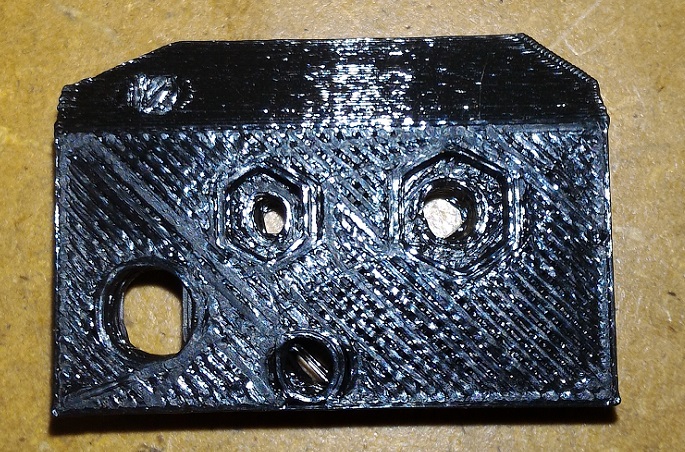
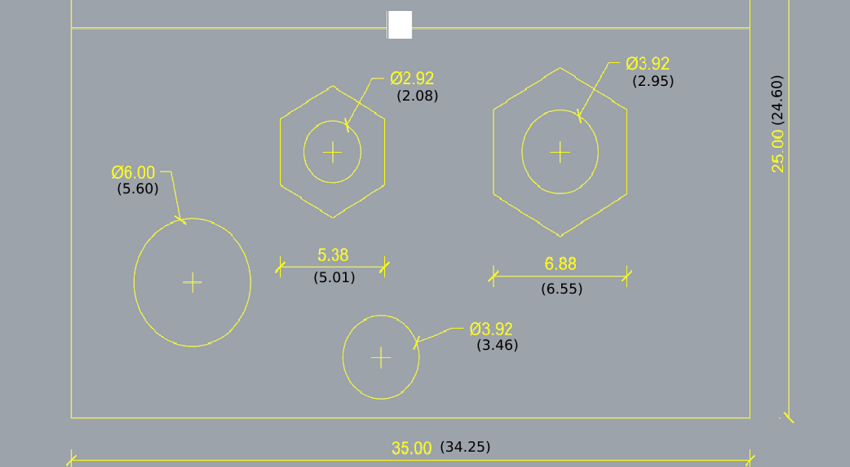
The last parameters analyzed were some measures, in order to understand mechanical precision of our object.
Here a grafical summery, yellow text is the drawing, black text is the printing:
Desing my object
I decided to use a new cad software, Rhinoceros is very good but it is a little bit complicated and for my final project I prefer something "more artistic".
I chose Tinkercad, an online software very simple but quite complete, ideal for a beginner...few options but enough! With the learning page (singing in) after few minutes you will be a PRO in this software.
Because of my bad ability to draw I went very slow, but using basic geometric commands, boolean operations as holes and groups, and adjustments as mirror and align, I was able to create my Devil Ring. Here the .stl file.
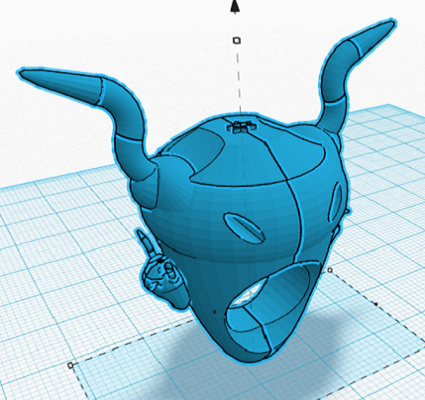
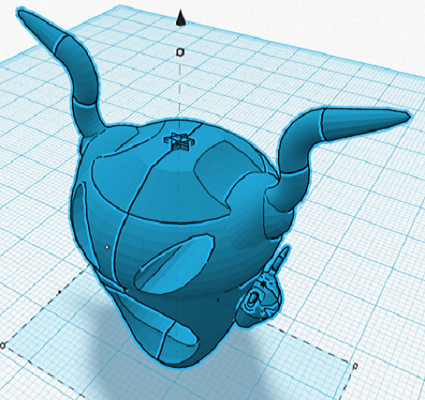
As soon as I finished the drawing I noticed two mistakes, two big typical beginner mistakes:
- Because of enthusiasm, I drew an object not ideal for 3D printing: there are too many particulars, too many floating parts, too many angles and holes difficult to make. I will probably have to semplify my object if I want to print something similar to my draw in less then 2 hours.
Tinkercad is not Rhinocheros! Tinkercad works directly with mesh, and in order to be basic, it hasn't mesh options like Rhino; so I couldn't set mesh amount, I couldn't refine mesh, I couldn't set nothing.
The only solution I found is to open that file in Rhino and launch "Mesh Tools": with it, I could use "Mesh repair wizard" that automatically removes all my horrible mistakes, and "Reduce Mesh" to decrease polygons amount and speed up the print.
With Rhino help, I get this improved file.
Print my object
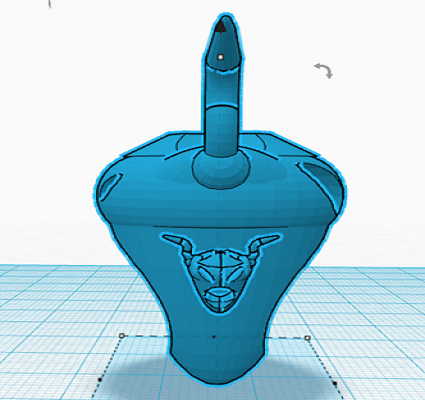
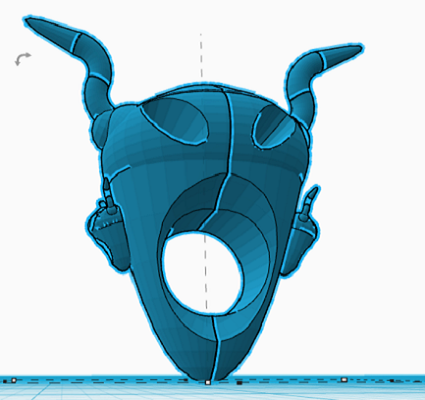
First I had to simplify my object, so I cut one half of it, I rotated it on XY plane, and I modified two little devil faces in order to decrease floating parts.
This is my final file and its Gcode.
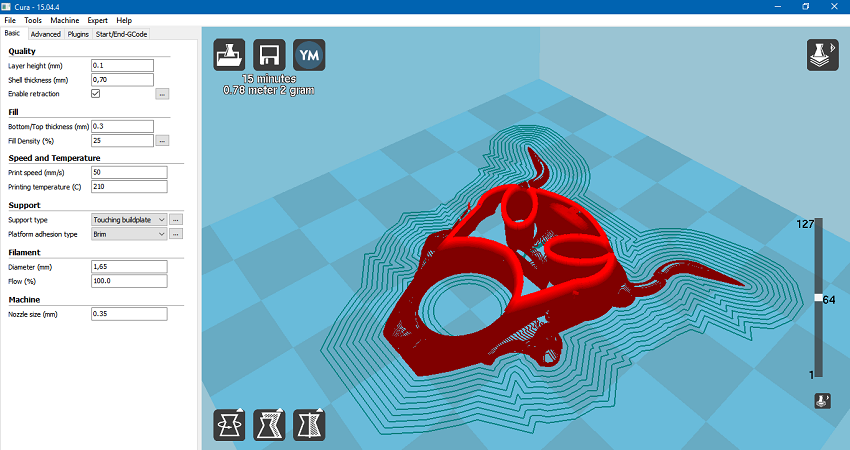
I repeated all preparing operations made for test printing, I launched preheating, I set "Use Gcode" to use my Cura parameters instead of PLA, and I printed.
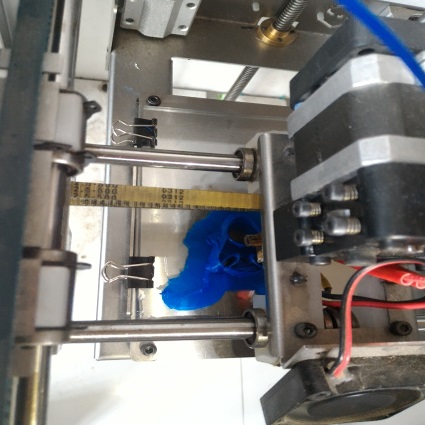
After 16 minutes, this is the result:
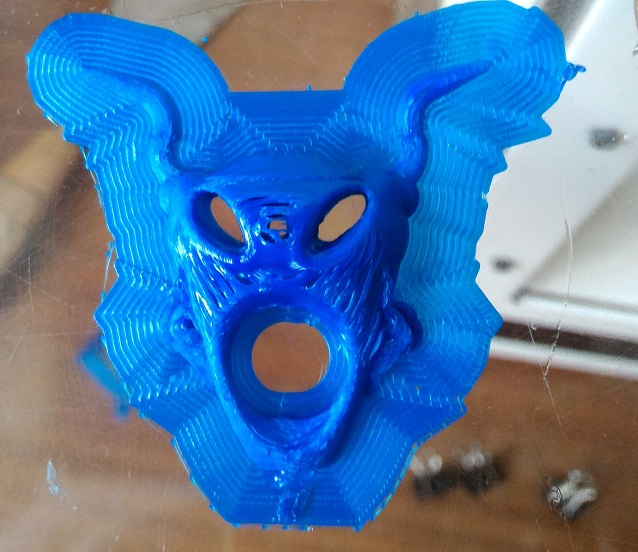
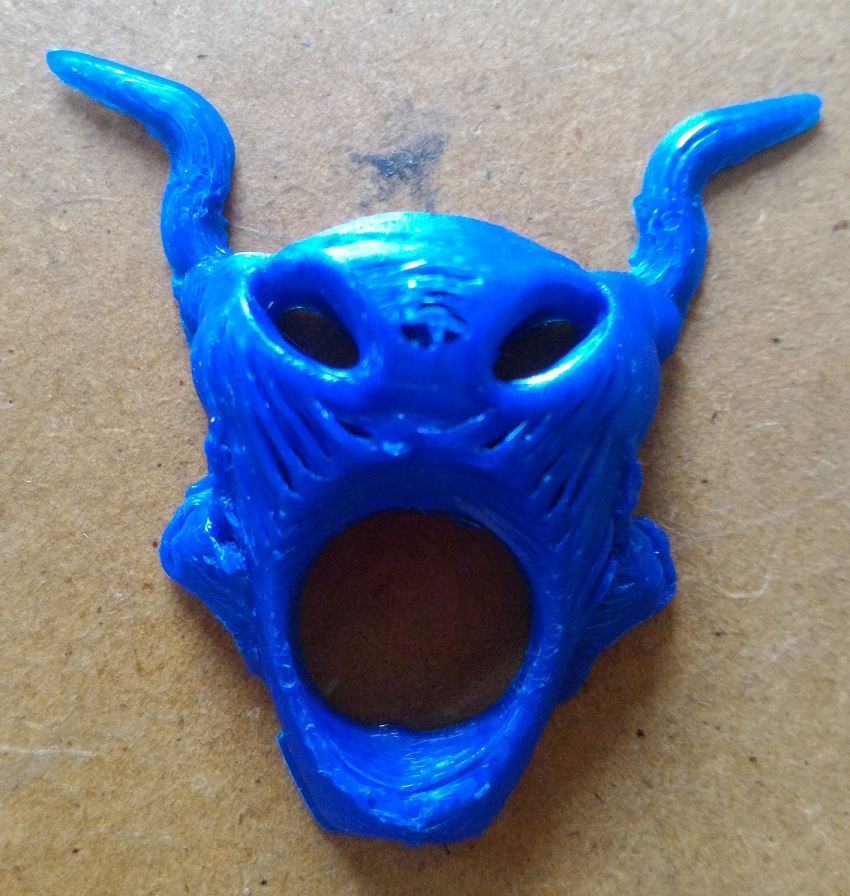
I'm quite satisfied! Ok, final product is not so good, but I have learned many news..
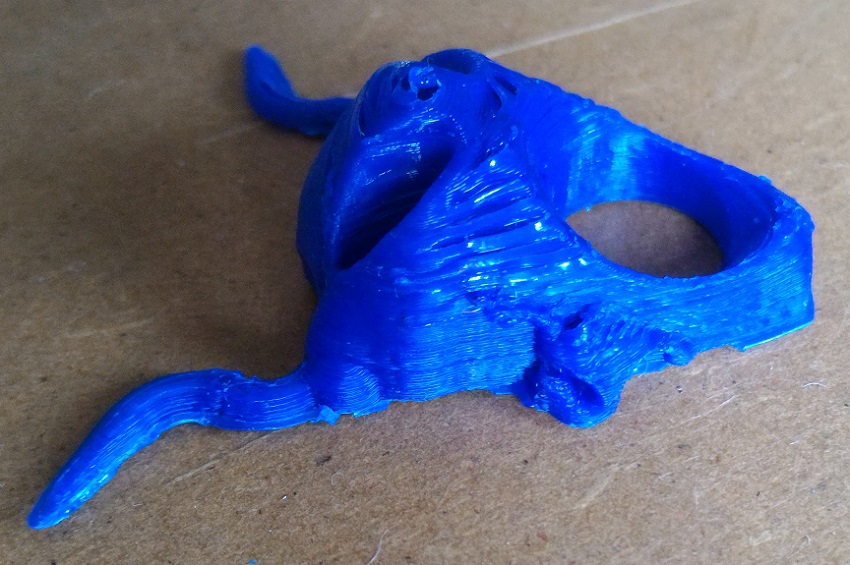
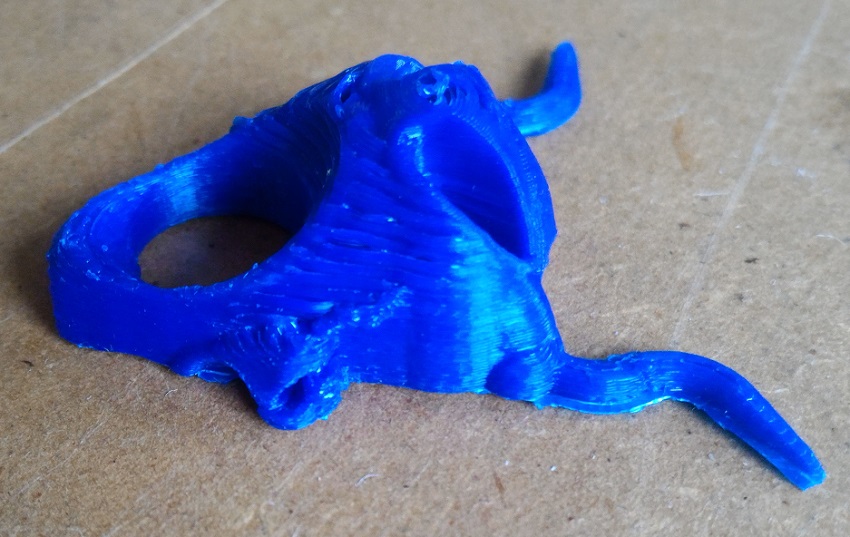
Brim is very useful to remove object from tha builtplane and to get a clean form; appearance looks like the drawing, specially holes, right little face and horns.
My principal mistake was to draw a Lucifero's face very roundish, there are critical angles under the eyes that have compromised frontal face and little left face.
In conclusion, I will spend next days to do further tests until I will get a good final product, but now I know a little bit more what I have to do and what I have not.
Scanning
I decided to use 123D Catch, a free software by Autodesk.
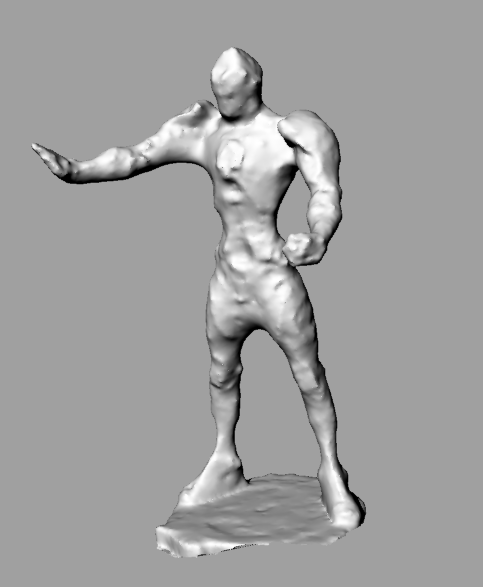
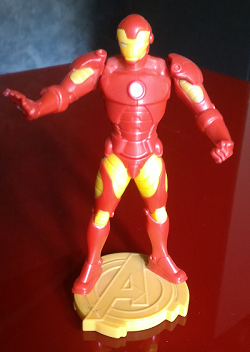
It's very easy because you need just a smartphone with camera: to know how to do it, I looked at learning page, including videos (I had many problems to visualize this page correctly, I reloaded many times...I don't know why). Then I downloaded the mobile app from Play Store, and I prepared my subject, a little toy of Iron Man.
The app is well done, it's enough to follow the instructions on screen: you have to take about 20 pictures walking around the subject, and repeat this operation with the camera a little bit higher (20 more pictures).
Now you just have to wait: the cloud spent about 1 hour to upload all the pictures, another hour to process them, and about 4 hours in "Thinking some more" step.
After this time, I finally have my model! Surely it is not perfect, but I can download the file and improve it in Meshmixer (for example I have to delete the background and other details).
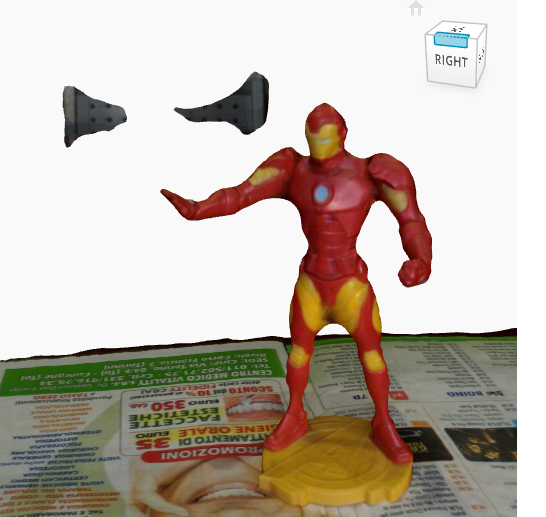
I imported the file in Meshmixer and I selected unwanted parts with "sphera mode": not so easy but quite fast.

I repaired the new file with usual Netfabb and my Iron Man was ready! (here, file)