Molding and Casting
This week I tried two techniques, one, use 3D printed object to do a mold. Two, use CNC to mill machinable wax. Also for the casting I use different materials: PU plastic & SnBi low melting point alloy.
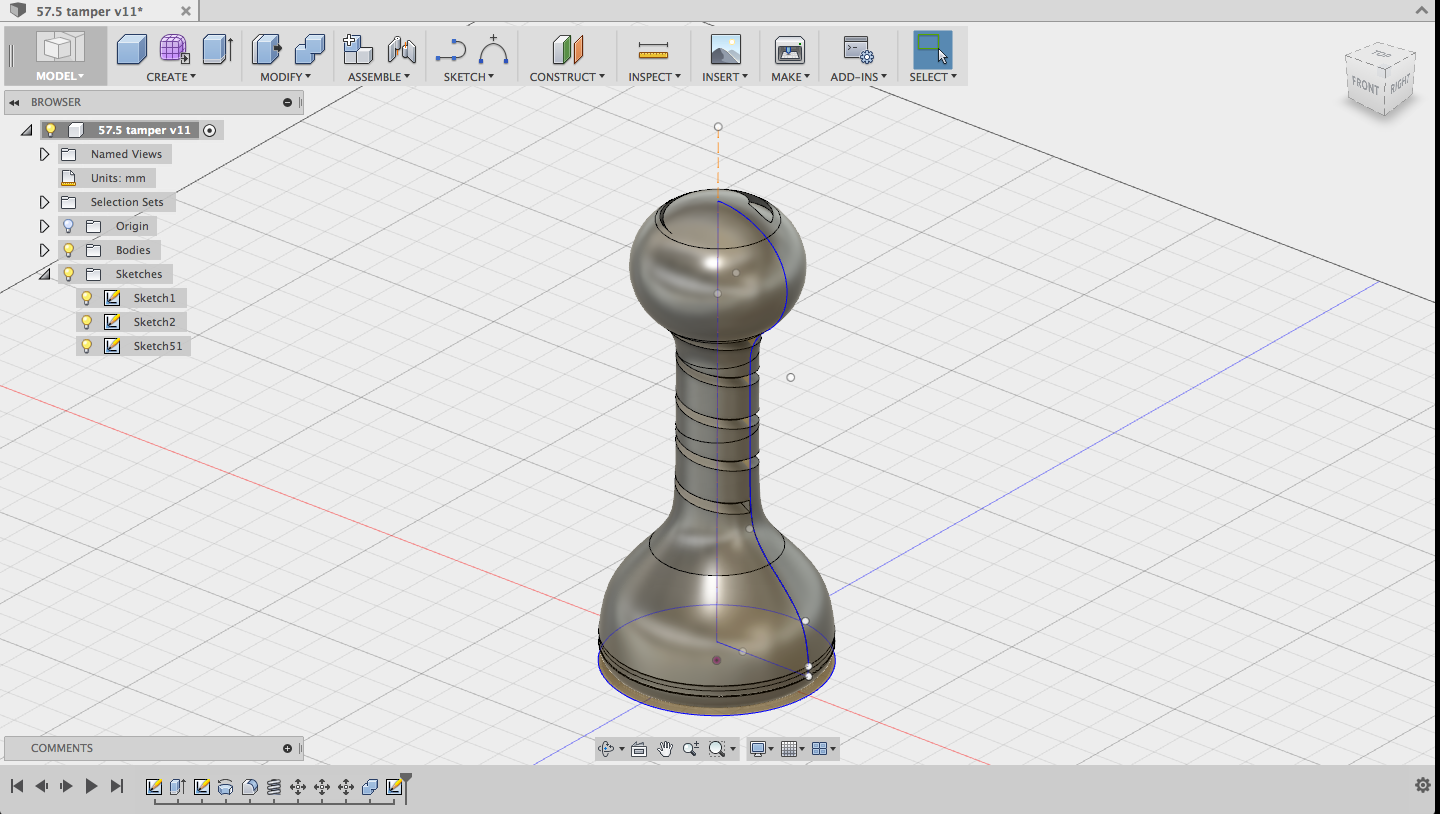
As usual, I use Fusion 360 to draw the espresso tamper.

I used some modeling paste to smoothen the hanging part.


Mold: Silicon
Cast: 8019 PU (HEI-CAST, a Japan manufacturer)
I used plastic bottle to make the mold

To stablize the 3D printed object, I use iron wire to give the object extra support


 Then pour the silicon into the mold, and put the container into vaccum chamber to get rid of the air bubble

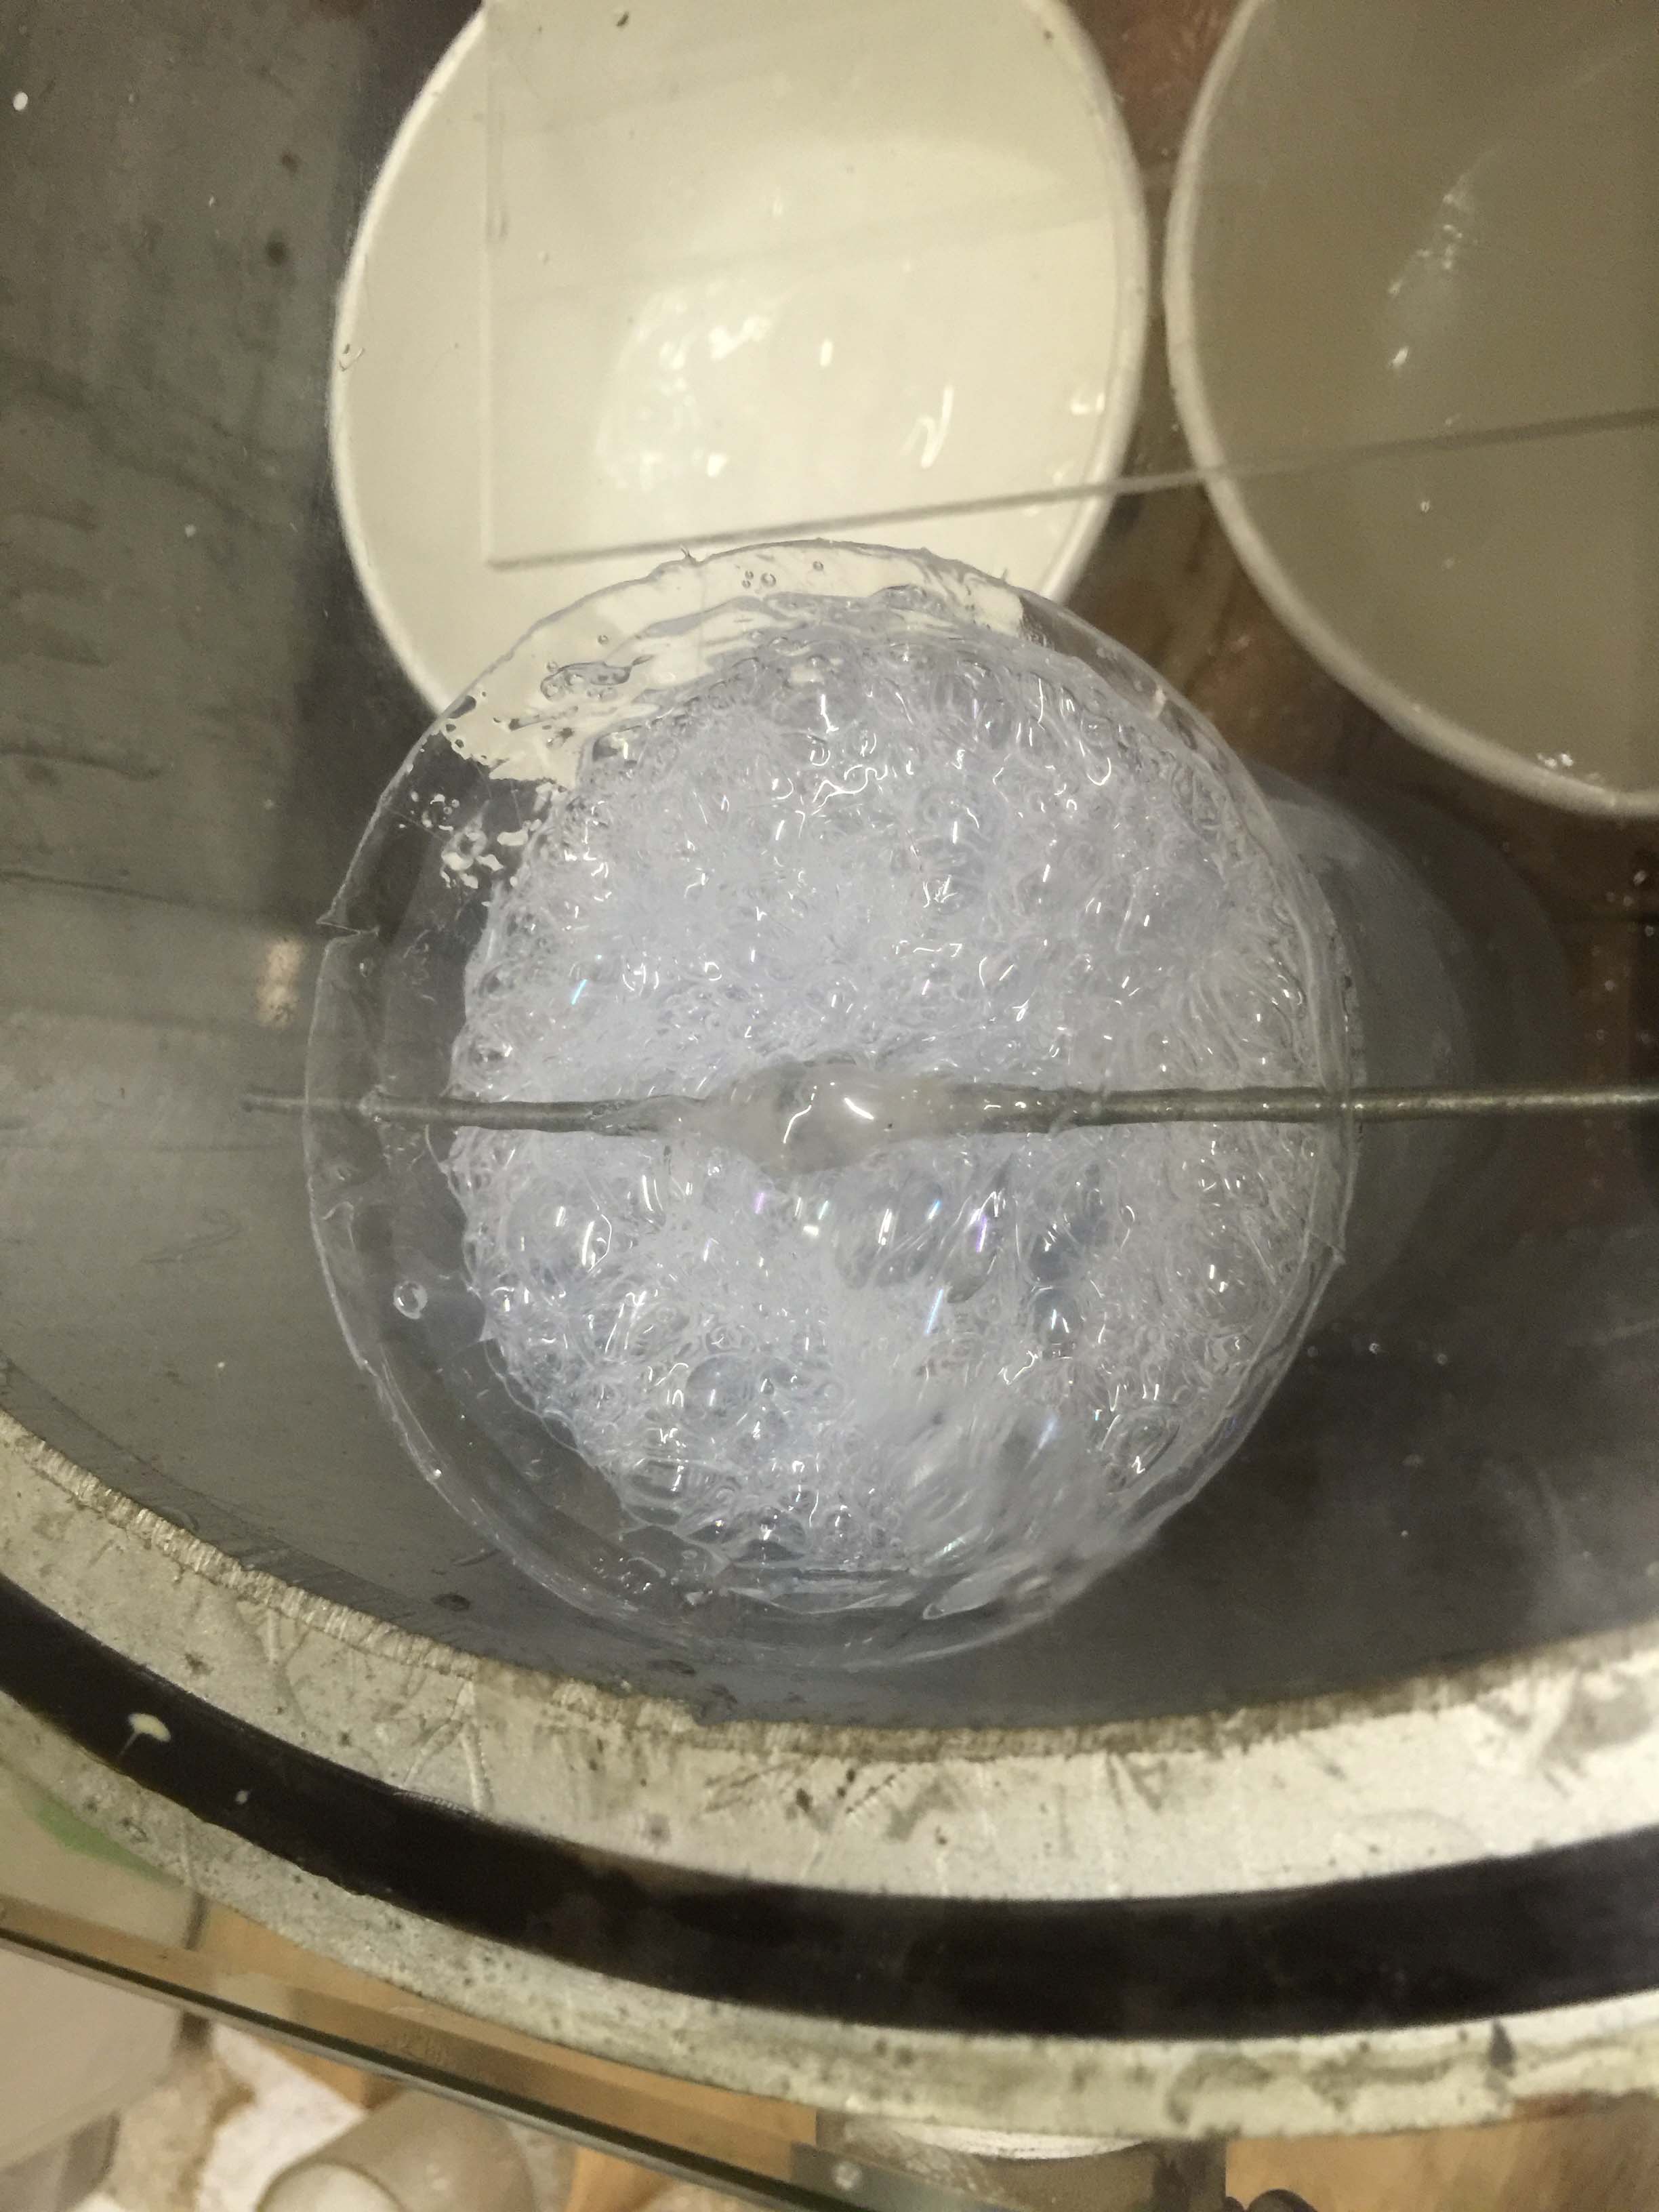
Wait for 18 hours... cure time...


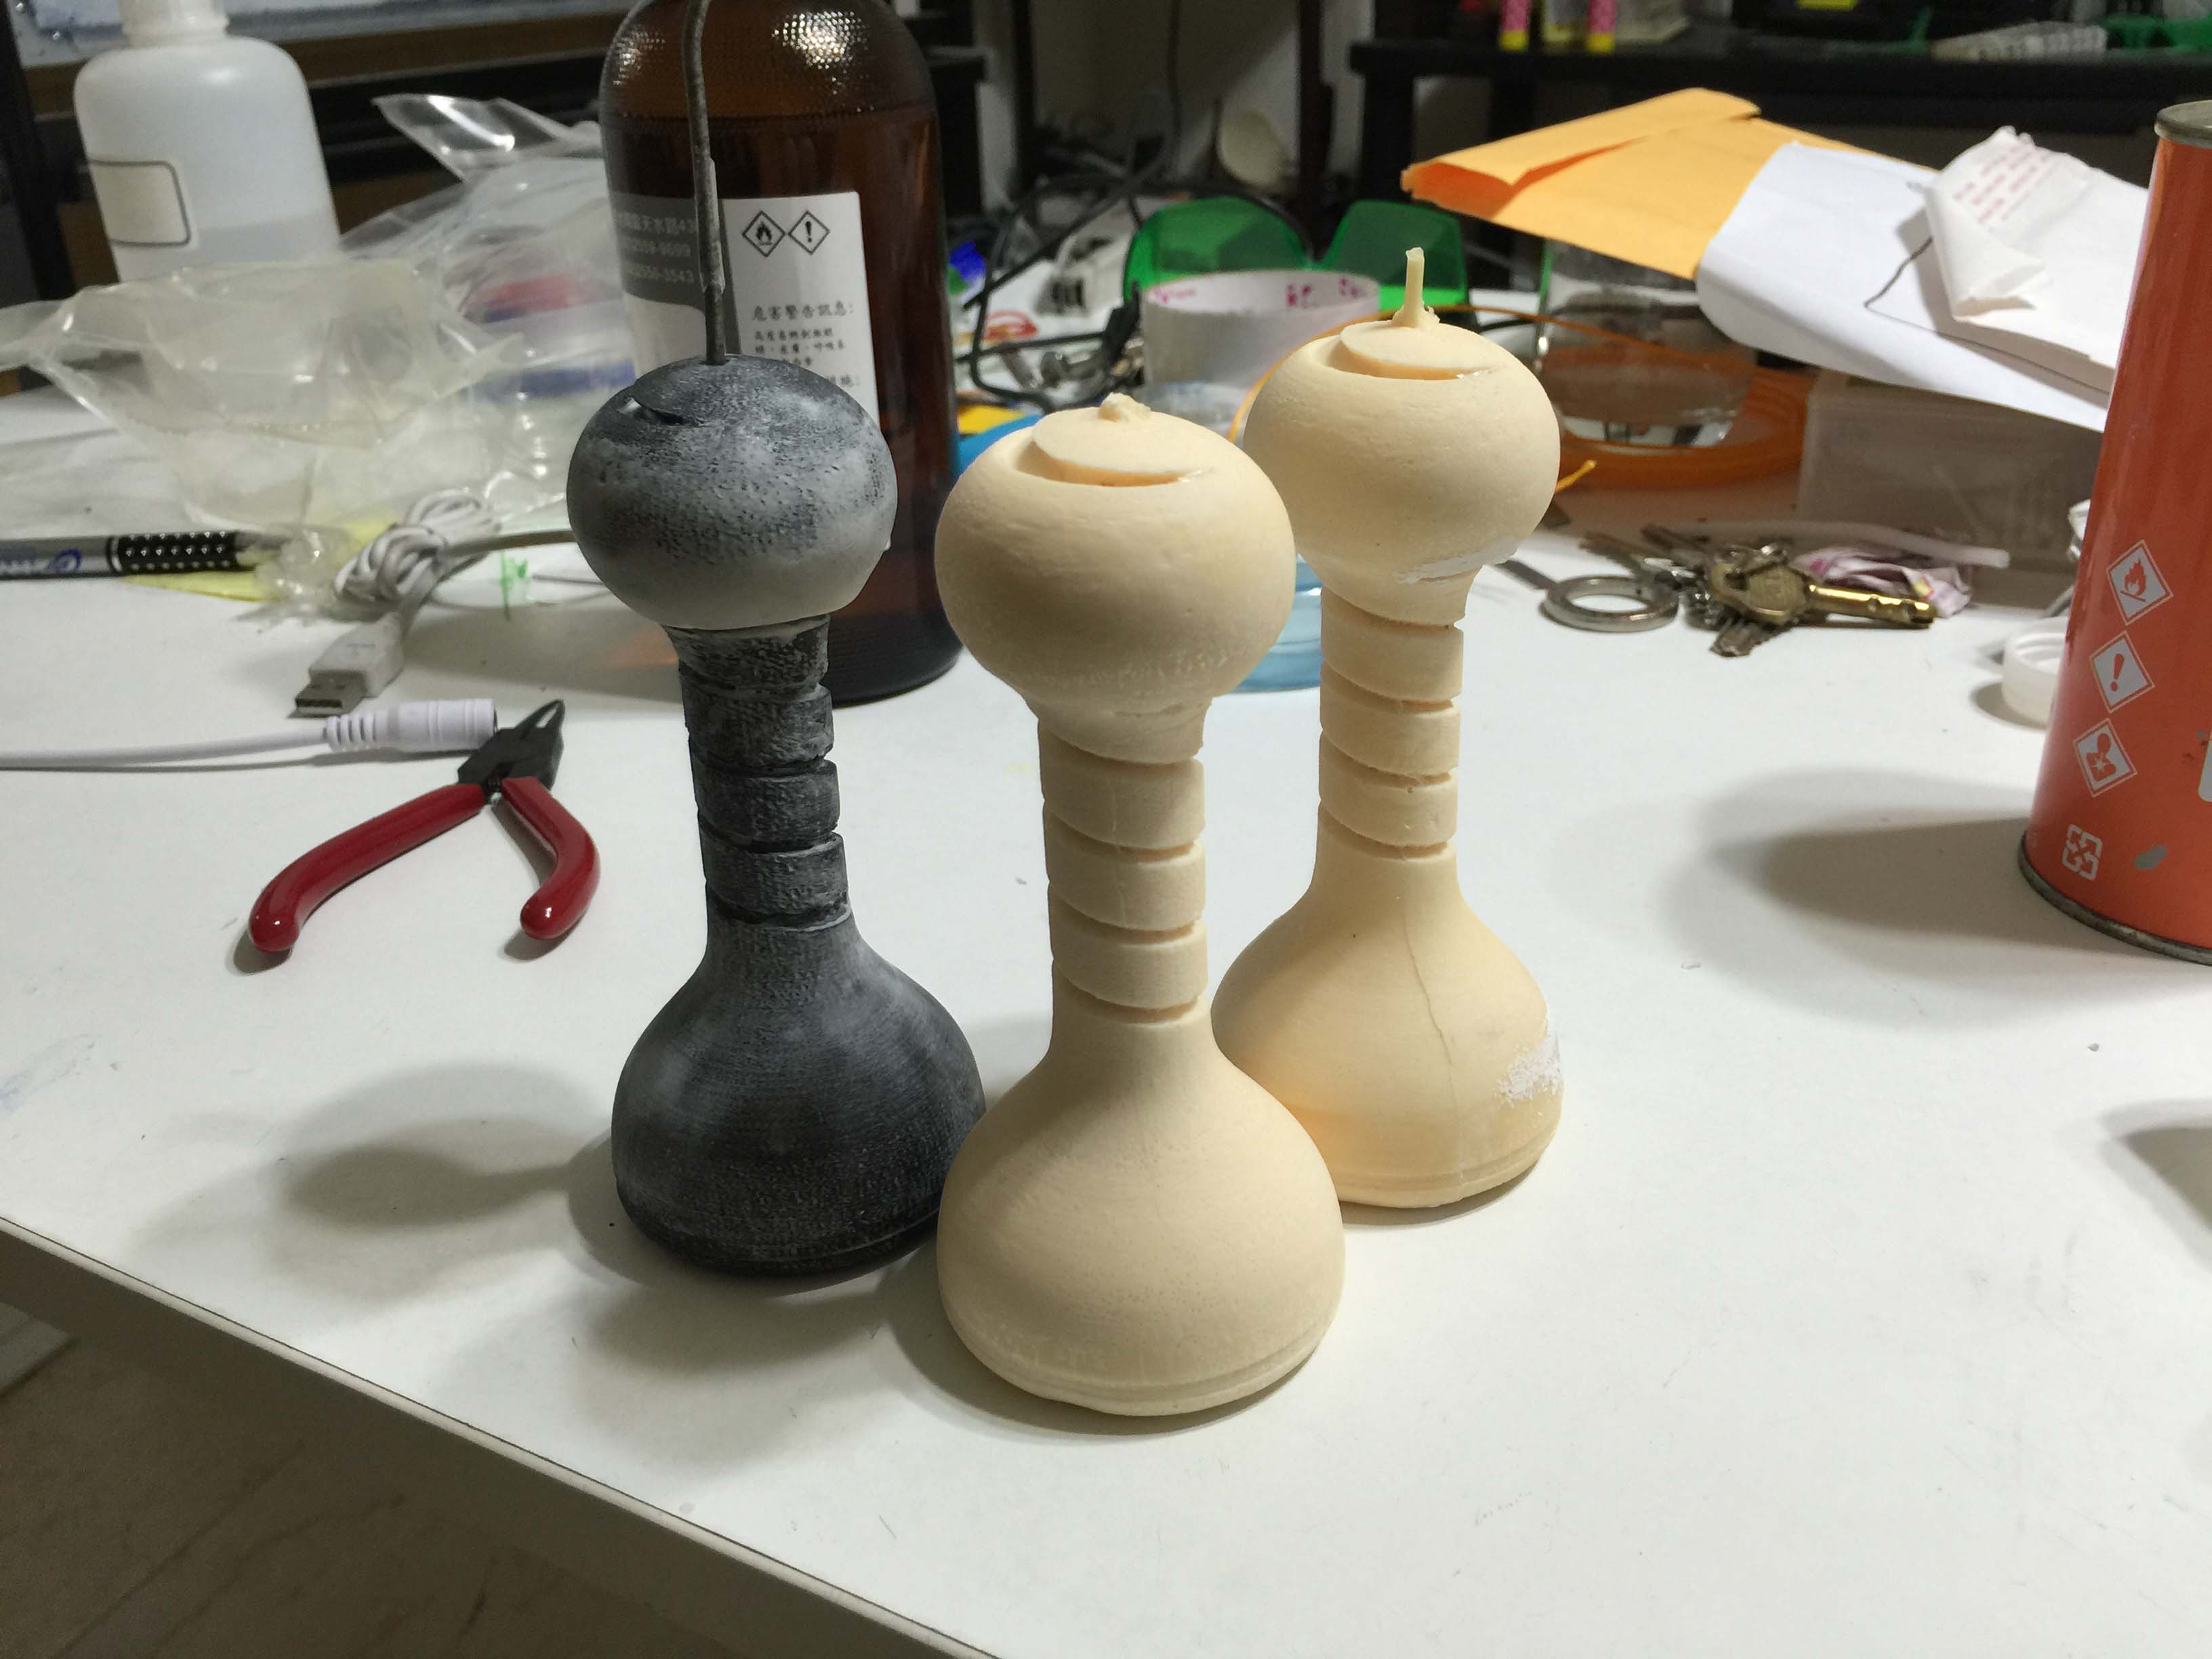
looks good, then use cutter to carefully cut the mold in half and remove the object.

Note: you don't need to cut the mold into two symmetric pieces, actually assymetric helps you to fit the mold, but make you make clean cuts.

Fitting the negative mold. I used duct tape to seal the mold.


Pouring the PU into the mold. The cure time of HEI-CAST 8019 is about 1 hour.


I was thinking maybe I can cast a coffee-bean-shaped button key for my final project, that would be used with a button. Though for my project I don't really have a button for interface.
So I milled a small piece of machinable wax with MDX-540. I used 3mm / 2mm / 1 mm / 0.6 mm milling bits to do the tooling.

Looks good but the tiny air vent made me concern...

Anyway I apply some Oomoo for the negative mold

There are bubbles in the mold, but I think for a mold this small it is acceptable.


Test cast. I melt down a poor kitten.

The test cast was a failure, no metal came into the mold. So I decided to use cutter to trim the air vent and the sprue.


Then applied some talc powder onto the mold, this is the technique Jason Wang told me.


I used two pieces of scrapped MDF and metal clamp to fix the mold, and melt extra metal, poured them relentlessly. The alloy can always be easily recycled so I was not too worried about being elegant.

Now this looks better, still you can see some detail in the bottom was missing, I think I will need to do another mold or modify the negative Oomoo mold to let the metal flow to the bottom of the mold.


Models here (.stl):