Week 12
Design a 3D mold, machine it, and cast parts from it
The work of this week I do is to make one part of the final project. In order to using a motor-driven slides, rotation of the motor needs to be conducted out, thus I designed two pulleys. This rotation of the motor pulley can be conductive to the screw, and the speed of motor can be decreased and enhanced the torque force. Because I need four pulleys, the task of the week is suitable for making copies of the same object.
本周的作業我所做的是final project中的其中一樣物件。因使用馬達驅動滑軌,需要將馬達的轉動傳導出來,因此設計了兩個滑輪。此滑輪組能夠將馬達的轉動傳導到螺桿上,同時能將馬達轉速降低及提升扭力。需要四組的滑輪,這周的任務正適合製作同一物件之複製品。
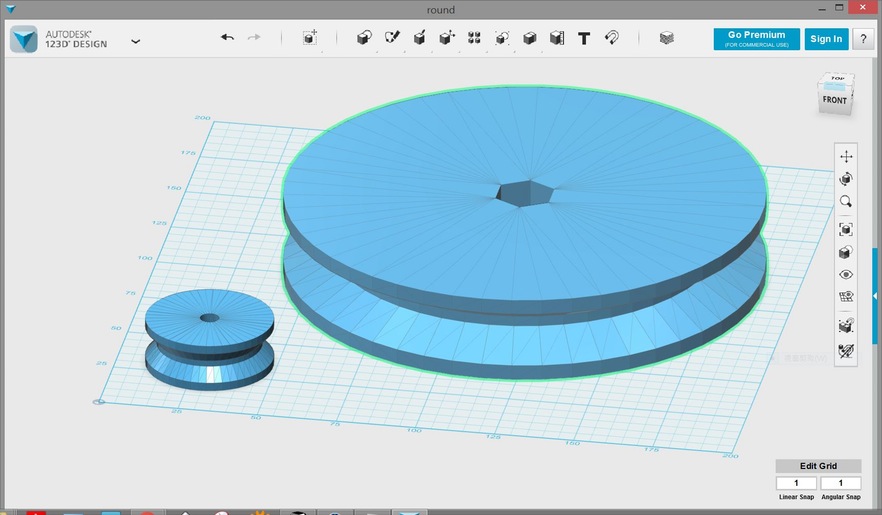
First, I used 123D Design to design the wheels. Then, I made a small wheels as the trial.
先以123D Design設計輪子,取小的輪子進行試做。
Designing the Mold:
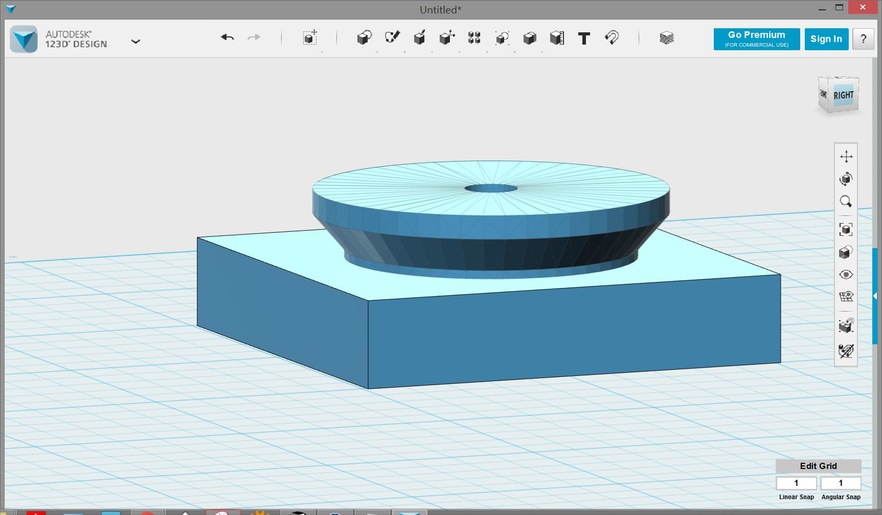
Due to the fact that the object is not a big item, it can be made directly by SRM-20. I 123D Design was turned into mold model. Since the beginning of the design had to make into a master mold that will be turned, the wheels were cut in half. After that, I putted them on the platform of CNC. The master mold can be two corresponding to watering the products. However, this required a higher level CNC to address with the internal ramp with the fourth axis of machine.
設計模具:物件不大可以直接使用SRM-20製作。使用123D Design轉成模具型式,一開始所設計因為要翻轉製作成母模,所以將輪子對半切,然後放上平台,之後母模就可以兩片相對應,將物品澆灌製作出。但此形狀需要更高強的CNC進行製作,可能需要第四軸以上的加工機器才能處理內部斜面。
So I reversed the wheels as the next chart and created an anchor point.
(Later I found that this is a problem, the structure is completely the opposite can not be used, and can not make the structure of the center.)
所以倒反過來放上輪子,成為下圖形狀。並製作定位點。(後面才發現這是有問題的,結構完全是相反的無法使用,且圓心結構無法做出。)
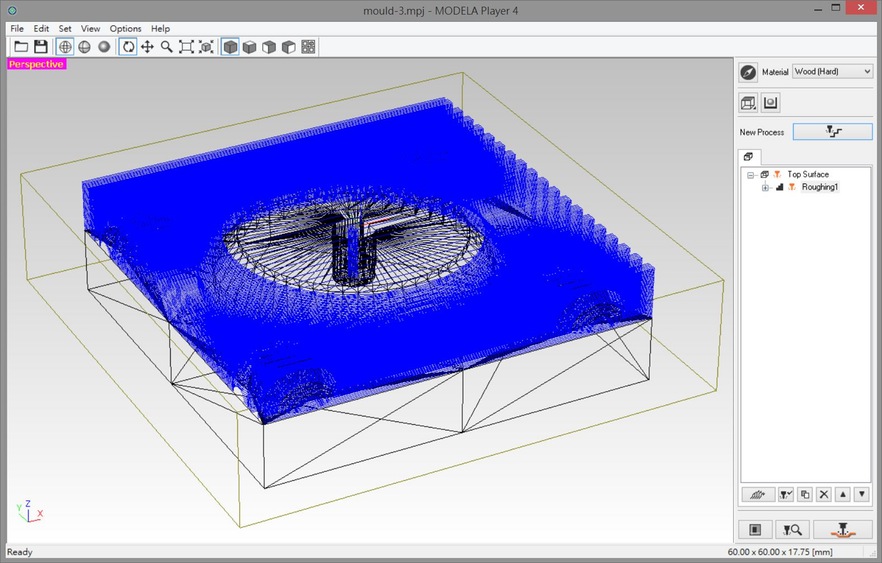
The output of * .stl file was imported into MODELA Player 4, as it is produced by Roland CAM software. Be sure to select the correct engraving machine, in order to use the corresponding tools. At the same time for the selection of material to choose the right "Material".
將輸出的*.stl檔案匯入MODELA Player 4,此為Roland所出產的CAM軟體。務必選擇正確的雕刻機,才能使用對應的刀具。同時針對所挑選的材料選擇正確的"Material"。
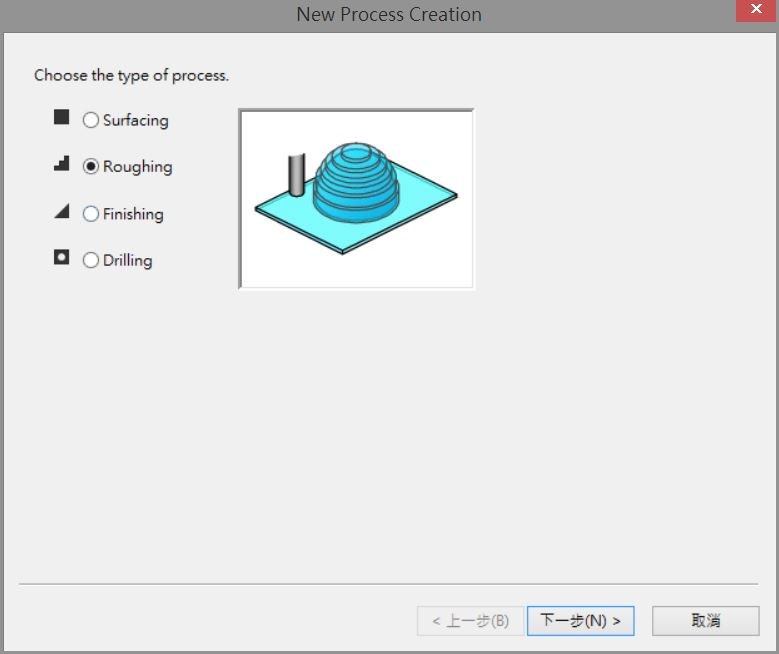
Click on "New Process", select "Roughing".
點選"New Prosess"後,選擇"Roughing"。
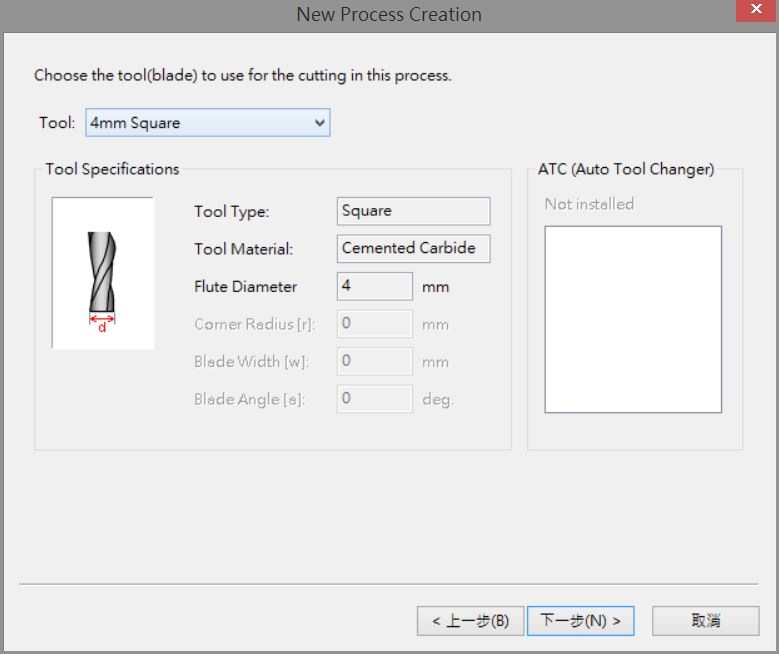
Select the tool to use.
選擇使用的刀具。
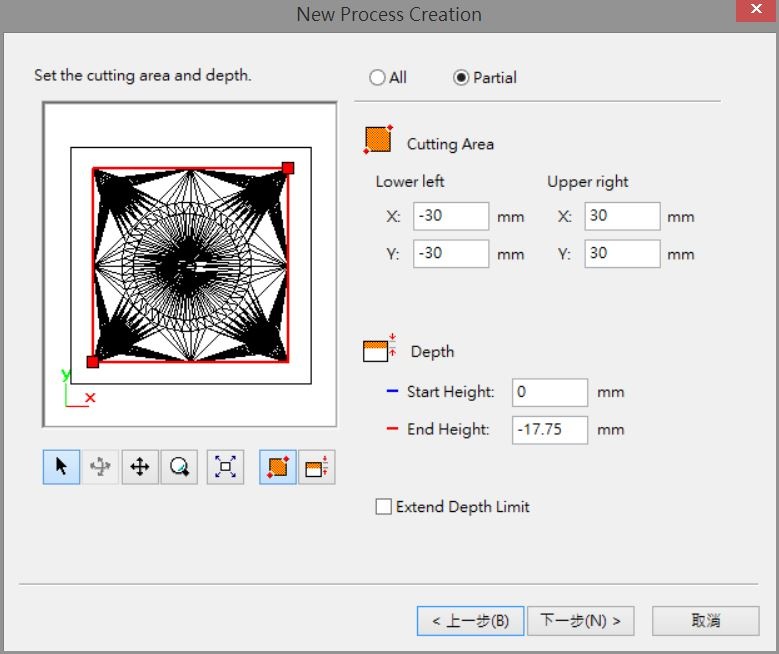
Select the cutting range.
選擇切割範圍。
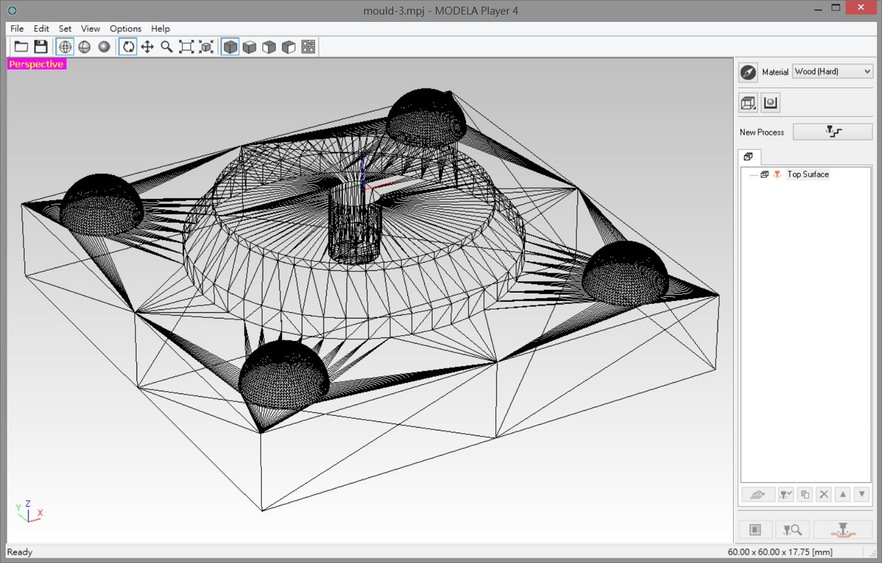
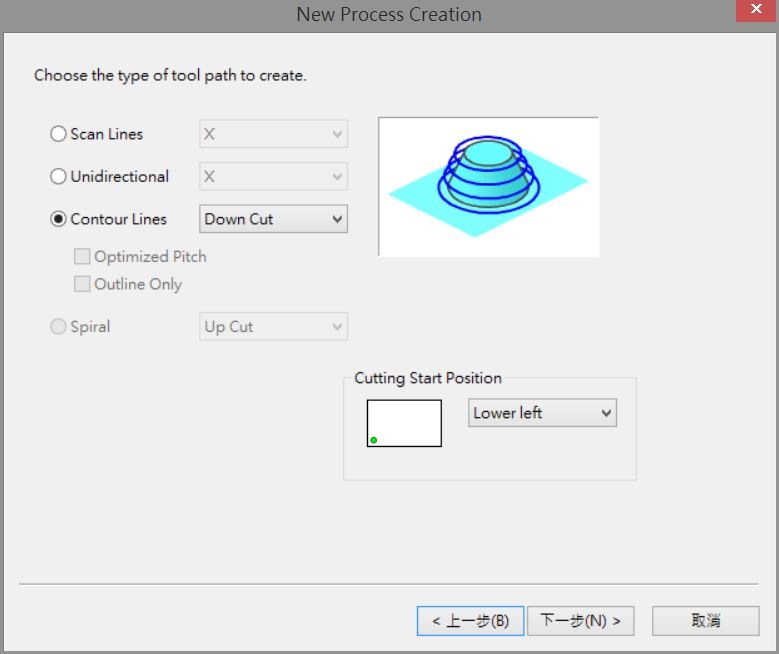
Select the cutting direction and the way I try to use the "Contour Line".
選擇切割方向及方式,我嘗試使用"Contour Line"。
Upon completion of the calculation processing may be convex see the blue path.
完成計算後可由凸面看到藍色的加工路徑。
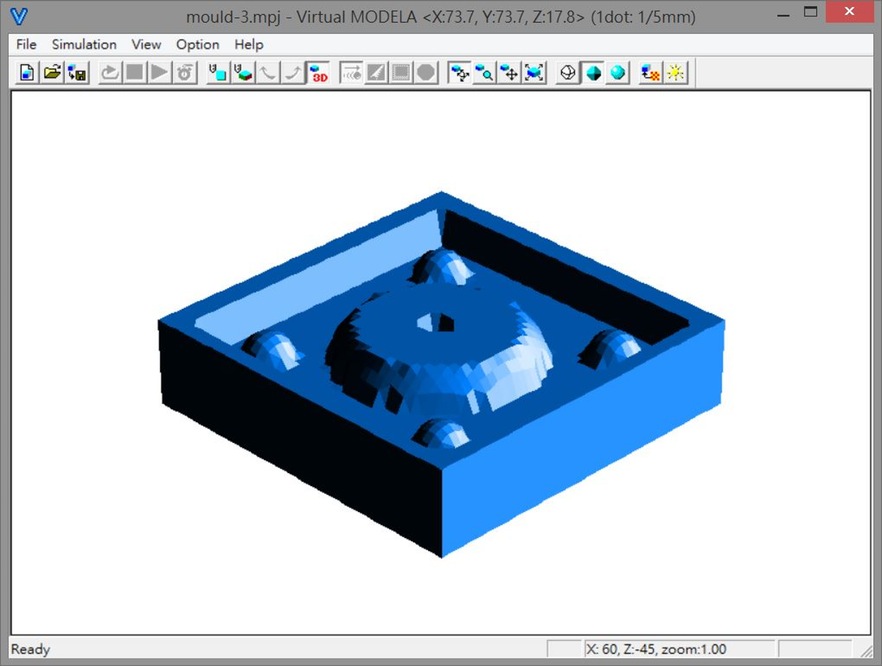
Within the software can also simulate 3D process and the final product.
軟體內也可模擬出3D加工過程以及最後的成品。
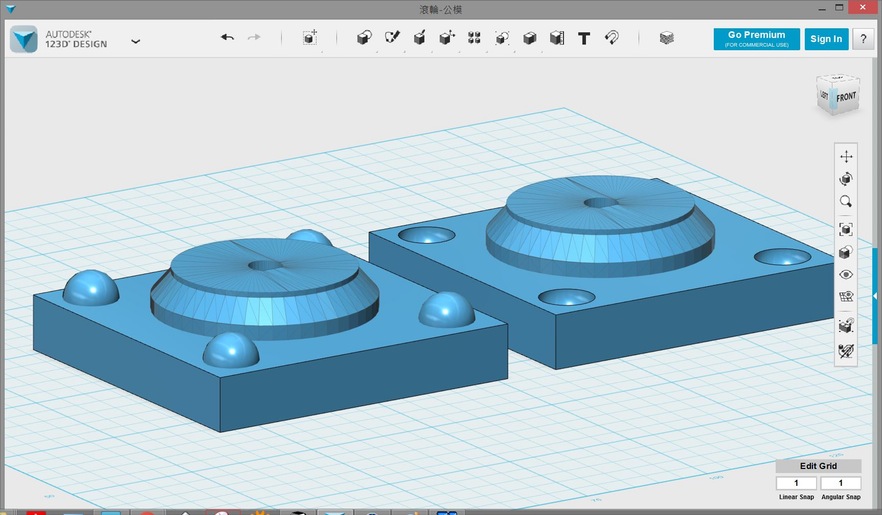
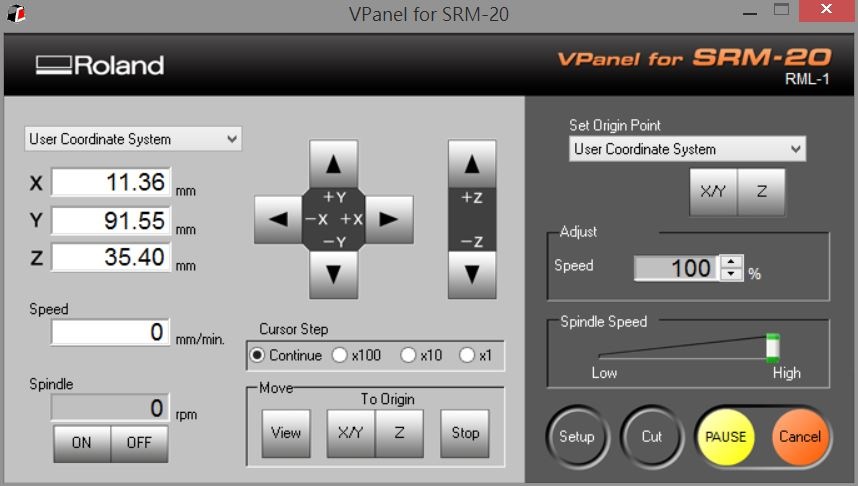
Click the "Cut" output code, and then open the file using Cpanel and start cutting. Before cutting the same origin and the first set of knives, I noticed I turn out to file the origin is located in the center of the workpiece.
點選"Cut"輸出code,再使用Vpanel開啟檔案並啟動切割。切割前一樣要先設定原點與對刀,注意到到我轉出的檔案原點是位於加工物的中心。
First two about 17mm plywood adhesive thickness increases. And use double-sided adhesive fixed in the processing board. A Note on the surface of the center position and start cutting.
先將兩片約17mm的合板黏合增加厚度。並使用雙面膠固定在加工板上。在表面上註記中心位置並開始切割加工。
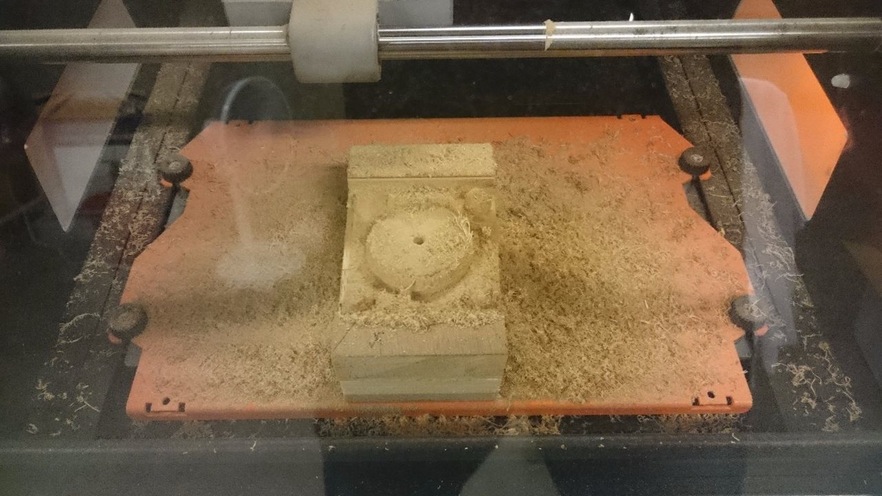
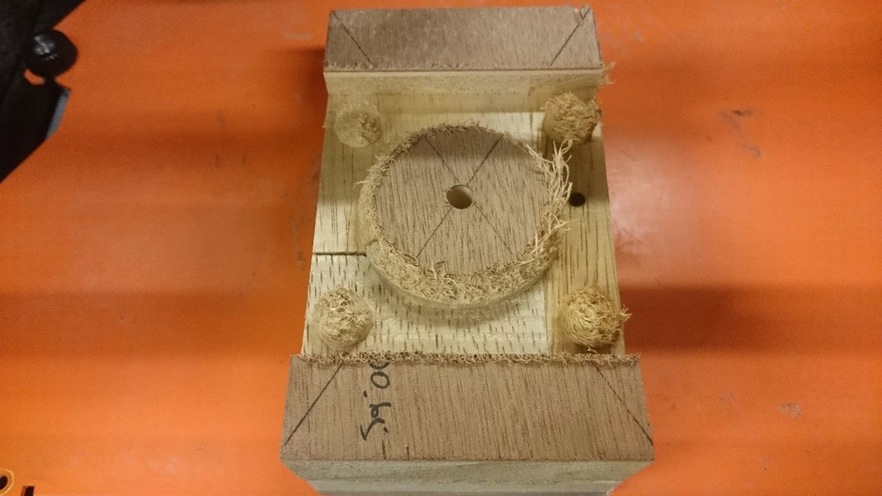
Replace the blade with a smaller diameter of the roughing tool repeat the steps above and then finished, select "Finishing" process. I am using a 1mm flat blade (1mm Square), there was a little rough, like the surface, some of the ground using sandpaper call. Another mold as steps.
粗加工完後再更換刀徑較小之刀具重複上述步驟,選擇"Finishing"加工。我使用的是1mm平刀(1mm Square),表面一樣會有些許粗糙,使用砂紙再打磨細一些。另一模具一樣步驟完成。
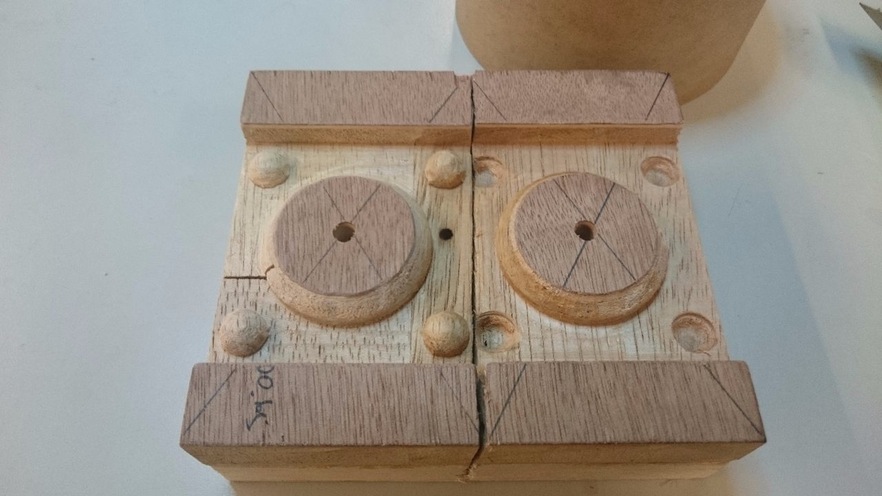
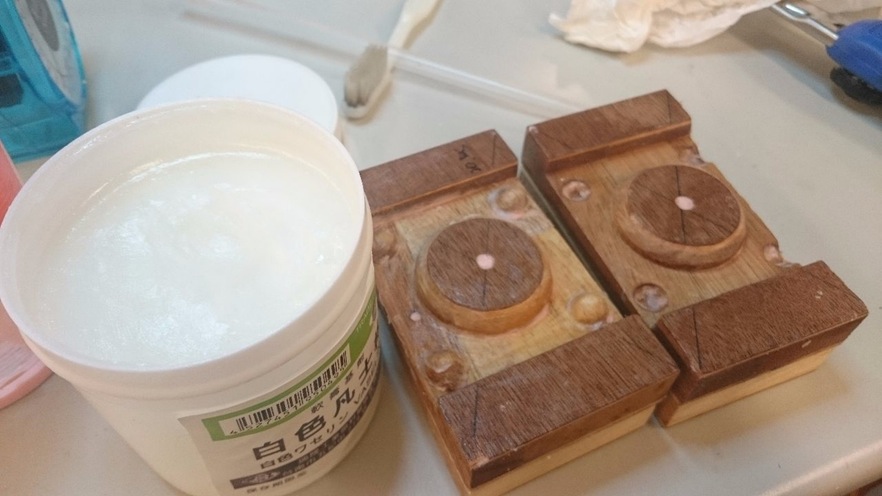
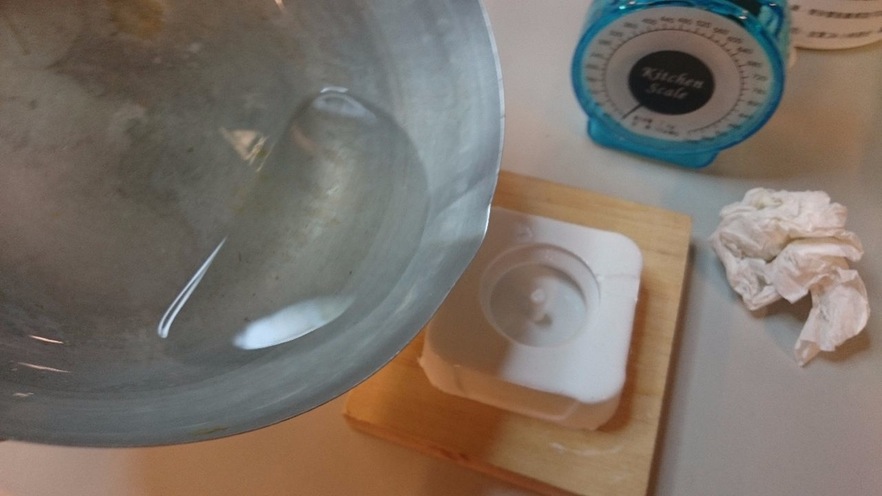
Master model
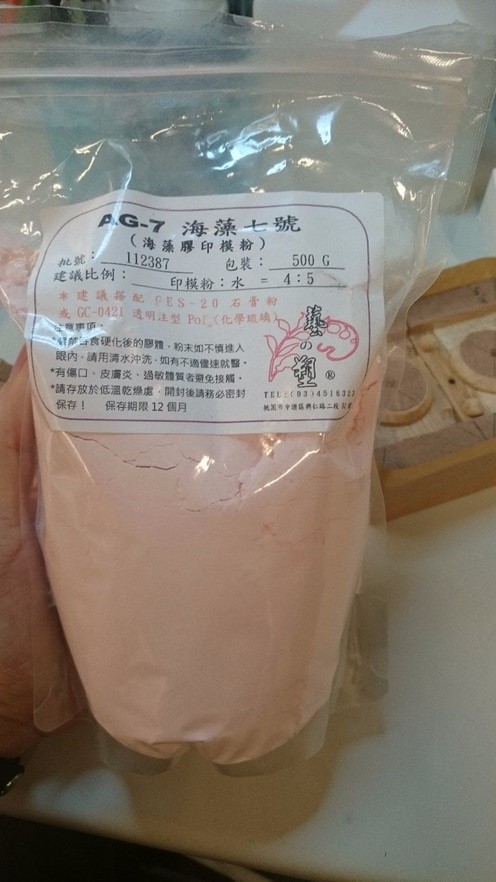
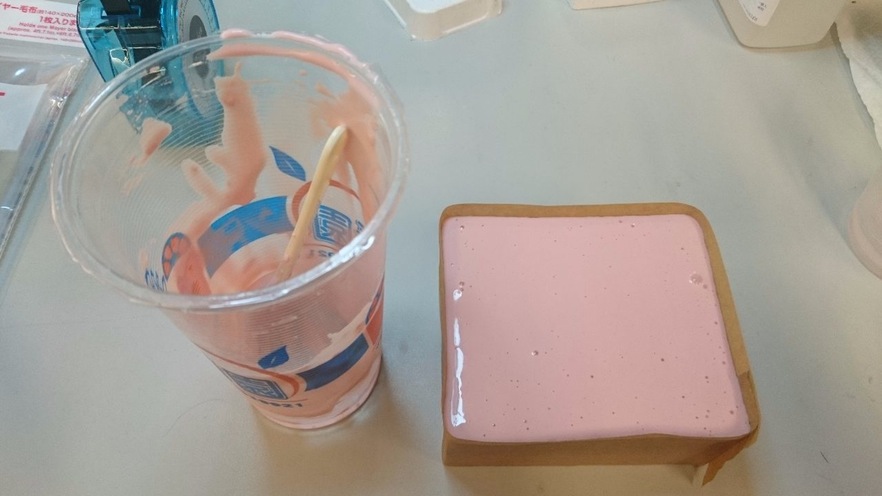
Side molding material is used for turning alginate (alginate gel), this is a material of seaweed extract. I have used in the dentist's office, doctor used to copy the shape of my teeth make dentures. This material hardens very fast, but the lack of strength, only a small amount of temporary use or production. Usually more robust then into the material. Water mixing ratio of 4: 5, depending on the water temperature is high to low curing time will be made about 1 to 5 minutes.
這邊使用的翻模材料為海藻膠(alginate gel),此為海藻提煉的一種材料。我曾經於牙醫診所用過,醫生用來複製我的牙齒形狀後製作假牙。此材料硬化非常快速,但強度不足,只能臨時使用或少量製作。通常會再轉成較堅固之材料使用。與水混合比例為4:5,依水溫高至低固化時間會由1~5分鐘左右。
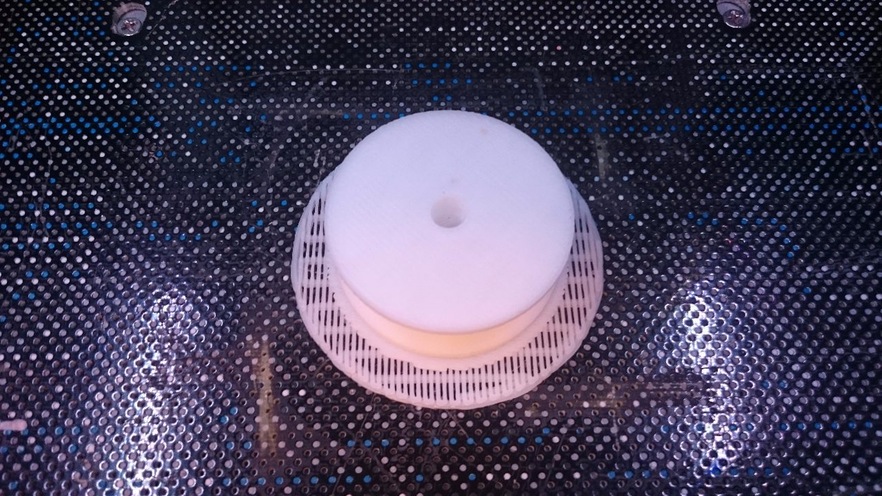
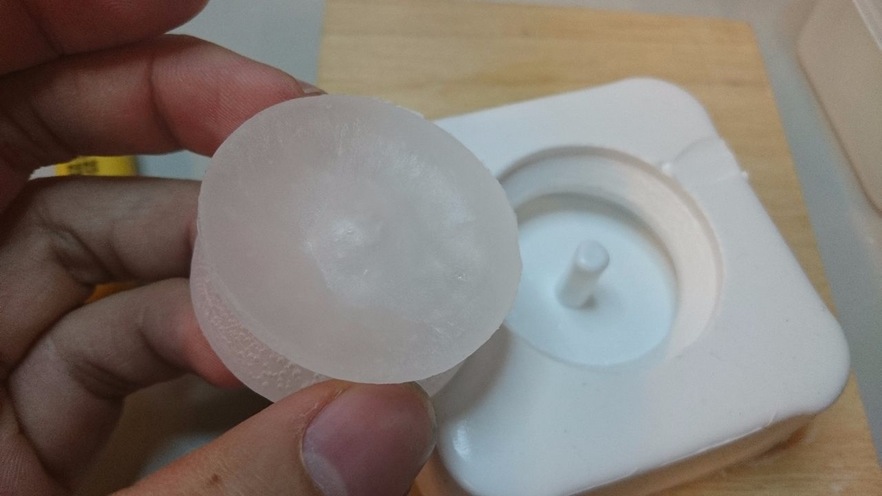
Bring down only to find no release agent is coated so bad ˙ split mold. However, at this time found fallacy structure, so that the wheels will turn to come out of the middle high low on both sides, the belt can not be fixed connection and lose functionality.
要拿下來才發現沒有塗脫模劑,所以拆壞模具。不過也在此時發現結構上的謬誤,這樣翻製出來的輪子將會是中間高兩邊低。而無法固定連接的皮帶。

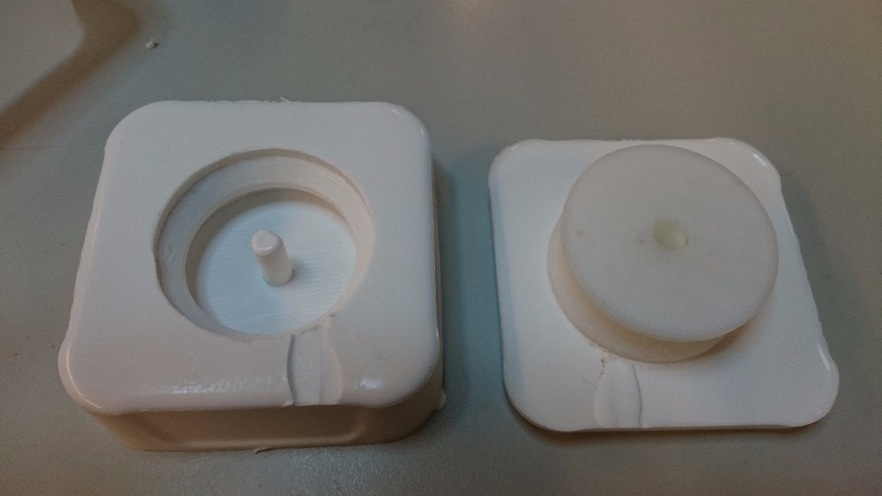
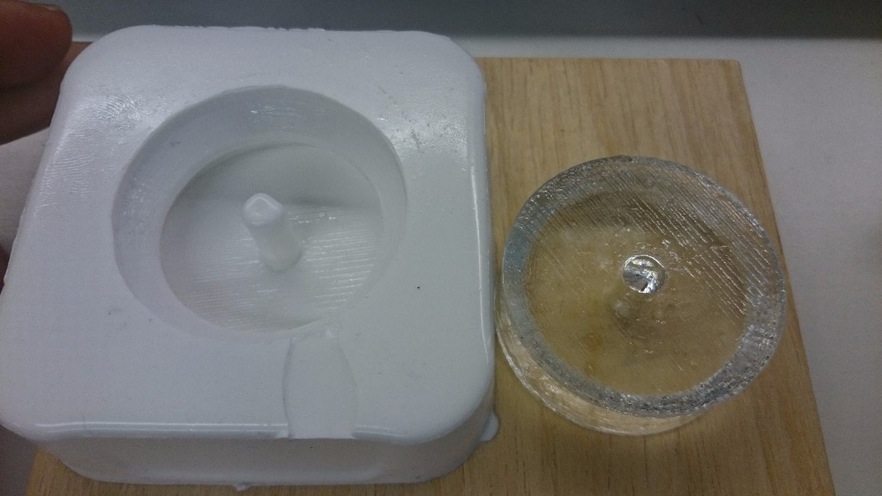
Round 2. Thinking for a while, structural problems can only be used to solve the separate production of wheels, left and right sides of the individual master mold, open at one end such as the use of 3D printing production step. Then turn on both sides of the mold are well after bonding, but hemisphere latch here there will be no use of. Later found another relative to both sides of the wooden mold and then making the master model, you can dig out the appearance of shape, but as the production of the intermediate structure does not come out. The first step is painted surface with Vaseline to do aside from the material.
Round 2。思考一陣,結構問題只能使用分開製作輪子來解決,左右兩側個別的母模,開放一端如使用3D列印製作的步驟。兩側分別翻模做好後後再黏合,不過此處的半圓球卡榫就沒有用途了。後來發現另一種將兩面木模具相對再製作母模,便可翻出外觀形狀,但中間結構一樣製作不出來。第一步先用凡士林塗滿表面才好撥離材料。
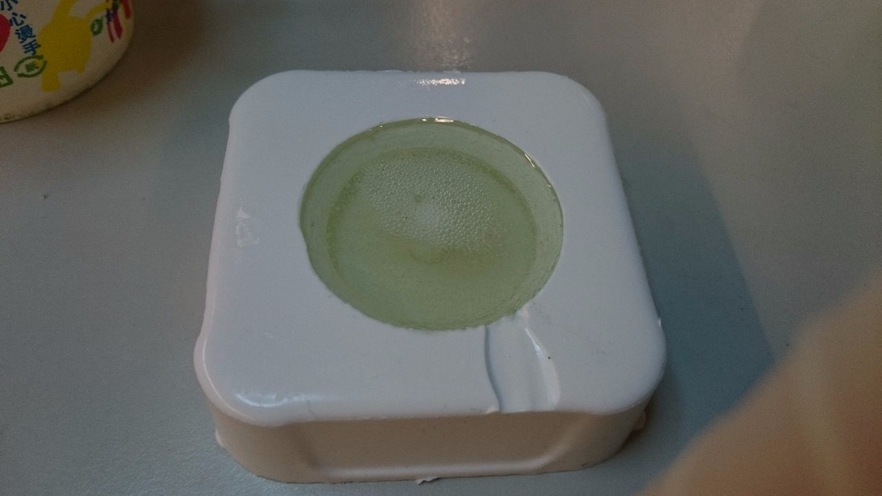
Poured into the alginate.
灌入海藻膠。
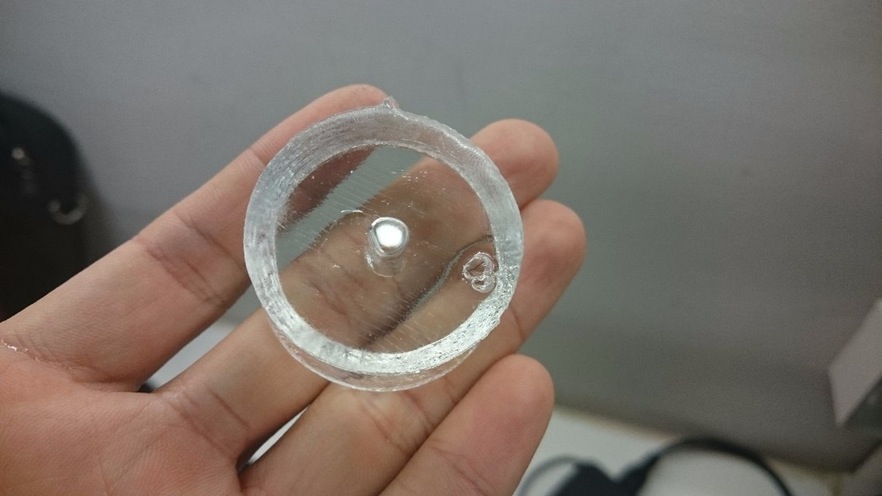
After complete hardening can finally be removed.
硬化後終於可以完整取下。
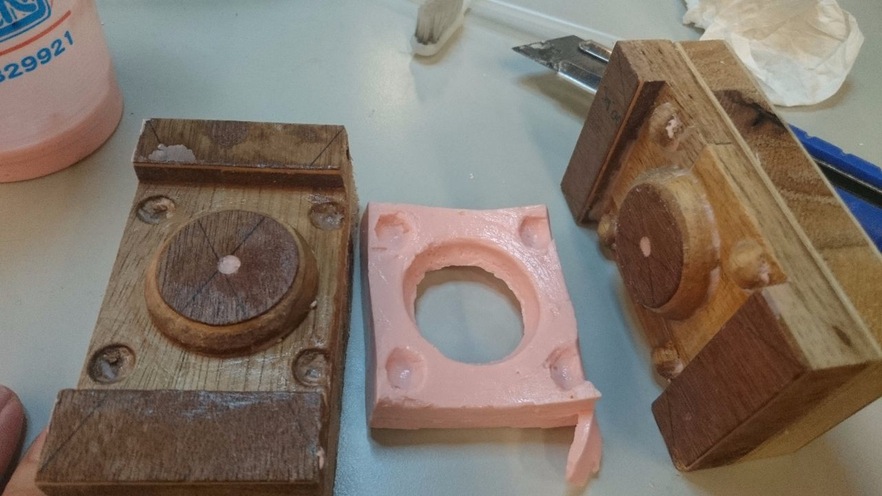
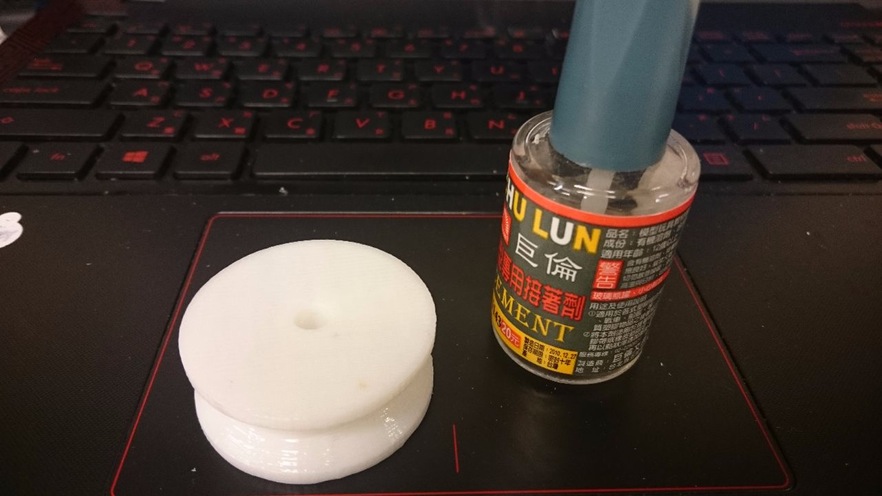
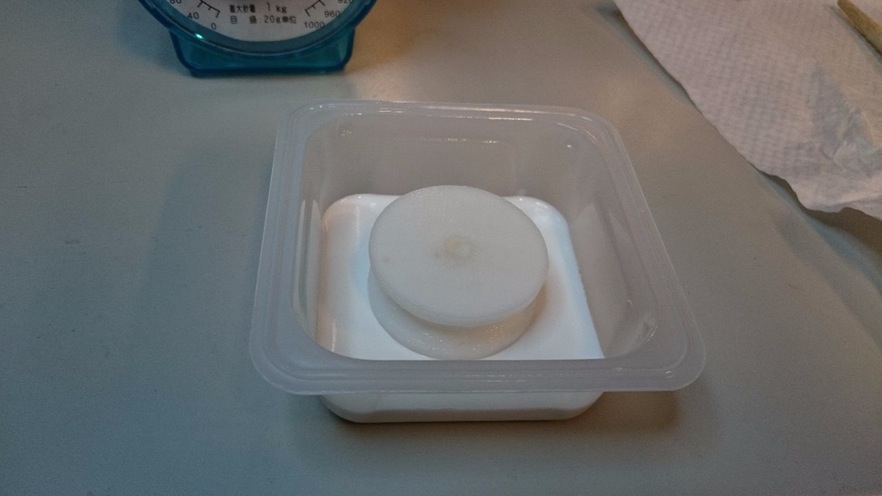
Use latch concave side when the bottom on top of that board, gypsum poured, you can make a complete exterior shape, the interior needs to be an additional drilling in the future into the motor. This mold although not very well produce the finished product available, but it was fun!
使用卡榫凹面那側當底放在紙板上方,使用石膏灌入,可以完整做出外部形狀,內部將來要裝入馬達時需要另外再鑽孔。此模具雖然沒有很順利製作出可用成品,但很好玩!

3D printing production method:
Subsequent use of 3D printing mechanism made a physical objects, and to turn his mother die.
3D列印製作法:
後續使用3D列印機製作了一個實體物品,並用他來翻製母模。
Worried surface due to unfavorable stripes printed mold making, first with a solvent for surface treatment, the smooth surface of some.
擔心表面因列印的條紋不利模具的製作,先以溶劑進行表面處理,使面光滑一些。
Master model
Master model making materials as will need: Silicone (silicone), hardening agents, mold release agents (silicone oil or Vaseline)
母模製作材料如下,會需要:矽膠(silicone)、硬化劑、脫模劑(矽油或凡士林)
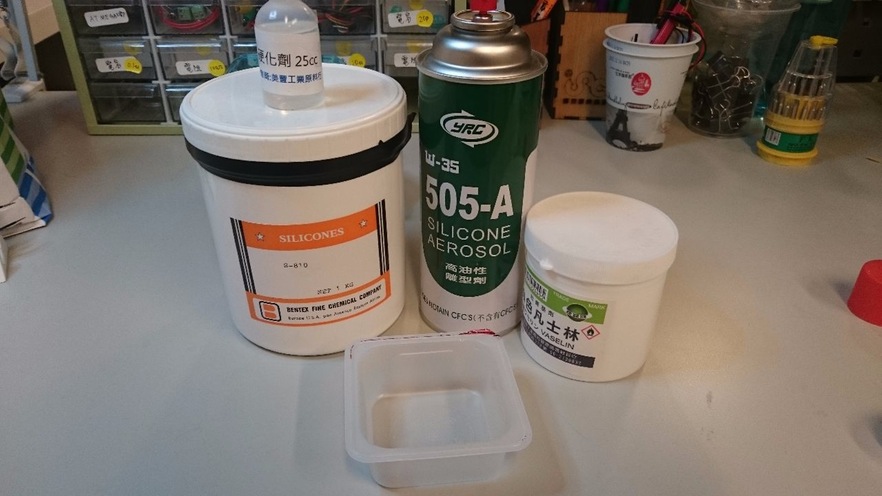
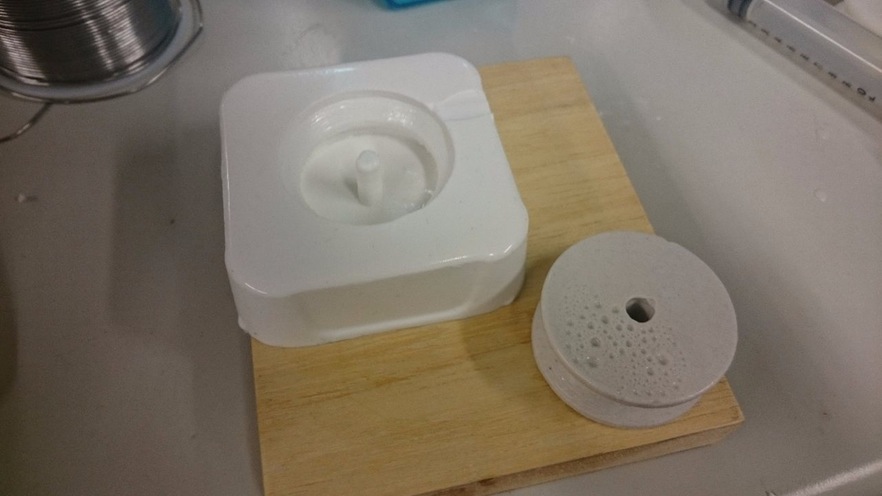
Choose an empty box painted with a release agent. Mixing silicone and the corresponding hardener, I am using this mixing ratio is 1Kg: 18cc, and suppliers used different seasons remind proportions are different.
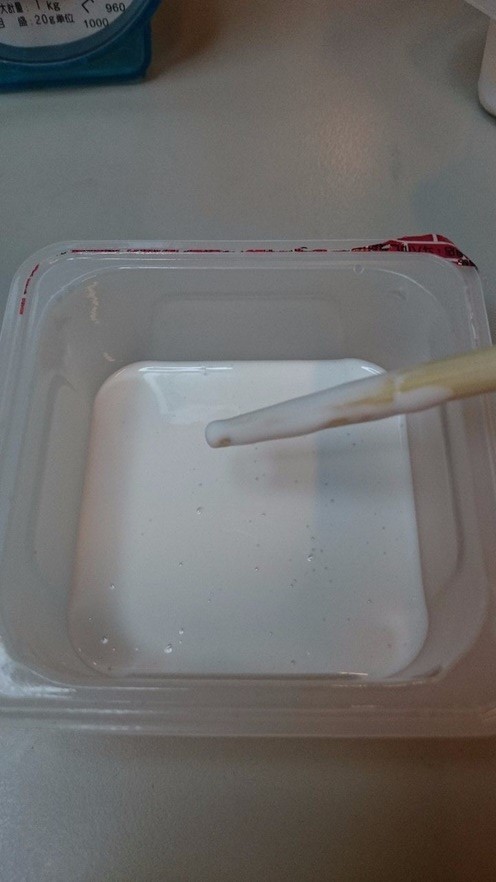
Because the wheels having flat sides, so I do first base layer, and other dry and then put the wheels do turn mold movement. Objects and containers to the release agent.
選一個空的盒子塗上脫模劑。混合矽膠及對應的硬化劑,我使用的這款混合比例為1Kg:18cc,且供應商特別提醒季節不同所用比例也不同。因為輪子具有兩側平面,所以我先做基底層,等乾後再放上輪子做翻模動作。物件及容器要上脫模劑。

The drying time is about 10 hours, removed and dried. You can see a good part not coated with a release agent adhesions.
乾燥時間約為10小時,乾燥後取下。可以看到有一部份沒有塗好脫模劑沾黏,
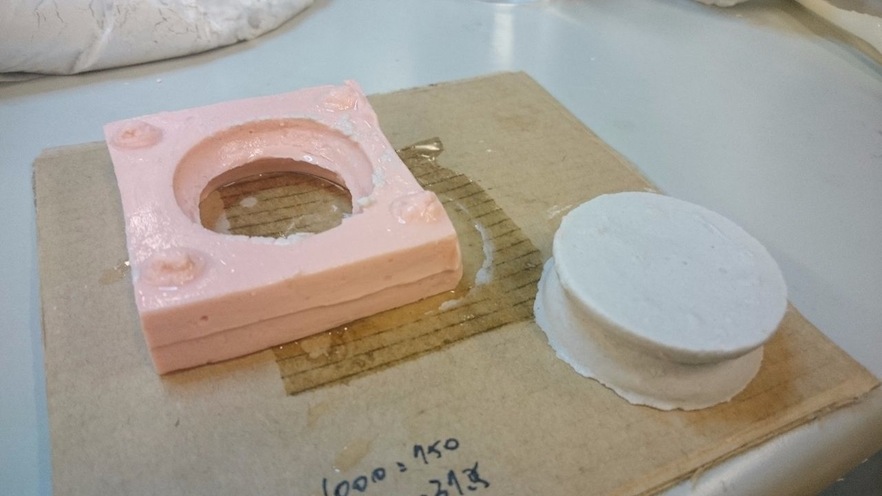
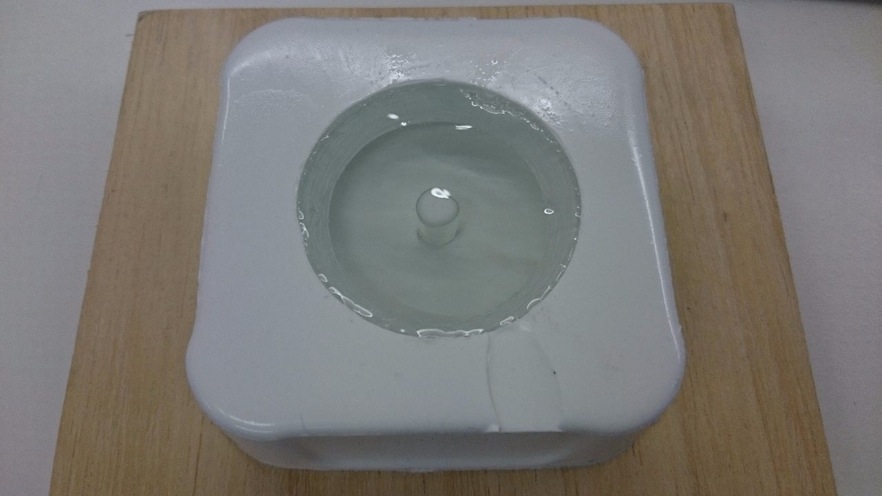
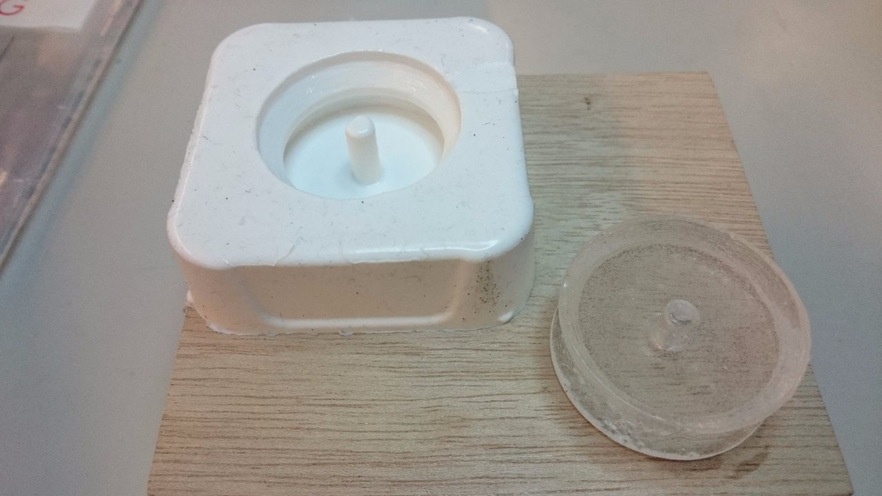
After making a good mother mold turning model can be carried out, I upper end is open, so we did not do more casting holes. The material can be poured directly.
母模製作好之後便可進行翻模,我上端是開放式的,所以就沒有再多做澆鑄孔。直接將材料倒入即可。
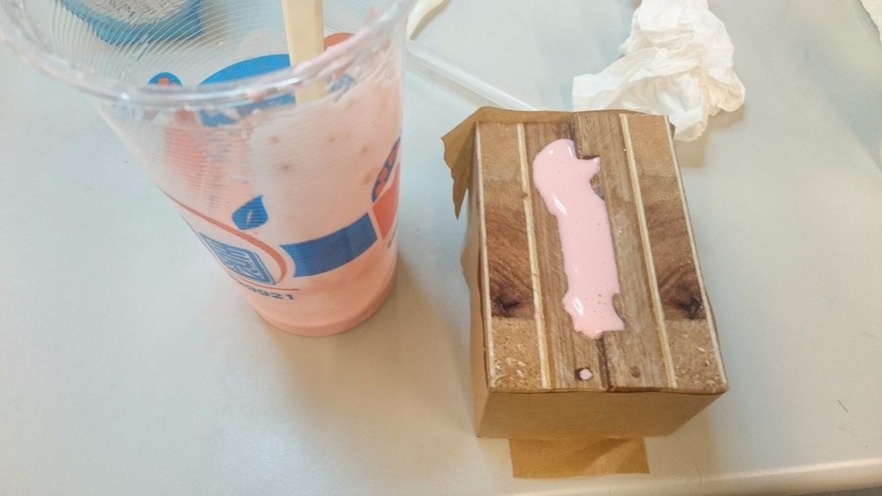
poly gum
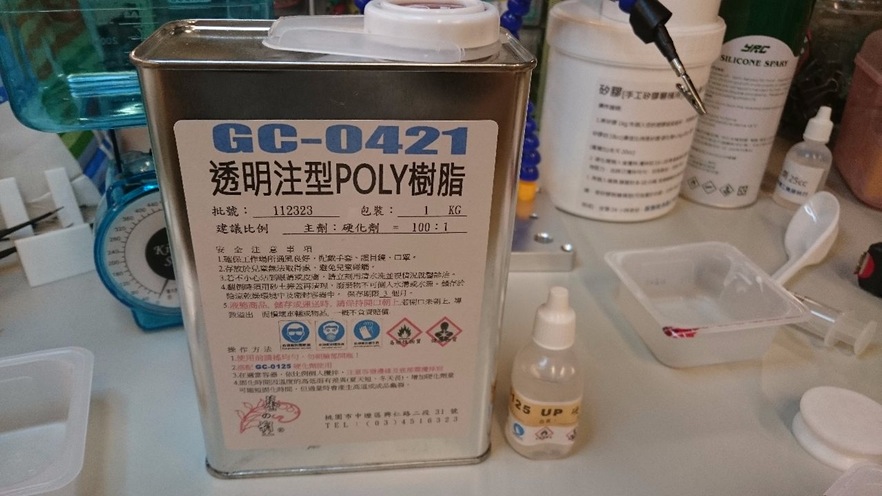
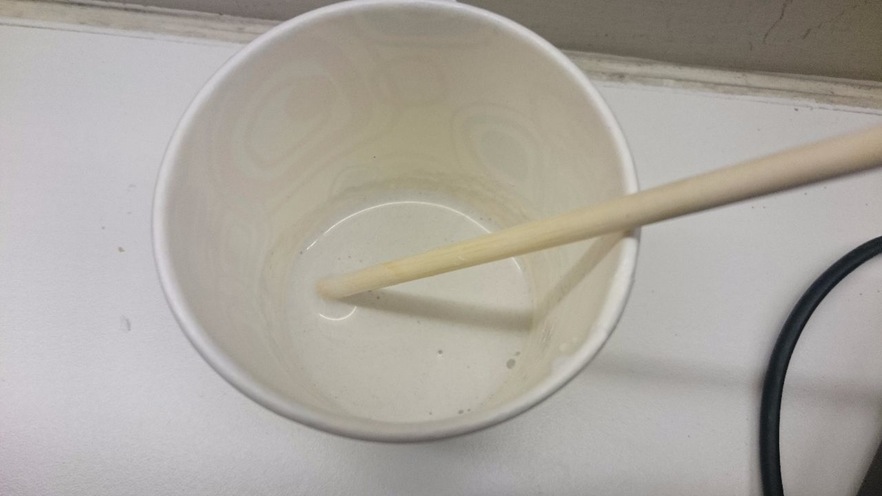
First with a transparent plastic poly try to see marked on the mixing ratio of 1Kg: 10g. This material has a strong pungent odor, and the curing agent is a strong oxidant, the instructions on the Notes Do not touch metal objects, there may be heat generation. We need to work in a ventilated place. From mixing to solidify only 30min. When used in the poly silicone film can not seem to use a release agent, but in order to mold my life, I will be sprayed with a release agent.
先用透明的poly膠嘗試看看,標示上的混合比例為1Kg:10g。此材料具有強烈刺鼻味,且固化劑為強氧化劑,說明上註記不要接觸金屬物件,可能會有高熱產生。需要在空氣流通地方工作。從混合到固化只需要30min。poly使用在矽膠膜時,似乎可以不使用脫模劑,但為了我的模具使用壽命,我一律噴上脫模劑。
And this material flow is very good, although there will be bubbles, but will slowly go to prison in forming the upper layer, you can manually punctured, if there is no break left on the surface may cause holes.
而這個材料流動性很好,雖然會有氣泡,但在成型監會慢慢跑到上層,可手動刺破,若沒有弄破可能會造成表面留下坑洞。
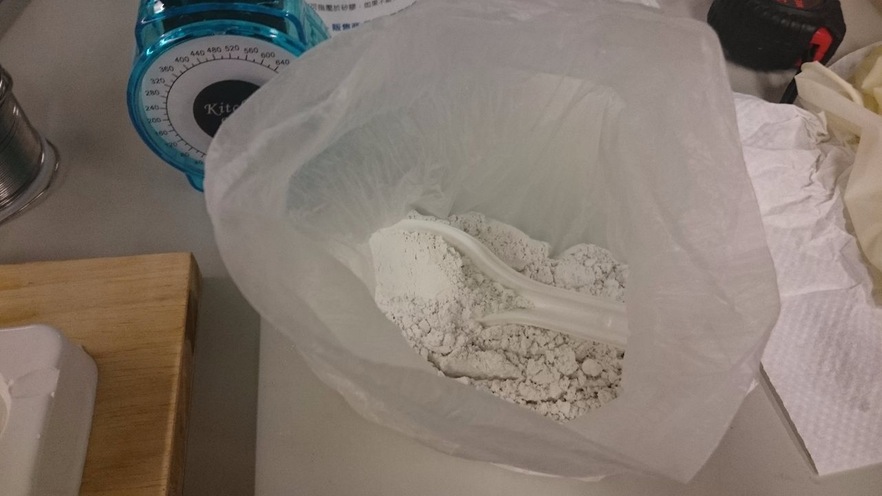
Gypsum
The second material is a common sense gypsum (gesso), it seems to be very common to the art of engraving material as a gray powder. Just mixed with water will be modulated within 6 ~ 10min initial curing. But drying to wait several days. I have here is the mixing ratio of gypsum: water = 1KG: 0.75KG.
第二個嘗試的材料是石膏粉(gesso),似乎是藝術雕刻很常用到的材料,為灰色粉末狀。只要與水混合調製6~10min內就會初步固化。但乾燥要等數天。我這裡的混合比例是石膏:水=1KG:0.75KG。

Beginning liquidity is very good, but in the end left some bubbles on the surface. So some pit.
一開始流動性很好,但最後留了一些氣泡在表面。所以有些凹洞。
Wax
The third attempt materials are generally hard wax (wax), this is my material in the production of candles. The furnace was heated to melt the material after using watering molding. Once cooling is removable.
第三種嘗試的原料是一般的硬蠟(wax),這是我在製作蠟燭的材料。使用爐子加熱融化材料後澆灌成型。等冷卻後可取下。
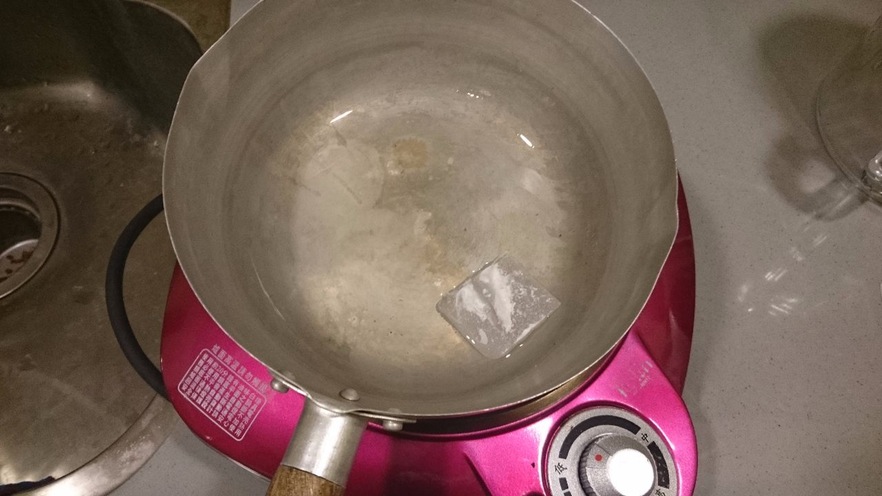
Wax on the surface condensation contraction, so the collapse of the middle part down.
蠟在表面凝結時有收縮,所以中間部分塌陷下去了。
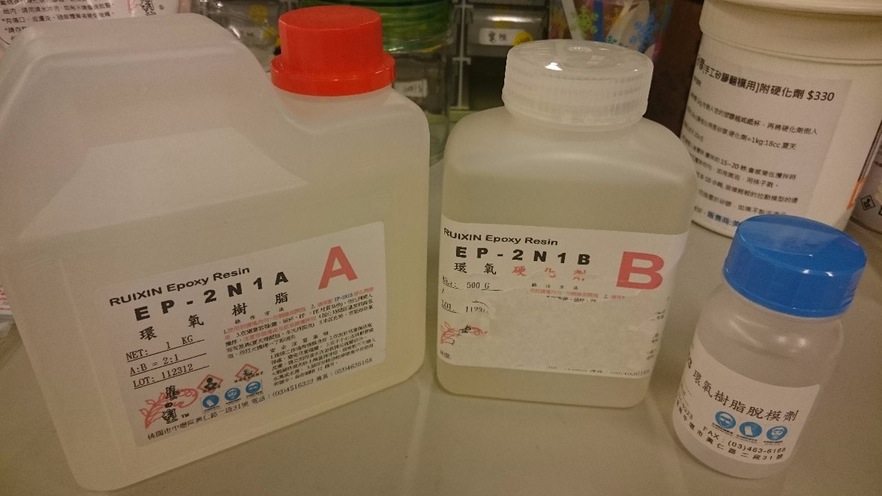
The epoxy resin
The fourth attempt materials are epoxy resin (epoxy), using a rapid hardening. A use of the agent and the B agent mixed hardening effect, two kinds of ratio of 2: 1. This material requires a vacuum device, the internal gas is eliminated. When not using the internal surface having a plurality of small bubbles and there are a lot of potholes. Curing time is about 10 hours.
第四種嘗試的材料是環氧樹脂(epoxy),使用的是快速硬化型。是利用A劑與B劑混合後作用硬化,兩種比例為2:1。此材料需要真空設備,將內部氣體消除。沒有使用時內部具有許多小氣泡及表面有許多坑洞。硬化時間約為10小時。
Troubleshooting:
The mixing ratio of the raw material is very important, the first mixed silicone waited two days has not yet dried, followed by a dropper to quantitatively successful completion.
原料混合比例很重要,第一次混合矽膠等了兩天尚未乾燥,後面使用滴管做定量才順利完成。
Note that material safety, prepare safety equipment, such as masks, gloves, and pay attention to environmental ventilation. Species materials are liquid or paste, when the operation is very easy to drop in the desktop and floor mats can be cleaned easily some newspapers.
注意材料安全性,準備安全器材,如口罩、手套,及注意環境通風。樹種材料都是液態或膏狀,操作時很容易滴在桌面及地面,可以墊些報紙易於清理。
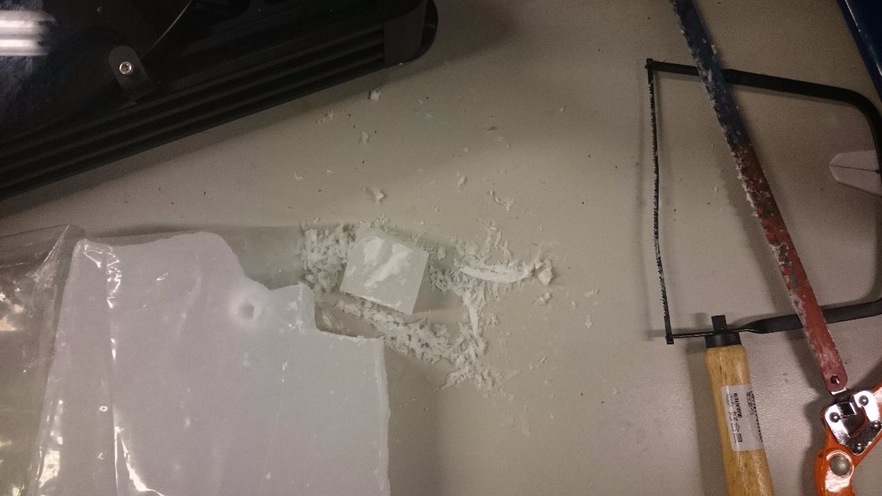
Too many holes in wood, via the same knife 1mm diameter very rough. Need to tool radius finer tools. Or with sandpaper and then polished. Also you need wax or Vaseline can make the mother die. Plywood is also due to internal repression is composed of many hardwood pieces together, there are many holes in the internal flaws and defects need to be repaired.
木頭孔洞太多,經由1mm刀徑一樣很粗糙。需要再刀徑更細的刀具。或用砂紙再打磨過。也需要上蠟或凡士林等才能製作母模具。
Only use roughing (Roughing) when the surface roughness, the need to re-use finishing (Finishing), in order to have a better finished products.
只使用粗加工(Roughing)時表面粗糙,需再使用精加工(Finishing),才能有更好的加工成品。

Tools:
Roland SRM-20
MODELA Player 4
123D Design
File:
mould-L.stl
mould-R.stl
