Exercise 10 - Mechanical Design ,Machine Design
Our group page.
There are 4 members in our team.Group assignment
We have decided to make a 2-axes pen drawing machine. There are 4 of us. 2 (Kai Chi & Tham) will be doing the mechanical design, the other 2 (Siew Chin & me) will be doing the programming. Siew Chin milled out the ftdi board and soldered on the pin headers. As we are not familiar with Python programming, we need to take the examples and do a reverse engineering. In order to have a better understanding, we need to understand the parts that we are using.
I am in charged of exploring the software. I am using a macbook and Siew Chin using Windows. The division of work can be found in our group page.Hit me with your best shot!
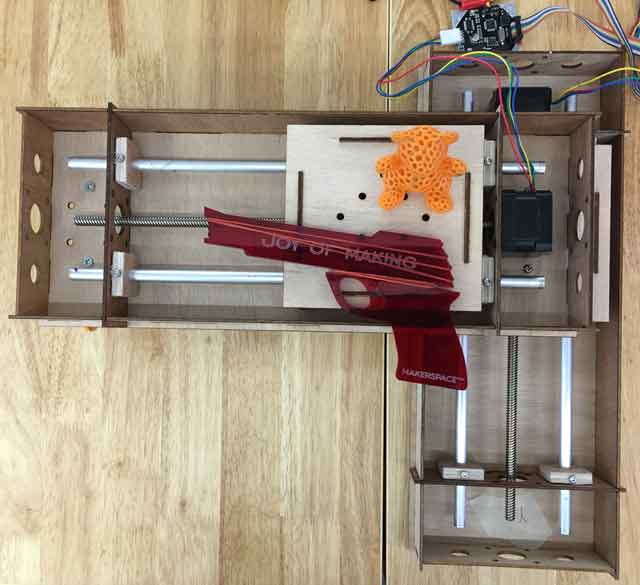
This is the title of our project. We started out doing a simple pen drawing machine and completed it but was inspired to add some fun to our project . We decided to make a shooting game. The objective is to hit a bear with the rubberband gun before the machine stops.
Let the fun begin
Stepper motor
We are using Nema 17 stepper motor. It is a bipolar stepper motor. It has 200 steps per revolution, 1.8 degrees per step. We need to have a better understanding of how a stepper motor works. Instructables has a good tutorial on How to use a stepper motor.
Gestalt
1. Install gestalt library 2. Python setup.py install 3. Pyserial 4. Install ftdi drivers As I am uing a macbook, I need to hardcode the name of my ftdi cable. All the steps are clearly stated in the tutorial. My ftdi is /dev/tty.usbserial-FTZ57P89. One node will control 1 axis.Connections
In order not to get confused, we deliberately put a red sticker so that all our ribbon cables will be connected correctly (red end to red end ...straight through).
Testing
1. Do a nano single_node.py
2. Edit the ftdi to /dev/tty.usbserial-FTXW6Q4L
3. Save the file and run python single_node.py
4. Press the button to identify the axis.
4. Each time you change the node, test.vmp must be deleted.
Understanding the code
1. Def initInterfaces()
In this part, we have to make sure that our port name is correct.
2. Def initControllers()
The nodes are defined here. Every axis will need 1 node.
3. Def initCoordinates()
We set it to mm
Problems & solutions
When we started our projects, there were many problems.
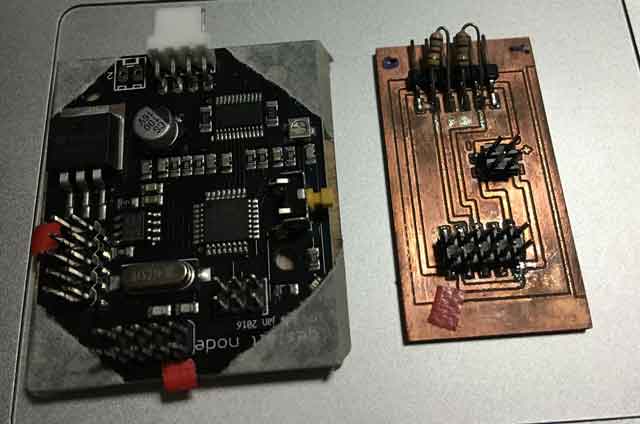
1. We forgot to solder the resistors to the bridge board. in order not to wait for the smt resistors, i used normal resistors. We had intermittent problems assigning the x and y axis. Steven tested Gestalt boards and told us that the 2 boards were faulty. We suspected that it was due to the placement of the Gestalt board below the stepper motor and thus accidentally shorting them. We replaced with 2 new Gestalt boards. We faced the same problem. This time we measured the bridge board and noticed that the 12V was intermittent. However, the discovery was too late....we killed another 2 boards.
The mistake that we made was that after milling the pcb, we used our naked eyes to check for short and open circuits instead of the multimeter. We quickly milled another board and this time we checked the connectivity before and after soldering. Everything worked.<br>
We spolit a record of 4 gestalt boards but we sure learnt a lot from this
.The 4 boards were eventually repaired by Steven. He replaced the IC chip.
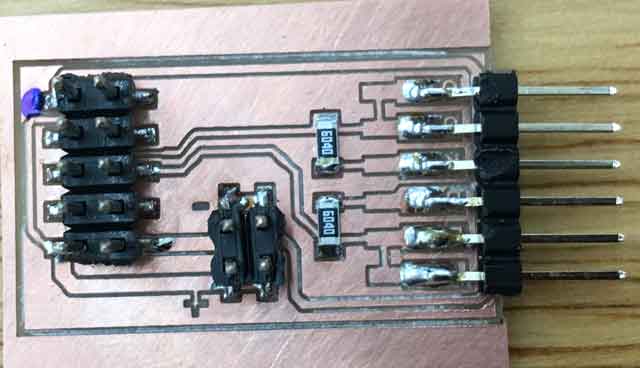
The new bridge board
wxPython
When I try to install wxPython, it show an error: The Installer could not install the software because there was no software found to install. Seems like the OS El Capitan has problems installing. When I googled, there are many users facing the same problem.Initial Design - Drawing a square
We started to try the example in the xy plotter. The example was able to work. We wanted to try to draw a square. I begun to try working on the co-ordinates. I modified the xy_plotter.py to moves = [[0,0],[-40,0],[-40,40],[0,40],[0,0]]
We quickly bend a sheet metal and secured a pen by using cable ties.
The result
I began to explore last year's project done that is similar to us. Credits goes to Asako from Kamakura. I try to learn their program by downloading their program to modify. They used Tkinter module. This is the standard Python interface to TK GUI toolkit from Scriptics. I did some self study on Tkinter. I learn some simple steps to draw and is able to understand the code.
Download
our_mouse (adapted from Kamakura lab)
My thoughts
All of us are Python zero. We know nuts about python programing. We might not have the strongest team in terms of knowledge. But we sure have a lot of fun complaining, learning and working together.There are some questions in my mind ...can we add micro switch to the gestalt board? There are a number of improvements that we can make as we get familiarise with Python software.
1. Add z axis (to lift up the pen when not drawing.)
2. Add limit switch so that power will be cut off when stepper motor moves to the limit.
Would you like to insert more style/elements?
Check the documentation of Bootstrap here.