Exercise 05 3D Scanning and Printing
Requirement
- Test the design rules for your printer(s) (group project)
- Design and 3D print an object (small, few cm) that could not be made subtractively
- 3D scan an object (and optionally print it)
Introduction
Additive Manufacturing is a term to describe set of technologies that create 3D objects by adding layer-upon-layer of material. 3D printing is addictive manufacturing. On the other hand, subtractive manufacturing is a process by which 3D objects are constructed by successively cutting material away from a solid block of material. Subtractive manufacturing can be done by manually cutting the material but is most typically done with a CNC Machine.
3D Printing Technologies
- Filament-based 3D Printing (Fused Deposition Modeling): Home printers typically work with plastic filament. The technology behind this is often referred to as “Fused Filament Fabrication” (FFF). In our 3D printing factory, we have more professional, industrial-grade machines: our filament printers use a technology called “Fused Deposition Modeling” (FDM). In an FDM printer, a long plastic filament is fed by a spool to a nozzle where the material is liquefied and ‘drawn’ on the platform, where it immediately hardens again. The nozzle moves to place the material in the correct location to build your model up layer by layer. When a layer is drawn, the platform lowers by one layer thickness so the printer can start with the next layer.
- Powder-based 3D Printing (Laser Sintering): The interior of the printer is heated up to just below the melting point of the powder of your choice. The printer then spreads out an incredibly fine layer of this powder. A laser beam heats up the areas that need to be sintered together just above the melting point. And voila: the parts that were touched by the laser are now fused together while the rest continues to remain loose powder. The models are printed layer by layer with the help of this laser beam. After a layer is printed, a new layer of fresh powder is spread over the surface by a roller. After the printing job is finished, the result is a big block of powder that contains the printed (sintered) models inside. In order to get your prints out of the powder block, we need to dig into the box of un-sintered powder and brush away the excess. The advantage of this technology is that no supporting structure is needed!
- Powder- & Binder-based 3D Printing: The starting process of this technology is quite similar to Laser Sintering: a roller puts a thin layer of powder on a platform. However, instead of a laser beam, a special print head places a binding agent at specific points, printing a thin layer of your model that is able to bind to subsequent layers. This process is then repeated over and over again until your model is complete. Since your model was only ‘glued’ together, some post processing is necessary with this 3D printing technology. The exact post-processing steps heavily depend on the material: Multicolor models get a bath in superglue, Ceramic prints are put in a drying oven and fired several times, High-Detail Stainless Steel and Stainless Steel objects are placed in an oven for fusing. Stainless Steel models are additionally infused with Bronze for extra strength.
- Resin-based 3D Printing (Stereolithography): The Stereolithography process takes place in a large tank and begins with a layer of liquid polymer spread over a platform. Since this piqued polymer is UV-sensitive, a UV laser hardens the area that will become one layer of your 3D print. The rest of the layer stays liquid. The platform is then lowered and the next layer is drawn directly on top of the previous one. When the object is complete, it is raised out of the tank via the supporting platform – much like a submarine rising to the surface of the water – with the excess liquid flowing away. Because a liquid material is used (and not powder), we need to add support material for overhanging parts and parts that stick out. The supports will then be removed manually after the model is taken from the machine. This means that the design freedom of this technology is somewhat limited. The main advantages of materials printed with Stereolithography are smooth surfaces and a lot of finishing and post-processing possibilities. Materials used in this printing process include Paintable Resin, Transparent Resin, and Prime Gray. They all feature smooth, high-quality surfaces. Additional plus points: Paintable Resin can be spray-painted, Transparent Resin comes with a transparent look in different colors, and Prime Gray comes at a low price.
- Lost-Wax 3D Printing & Casting: First, 3D printing your model in wax. This step is a type of Stereolithography that uses a wax-like resin. Support structures are printed along with the model to make sure it doesn’t fall apart. These support structures are automatically generated and manually removed after the printing process. Next, one or more wax sprues will be attached to your model. Then your model will be attached by the sprue to a wax ‘tree’, together with several other models. The tree is then placed in a flask and covered in a fine plaster. When the plaster solidifies, it forms the mold for casting the metal. The plaster mold is then put in an oven and heated for several hours to a point where the wax is completely burned out. Then, molten metal is poured in to fill the cavities left by the wax. Once the metal has cooled and solidified, the plaster mold is broken and the metal models are removed by hand. Finally, your model is filed and sanded to get rid of the sprues. It will be sanded, polished or sandblasted to create the finish you desire. This means, however, that complicated designs such as a “ball within a ball” or links of chains cannot be made with this process. But the upside of casting your model is that the final product will have the best quality: surfaces will be smooth, and the strength, feel, and look of precious metals (e.g. a silver ring or a gold pendant) is exactly what a customer would expect.
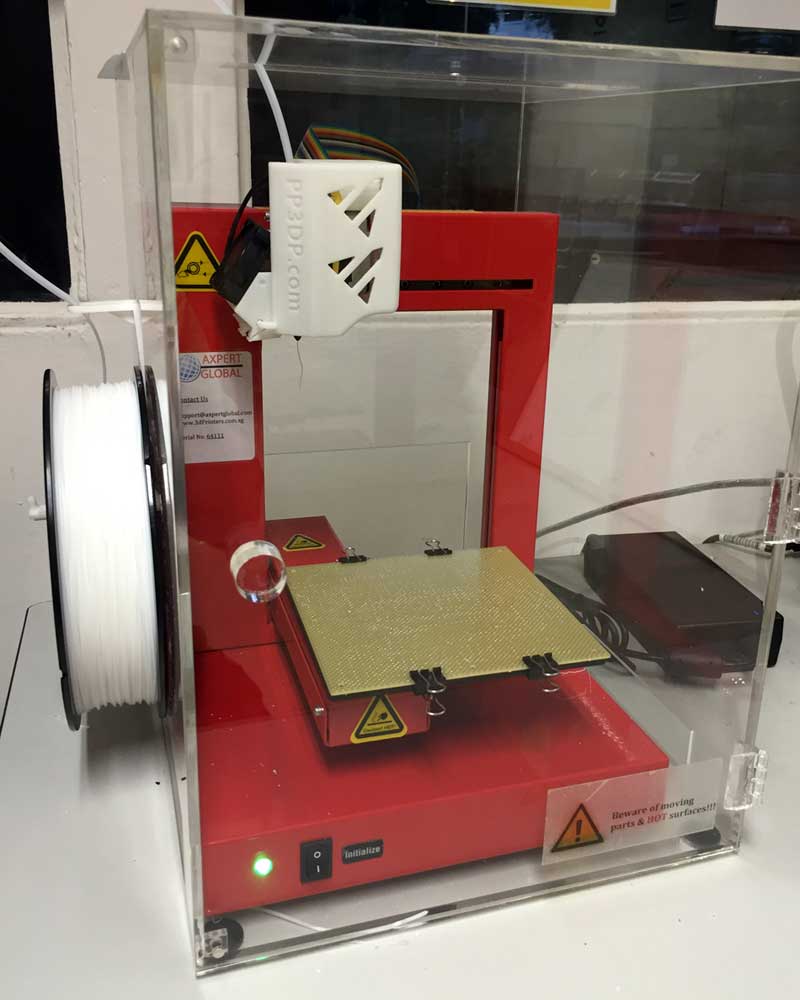
Stress-testing the 3D Printer
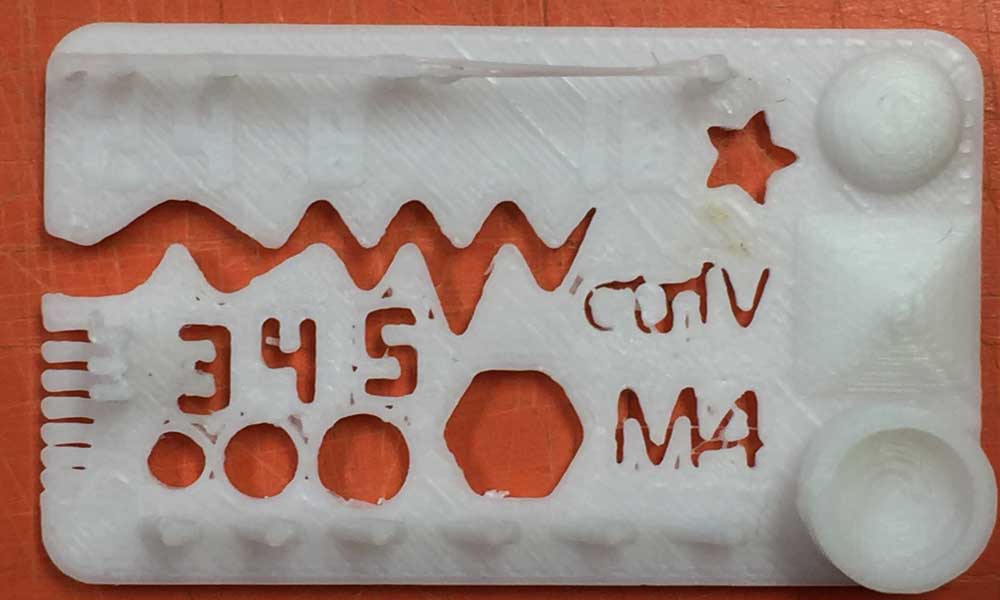
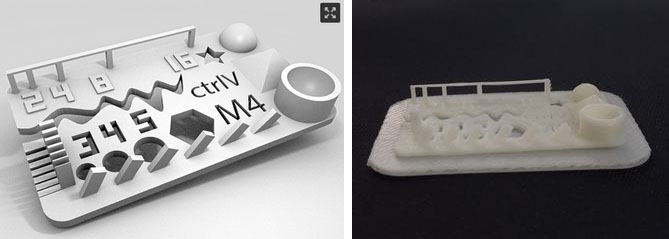
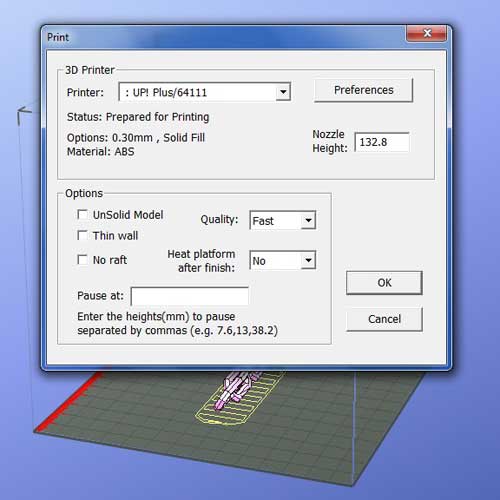
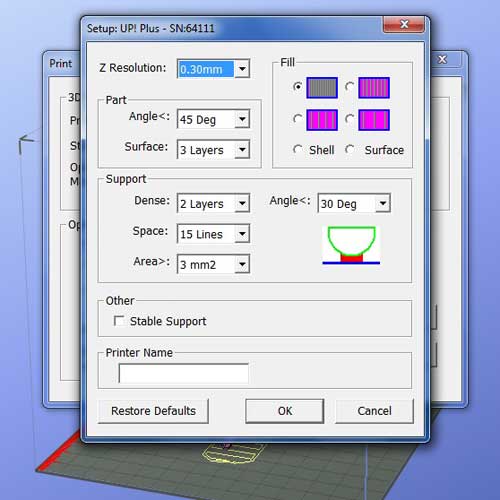
The 3D printer in my lab is a ABS UP Plus. It uses a software called UP!. Thingiverse has a collection of test files for 3D printers and I am using this model to test my printer.

The test file is able to observe the following:
- Size: the object is 2 x 50 x 30mm (baseplate)
- Hole size: 3 holes (3/4/5mm)
- Nut size: M4 Nut should fit perfectly
- Fine details: pyramide, cone, all numbers
- Rounded print: wave, half sphere
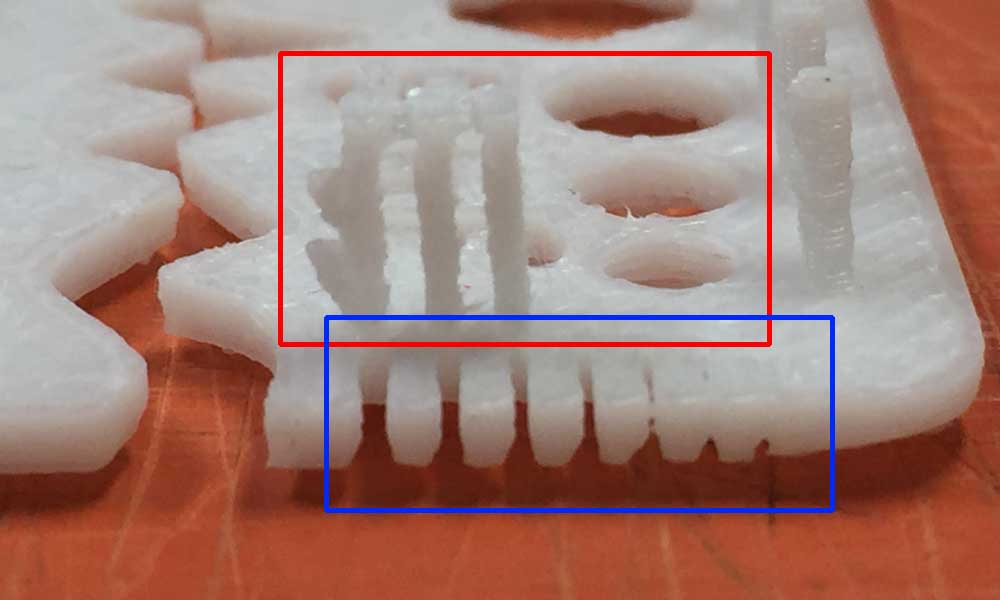
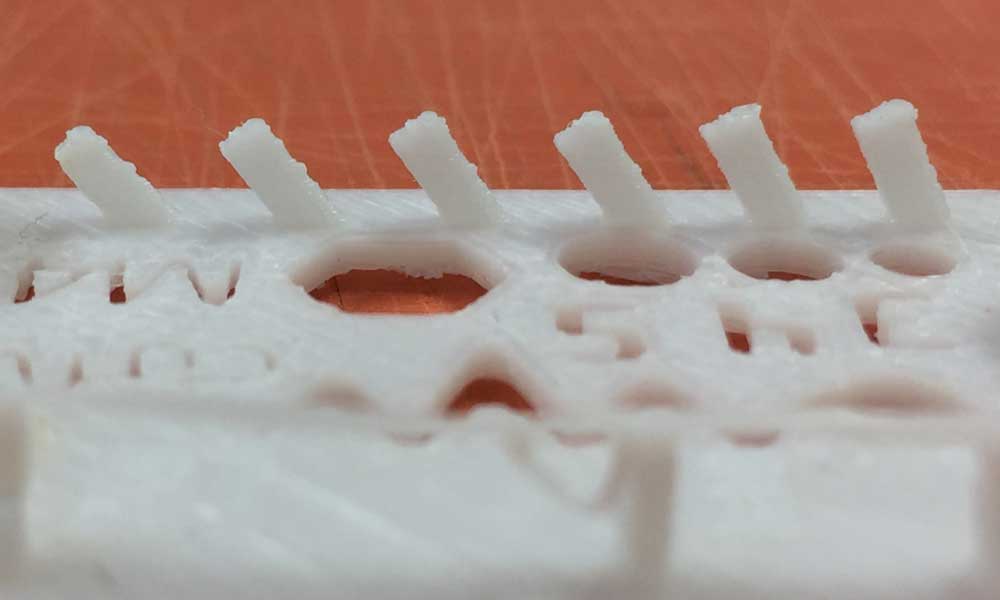
- Minimum distance & walls: 0.1/0.2/0.3/0.4/0.5/0.6/0.7mm
- Overhang: 25°/30°/35°/40°/45°
- Bridge print: 2/4/8/16/mm
- Surface: all the flat parts
The observations are as follows:
- Size: 1.6 x 50.2 x 29.8mm (baseplate)
- Hole size: 3.2/4/4.8mm
- Nut size: Did not have a M4 Nut available
- Fine details: pyramide, cone, all numbers - Passed
- Rounded print: wave, half sphere - Passed
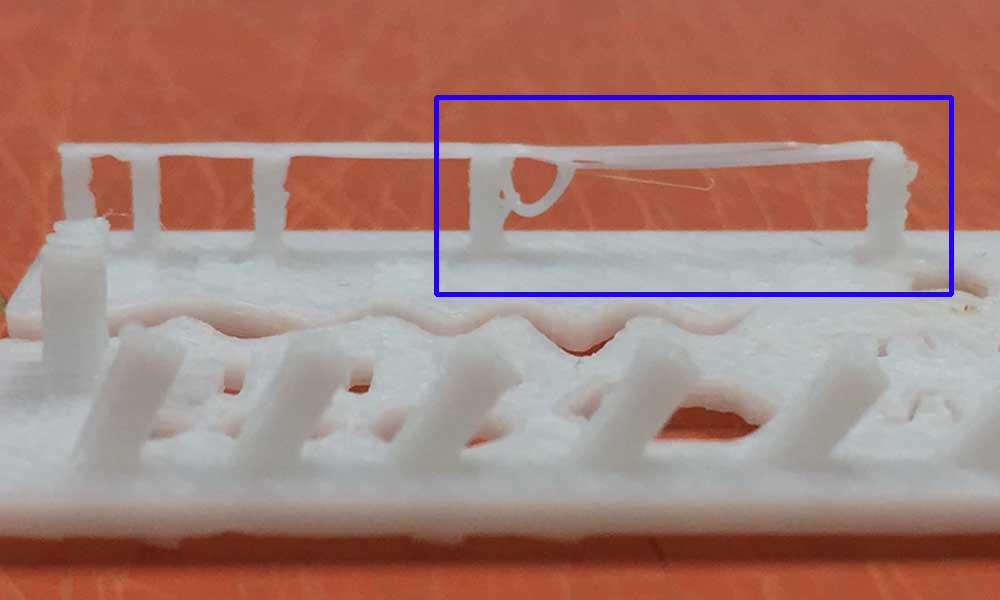
- Minimum distance & walls: 0.1/0.2/0.3/0.4/0.5/0.6/0.7mm - Failed to print walls which are less than 0.5mm. Minimum distance is about 0.5mm.
- Overhang: 25°/30°/35°/40°/45° - Passed
- Bridge print: 2/4/8/16/mm - 2/4/8mm passed. 16mm bridge failed.
- Surface: all the flat parts - Passed
My classmate, Steven did a similar test on Cubicon 3DP-110F, a 3D printer from Korea, and below is his result.
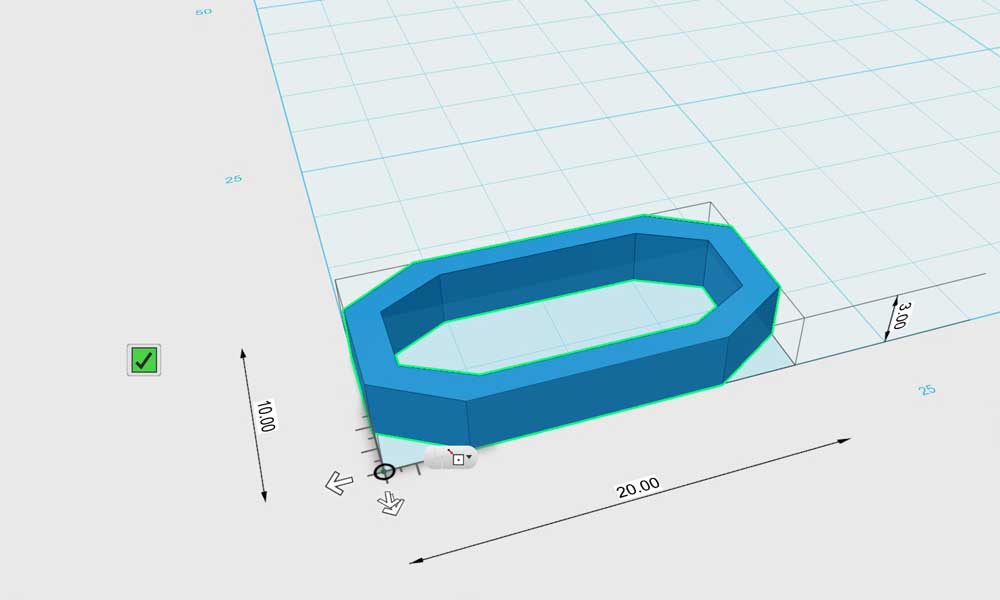
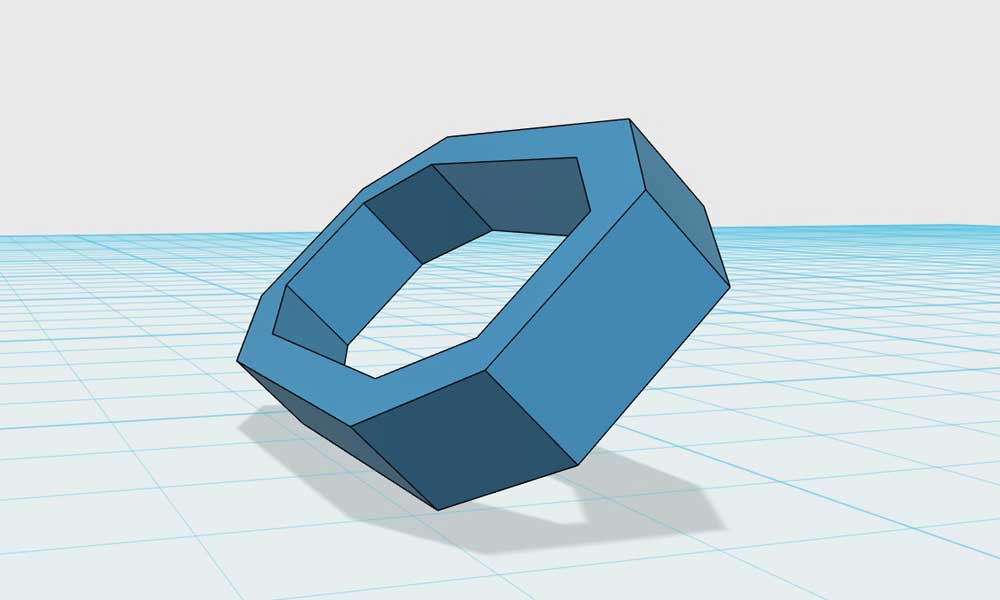
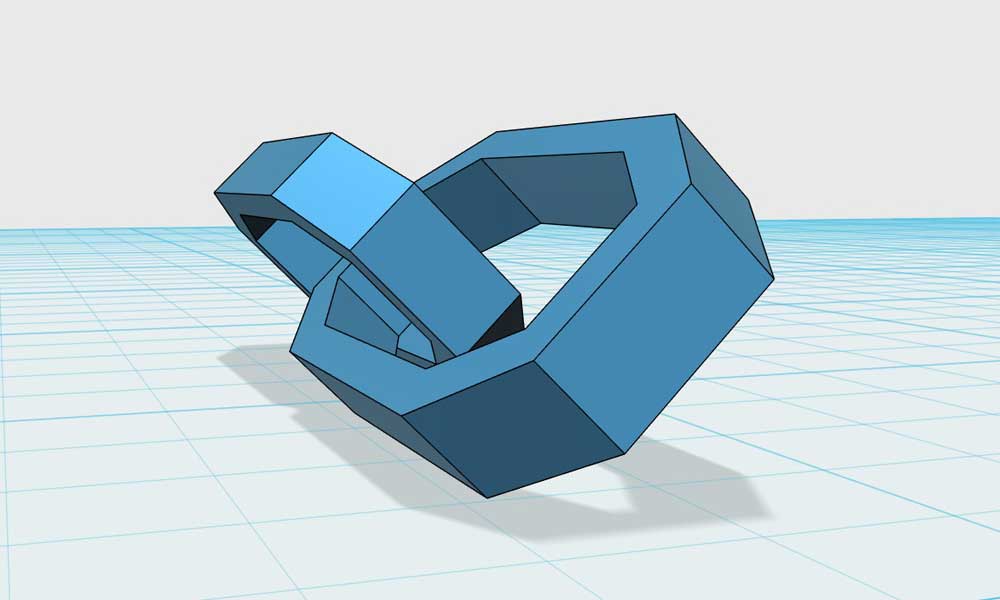
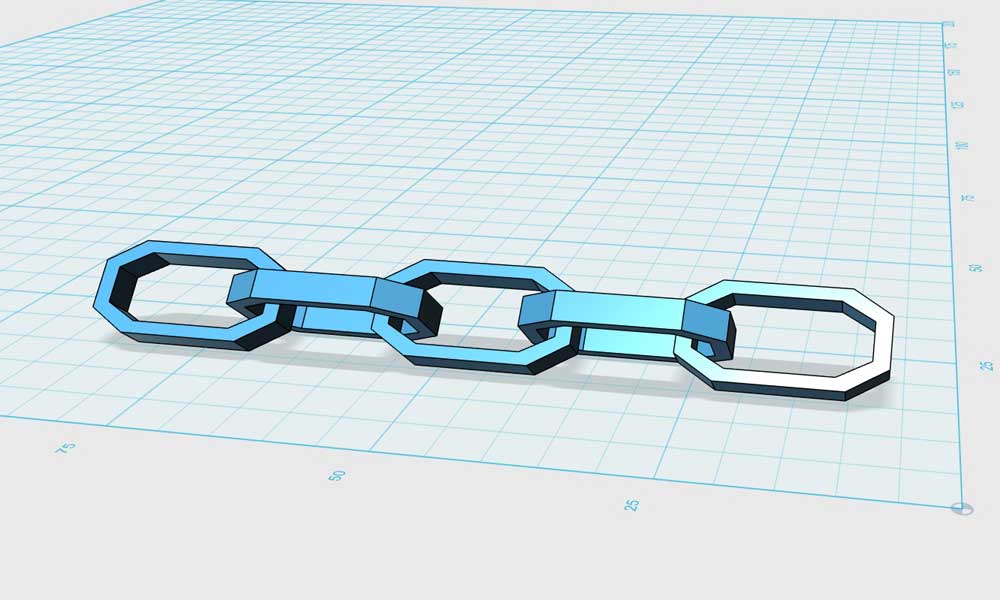
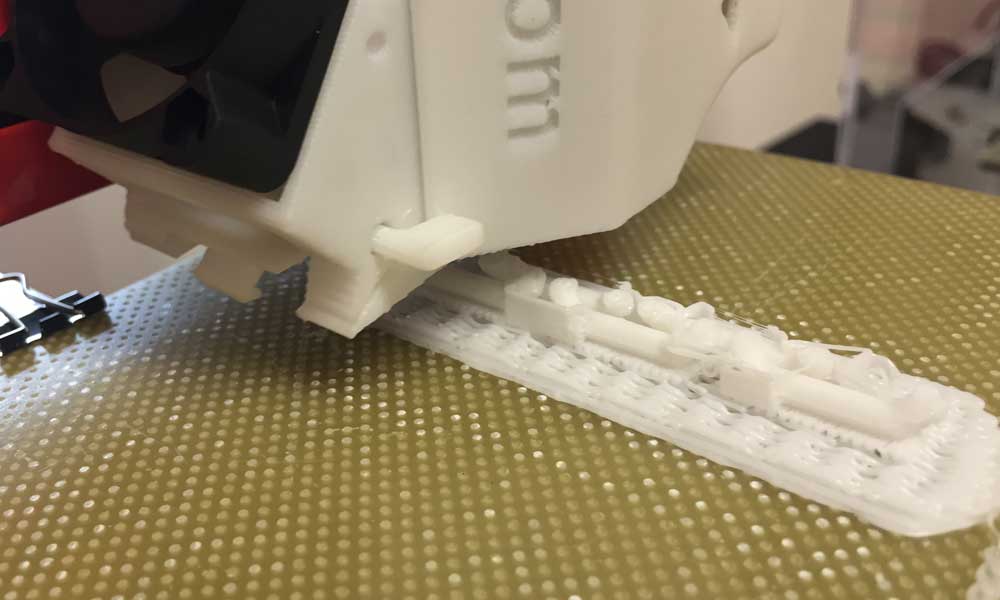
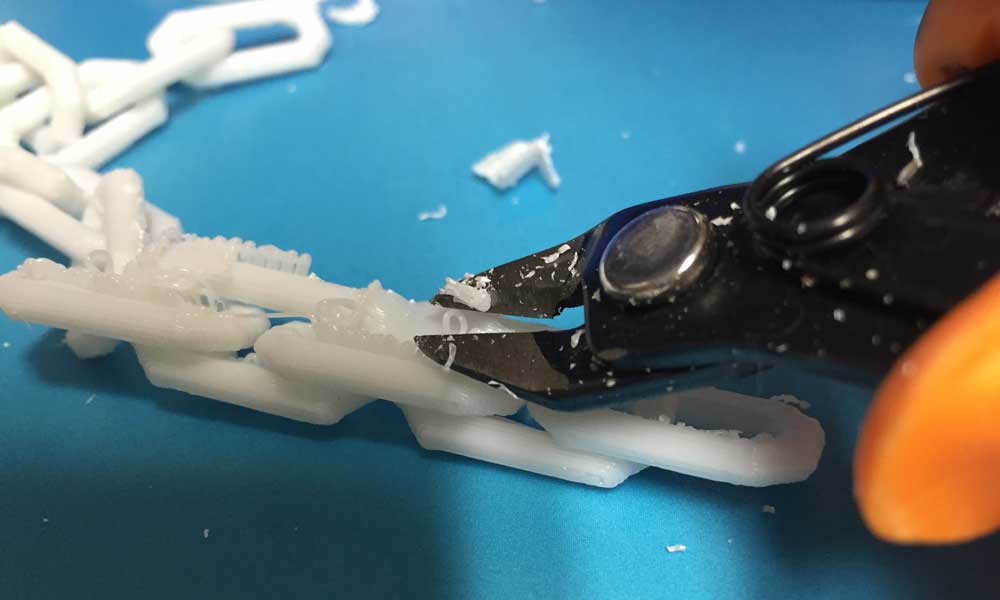
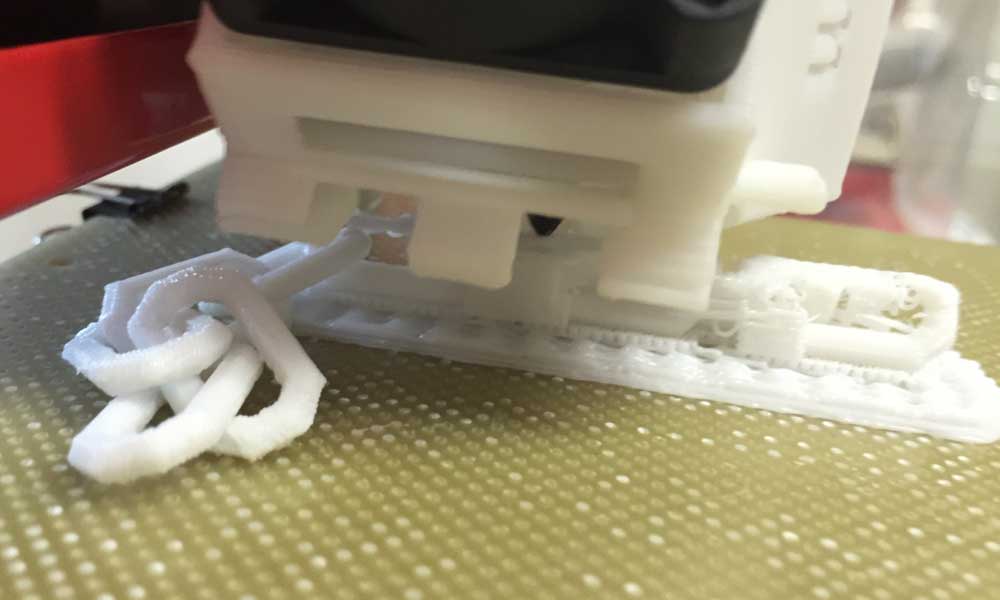
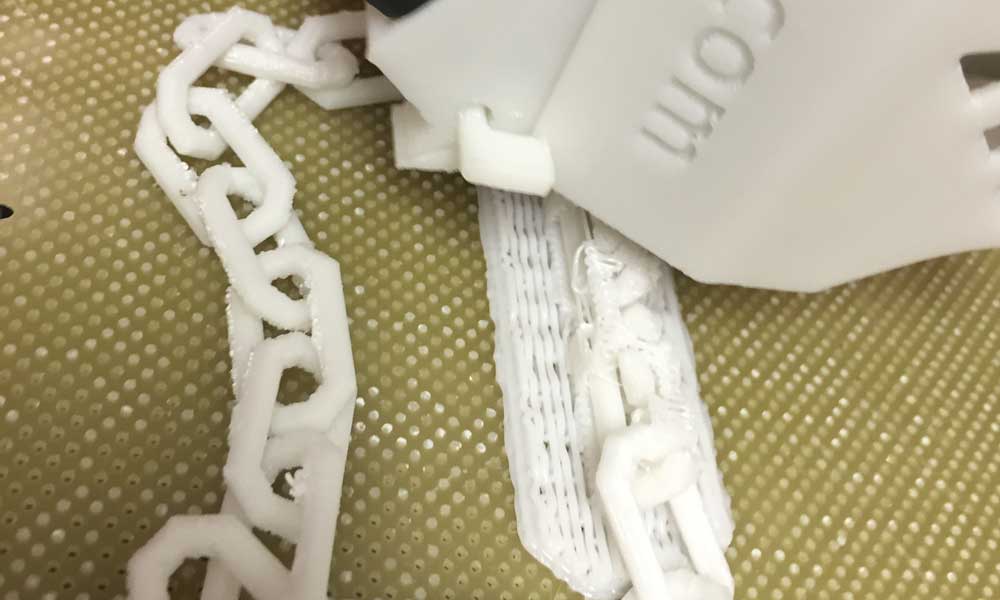
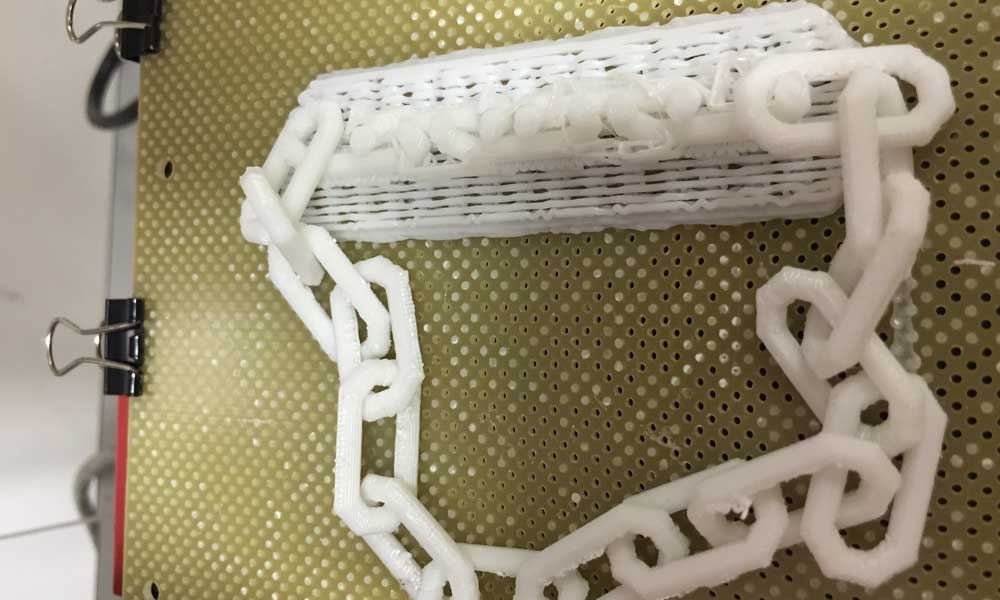
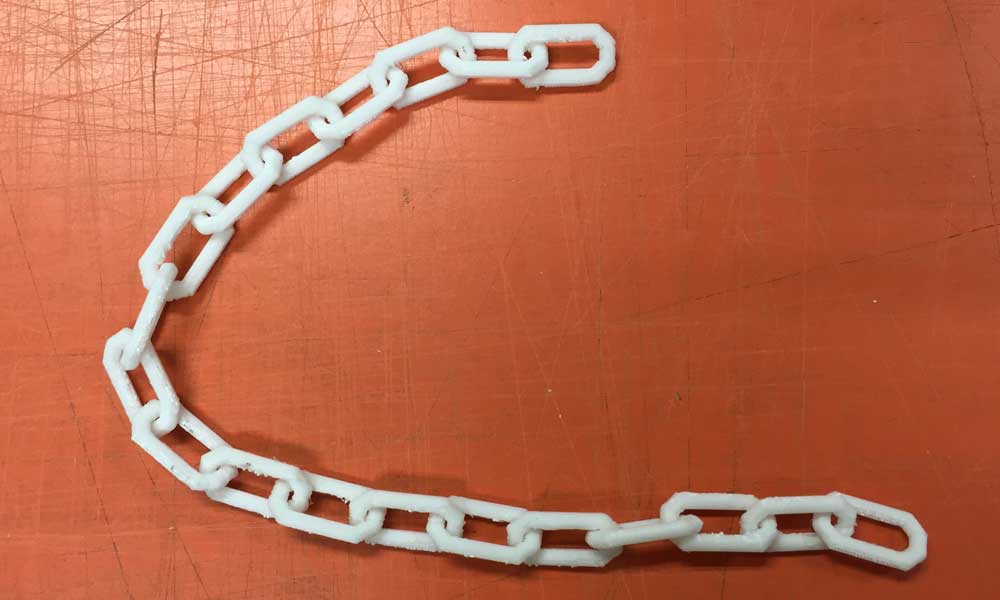
3D-print a small model
I have decided to make a chain because you cannot do this subtractively without splitting it apart and gluing it back. But with a 3D printer, not only can you make the chain, you can add on and even close the loop, while printing the next set. Designing the set of 5 at a 45 degree angle is to facilitate the adding of more chains after it. I was inspired by this youtube video clip to do this.
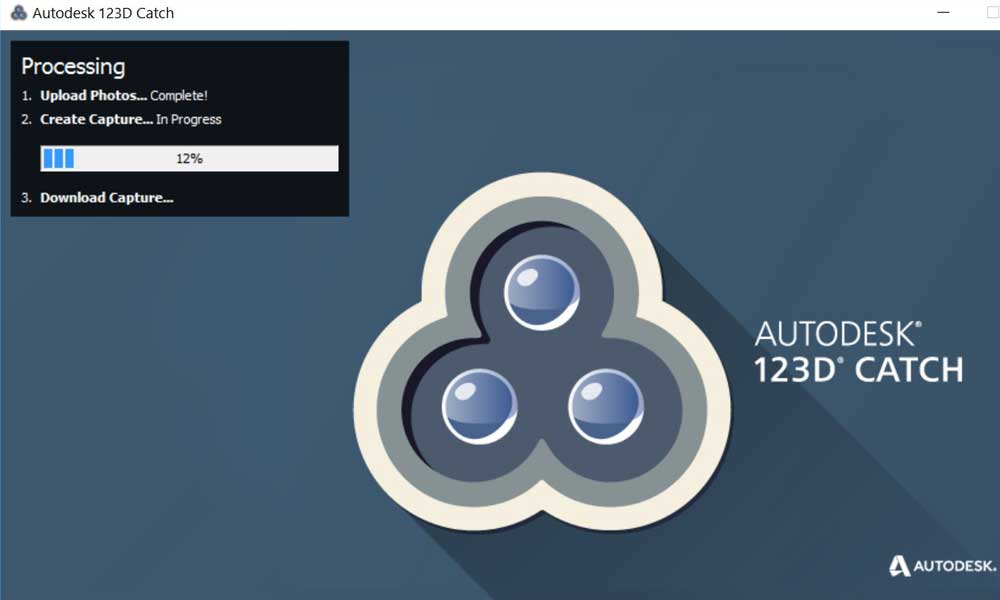
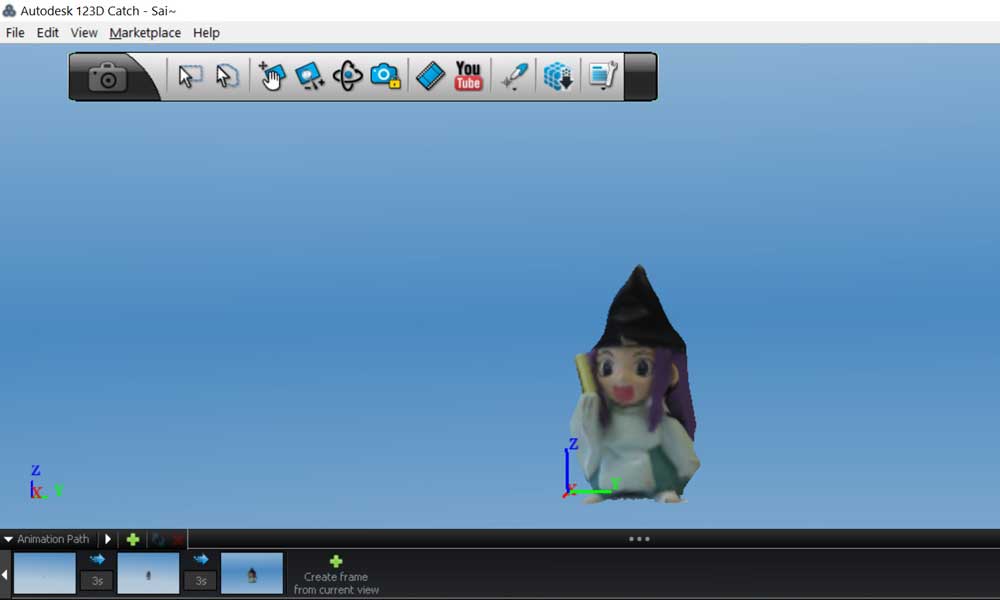
3D Scanning
Prerequisites for the object to be digitized
In order to be able to digitize an object in 3D, the object must be able to reflect light. The object cannot be too shiny or reflective either. A mirrored surface, polished metal or crystal cannot be digitized. Reflections and refractions of the light confuses the reading of the geometry. When the volume to be scanned is extremely thin, the canner can have difficulty determining the front side from the back side. Other tips and tutorials can be found below:
- 123D Catch Photo Tips
- It’s Easy as 123D Catch
- 123D Catch web app Tutorials
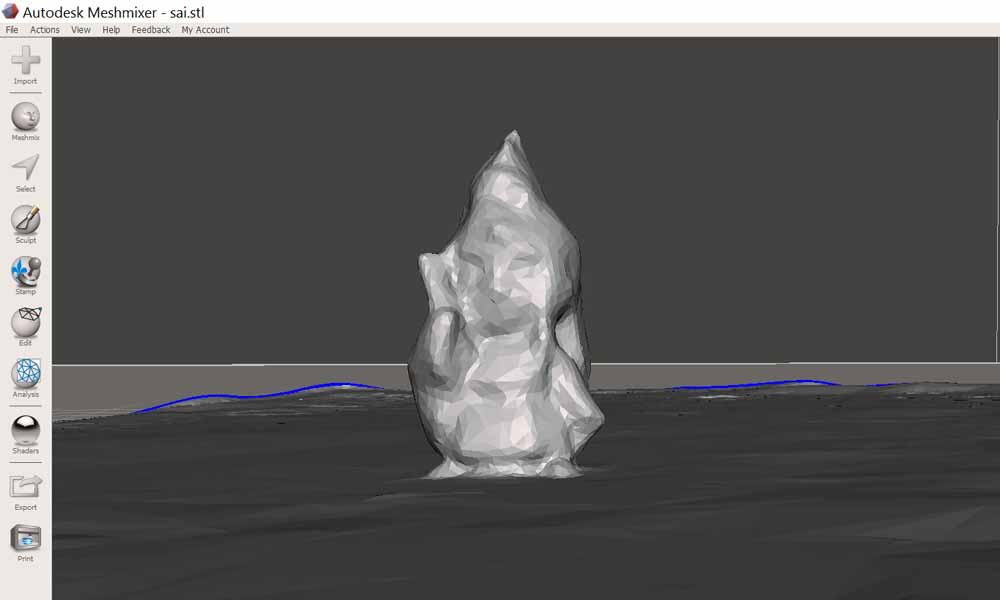
- Autodesk Meshmixer 101 Tutorials
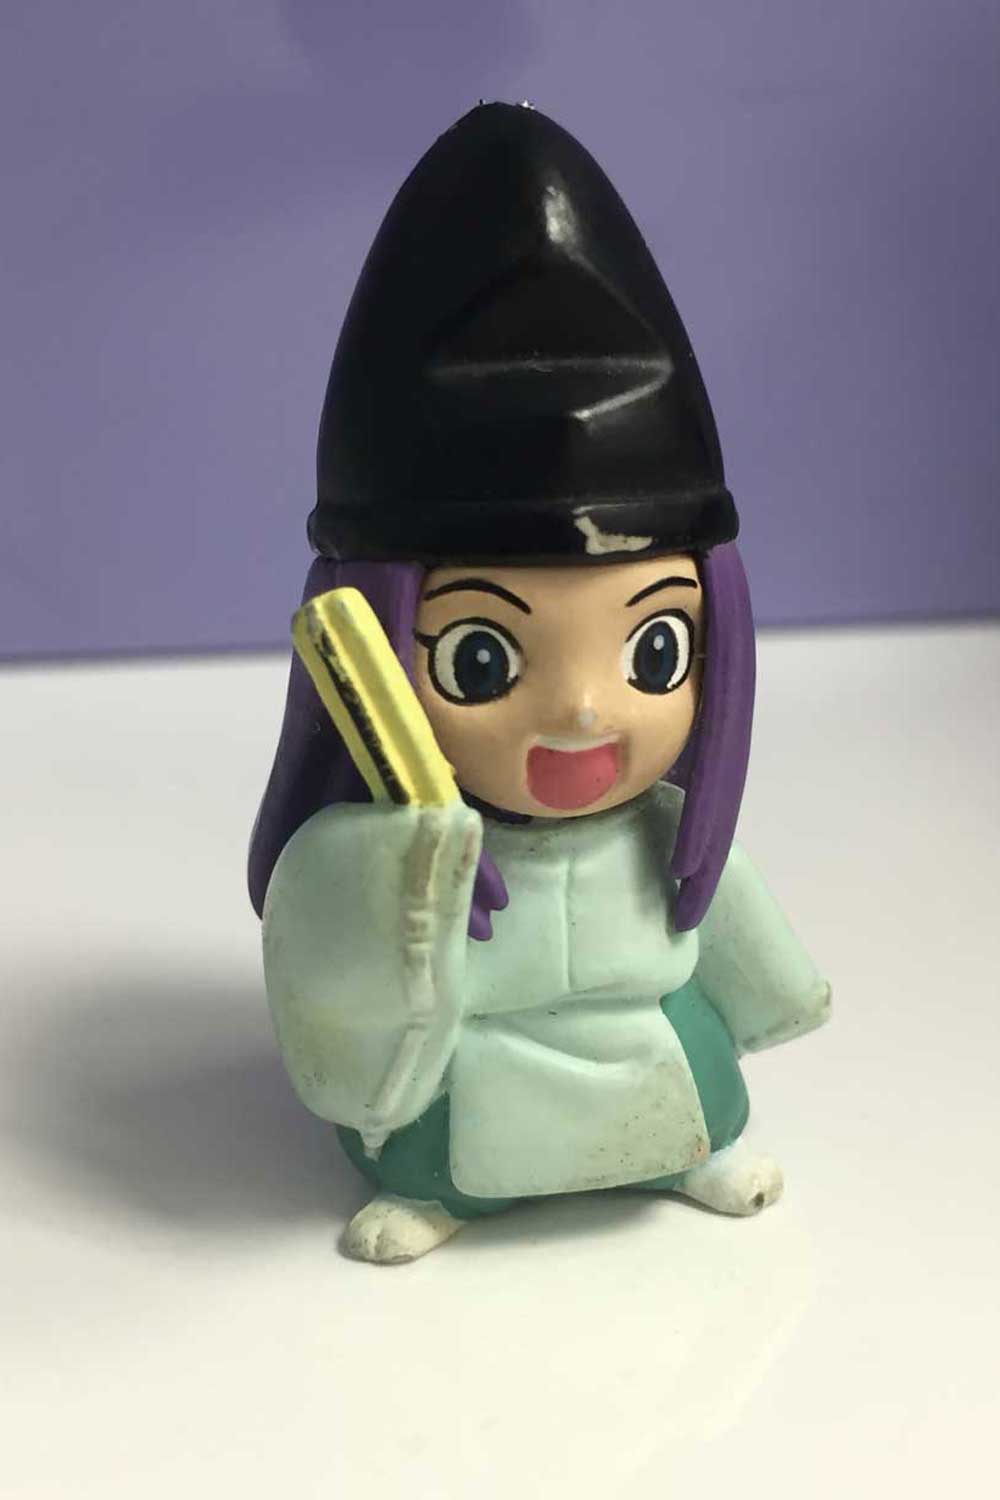
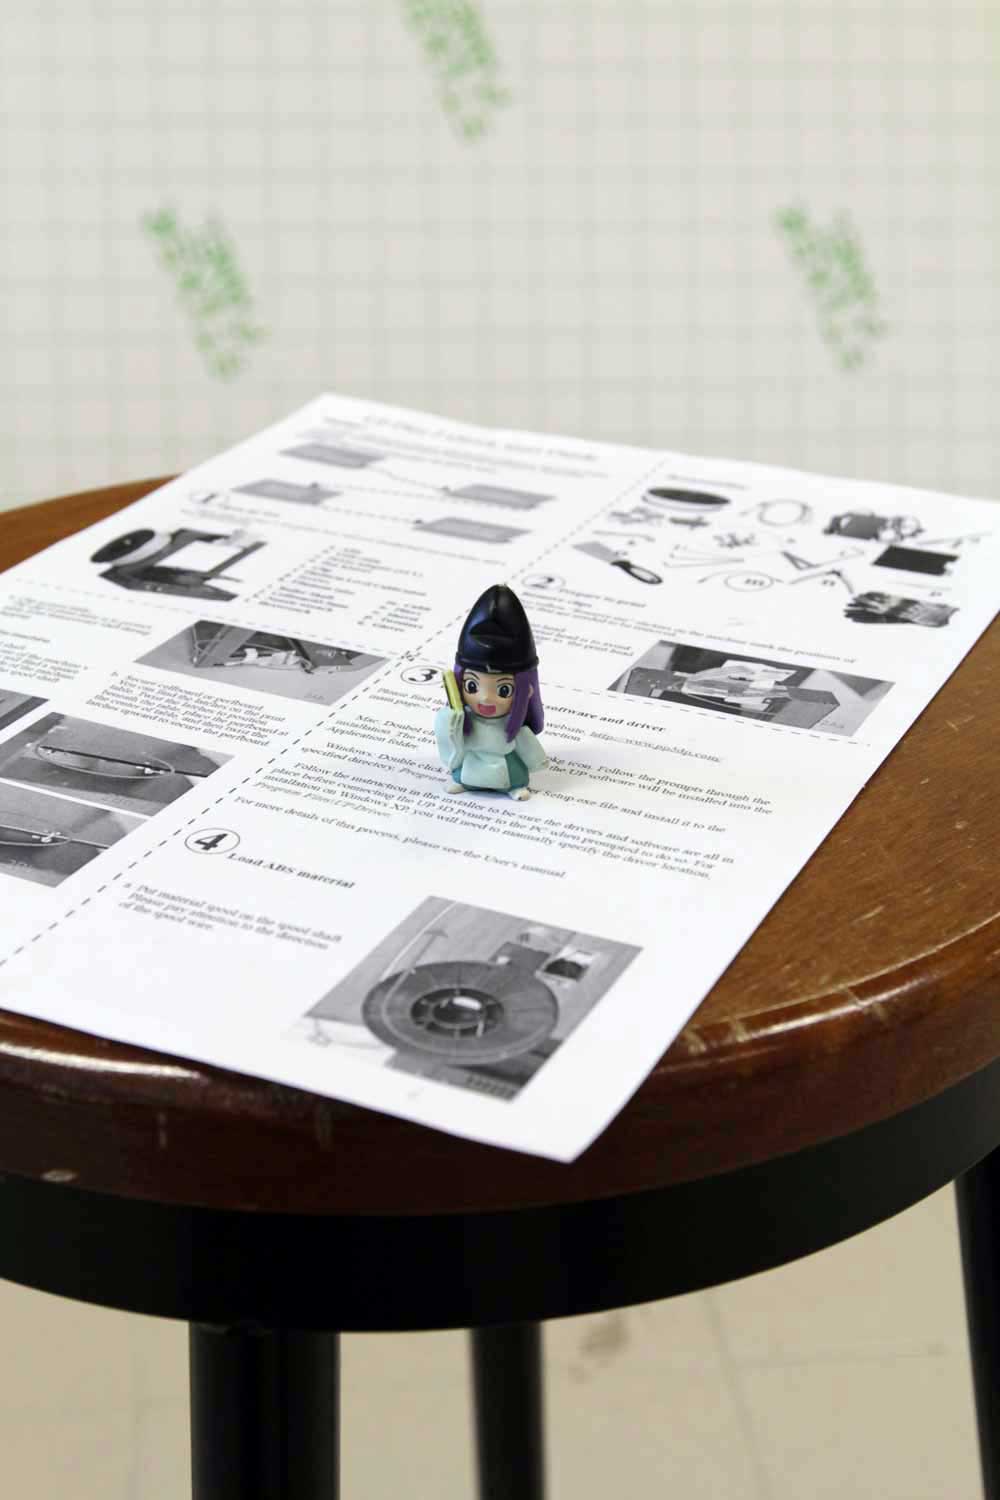
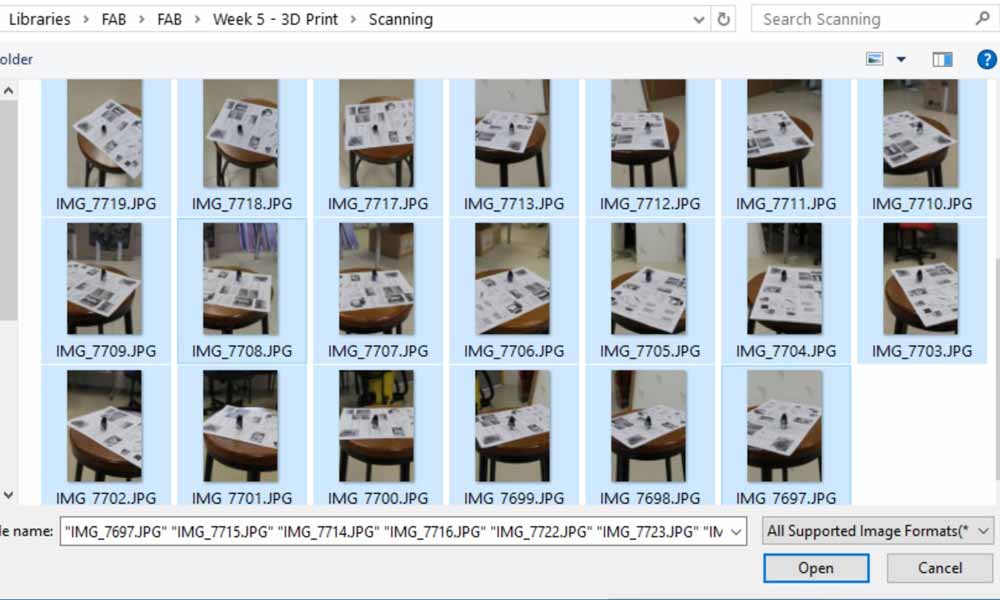
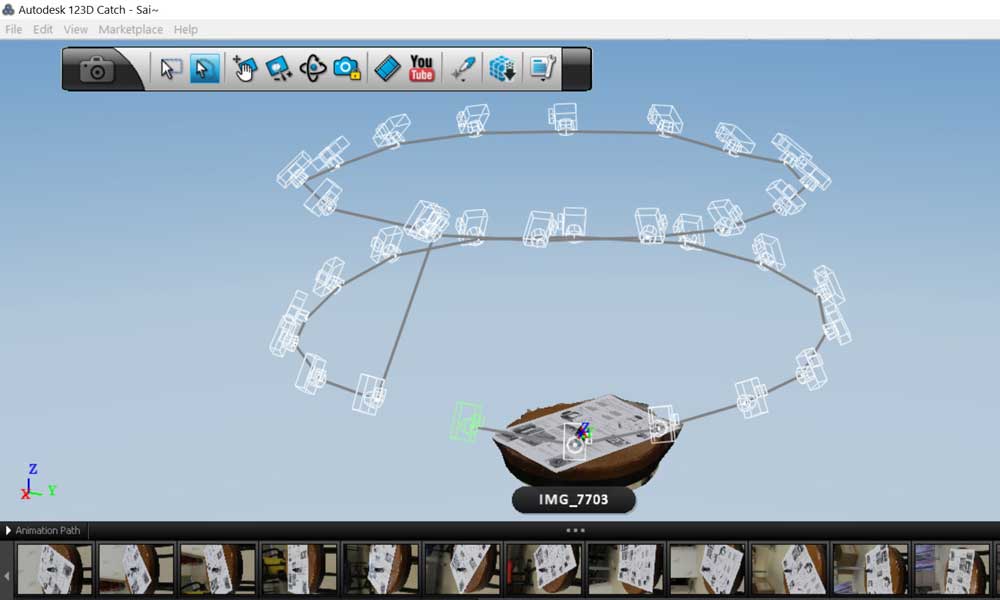
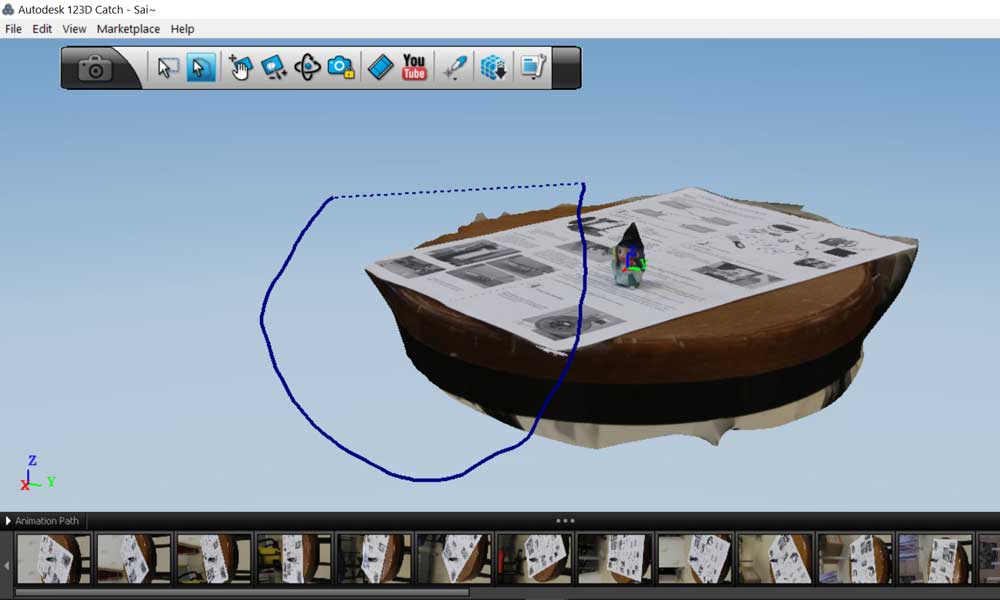
I have used a piece a printed A4 material to be the base which act as the landmark features for the software to render the 3D image. I have taken 33 shots in total. Starting from the center, I took photos on every 5 or 10 degrees, until 360 degrees is covered, at a single altitude. Then another round at a different altitude. It is important to have a consistent exposure, so I used manual mode for this shots.

Download Week 5 work files
References
- Additive Manufacturing vs Subtractive Manufacturing
- Types of 3D printers or 3D printing technologies overview
- Designer Creates an All-in-One Solution for Testing & Calibrating Your 3D Printer
- Test your 3D printer! v2
- The Most Important 3D Printing Technologies & Materials You Need to Know
- How to Choose the Perfect File Resolution When Turning Your 3D Model into a 3D Print
- 3D Printing Tips & Tricks – How to 3D Model A Great 3D Print
- How to Design and 3D Print Chainmail Patterns and Interlocking Parts
- 5 Mistakes to Avoid When Designing a 3D Model for 3D Printing
- 3D Design Rules
- Things to keep in mind when designing for 3D Printing
- 3D Design For 3D Printing
- Design tips
- PLA vs ABS | What's the Difference for 3D Printing?
- Make: Design for 3D Printing by Samuel N. Bernier, Bertier Luyt, Tatiana Reinhard
- Download an STL of your 123D Catch project