Week 12 - Molding and Casting
Tasks:
To design a 3D mold, machine it, and cast parts from it.
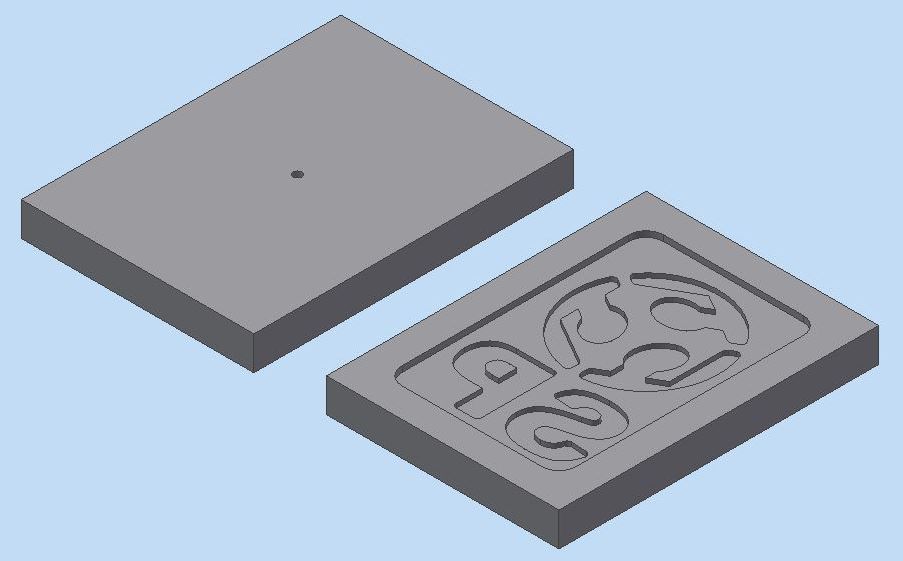
Design of 3D Mold
A simple 3D design was designed in Autodesk Inventor. The mold was then derived from the 3D design as shown in the following.

Designed another half of the mold with feeding gate as shown.
Fabrication of the 3D Mold
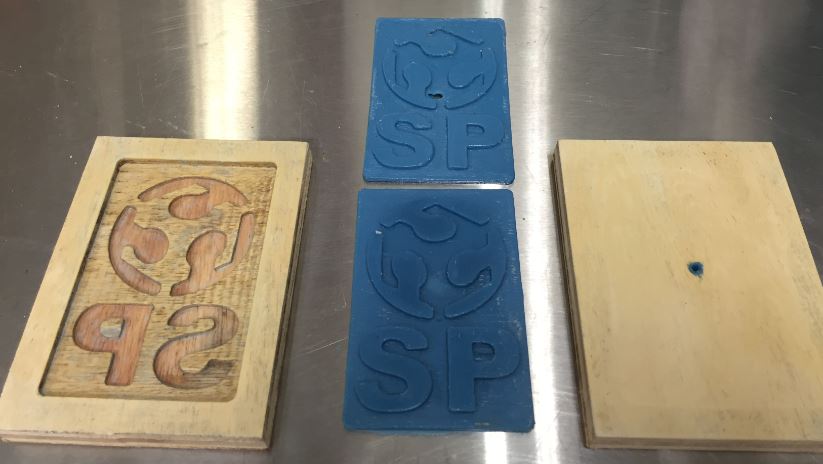
The plan was to use wood to make the mold. Thus, router was the choice to machine the cavity of the 3D mold.
The 3D CAD designed was imported into Mastercam X9 for g-code generation. Next, load onto the router and the following is the machined molds.
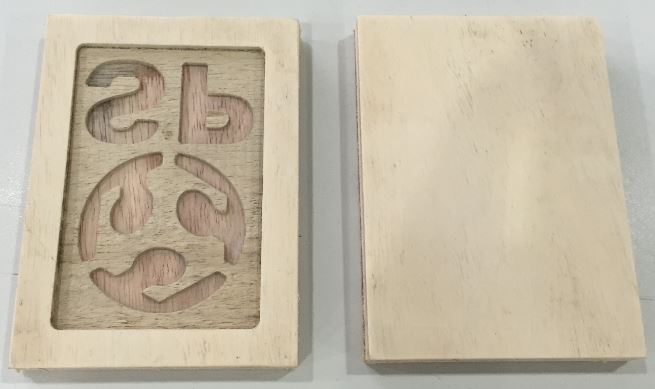
There was no feeding gate on the right hand image. Thus, next task was to drill the feeding hole of 3.4mm diameter at the centre.
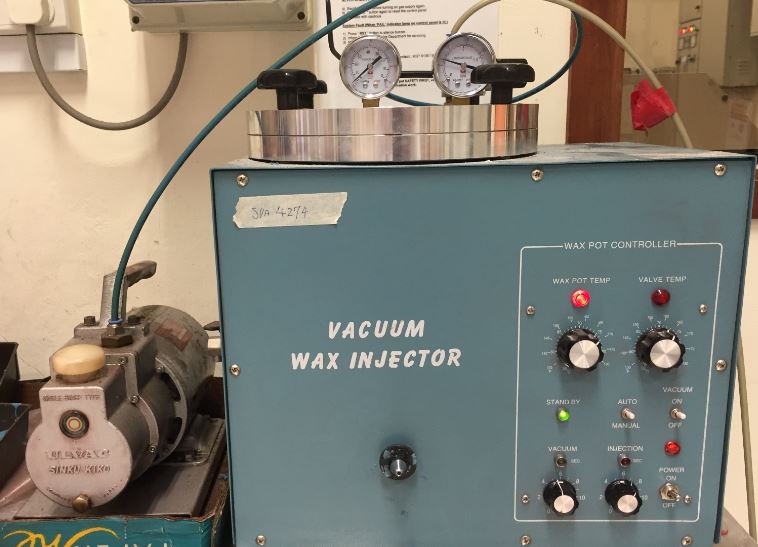
Cast Parts with The Mold
Cast/molding material to be used was candle wax. Moreover, Singapore Polytechnic has small wax injector machine. This helped the molding process easier and faster since the machine took over the heating and injecting of the wax. The following shows the wax injector.
Before the start of the molding, it is advisable to apply a coat or two of releasing agent onto the 2 halves of the molds to facilitate demolding when the wax solidified.
The molding started when the mold were held-closed firmly.
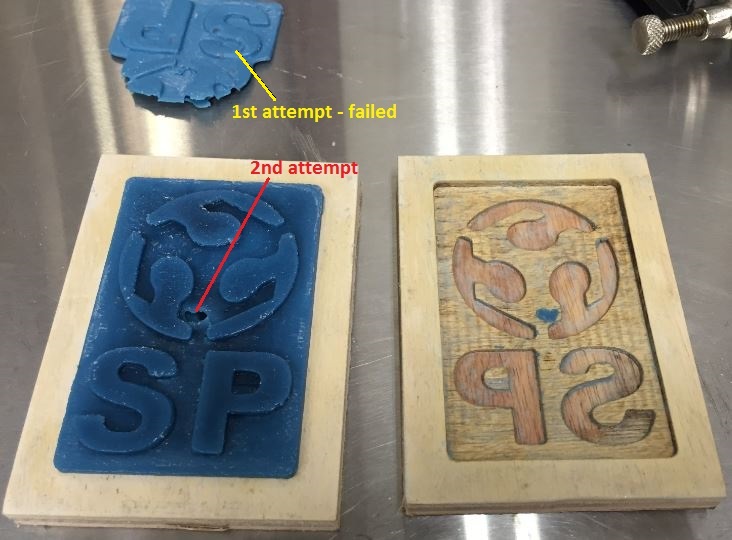
First and second attempts were failed due to insufficient wax injected. Note: the releasing agent needed to be re-coated each time the molding cycle was repeated.
Here is the successful molding.
Interested to try on your own? The working files can be downloaded here.