Website Making 1: HTML&CSS Basics
29 Jan
Week1 Project Management; Project Management; Hackable Documentation
Starting a website from scracth, I relied heavily on Codeacademy. The HTML and CSS course should gain me enough background knowledge to build a basic static site and it shouldn't take more than 3 hours. From then onwards I navigate a lot about the site of www.w3schools.com where you may find a decent enough library for me to look for a particular spell of a function or effect.
I'm gonna touch upon languages such as Javascript and jQuery to add more interactive effect later on.
☞ Tips
1. Type Special Character in HTML Text
Reserved characters in HTML must be replaced with character entities. A character entity should look like:
&entity_name;
OR
&#entity_number;
Some commonly-used characters in HTML can be typed as:
| Character |
Name |
Number |
| (space) |
|
  |
| < |
< |
< |
| > |
> |
> |
| & |
& |
& |
| $ |
$ |
$ |
Click here for more reference.
2. Link .css and .html File
Codes for styling can be written on the same page with the main body simply by typing the styling code within <style> </style> before <body> section in a .html file
For more lengthy descriptions of a style or to use a unified style for several pages, it's easier to seperate the styling codes from the .html file and link the two by typing the below codes in the <head> section of the .html file:
<link rel="stylesheet" type="text/css" href="file_name.css"/>
Website Making 2: Tools for Documentation
30 Jan
Week1 Project Management; Brakets; Batch Downsize; Documentation
· Batch Downsize Images
- Capture One Pro, which I use for photo editing, can perform batch downsize by going into 'file' -> 'export images' -> 'variants'. Then adjust the quality in the 'basic' option under the section called 'recipe'.
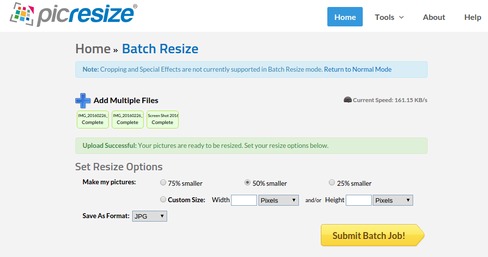
- Another online photo resize tool I'm using is picresize.com/batch.phpwhich allows users to choose to downsize the images by 25%, 50% or 75%.
· Website Coding
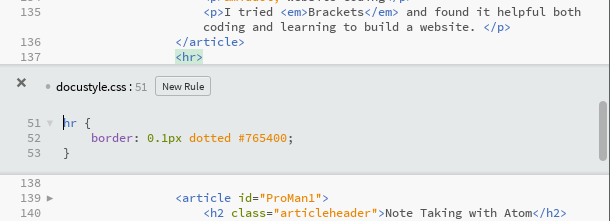
I tried Brackets and found it helpful both coding and learning to build a website. To quickly apply a CSS effect to a specific id, I only have to hover my mouse on that id and press Ctrl+E/Command.
Note Taking with Atom
29 Jan
Week1 Project Management; Project Management; Hackable Documentation
I had a feeling this course would not only gain me technical skills but also great habbit of multi-tasking and problem-solving capacity.
I've installed an App called Atom as the alternative to Onenote after I've changed to Linux OS. It's basically a hackable text editor to help organize my notes and files. https://atom.io
Task Management with Trello
29 Jan
Week1 Project Management; Project Management
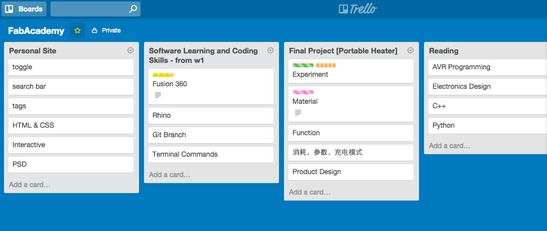
Trello is an online paltform for project management. It's been widely used in teamworks. Now I use it as a personal project management tool since helps me to jot down ideas, and later to catogorize or follow up tasks with ease. It takes long to login from mainland China though. Still I would highly recommend it especially for new users because the user interface is designed in a way that even new users could navigate effortlessly.
Git Setting-Up
29 Jan
Week1 Project Management; Preparation; Version Control
There's an easy-to-read brief guide to using Git called git - the simple guide that I used to start off. Very worth following step by step to ingrain a very important idea of version control.
To upload local files to the repository, I need three steps:
$ git add file_name
$ git commit -m "reason_to_update"
$ git push
Git File Name Change
4 Feb
Git; filename; terminal
To change the name of an existing file in the repository, simply use the command git mv.
$ git mv <current name> <new name>
Ubuntu Installation
28 Jan
Week1 Project Management; Preparation; Operation System
The OS environment of my PC was Intel® Celeron(R) 3205U 4GB Memory @ 1.50GHz × 2 with Windows 8.1 pre-installed.
I first created a bootable Ubuntu USB flash drive by following the tutorial where you can find here. The problem I encountered during installation was the PC wouldn't boot from USB by default so that you'll probably have to enter the BIOS setting when it's starting up. If you don't know which key to press to enter BIOS, Barry came up with an awesome solution -- to swipe all F-keys in a row and continuously repeat it until you get the right one! It took me hours to figure out the way to enter BIOS and the problem was solved as soon as I saw Barry the second time. KUDOS Barry!