Assignment 10
Molding & Casting
Assignment:
Design a 3D mould, machine it and cast parts from it:
Learning outcomes:
- Design appropriate objects within the limitations of 3-axis machining
- Demonstrate workflows used in mould design, construction and casting
Have you:
- [ ] Explained how you made your files for machining
- [ ] Shown how you made your mould and cast the parts
- [ ] Been surprised today
- [ ] Described problems and how you fixed them
- [ ] Included your design files and 'hero shot' photos of the mound and the final object
This week's recitation
So, the final part of the assigment was quite simple ... mix the gesso with water until it becomes dense and pour the mix into the mould, wait and remove ...
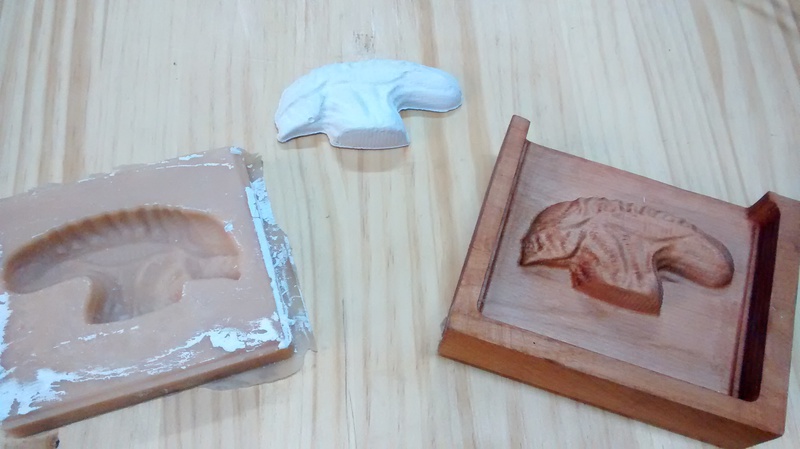
Well, this part of the work actually have a couple of interesting things to point out. First of all, we planned to cast at least gesso and concrete, so we selected a proper silicone to these materials. The suggested product was the Vitaflex 30 silicone (from this store), which is a little bit harder than the regular molding silicone; this was necessary due to the concrete's corrosive behaviour when casted.
This silicone has a hardening time of 16 hrs approximately.
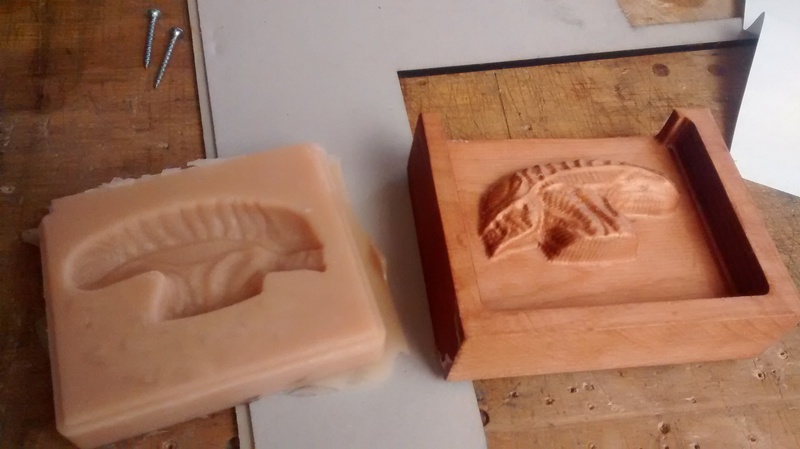
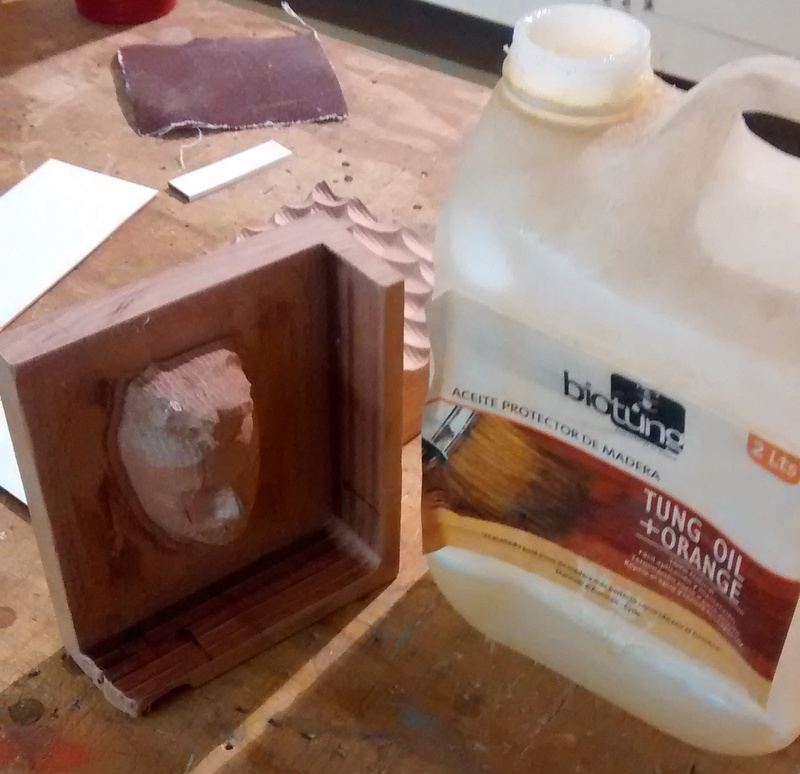
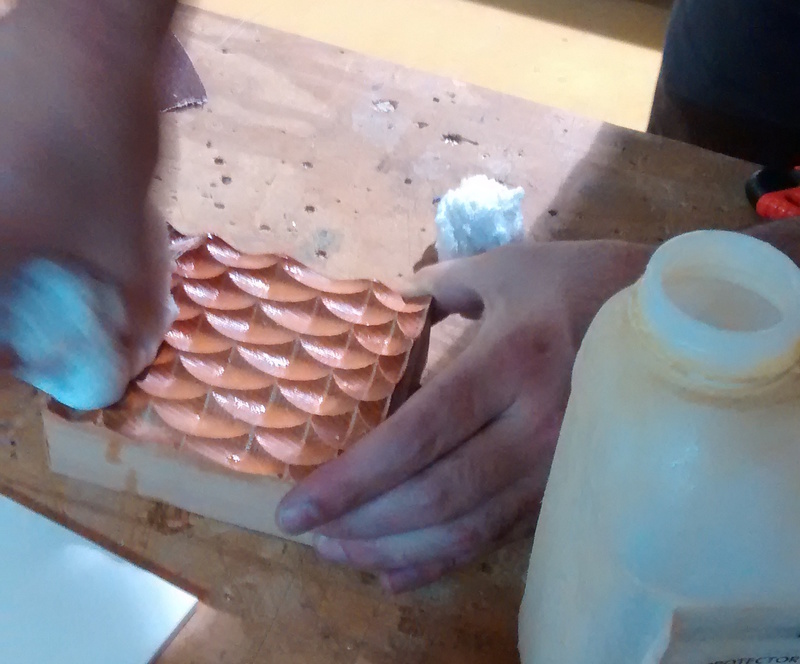
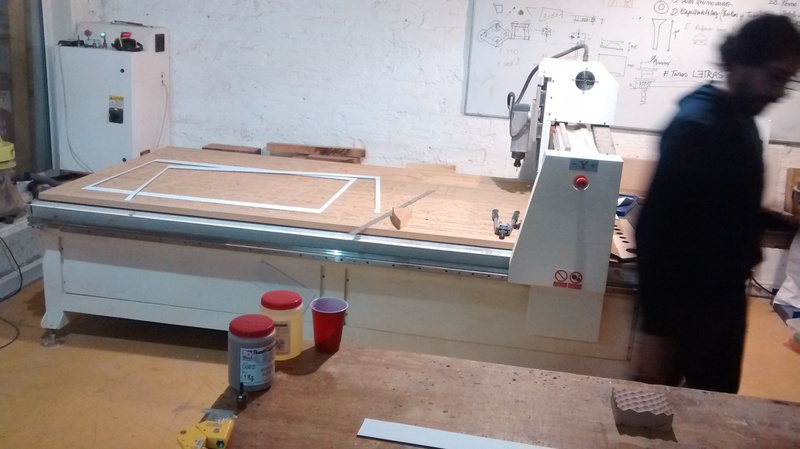
As the mold was milled on wood, precautions had to be taken too since its porosity could generate the silicone to stick to it. Our solution was to impregate the milled wood with Tung Oil (to seal it) and spread some solid vaseline on the mould.
Other tip provided by the silicone seller was to wet the mould with water and detergent (or some kind of soap) before casting the concrete. This step is necessary to reduce the concrete's grip to the silicone.
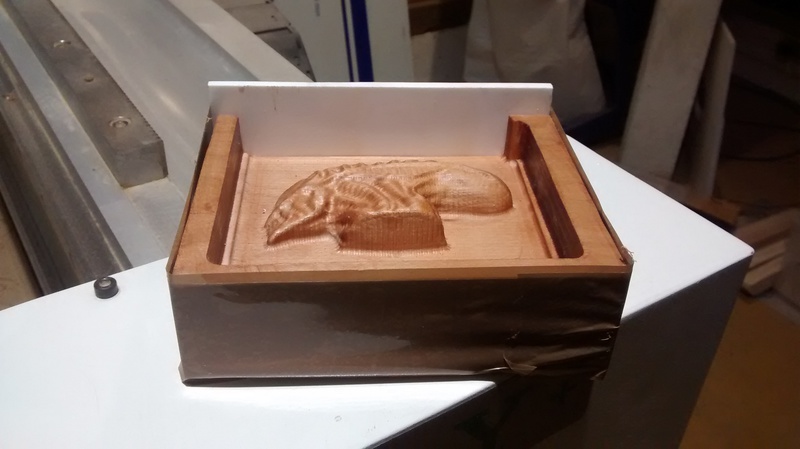

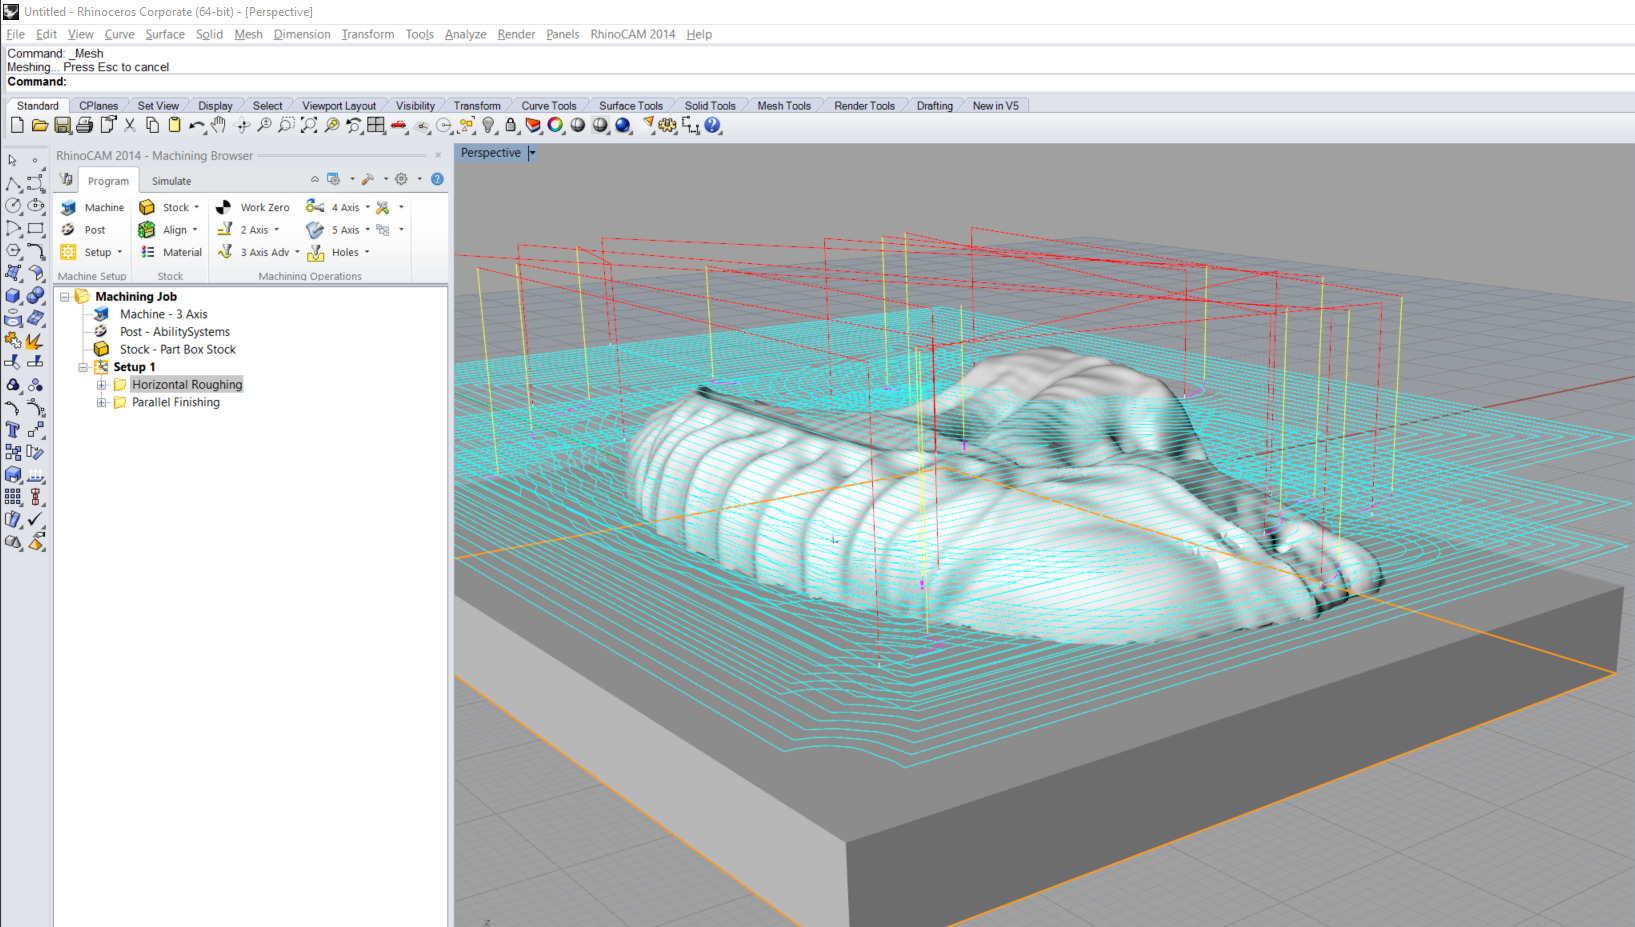
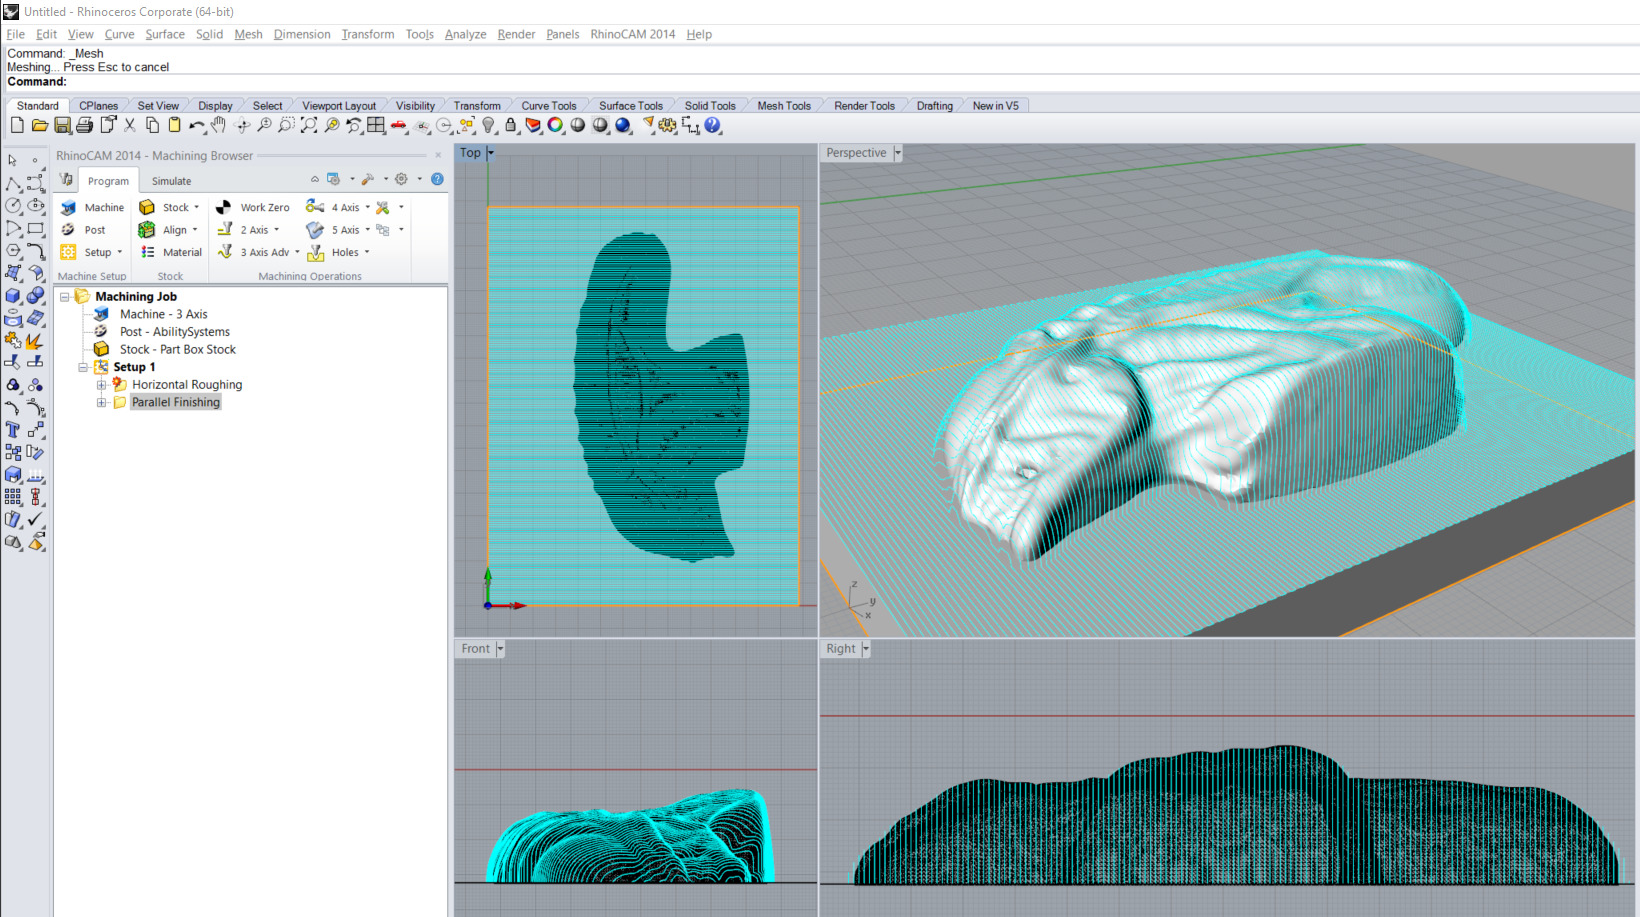
So, this part was kind of straight forward. We processed the model with Rhino CAM and sent it to mill.
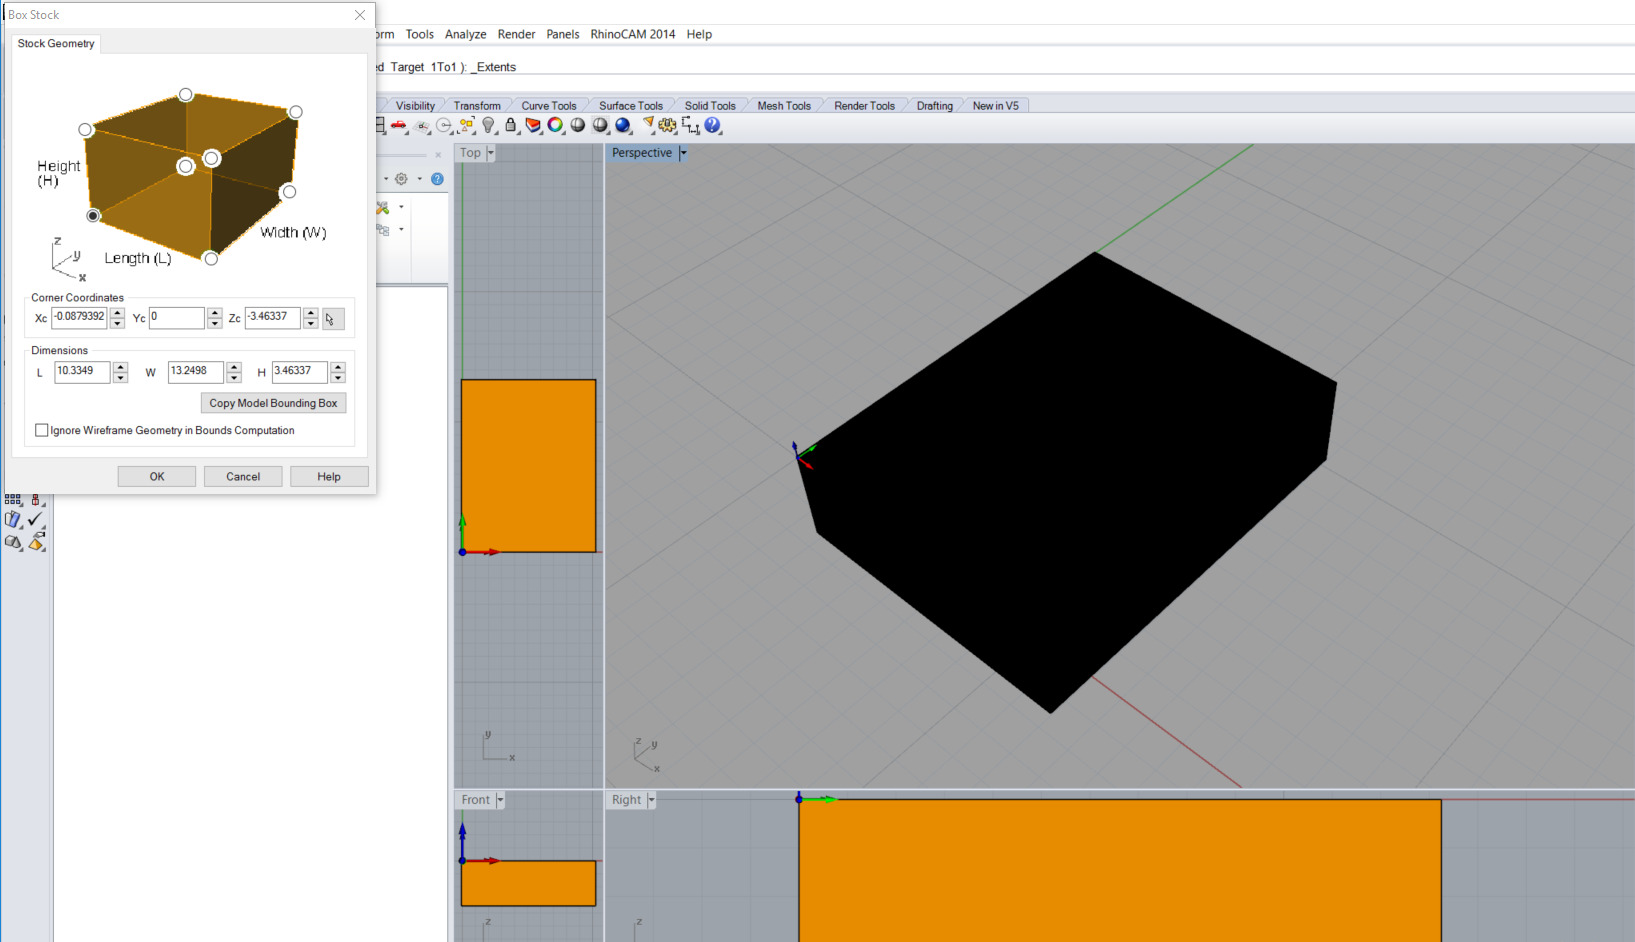
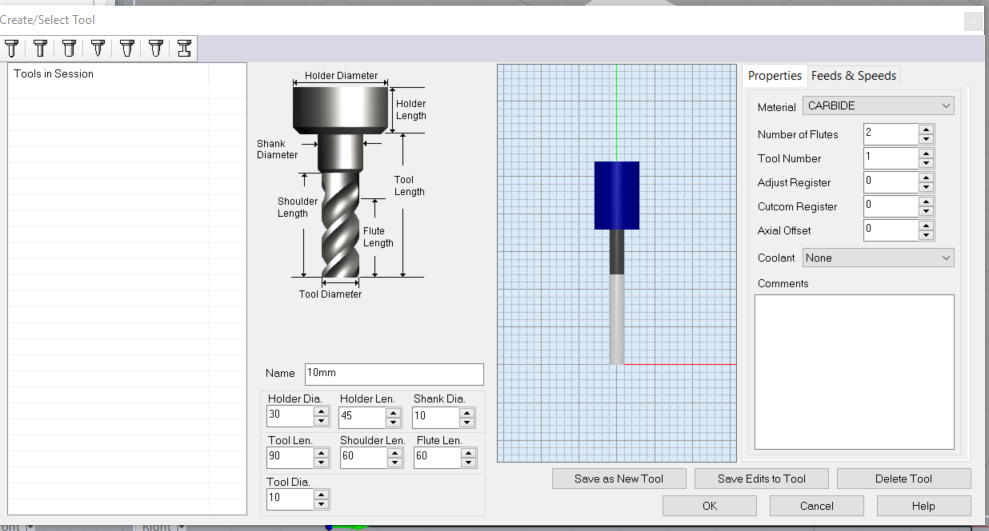
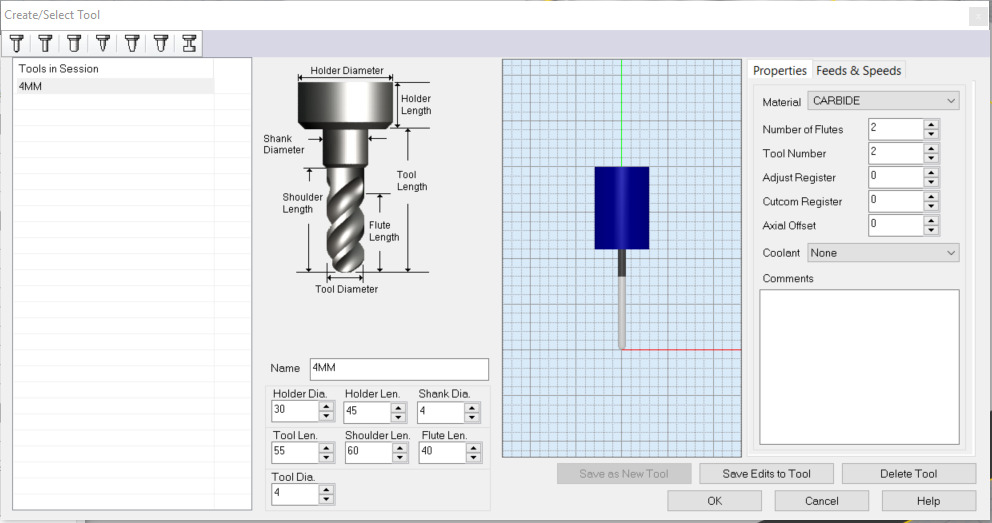
So first we imported the .stl model into Rhinoceros and draw a containing box to model the raw material from which we'll mill the model. Then we select the model and set the milling tool we'll use on the roughing milling path (10mm endmill).
After we generate the tool path and go on to the finishing toolpath, and again we must set the bit's parameters and generate the finishing toolpath.


So here are the .3dm Rhino file and the Rhino CAM file.
Well, the first thing to do was choosing what model should I replicate through casting, so I went to Thingiverse and chose an Alien bust to replicate.
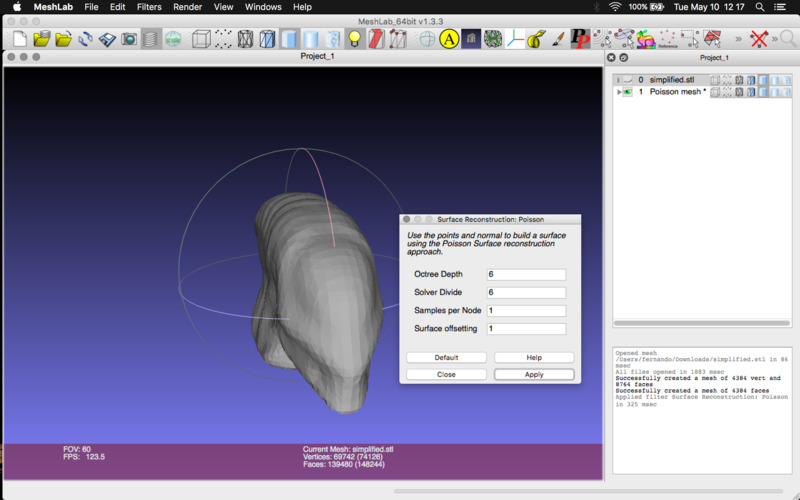
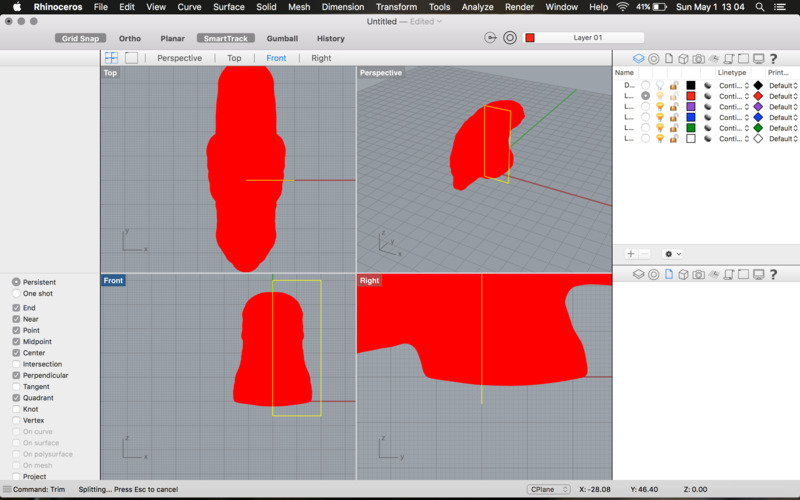
Besides the fact that most CAM software can define the model's depth of cut to mill only the parts accessible to a 3-axis machine, I decided to trim and to simplify the model by myself using Rhinoceros (originally the STL file had too many faces and was too heavy; most of its detailed information would not be noted on the milling process).
So, as I needed to trim the model I went to Rhinoceros, but it was too heavy to work fluently on it, so I went to Meshlab and tried to use "Filters -> Remeshing, Simplification and Reconstruction -> Quadratic Edge Collpase Decimation", but the model had no textures and that produced an error, so I went to "Filters -> Remeshing, Simplification and Reconstruction -> Surface Reconstruction: Poison" to smooth its surface. This way I got the model to be light enough to be easily trimmed in Rhinoceros.
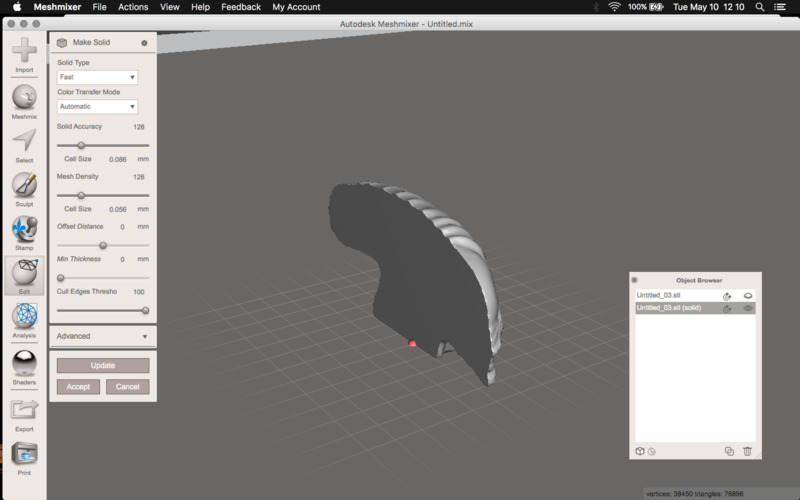
After trimming the model in Rhinoceros, it was open at one side. This should have been easy to solve in Rhinoceros, but instead I went to seal it on Meshmixer. And with this, I got the model ready to be milled.
After all the pre-processing, I sent the model to mill. Here are the source .stl files: original, trimmed and trimmed and sealed