 JOSE REAL
Week 4 - Electronics Production
This week in order to build our PCB we will learn to mill, to solder and to programm a printed circuit board
Milling, soldering and programming a Fab ISP board
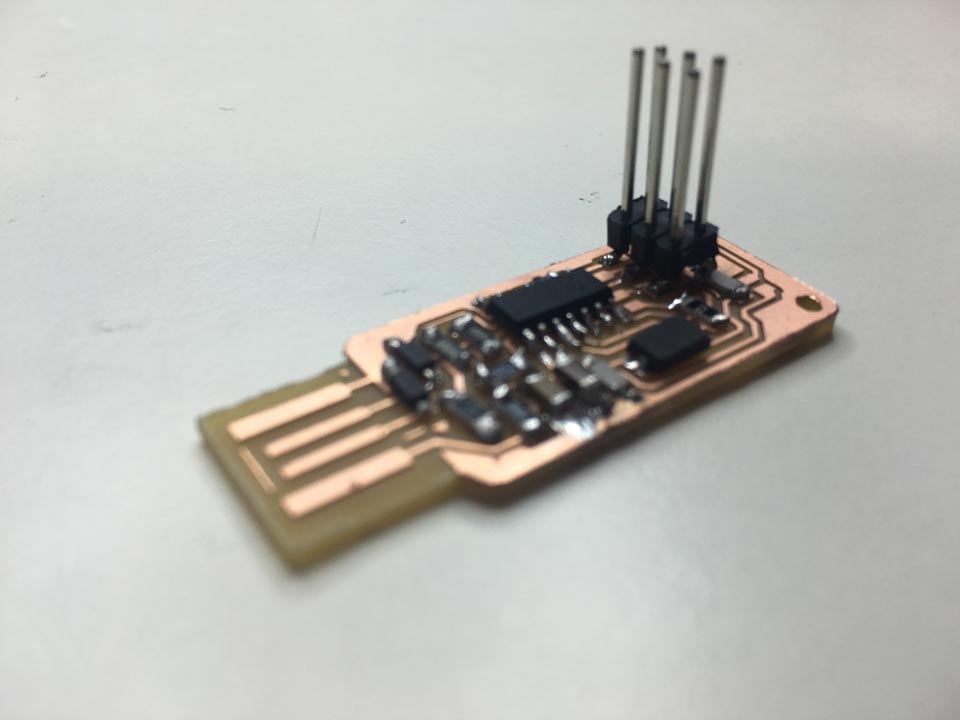
I chose the Andy board because I think it's the simple one.

We have in our FabLab a Roland MDX-40A milling machine.
It have a sensor to calculate the Z coordinate and the position of the milling head. The problem was that boards were bended, we must to make pass almost 3-4 times being carefoul with the milling head (0.1mm depth)
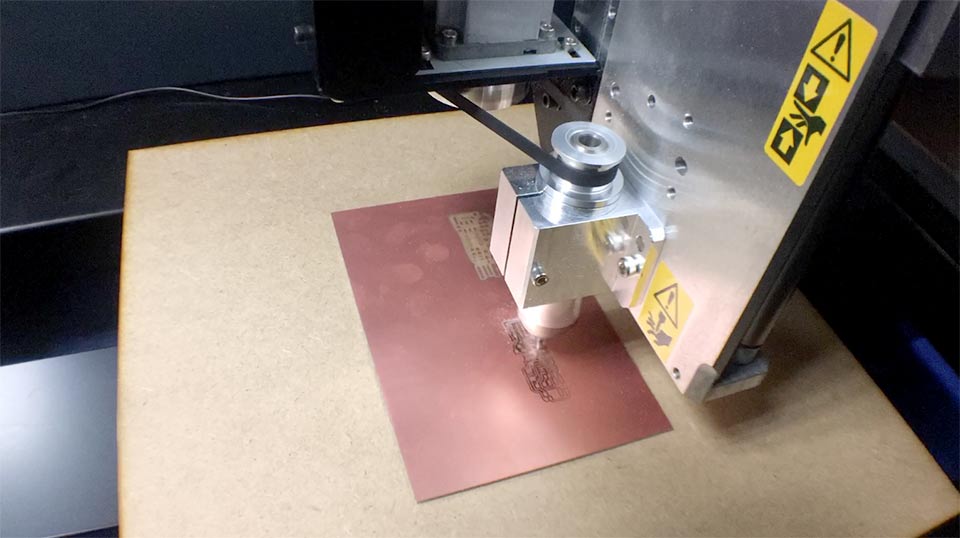
To mill the board we should send two routines to the milling machine: the inner tracks and the outter boundary. First, the traces with the 1/64 head and then the outline cut with the 1/32. The 1/64 is used to make the circuits, is faster (4mm/seg) and the 1/32 for cut the board is slower (0.5mm/seg)
We use online Fab modules first and then the milling machines own software (VPanel)

In this practice I used the recommended parameters:
Speed 4 mm // this is the speed machine when it mills
zjog: 2mm
cut depth: 0.1 // this is very important because if I use more than this the mill will brake. If the board bends I make more passes (0.2-0.3 etc)
number offsets: 4
in this image the interior cut’s configuration for the mill 1/64.

Soldering
This is my first time soldering and I think that it's very difficult, everything is so tiny! But we have a augmented glass lamp to work finally I have soldered everything but i doesn’t work. Before starting I have tried with a cable and an used board.
There are the components that I'm going to use:
2x resistor: 49,9 Ω. (49R9)
1 resistor 1k Ω. (1001)
1 resistor 10k Ω. (1002)
1 resistor 0Ω. (0)
1 resistor 499 Ω.
2x capacitor 10 pF
1 capacitor 1 pF
1 capacitor 0.1 pF
1 resonator 20 Mhz
2 Diode zenar 3,3V
1 conector pinhead 2x3
1 attiny44

I hope that when I finish the Academy I will solder better!
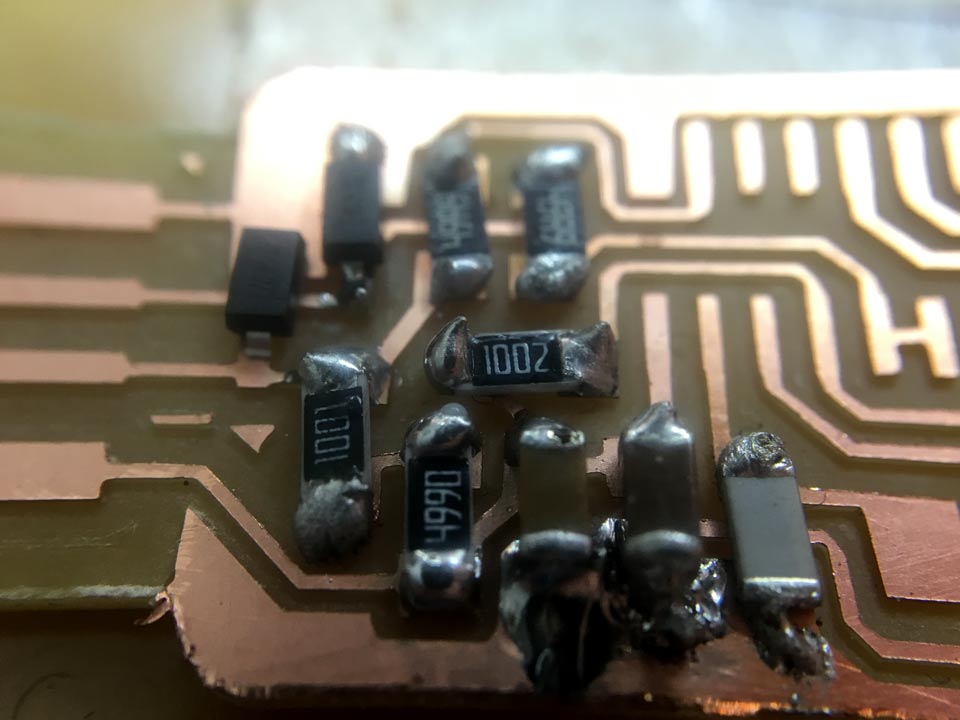
After soldering I checked every connection of the circuit with a multimeter in 200Ω and everything was well welded because the machine beeped in every track test.
Programming
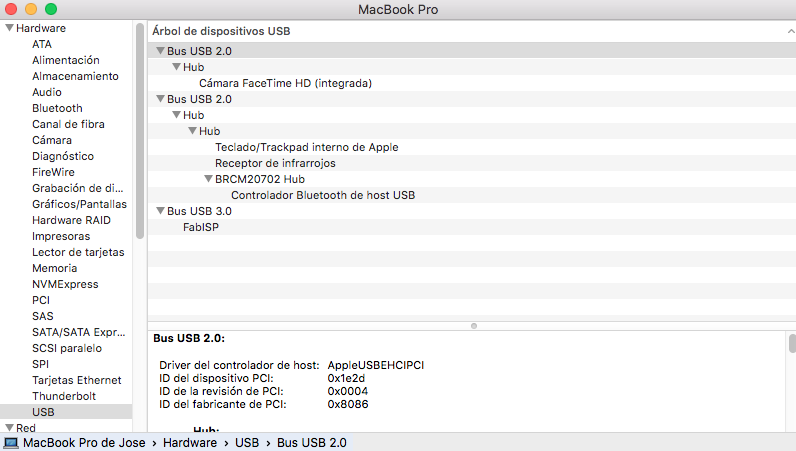
We had at the lab an extra fabIsp programmed board, it was really easy to program following the tutorial; but the only problem I found was that the board doesn’t fit properly on the USB connector. It is super tricky to find the right angle and position for the computer to recognize it as a device.
We need four hands to do this!


This is the FabISP connected to my Mac
ELECTRONICS PRODUCTION |
|
Shown how you made the board |
X |
Explained any problems and how you fixed them |
X |
Included a ‘hero shot’ of your board |
X |
FILES