


The assignment for the week was to model, draw, render, animate, simulate a possible final project and post it on our page. This was after we evaluated the various commercial and open-source 2D and 3D programs that ranged from design software to 3D modeling software. This included game engines, audio, video, simulation and design software.
The weekly global lecture introduced us to computer-aided design. We started with 2D
design and the difference between rastering and vectoring. Raster is composed of pixels arranged in different colors to display a picture. Most raster file extensions are .gif, .png or .jpeg. The vector image files
are made up of paths. This allows for scaling to be done without distortion. The paths scale and retain their appearance since it is based on mathematical formulas. These file extensions are .ai, .pdf or .eps.
Raster images are better used for color and photographs due to the myriad of colors and editing and color corrections. Vector files are better used for scalable logos, icons, or letterhead design. I found out recently while
designing images for a web format that vector graphics was the way to go. Commercially popular programs like Adobe Photoshop is a raster program while Adobe Illustrator is a vector program.
It was a great discussion of the types of 3D design. I learned a tremendous amount about the different types of functions like constructive solid geometry, GUI's, contstraint and optimization.
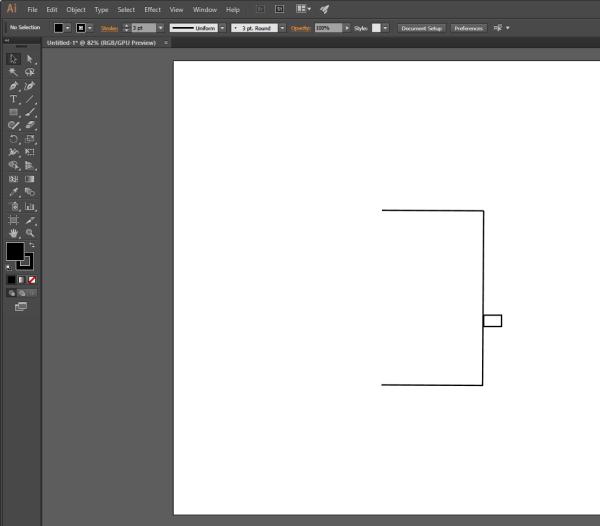
I started using Microsoft Paint to create a basic layout of my final project. The final project is a bidirectional people counter for our new fabrication lab. I wanted to count the number of users in the area and have it visually displayed above the door on a large LED screen. I used Microsoft Paint to create a very simple diagram of how the project would layout over the entrance door of the lab. I also used the Ubuntu version of GIMP to draw a diagram of the project similar to MS Paint. I also used the program Adobe Illustrator to create a similar diagram of the entrance project. I found MS Paint a very easy and straightforward program to use in the diagraming process for a simple drawing. It has the basic features you would look for in a basic raster program. GIMP is powerful because of the free open-source nature and can perform relatively the same actions as Photoshop. This is an ongoing theme as the most popular raster program Photoshop has an open-source equivalent program. This leads me to my next program of Adobe Illustrator. I used Illustrator to design in vector based graphics a diagram of the entrance similar to MS Paint and GIMP. Adobe Illustrator is a great feature rich program to create vector graphics. I am very familiar with the Adobe Creative Cloud, as we have a site license for our school. I also installed Inkscape on virtual machine and created a similar entrance diagram in Inkscape. I am used to Inkscape as I used to use this program before I had the Adobe Creative Cloud suite to create graphics for 2D video games on GameSalad. I liked Inkscape as a program because it was free and relatively easy to use. I do prefer using the industry standard Adobe Illustrator at this point.
Starting The Door in Microsoft Paint and Final Door (Images 1 and 2) | Starting the door in Adobe Illustrator and final door (Images 3 and 4)
This weeks look at CAD software provided me an opportunity to look at readily available CAD software that our school has access to. I choose to focus on SolidWorks, Google SketchUp and played around with AutoCAD. I limited my focus to software our school uses and will potentially use in the classroom. We are an educational institution so AutoDesk software is free to educational institutions as with Google SketchUp. We pay for SolidWorks as it is a functional software package that is perceived as the industry standard. The pricing is far mor than AutoDesk which is free for educational institutions. The learning curve for SolidWorks is significant, but easy once you understand the basic concepts of the workflow. It is extremely powerful in what is can produce and why some believe it is the industry standard 3D CAD software. Google SketchUp is a very easy 3D software package to learn. There are numerous tutorials readily available online to walk you through the process of how to maximize the potential of the software. It allows you to create .dwg files. AutoCAD is also user friendly and they provide plenty of tutorials to get you started. I was easily able in Google SketchUp to take the 2D drawings of our new fabrication space and create a 3D model based upon the same exact dimensions in the drawing. I then created a 3D model of my final project on the entry door to the fabrication lab based on the exact dimensions and materials used.
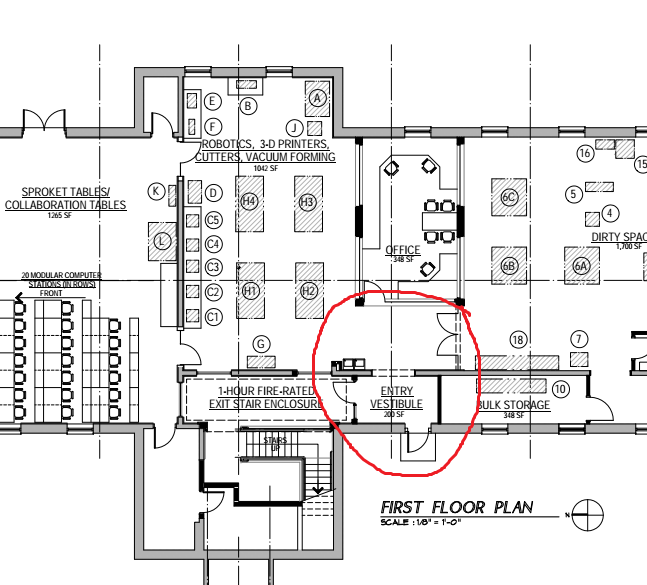
Blueprint of Fabrication Lab
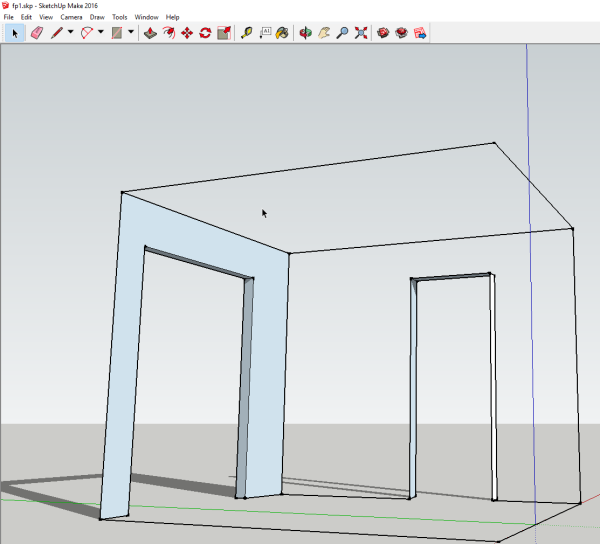
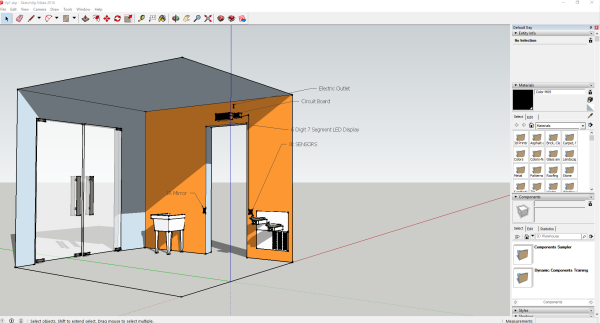
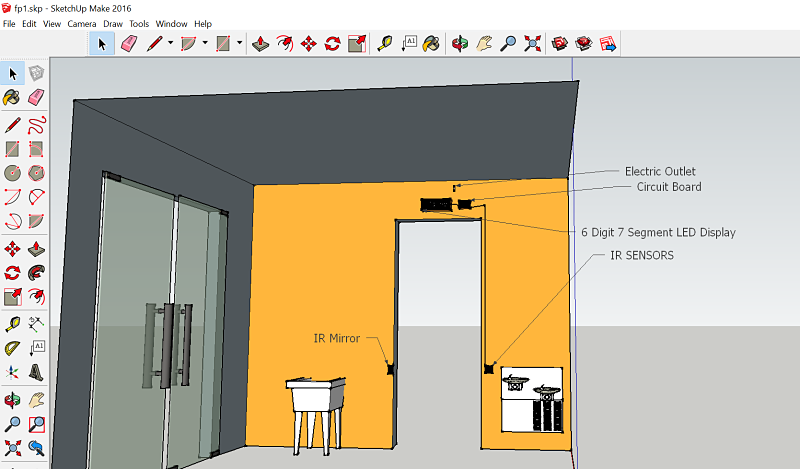
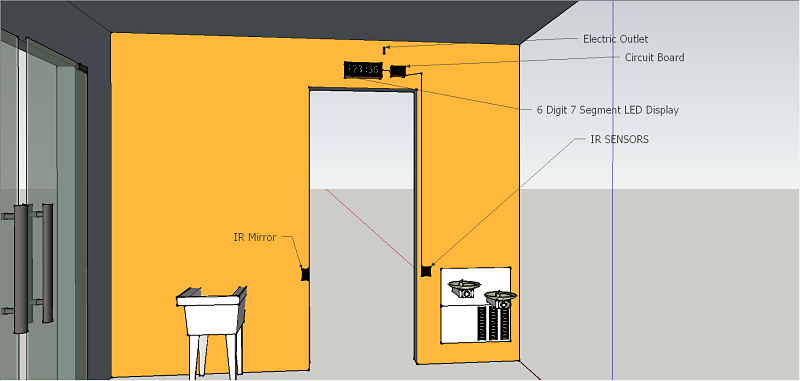
Google SketchUp 3D Modeling of Final Project Entry Door(R)
Using 3D software is helped by having a mouse and middle scroll wheel. I found myself plugging in my USB mouse when using all the 3D CAD programs. I even have a touch screen laptop with a stylus and found it to be extremely useful when working with files over my desktop without a scroll wheel on my mouse. The 3D software allows us to take conceptual designs, like my final project, and make them materialize in 3D. If you want to produce something commercially and send to a factory to produce, you would probably want to stick to AutoCAD or SolidWorks. For fast 3D modeling at the right price, my exploration of Google SketchUp worked wonderfully. It was easy to use and quickly produced conceptual drawings of my idea. It allowed me to work in 3 dimensions, while producing a professional looking model. It is an easy process.
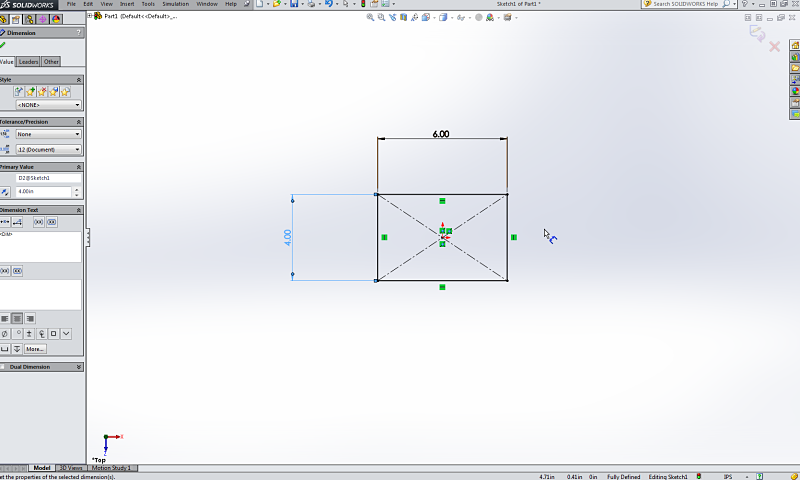
SolidWorks is a different process than Google SketchUp. The software is feature rich and anything from basic extrusions to complex simulations can be achieved in the software package. I found SolidWorks to be more exciting to use because of all the features. I started with the book, The Beginner's Guide To SolidWorks 2015, and worked my way through the software. It was eventually rewarding to have a decent grasp of the software and be able to take my idea and create a part and finally a rendering from my idea. I learned about extrusions, sketches, 3D, motion, rendering, simulations, cuts and much more while working with SolidWorks. In SolidWorks I made the part that would house the circuit board above the door that drives the programming to count people. I found it very easy to create, extrude and model the part. I even was able to assemble the part in SolidWorks.

First Sample Part in SolidWorks Following My Book
I then started using Solidworks to create the assembly box to hold my circut board above the door. I started with a sketch and extruded the sides and bottom to create the box. I then added the holes usign the hole wizard and extruded cut features. I then created the lid or top and assembled the box. This is all demonstrated in the drawings below.
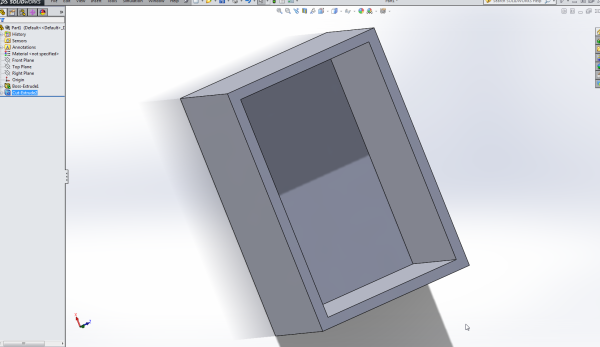
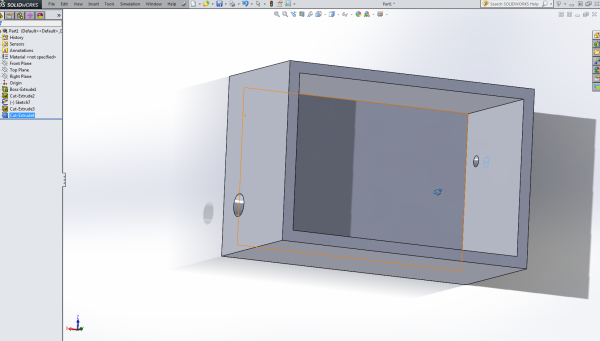
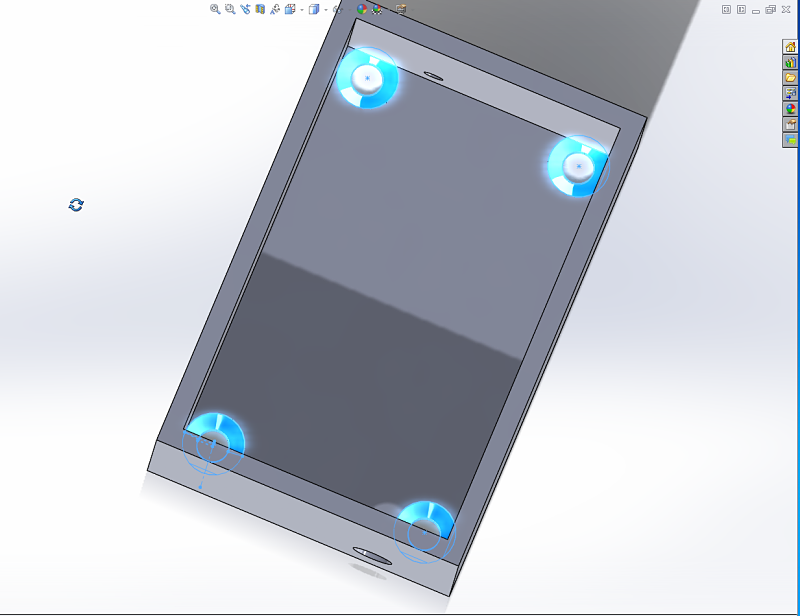
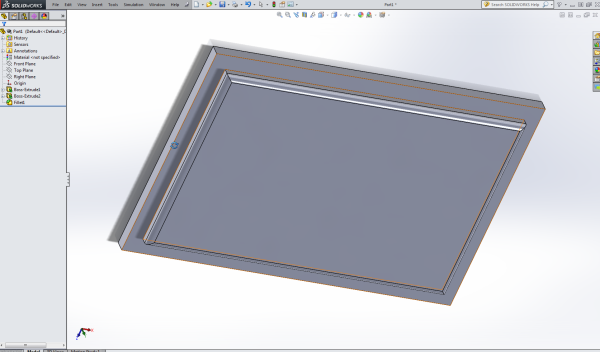
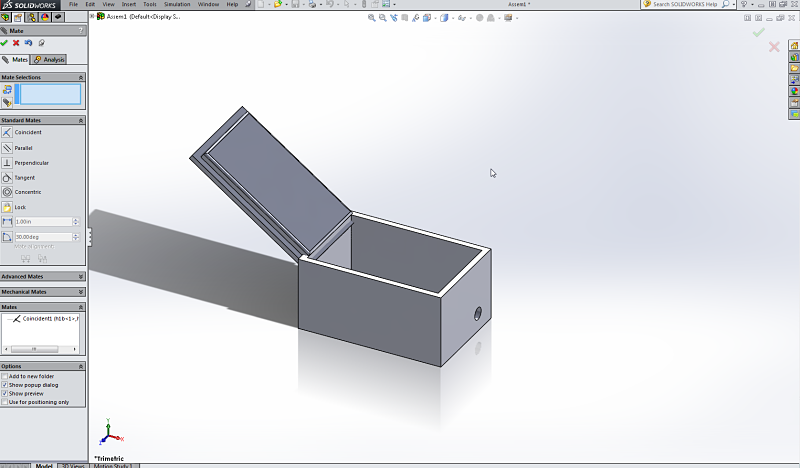
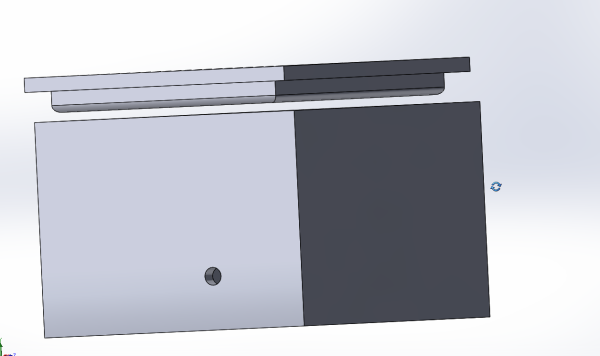


My design progression using Solidworks to create Container with Lid and the lastly the CAD Sheet
Animation software allows you to animate your design. This allows for you to show your object in motion. My object for my project is a static box, however within SolidWorks I was able to animate the box rotationally in several axis. You can watch the movie I put together here: https://youtu.be/BvaOC2GEeUQ . I found it quite simple to animate from within Solidworks and if I would have created a working model, it would have simulated the gears moving or piston firing. It works on a keyframe method and is quite simple to use after you get the parts to work correctly.
Rendering is a powerful tool as you can take your model a step further by illustrating what it would possibly look like if it was created. This is helpful to gain a conceptual idea without actually having to apply finishes to the product and shoot the product in a lighted room with background. Again, I used SolidWorks and took the project from start to finish in the software. It was faily easy to create a rendering using PhotoView 360. It is an add-in to SolidWorks that allows you to create realistic renderings of the part. I tried two different finishes and backgrounds. The first is a yellow powdercoat paint and the second is a cast copper finish.
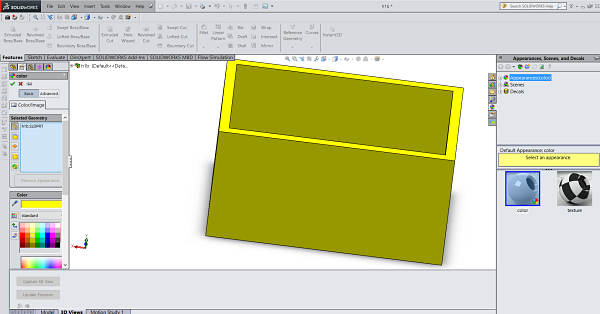

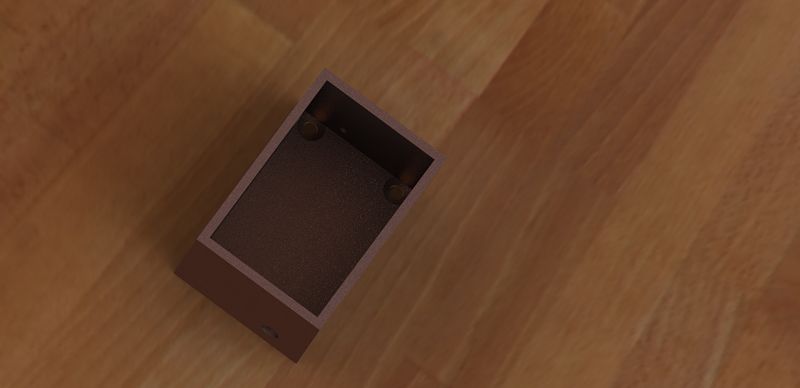
Solidworks Photoview 360, Yellow Powder Coat Finish and Copper Cast Finish Using SolidWorks PhotoView 360
Simulations allow you to simulate velocity, shear, windspeed, load, force, and airflow patterns around objects to understand the physics involved. I have used several simulators in classes over the years including a airflow simulator to gauge lift on an airfoil. Simulations allow for how a design would stand up to the forces applied upon it in the real world. These are extremely helpful tools to use. I used the free AutoDesk simulator Flow Design to evaluate air flow moves around vehicles and buildings. As you can see from the images below I set up several differing senarios about how air moves around cars and buildings. I found the building one fascinating as different variables impacted the building in various ways including wind speed, wind direction, height of building, etc. This is a much better way to initially study air flow before taking a product to an expensive wind tunnel facility.
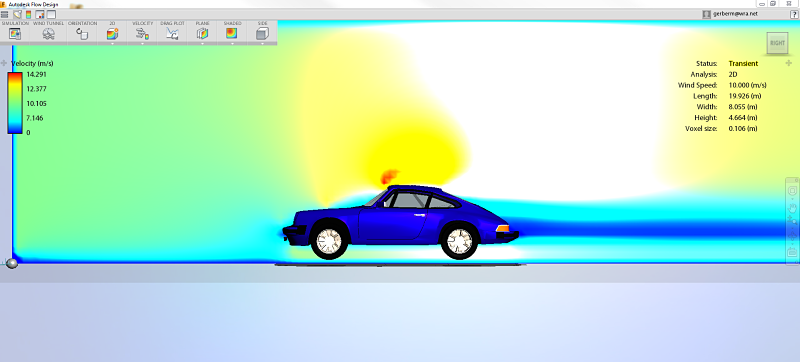
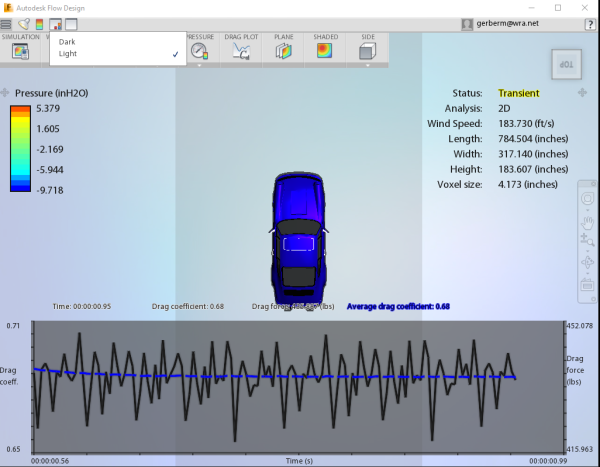
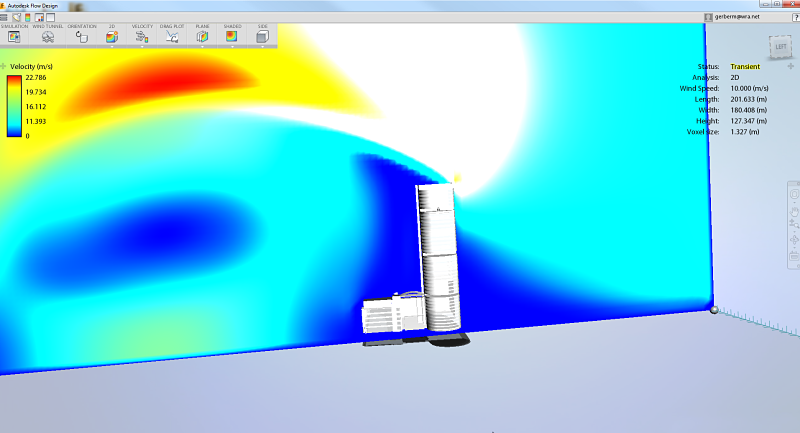
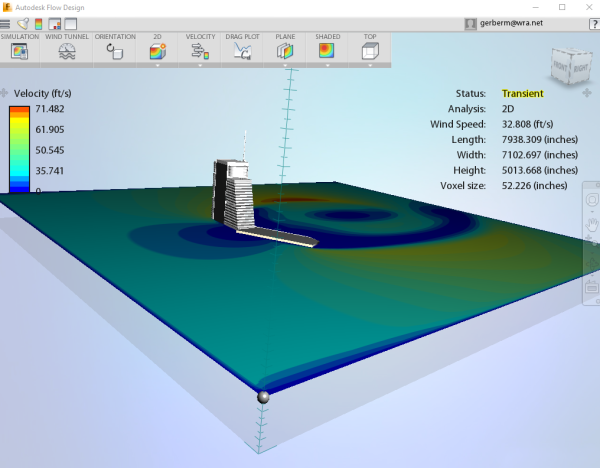
Automotive Simulation using AutoDesk Design Flow and Architectural Simulation using AutoDesk Design Flow
This week provided me with to time to think about computer-aided design(CAD), whether it be 2D, 2.5D, 3D, simulations, rendering or animation software, and how it fits into the process of taking an idea and digitally translating that idea into a physical object. The process by which one starts to see the connections between CAD and computer-aided manufacturing (CAM). I wanted to think about the workflow of how you start with a basic 2D or 3D file created in various CAD software programs and turn those into a representation on the ShopBot, CNC, laser, etc and the interface between the two.
I think it is important to choose the correct tool when deciding upon what it is you want to accomplish. This can be as simple as do I need a 2D or 3D drawing or a rendering. The best process from my limited evaluation of several software tools on the list this week is to pick one or two in each category and focus on improving your proficiency on each tool. This also looks at your budget and availability of the software. It is important to use software you feel comfortable using and can find the appropriate documentation and support to learn the tool you are going to use. For example, I chose to use SolidWorks as one of my 3D parametric CAD programs, because I have access to it and can find the amount of support both in print and online to help me use the tool. This can be somewhat limited with some of the tools we evaluated that have a steeper learning curve. It is also just as important to know what machine works best with what you are trying to accomplish. For example, what CAD program and file format works with the CAM software you are going to use. It can be a bit of backwords design. You need to start with the end in mind. This would be if you knew you wanted to use the Epilog laser you would use the Epilog print drive which works well with Corel Draw, Adobe Illustrator, Inkscape, etc.
The recitation this week by Primavera de Filippi was an interesting glimpse into the future of decentralized connectedness using blockchain technologies. The Bitcoin revolution in banking is an interesting development in blockchain as it is possibly the first well known blockchain technology to go mainstream and challenge conventional thinking about banking. I would argue that Bitcoin is not well understood by the average person because of its decentralized nature. I do think that this is possibly the future of decentralized connectedness which great examples about Uber and AirBNB, two services that I have used and find extremely helpful as it eliminates the middle person and keeps pricing competitive. This is spreading to office space and every industry as a way to decentralize the middle person and provide consumers what they want. I do think the issues of trust is a great point. I do see it with Bitcoin going both ways. First, most people do no understand Bitcoin enough to trust how it operates, but for those who use it they find it very honest and trustworthy. For example, it is interesting that when you download Bitcoin you get all the transaction ledgers of every transaction in Bitcoin. This is a very transparent banking system that pales in comparison to the current modern banking system. I see this as a great development in banking. Overall, it was a great talk that provided much to think about in the coming years.