14. COMPOSITES
Assignment
Design and make a 3D mold (~ft2 /300mm²), and produce a fiber composite part in it
Lecture

IDEA
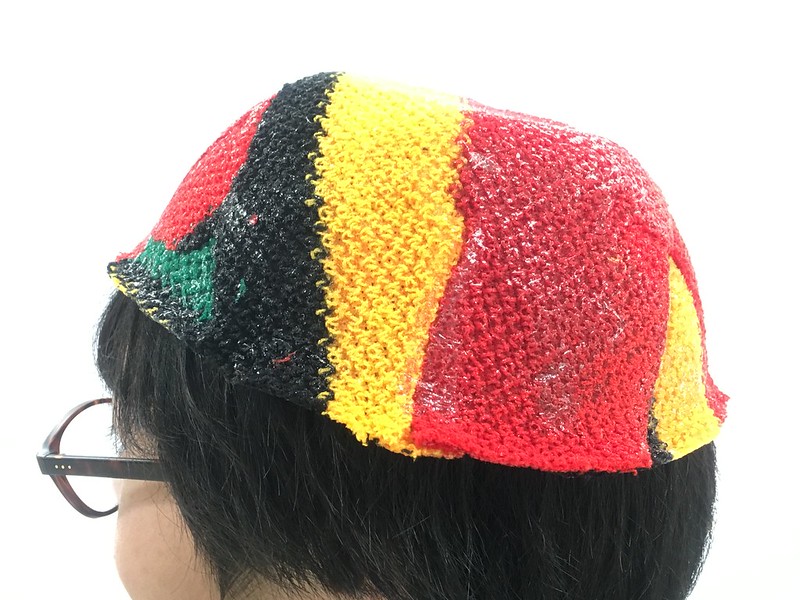
My plan for composites is a "Hango-Suisan" shaped sholder bag. Hango Suisan means a mess kit or Messtin in Japanese. The idea is that the bag made by straps of cloth of traditional Japanese crafted textile is eco-friendly and beautiful at same time.

photo from ysishikawa
my plan is that:
3D model
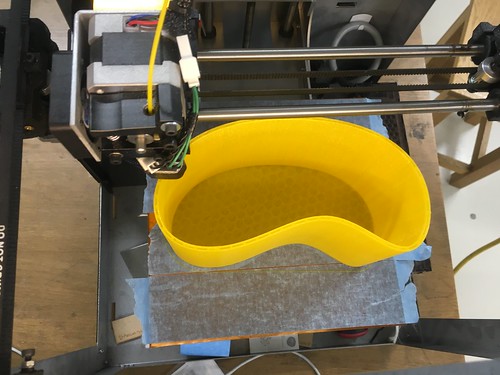
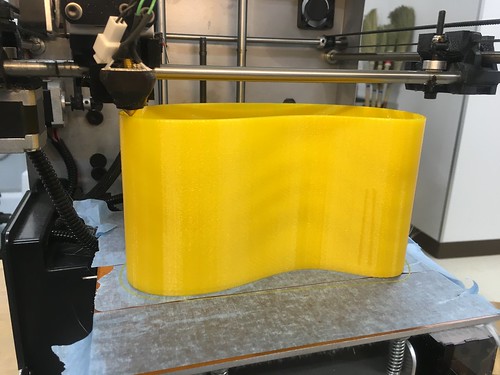
First, I made a 3D model with Fusion360.
Hangosuisan Bag by itosinex on Sketchfab
3D printing
I 3D printed the model with 3D printer called Solidoodle4. The CAM software I used was Repetier-Host which is a opensource cam software for 3Dprinter. The layer height was 0.3mm. It took more than 7hours and it didn't finish to print. I have to close my lab, I stopped the 3D printer and removed the unfinished model. It was still big!
Composites
tool
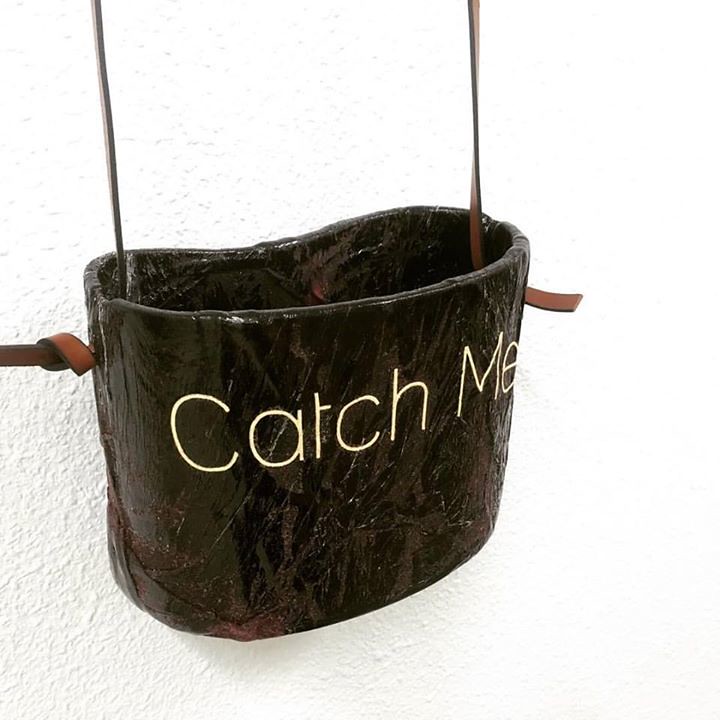
I went to secound-hand shop then I found a 100yen T-shirt which costed about $1. I kind of like the "catch me" thing on the T-shirt, so I wanted to have it on my composites as well.
The tools are:


measure the weight of epoxies
Let's prepare 2 cups and epoxies. There are 2 kinds of epoxy: main resin and hardner. The ratio of the main and hardner is 5:1. I used a weighing machine to make the beautiful ratio of resins.


mixing
After weighning the epoxies, I mixed each epoxies in the cups. Then, I conbined them together in one cup. I mixed it again well. To mix well is a key for my success.


wrapping
After one minite mixing, let's put the epoxy on each pieces of T-shirt which was cut in parts with scissors before hand. Then, I sticked the fabric with epoxy on the 3D printed core.
Completed the putting the fabric on 3D printed core!

Then, wrapped the composites with cling film as release sheet. Be careful to wrap the inside. Then, I put towels around the wrapped composite for breathing superfluous epoxy.

vaccume bagging
Then, put the composite in a vaccume bag. Finally, it's time to vaccume! I used a normal vacuum cleaner.

outcome
After 24hours, I unpacked the vacumme bag, towel, cling film.

With sholder string it looks cuter!
Extra composites without Digital Fabrication


outcome