RUNNING
TEAM
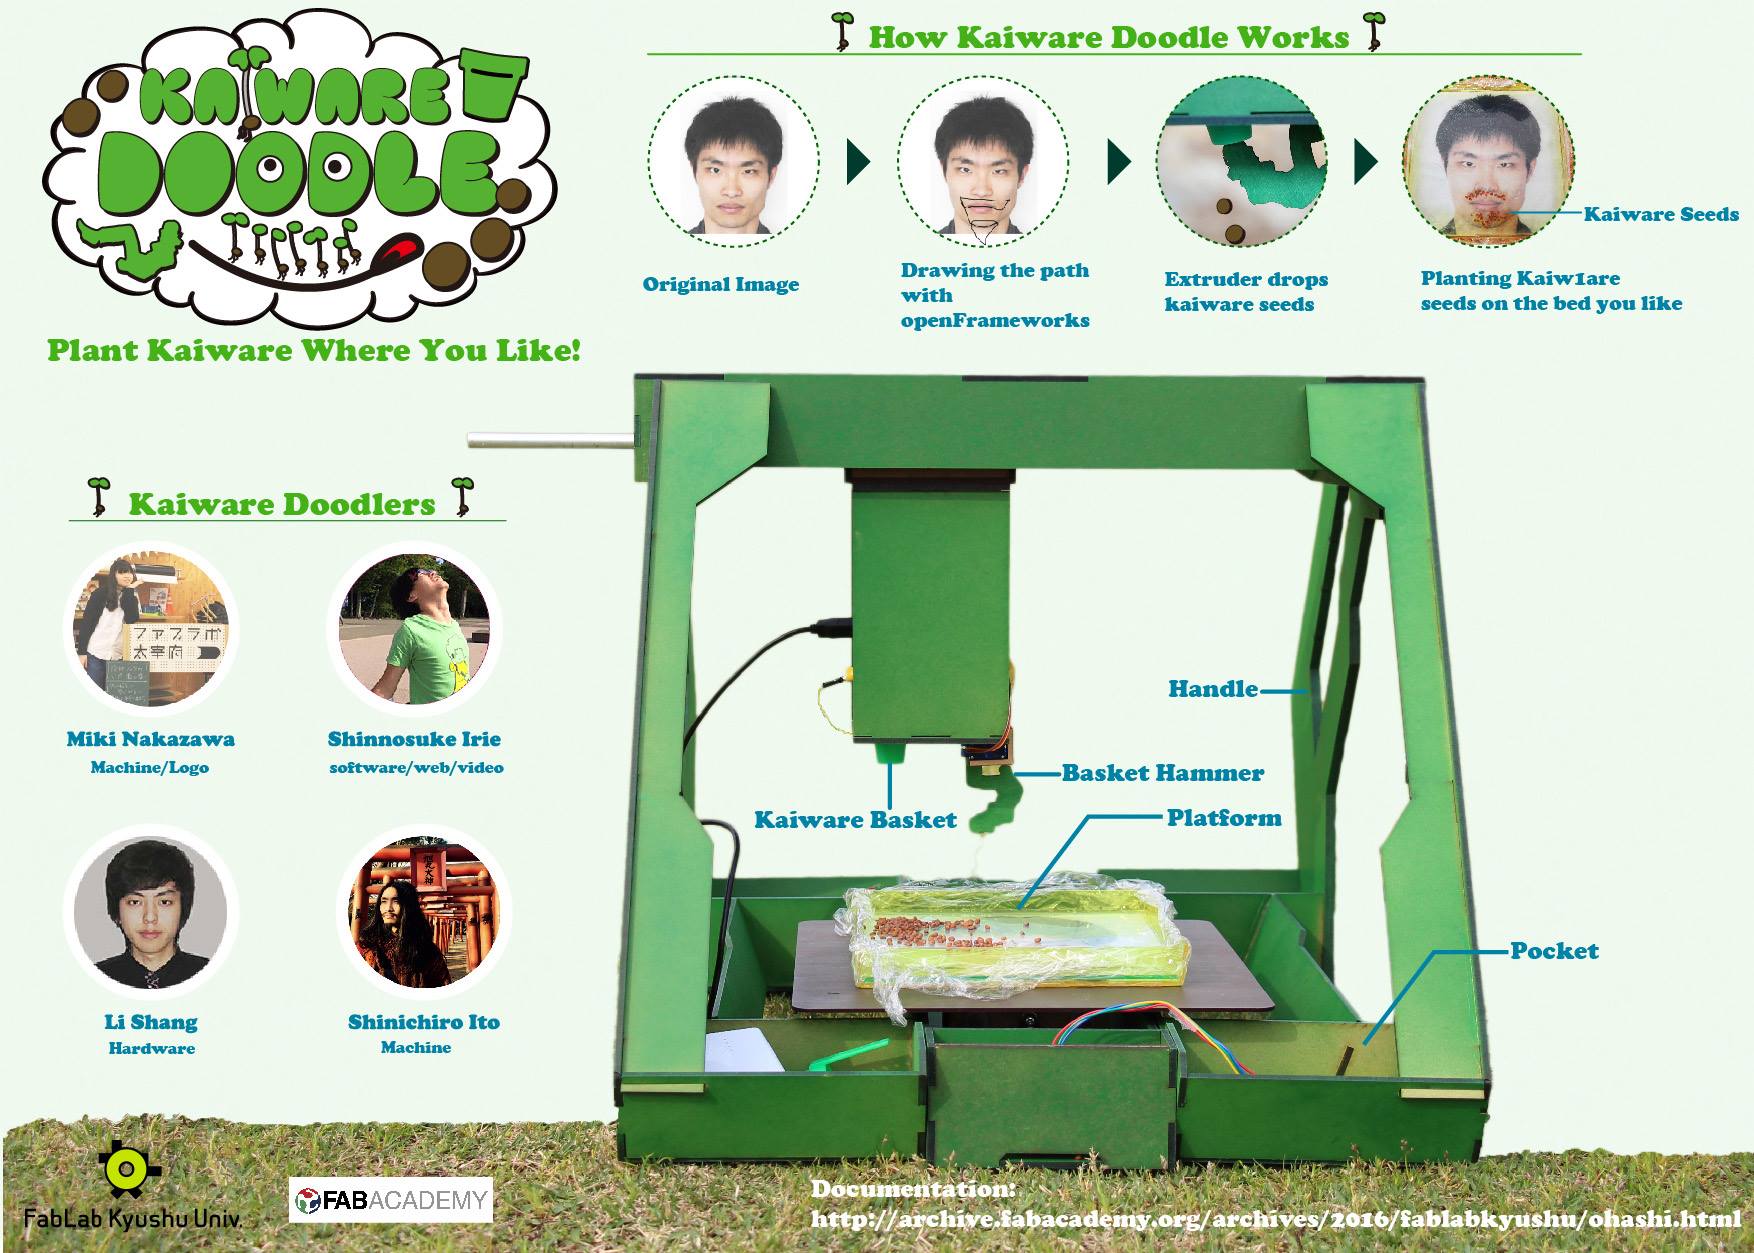
- Shinichiro Ito(KAIWARE LEADER)
- Shinnosuke Irie(KAIWARE PROGRAMMER)
- Miki Nakazawa(KAIWARE DESIGNER)
- li Shang(KAIWARE DESIGNER)
IDEA
To make a machine that make something we started with ideation process. We had many ideas like a machine that sprinkle sesame on ramen, a machine that play Jenga game, a machine that dip vegetable to Bagna càuda...etc. Finally we made a decision. Our concept is called “Kaiware Doodle”. Kaiware Doodle is a Kaiware Sprout planting machine.
Kaiware -
“Kaiware are sprouted daikon radish seeds. Frequently used in Asian cuisine. Use in salads, sushi and as a garnish. These radish sprouts have a very powerful radish flavor with a real peppery finish. Find them in Asian grocery
stores, usually in little clumps with roots attached.”
http://www.gourmetsleuth.com/ingredients/detail/kaiware-sprouts#ixzz46NAOzHwq
MAKING
FAB NET (http://mtm.cba.mit.edu/fabinabox/dev/fabnet/overview.html)
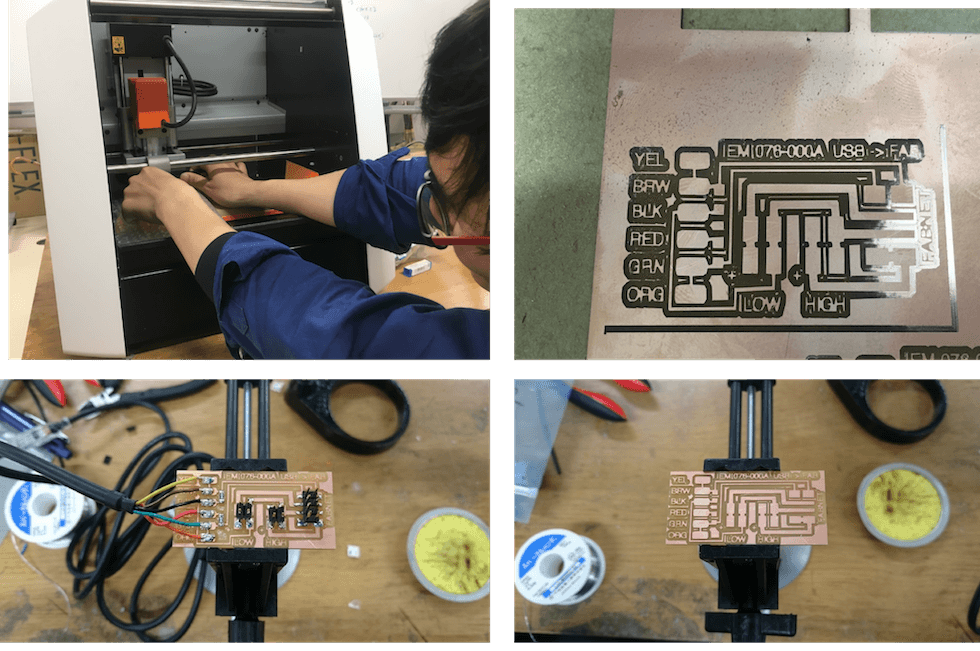
Milling:SHINICHIRO ITO
■Tools:
Roland SRM-20
w/ 3mm collet: Roland ZC-23-3 for MDX-40
First I used the 076-000Ar1.rml file which was downloaded from FABNET files page. It didn’t work because the milled size was very small. I guess the reason for this mistake is that the 076-000Ar1.rml file is made for other machine which has different work scale than SRM-20.
Second, I downloaded 076-000Ar1.png and converted it to .rml file with FabModules for SRM-20. The trace milling was succeeded. However, second trial ended with failure because of milling outline. The cause of trouble was the original .png file didn’t have clearance area for outline milling. So I added clearance area with Photoshop.
We succeeded to milling the board when we tried third time.
There are notes about using 3mm collet called Roland ZC-23-3 for SRM-20. The collet is originally for Roland MDX-40A, but it fits on SRM-20. The usage is bit tricky because the ways of holding endmill are different. We figured out that when we tightened the collet and fixed it to SRM-20, Z-axis height moves about 0.10-0.20 mm to upper direction. So, we made Z-axis 0.10-0.20 mm to lower than set z home position with rotating the endmill. The shiney part on the pictures were made in experiment milling job when we were trying the Z height adjustment.
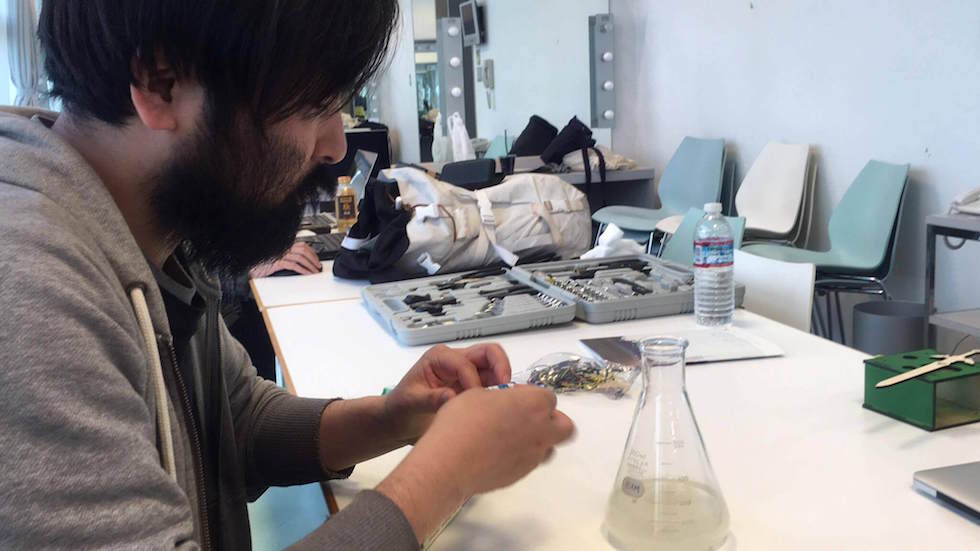
Solidering:SHINNOSUKE IRIE
Shinnosuke Irie did soldering the parts on the board.

DOWNLOAD
- FAB NET .png & .rml
→https://drive.google.com/folderview?id=0B_iiS9U3scwFcEczNTJqMnpmWEU&usp=sharing
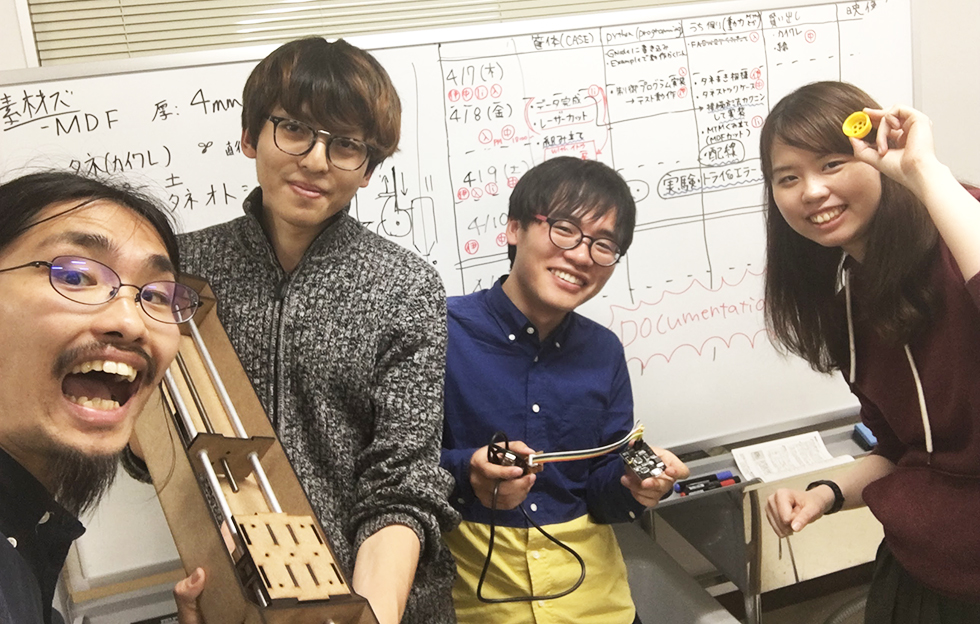
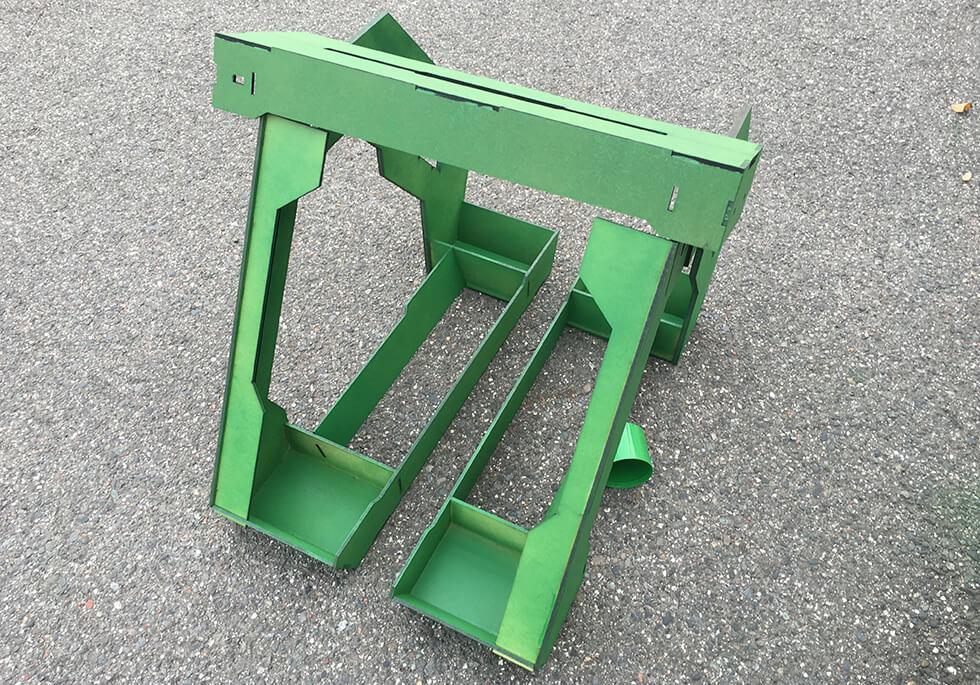
MODELING:li Shang
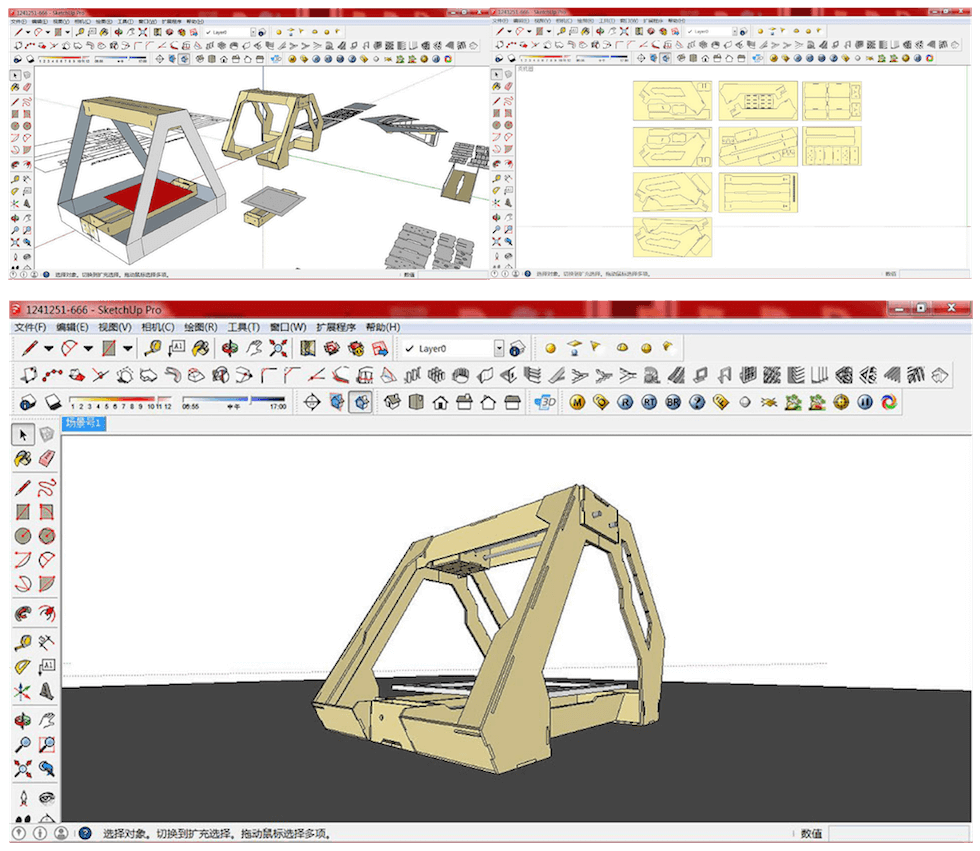
All of us want a good-looking frame, so When I finished designing the basic framework I improved it and increases the handle.
■software:SkechUp.
LASER CUTTING
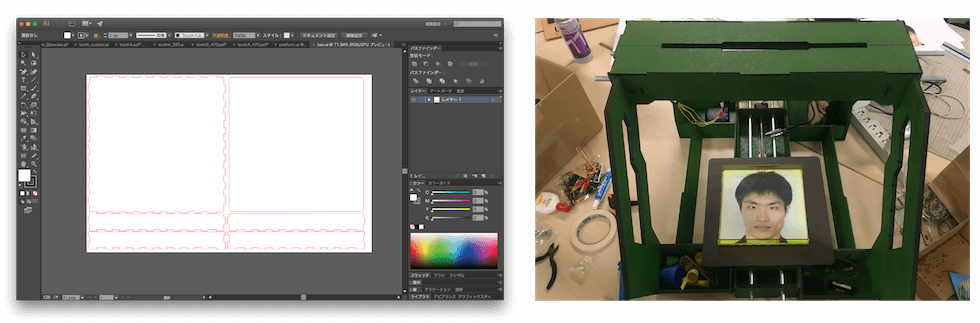
I downloaded the MTM frame data and cutting it out with laser cutting machine. Unfortunately, we only have 5 mm cardboard, it is too thick to be assembled, so I need to re make a data that using MDF to cut.PS:When I design the handle, I used 2 pieces of 4mm MDF, to ensure the firmness.
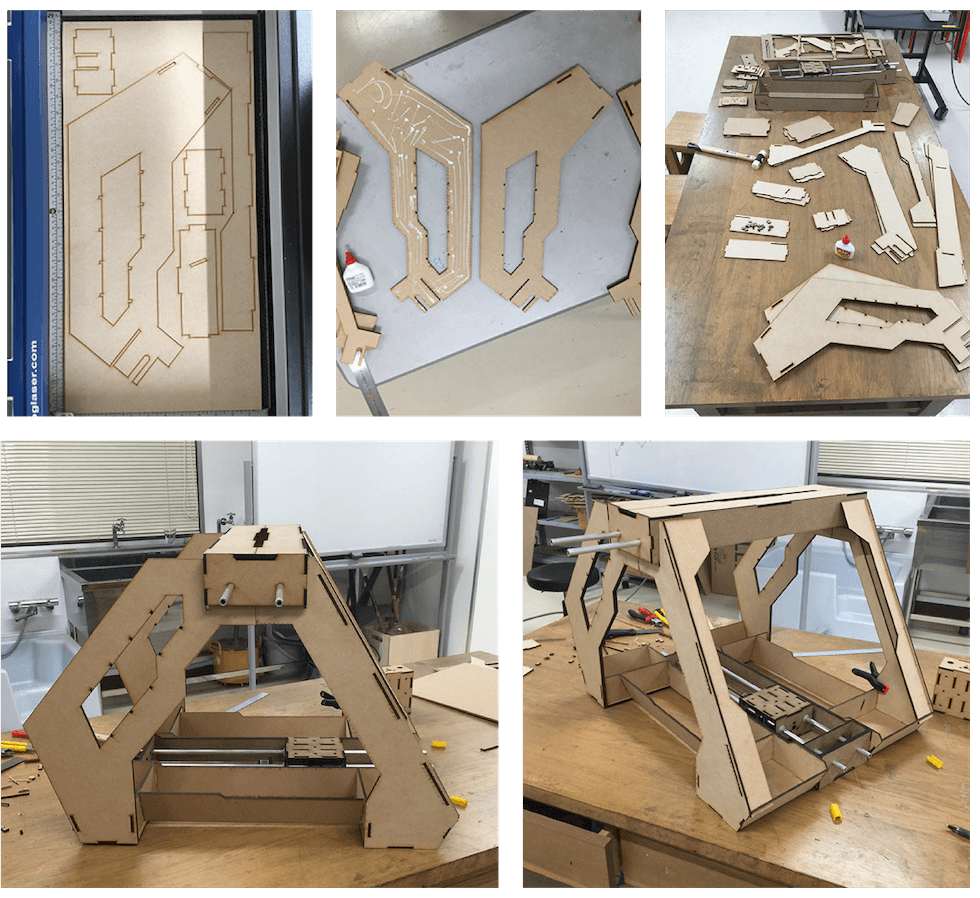
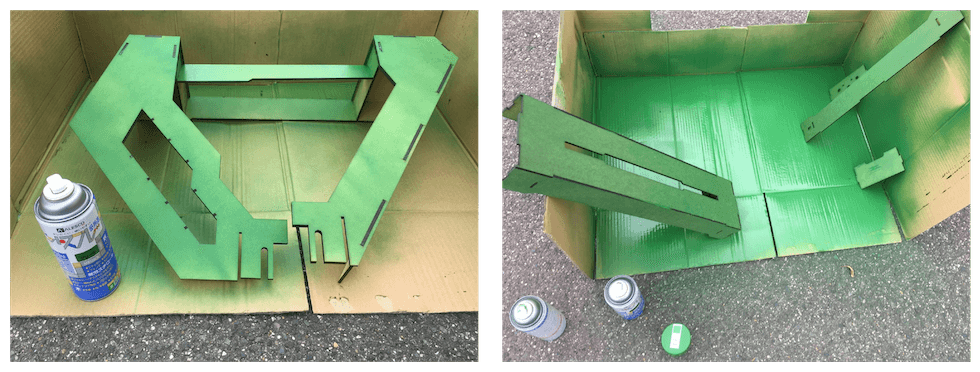
After that we painted the body parts green with a lacquer spray.
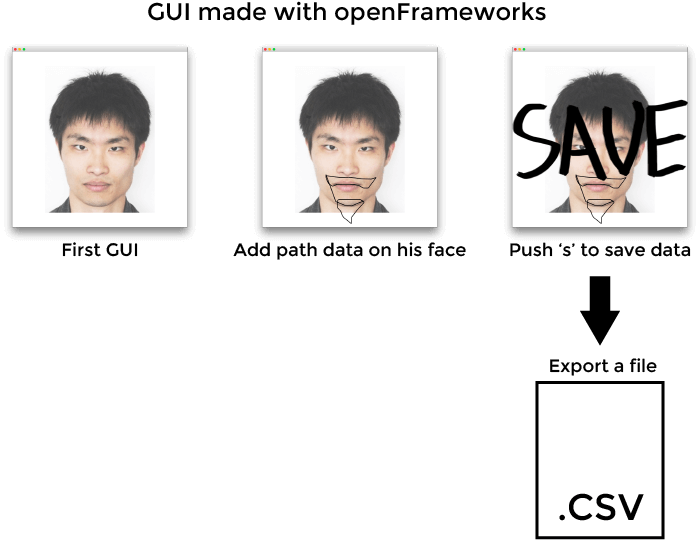
PROGRAMMING:SHINNOSUKE IRIE
I edited “xy_plotter.py” under Pygestalt/example/machines/htmaa/ to control the machine. I added a function that was to import .csv file and convert them to list of python. Then, I could change the movement of the motors as I overwrote an external file. I used openFrameworks that is the most familiar programming tool for me to make the program which function is to export .csv file and to set moving points. Actually, I tried to substitute pass data exported as .txt file for list of python because it is the easiest in what I thought. However, I have an error because python recognized the numerical value as character string. I explain the process of the program. First, I put dots to draw lines. Next, I pushed ‘s’ key to run save command. Finally, I got a file named ‘sum.csv’ in ./bin/data. I couldn’t aware that the movement of the motors was not recorded until running machine. So I edited the function that is to add [0,0] first and last of .csv file.
DOWNLOAD
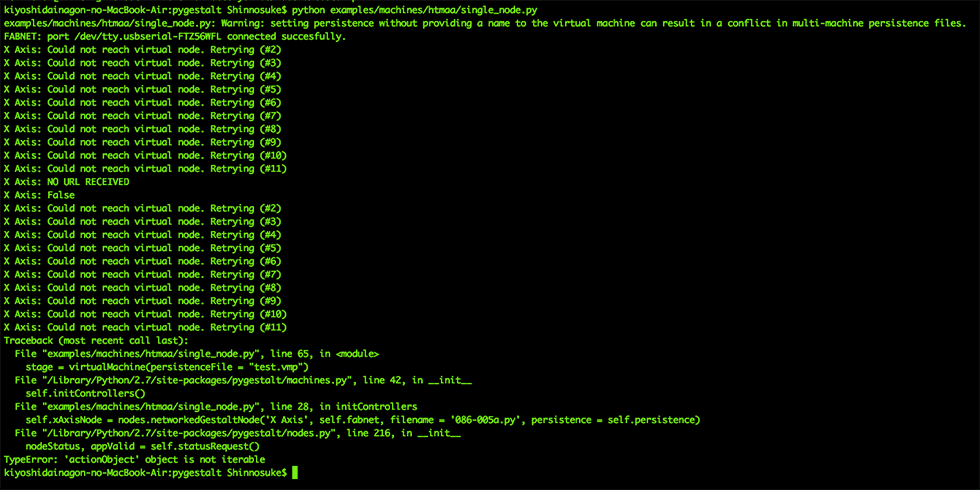
Trouble about gestalt node connection
When we tried to run single_node.py prgram we ran into a trouble that the program didn’t work and not respond.
The cause of the trouble was wrong wiring on Gestalt node. The wire RS-485B didn’t connected.
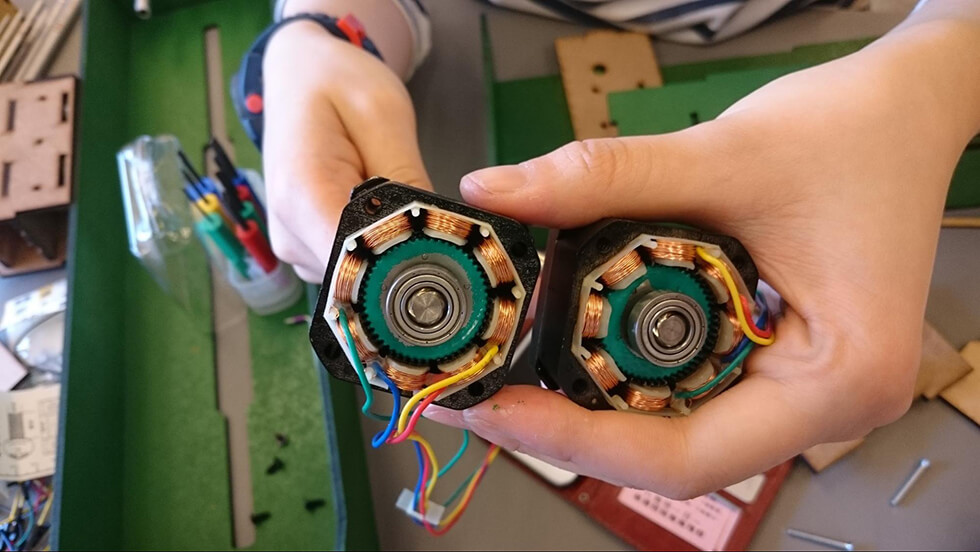
Trouble about stepping motors
One of our stepping motors have stuck. It did rotate.
We figured out that the cause was gestalt node.We tried to upload firmware, but it didn’t help us.
As a result, one of the gestalt nodes was broken. So we borrowed another board from FabLab Kamakura. The board from FabLab Kamakura was 2015 version and it worked.Thank you.
EXTRUDER
We tried several of planting the Kaiware seeds. The mechanism to drop the seeds is that a hammer which is driven by servo motor hits a seed basket. The seed basket has a hole which size is little bit bigger than diameter of kaiware seeds and the seeds stays in the basket. The seeds drop when the hammer hits the basket because of the shock.
Hammer:SHINICHIRO ITO
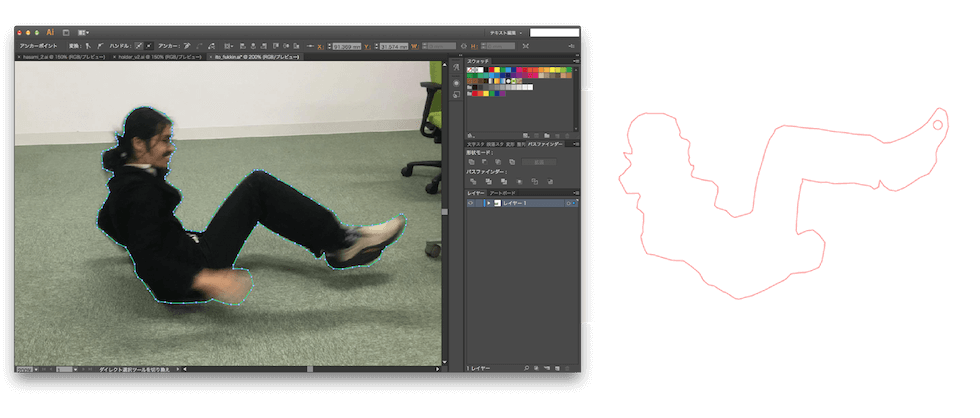
To make the hammer part we took a photo of doing sit-up. Then, we made traced line with Adobe Illustrator. we cut the MDF with laser cutter to materialize the hammer.
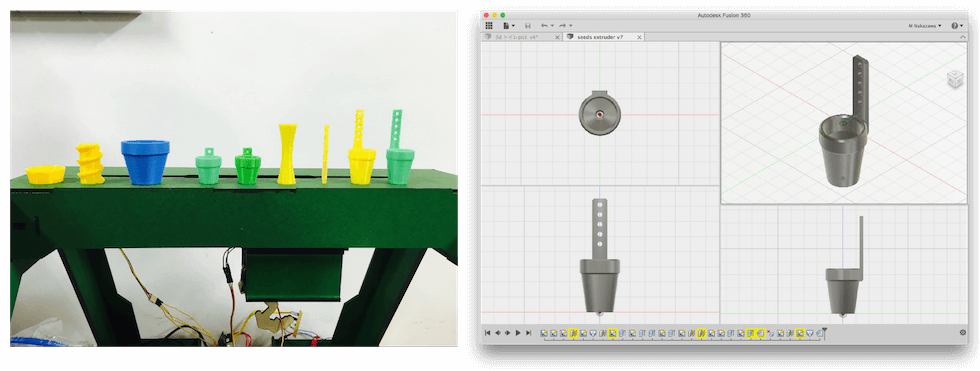
Basket:MIKI NAKAZAWA
We made several prototype of the basket with 3d printer. After many trial and error, we chose one from them. I used the software Fusion 360.
Video
DOWNLOAD
- Ai file of sit-up
→https://drive.google.com/open?id=0B_iiS9U3scwFa3p5anpnQXVQZzg - stl file of basket
→https://drive.google.com/open?id=0B43aoEwaulnuVHRramFvOW82Qkk
PLATFORM
To put a tray for planting seeds We attached a platform to MTM kit with screws. We cut brown color MDF 2.5mm with laser cutter.
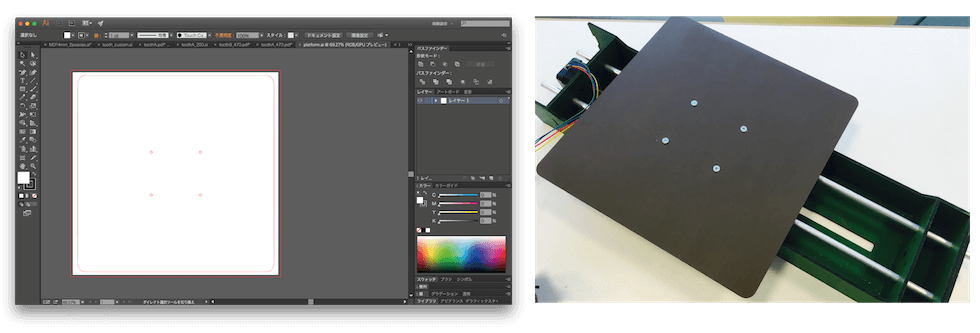
We made a tray with not MDF but acrylic because kaiware seed need wet bed to grow.The size of the tray is 200mm square.
DOWNLOAD
- Ai file of platform
→https://drive.google.com/open?id=0B43aoEwaulnub3NWMS1XX2hSQjg - Ai file of tray
→https://drive.google.com/open?id=0B43aoEwaulnuRlpVdXdTODVYdjA
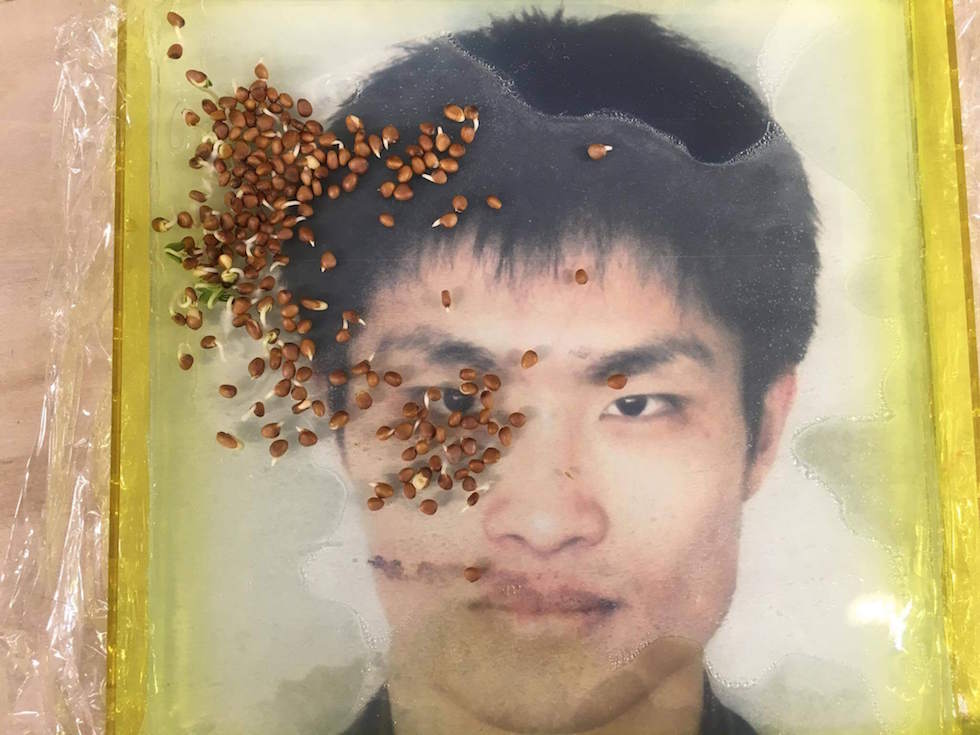
IDEAL
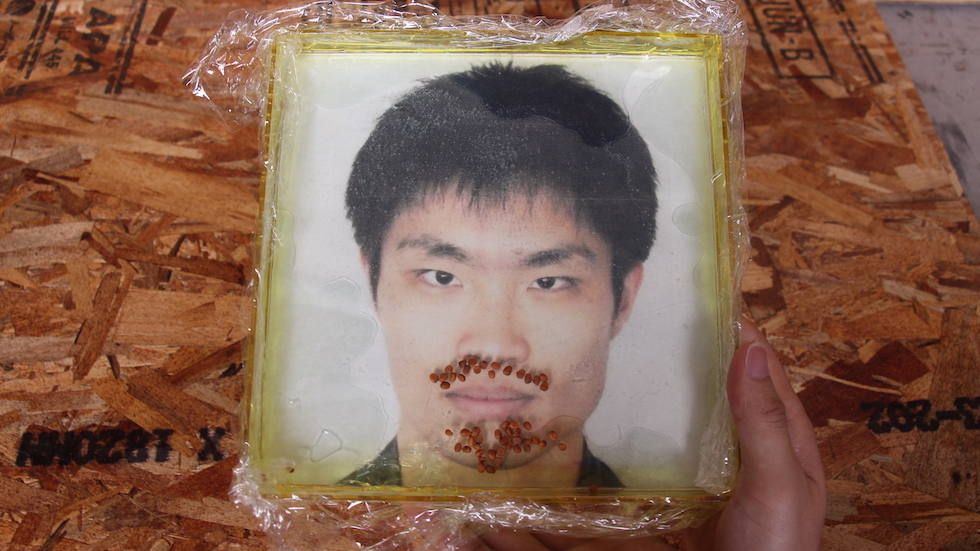
This is the image of our ideal output:
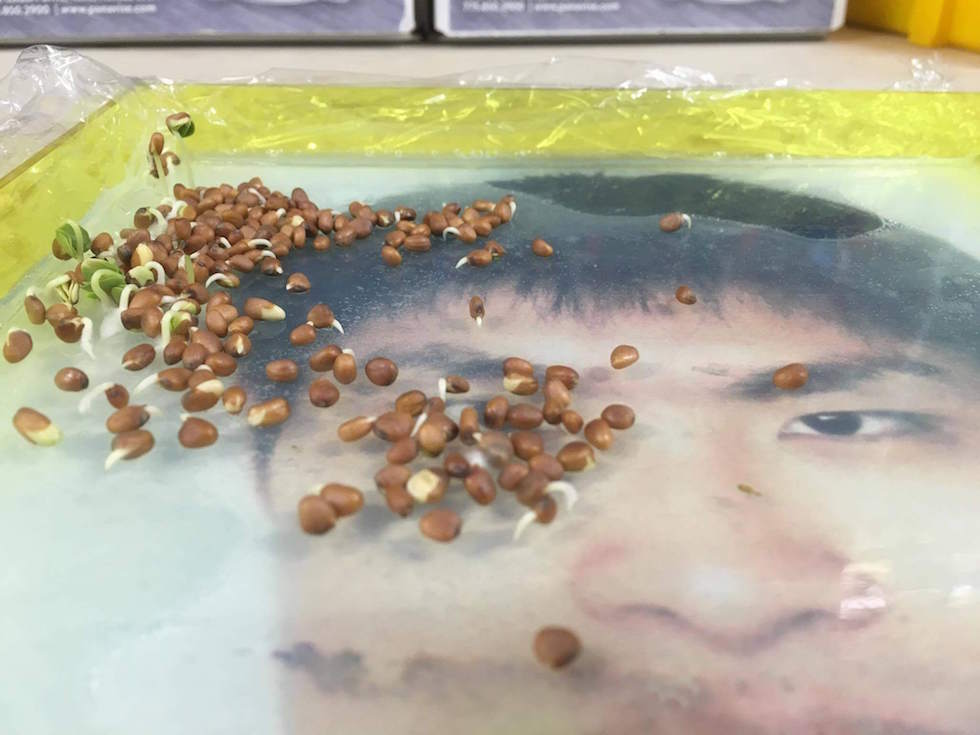
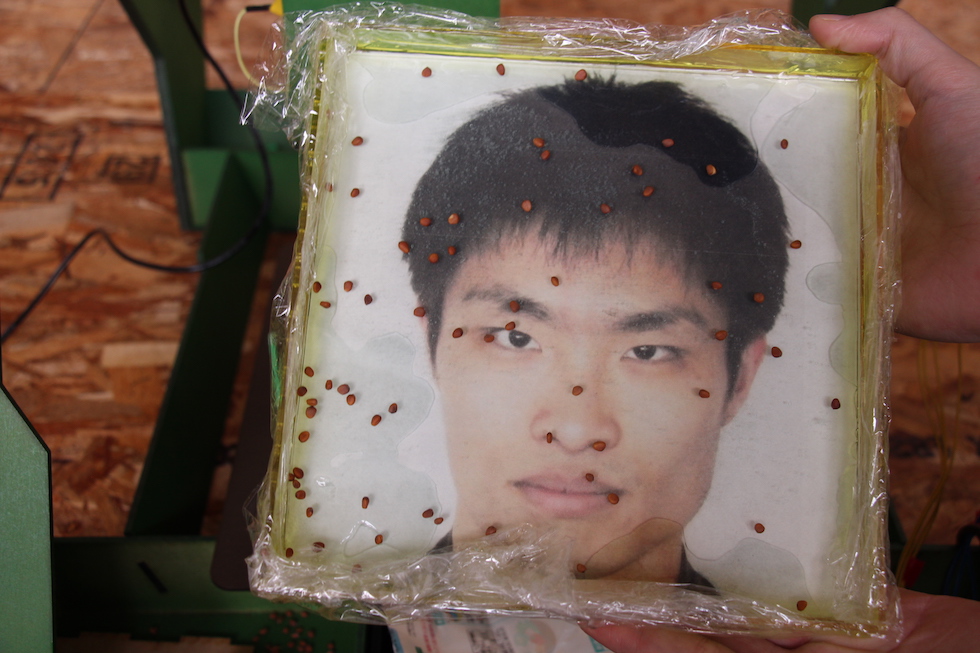
1st TEST
The seeds scattered like this.
Agar Bed
To avoid scattering kaiware seeds, we used agar.
These are the tools to make agar bed: 200ml water, 4g agar powder, microwave, plastic film, a beaker.

Kazutoshi Tsuda who is one of te alumni of FabAcademy and HTGAA gave us the idea of using agar for bed and made agar medium with microwave.
First, we mixed 200ml water and 4g agar powder in a beaker. Then, put it in the microwave and heated it again and again. Be careful not to boil the water too much.
Thank you, Kazutoshi!

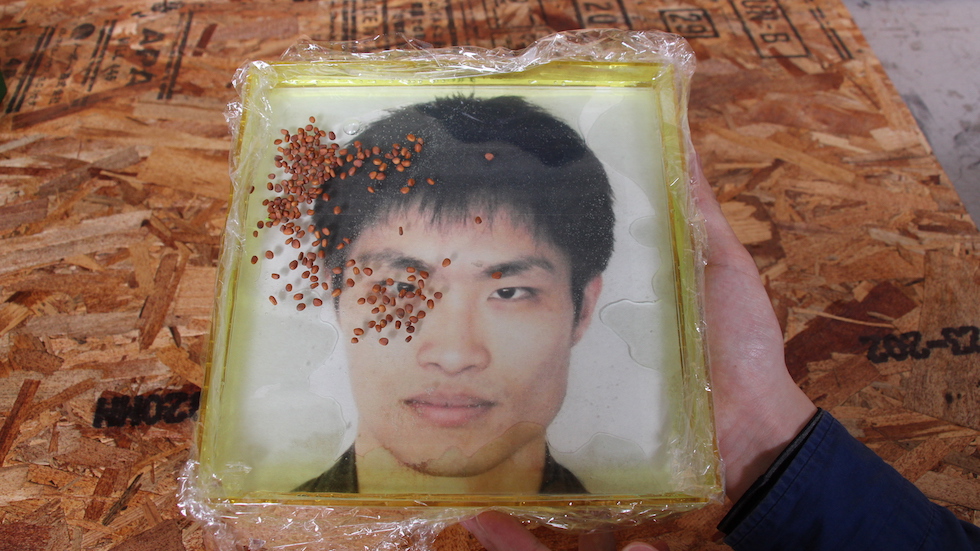
2nd TEST
When the agar is hot and soft we tried to run machine again. As a result, the seeds did scattered.
RESULT
A few days later....Yes! IT'S GROWING!
This is the beaty of the life.