Week - 8
Embedded programming(MARCH 16)
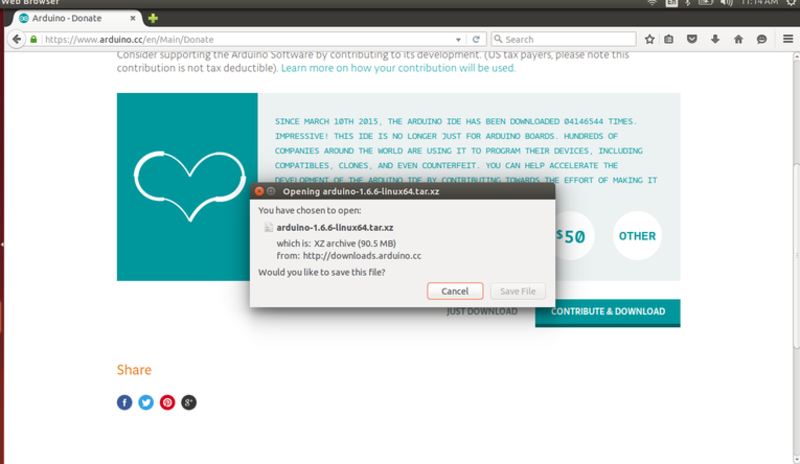
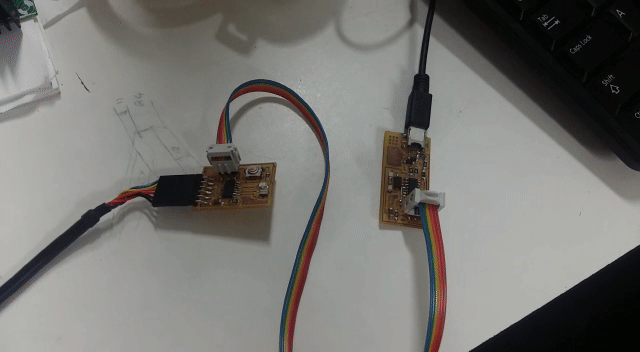
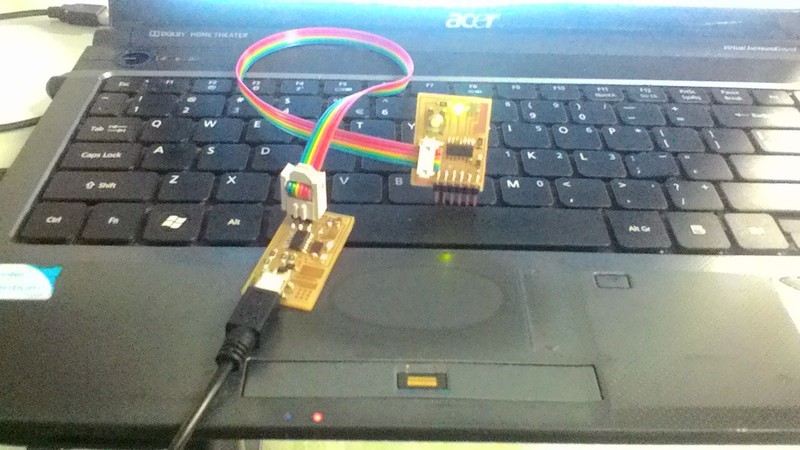
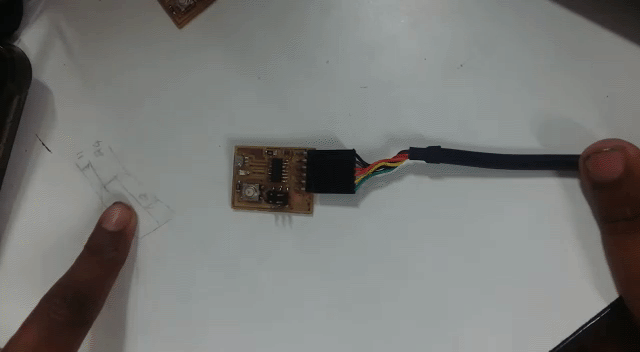
This week's assignment was to read the ATtiny44A microcontroller datas234heet and to programme the modified Hello Echo board we made during the previous week .To program a microncontroller for an electronic circuit, we need an ISP programmer ,i used Fab ISP which i made on previous week, , So I'm going to program the board using arduino language and IDE and then using assembler language on AVR-studio. First downloaded the arduino IDE following this steps, and then download the attiny library here. Arduino installation process
Tutorial link
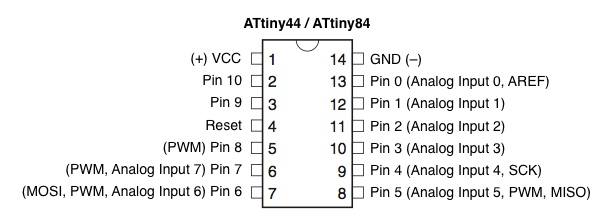
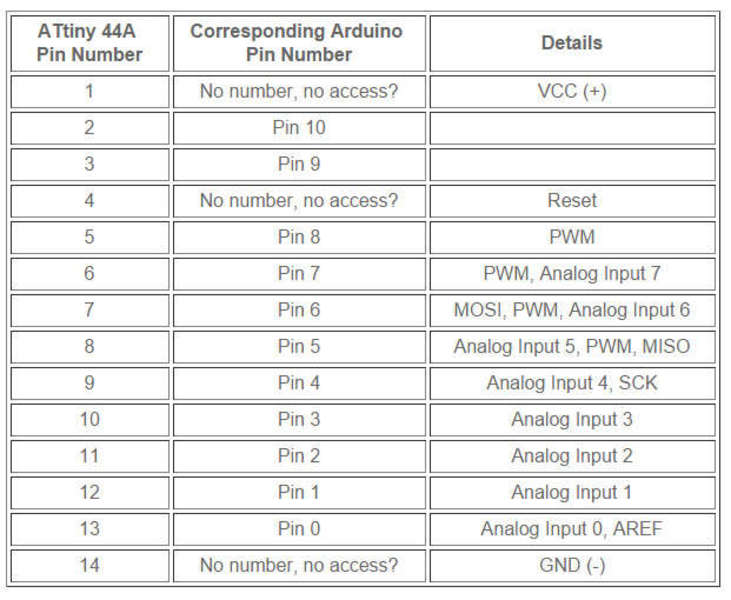
First of all needs to find out that what is the pinout for led, for that I have checked the schematic layout of ATtiny44 microcontroller to refer the pin numbers which are being used in my HELLOboard
After installing all the required software, drivers and libraries, programmed the HELLOboard with Arduino IDE, for that I needed to follow severals steps. Reffered the tutorial by High- Lowtech.org
LInk
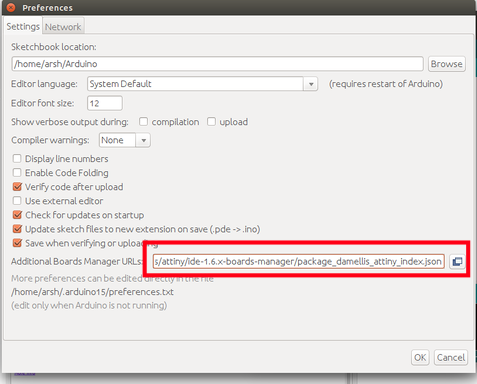
Steps to programm the board: 1- Installing ATtiny in Arduino
Open the preferences dialog in the Arduino software.
2-Power and connect the boards
3-Configuring the ATtiny to run at 20MHZ
4-Select the programmer -Steps to programming the micro controller with Arduino: Connect the ISP programmer with the Hello board using my ISP connector cable. With the USB cable conect ISP programmer to my computer and open Arduino IDE. -Go to Tools > Board menu and select ATtiny44 (20 Mhz Clock). -Go to Tools > Programmer menu and select USBtinyISP. -Go to Tools > Select Burn To Bootloader to execute the bootloader to the microcontroller. If the operation is succesfull it's possible read the message of Arduino IDE: DONE BURNING BOOTLOADER.
To complete the procedure, it's necessary sends an Exemple Sketch of IDE to the Echo Hello-World.
## Blinking an LED:
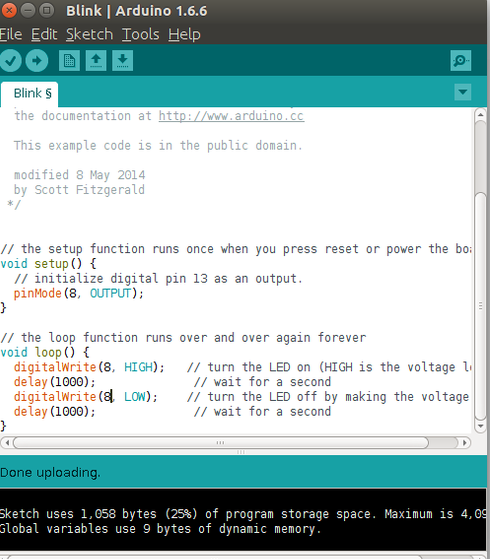
Blinking an LED Code:
The code for blinking an LED:
    void setup() {
     pinMode(8, OUTPUT);
    }
    void loop() {
    digitalWrite(8, HIGH);
    delay(1000);
    digitalWrite(8, LOW);
    delay(1000);
}Button press led on

Button press LED on code:
const int buttonPin = 6;
const int ledPin =  8;


int buttonState = 0;

void setup() {

  pinMode(ledPin, OUTPUT);

  digitalWrite(buttonPin,HIGH);
}

void loop() {

  buttonState = digitalRead(buttonPin);


  if (buttonState == HIGH) {

    digitalWrite(ledPin, LOW);
  } else {

    digitalWrite(ledPin, HIGH);
  }
}Serial communication
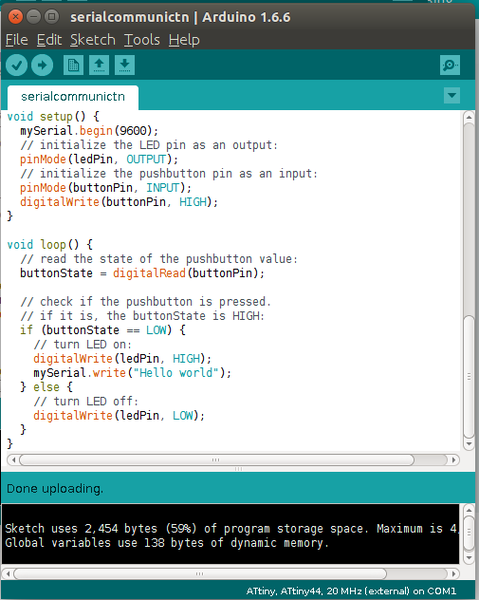
Serial communication Code:
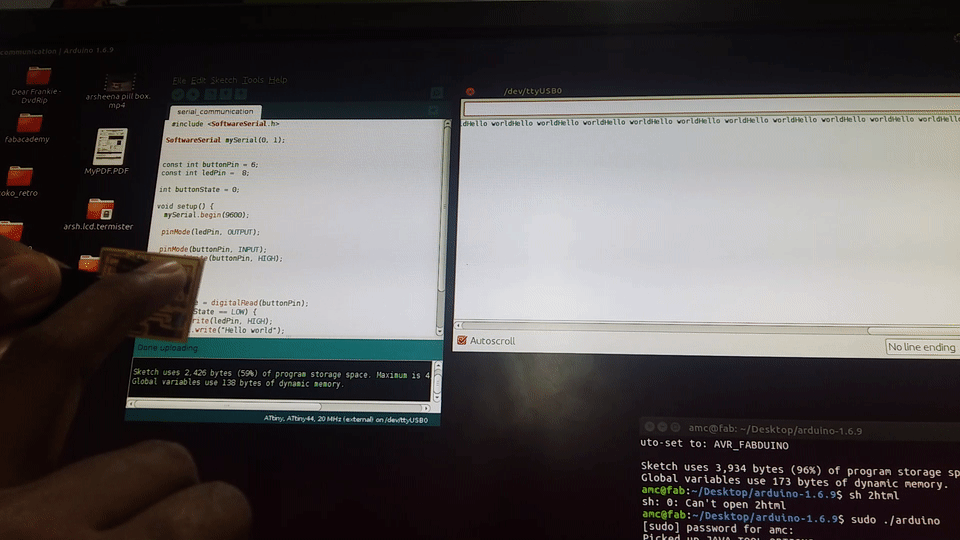
#include <SoftwareSerial.h>
SoftwareSerial mySerial(0, 1);
const int buttonPin = 6;
const int ledPin = 8;
int buttonState = 0;
void setup() {
mySerial.begin(9600);
pinMode(ledPin, OUTPUT);
pinMode(buttonPin, INPUT);
digitalWrite(buttonPin, HIGH);
}
void loop() {
buttonState = digitalRead(buttonPin);
if (buttonState == LOW) {
digitalWrite(ledPin, HIGH);
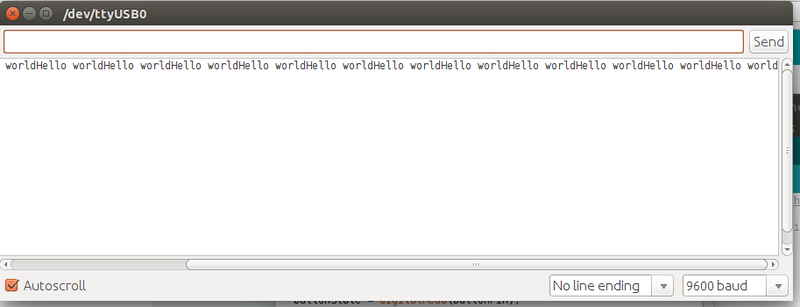
mySerial.write("Hello world");
} else {
digitalWrite(ledPin, LOW);
}
}