Week 8
Embedded programming
Assignment
This weeks assignment consist of reading the microcontroller data sheet (attiny) to understand the functioning of our microcontroller and program my board (hello world) to do something, with as many different programming languages and programming environments as possible.
Arduino Installetion and setting FabISP
First download and install the arduino software. click here
- unzip it
- move the folder to desktop
open terminal in arduino folder
sudo ./arduinoOr
if you need desktp icon. open terminal in arduino folder
sh arduino.desktopIn desktop you can see Arduino IDE file , rigth click on it > properties > permisions> mark tick on "Allow executeing file as program" .Now you can see aurduino IDE in your desktop.
Adding Attiny Boards
Tutorial link
1- Installing Arduino and the ATtiny files
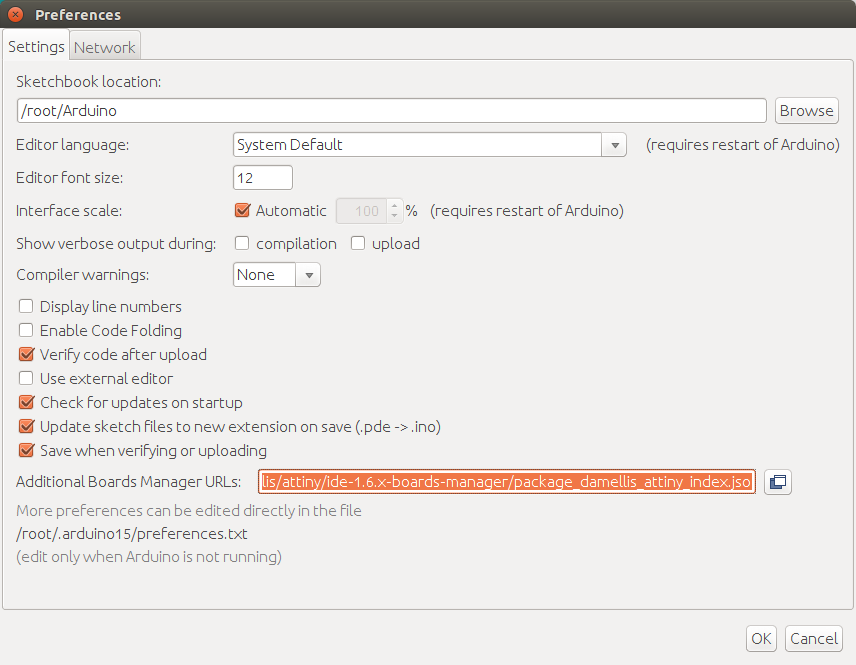
Open the setings file>preferences. Then paste the URLs address.
https://raw.githubusercontent.com/damellis/attiny/ide-1.6.x-boards-manager/package_damellis_attiny_index.json
OR
By default, The attiny board wont be present in Arduino. You either have install the borad files or paste the ATtiny files into the arduino directory.To install the files, select
tools>board>boards manager

Programming
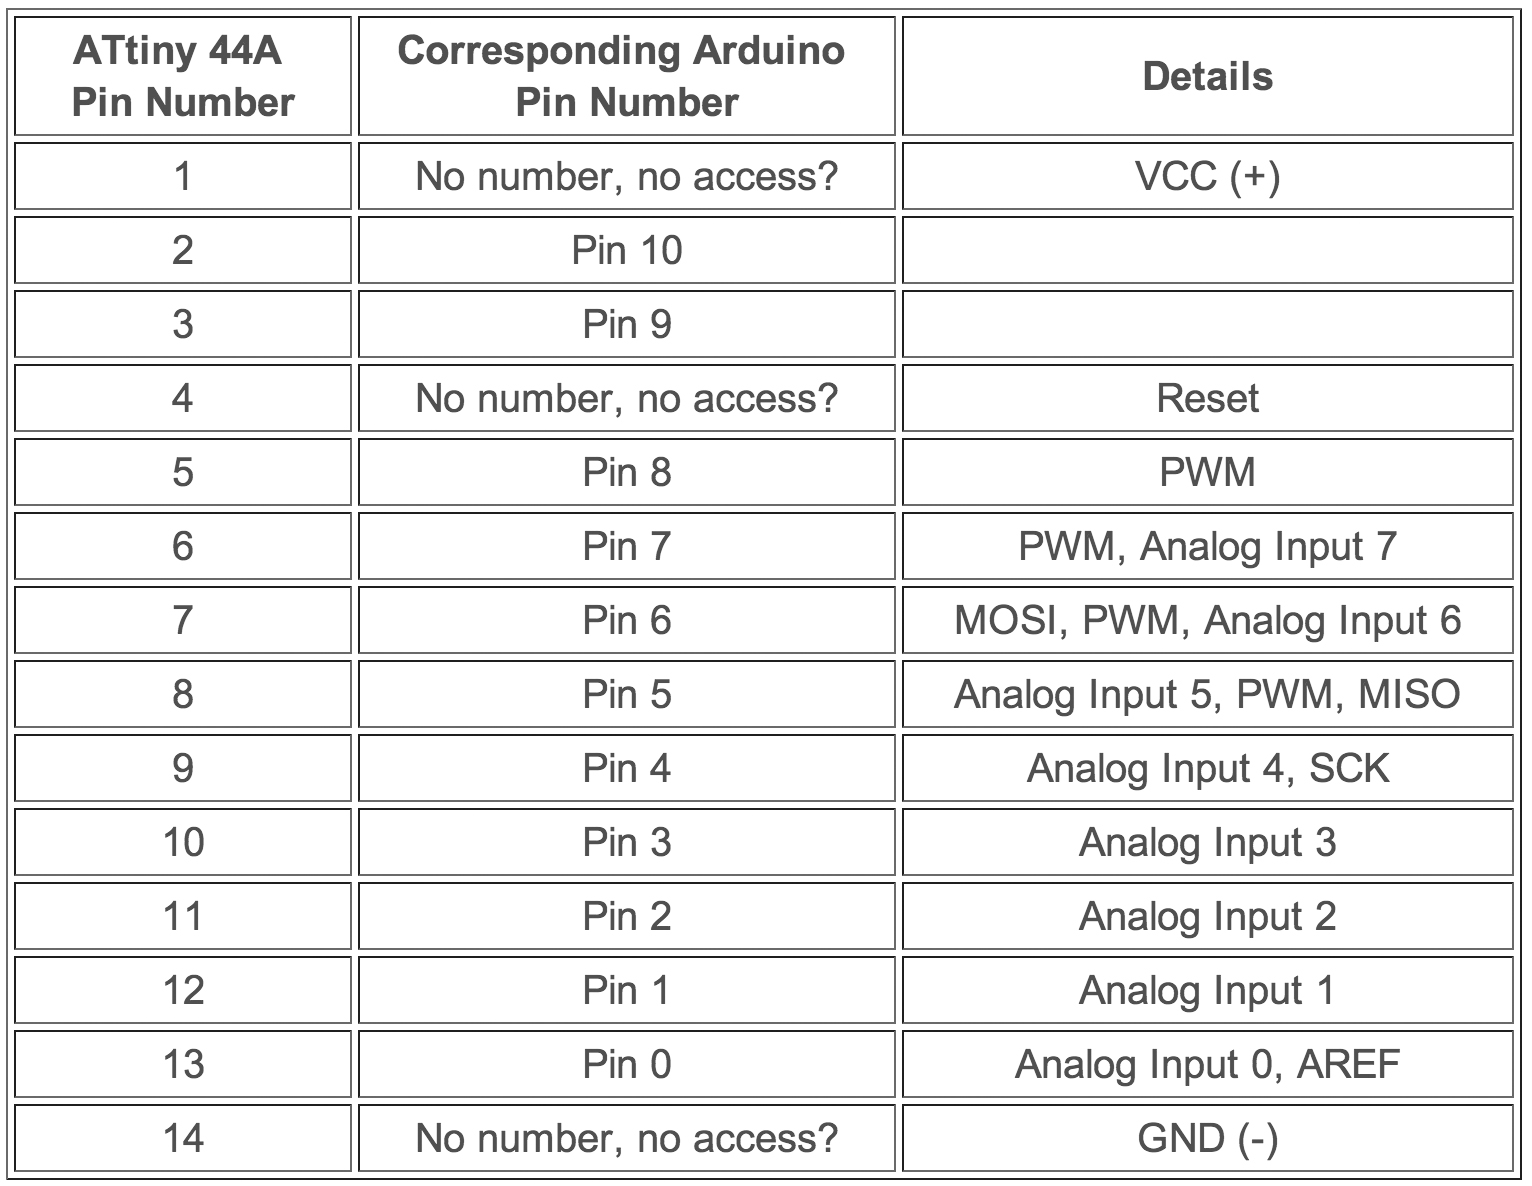
IC Attiny 44 diagram
I had to make sure that the pin out of the ATtiny44 was compliant with that of Arduino as shown in the image here:

I Refer this sheet for pin arduino ATtiny configuration.
Blink led
I uploaded the blink example code using Arduino on to the ATtiny44 board I made the other day (all the programs created can be found embedded in this page).
The program was successfully uploaded on to the board through the FabISP (which I made, check here) using the following settings:
- Board: ATtiny
- Processor: ATtiny 44
- Clock: 20 MHz (external) Programmer: USB Tiny ISP
    void setup() {
     pinMode(8, OUTPUT);
    }
    void loop() {
    digitalWrite(8, HIGH);
    delay(1000);
    digitalWrite(8, LOW);
    delay(1000);
    }
Button press LED on
const int buttonPin = 6;
const int ledPin =  8;


int buttonState = 0;

void setup() {

  pinMode(ledPin, OUTPUT);

  digitalWrite(buttonPin,HIGH);
}

void loop() {

  buttonState = digitalRead(buttonPin);


  if (buttonState == HIGH) {

    digitalWrite(ledPin, LOW);
  } else {

    digitalWrite(ledPin, HIGH);
  }
}
Serial communication
 #include <SoftwareSerial.h>

SoftwareSerial mySerial(0, 1);


const int buttonPin = 6;
const int ledPin =  8;

int buttonState = 0;

void setup() {
  mySerial.begin(9600);

  pinMode(ledPin, OUTPUT);

  pinMode(buttonPin, INPUT);
  digitalWrite(buttonPin, HIGH);
}

void loop() {

  buttonState = digitalRead(buttonPin);
  if (buttonState == LOW) {
    digitalWrite(ledPin, HIGH);
    mySerial.write("Hello world");
  } else {
    digitalWrite(ledPin, LOW);
  }
}