Week-4 : Electronics production (Feb 17)
Assignment
Assignment is to mill the board, stuff it with components and program it.
Fab ISP
The FabISP is an in-system programmer for AVR microcontrollers, designed for production within a FabLab.
Download the Board Files and Mill the Board


Milled FabISP Board
Run fab modules in the terminal
$ fab
Select input as PNG, output as Roland Models .rml and click the “make_png_rml” button to open the new window.
Once in the new window, you must load the particular PNG file of your circuit or board outline. In the left column, click “load PNG” and select your file.
Set the Z depth to -0.15 mm, set the speed to 3mm/s and set up your X and Y offsets. Be aware that your PCB image might have an offset outside of traces.
Modela Milling Machine
This machine is used to make PCBs for digital fabrication,this one is compatible with most 3d and 2d authoring software, making it ideal for the rapid prototyping of product designs.It becomes an essential part of Fab lab as it can use to milling of custom circuit boards, and the production of moulds. This Modela can be used on wood, mdf, modeling wax, plaster and FR1 circuit board blanks.
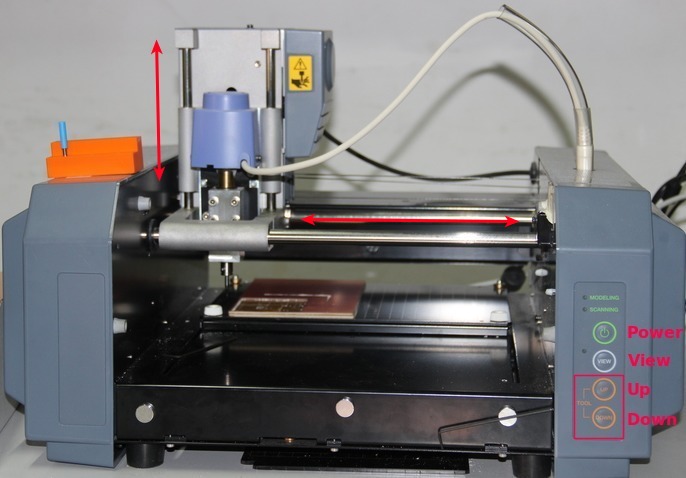
Working with Modela Milling Machine
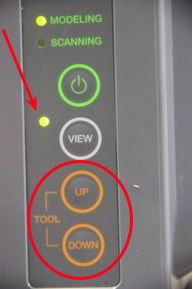
1 .The Green power button, well controls the power.
2 .View, moves the cutting head away and the base plate towards you so that you can place/see your cutting surface.
3 .Tool Up, moves the cutting head up.
4 .Tool Down, moves the cutting head down
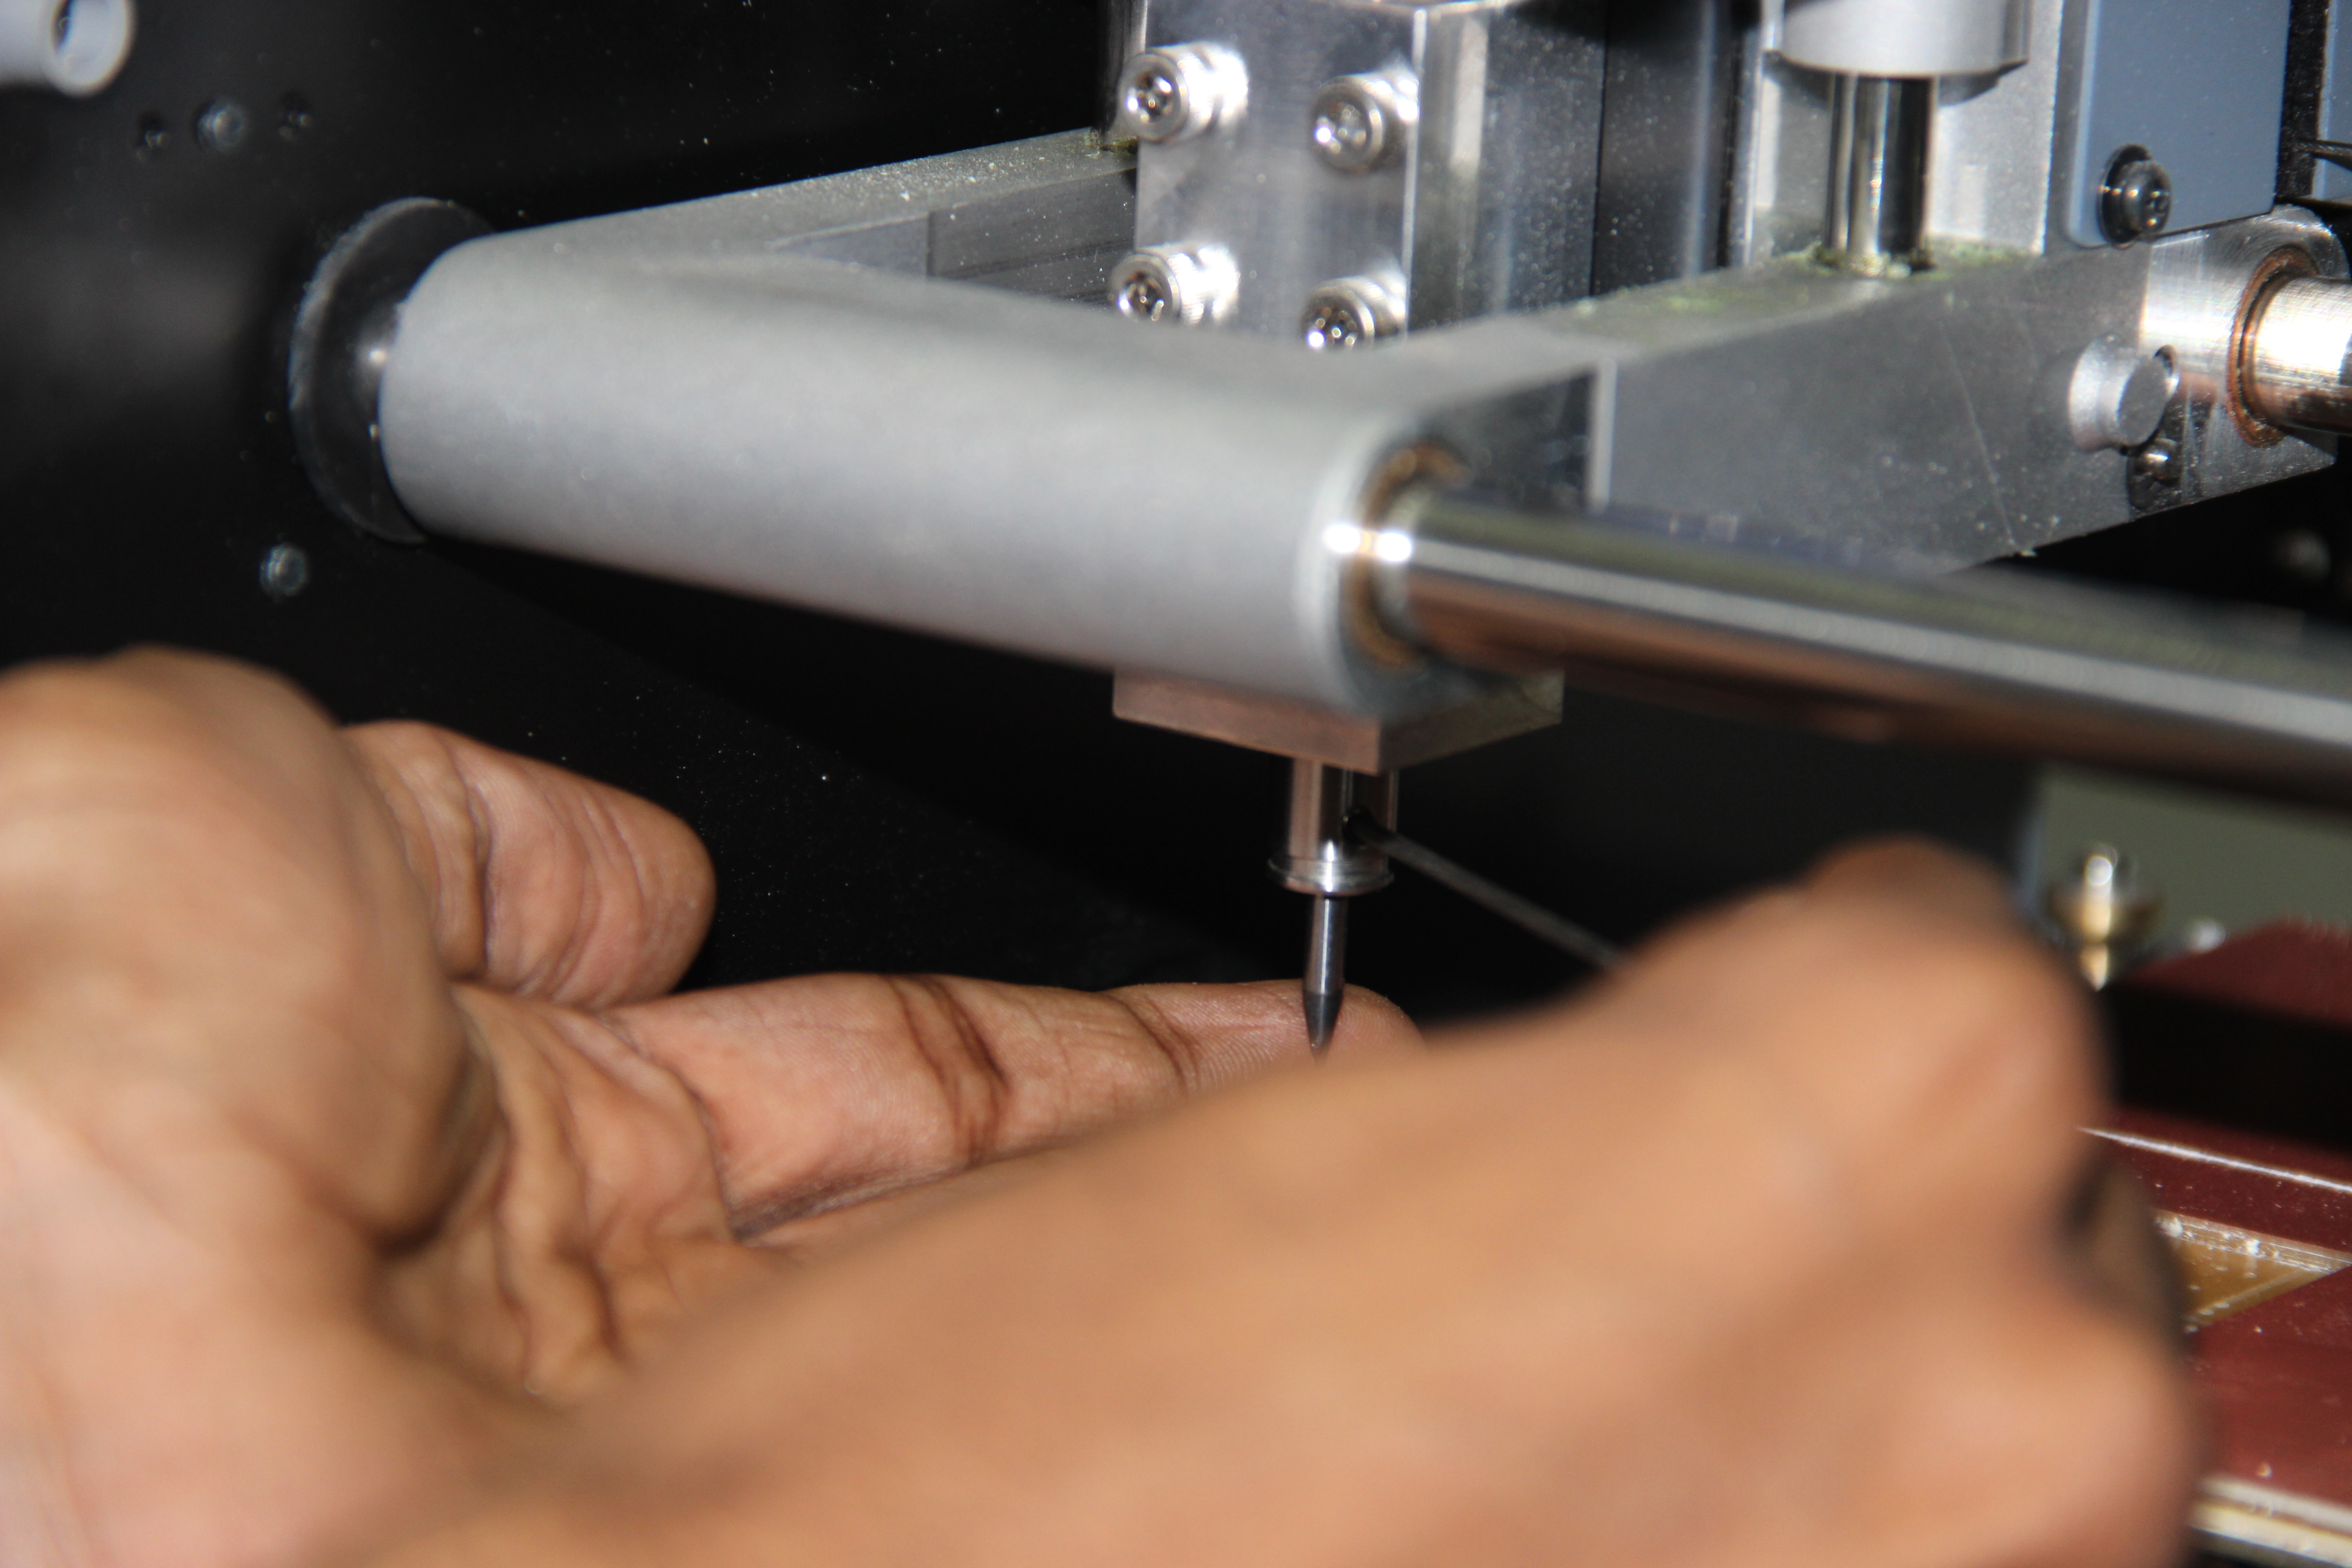
Fixing your board to the Modela
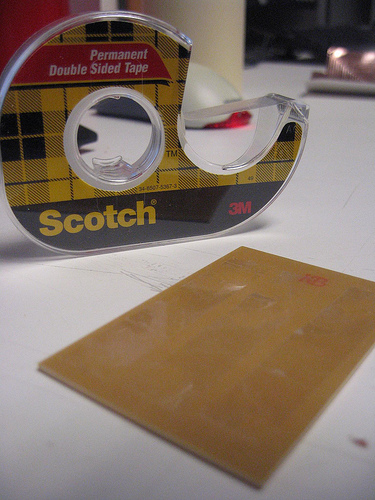
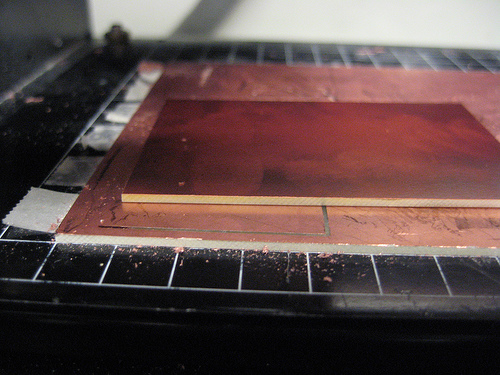
First make sure you have a sacrificial board underneath the board that you are milling. When you drill out the PCB you are making, you might go further than the actual thickness of the board. Attach the sacrificial board and the board you are milling out to the modela with double sided tape. Make sure the tape is not overlapping in any way as to not make the base for your board uneven.
Zeroing Z-axis
First Turned on the Modella Milling Machine. To make it forget its previous Z-zero setting keep Push the both Butten Up and Down up to the Green LED blink into steady. To double check it probably used the view button to take it out of view mode.
Then,slowely slide the bit into the modela. Now with the Allen key, gently tighten the hex-nut to tighten the bit.
Bits
Picking a bit
To mill out the traces of a circuit board you will generally want to use a 1/64th endmill, but if you have a particularly rough circuit you might be able to get away with 1/32nd (if so, you'll need to adjust the commands in the previous section for a 1/32" endmill).
Putting the bit in
Turn the Modela off and then on again to make it forget its previous z-zero setting. You'll probably need to press the view button to take it out of view mode. Then, slide the bit into the modela. When you put the bit into the modela, you don't have to tighten the set screws all that much.
Zeroing Xand Y axis
Fab module window. Used the rml_move tool, change the position of x and y. For generating origin click on 'make rml'.N ext sept was setting up the Z axis manually,the bit close as get to the copper plate but without touching it by keeping the down button pressed. Then loosened the set screws again using Allen key and pushed the bit all the way onto the copper Sheet, then tight the screws again.

now the mechine is all set to milling,next step is loading a png file and start milling.

Stuff Board
Download the FabISP labeled board diagram so that you can see what components you need to and where to place them on the board.
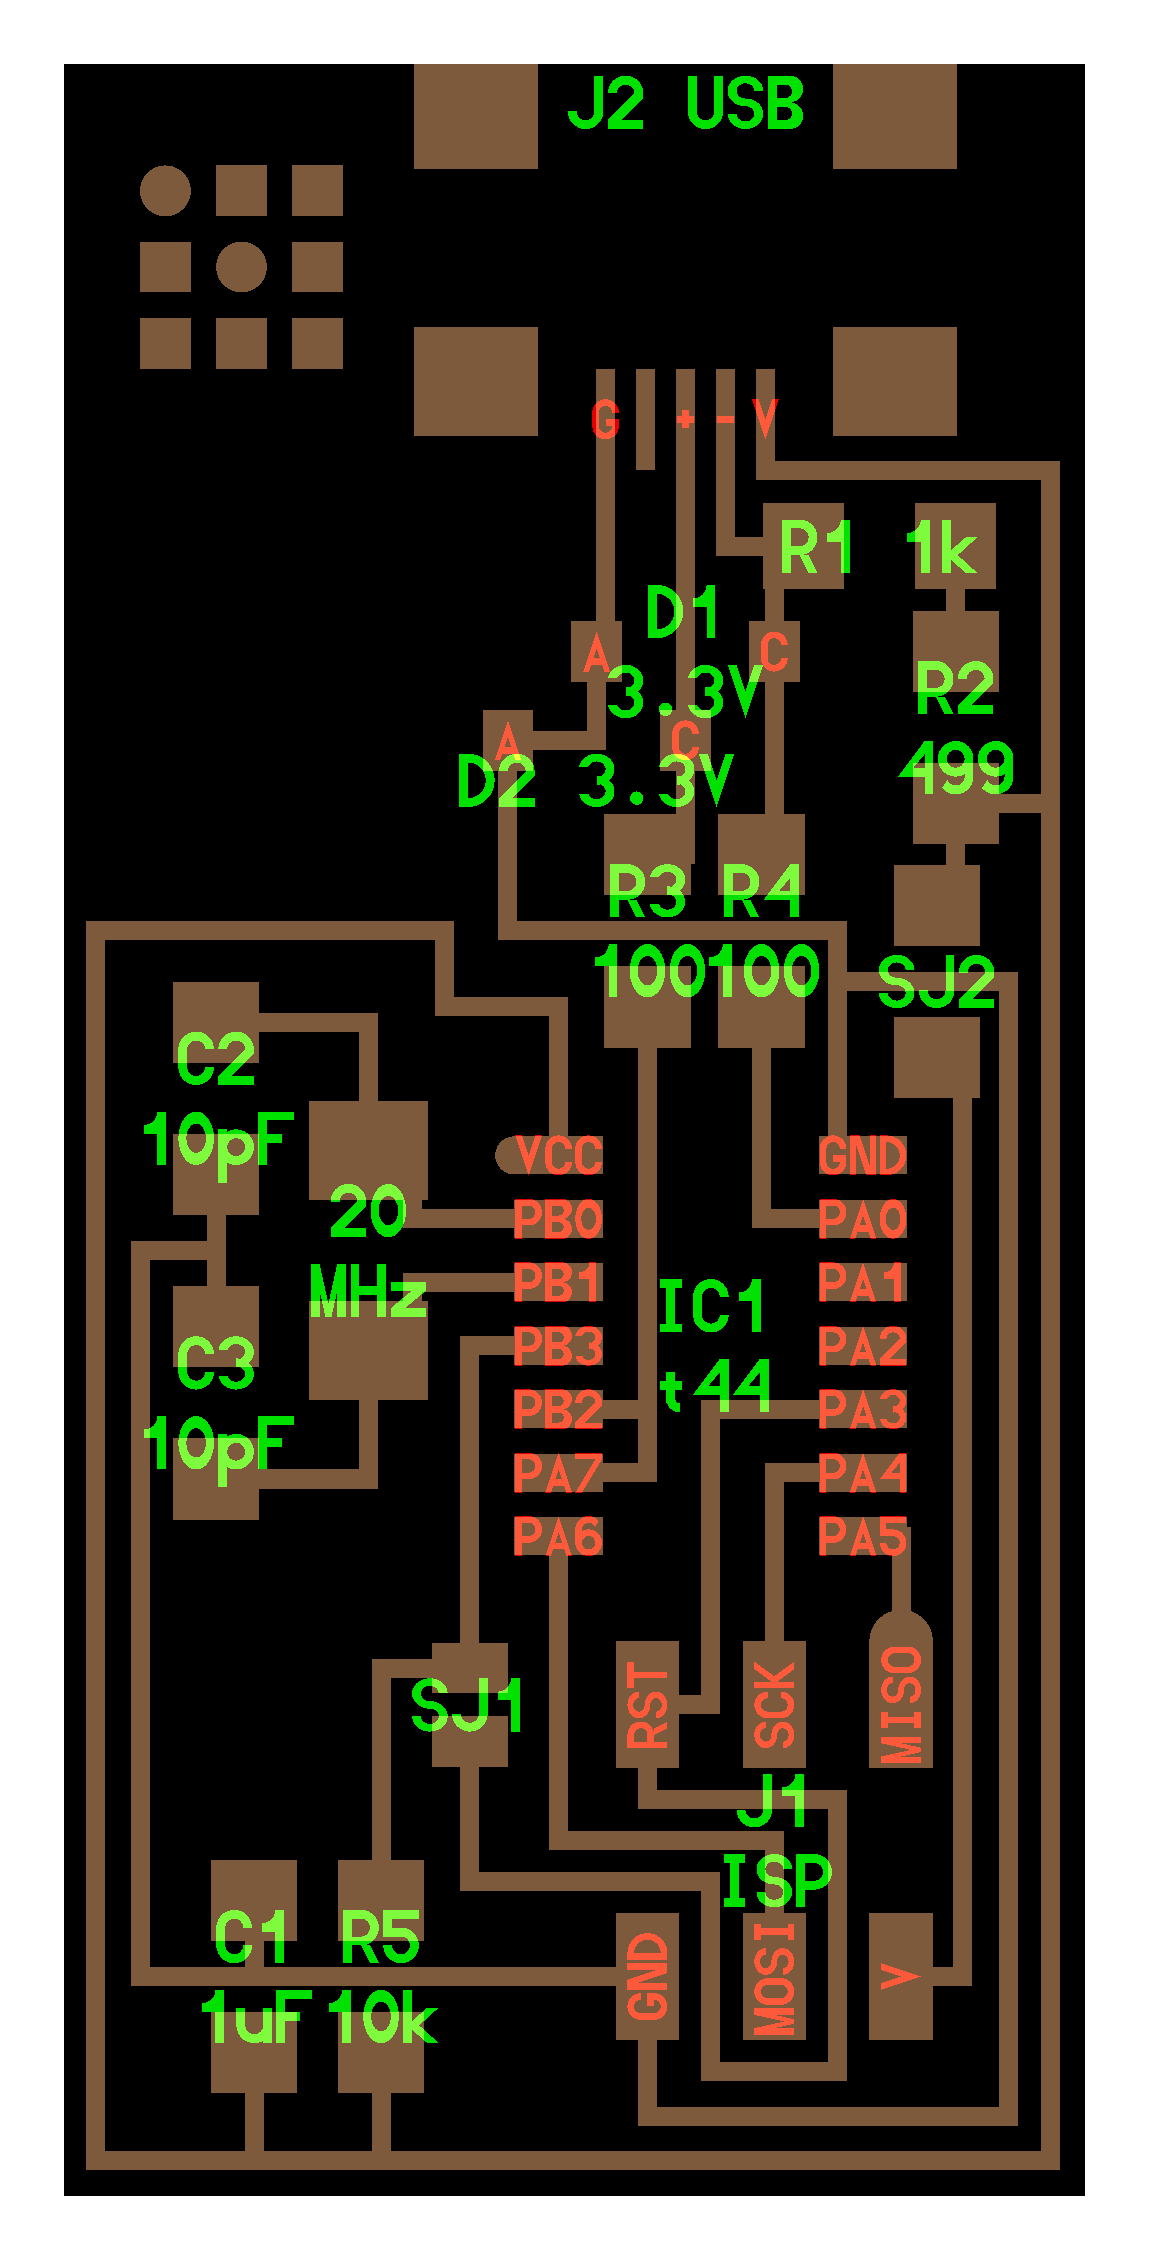
That is, it allows us to program the microcontrollers on other boards we make, using nothing but a USB cable and 6-pin IDC to 6-pin IDC cable. It's based on the USBtiny and V-USB firmwares, which allow the ATtiny44 to perform USB communication in software. Programming can be done through avrdude.
The schematic (PDF) is super simple: USB connector, ATtiny44, and 6-pin ISP header, with assorted passive components. I started with the Eagle files for the USBtinyISP, although there's almost nothing left of it. Most of the parts for the FabISP are in the FabLab inventory. Exceptions include the Mini-B USB connector (SparkFun, Digi-Key), 12 MHz crystal (Digi-Key), and 18 pF capacitors for the crystal (Digi-Key).
Needed components
|
|
Programming FabISP
Get and install avrdude / GCC software and dependencies
Open Terminal and type:
    sudo apt-get install flex byacc bison gcc libusb-dev avrdude

    sudo apt-get install gcc-avr

    sudo apt-get install avr-libc

    sudo apt-get install libc6-dev
Download the firmware from the Fab Academy Electronics Production page.
wget http://academy.cba.mit.edu/classes/embedded_programming/firmware.zipUnzip the firmware, Move to the desktop
Edit the Makefile
The Makefile is set up to work with the AVRISP2 by default. If you are using another programmer, you will need to edit the Makefile.
cd Desktop/firmware nano Makefileselect your ISP , other inactive by ging '#' before.
save it
Program the FabISP
Navigate to the directory where you saved the FabISP firmware. If you followed the instructions above, this will be the desktop. Open your terminal / command line interface and move to the firmware directory.
    cd Desktop/firmware

    make clean

    make hex

    make fuse

    make program
Wooo! Success!
To Verify That Your ISP is working correctly:
lsusbit shows on your terminal
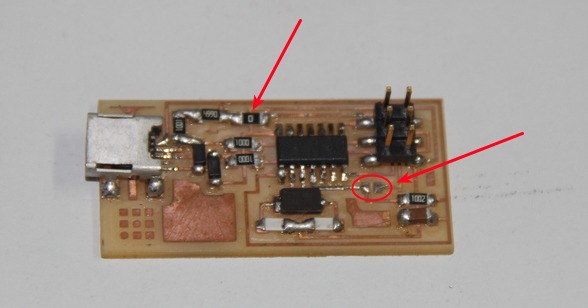
Bus 002 Device 004: ID 1781:0c9f Multiple Vendors USBtinyAfter You Have Programmed the Board:
Remove the 0 ohm resistor and solder bridge as shown in the picture below.
Now you can use it as a programmer to program other boards.