
E13: Output Devices
In this weeks assignment I have to add an output device to a fabricated microcontroller board and program it to do something.
-
Assignment:
- Add an output device to a microcontroller board you've designed and program it to do something
How to MAKE it
Technical Setup
From a students project, there was a powerful motor left over. They used it to motorize a longboard 2 years ago. Unfortunately the setup was quite unstable (in terms of controling the motor smoothly) and that was the reason why we stopped the project - for reasons of safety. My goal (meanwhile also as art of the final project: fabKickBoard) is to improve the motor control and make it safe and reliable.For my test setting it was perfect, because the motor was still mounted to the board, so that I coud test it safely. Also the batteries could still be used for testing.
The specs of the motor are as follows:Alien 6374 Outrunner brushless motor 170KV 3200W
MOTOR: 6374
KV: 170
MAX POWER: 3200W
WIRE WINDS: 10
MAX AMP: 80A
ESC: 100/150A
MAX VOLT: 10S
RESISTANCE: .56
NO LOAD CURRENT: 1,4
SIZE: 63 x 74 ( without shaft )
WEIGHT (g): 0,750
SHAFT: 10mm with 3mm keyway
Accessory pack: Yes
Keyway: 3mm
As ESC I used the Alien 200A 3-16S Heli ESC HV (which turned out to not work proper at the end) and the TURNIGY K-Force 120A-HV OPTO V2 5-12S Brushless ESC
Controling the ESC
To run the fabKickBoard I basically need a powerful motor, ESC (electronic speed control), a unit that controls the ESC and batteries of course.Aim of the Output Devices assigment is to control the ESC using a redesigned board, in this case I modified the satshakit from Daniele Ingrassia.
satshakit is a 100% Arduino IDE and libraries compatible, fabbable and open source board, and also an improved version of Fabkit.https://github.com/satshas/satshakit
Main improvements and features over Fabkit are:
16Mhz instead of 8Mhz
crystal instead of resonator
costs less (7-9 euro vs 13 euro)
100% compatible with default Arduino IDE (satshakit is recognized as Arduino UNO)
ADC6/7 connected instead of ADC6/7 not connected (satshakit laser and cnc)
larger space to easy soldering (satshakit laser and cnc)

In order to decide which modifications apply to the satshakit, I wrote a list of requirements of my fabKickBoard final project:
- it needs to drive the aforementioned brushless motor
- it needs a voltage divider to measure the battery charge status
- it needs to drive a RGB led
- it will take input from a button and a pressure sensor
So I tought about the following modification to be done:
- for the ESC a PWM digital pin can be used, so no modifications are required to control the motor
- attach new resistors to an analog input pin for the voltage divider
- put in series to 3 PWM pins 499 resistors to be able to drive the RGB led
- attach pull-up resistors to an analog pin for the pressure sensor
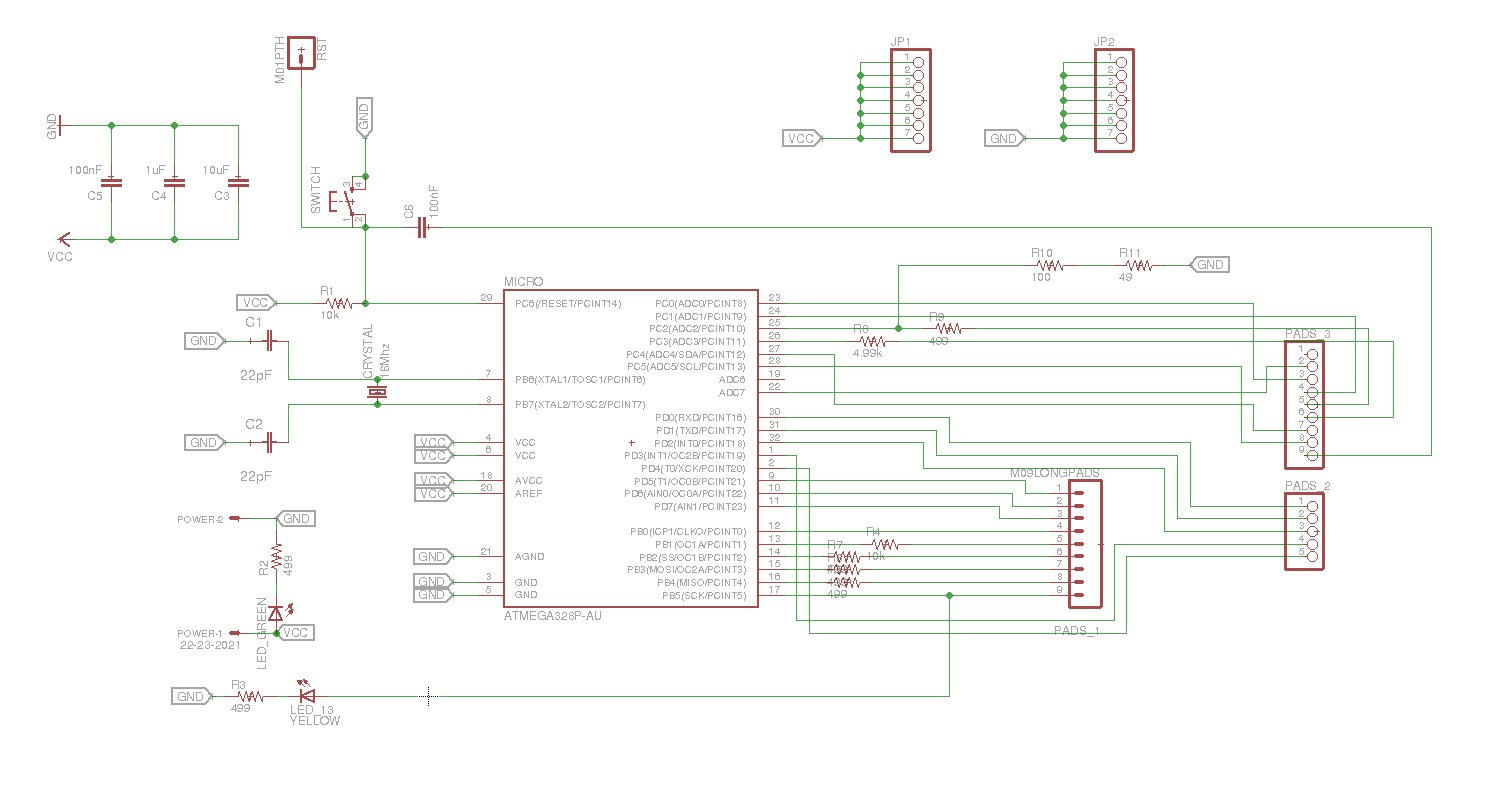
First of all I worked into the schematic section of Eagle to add the components I needed:
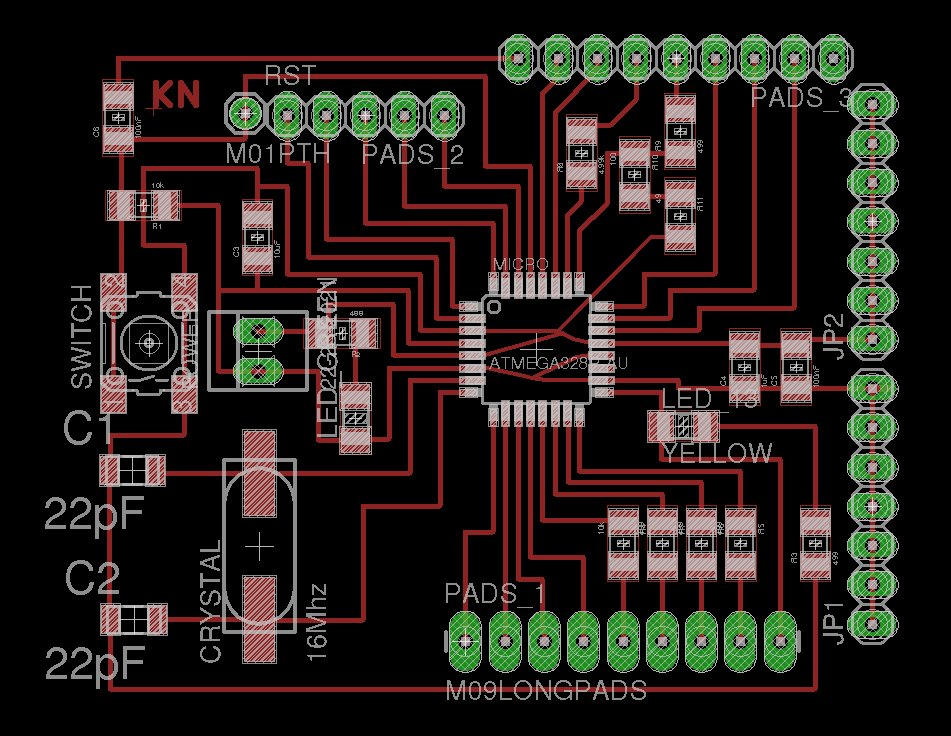
And I did the routing of the board in the board section of Eagle, paying attenction to modify only the parts of the board I needed, to keep the rest of the design as the original satshakit:
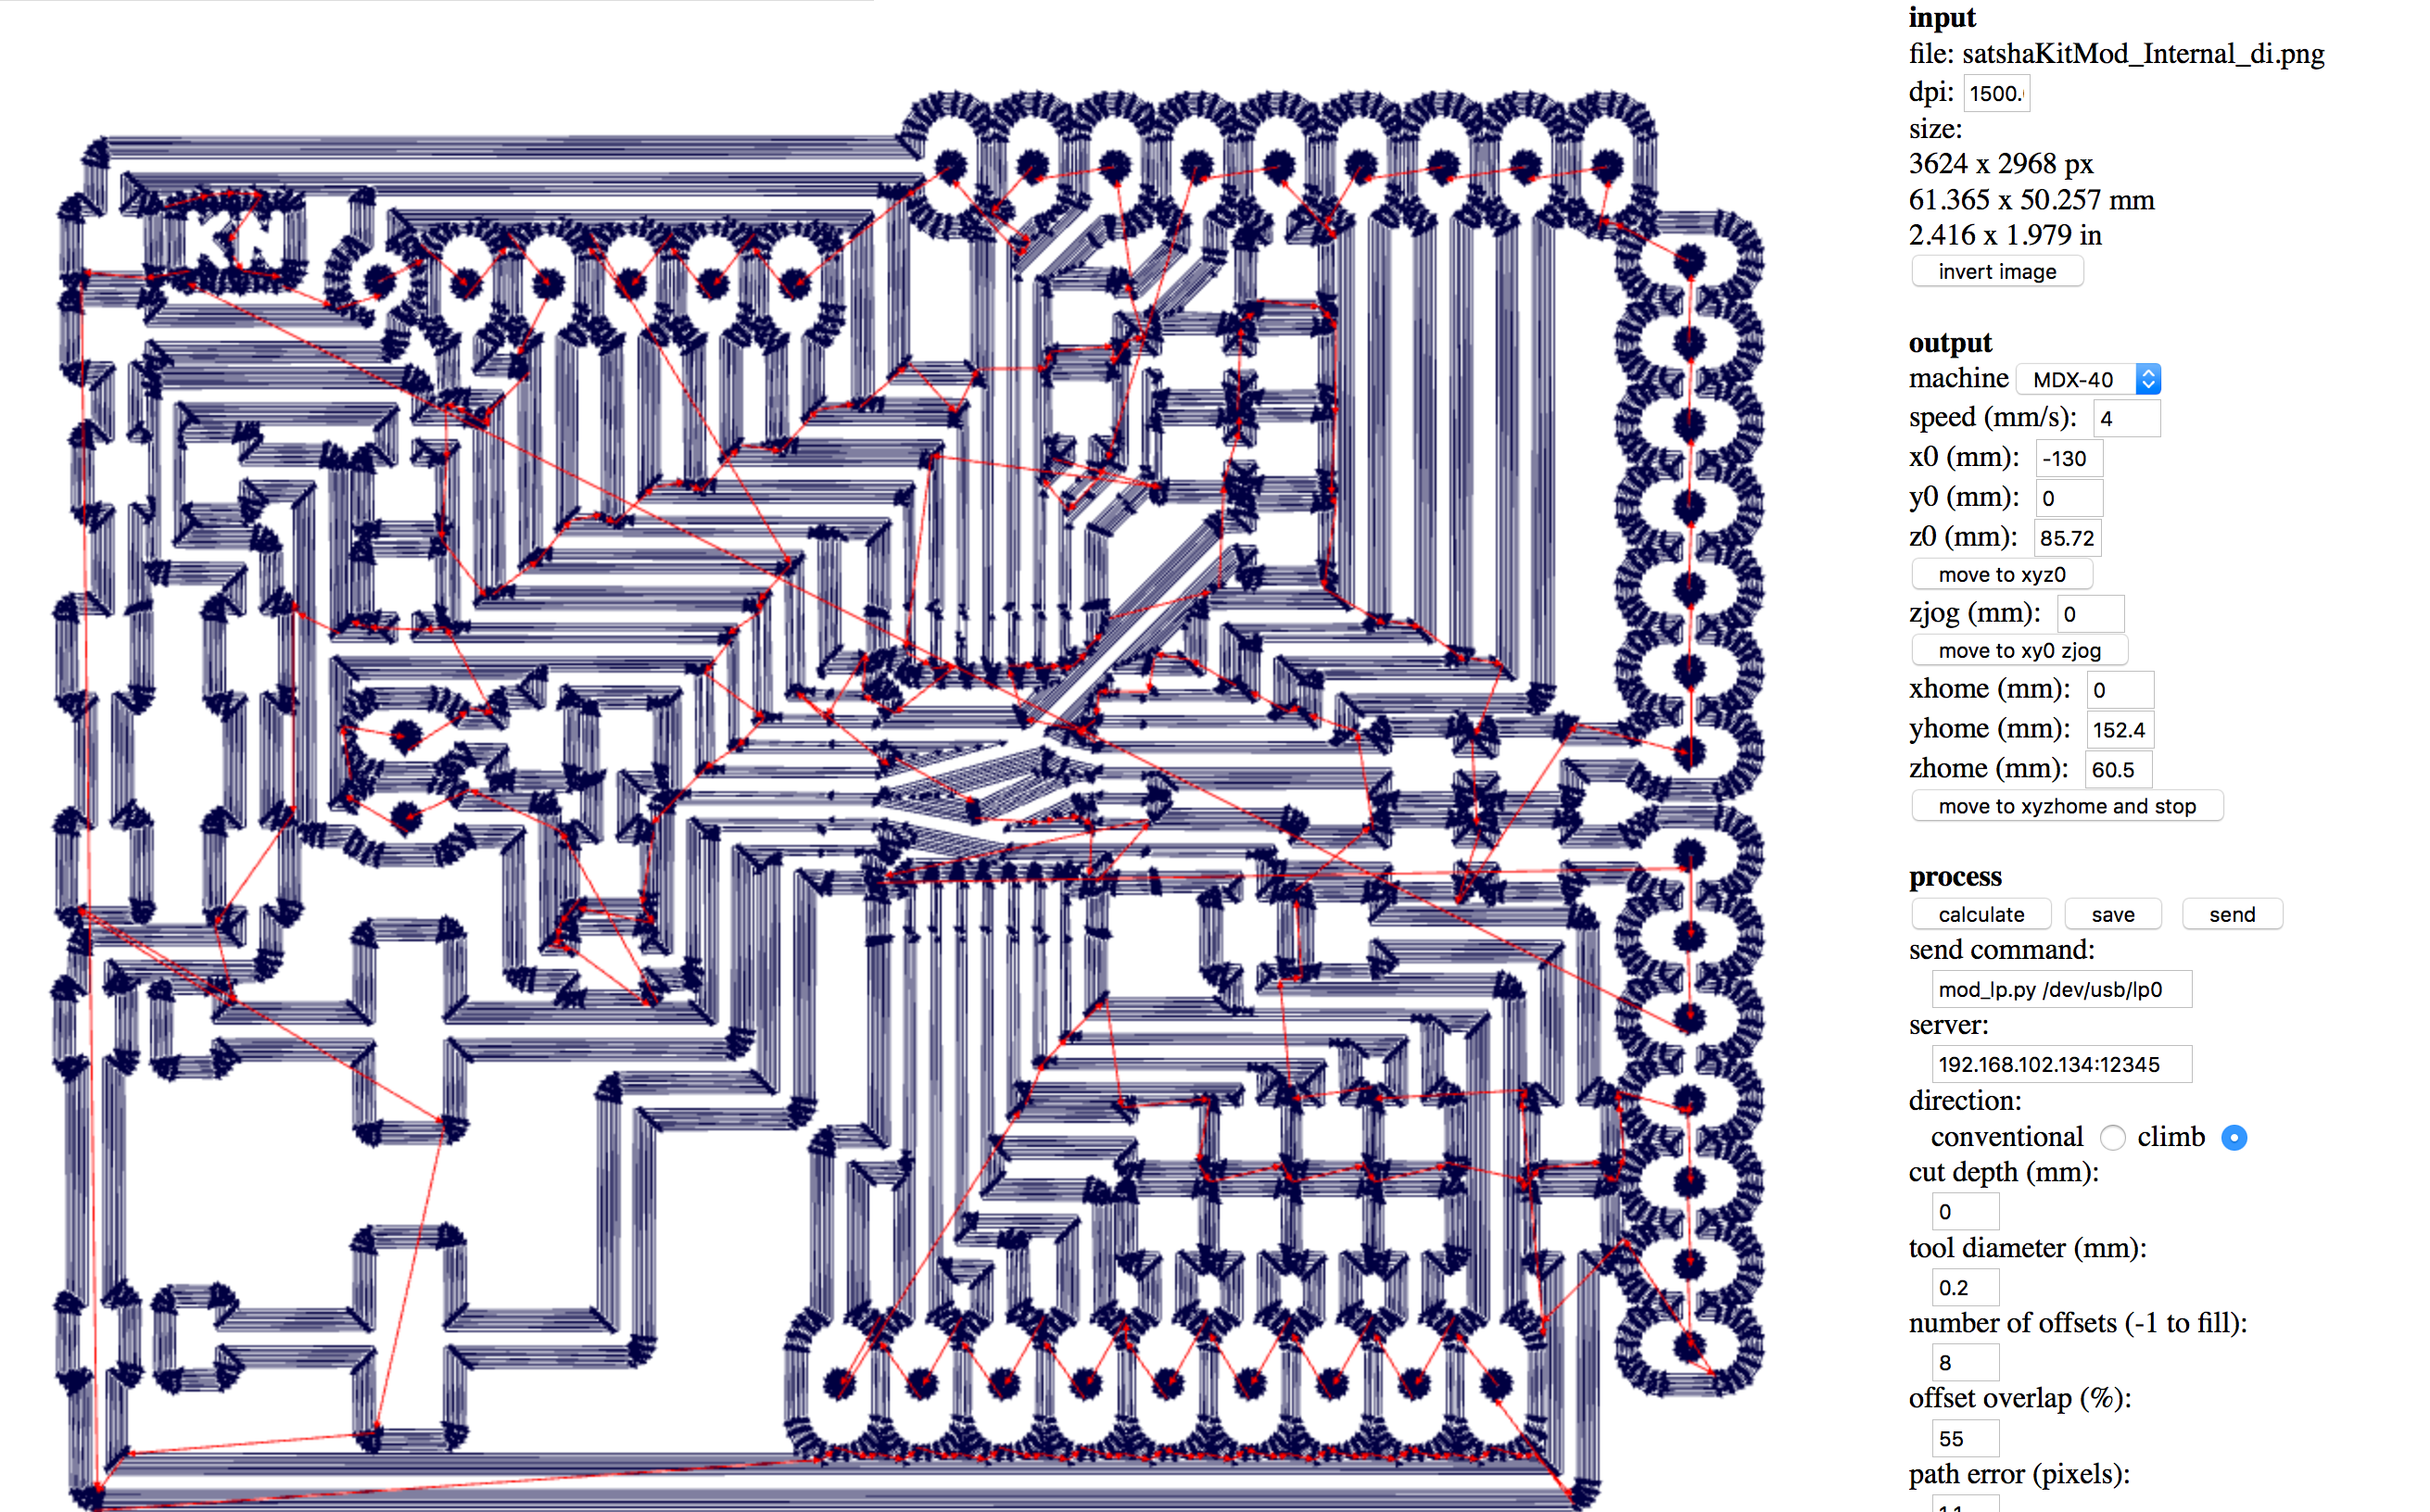
Time to mill! I used our local installation of FabModules to mill the board. To have an easy life in soldering I added 8 offsets:
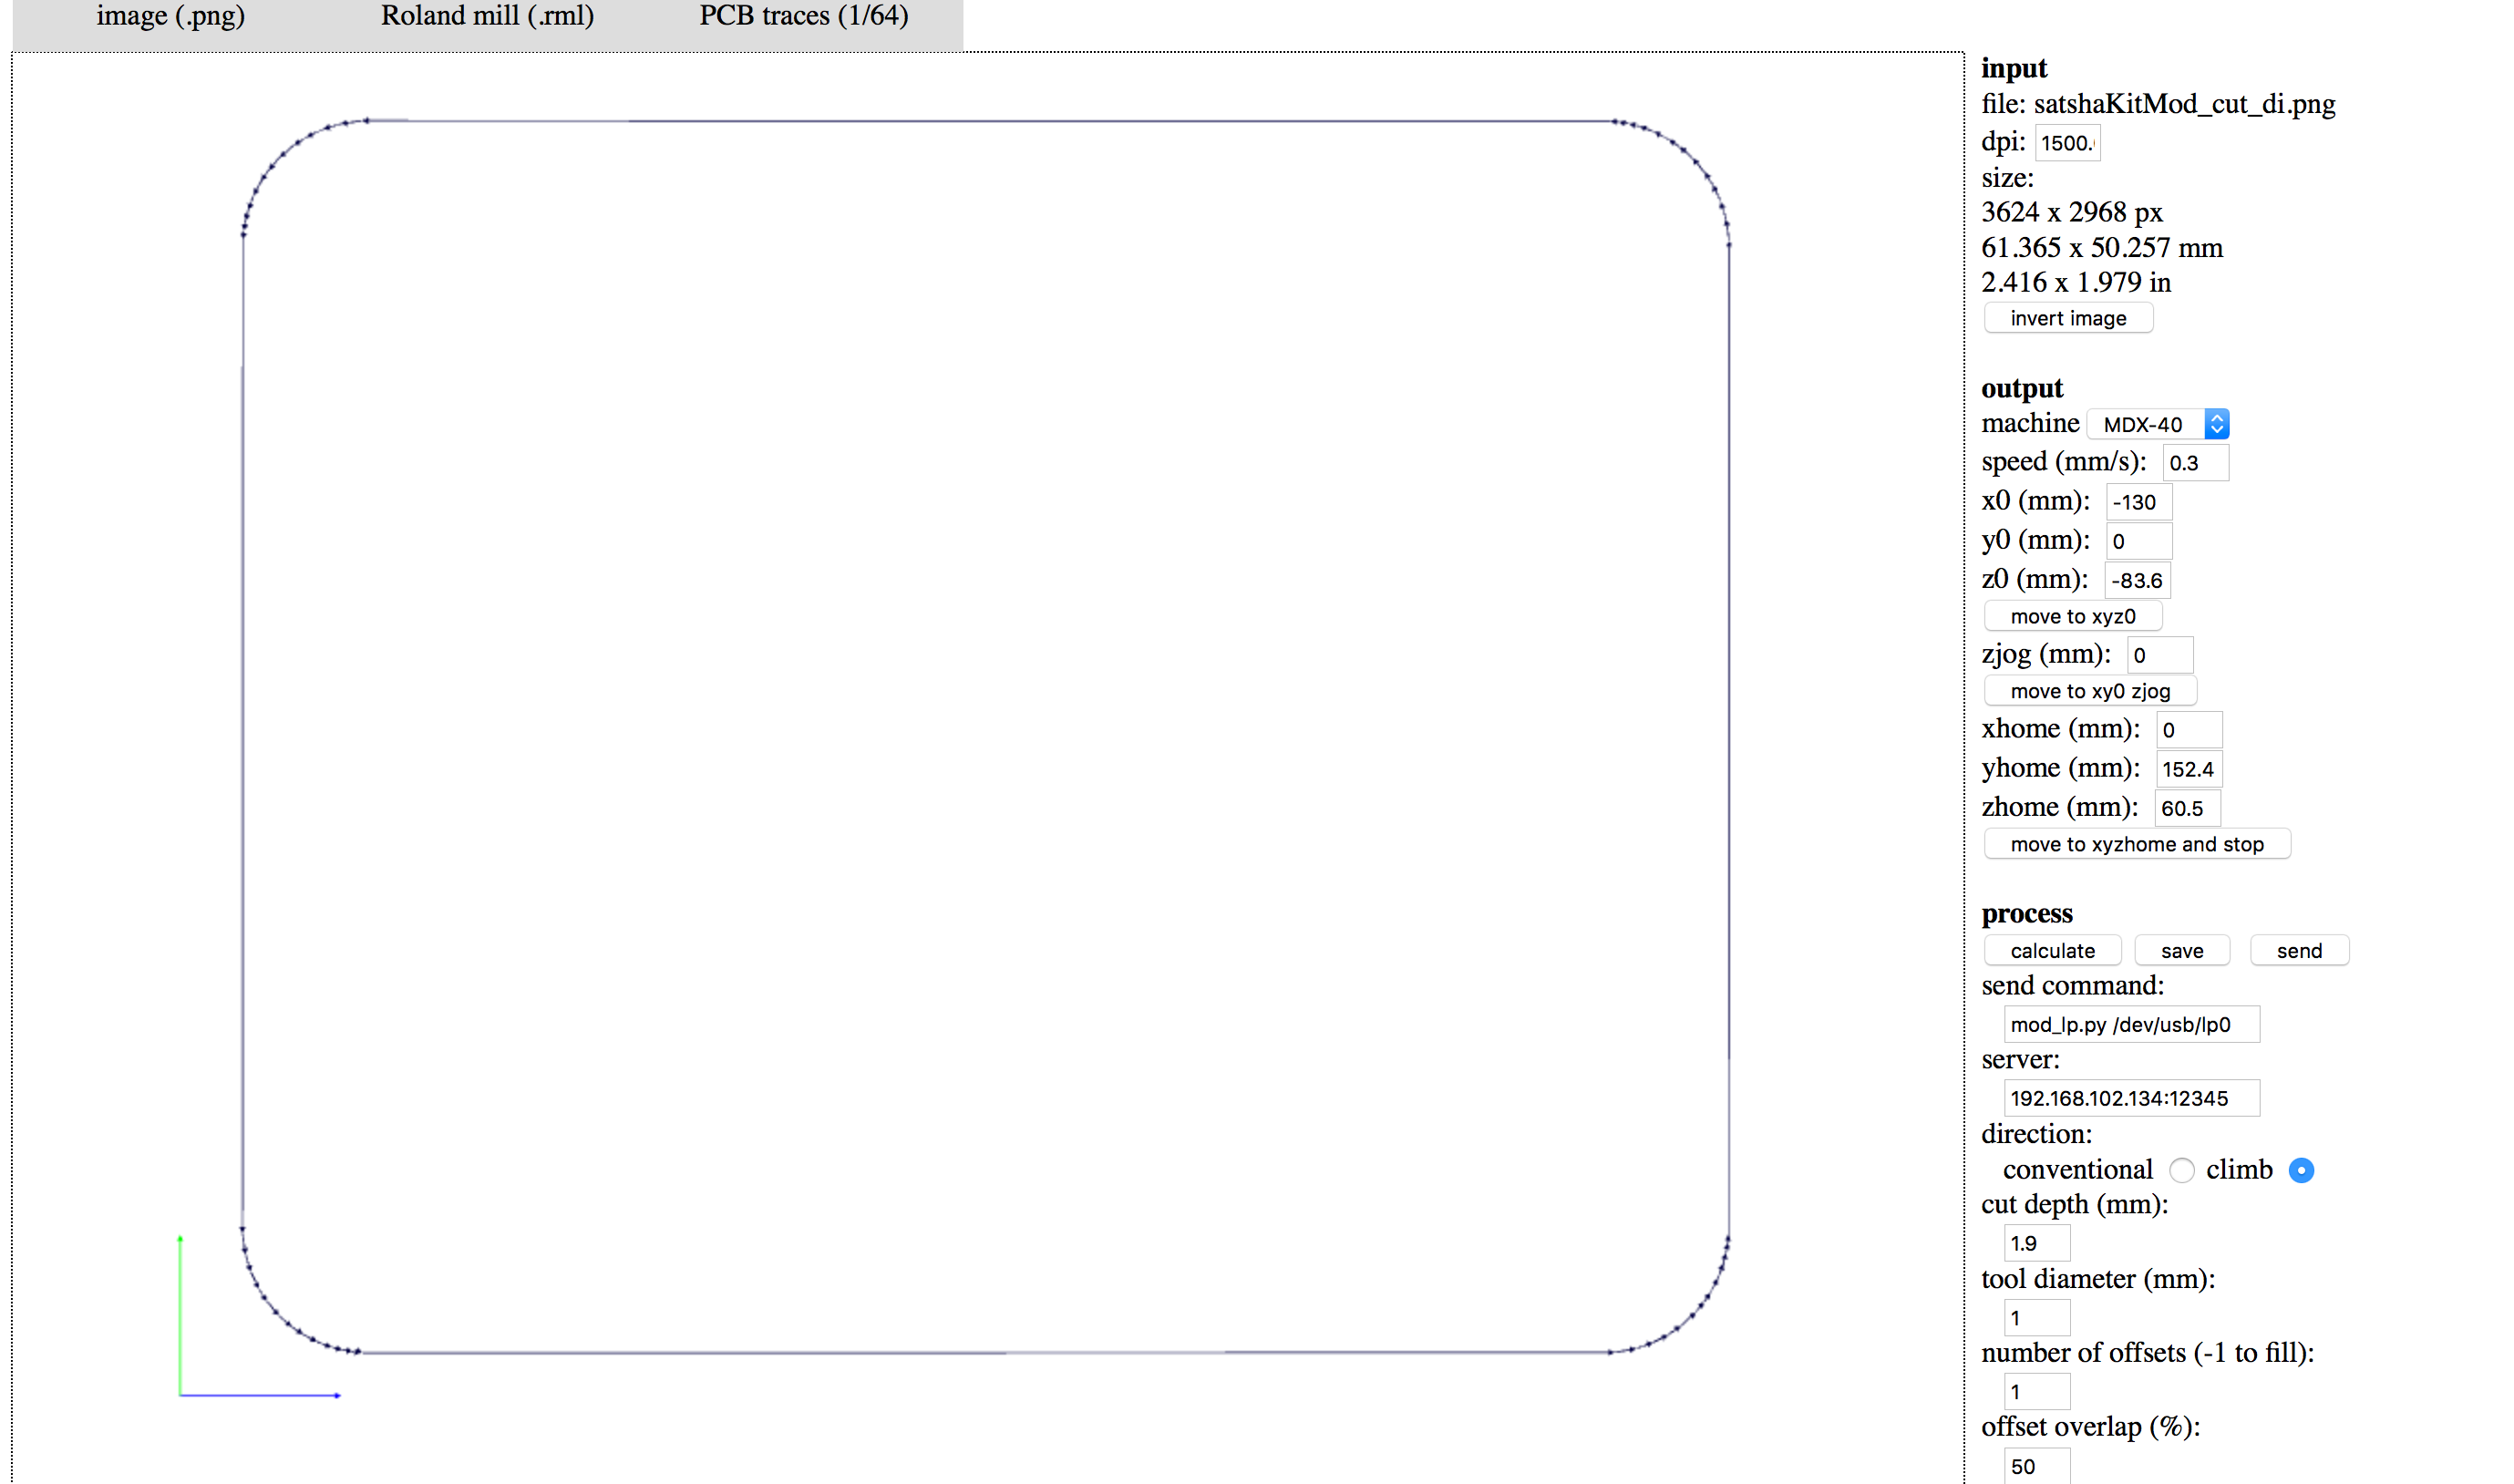
Also, I did the cut with rounded corners to have an easy mounting in the fabKickBoard electronics enclosure:
Using a v-shaped tool of 0.2 to 0.5mm from cirQoid and our Roland MDX40A the milling process went quite good, as you can see from the following picture:

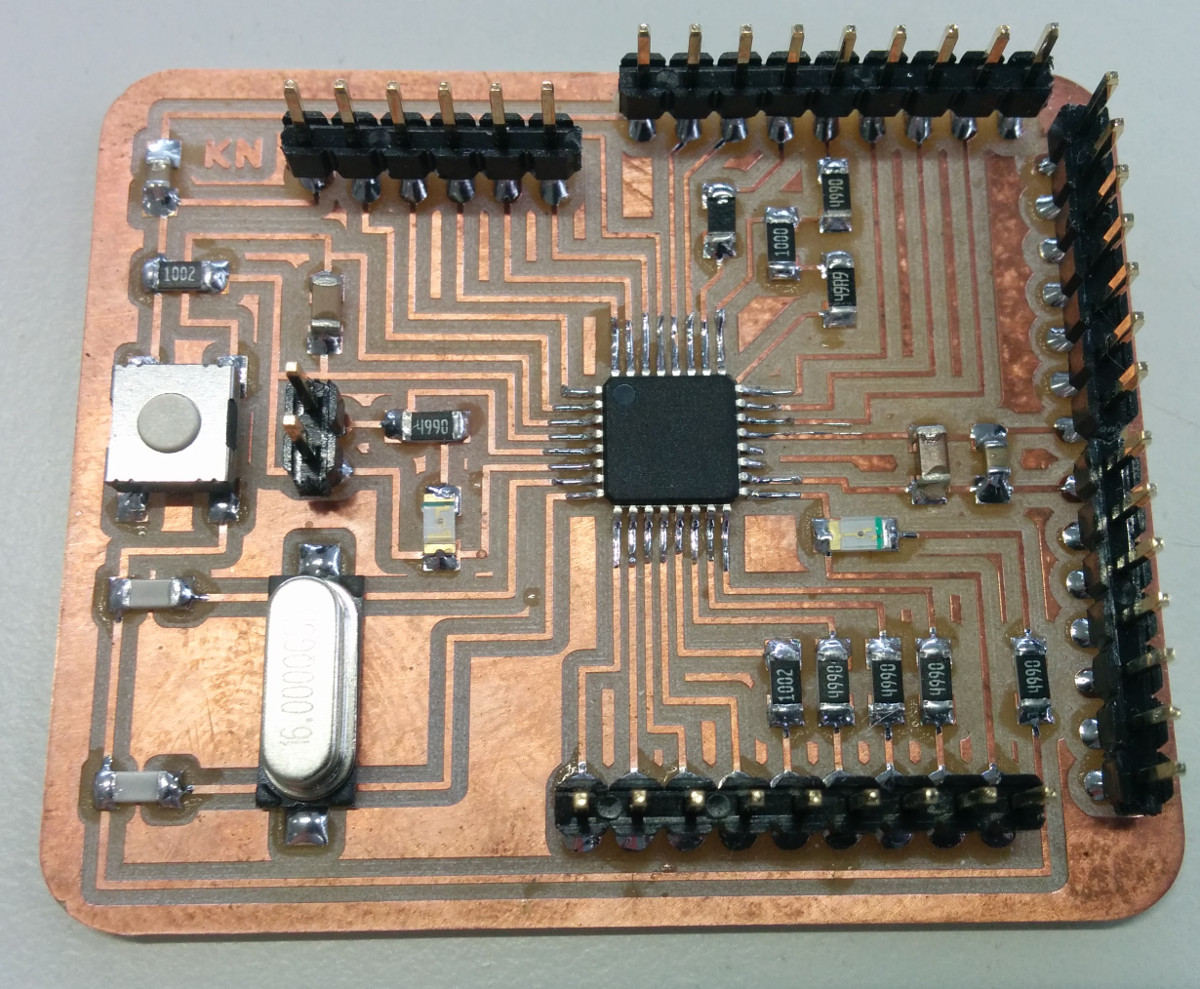
Then I carefully soldered all the components, and finally here is the modified sathsakit board:
Programming
I wanted to use the 'Servo library' from Arduino Library (Servo.h).This library allows an Arduino board to control RC (hobby) servo motors. Servos have integrated gears and a shaft that can be precisely controlled. Standard servos allow the shaft to be positioned at various angles, usually between 0 and 180 degrees. Continuous rotation servos allow the rotation of the shaft to be set to various speeds. The Servo library supports up to 12 motors on most Arduino boards and 48 on the Arduino Mega. On boards other than the Mega, use of the library disables analogWrite() (PWM) functionality on pins 9 and 10, whether or not there is a Servo on those pins. On the Mega, up to 12 servos can be used without interfering with PWM functionality; use of 12 to 23 motors will disable PWM on pins 11 and 12.https://www.arduino.cc/en/Reference/Servo
On a continuous rotation servo, the write function will set the speed of the servo (with 0 being full-speed in one direction, 180 being full speed in the other, and a value near 90 being no movement).
To arm the ESC the PWM-frequecy needs to be less than the frequency needed to start the motor tuning. If you use a higher value, you will hear the feedback signal (error).
The contoller unit (in this case the satshakit) needs to send the proper frequency (arm value) before you power the ESC. Otherwise the ESC will not arm.
Usong the code below I tried to figure out the correct arm values, which was really not easy to to. I could not find a documentation of parameters for the motor. Thus, I did several test runs, which randomly worked but also did not work after a while anymore.
Thats why I also tried to flash the ESC using the Alien Power System Updater.

For various randomized reasons I did not make the ESC work. Finally, I tried the TURNIGY K-Force 120A-HV OPTO V2 5-12S Brushless ESC and managed to make it run.
But also here I made an interesting observation: In the given setting, the "Control connector of the ESC" the VCC and GND needs to be connected (in addition to the control wire). Meaning, the controler unit (here: satshakit) sends 5V VCC to it. This is not necessaryly common. Many ESCs don't need this.
Most likeley this is needed to power supply the electronic components in the ESC.
Following parameters have been identified: To arm = 1078;
1200 for making the motor start (1190 while slowing down);
Maximum: 1700
Following code was used to control the motor.
// This sketch uses the servo library to arm the ESC. #includeServo esc; // Define the ESC as a servo object int arm = 1078; // defines pulse width (measured: 1078; 1765 & tested: 1200 for starting (1190 while slowing down); max) int speedvalue = 0; int steady = 300; int initiate = 0; int controlPin = 5; int speedTest = 0; void setup() { Serial.begin(9600); //pinMode( controlPin, OUTPUT); esc.attach( controlPin , 1200, 1700); esc.writeMicroseconds(arm ); // This command sends a pulse train // from pin 5 that continues until // the pin is called to do something else. } void loop() { while (Serial.available() > 0) { speedTest = Serial.parseInt(); Serial.println(speedTest); } if (speedTest > 0) esc.writeMicroseconds(speedTest); }
Alien 6374 Outrunner brushless motor 170KV 3200W from usableDesign on Vimeo.
Downloads
Take Away's
- You have to arm the ESC. To arm the ESC the PWM-frequecy needs to be less than the frequency needed to start the motor tuning. If you use a higher value, you will hear the feedback signal (error).
- The contoller unit (in this case the satshakit) needs to send the proper frequency (arm value) before you power the ESC. Otherwise the ESC will not arm.