
E05: 3D scanning and printing
Sorry for not being present today.
I am giving a talk about "BEING MAKER" in the series of "Kinder-Universität" at our University. It is an interactive class about MAKERs. Adriana and I, we will show what is meant by being a MAKER and we want to encourage Kids to become active MAKERs in our FabLab and community.
This is my second talk in the series of "Kinder-Uni".
The first one was about Computer Science "Nullen und Einsen zum Anfassen", in which I explained how computers work and how we can interact with them, today and in future. Here you can find an article about the first talk (sorry, just in german).

Here you can find the article about the talk.

This weeks assignment ist about 3D printing (and design for) and 3D scanning. 3d Printers are quite useful in creating new objects (although there are many other tools and machines, too). However, 3D printing is not as easy as may people expect. In 3D printing you have to deal with many hassles:
First, each printer is different - not just by model. Even if you own more than one printer of one model, you will face differences in behaviour. You need to know all relevant parameters to print in the way you expect it to be, such as temperature, speed (booth according to the material used), etc.
Second, you need to design appropriately - according to the parameters of the printer. When designing an object you need to know how thin the walls can be made, how close walls can be placed, the possible sharpness of edges, the handling of hangover's, when to use support material, etc. Designing for 3D printing is not as easy as often expected - not just a 'click' to print.
In addition to printing we also had to try 3D scanning. I did some scans with ArtecEva a while ago. I also tried the Sense Scanner of 3D Systems and the iPad App 123D Catch.
-
Assignment:
- 1: test the design rules for your printer(s) (group project)
- 2: design and 3D print an object (small, few cm) that could not be made subtractively
- 3: 3D scan an object (and optionally print it) (extra credit: make your own scanner) Machines/Tools:
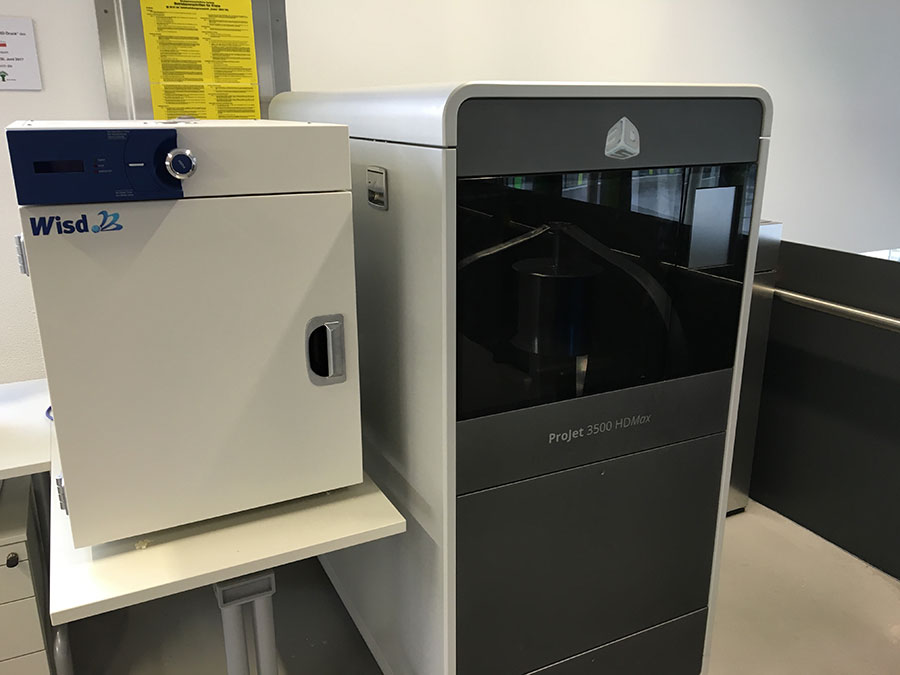
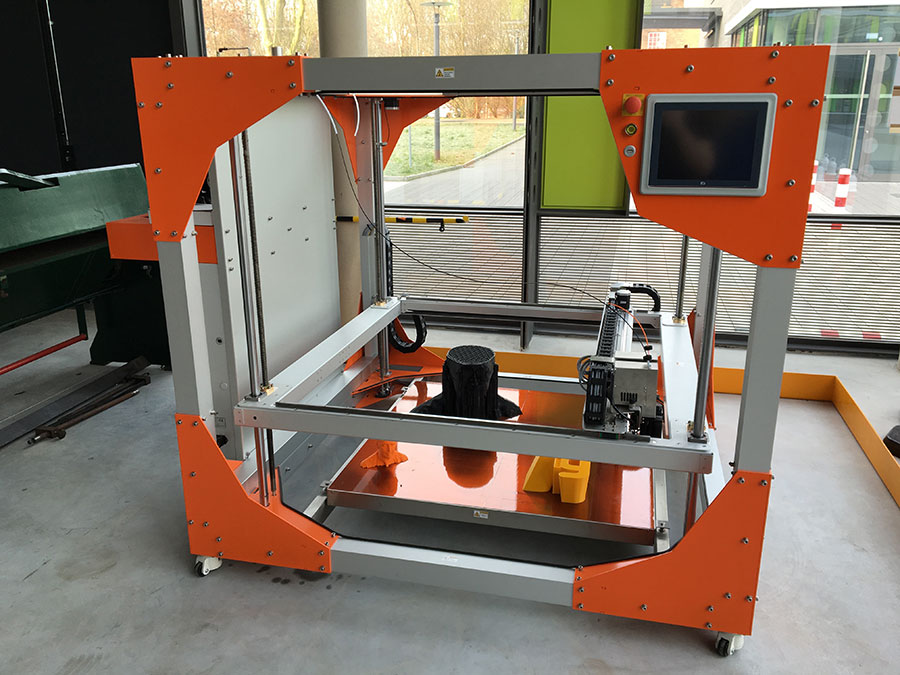
- 3D Printer: 3D Systems 3500 HDMAX, 3D Systems Cube 2ndGen, BigRep ONE v3, FormLabs Form 1+, Makerbot 5th Gen, Makerbot 2X, Ultimaker 2, RepRap Mendel
- 3D Scanner: Sense, David, Eva Software:
- Rhinoceros 3D, Cura, 123DSculpt (iPad), Artec
Notes from lecture + comments:
- 1: Group Project: check printer; how thin the walls can be made; how close walls can be placed; sharpness of edges; clearance
- 2: Make something SMALL that cannot be made with any other tool.
- 3: Scan something (and print it).
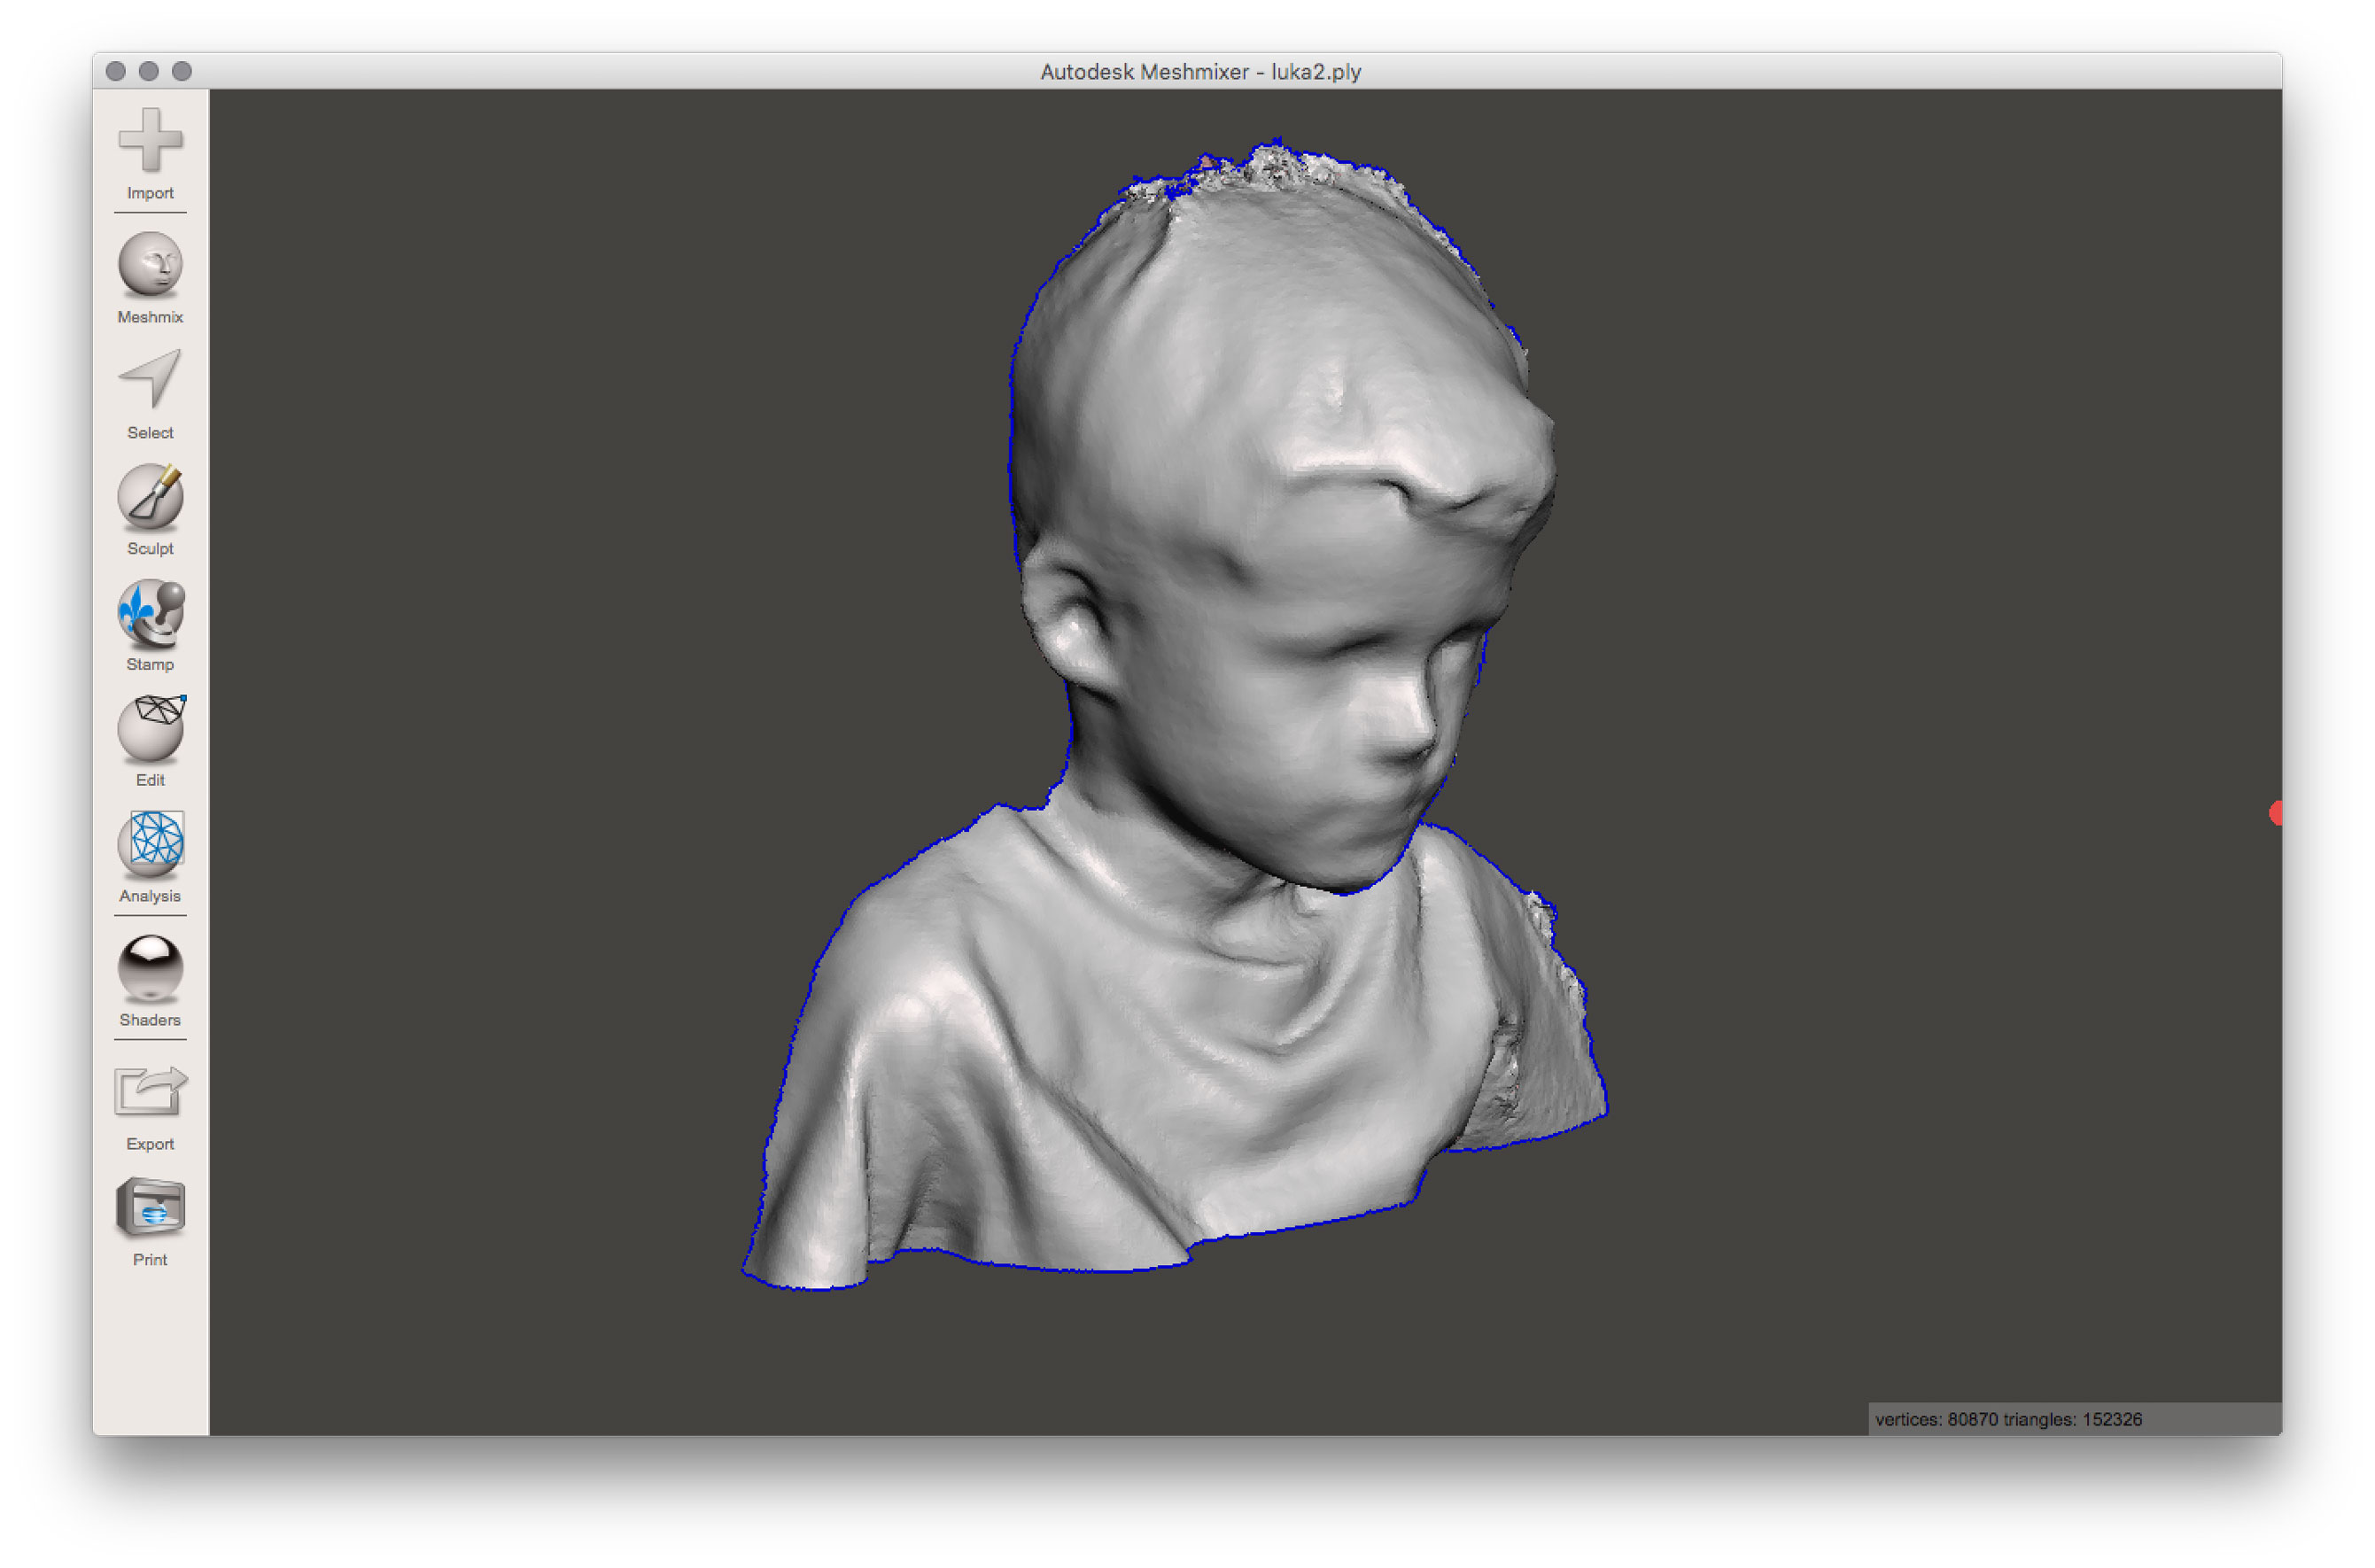
- Use tools that enable you to make solid objects. Use a Mesh-Mixer tool (e.g. netfabb or meshmixer). Try different scanners.
- Be aware: There is a minimal wall thickness and sharpness of edges; If you don't respect this, your print will fail.
- What you want to do is to make dense parts (as less infill as necessary).
- You can tweak your printer to decrease the print time.
- Older Version of Cura enables you to choose default settings for fast printing.
How to MAKE it
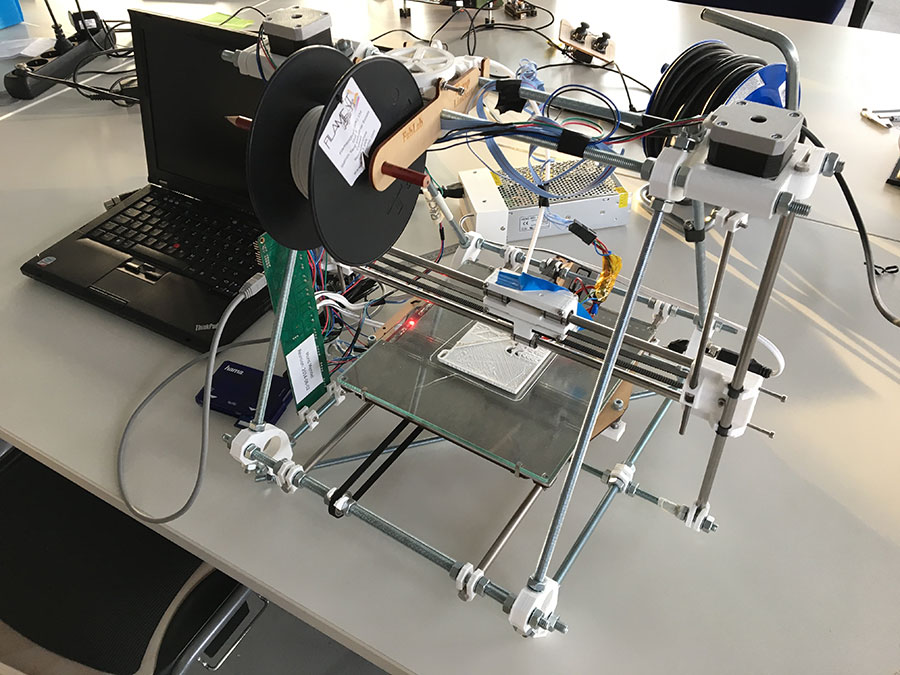
Currently, at the FabLab Kamp-Lintfort we do have fifteen 3D Printers of different branches (3D Systems, BigRep, FormLabs, Makerbot, RepRap, Ultimaker) plus several self-made versions.
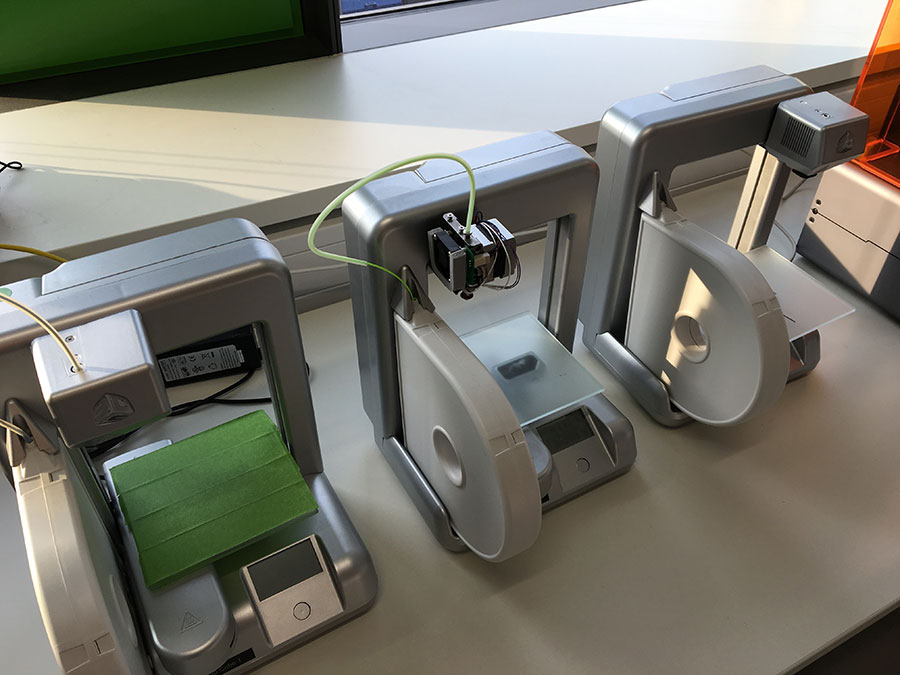


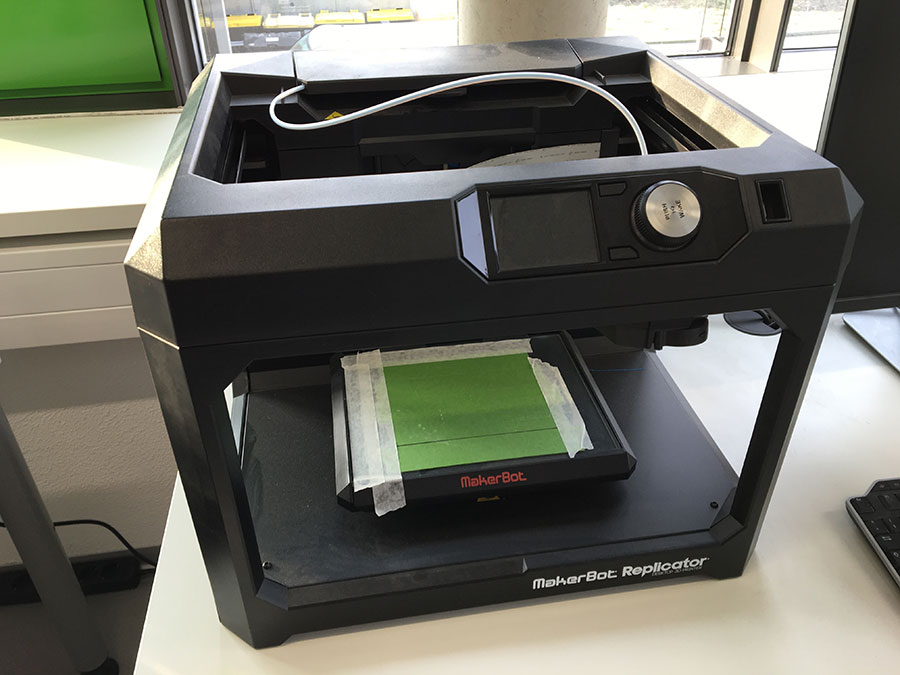

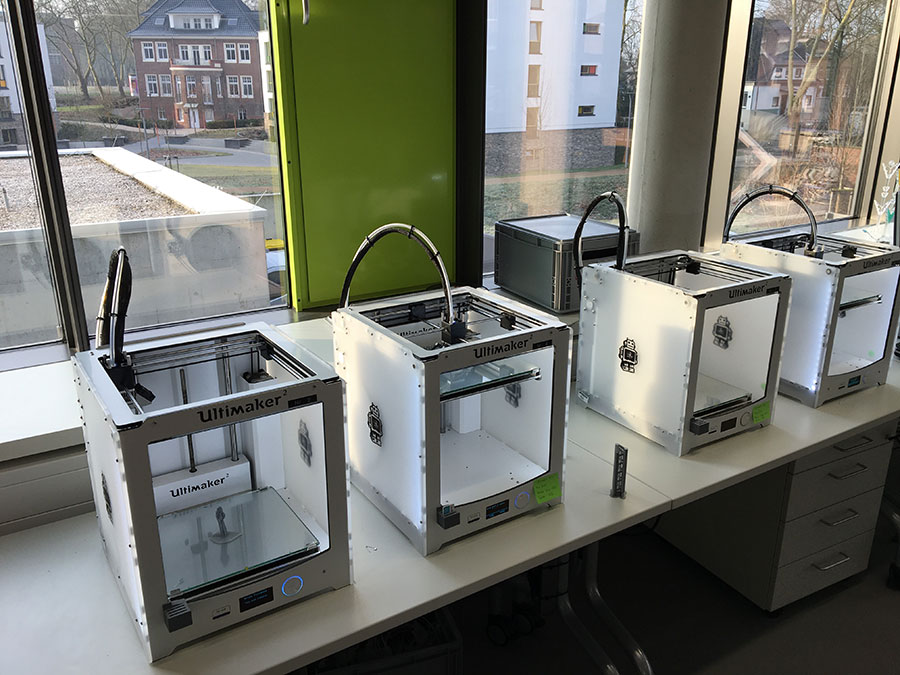
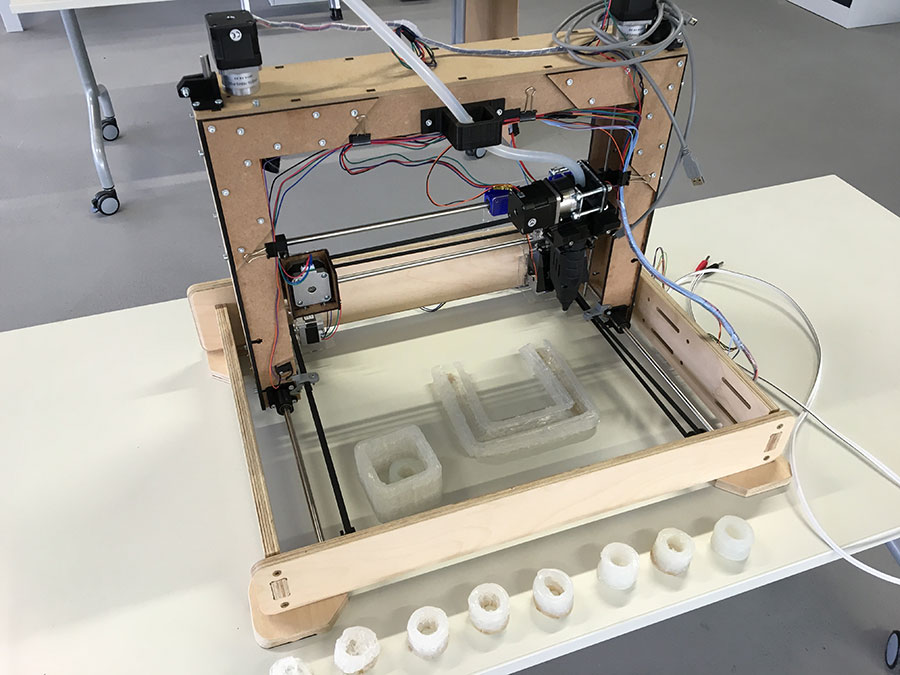
Unfortunately I was not able to test each printer in the time given. The ones I tried was the 3DSystems Cube 2nd Gen, Makerbot Replicator 2X and the Ultimaker 2.
MAKE a test of your printer(s) parameters
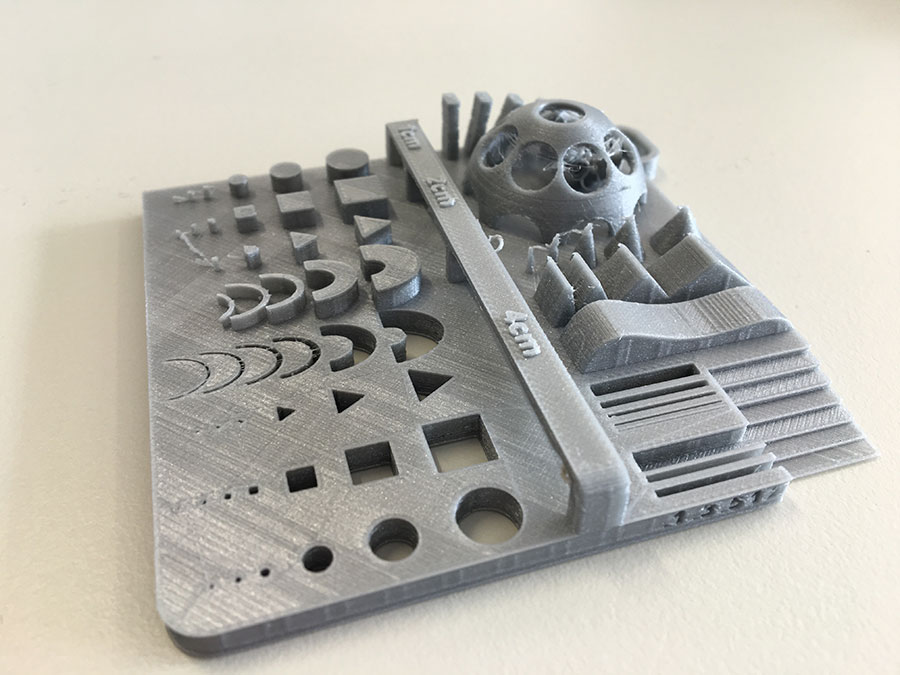
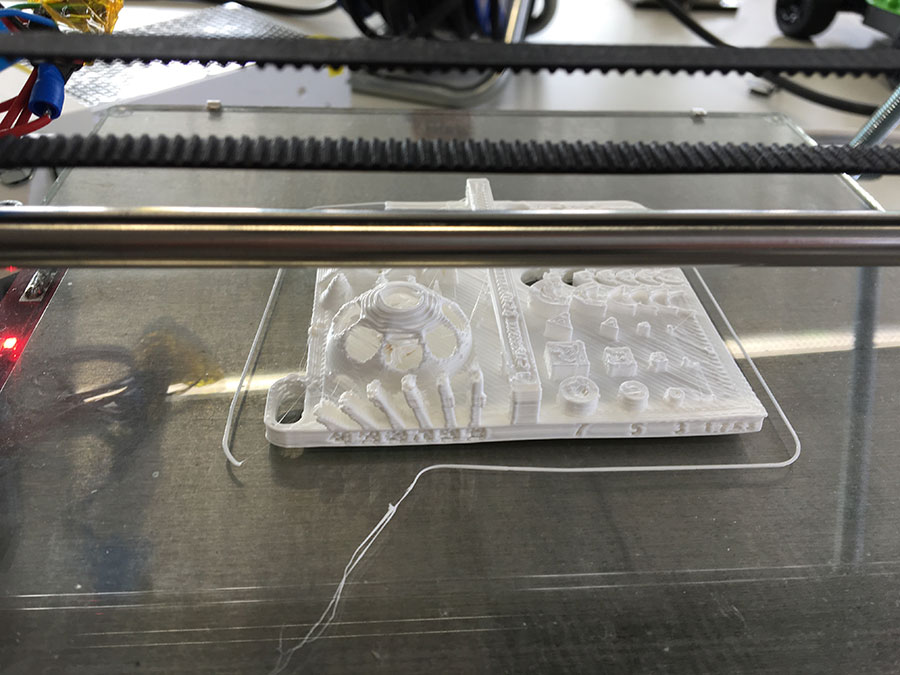
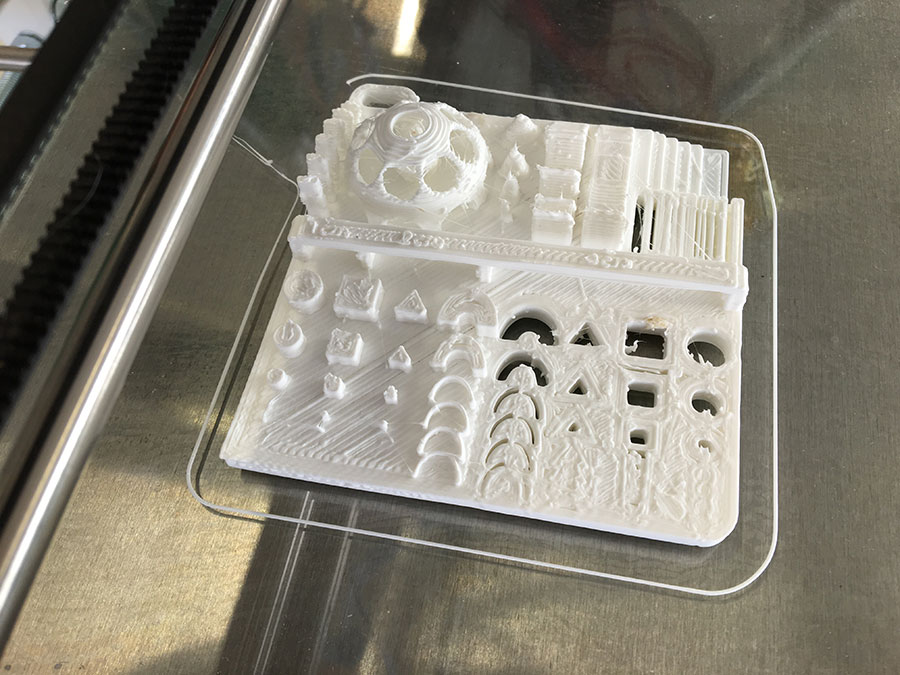
As group-task we had to test our printers. Therefore we did some test patterns to be printed on each printer.
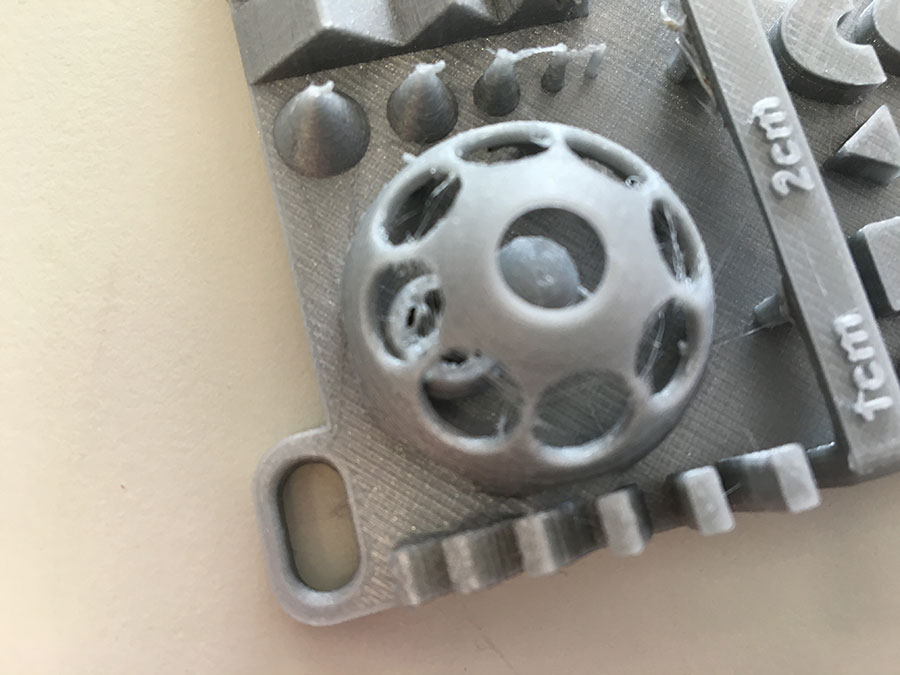
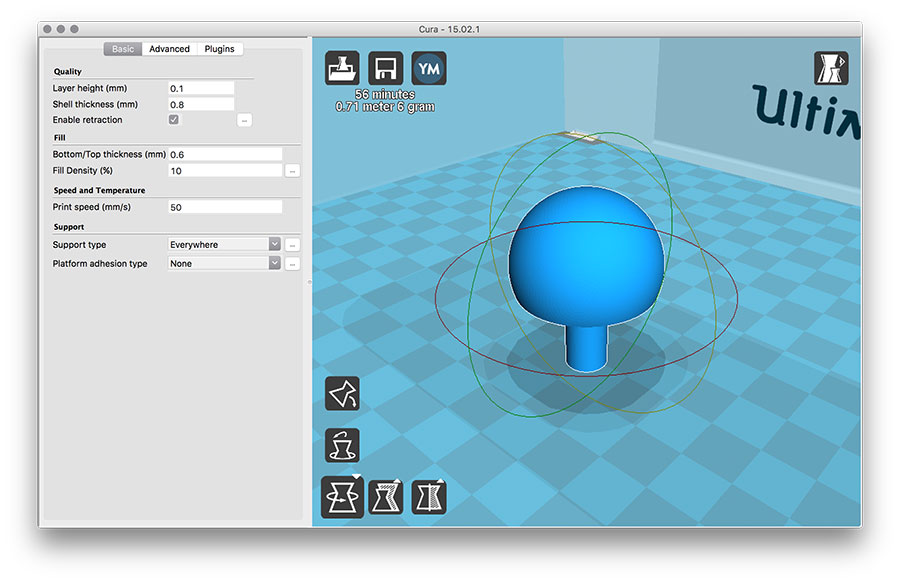
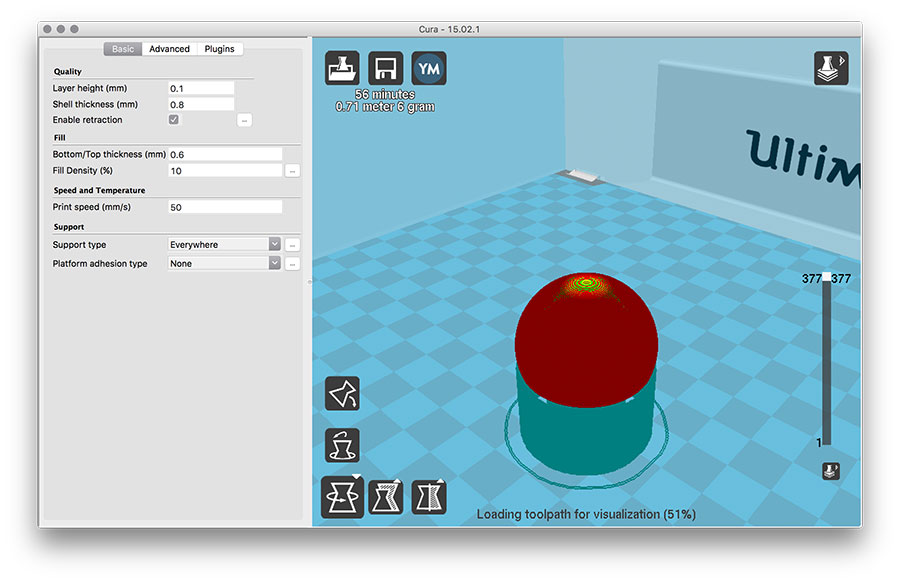
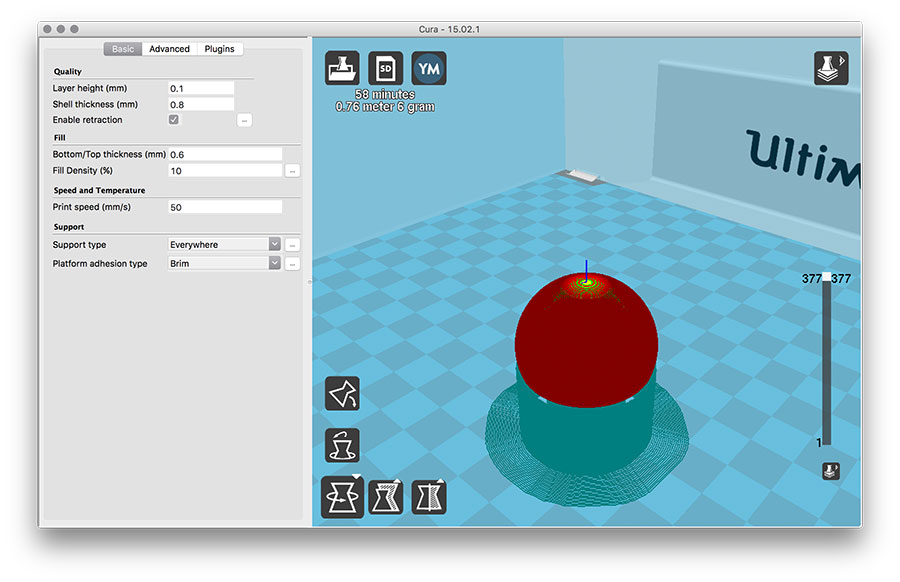
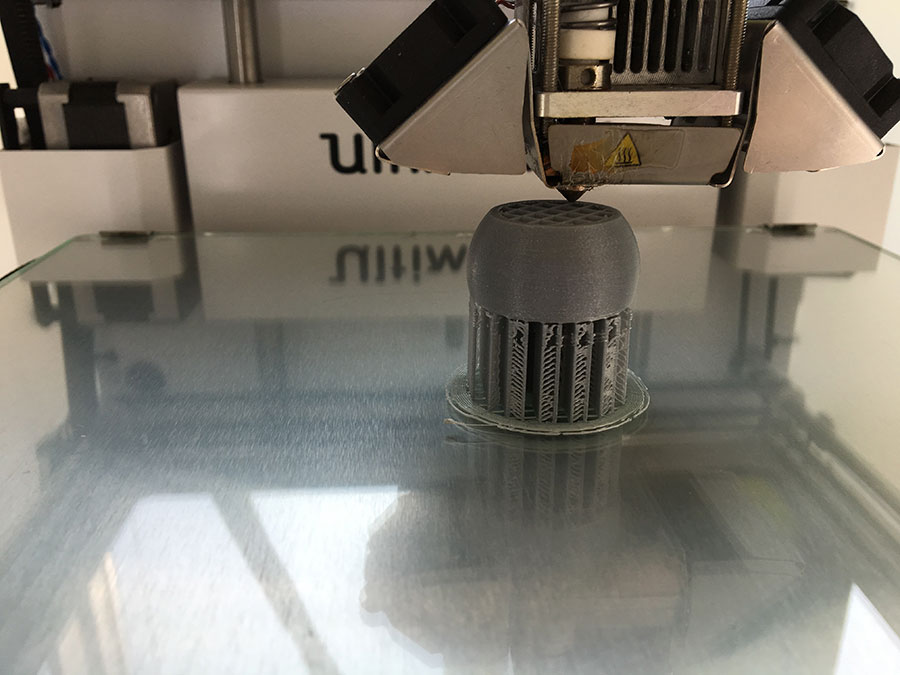
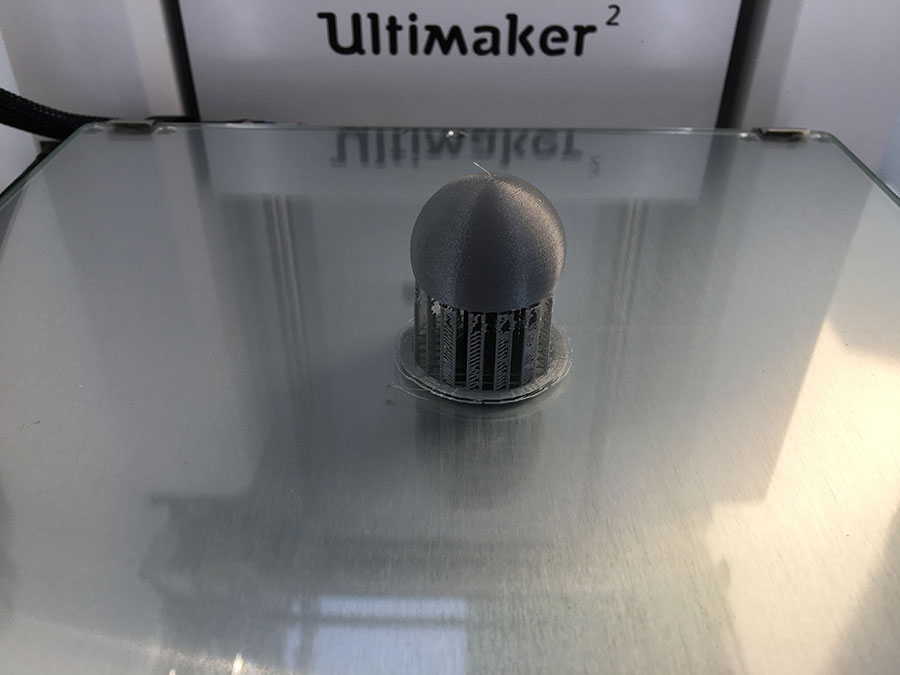
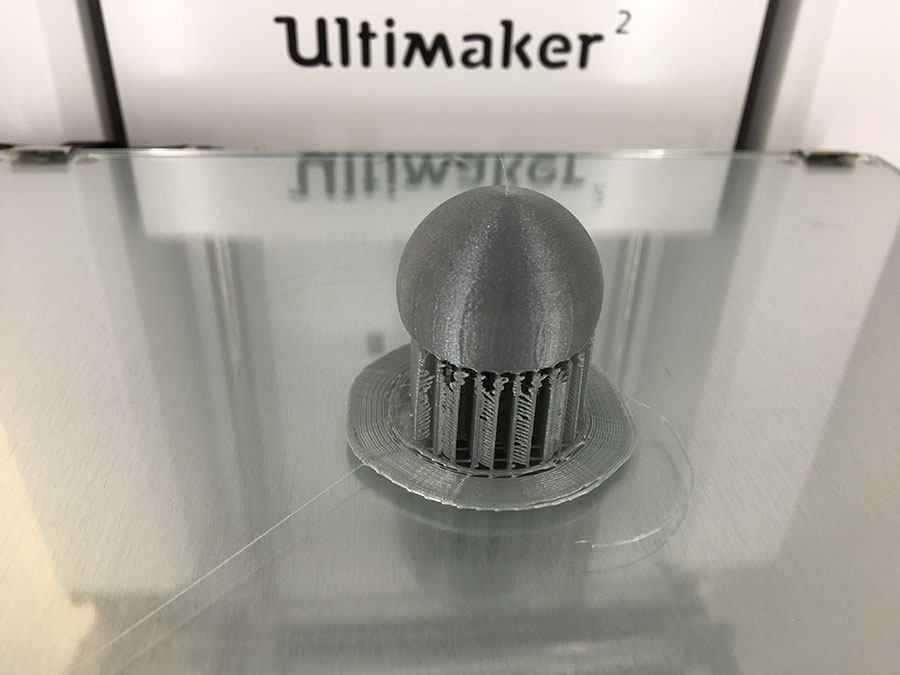
I made a pattern too, but at the end we decided to use Johnathan Yen's pattern (see model in the 3D Preview below). Here you can find the documentation on how he made it and the results of testing the Ultimaker.
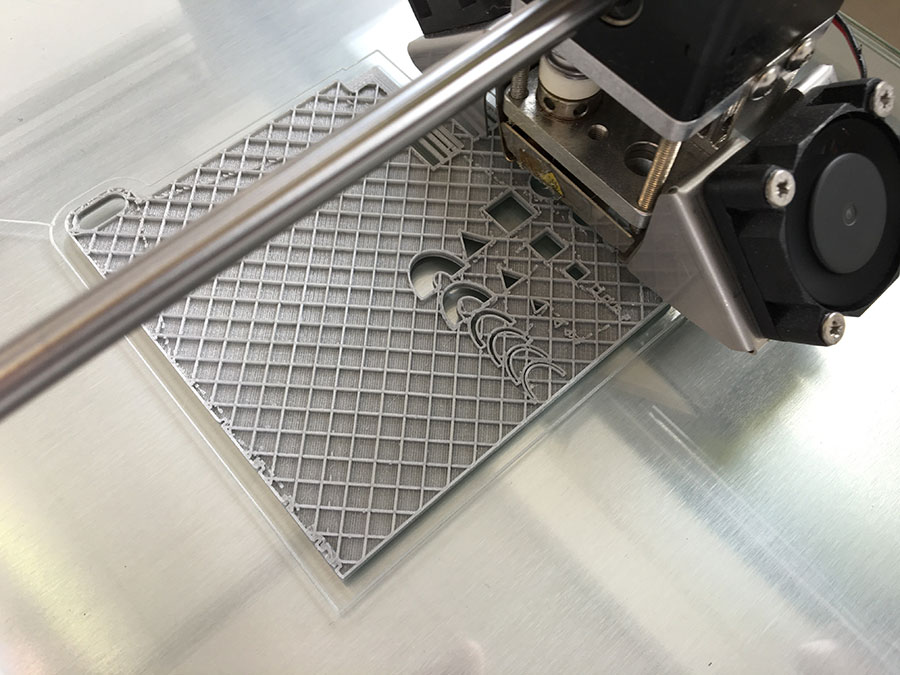
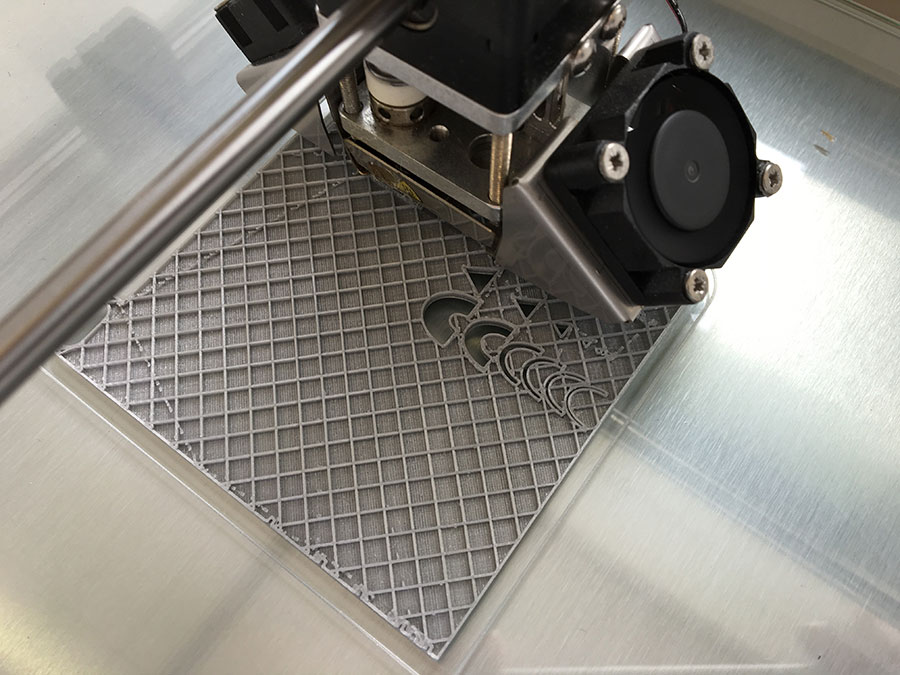
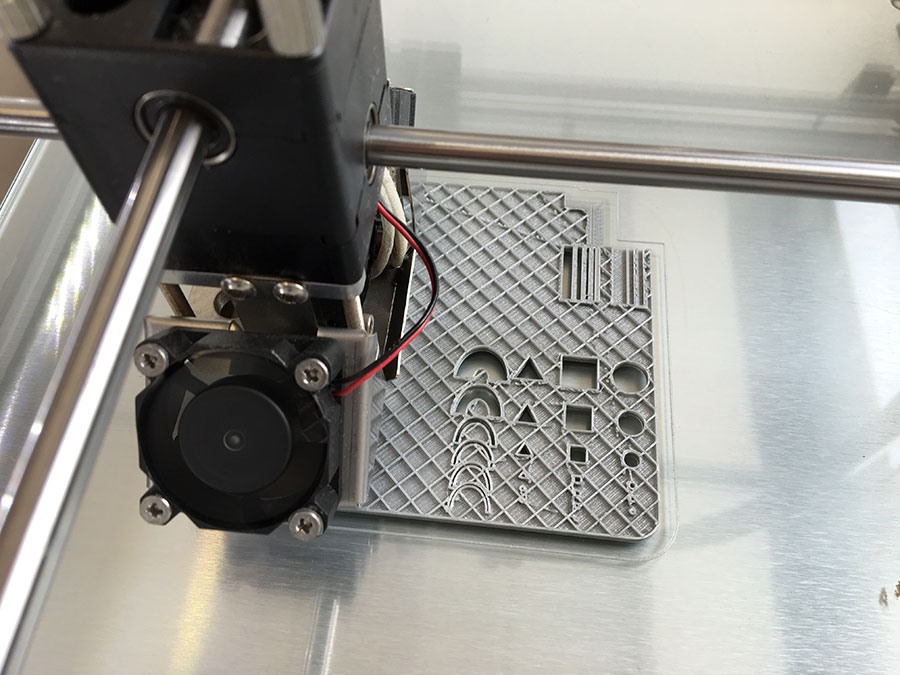
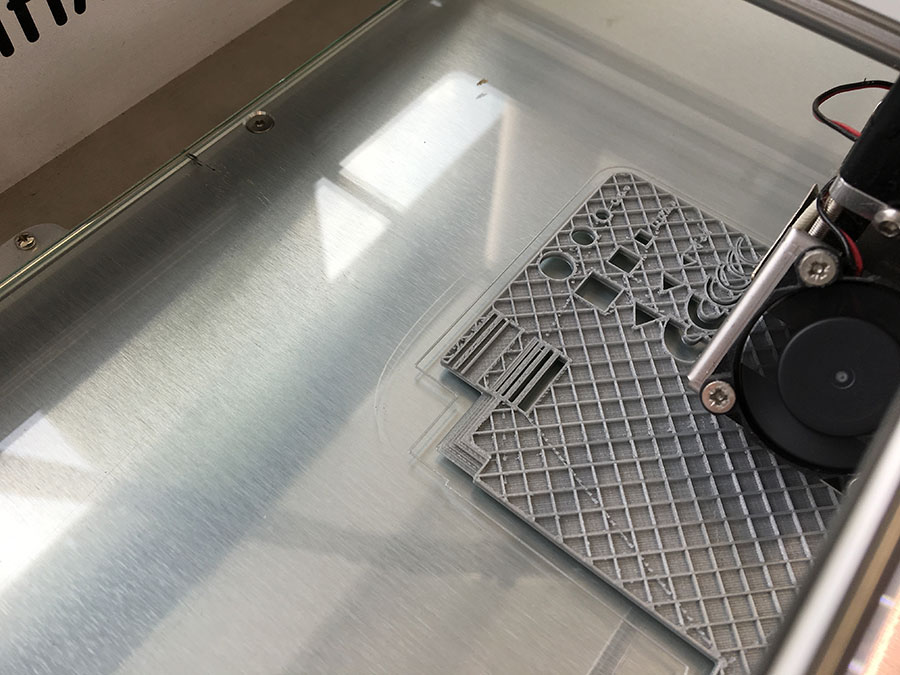
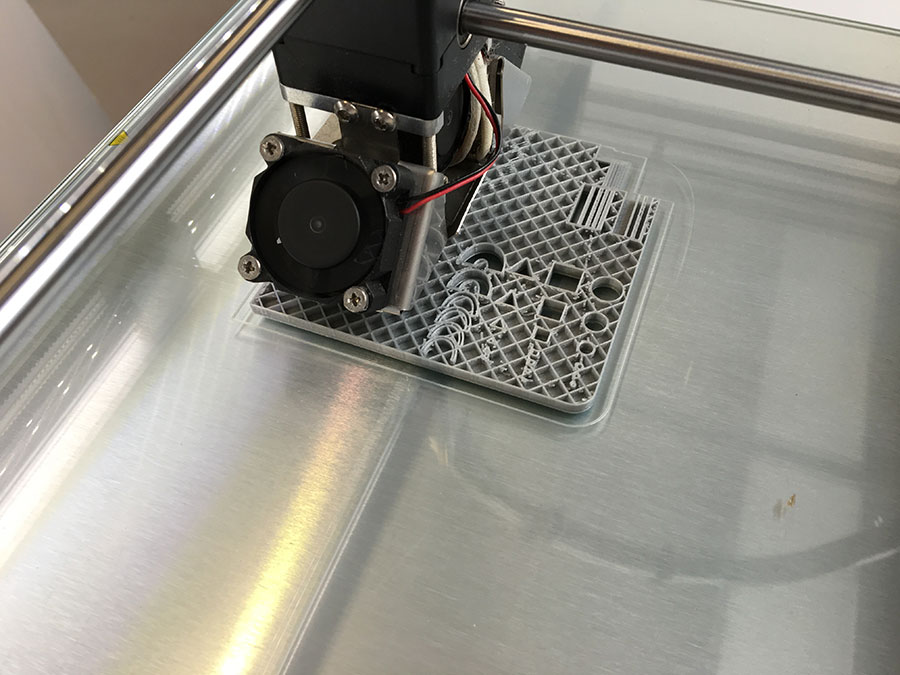


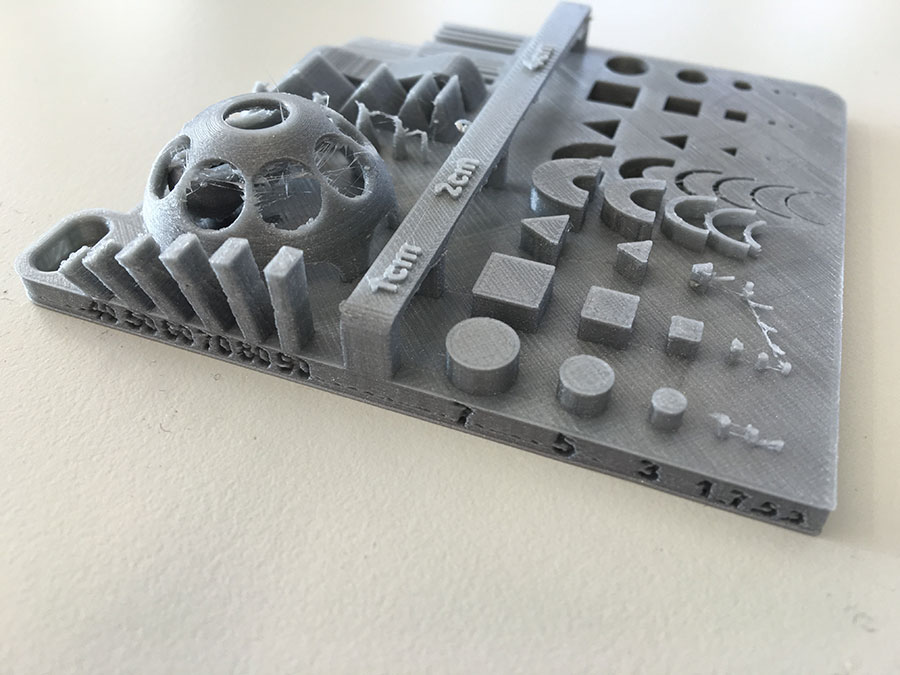
Except for the little ball within the dome the print worked out quite well.
Limitations of this pattern in the Ultimaker 2 are:
- Hangovers (without support) tend to droop especially on the 2cm and 4cm bridges.
- The peaks of the cones tend to smut.
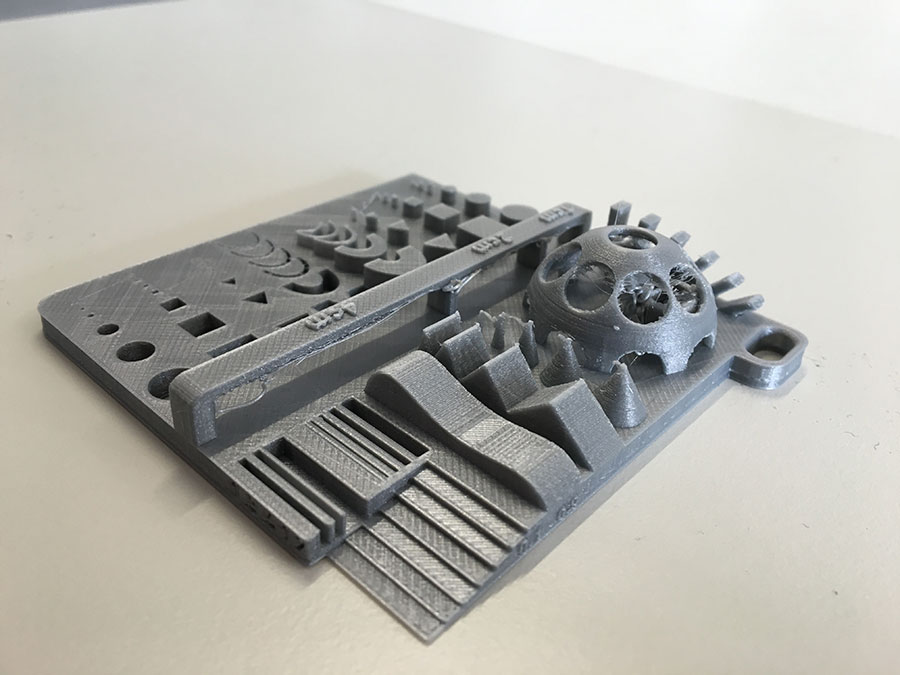
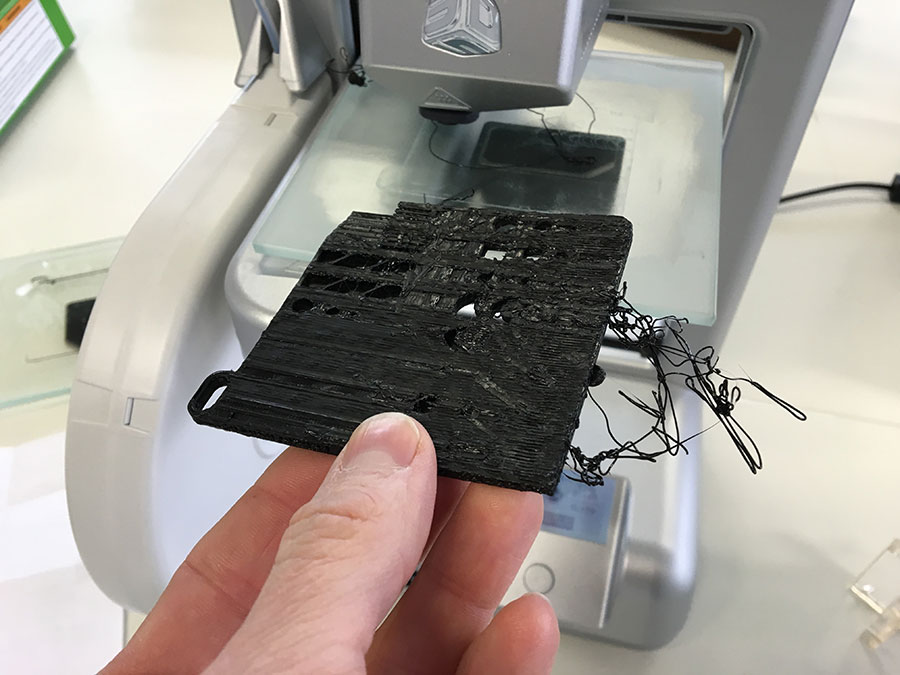
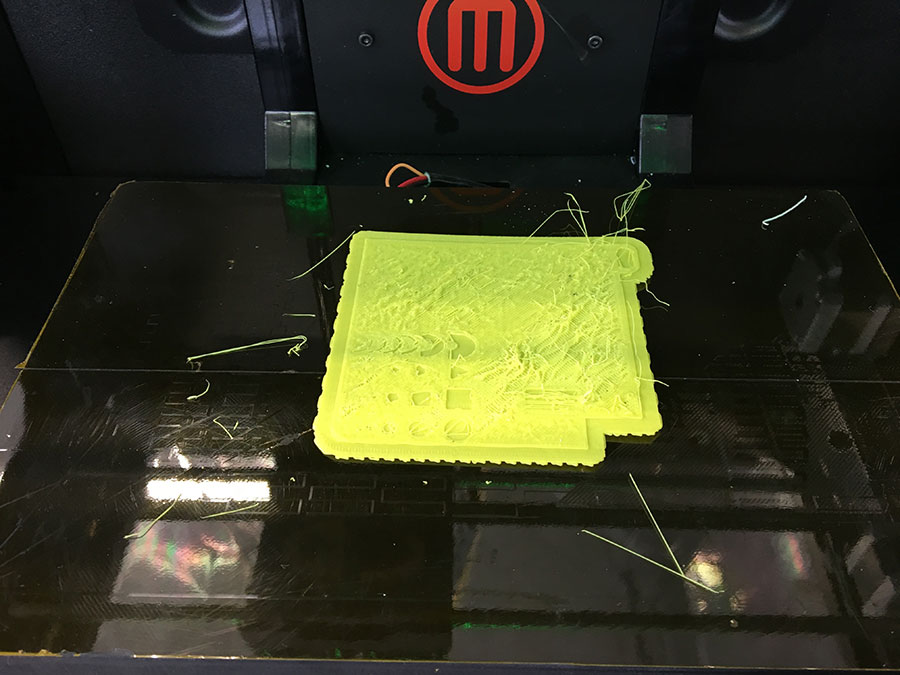
I also tried the 3D Systems Cube 2nd Gen, the RepRap Mendel and the Ultimaker 2X. However, due to various reasons most prints on the Makerbot and Cube failed. The Makerbot simply stopped to extrude without reason. The print on the Cube startet quite well but the object on the cube did not stick to the surface
Thus, We further have to investigate on their parameters.
Download
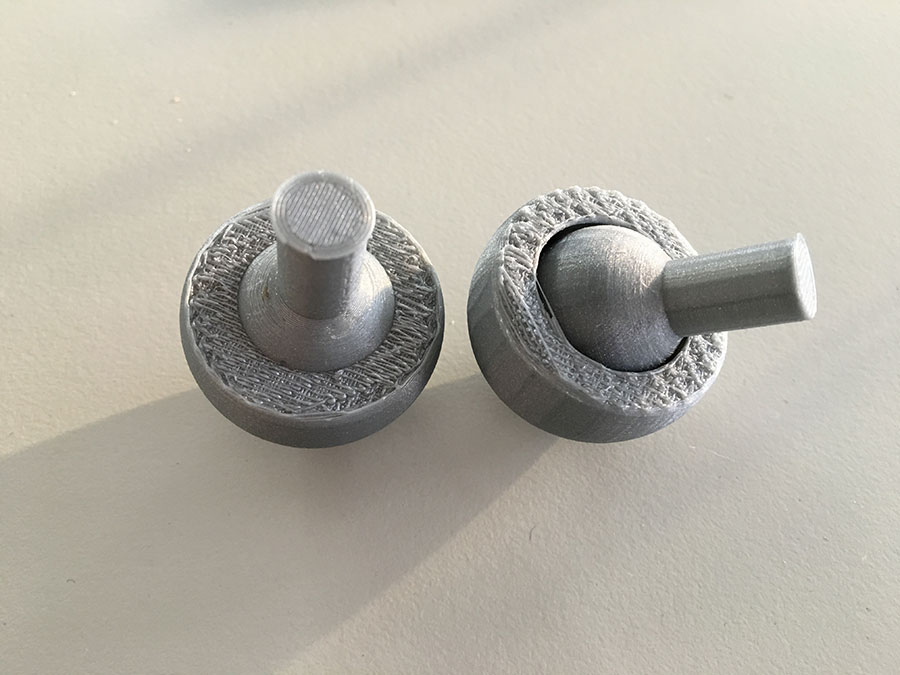
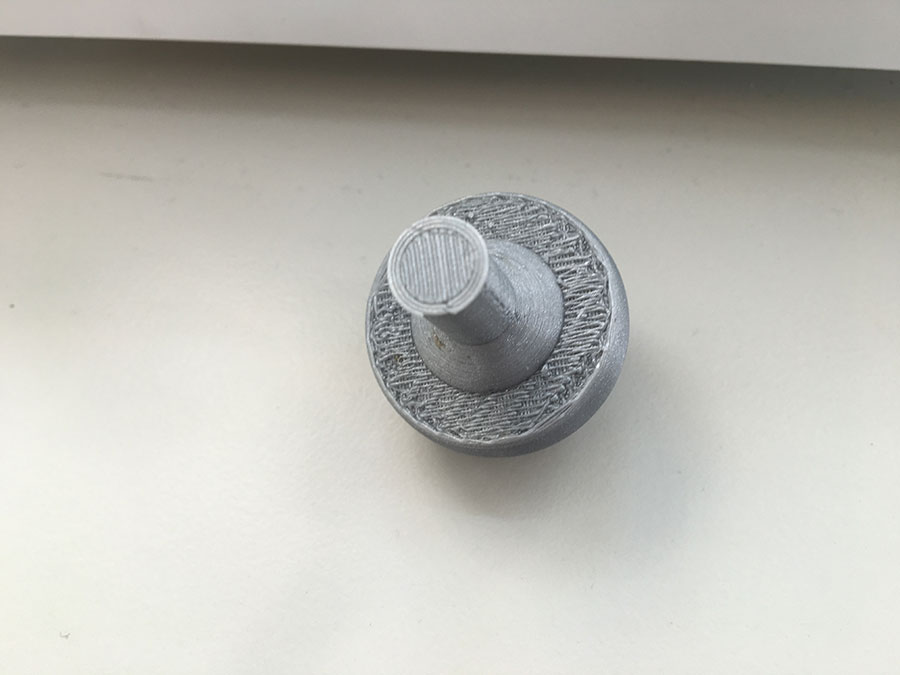
MAKE a 3D Object that could not be made subtractively
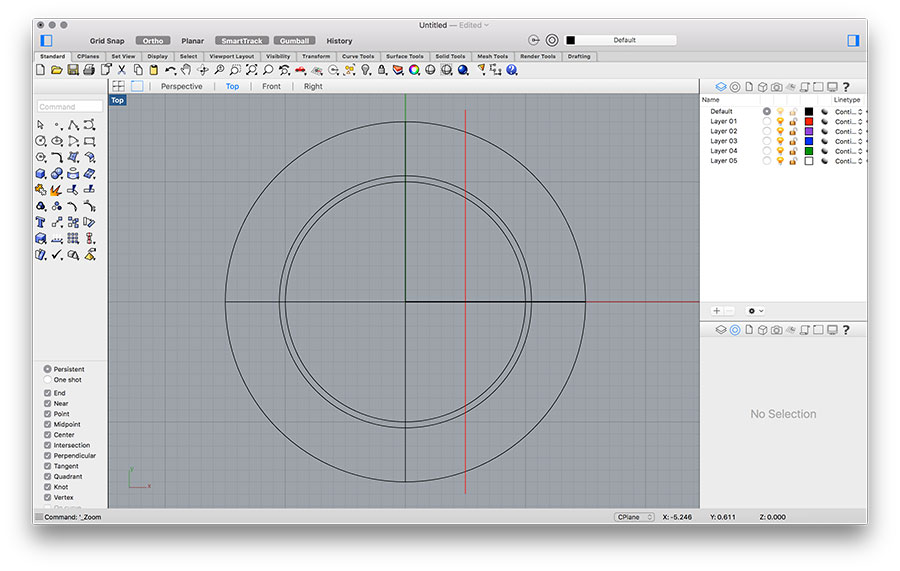
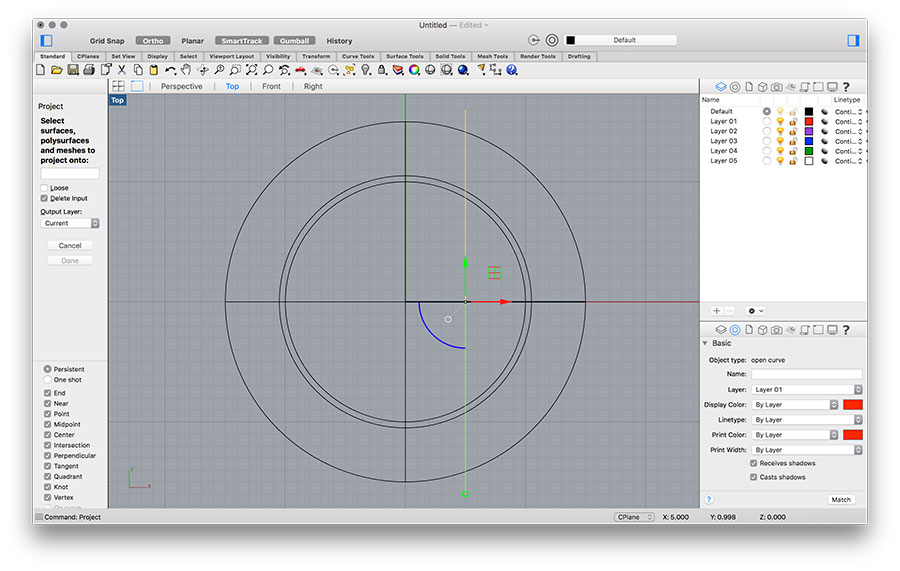
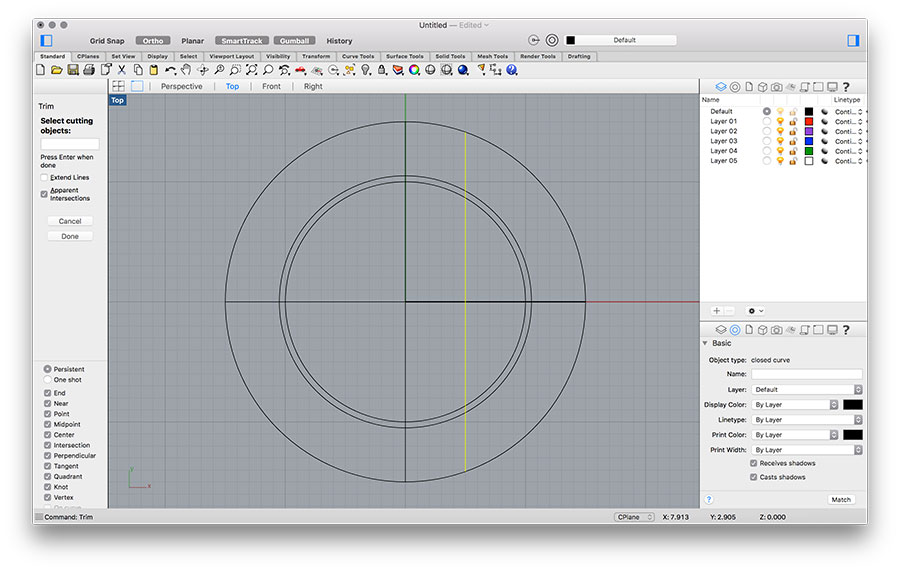
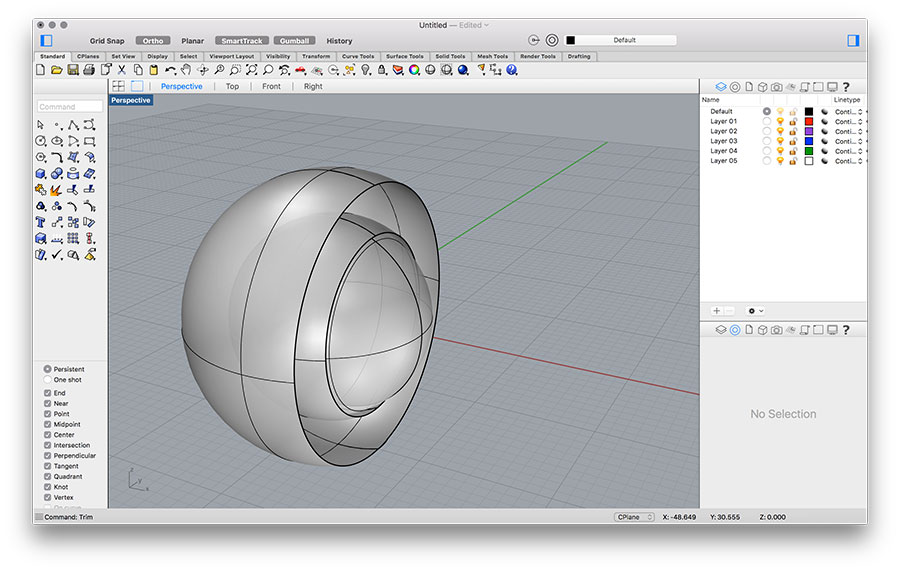
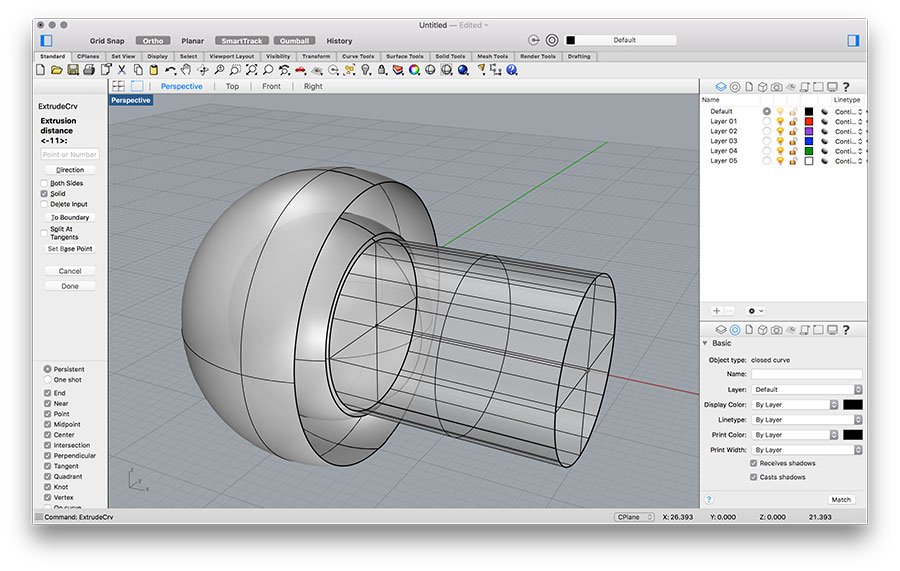
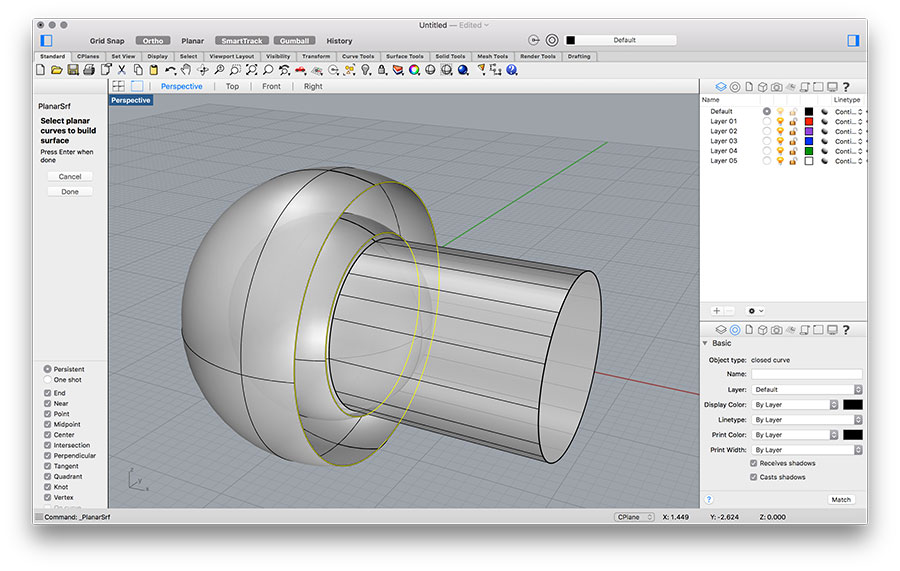
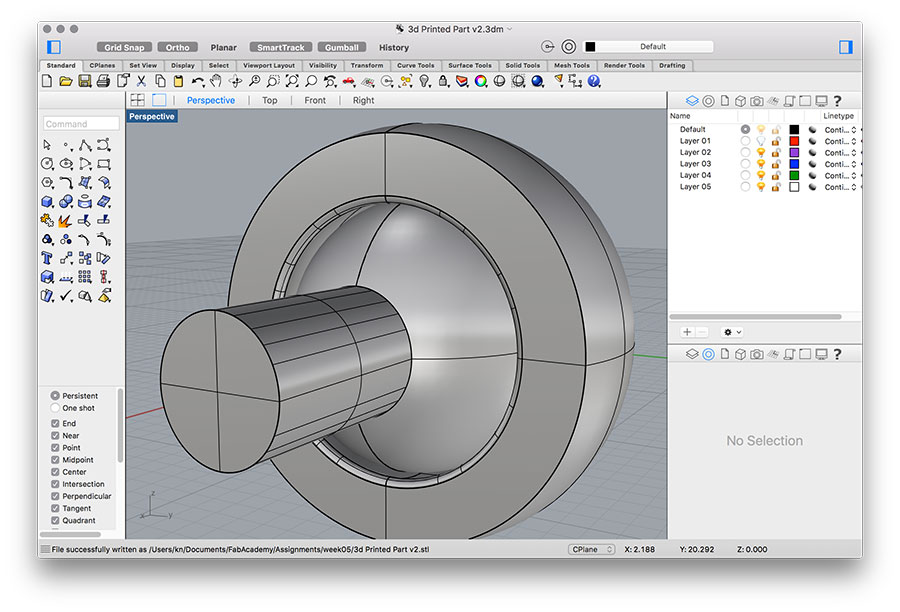
I used Rhino to create such an object. I did this by creating 3 spheres (0,0 in center) whereas the 1st and second sphere do have a distance of 0.5mm as shown in picture 1. Then. I created a polyline, which I have projected ('Project') onto the spheres for trimming. By using the trim command ('Trim') I cutted the objects as seen in picture 4.
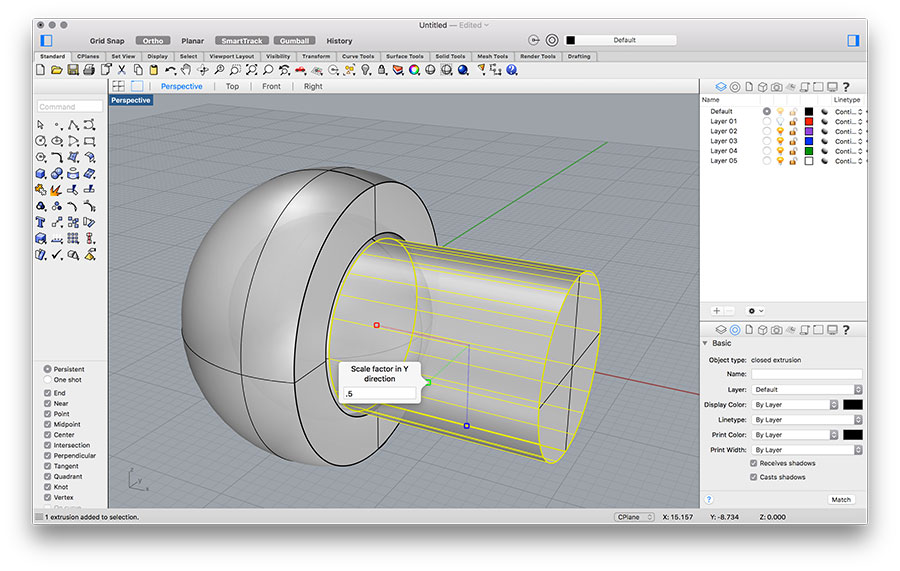
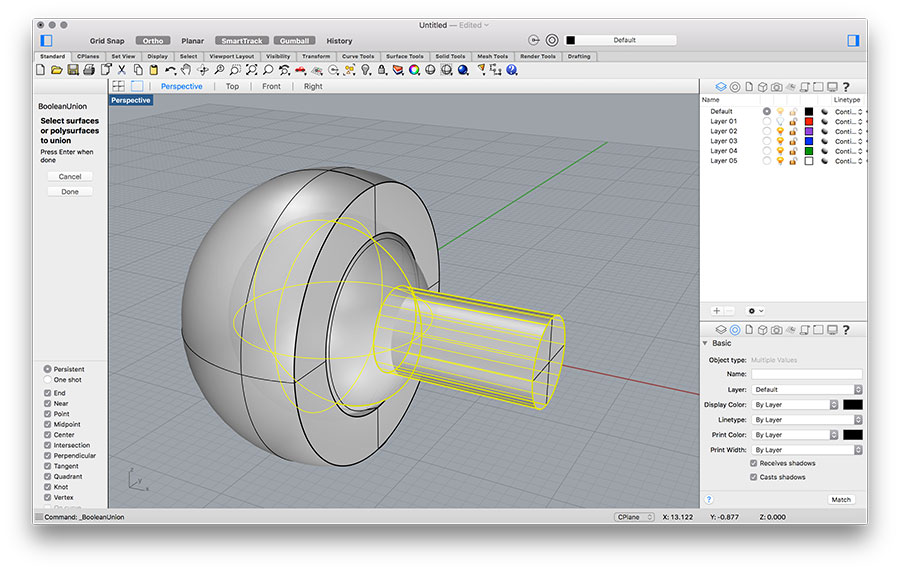
I created a cylinder, scaled it and combined it ('BooleanUnion').
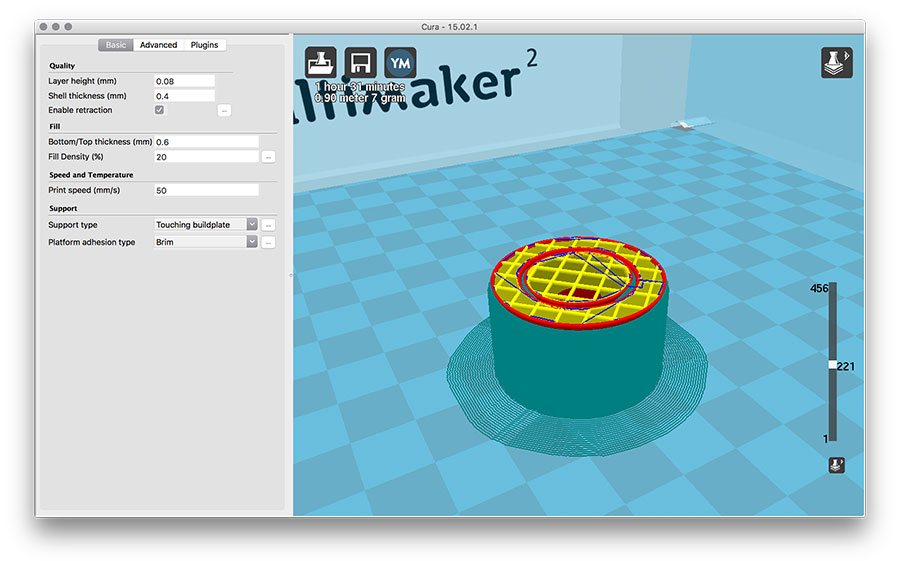
The file was exported as .stl and opened in Cura.
Following parameters I used for printing:
Layer height: 0.1mm
Shell thickness: 0.6mm
Bottom/Top thickness: 0.6mm
Fill density: 20%
Support type: everywhere
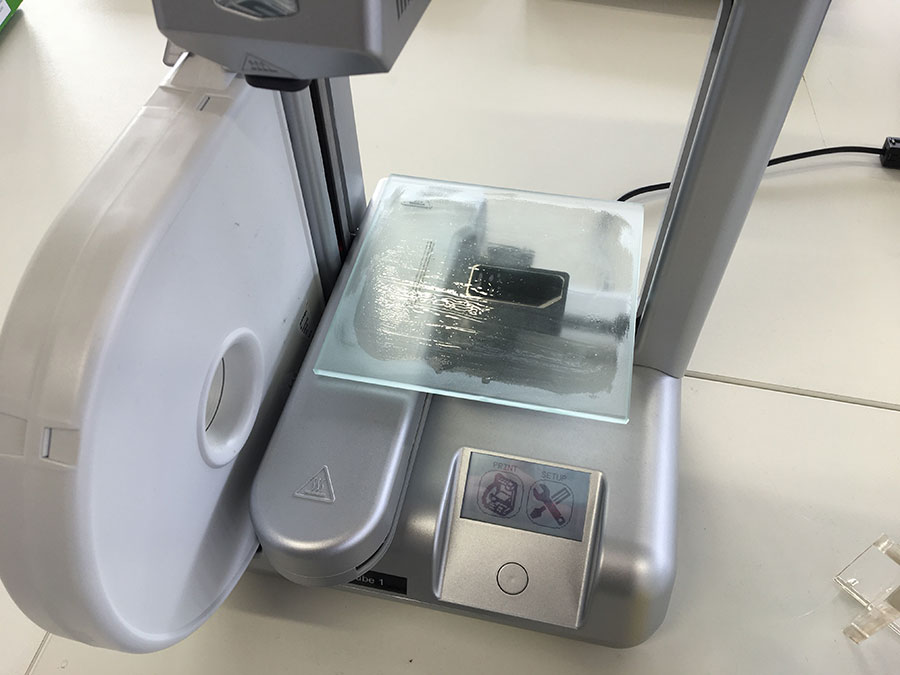
The first print failed because the support material did not stick to the bed. Thus, I had to stop the print and did it with 'Brim' (Cura option).
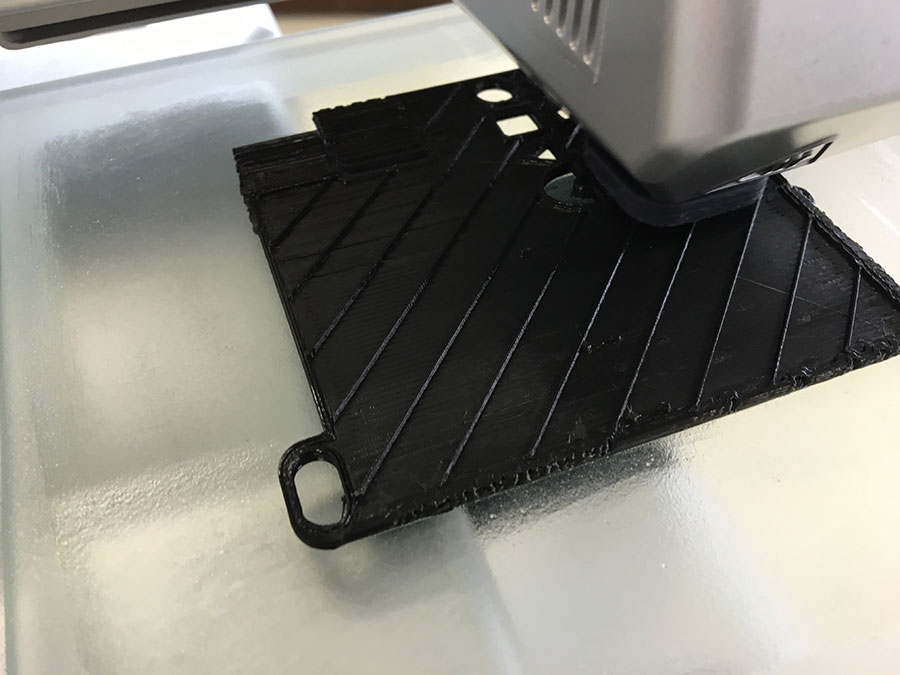
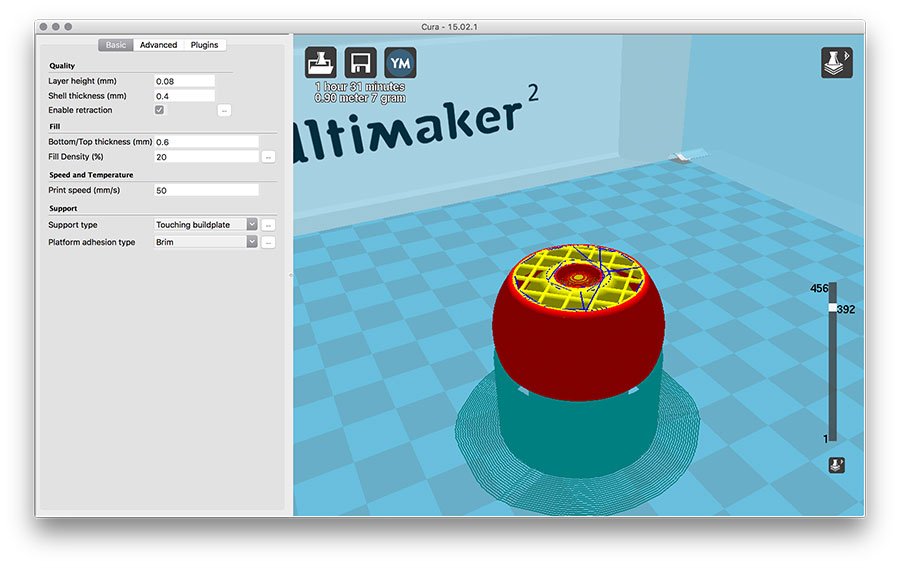
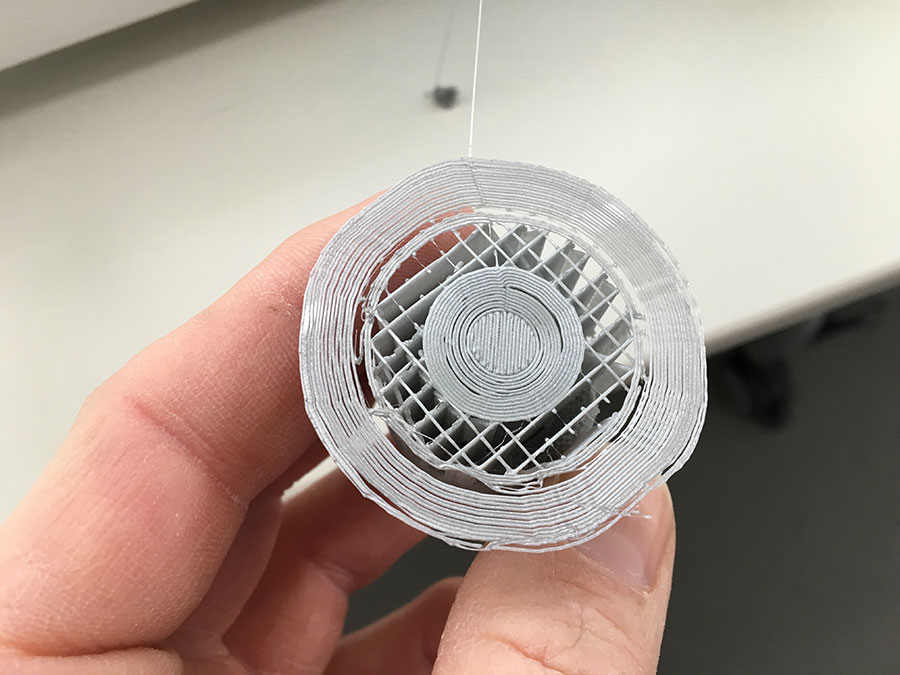
Now, the object was printed but other than expected. It turned out that Cura did not separate the two objects - and I did not check before. In Cura I then used the layer-view and sliced through the model. I then could see that it was interpreted as one singe object. I tried several manipulations of parameters (wall thickness, layer height, etc.) but couldn't make it two separated objects.
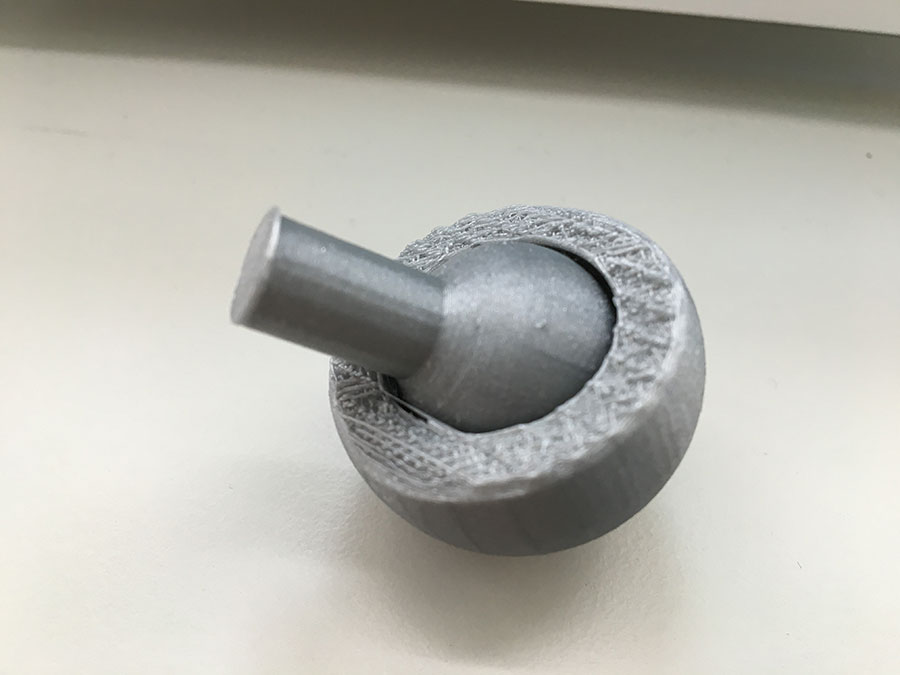
Finally, I had to change the model. Instead of using 0.5mm distance between the 2 objects I set it to 1mm. Consequently, the resulting objects will have 1mm distance on each side which will make them quite loose. Anyway - I continued.
Before printing I checked the layer. Now the objects were separated.
Following parameters I used for printing:
Layer height: 0.08mm
Shell thickness: 0.4mm
Bottom/Top thickness: 0.6mm
Fill density: 20%
Support type: everywhere
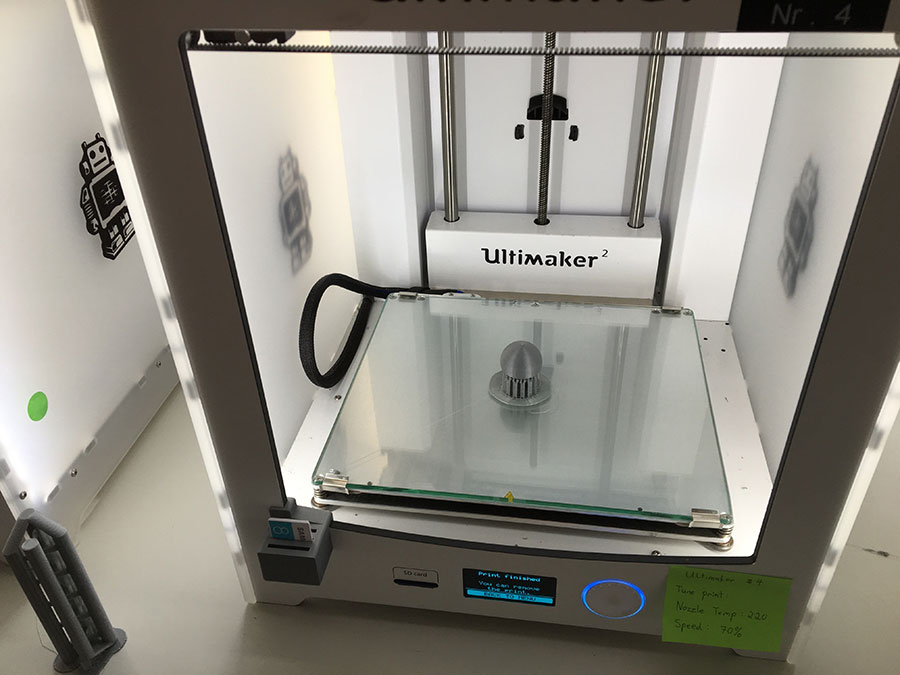
Finally, I made an object that could not be made subtractively. Here it is:

Download
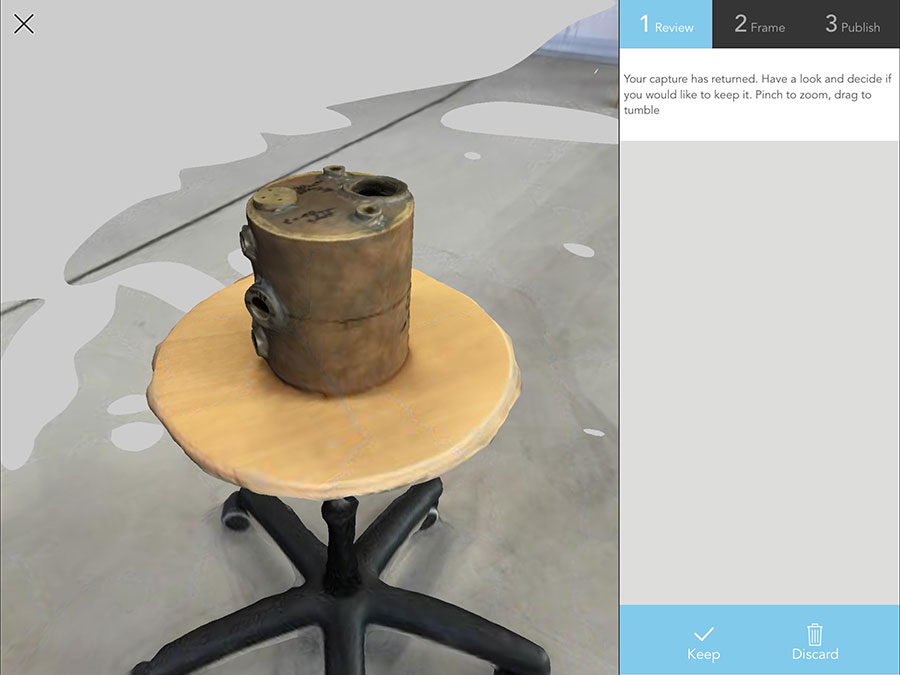
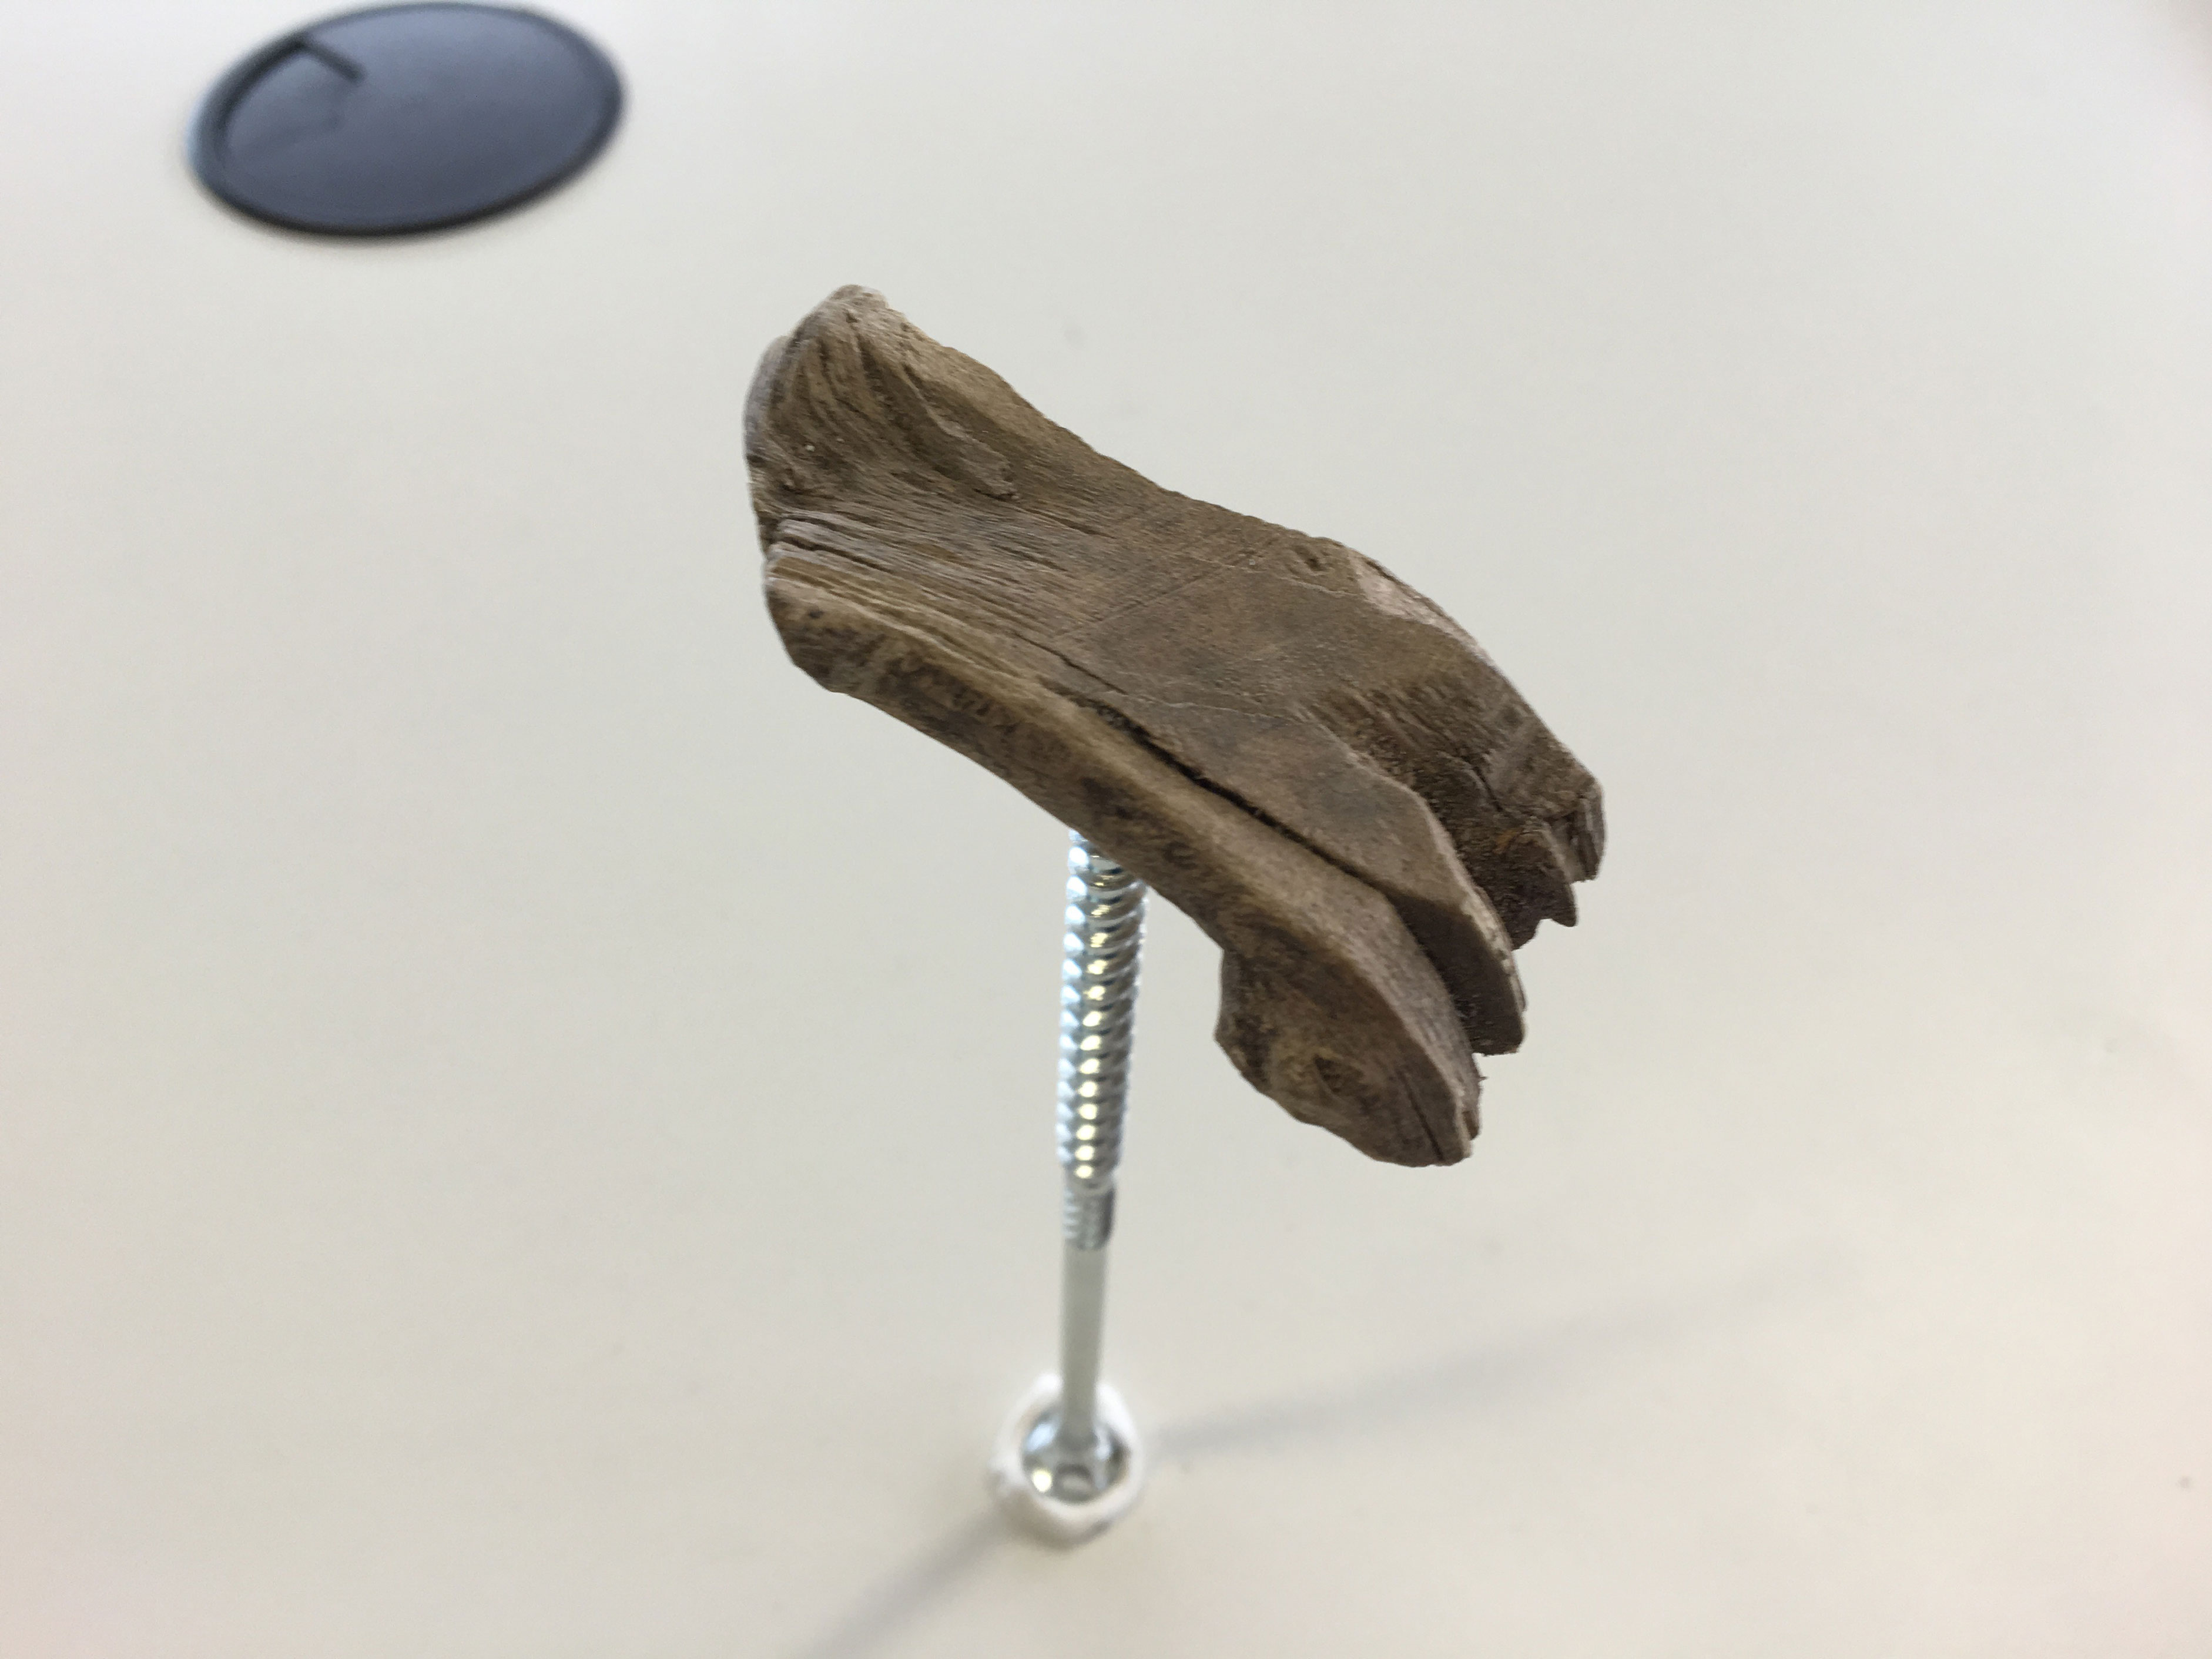
MAKE an Object you have 3D scanned (and print it)
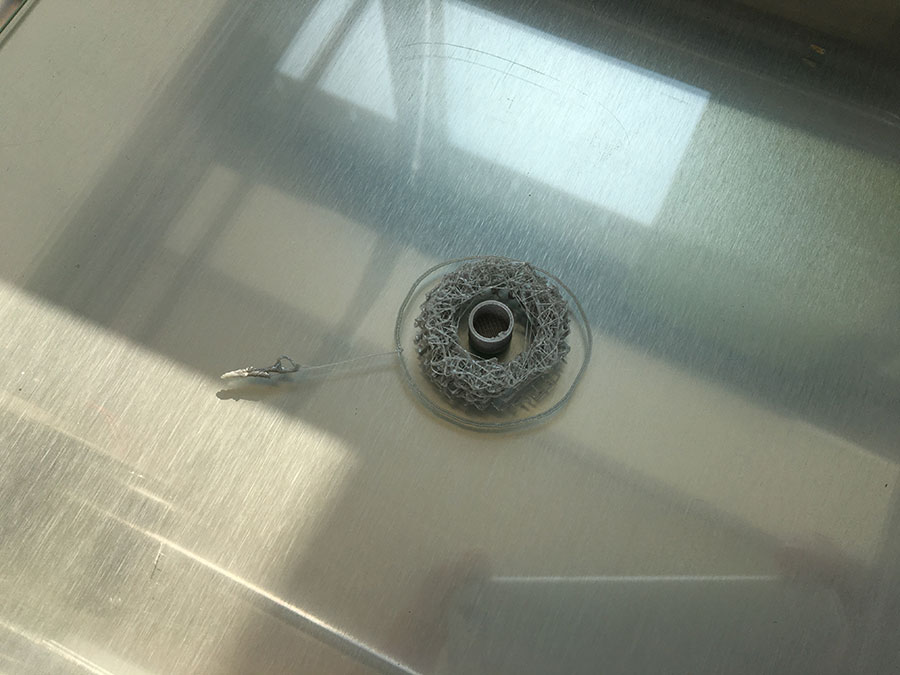
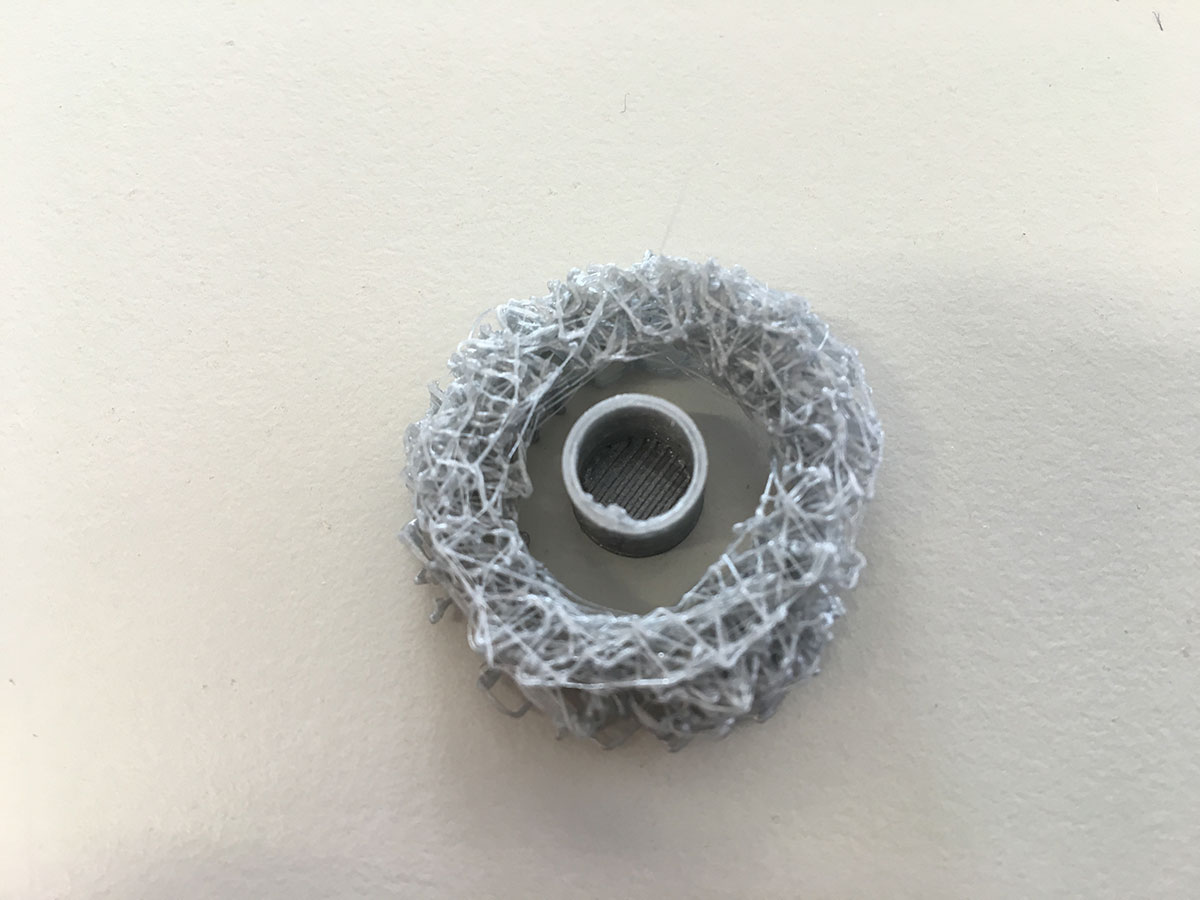
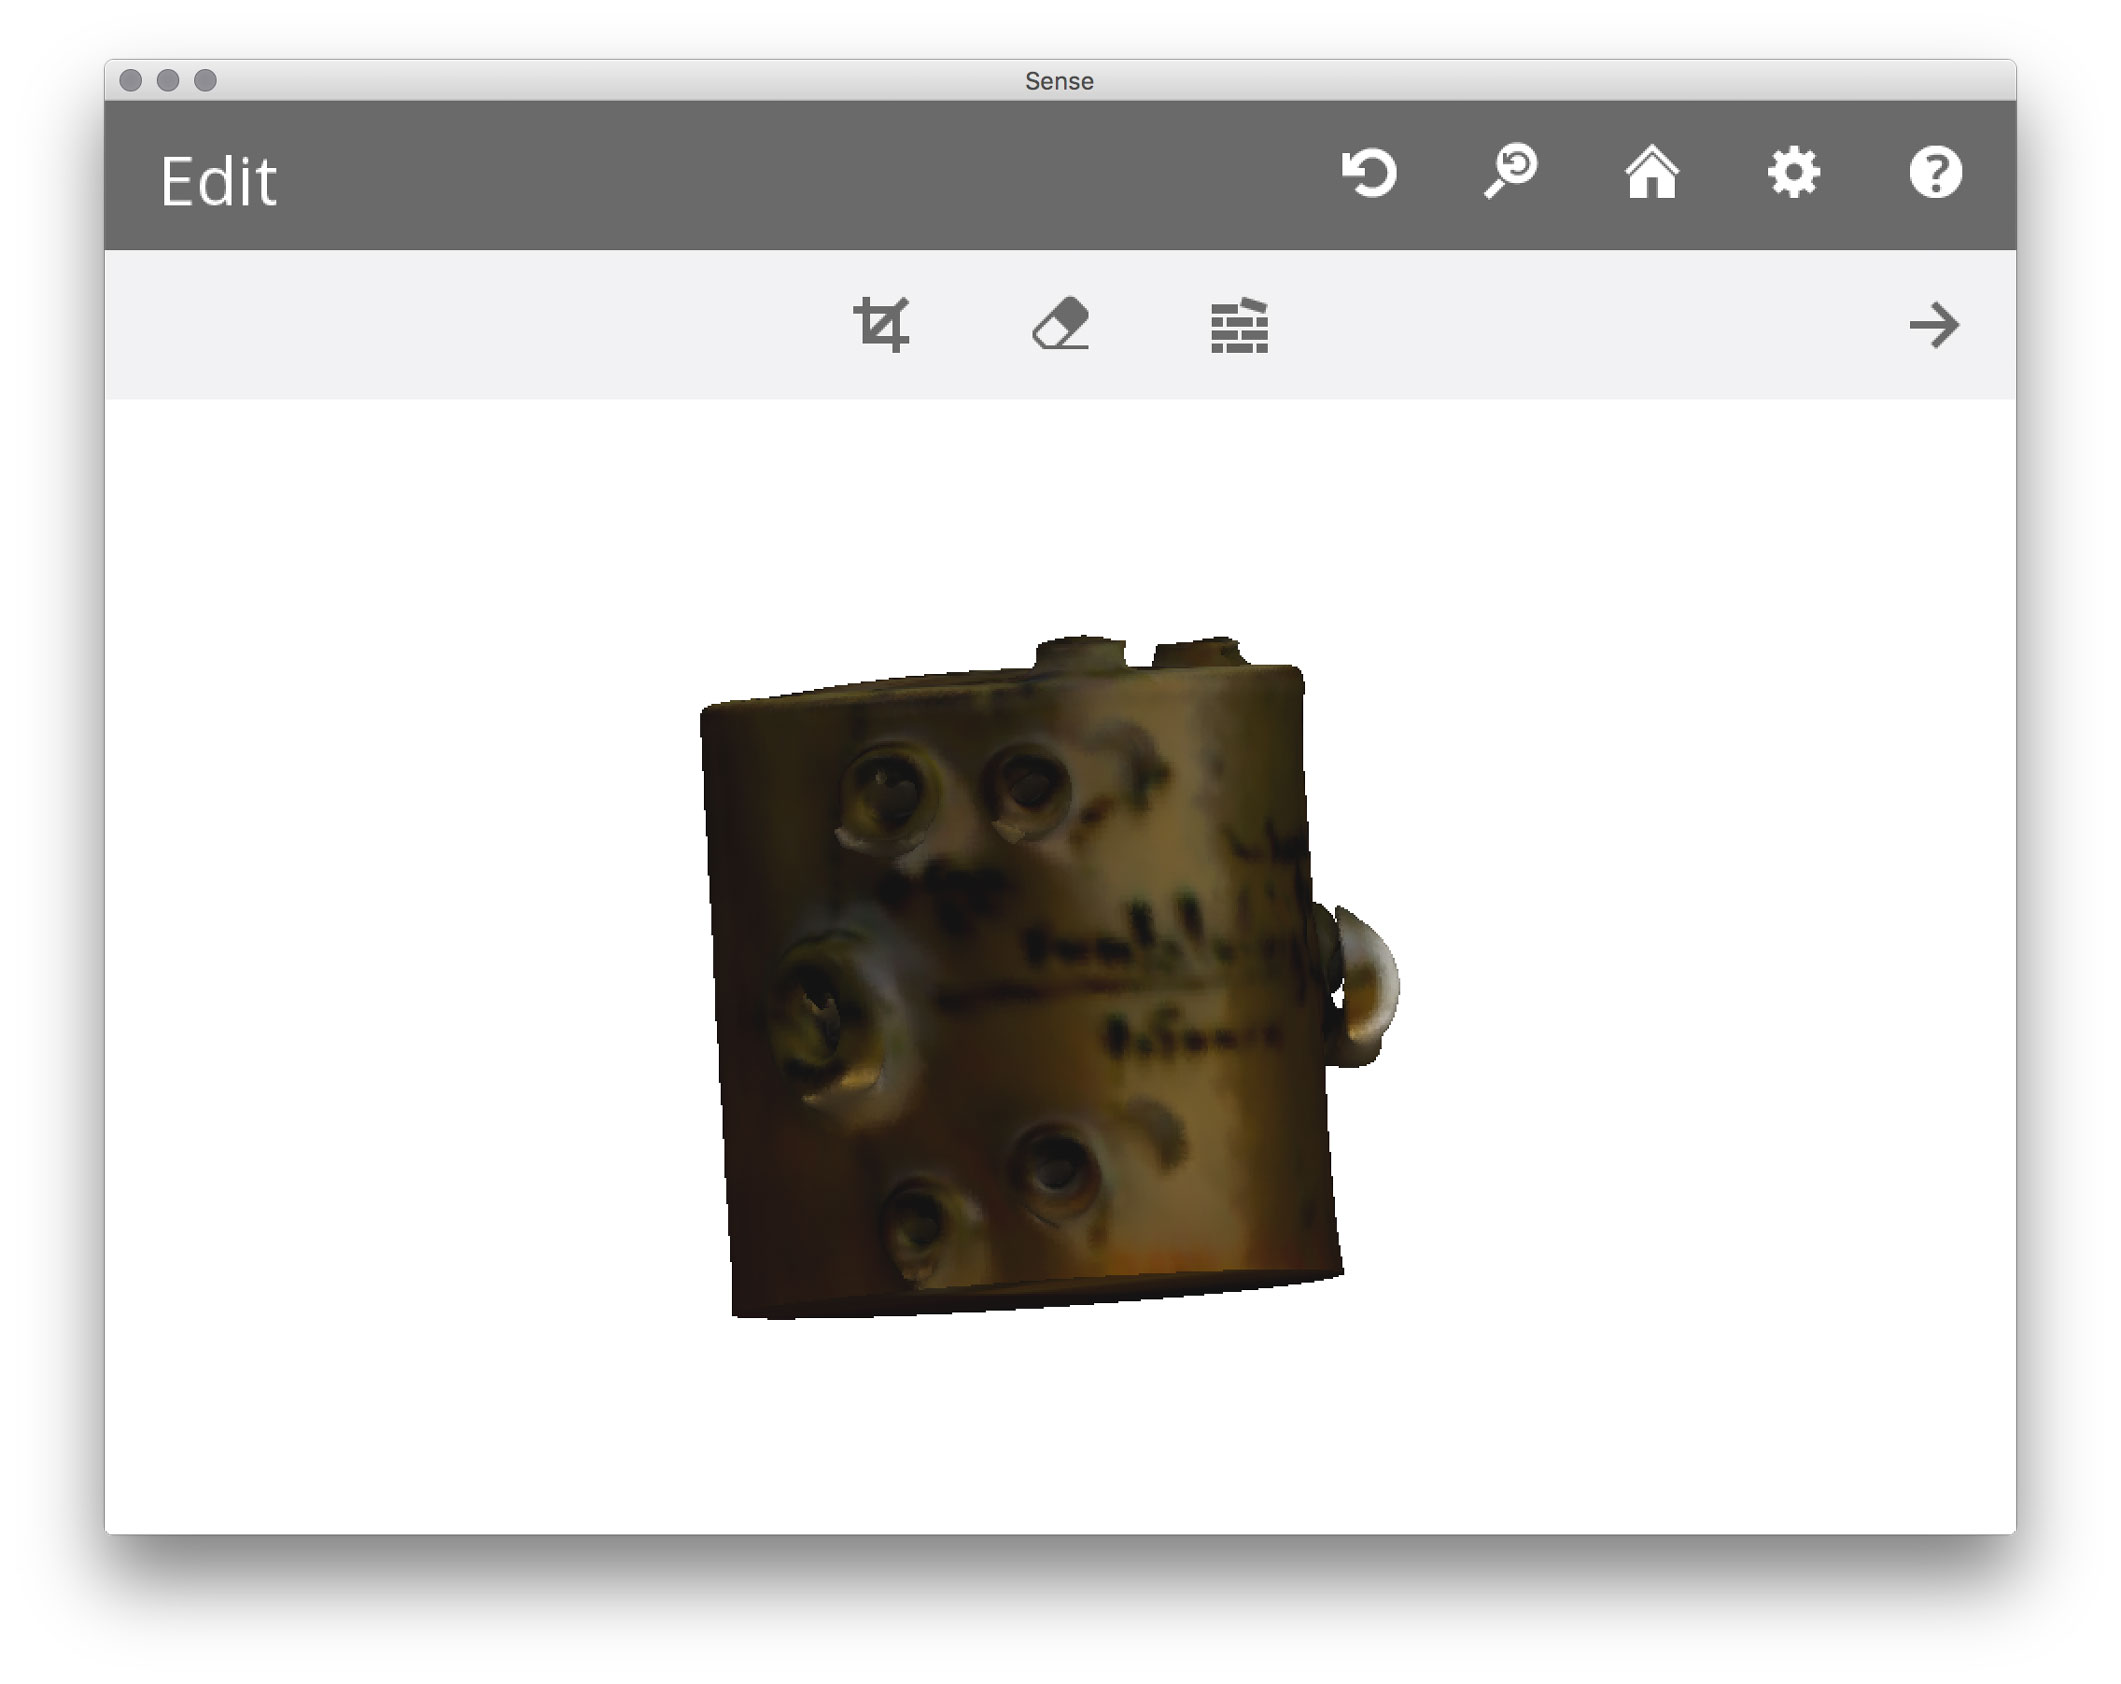
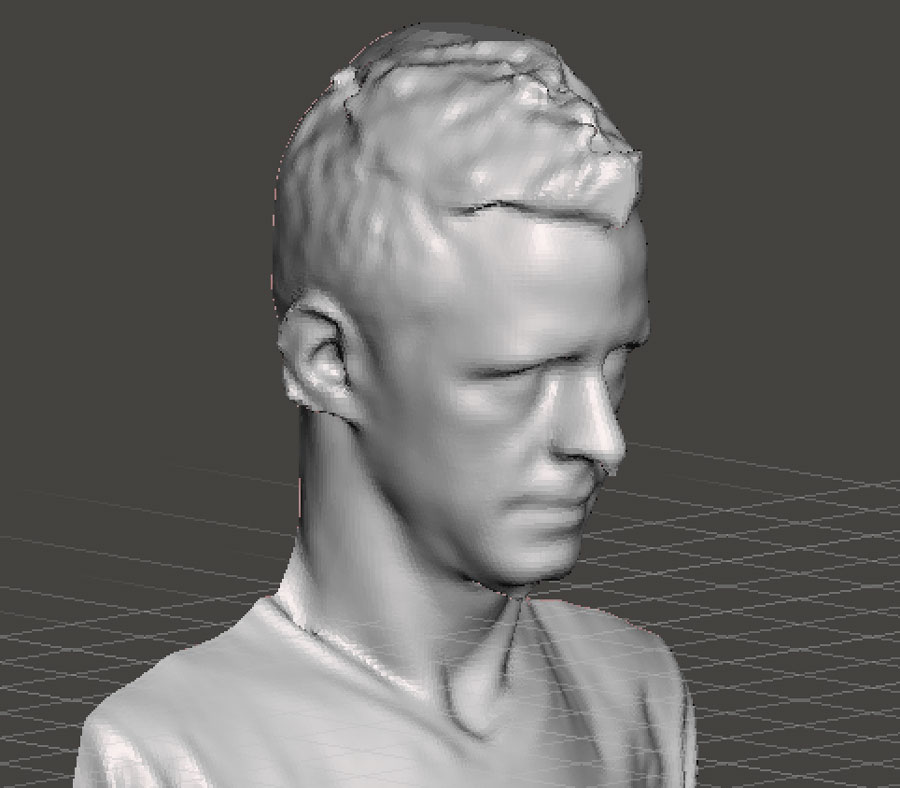
I used 2 different software to test 3D scanning: 123DCatch from Autodesk and Sense from 3D Systems (along with the Hardware of 3D Systems Sense Scanner).
First, I tried 123DCatch for scanning. It is a free App that creates a 3D model based on photos you take of an object.
In principle it works quite well - except for the fact that it needs ages to upload all images to the cloud. You have to be patient and wait for the finalization.
The scan below is a tank of an espresso machine.
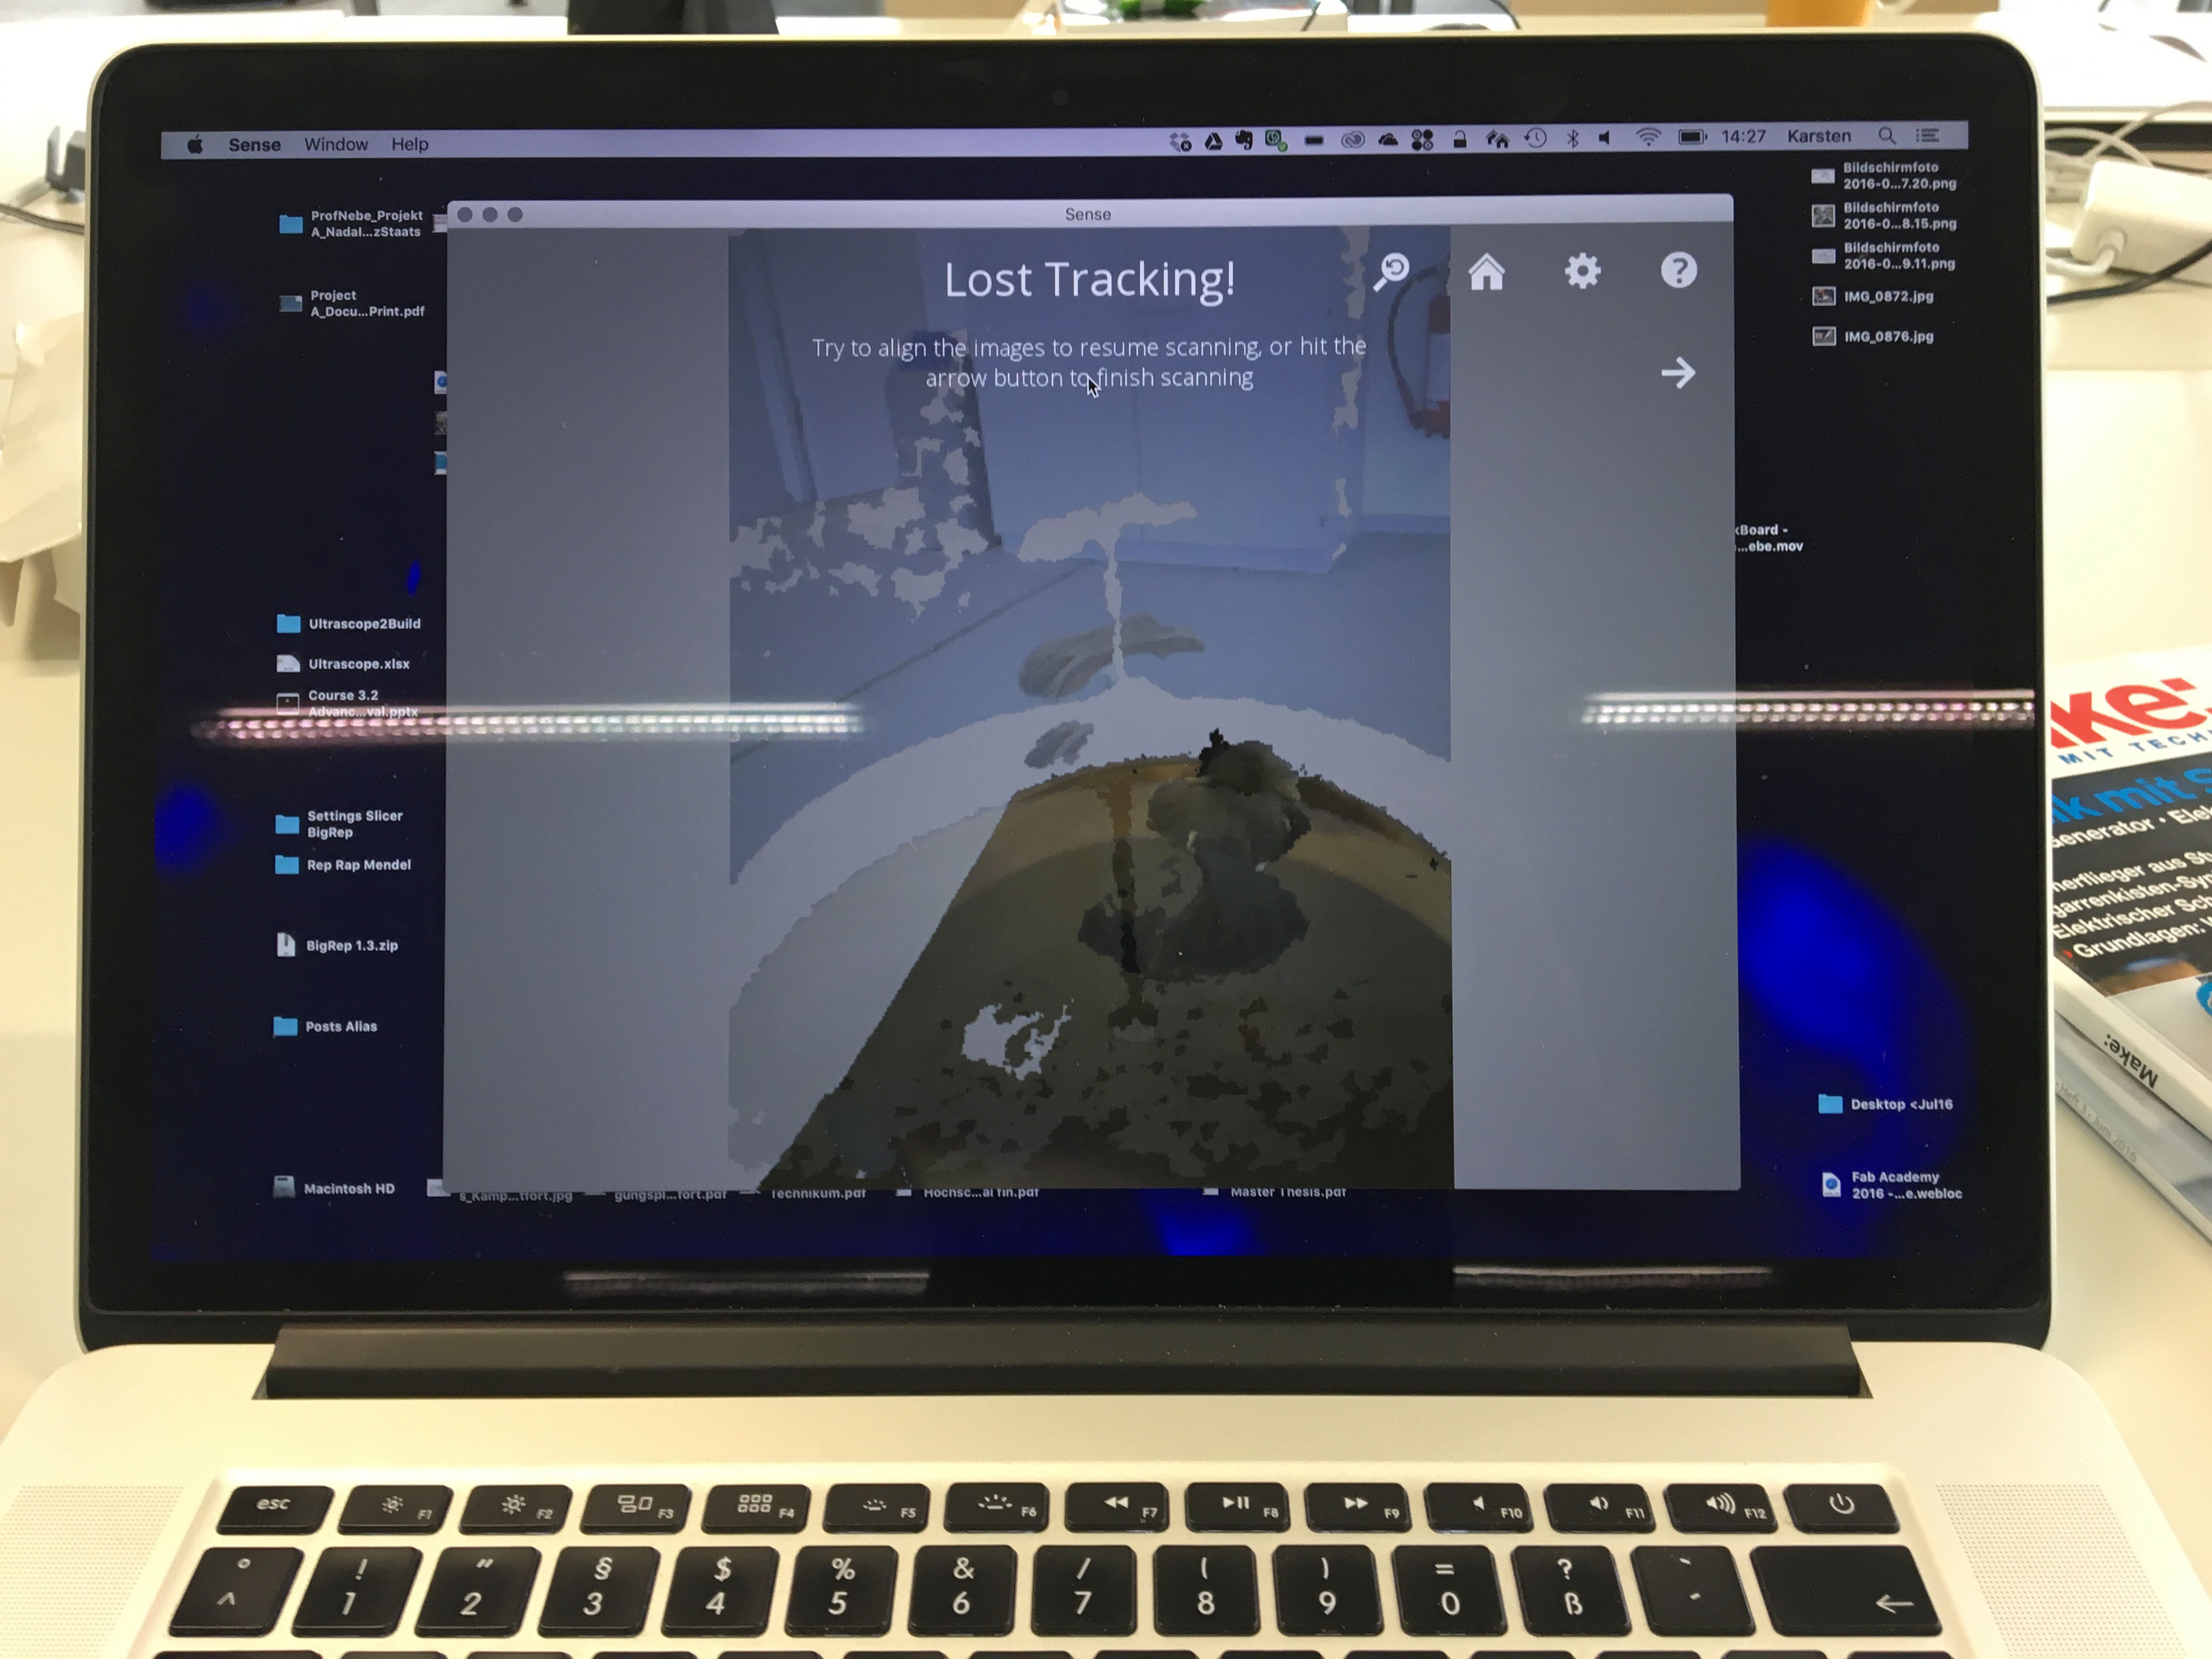
As second option I tried the Sense Scanner from 3D Systems. You simply have to follow the workflow offered by the software. Scanning small objects often causes difficulties, because the scanner lose track.
Download
Take Away's
- Always check your model before printing! E.g. in Cura, by using the layer-view or another slicing program.
- Know your printer. You need to know the parameters. Make a test-print using a test object that shows the printers strengths and weaknesses.
- When using the Sense Scanner, objects should not be too small because the scanner than often looses track.