
2016
Rudrapalsinh Solanki
Week-5
3D Scanning and Printing
Assignments
1. Design and 3Dprint an object
2. 3D scan an object and print it.
3D Scanning
For scanning I used a software called agisoft photoscan. This not the best technique to do 3D scan but I wanted to explore the technique.
The first step contains of taking the pictures of the object that we need to scan.
Agisoft PhotoScan (commonly known as PhotoScan) is a professional tool for a photogrammetry pipeline. It is a stand-alone software product that performs photogrammetric processing of digital images and generates 3D spatial data to be used in GIS applications, cultural heritage documentation, and visual effects production as well as for indirect measurements of objects of various scales.
Install the free version of the software here....Link
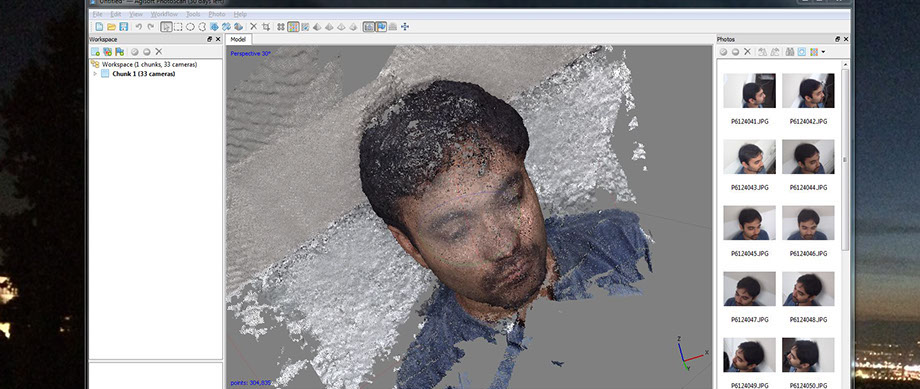
Once the software is installed in the system. The software window will look like this:

Select an object or an element . Here in this situation I decided to make my own face mesh. So Tapan helped me in taking pictures of my own self from various angle.
The important thing that I kept fixed was the back face. I just wanted the front part of my face scanned, so I kept white background fixed.
Tapan took 25-30 pictures of my face from various angles but keeping some area common in all the pictures.


Once you take all pictures and place it in the software it merges all the images and create a mesh surface with all the colors and surface modulation.

You can select/insert or delete any picture from the file and see the changes that it gives simultaneously. The pictures are now the surface feeding source to the whole mesh created.
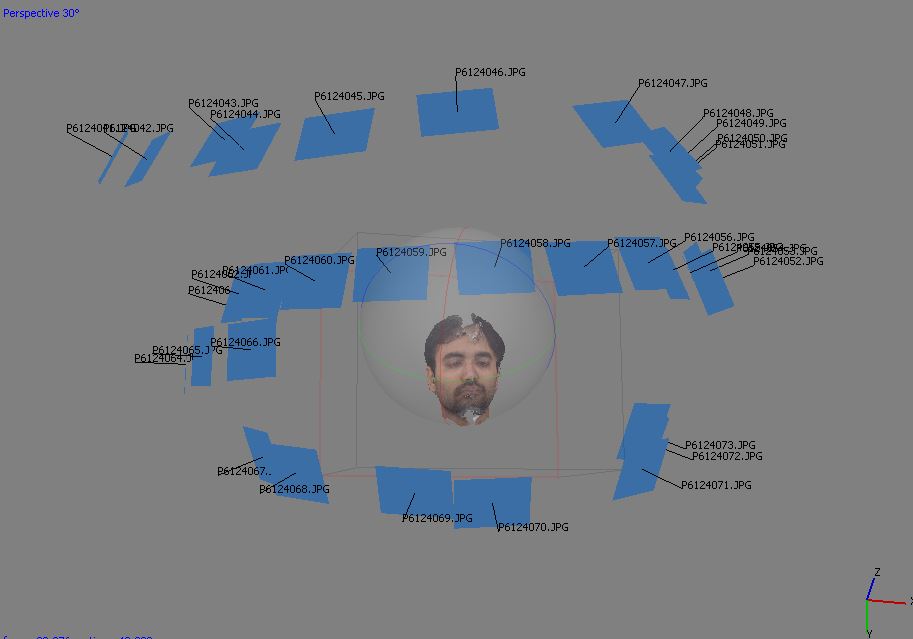
The pictures that are used are stored as memory and the mesh surface has the same color and texture that the pictures will have.
The surface needs to be cleaned before directly printing it. We can rotate and see the surface from all the sides till the information is complete.
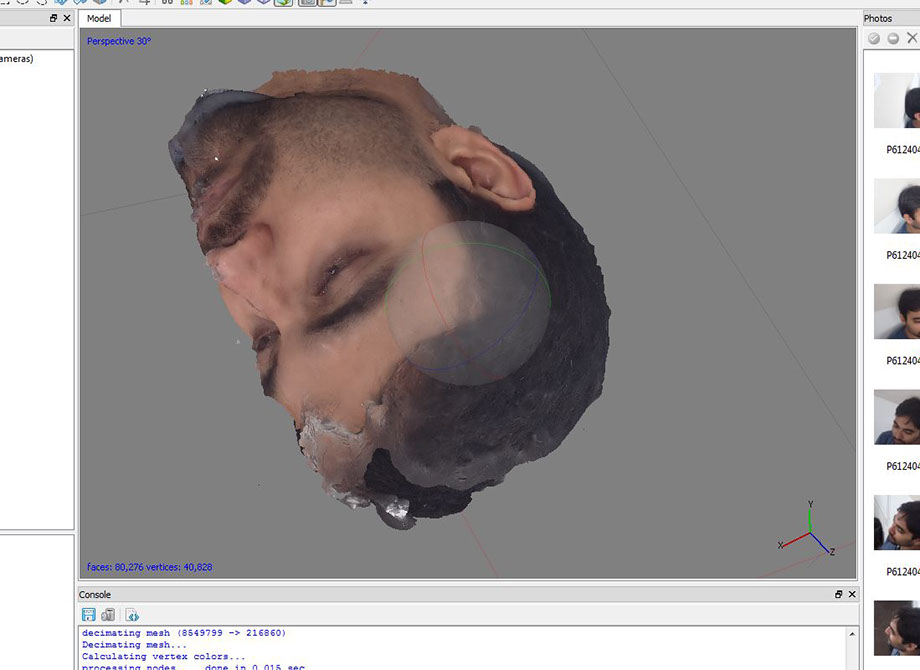
After the mesh is created than that mesh is taken in rhino. Once the file is taken to the rhino It is modified and edited as the mesh is first converted to the nurbs surface and than all the small details which were not seen in the scaned mesh is added.
.jpg)
The nurbs surface is than modified and is made ready for the contouring. The surface is than sectioned in the xz plane. The layers of the surface will be the curves that are making the surface.
.jpg)
I was working for this design earlier but I wanted it to take it further so, I decided to modify the design and use the modified design to print it.
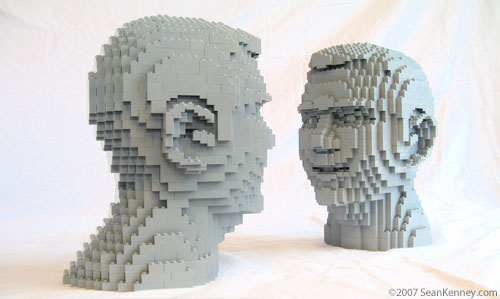
These are few examples that Inspired me to work:

I modefied the scanned face and them made this :
Once the curves are defined, then the bricks are arranged to it . Manually it takes a lot of time to arrange all the bricks/blocks. The main task to print the surface was to give the surface a thickness to build it.
.jpg)
Than I switched to grasshopper for the scripting of the surface. I used my another script for placing the block along the curve defined. And the final surface has many variation in the blocks placed to make the surface.
.jpg)
Once the scripted codes from the grasshopper is ready, the rhino file is now transformed accordingly the grasshopper.
.jpg)
.jpg)
All the files from RHINO are made at first and than stage wise saved as .obj file/ .stl file formate.
The 3d .stl files are opened in Cura.
The development of the files in Cura is as follows:
461x259.jpg)
.jpg)
.jpg)
.jpg)
The .stl file saved is opened in Cura and the printing setting are made in the file. This Face does not have a flat surface so I aligned that to base in angle and added base and supports in the file from Cura.
The file once all the setting are made than It is sace as .gcode file formate for 3D printing.
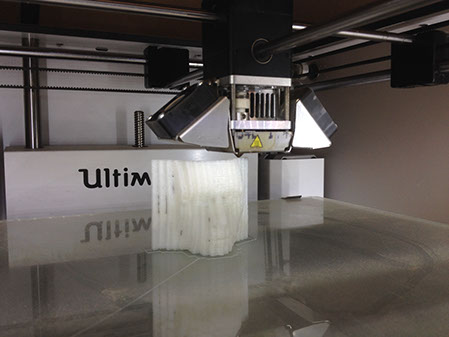
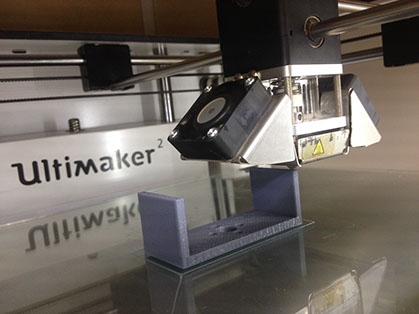
The Ultimaker printer uses the gcode files for printing.
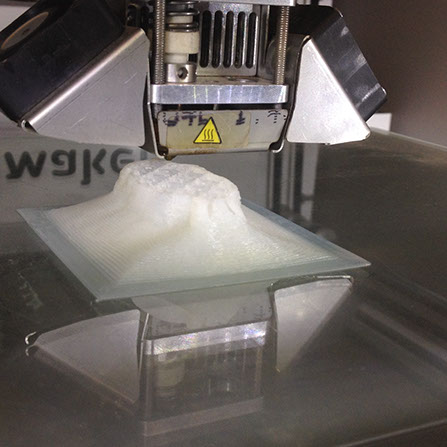
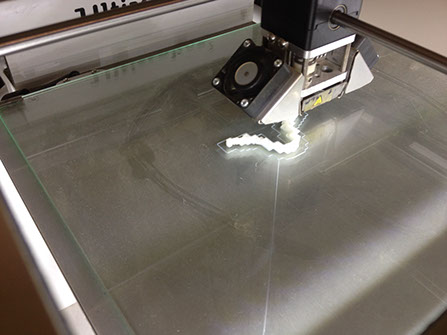
Stage wise printing of the face.

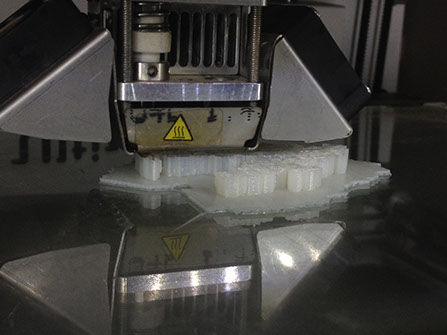
The scanned face that I directly transported from the Agisoft Photoscan didn't work. I figured out that the file that i exported to cura was a mesh file (The face was just a plane surface without any thickness so It didn't work as there was no thickness that had to considered an printed so it just printed the total area of the face from cura.
Once the Initial face is made than the second phase surface with the extended surface is taken and opened in the Cura.
.jpg)
.jpg)
.jpg)
.jpg)
The .stl file saved is opened in Cura and the printing setting are made in the file.
The file once all the setting are made than It is sace as .gcode file formate for 3D printing.
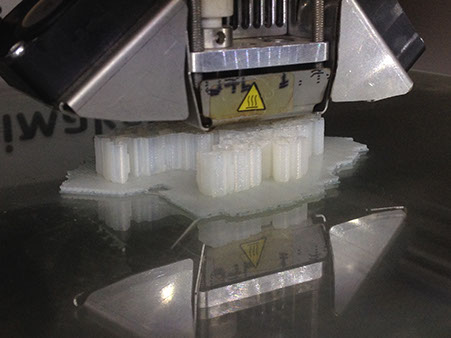
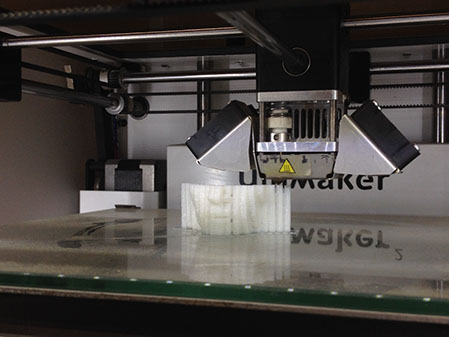
Stage wise printing of the face.


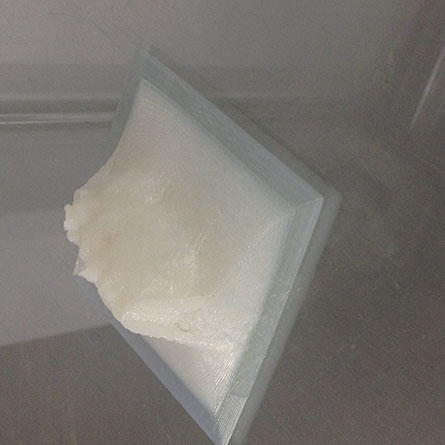
The Second technique worked as the surface was built with the edited edges on its surroundings. The external surface gave the face support and also made the printing easier as there was a base surface which was parallel to the printing bed.
After the second trial of the surface than the third final printing of the edited surface that is converted into the blocks and than the form of the face is taken. This face had many different iterations for exploring it.
The .stl file is taken into the Cura. As the surface had the flat base so I need not had to worry about the supports and other base . I directly opened the file and given the basic settings in the cura and saved as gcode file.
.jpg)
.jpg)
.jpg)
.jpg)
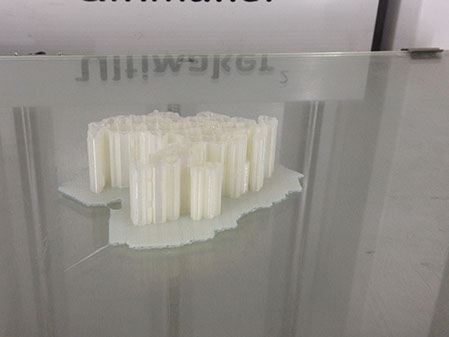
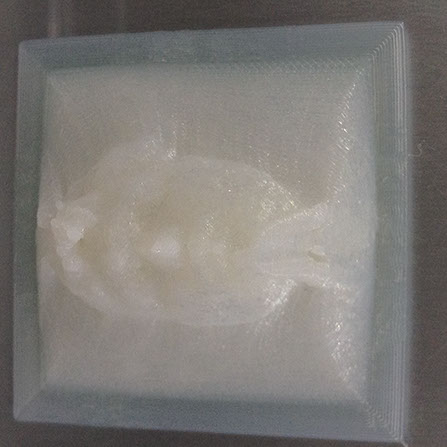
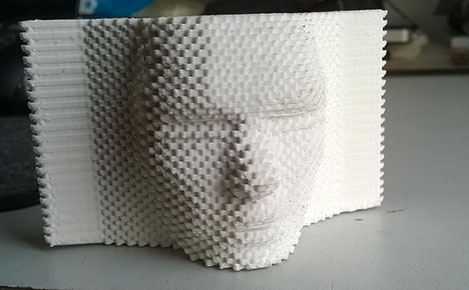
The .stl file that we see in the above pictures have still the error in between the bricks. Still I printed the file but already decided to modify the surface and than print it again.


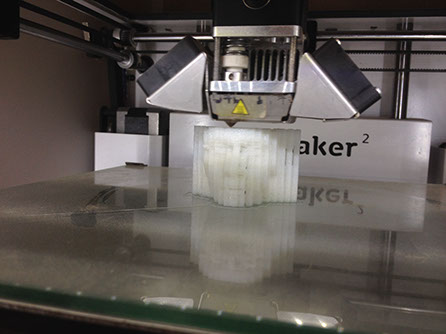
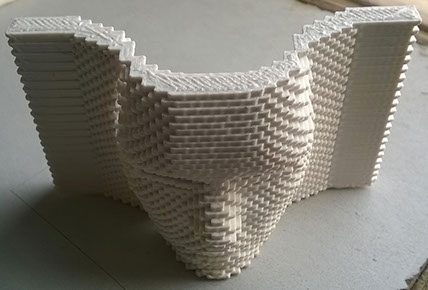
The printing came out to be pretty well as the surface was converted to solid block at minute pixel of 2*2 mm. Now the face can be printed very easily as it has a base and front/back and top.
Finally I modified the last printed surface in rhino and than made the stl file and than converted it in gcode file from Cura and than printed again.
.jpg)
.jpg)
.jpg)
.jpg)
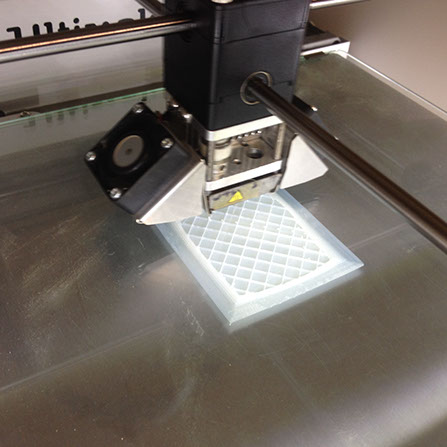
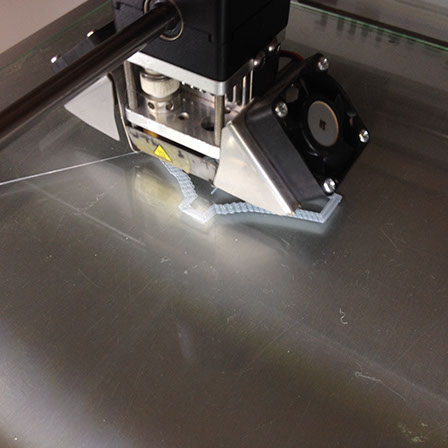
The .stl file is converted to gcode file that contains the face without any supports. It will take 45 minutes according to cura. Once it started printing I changed the speed to 80% to make the printing better.
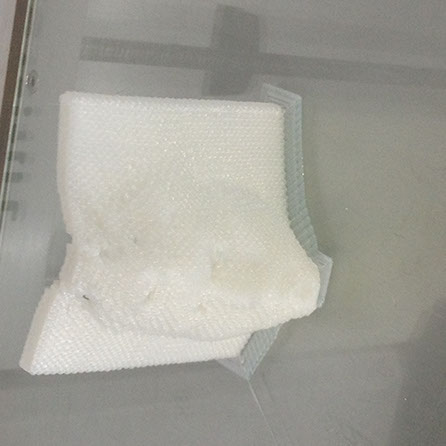
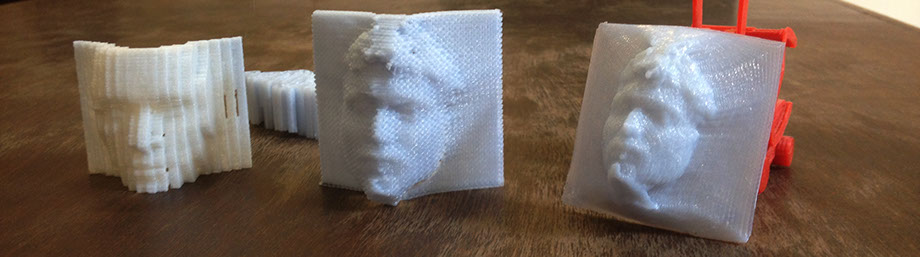
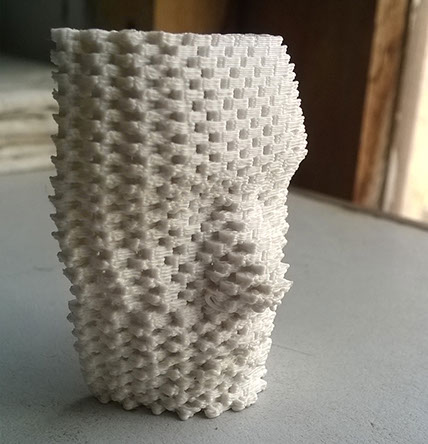
This printing gave me satisfying result as the final printed face was looking very good and also it was in detail with all the characteristics of my own face. This is the compilation of all the 3d printed faces in sequence.

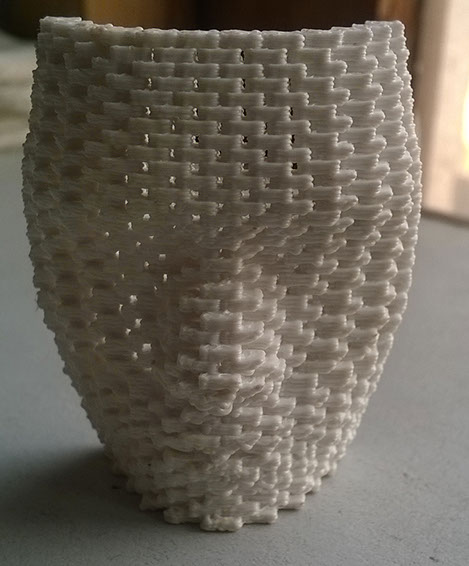
Similarly I changed the grid of the pixels on the surface that I have developed and these are the resultants of the further explorations.
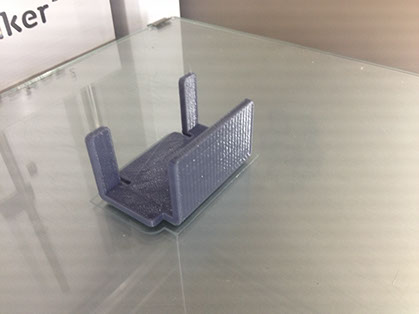
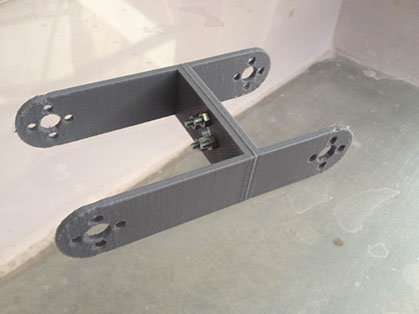
I have also printed other components for my final project. Here is the link to the process and for the 3D printing. Here is the link to the components for the robotic arm.
Few reference images of the 3D printing from the final project:


Link to 3D printing files for final project