This week's assignment was to use the ShopBot to make something big. Since we have needed help in getting visitors to our Fab Lab from the museum, I decided to make a sandwich board sign. I will design and cut two parts using the ShopBot and then I will hinge them together so that the sign can stand anywhere.
I designed my sign in VCarve. The first thing I did was measure my piece of scrap wood that I was using, and I setup my material to that size. Changing the material settings is very easy in VCarve, and whenever you start a new file, it pops up automatically. After I set up the thickness of the material and set the Z starting point on the TOP of the material, I drew screw hold downs using the circle tool. I will use these holes as a guide to where I can safely place my screws once I put the material down on the ShopBot bed.

Once my material was all setup in the software, I imported the fab logo as a .jpeg and then I converted it to a bitmap then traced it (similar to the process in CorelDraw) so that I could just use the outlines.
![]()
![]()
Once I had the logo the way I wanted it, I drew the shape of the sign itself, combining the circle and the rectangle shapes using the weld tool. The one frustrating thing I found in using this software was that it is difficult to measure things precisely.
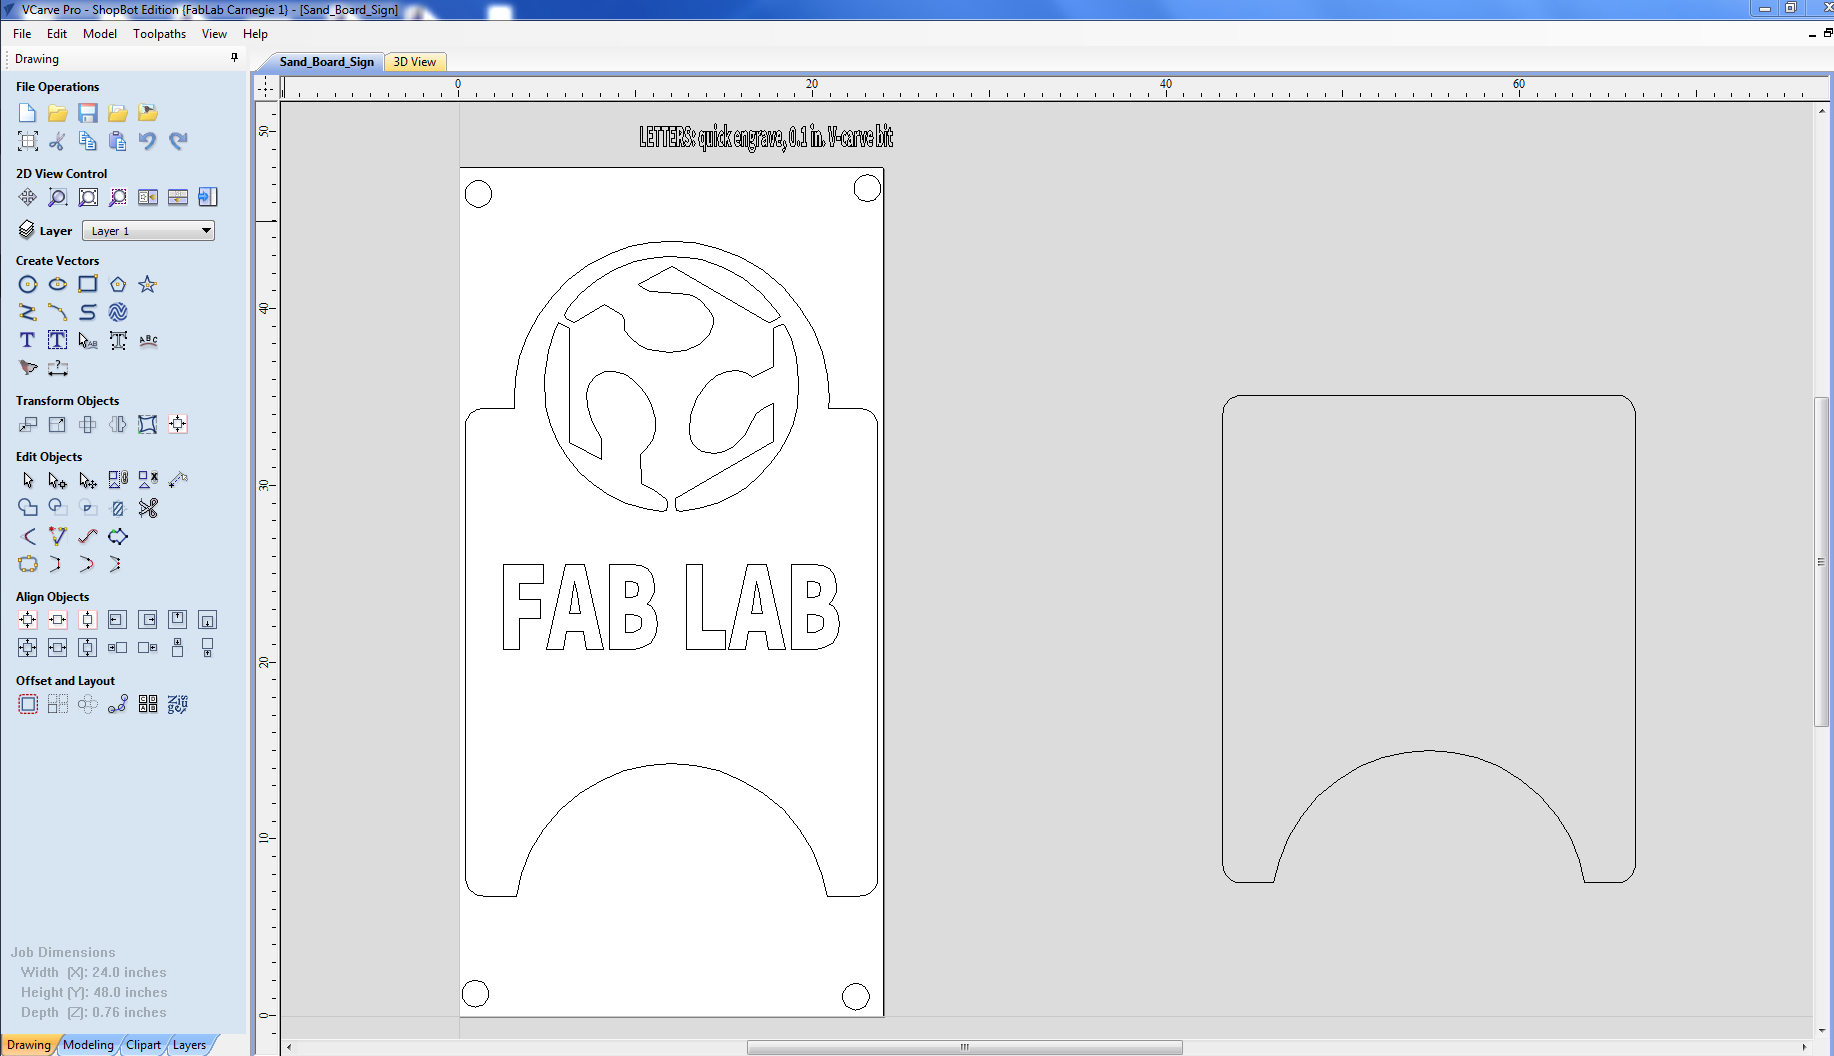
My VCarve design file can be found here.
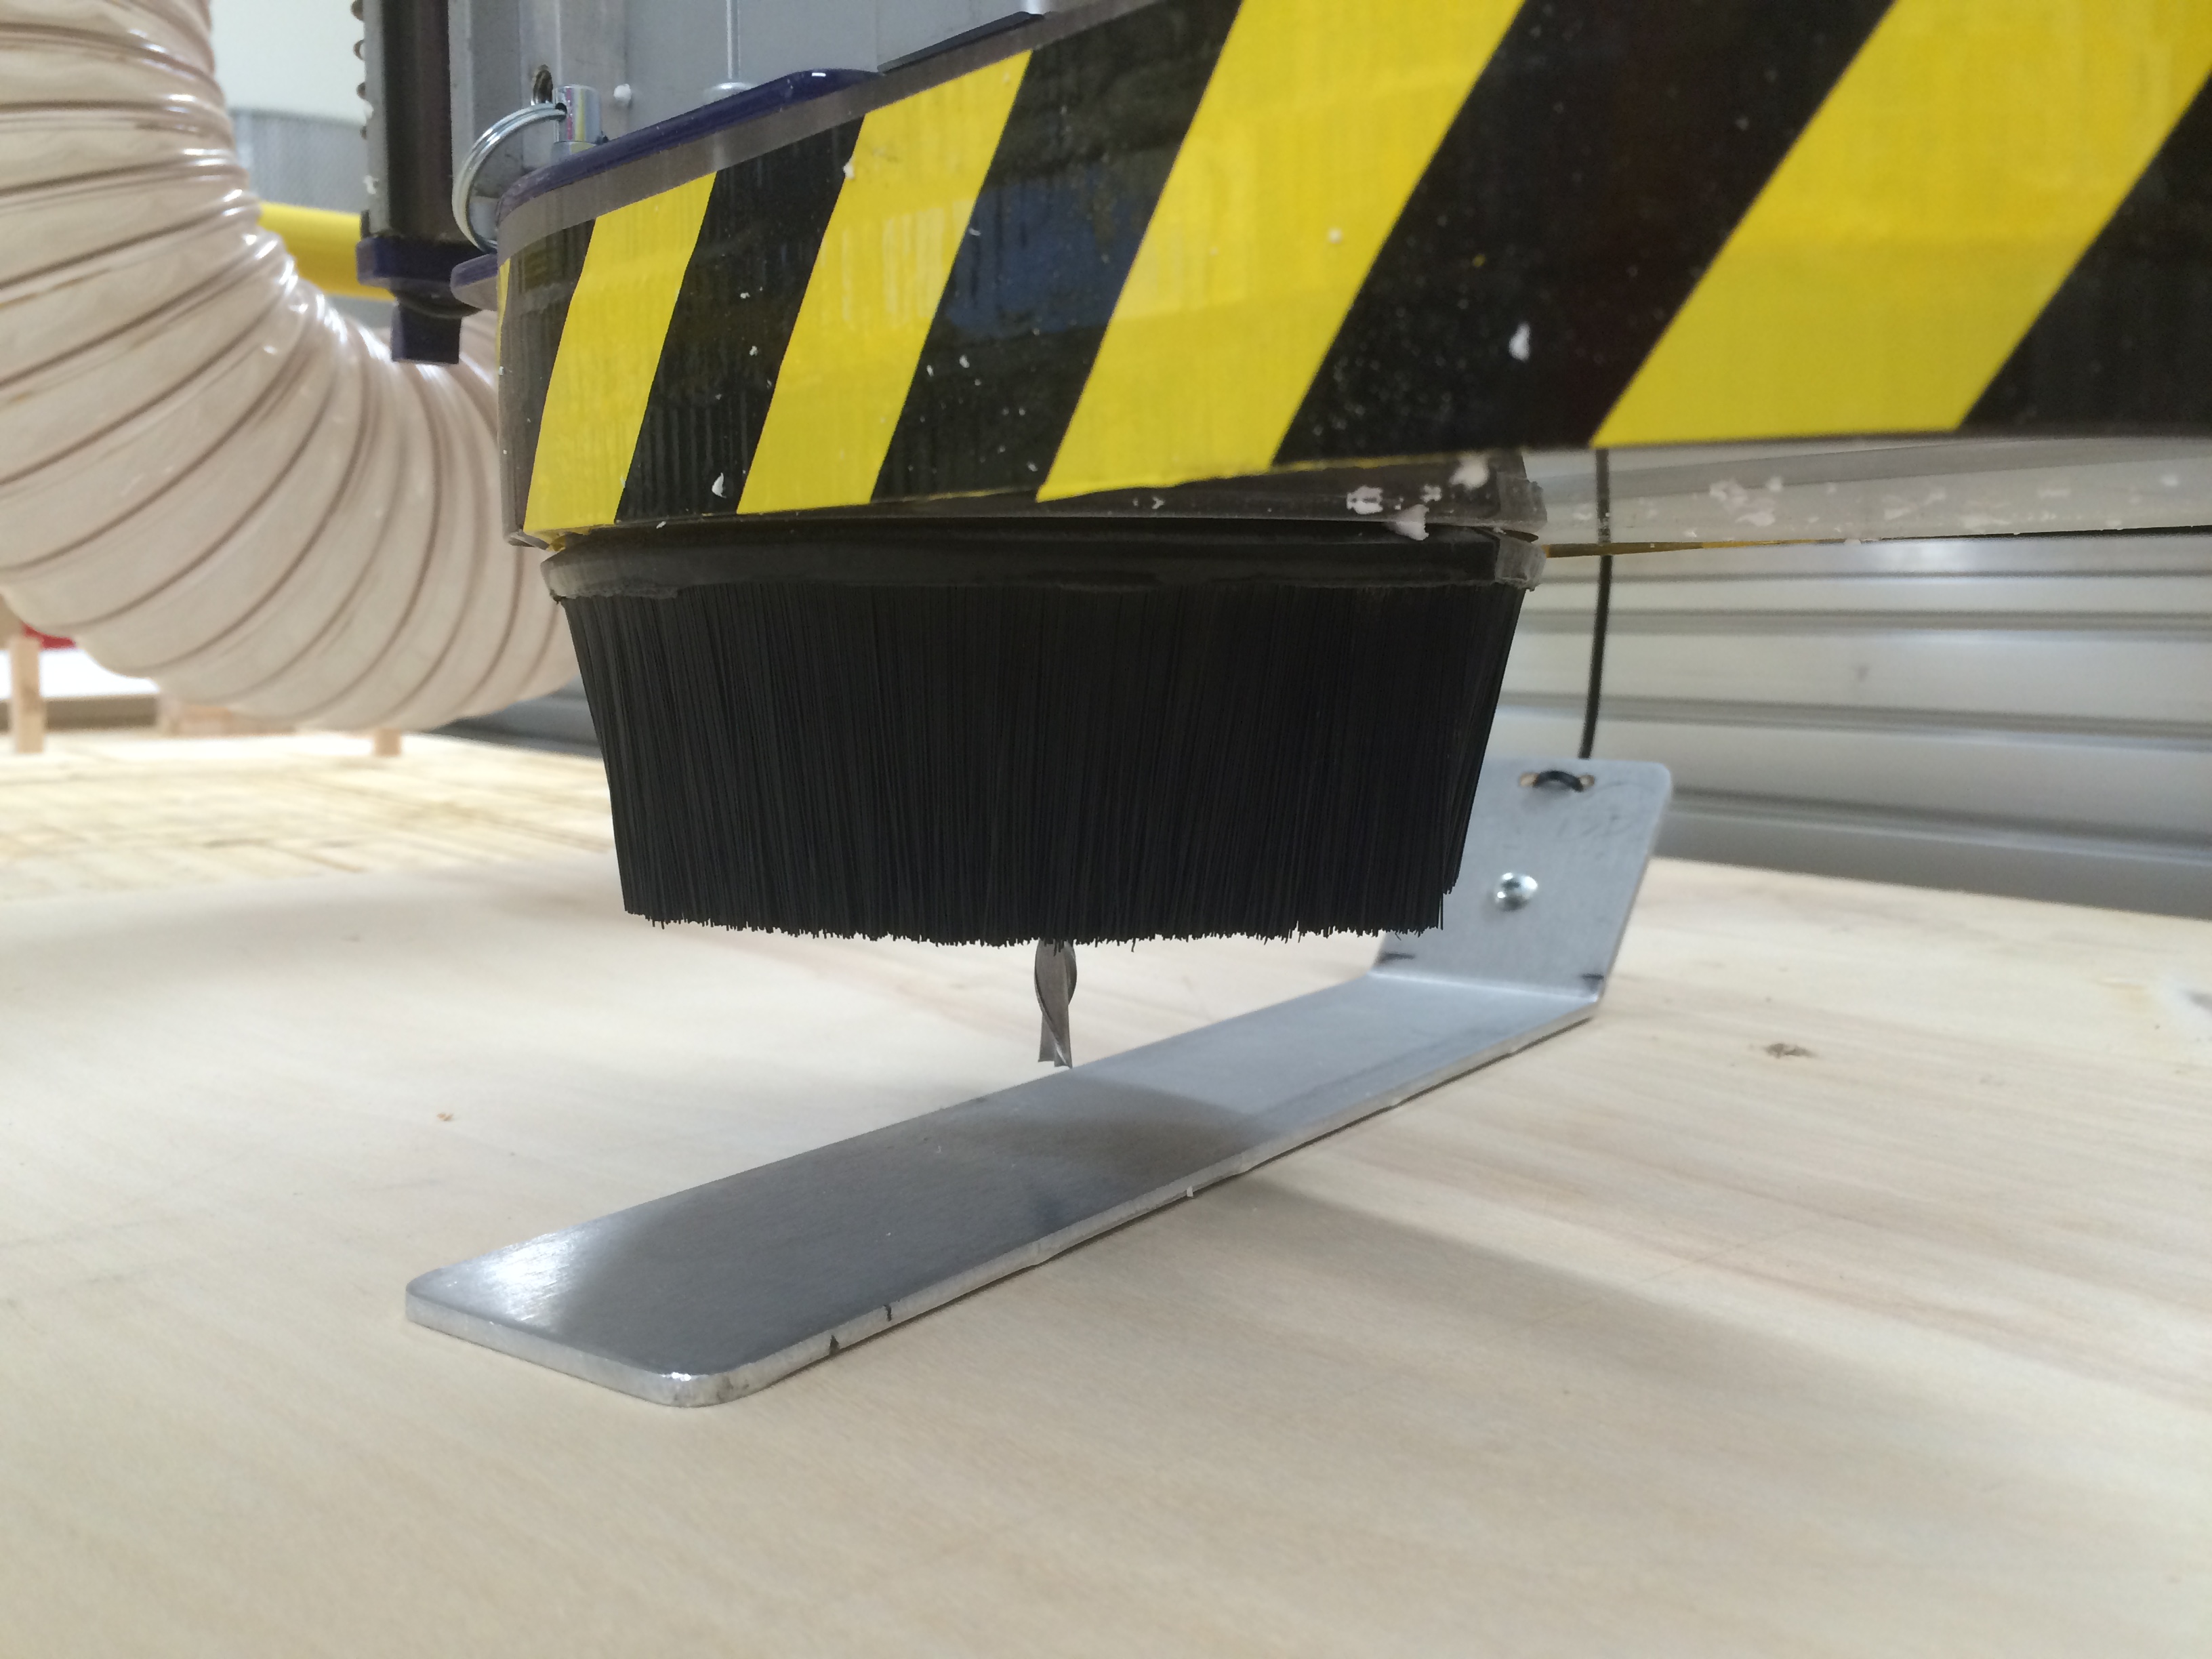
Next, I had to switch the bit on the ShopBot. We had a 1/4" bit in there, and I switched it out to the angled V-Carve bit which is used for engraving. This took a lot of muscling, and I did drop the bit once into the wood, but it seems to have survived.

Before I actually opened a toolpath, I setup the Shopbot for use. I homed the machine using the X-Y home button, which is in the red position box when you open the ShopBot software. This homes the x and y axis at the very edge of the machine, as it uses the built in stops. I also opened up the "Full version" of ShopBot because I wanted to change the jog speeds onf the machine manually, beause the gantry moves so slowly. I changed the X/Y speed from 1.00 to 5.00 and the Z speed from 0.05 to 1.00.
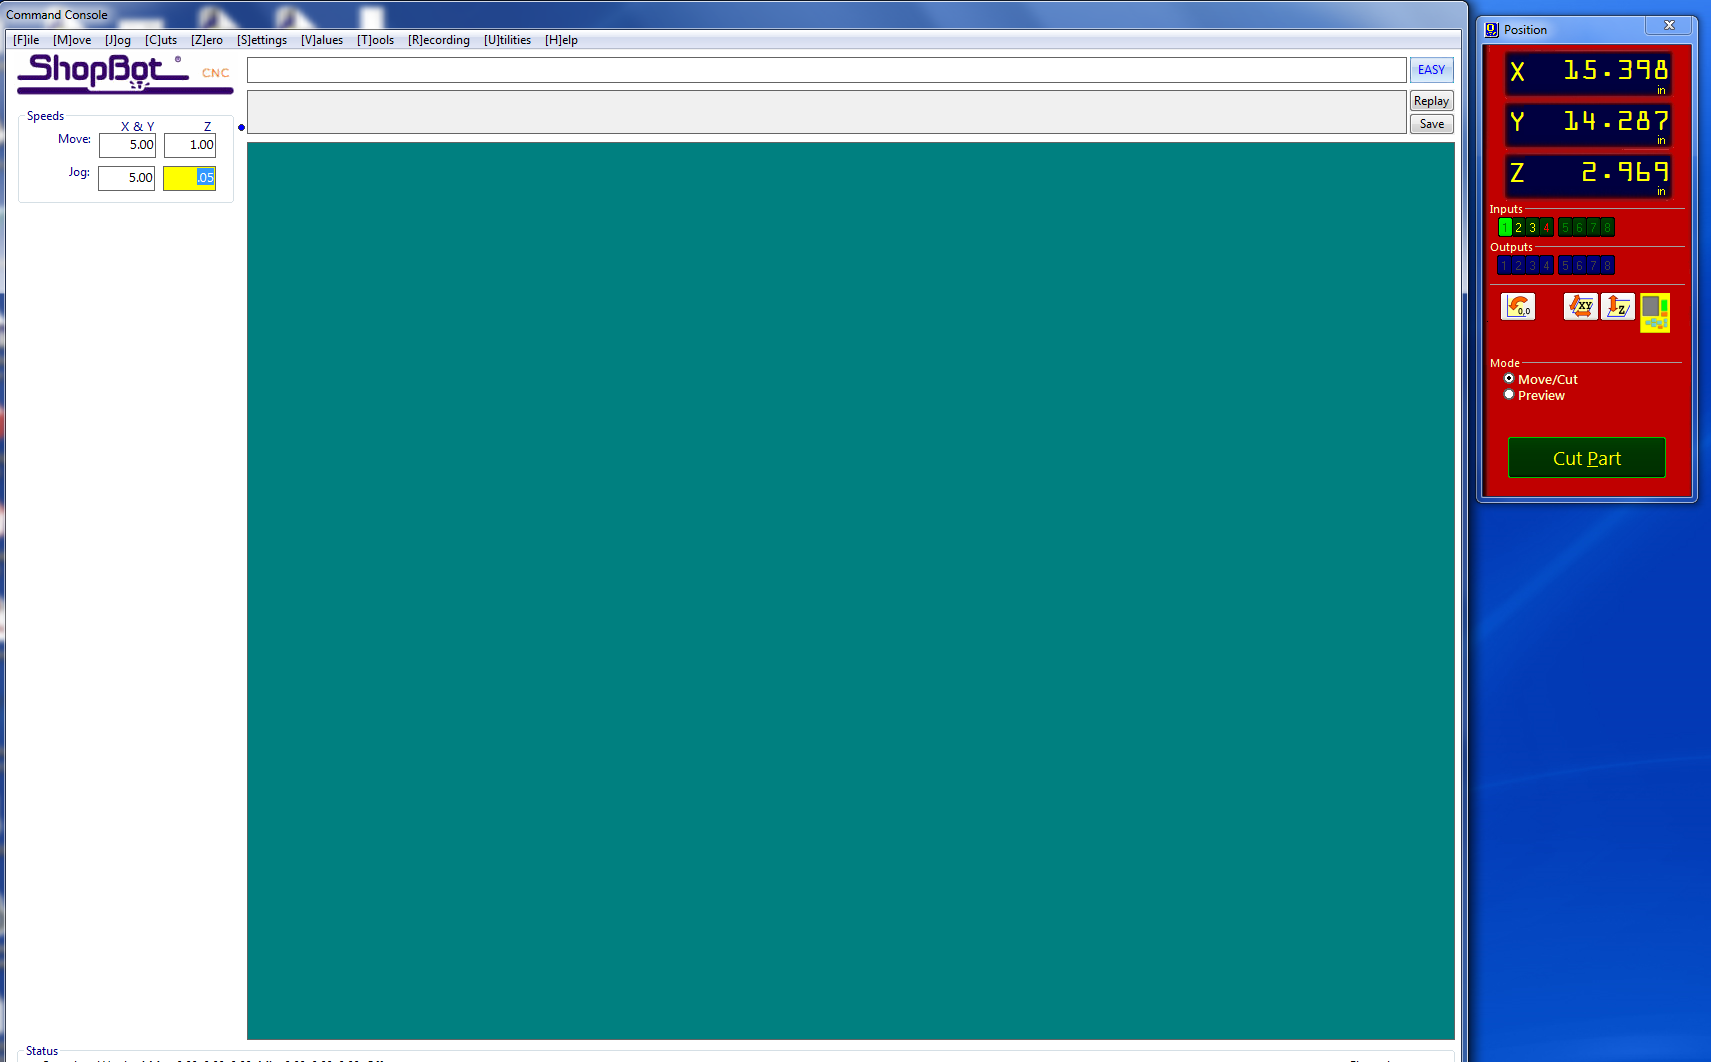
I pulled out the metal piece to home the z axis to the surface of the material. There is a button in the red position window that does this automatically. All I had to do was make sure that the metal piece was underneath the bit and then press enter when it asked.

Then I decided to try an "air-cut" to make sure that my cut was positioned correctly. You can do this in the Shopbot software by selecting the 3D-offset selection. This ran the tool above the surface of the material, so I could watch and make sure it would be where I wanted it to be.
![]()
So once I knew that my cut was going to be exactly where I wanted it, I tried my first attempt at engraving the letters. I set up my toolpath in VCarve as a quick engrave toolpath with a fill. I just set the toolpath for one letter so I could see the reults. I saved my toolpath and then opened it in ShopBot. This time I cut it without any 3D offset. It looked terrible.
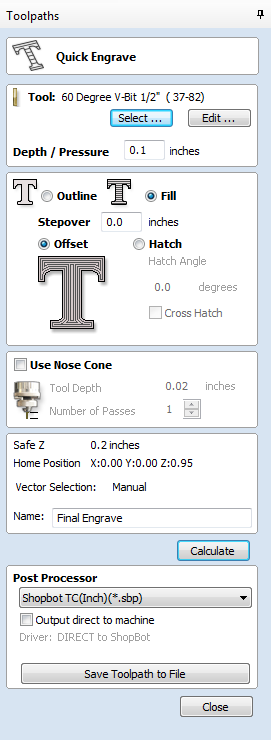
I think this setting would work better with a flat nose bit where the stepover wouldn't show so much.

I tried changing the depth setting on the engrave toolpath, but the result was much the same. I didn't like being able to see the grooves between passes..
Finally, I tried using the quick engrave toolpath, and I chose "outline."
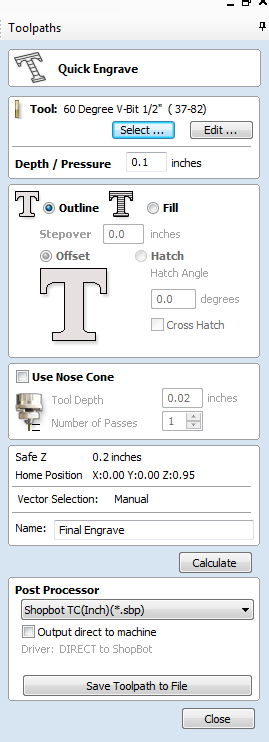
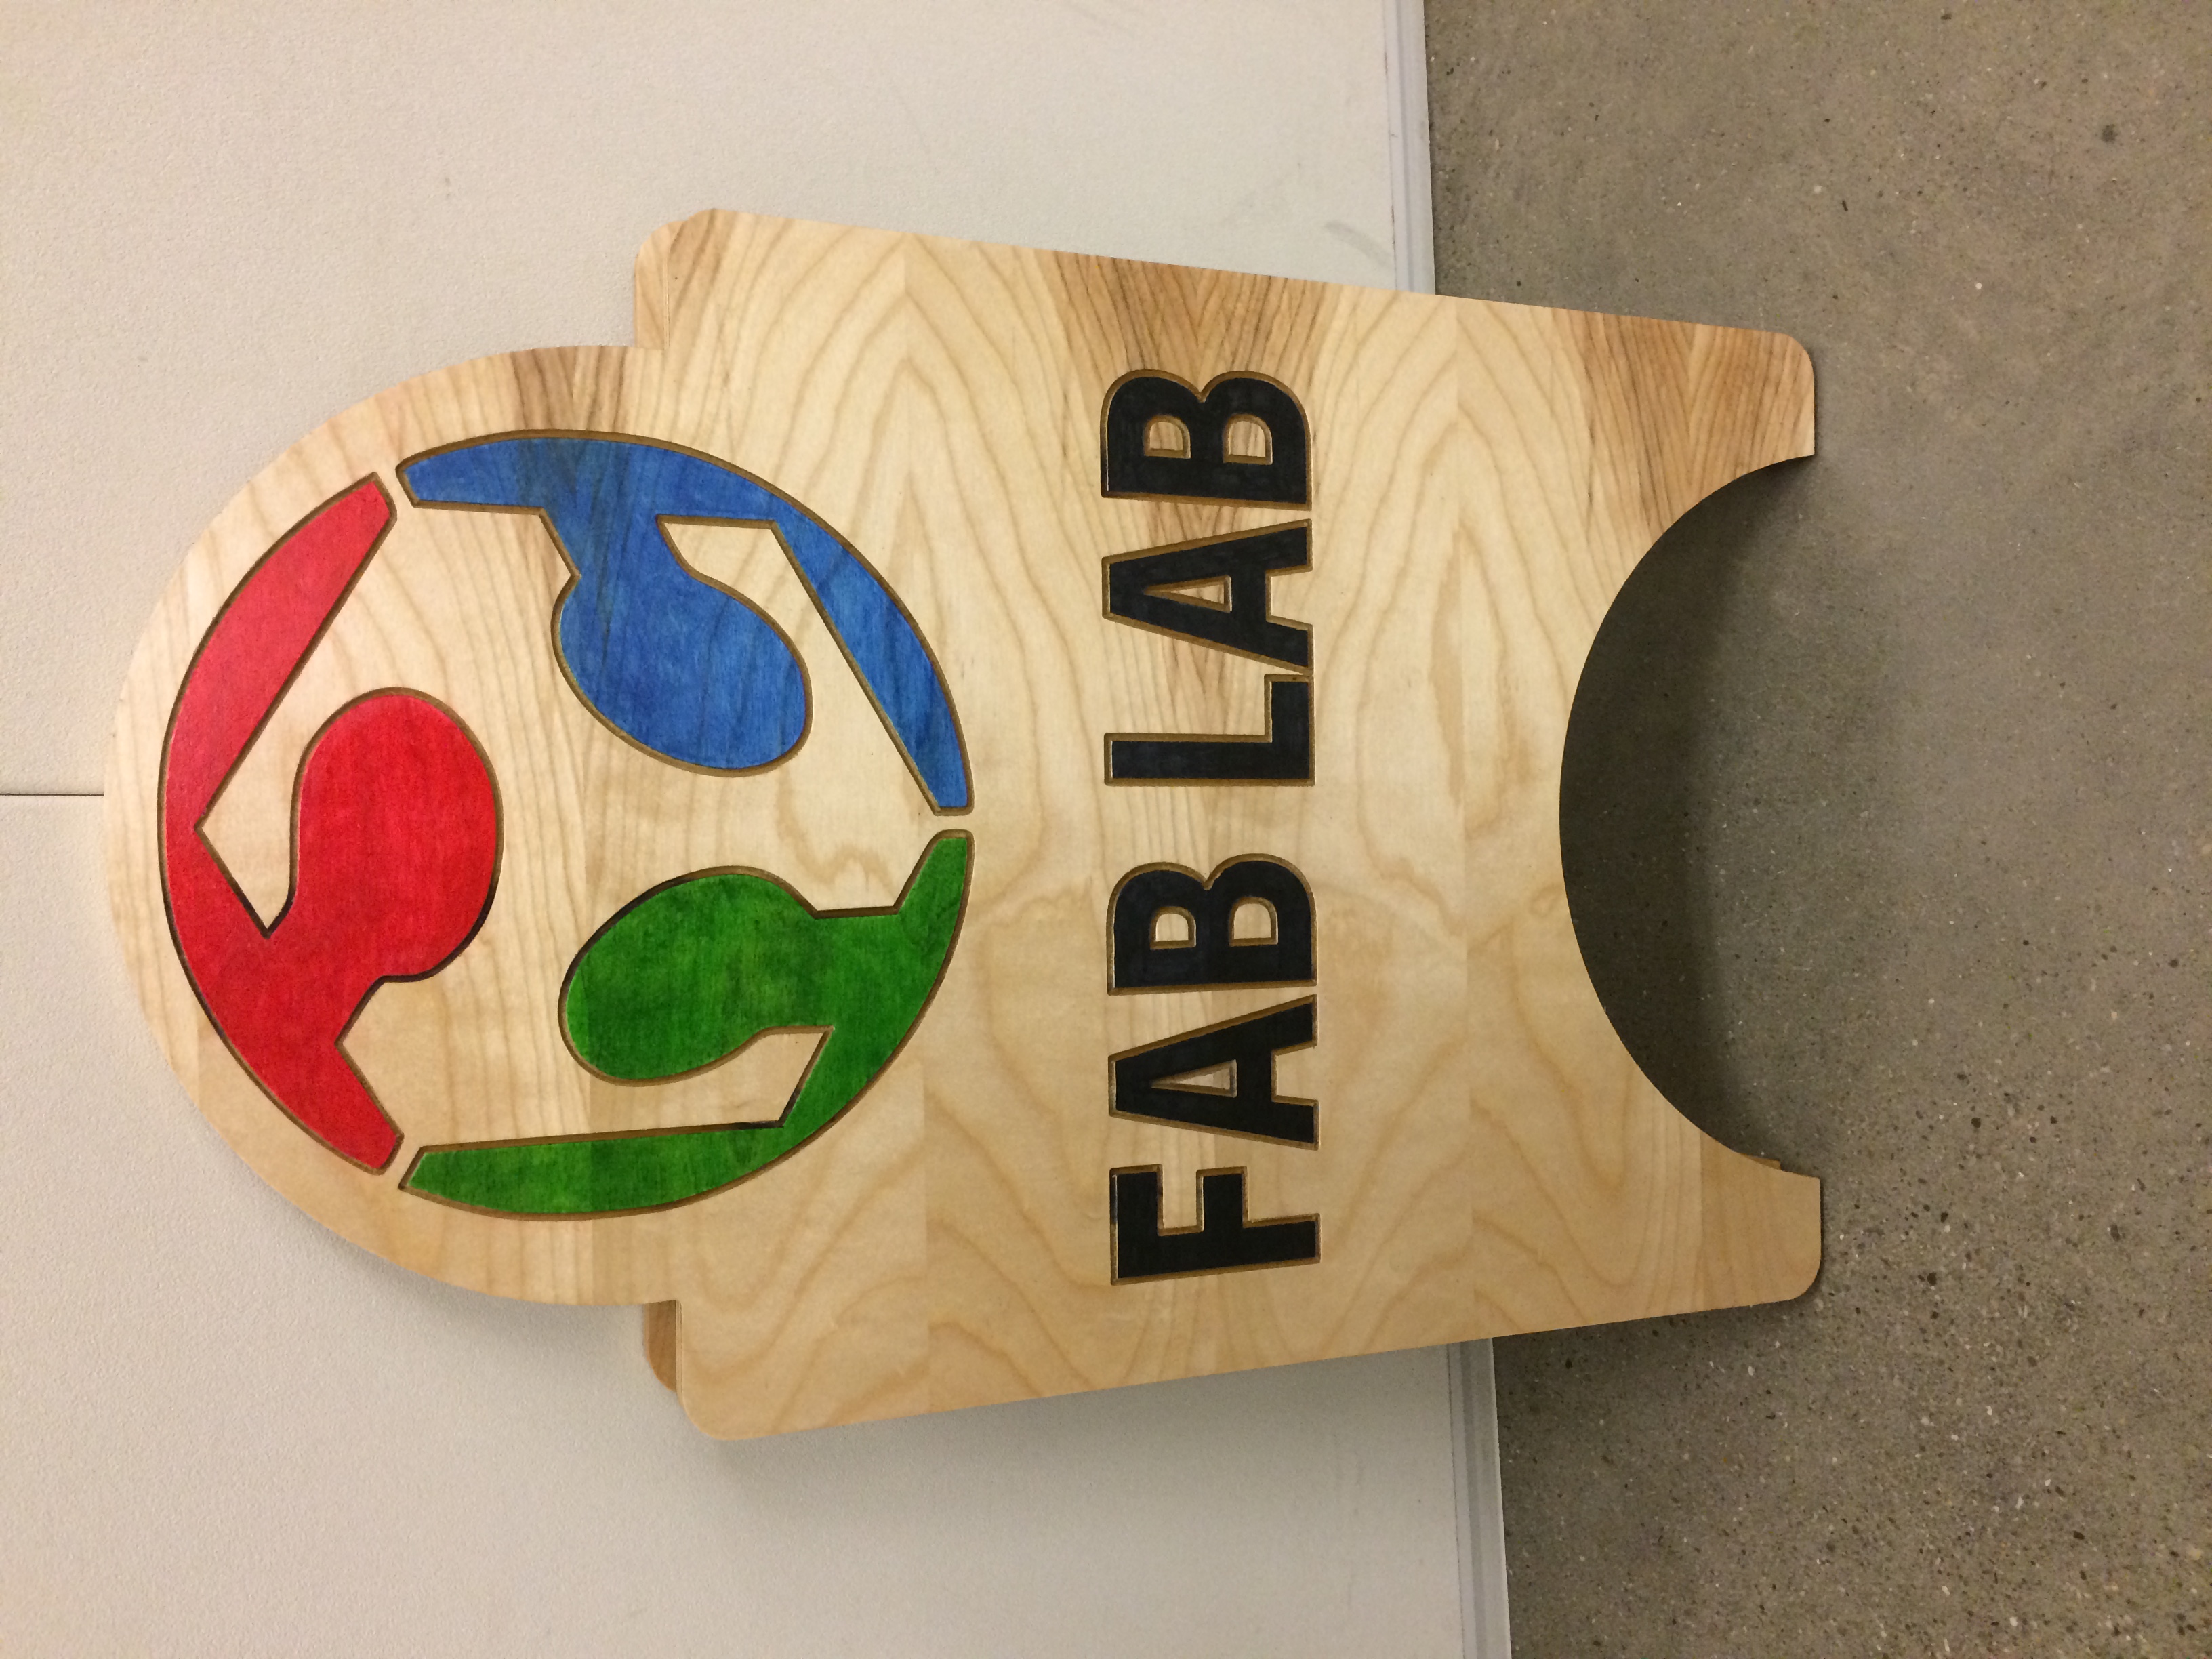
The result was much better, and I engraved the whole board. Then, I switched bits again (this time being careful not to drop the bit), and I set the profile toolpath to cut out the shapes. Here is the sign after cutting it.
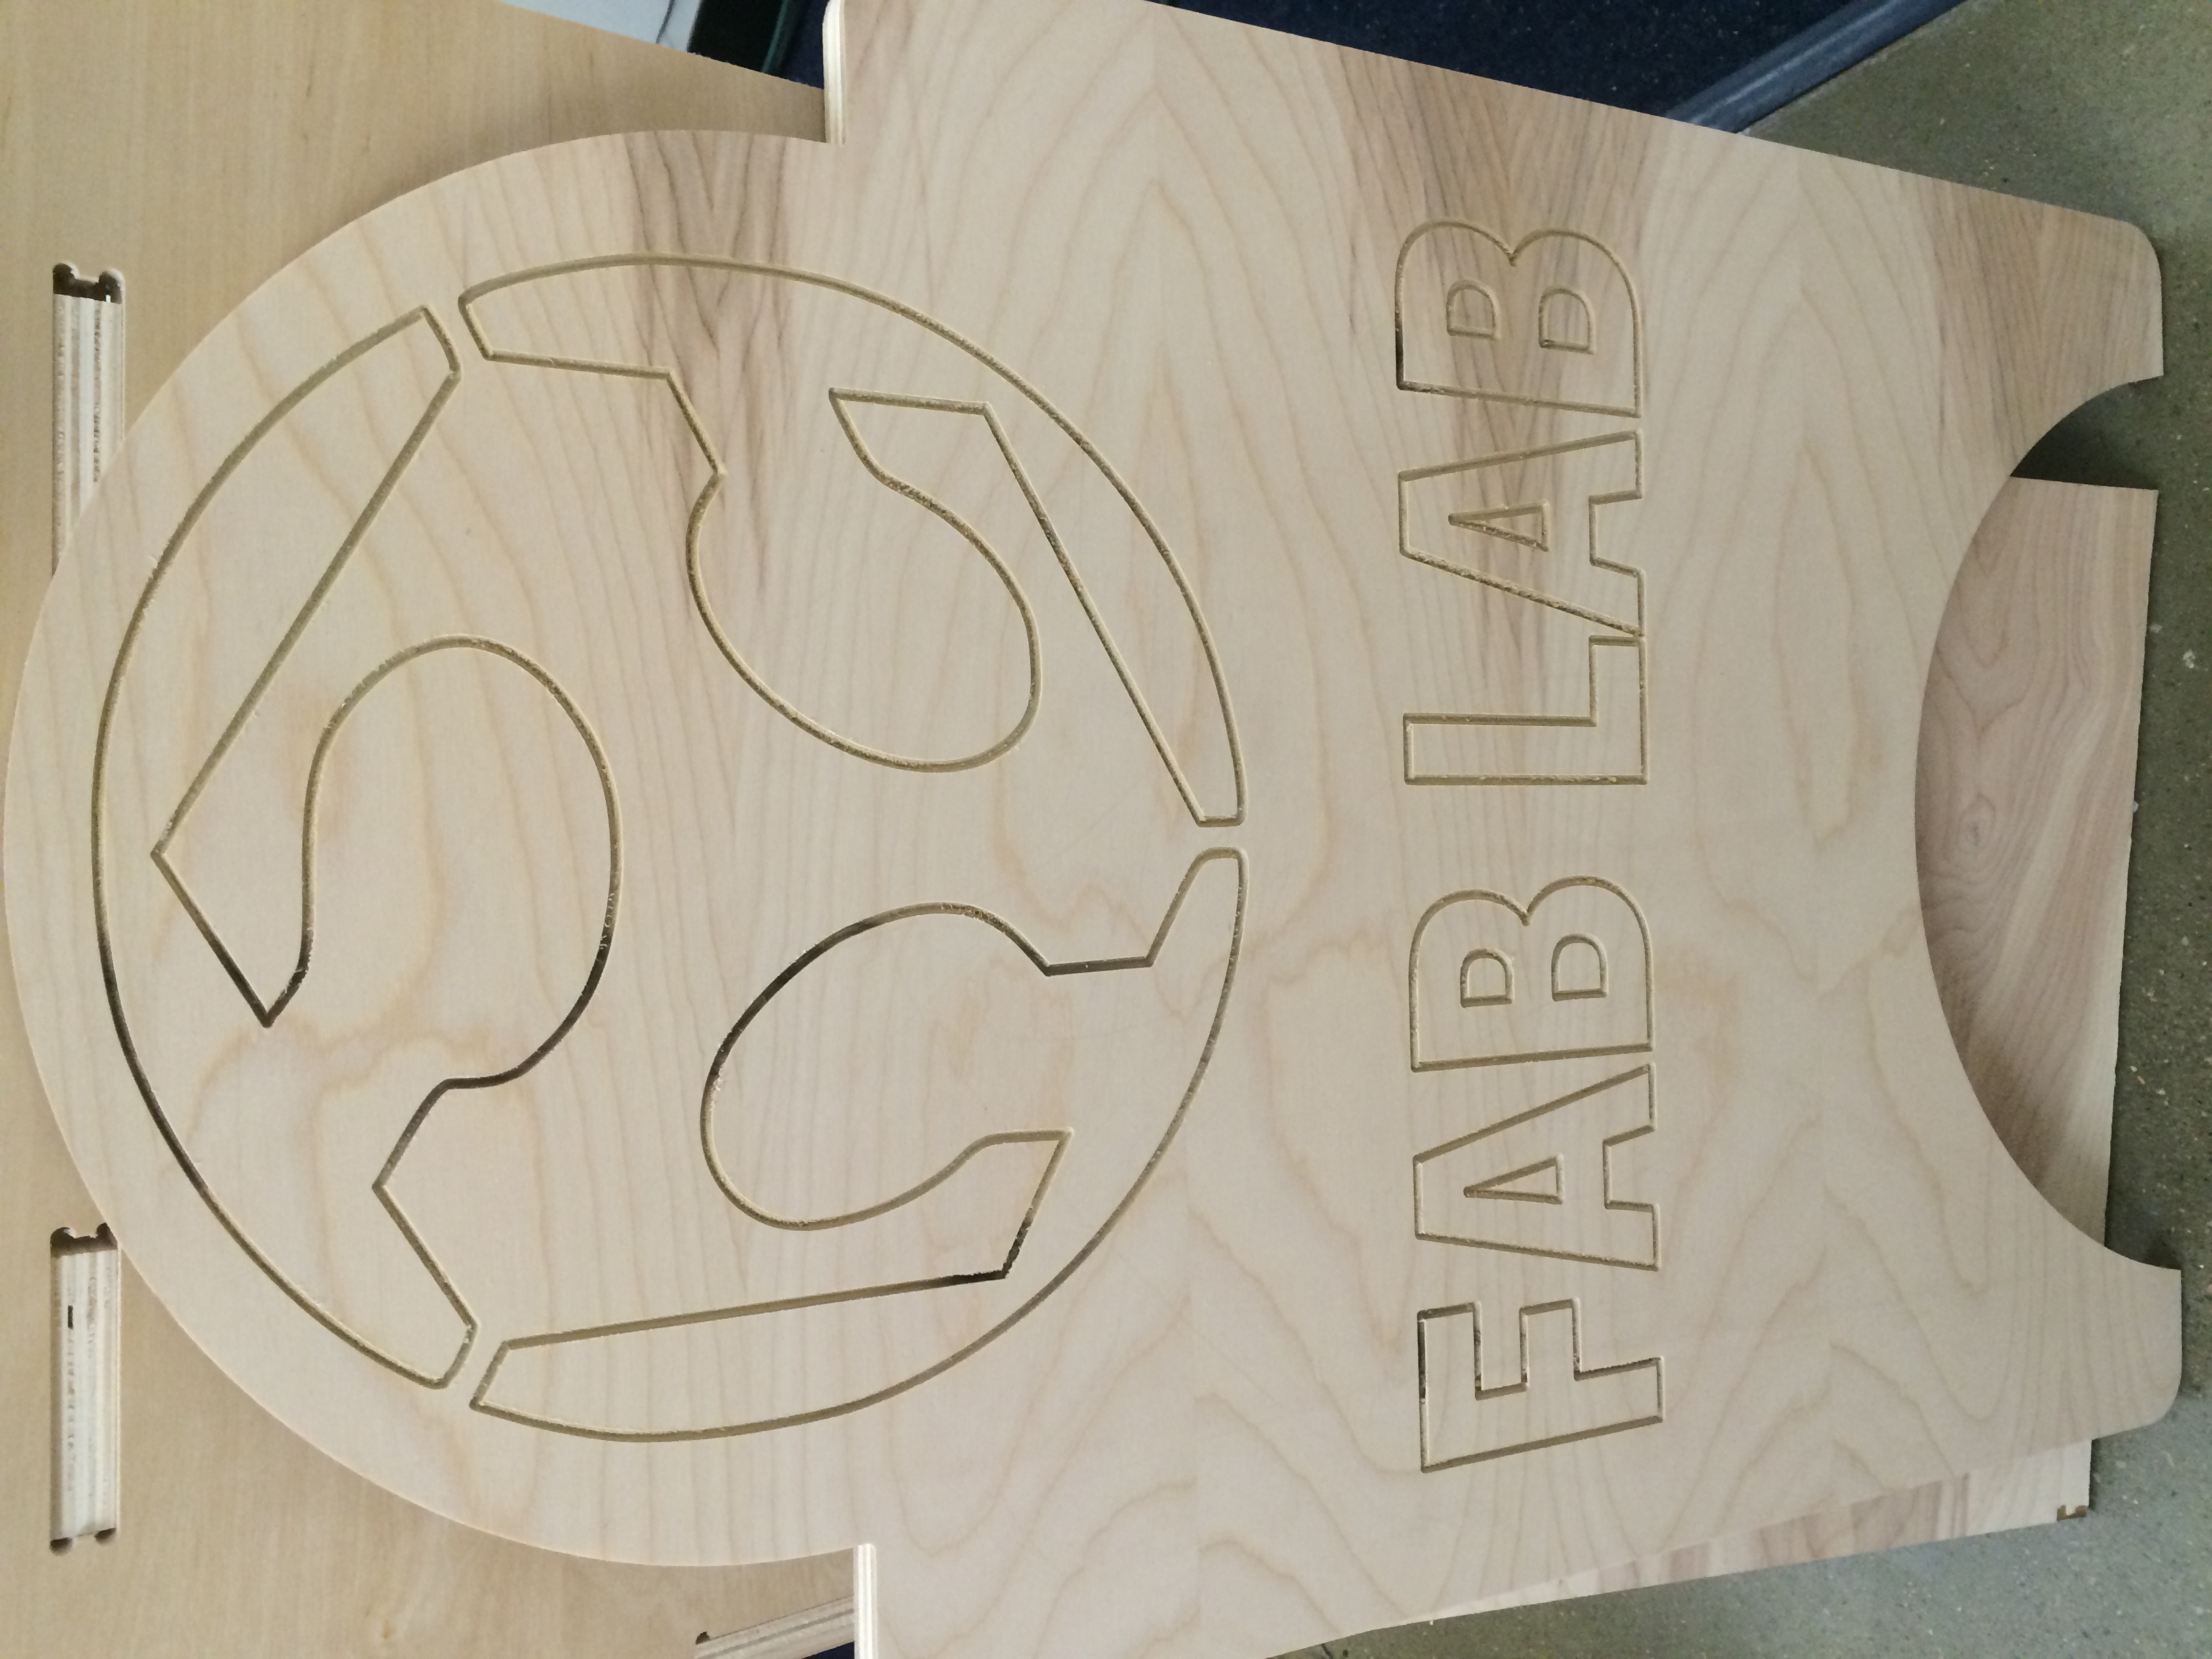
To give the sign a little more "pop," I tried staining it with different colors of indelible ink (yes, I "Sharpied" the sign). Then, I put two coats of clear polyurethane gloss over it. Once it dries, I will add hinges and a stopper chain and then I will have a custom designed Fab Lab Sandwich board.