This week is about embedded programming. We have to program our Hello Boards in as many ways as possible using differente languages.
Datasheet:
Datasheets are instruction manuals for electronic components, They explain exactly what a component does and how to use it.
Content:
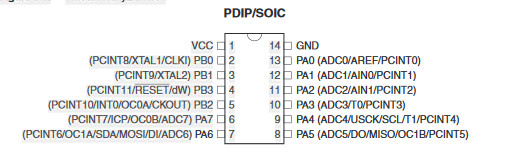
The first page is usually a summary of the function and features of the part. You can quickly find a description of the functionality, the basic specifications (numbers that describe what a part needs and can do), and sometimes a functional block diagram that shows the internal functions. Pinout lists the part’s pins, their functions, and where they’re physically located on the part.
Tables of Elecrical specifications, this will list the absolute maximum ratings a part can handle before damaging it.
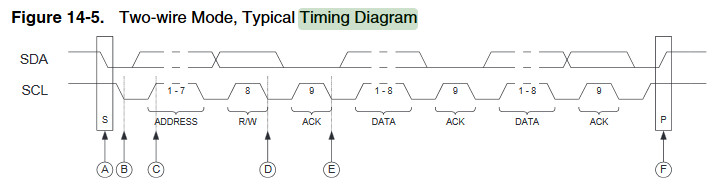
Timing diagrams show how data should be sent to and received from the part, and what speed it should be sent and received.
During my reading of the Datasheet I found a couple of interesting Libraries for the Future. The Touch Sense Library and the Servo Library for the Attiny45.
Programming Hello Board:
Since I was going to use Arduino IDE as the main process to program my boards I had first to install the Attiny support manager.
Open the preferences dialog in the Arduino software
Find the “Additional Boards Manager URLs” field near the bottom of the dialog.
Paste the following URL into the field (use a comma to separate it from any URLs you’ve already added):Link
Click the OK button to save your updated preferences.
Open the boards manager in the “Tools > Board” menu.
Scroll to the bottom of the list; you should see an entry for “ATtiny”.
Click on the ATtiny entry. An install button should appear. Click the install button.
The word “installed” should now appear next to the title of the ATtiny entry.
Close the boards manager. You should now see an entry for ATtiny in the “Tools > Board” menu.
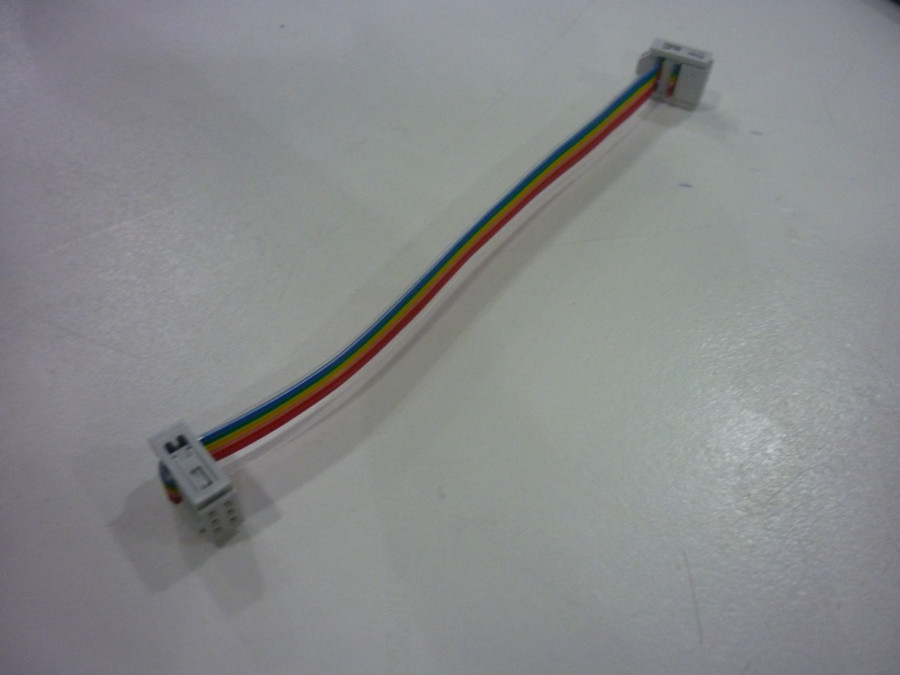
6 Pin header Cable
Now its time to make our 6 Pin Header cable that will connect the Hello board to the FabISP to load the program into it through the ISP.
BOM:
2x3 female connector
10 Wire cable (it will be reduced to 6)
Connect the 6Pin cable to both bords , be sure that GND is connected between both boards.
Connect the FTDI to the USB cable to the Hello board, the GND cable (black) should be connected to the GND pin of your board.
Arduino IDE Board Programming
Navigate to "Tools - Burn Bootloader". if there is no problem with your board you should get the "Burn Bootloader done".
Before any programming you should take in consideration the difference between the Attiny and Arduino Pins. Here is a Diagram that will help you.
In My case for example I connected my LED to pin 6 of the Attiny which representes Pin 7 in Arduino.