* Design and build a wired &/or wireless network connecting at least two processors.
For this week I chose to do the asynchronous serial communication board.
Assignment:
* Design and build a wired &/or wireless network connecting at least two processors.
For this week I chose to do the asynchronous serial communication board.
I designed the boards in eagle looking the connections from Neal's boards:
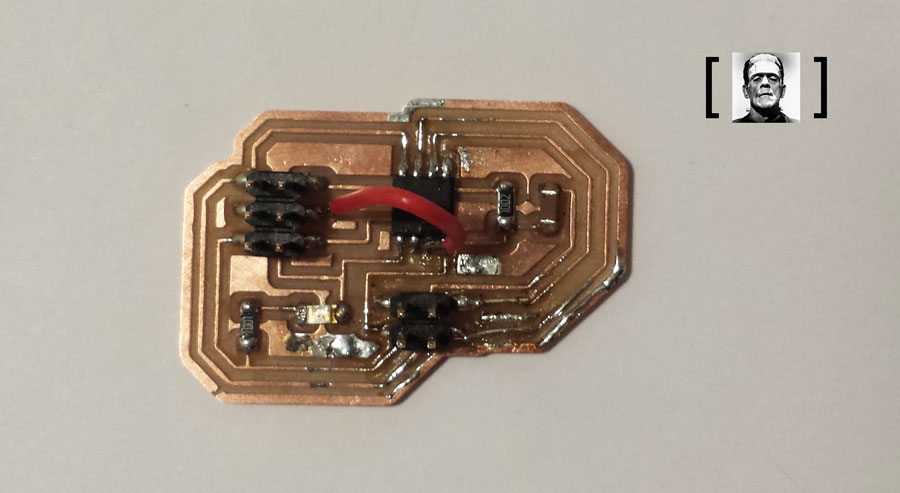
Bridge:

Node:

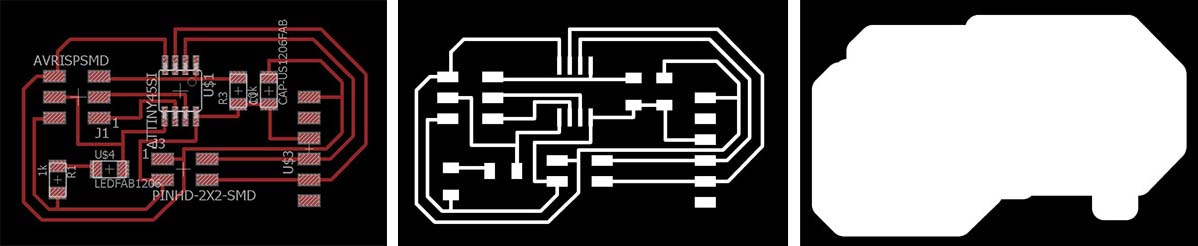
BRIDGE:
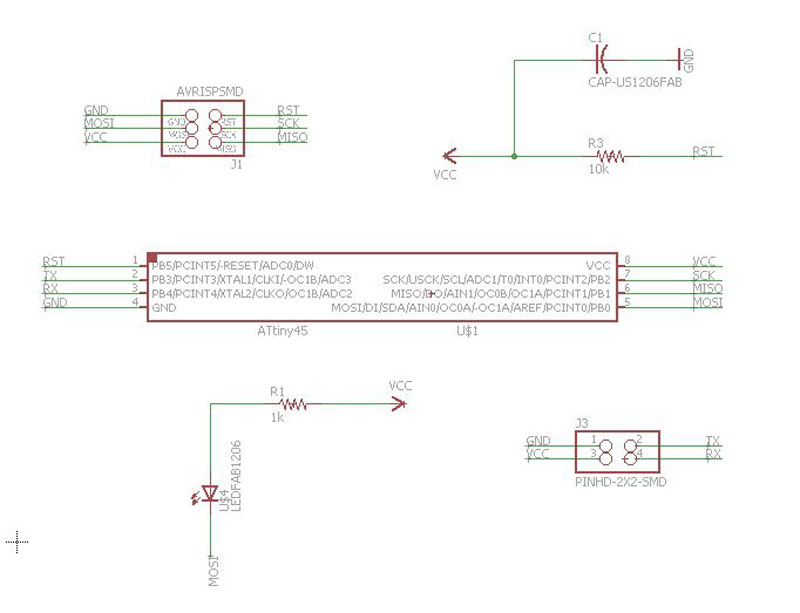
* SCHEMATICS:

List of components that I used:
1X FTDI header: powers the board and allows board to talk to computer
Inventory: CONN HEADER 36POS .100 R-A SMD (S1143E-36-ND)
Fab library symbol: FTDI-SMD-HEADER
1X Resistor (value 10k)
Inventory: RES 10.0K OHM 1-4W 1% 1206 SMD (311-10.0KFRCT-ND)
Fab library symbol: RES-US1206FAB
1X 6-pin programming header: for programming the board
Inventory: 649-95278-101A06LF
Fab library symbol: AVRISPSMD
1X Microcontroller: attiny45. Once the microcontroller is programmed, the program stored in non-volatile memory. This means that it will remember the program.
Inventory: ATTINY45V-10SU-ND
Fab library symbol: ATTINY45SI
1X CAP 1uF
Inventory: CAP CERAMIC .1UF 250V X7R 1206-
Fab library symbol: CAP-US1206FAB
1 X 2X2 PIN HEADER SMD
1 X LED 1206 smd
1 X 1k RESISTOR RES-US1206FAB
* TRACES/OUTLINE:
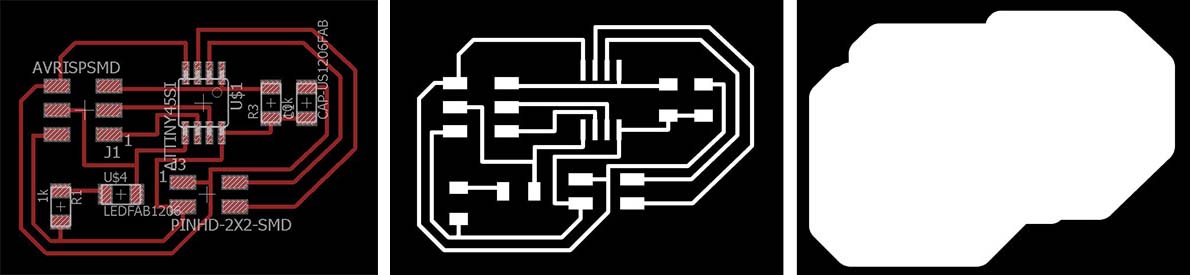
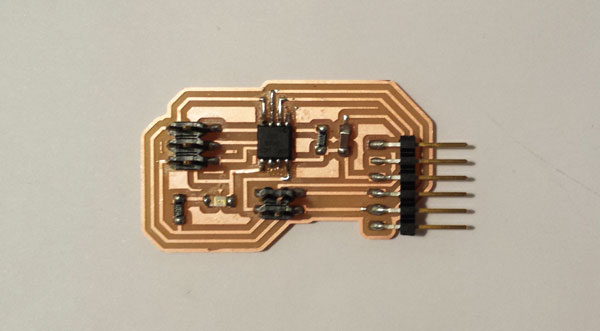
NODE:
* SCHEMATICS:
List of components that I used:
1X Resistor (value 10k)
Inventory: RES 10.0K OHM 1-4W 1% 1206 SMD (311-10.0KFRCT-ND)
Fab library symbol: RES-US1206FAB
1X 6-pin programming header: for programming the board
Inventory: 649-95278-101A06LF
Fab library symbol: AVRISPSMD
1X Microcontroller: attiny45. Once the microcontroller is programmed, the program stored in non-volatile memory. This means that it will remember the program.
Inventory: ATTINY45V-10SU-ND
Fab library symbol: ATTINY45SI
1X CAP 1uF
Inventory: CAP CERAMIC .1UF 250V X7R 1206-
Fab library symbol: CAP-US1206FAB
1 X 2X2 PIN HEADER SMD
1 X LED 1206 smd
1 X 1k RESISTOR RES-US1206FAB
* TRACES/OUTLINE:
For milling the bridge I used the Roland SRM-20 and folowed the steps from
Week4 for doing the rml files.
For milling the node I used the Roland SRM-20 also, but we were reusing a broken mill, so we changed the values of the speed to 40mm/s and the number of offsets to 6.
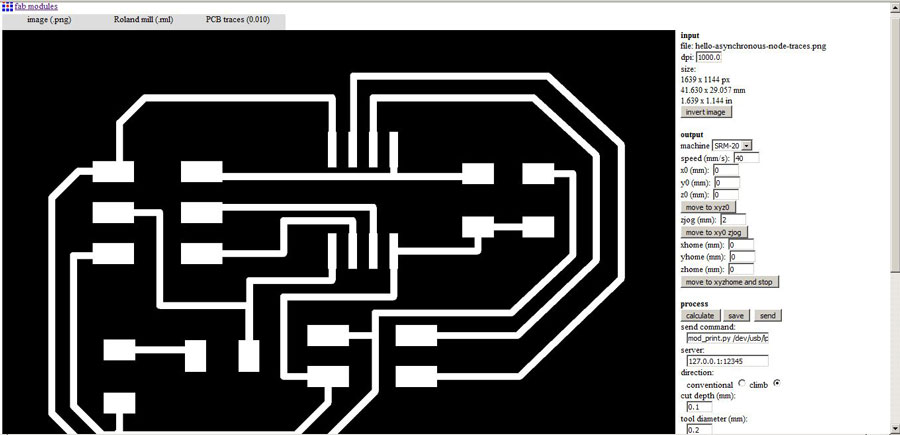

It mills very quickly but some traces were not so good, therefore the soldering was not easy.
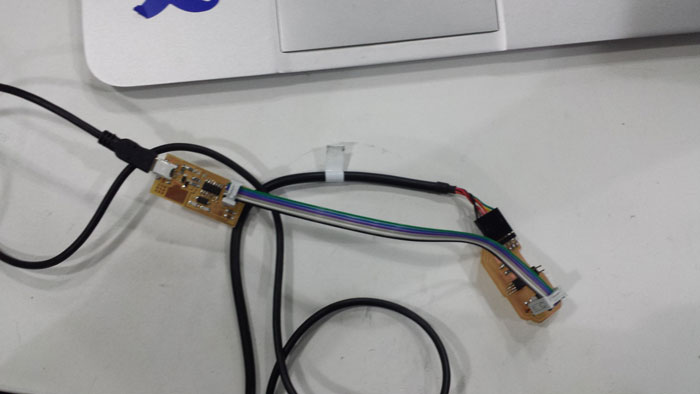
At first I ran the make file and it gave me an error (error 1), it wasn't able to find the usb device connected. Therefore I checked all the connections and I found a bad connection in the FabISP :)
After fixing the FabISP, I first connected it with the bridge to program it, so I ran the make file again: sudo make -f hello.bus.45.make program-usbtiny.

Connections:
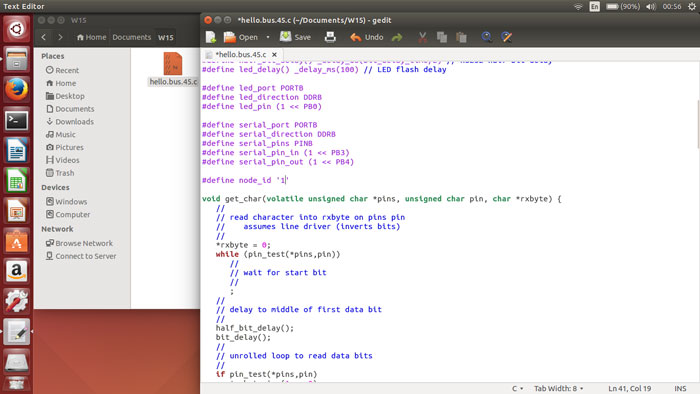
For the bridge i left #define node_id '0' in the c file, and for the node 1 we have to change it to #define node_id '1', saved and ran the make file, if you have another node would be #define node_id '2', but i didn't have the time to do another one.
Connections:

Programmed!

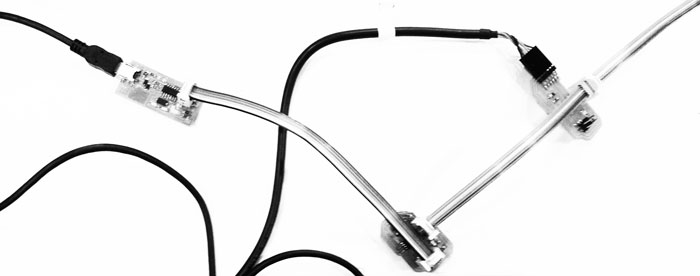
Once the boards were programmed, I connected them with a GND-VCC-TX-RX cable and powered through the FTDI cable. After that opened the Arduino serial port and typed 0 (bridge) and 1(node) to check the communication between the boards: the board whose identity corresponds to the number typed will flash a second time and send a message to the serial port.

hello-asynchronous from carovignoli on Vimeo
Download file