Week 09:
Machine Design, week 1/2
Important Things Noticed
One: I am getting irritated with everyone in the lab. Two: I really like working with people. WHAT??? It is, in fact, interesting to notice how some people thrive on finding their own place to work on their own, opting out of being part of a group by simply not doing it. Others of us feel happiest this week, because we love working on a project with others. Despite the fact that other people are hell.
Outcomes Expected ...
Make a machine, including the end effector,* build the passive parts and operate it manually.
* an effector, acc to Wikipedia, is "the device at the end of a robotic arm, designed to interact with the environment."
... and Outcomes Achieved
- created team
- design discussed and mechanical operation determined
- some parts fabricated; some still to fabricate
- some tests manually
- some programming learnt and tested
Software
- Arduino IDE
- Python, kind of
Hardware / Machines
- Arduino Uno
- EasyDriver shield
- DK electronics shield for controlling multiple steppers / DC motors (see what seems to be an identical product here at Adafruit; yes, we were using what is referred to as the "ancient" V1 shield
- various stepper motors
- RepRap
- Formbytes
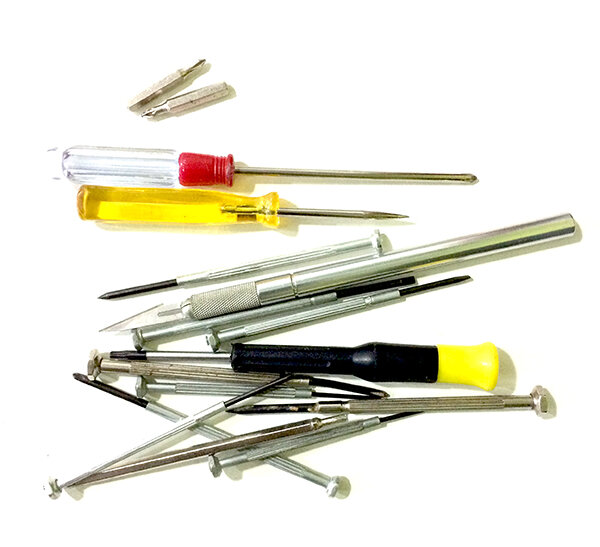
- Hand tools: calipers, drill press, electric sander, screwdrivers
Supplies
- assortment of screws and washers
- assortment of suction cups
- stepper motors of a variety of specifications
- MDF (sheets for lasercutting)
- PLA (coils for 3-D printing)
- USB-to-SD card reader (for transferring files onto the card read by 3-D printers)
Making a machine as a team
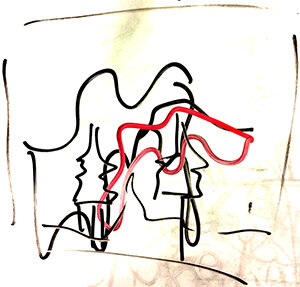
Initial Idea
Caro and Cit got interested in using motion detection via Kinect as the input for a drawbot. We were talking about what the affective output could be ... there were too many ideas as people kept joining and leaving our group, so we have decided to make the mechanics work and get back to the why and what for later. We are interested in:
- people relating to each other
- people relating to space
- people seeing their effect on the output
- people getting something additional back, some aspect of meaning, besides mere participation
- that the meaning has the theme of relating to each other (though this sounds a weak notion when I type it ... I think we'll do better)
References
We made a place to put our ideas and major references in Google Drive.
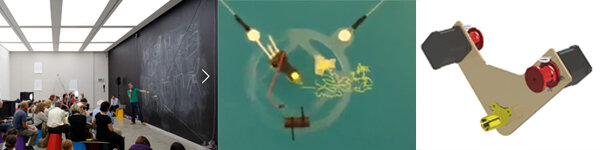
These projects have been major influences:
- Viktor, a drawing robot by Jürg Lehni that I saw at the Walker Art Center in Minneapolis a few years ago
- lightbot project made in the 2015 Fab Academy, Barcelona
- Makeangelo, a great mostly open source vertical drawing machine with its own app
The major difference in our project is to see a contemporary input-to-drawing effect with Kinect.
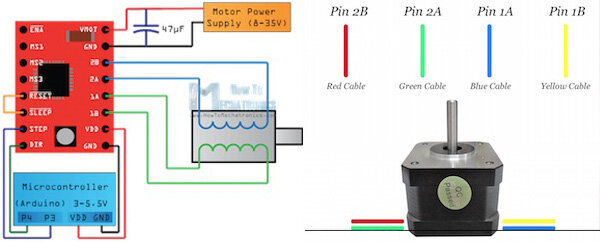
Moving Motors
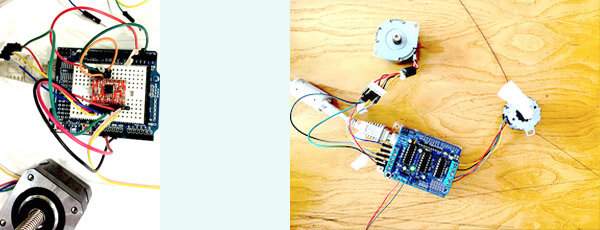
We started with Arduino and worked with an EasyDriver Pololu (or "boyfriend" shield).
We also looked at another shield that Cit had, the one from DK Electronics listed above.
After the physical set-up, we changed some of the Arduino example code to explore:
- changing quantity of steps
- changing delay between steps
- how to minimize vibration and sound depending on steps
- how a fixed or floating part moves along the axle
- We tried to figure out what "lo" means: it is a way of calibrating different timings, though when looking for physical change, you see none
To test the steppers via Arduino, we used the Adafruit Motor Shield library, which you can find under "Examples" in the Arduino menus. To use it, there are some files to get into your Arduino/libraries directory from the Adafruit github. Follow these directions.
We ran the following two programs, as well as "MotorParty" from libraries/AFMotor/examples in Arduino.
Does the motor work?
motor_operationtests.ino
Want to mess with a simple code?
stepper_codetests.ino
USEFUL INFORMATIONAL SITES
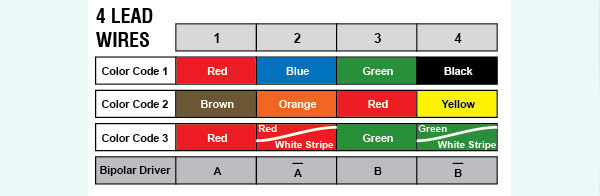
Re-cap of the process of testing motors
- If you test resistance on two wires on a motor, less than 100 ohms means they are connected. Otherwise, the ohmmeter reads "1," which is what it reads when it is connected to nothing.
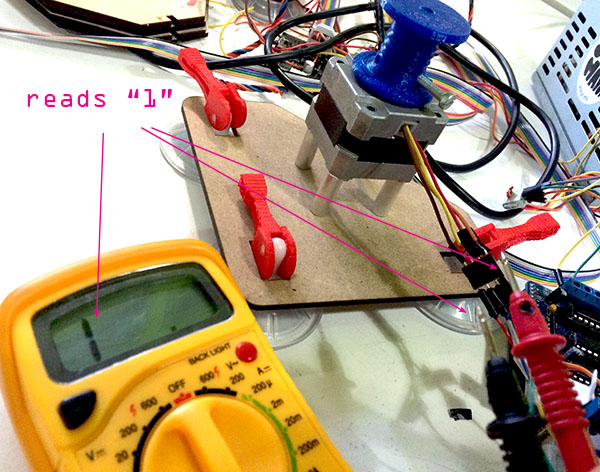
- In this case above, the red-and-yellow are connected to one coil, and the brown-and-orange are connected to another coil. The only way to know that is to find a diagram. See diagrams at Lin Engineering.
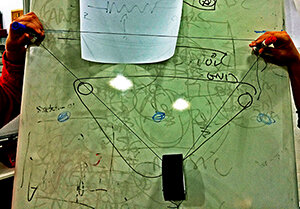
Location, location, location
Ah, the sidetracks of group work. Well, okay, of work. Of being human. We spent a long time choosing to use this window as our canvas.
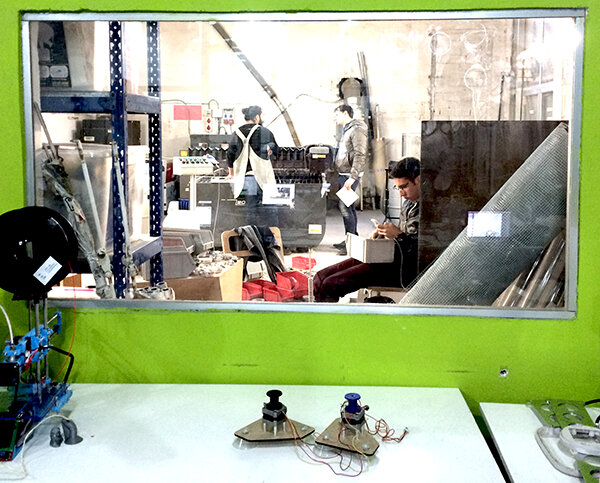
Material Supports
- Caro made a file for the lasercut base to support the motors.
- Gori cut some pipe to use as spacers and is making a new head for one of our suction systems (see the section just below on sucking.)
- I made a spool, based on spools used to prototype a similar project last year.
- Cansu is making a penholder.
- Our fifth teammate, Cit, has been working on stepper motor code.
Sucking ~ which is pidgin Spanish-English. Suctioning.
We found that the suction cups that we had fitted in our lasercut file, with just a hole for the cups, fits a kind of suction cup that doesn't hold well. So Gori is re-designing the hook part of this suction cup so that the part can hang vertically.


Expectations
To get this thing moving and add Gestalt node drivers. We thought we'd get it done this week, but the building is closing in 15 minutes. And, as usual, we have a cake to eat.
////////////////////////////////////////////////////////////////////////////////////////////////////////////////////////////////////////////
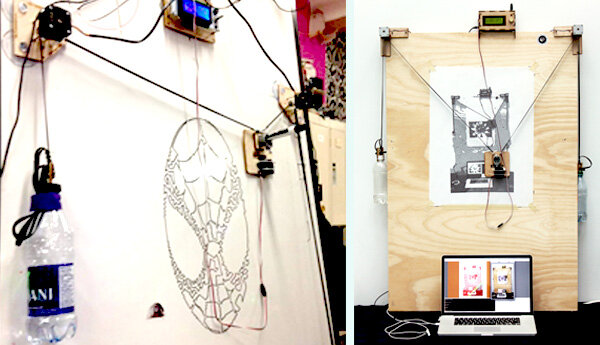
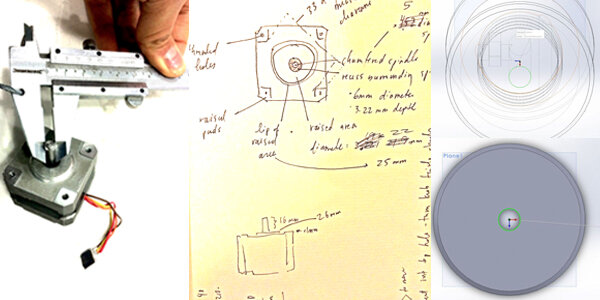
Making the Spools for the Spindles (my part)
The stepper motors have spindles sticking out of them. We will attach a spool to the spindle so that it can let out and take in nylon fishing line. Our penholder will be controlled in "x" and "y" by the relationship of the two stepper motors in the upper corners of our drawing area.
I started with a file from a 2015 project in Barcelona, that of Gabriel Tanner Passetti and Alexander Nicolas Walzer. They were only two people working together, but combined they had six names, so this must have helped them get three times as much work done.
Steps
- Measure spindle with caliper.
- Check diameter in file.
- Adjust diameter, save as .stl to send to cloud to open in Cura
- In Cura, make all adjustments then save as .gcode file. The 3-D printers read g-code only.
- Send .gcode to cloud and get it onto a machine that has an SD card reader or find an SD card reader, save .gcode file onto SD card. The SD card comes from one of the 3-D printers ~ it should be in a slot on the left-hand side. After your file is on the card, return it to the printer from which you took it.
- Prepare the machine to print. (hoping to make another tutorial on difference between Formbytes and RepRap ... someday)
- Retrieve the piece from the print bed.
- Check that it fits the spindle.
- Adjust file if needed and do process again.
WISE to do a gauge of hole sizes to get a feel for the kind of snugness desired. A .1mm change in the file can alter a piece from no-way fit, to super-tight fit, to reasonable press-fit, to loose. It's not always foregone how you want the piece to fit till you feel it and let your fingers think about the eventualities.
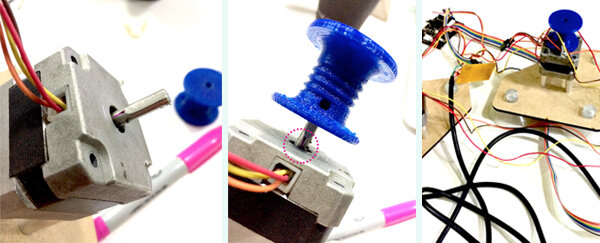
Re-sizing the Spool
The first spool didn't fit!
Rather than going through a 1hr+ printing process again, I used the drill press and hand drill to widen the hole till it could get mushed onto the spindle.
Wait!! Oh no!! Pry it off, add a washer (as an insulator against the heat of the motor, which could soften the PLA), grind the motor spindle so there's a flat space on it for the set screw to set against, then stick it on again.
Add a set-screw for insurance against wear-over-time.
Complications to the workflow
To tell the truth, the second spindle, at a .1mm increase of diameter, also didn't fit. It was a 5.1mm hole in the file, and Martin helped me find a 5.1mm drill bit to press through, then it fit. I don't know Martin's title. Lab manager, perhaps? He's the man who knows all the things about all the machines and cares for them and us with infinite politeness.
I made a mistake and "saved model" in Cura instead of "save G-Code." Because things in the lab are a little chaotic and pointy right now:
I decided to download Cura to my computer rather than try to find a working computer connected to the network with an SD drive. I reopened my .amf and re-saved as "save to g-code," which then makes a file that shows up with extension ".gcode"
In reprinting spool, I forgot to check for the "brim" or "raft" in the transition from .amf to .gcode. As a result, no brim!
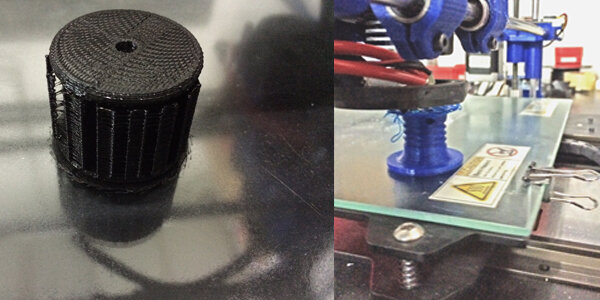
As you see in the pics above, though, it turned out fine.
Shoulda ...
... made a piece of plastic to test for sizes and see which hole size works without needing a pass with the drill press (unlikely we'll ever get to this ... according to the unspoken law that the prototype is often the final).
Events and their Ideas
Fab Lab crit for Final Projects
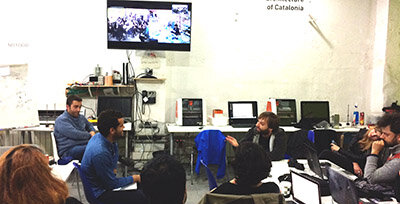
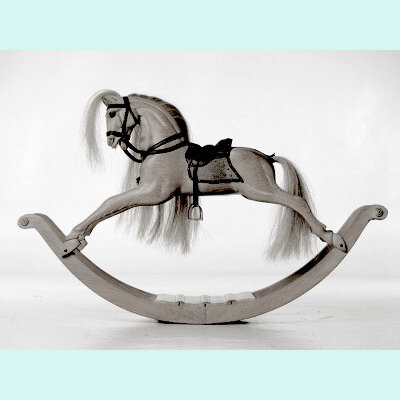
- Gori presented idea of a project that helps us be less dependent on technology
- Cit presented wearble sensors for dance
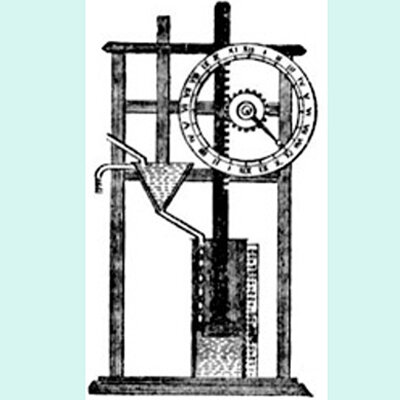
- Arnau presented Macchina del Tiempo
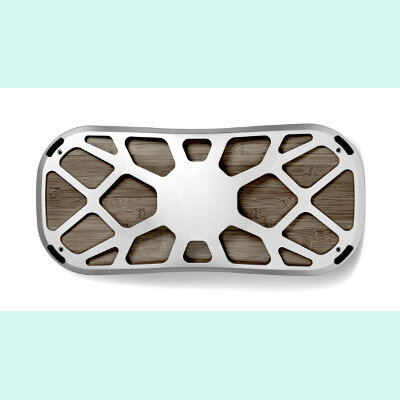
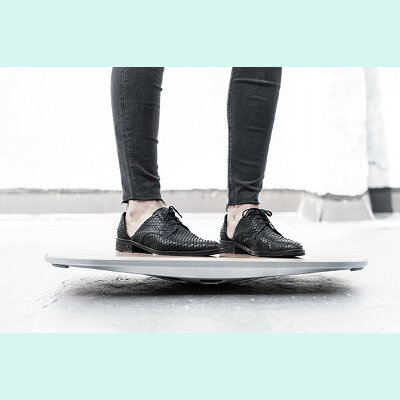
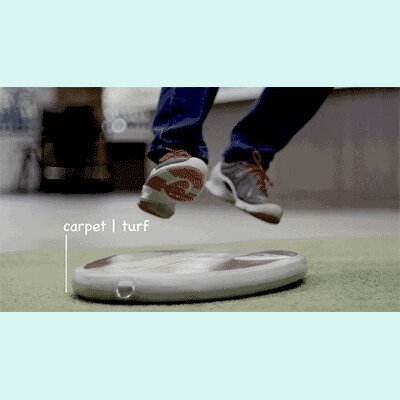
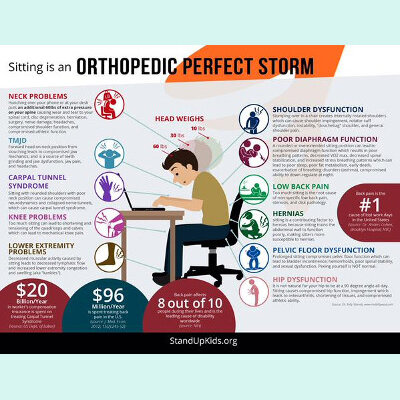
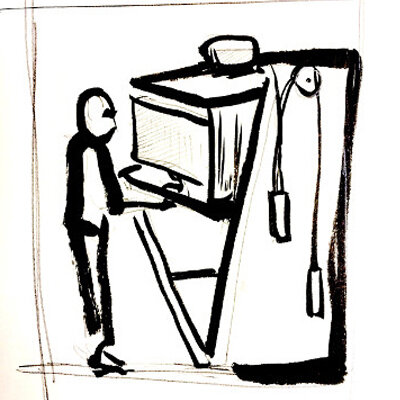
- I presented an active workstation concept: the Shelf-Sufficient.
Here's my presentation, which I'll elaborate when I get some time. For now, it's my first use of JavaScript!


Many thoughts arose. I am marking down some questions here for now.
Art vs design?
- Re-evaluate certainty, or dictate solutions?
- Create ideas for social utility, or create just for yourself?
How about: successful art reveals a lot about everyone through insightfully focusing on the life of one; successful design ...
I don't know.
Creates material need for a new object? Privileges its user by giving them a sense that they fit well in the world? Helps groups of people solve some of their problems?
Maybe the last one. I am still looking to know. If anyone is prompted to send thoughts about it, please do.
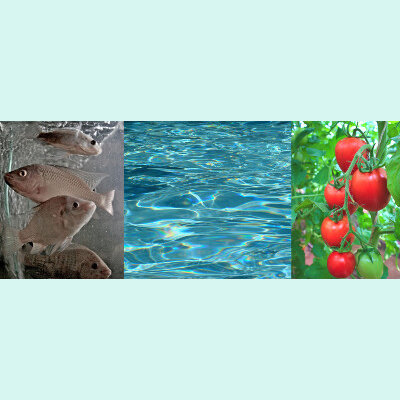
recitation: Food Computers by Caleb Harper
A talk of enormous scope about the future of farming.
Things noted:
- Surprising:
- average apple in the US is 14mths old
- 80% of ppl in the US would support mandatory labeling on food containing DNA
- In the face of lack of education, Caleb feels that what is missing is the right platform.
- He poses three questions:
- What if climate was democratic?
- What if we could email a tomato?
- Could you have the climate of Napa in Australia, for instance?
- What if there were 1 billion more successful farmers?
- Most farm families are giving up on farming right now. Massive knowledge attrition.
- Comparing agriculture with 1950s computing, the mainframe. How to make farming personal, like personal computing?
- This seems like a standard trope in the world of technology for a great success story. I wonder if there is a counter-story? Well, we spend too much time on our computers, obviously ~ there's that oft-told story. We've all become techies and secretaries ...
- One of the goals: Community of development, people to supply mods. Agricultural economy has not become a networked, or shared, economy. No AirBnB or Uber of agriculture.
- Kinds of Sharing Networks:
- Coder
- Maker
- Network
- Food (digital biology)
- Caleb shows a lovely picture of lettuce grown in Media Lab and eaten there in a big salad party. Hyperlocal lettuce party.
- Climate decoder; a box with many climates to see what was happening to the same plants in different climates.
- Food Computer monitors your plants.
- Lets you know the "plant recipe" and monitors health and status of the plant (it seems to have a sophisticated camera to see the plants?).
- Goal of food computer: increased noticing? Moving towards self-sufficiency? Re-educating a public who has lost the habit of noticing plants?
- Culture back the biome in the gut that mimics the biome of the soil.
- A teacher set the Food Computer to the climate of 50 years ago. Then the kids predicted the climate of 50 years hence. What grows?
- DARPA farm where the plants are injected w tobacco mosaic virus to synthesize a protein that is resistant to Ebola.
- Is the main thing making farming an urban proposal? So that you can grow things in buildings?
- Using an industrial designer to make the food computer come down from $1500 with industrial manufacture.
- "Open Phenome." Open data for how all living things express.
- The future of food is no longer about calling out what's wrong or lamenting the big problems like climate change, it's about:
- Connecting and networking for the next 1 billion farmers.
- Put a farmer's brain in the cloud for us to resource.
- Self-sufficient cities rely heavily on the Food Computer. (Ah, that's not what I, personally, understood! I thought it was about a greater awareness of connection. That what it seems when standing on the terrace at Valldaura.)
- Caleb says some sweet things in a response to a critique that his vision is dystopic:
- Caleb says, the data sets that he and his team are producing do not exist in the public realm. Democratizing data. Farming is not natural. It's humans controlling the environment. It always has been. Farming is inherently unnatural. How do we make farming less env impactful and use the food we produce to create healthier people.
- Caleb is convinced that the way to reconcile feeling good and ignorant about nature and big food solutions is A PLATFORM.
- He also feels that what he and his folks do is quite romantic. He is caring for the lives of 2000 plants. What's more intimate than personally pollinating a tomato?
- Potential applications:
- Food computer as a medical box so that a doctor can prescribe which plants you grow for yourself (super-cool idea!).
- Reclaim the grey water and see if the minerals and nutrients in it can be reclaimed BEFORE it goes to blackwater.
- Major farms buried underground in the cities that are used as hepa-filters to soak up CO2 and give us O2.
Caleb is inspiring about how to re-see the landscape so that it is part of the systems that we use.
SolidWorks Tutorial by Gregoire Durrens
Software tutorials are hard to organize, because everyone is at such different levels. Greg was showing us how to make a fully parametric design in SolidWorks. He showed three ways to create an equation. For some reason, I couldn't focus on this tutorial. I did catch one phrase from Greg:
"I am not sure what I did just now, but my toolbar disappeared."
... which sums up a great deal of my SolidWorks experience.
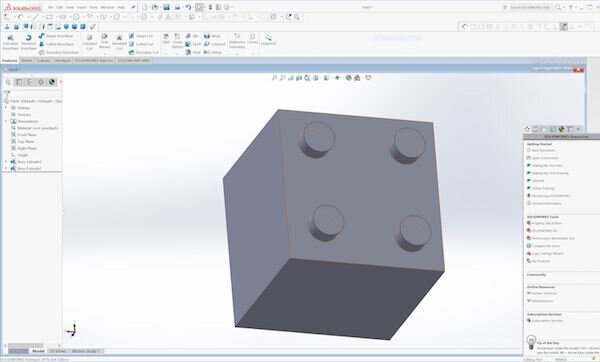
Greg took a real lego, drew it up in SolidWorks, made assemblies, figured out how to make it a parametric lego (for different materials, for instance) ~ it's a great idea to model legos from life and experiment with assemblies.
Theories
My theory of the week is that I am less self-centered if I exercise more and eat less cake. I have yet to test this theory, and so far I am proving it only by pursuing its opposite.
Santi and I were talking about our mutual aversion to talk to people as if or make projects that indicate that we have the answers for other people's lives. At the same time, this seems to be the crux of the difference between "artist" and "designer," which became a big takeaway of the crit / semi-crit I received on Friday about my final project. I think it is possible that modularity solves this problem. You don't make a solution: you make parts that help people make their own thing. I am getting why this is so important as a structure for pedagogy, for design. Is it a thought-process that relates to art? It might less fundamental to art than as a design or pedagogical concept. Can modularity be breathtaking? I'd like to see an example of that. Maybe a model somewhere in the realm of architectural pre-fab?
And, since I am the Old Lady of the FabLab (as Xavi, to my delight, said), I can at least communicate this wisdom that I have seen enacted this week: a group sometimes has to make mistakes together in order to learn as a unit, even if one person or another might know better. Collective patience probably makes for collective resilience. (Needing to wrap up, I may have gone one sweeping conclusion too far.)