
Week 15
This was an interesting week for me because I know there's a lot of possibilities on connecting the boards we did in the past weeks to create more valuable projects.
After having done it I have to say that this is a deep subject and for sure I will spend more time on the future trying different types of networking, for example I'm interested in bluetooth and IP.
Objectives
Design and build a wired &/or wireless network
Connect at least two processors
Weekly Progress >

First, we had our weekly lecture with Neil Gershenfeld, you can watch it here.
Neil Gershenfeld hosted this week’s lecture, we talked about The State of the Fab Lab Network.
Revision and update about the various programs, projects and events going on in the Fab Lab Network.
Assingment >
This week we had to make a small network between self designed boards. For this one I did the Serial Asynchronous, with the RS-232 standard which is a commonly used in computer serial ports.

First step is to design the board. I based y design on the hello.bus.45.bridge and the hello.bus.45.node.
This is the list of components I used for the bridge.
ATTINY45SI / x 1
AVRISPSMD / 2X03SMD / x 1
CAP-US1206FAB / 1uf / x 1
LEDFAB1206 / x 1
PINHD-2X2-SMD / 2X02SMD / x 1
RES-US1206FAB / 10K / x 1
RES-US1206FAB / 1K / x 1
FTDI-SMD-HEADER / 1x06SMD / x 1
You can access the eagle files: here
This is the list of components I used for the nodes.
ATTINY45SI x 1
AVRISPSMD / 2X03SMD x 1
CAP-US1206FAB / 1uf / x 1
LEDFAB1206 / x 1
PINHD-2X2-SMD / 2X02SMD x 1
RES-US1206FAB / 10K / x 1
RES-US1206FAB / 1K / x 1
You can access the eagle files: here
Next step, mill the boards. This time Ferdi (out tutor) recycled some broken 1/64 milling bits. He grind the tip to make it conical and then he made a vertical straight cut in the diameter so the bit can take out material when spinning, with this fix we have a new 0.01 milling bit that can go really fast (40mms!).
Everything went ok, the milling worked, but the quality wasn't the best. I added 6 for offset, but you might need more, the paths where a little bit close in some areas.
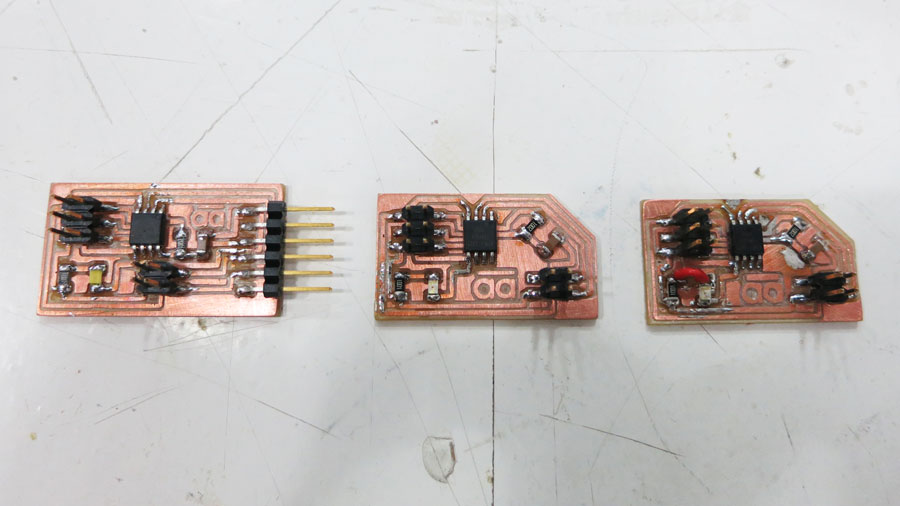
Then stuff the boards. No surprises here, by now I have soldered a pretty decent quantity of components so it's becoming easier every time.
I just had one problem in a node board with the connection between the 1k Resistor and the anode of the LED, the path wasn't milled that perfectly and when I was fixing it the copper it detached on that spot, so I was unable to put solder there. I made a bridge with a small cable to fix it. After this, everything went smooth.
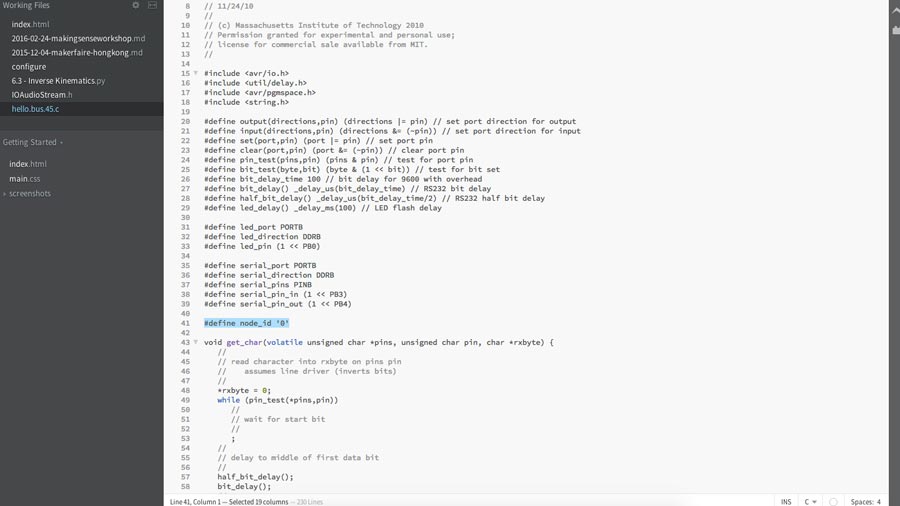
Next, program the boards. For this process you need to have the .c file and the .make file. You can find those here.
First I started with the Bridge board then the nodes. In this case we assigned each board an ID so we can send instructions to each one. You have to find this line in the .c file: #define node_id '0'. Here you change the "0" to any ID you want to assign, I used numbers.
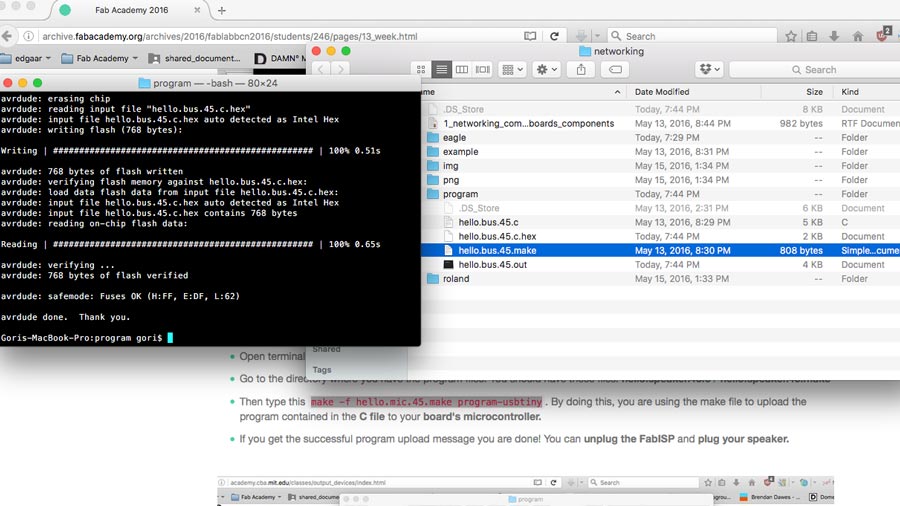
Then after changing you have to connect your FABISP to the bridge board. Next you have to go to Terminal, then the folder where your .c and .make files are and execute this: make -f hello.bus.45.make program-usbtiny. You will see that the led in your board blinks, this is because it is being programed.
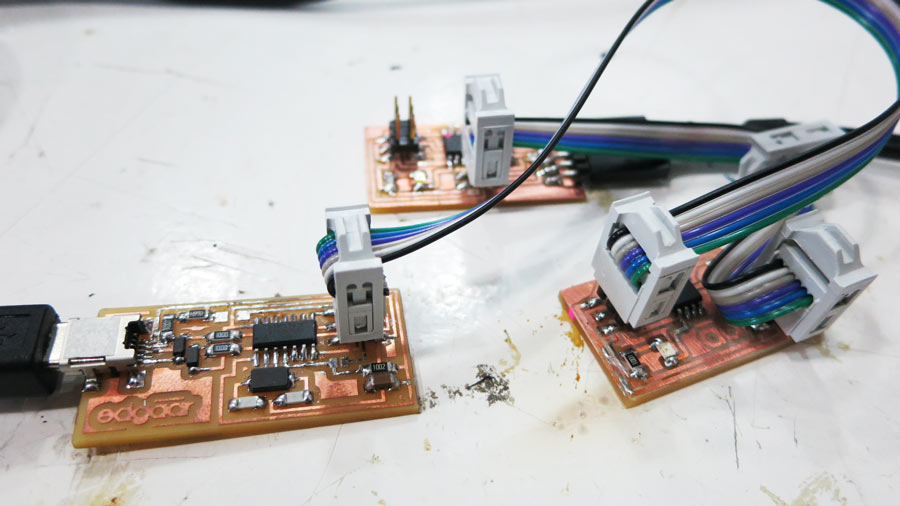
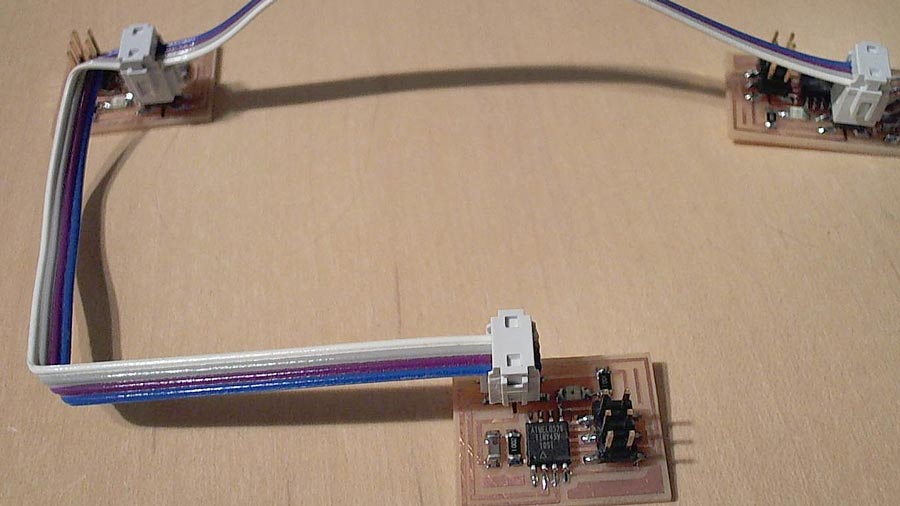
Repeat the previous steps for programing the nodes. The only thing that changes is that you have to do it by using the FABISP and the Bridge Board (for power). You will have to make a new cable for connecting the boards, use ground as your guide on how to connect them.

And the las step, testing it. For this I used Arduino.
Open it, go to tools > port and select the port where you have your bridge board connected, it should be something like /dev/cu.usbserial-FTHBQ1K0. Then click on Serial Monitor and a new window will appear, here you can send the "instructions for communication" to your boards, just type the ID of one of the boards, hit enter and you will see that the LED blinks each time you send the ID.
And this is the result, networking boards!
