Week 16 - Interface and Application Programming
Assignment:
- write an application that interfaces with an input &/or output device that you made, comparing as many tool options as possible
- This week’s home work page
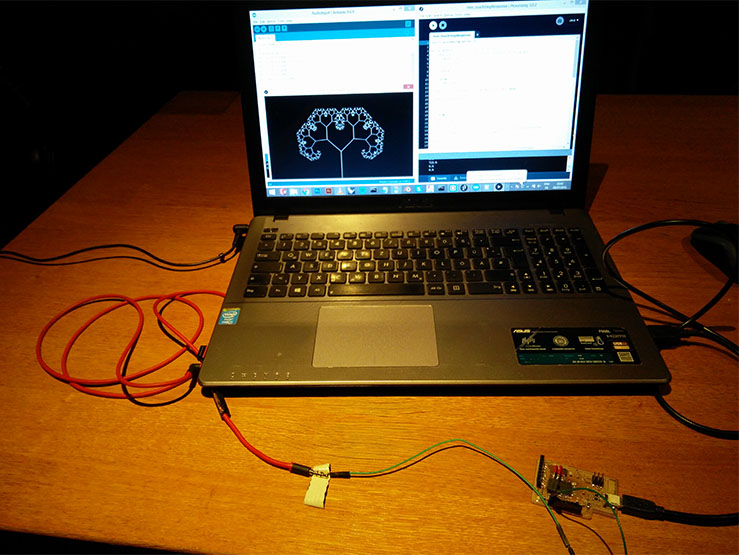
Processing Graph Tree versus Audio output, via Luizino micro-controller :I wanted to play a bit with Processing. I like it how it looks and the interesting things you can do with it.
Our Fab Academy Guru Ferdi showed us, among many examples, the Recursive Tree by Daniel Shiffman.
I wanted to, instead of using the mouse to control the tree's opening, that the tree would react to music, just like my final project.
For that I used:
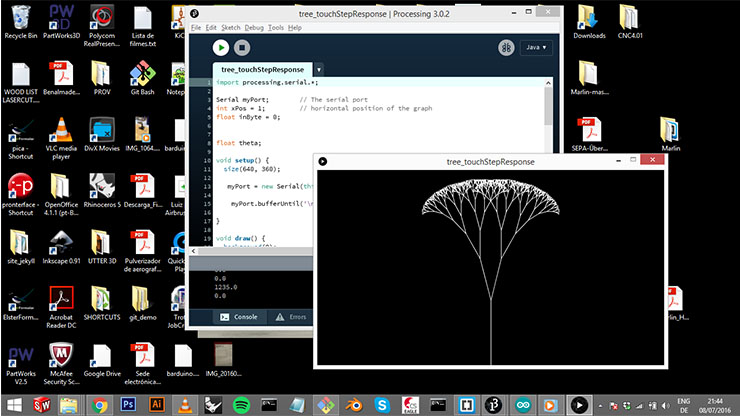
Processing Code :import processing.serial.*;
Serial myPort; // The serial port
int xPos = 1; // horizontal position of the graph
float inByte = 0;
float theta;
void setup() {
size(640, 360);
myPort = new Serial(this, Serial.list()[0], 9600);
myPort.bufferUntil('\n');
}
void draw() {
background(0);
frameRate(30);
stroke(255);
// Let's pick an angle 0 to 90 degrees based on the mouse position
float a = (inByte / (float) width) * 90f;
// Convert it to radians
theta = radians(a);
// Start the tree from the bottom of the screen
translate(width/2,height);
// Draw a line 120 pixels
line(0,0,0,-120);
// Move to the end of that line
translate(0,-120);
// Start the recursive branching!
branch(120);
}
void branch(float h) {
// Each branch will be 2/3rds the size of the previous one
h *= 0.66;
//h *= 0.90;
// All recursive functions must have an exit condition!!!!
// Here, ours is when the length of the branch is 2 pixels or less
if (h > 2) {
pushMatrix(); // Save the current state of transformation (i.e. where are we now)
rotate(theta); // Rotate by theta
line(0, 0, 0, -h); // Draw the branch
translate(0, -h); // Move to the end of the branch
branch(h); // Ok, now call myself to draw two new branches!!
popMatrix(); // Whenever we get back here, we "pop" in order to restore the previous matrix state
// Repeat the same thing, only branch off to the "left" this time!
pushMatrix();
rotate(-theta);
line(0, 0, 0, -h);
translate(0, -h);
branch(h);
popMatrix();
}
}
void serialEvent (Serial myPort) {
// get the ASCII string:
String inString = myPort.readStringUntil('\n');
if (inString != null) {
// trim off any whitespace:
inString = trim(inString);
// convert to an int and map to the screen height:
inByte = float(inString);
println(inByte);
inByte = map(inByte, 0, 1023, 0, height);
}
}
Files are at the Bottom of the page (Arduino's also).
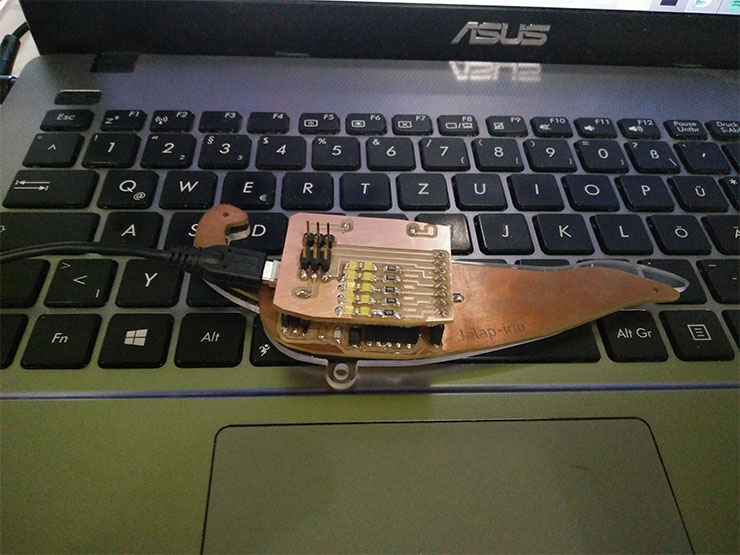
Shield for Luizino and Jalapino - Interfacing sound with LEDs :For my final project, as I'm controling my machine with music, I decided to make a shield for Jalapino to control the servos accordantly, and there, to add a sequence of LED's as a Sound Bar.
The output from the pc's sound jack has three contacts. What I'm doing is I'm getting information from the left contact. What comes from a sound's player outplayer is electricity, after all. This is how the speakers would work. Current would go through the coils, producing a magnectic field, vibriting the membrane of the speakers.
Instead of plugging it to the speakers, I'm reading that current and wrote a code that will light up the LEDs gradually.
The shield was based upon the PIN structure of Luizino and Jalap-ino.
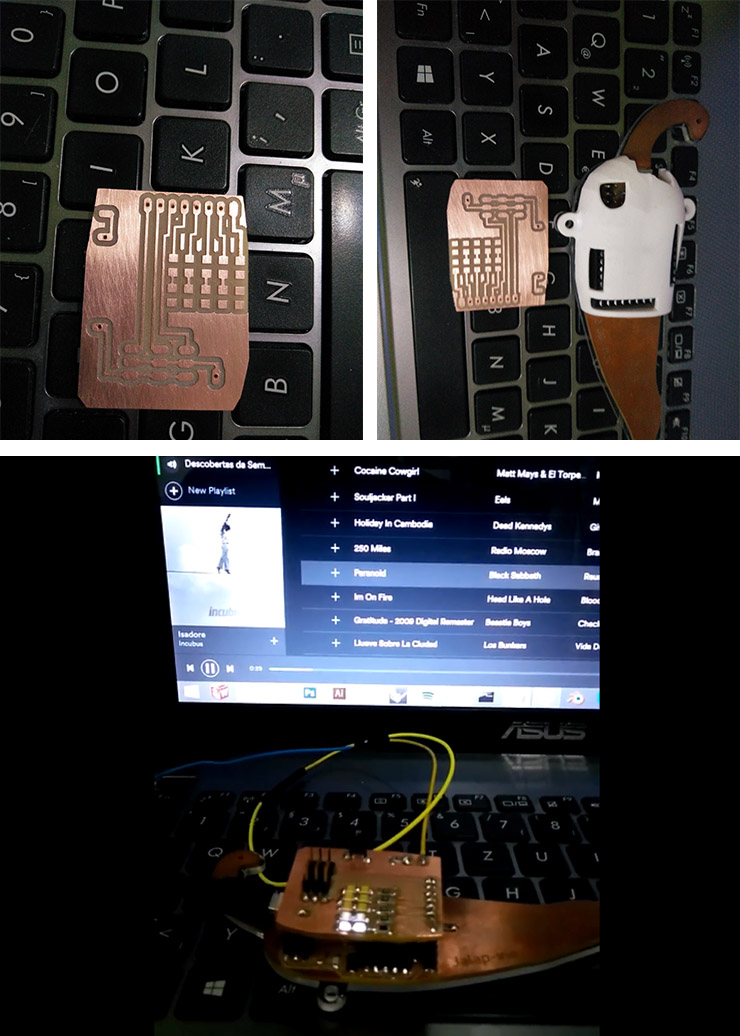
The results are that with this code I managed to reproduce a Sound Bar.
The way I did it was simple actually. I've created an intiger X, one sound, and one for every LED.
At the void setup(), I've called all the LEDs outputs. I also began the Serial (Serial.begin(9600);).
At the void loop(), I've Set:
Where Sound Is the result of the analogue read of X.
It then prints Sound (Serial.println(sound);)
Now I'm playing with "IF"s in a way I get a range of the sound. If the results are lower than 30, So do one thing. Or elso, if higher, than do another thing.
if (sound > 30) {
digitalWrite(led1, HIGH);
delay(20);
}
In this video, the music is not audible because I was using my headphones.
-Download my files::-Traces Shield LED >PNG<
-Outlines Shield LED >PNG<
-Holes Shield LED >PNG<
-Processing CODE for Sound Tree
-Arduino CODE for Sound Tree