Week 12 - Molding and Casting
Assignment:
- design a 3D mold, machine it, and cast parts from it
- This week’s home work page
"Jalap-ino", "Pepper-ino" & "Chill-ino" and its shell:The Input Device's week was productive and addictive. This was the latest result of that week and I will make it a shell, in green polymer (As a Jalapeno).
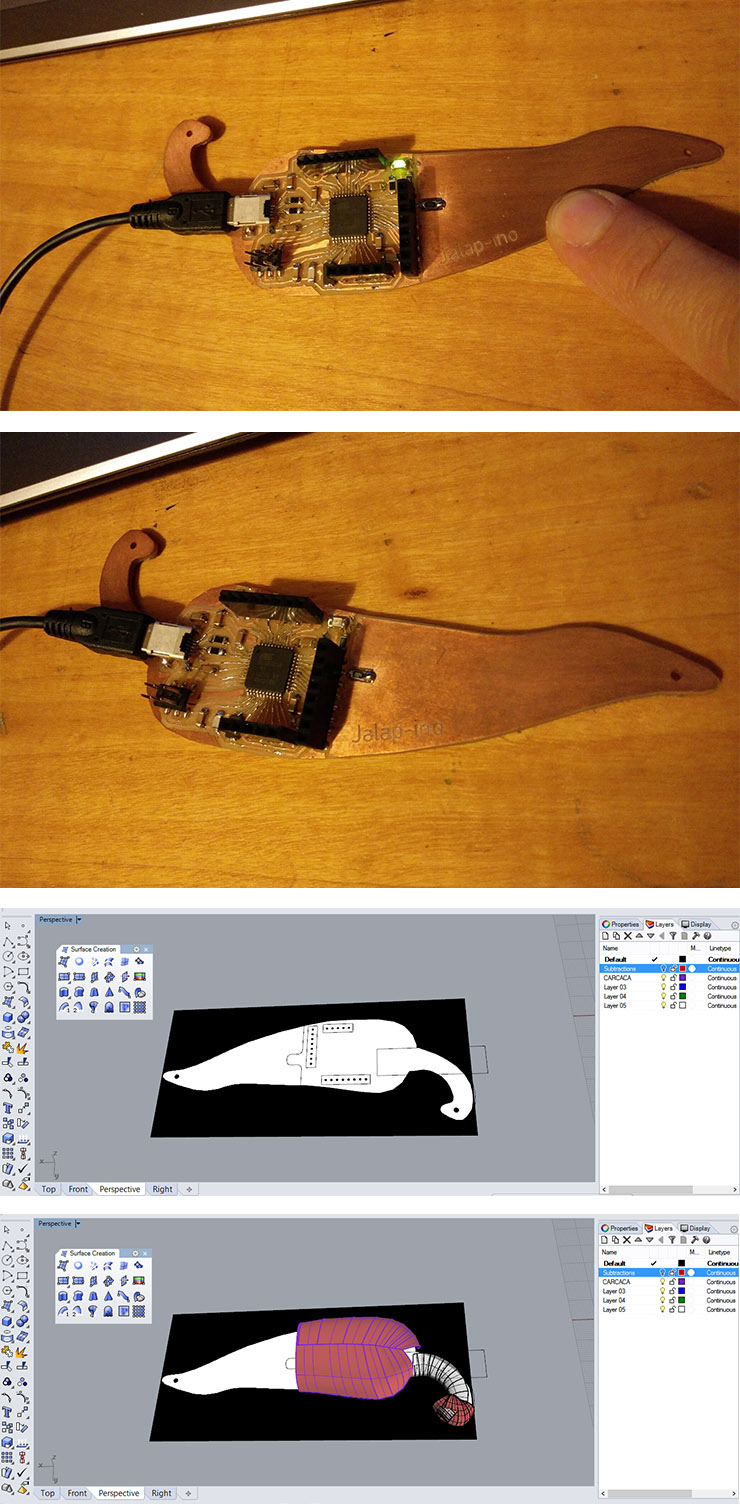
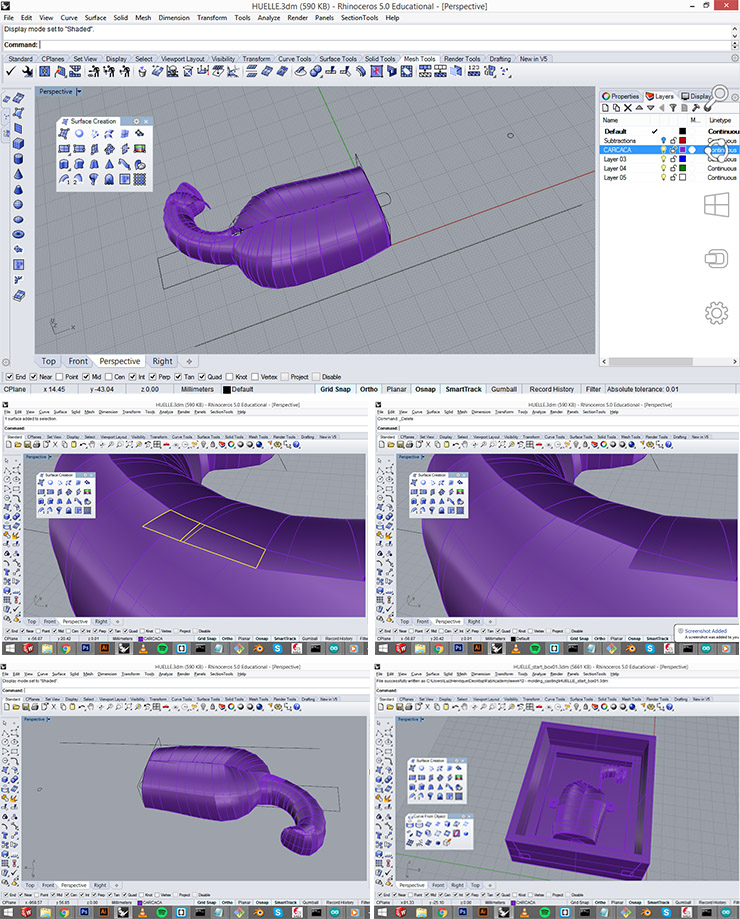
Finalizing the drawing on Rhino was harder than I had projected. All the details, the pins, the USB cable, the components in general, that was not the easiest to calculate. After a lot of effort and new commands learned, the design was ready.
Project Curves and Split were commands I used it a lot, that I didn't use a lot before. The Booleans also, but those I used before.
Milling Wax Block >Counter-Mold<:I exported the Rhino file as STL and Opened it in Modela Player 4's Software.
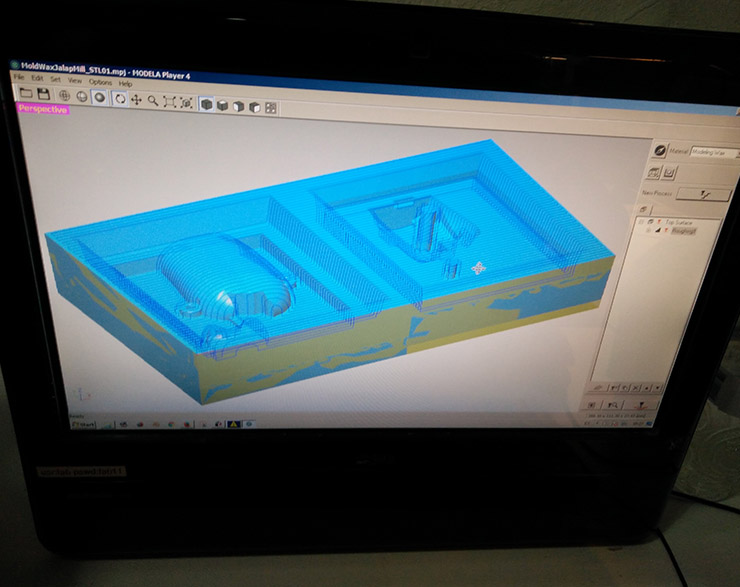
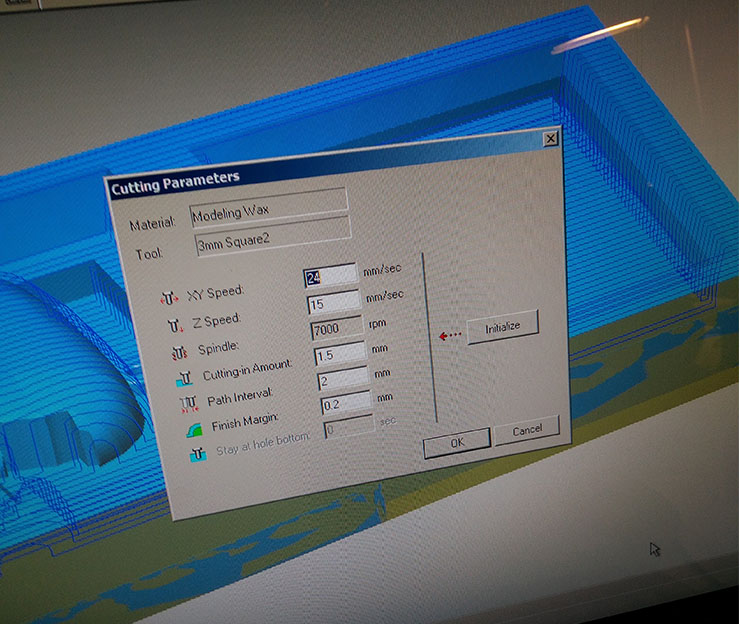
Select a surface, go to New Process, choose among Surfacing, Roughing, Finishing and Drilling. Select the Surface you want to mill. Click Next. Choose the tool(Blade) to cut in this process. I used the 1/8 milling bit. Enter Area and Depth. Depth for surfacing is the thickness of the Stock. Next. Select the type of toolpath to create.I used the default one (Scan Lines X). Setting cutting parameters, I used default also. Name your process.
Repeat this for the many toolpaths you have. This is interesting cause at certain point you start finding a pattern among the CNC softwares. The interface is different but the names are similar.
Once you start a new toolpath (New Process), you can also define a region, clicking on Partial, instead of All. You can also limit the depth by the Pull up line (End Height). Once you finish your new process, you'll see the results on screen, like a preview.
For the finishing, I selected "Contour Lines" and checked "Outline Only" check.
Select a Toolpath process, click on Cutting-Position Setup. Click OK. You'll see an animated preview of your process cut.
Save changes.

I used the MonoFab Roland Milling machine, SRM-20.
Loading the Wax is not too difficult. We used double sided tape to stick it to the table.
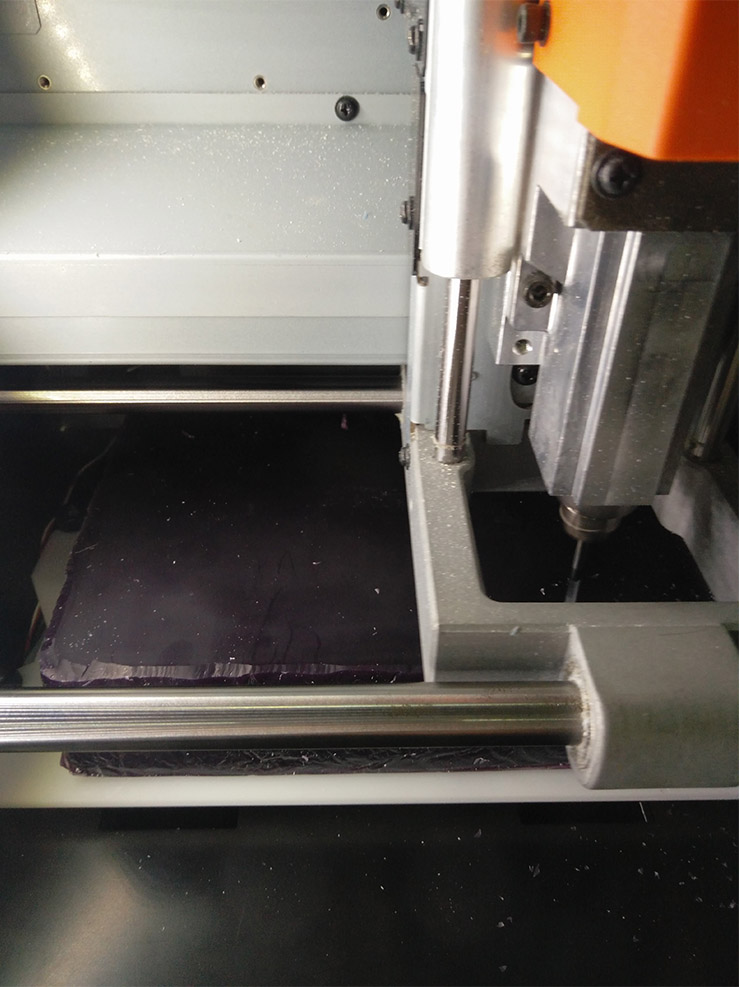
To start the job, it is just like uploading files from Fabmodules, like we've been doing for milling all our eletronic boards.
Don't forget to set X,Y,and Z.
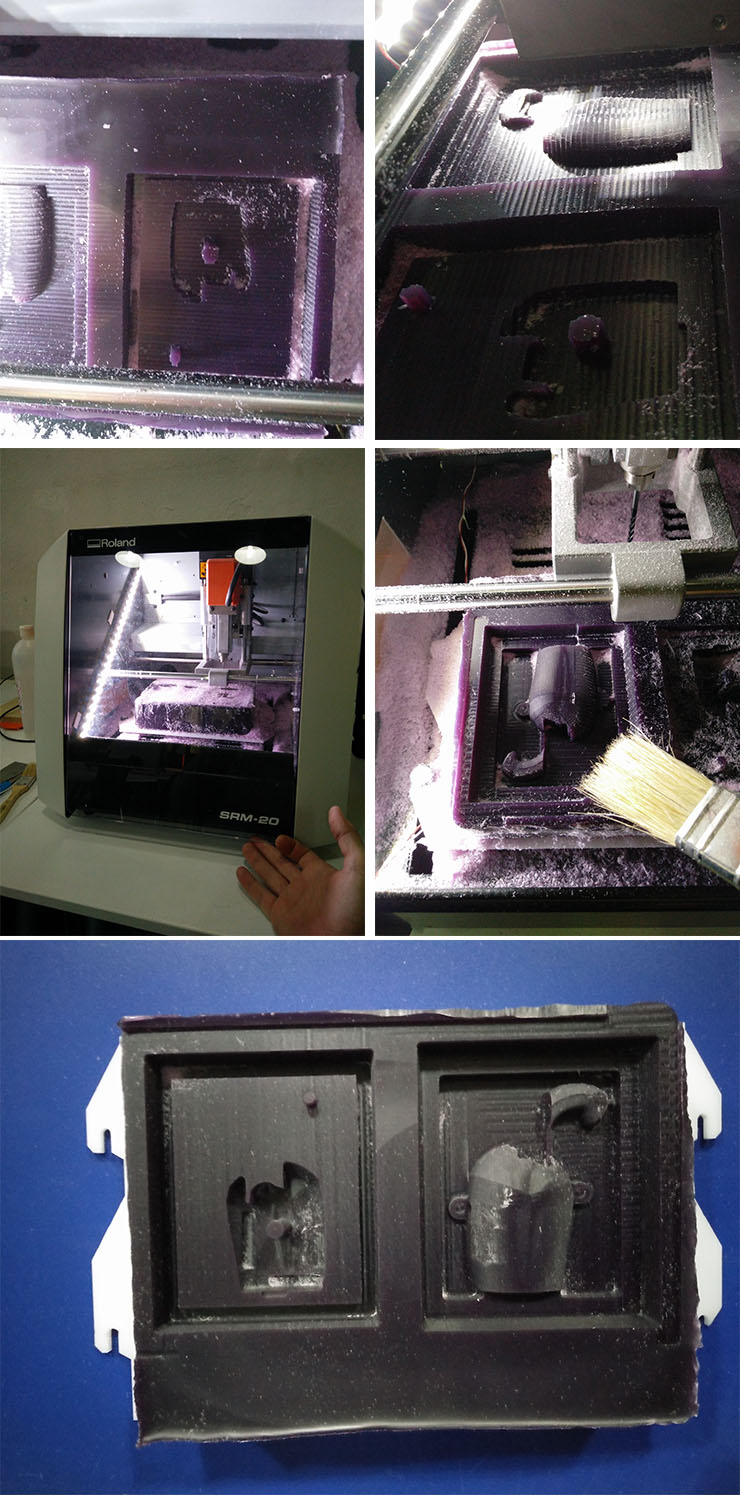
There is is made a mold for a mold
Silicone mold:That was the reason I found designing this mold difficult. This is not a prototype of a part I need. This is the counter part I need.
Now, in this gap there, I'll cast some silicone rubber, aiming to create a mold to cast resins, plaster, wax, plastics...
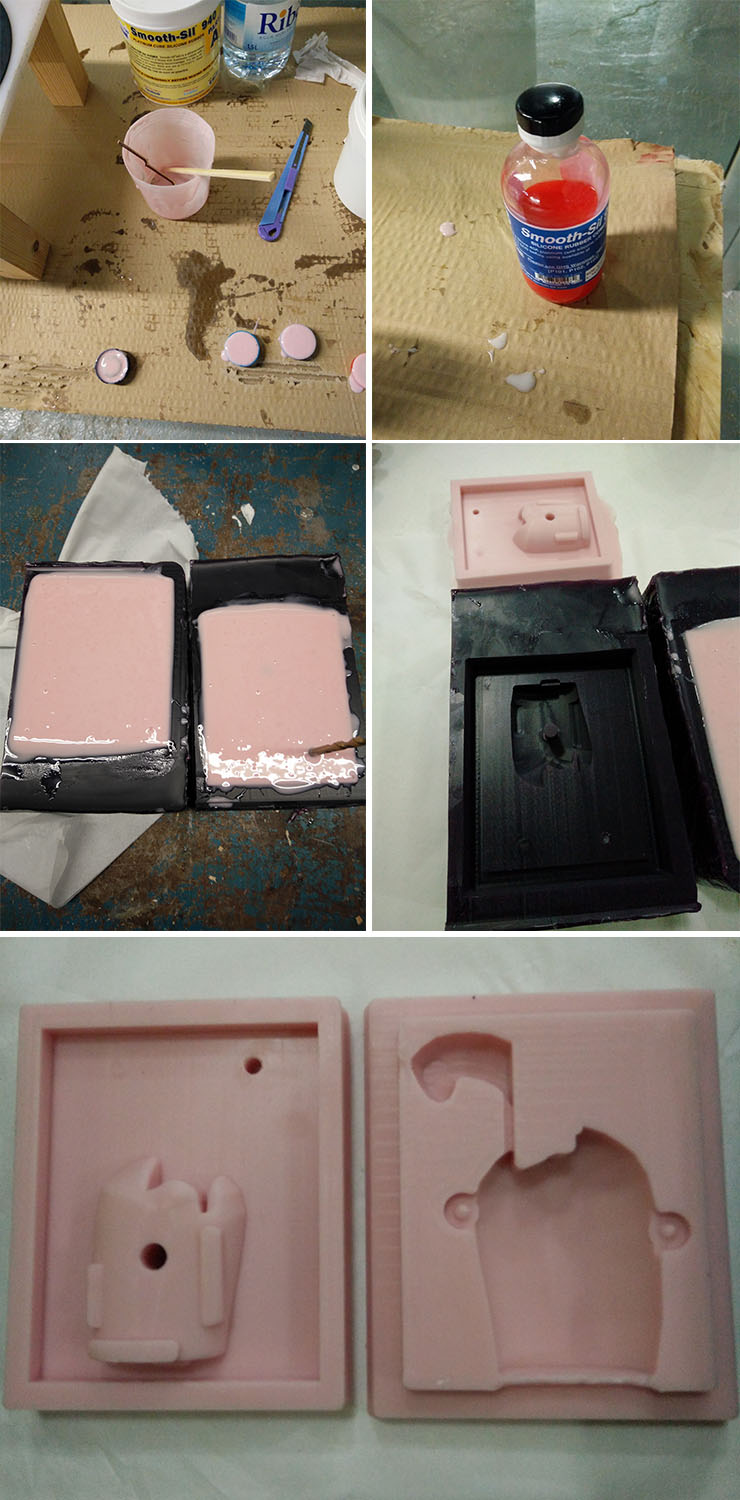
This part was pretty pleasing. The silicone is a nice material to work with. We ran out of the normal silicone rubber, so I used the one we had which was the one for food. A bit more dense than the normal, but works also. I used the SMOOTH-SIL-940.
In Barcelona we buy it in this store in the link. It's the FormX, a very complete store. A bit pricy but quality stuff.
This silicone comes with a catalyst that works in the rate of 1 - 10. (Or 100 - 10, as they tell it.)
Make sure to stir it thoroughly.
Now, mind the bubbles. You want to pour it slowly, very slowly. Ferdi made a simple vacuum chamber for it. Works great.
If you dont have a vacuum machine or Ferdi, well, just go very, very slow - minding the cure time.
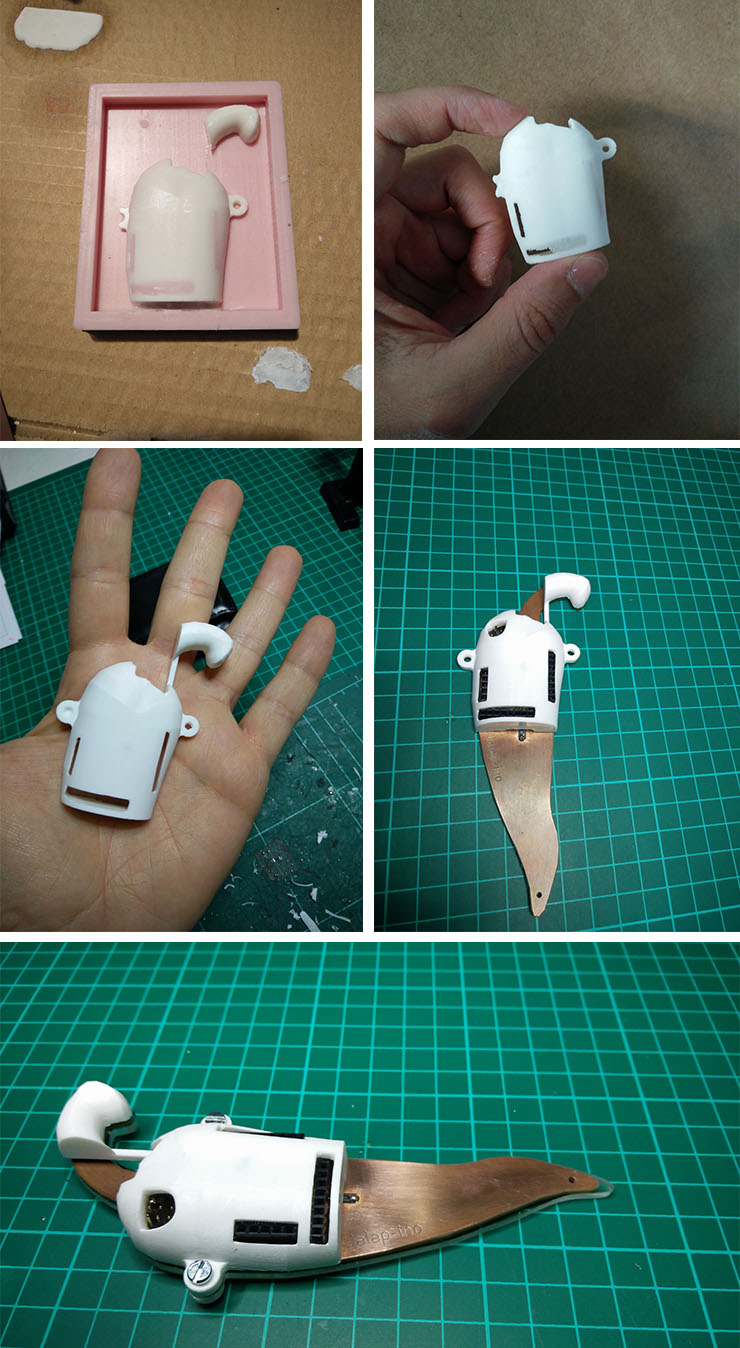
Casting the first Jalapino's shell: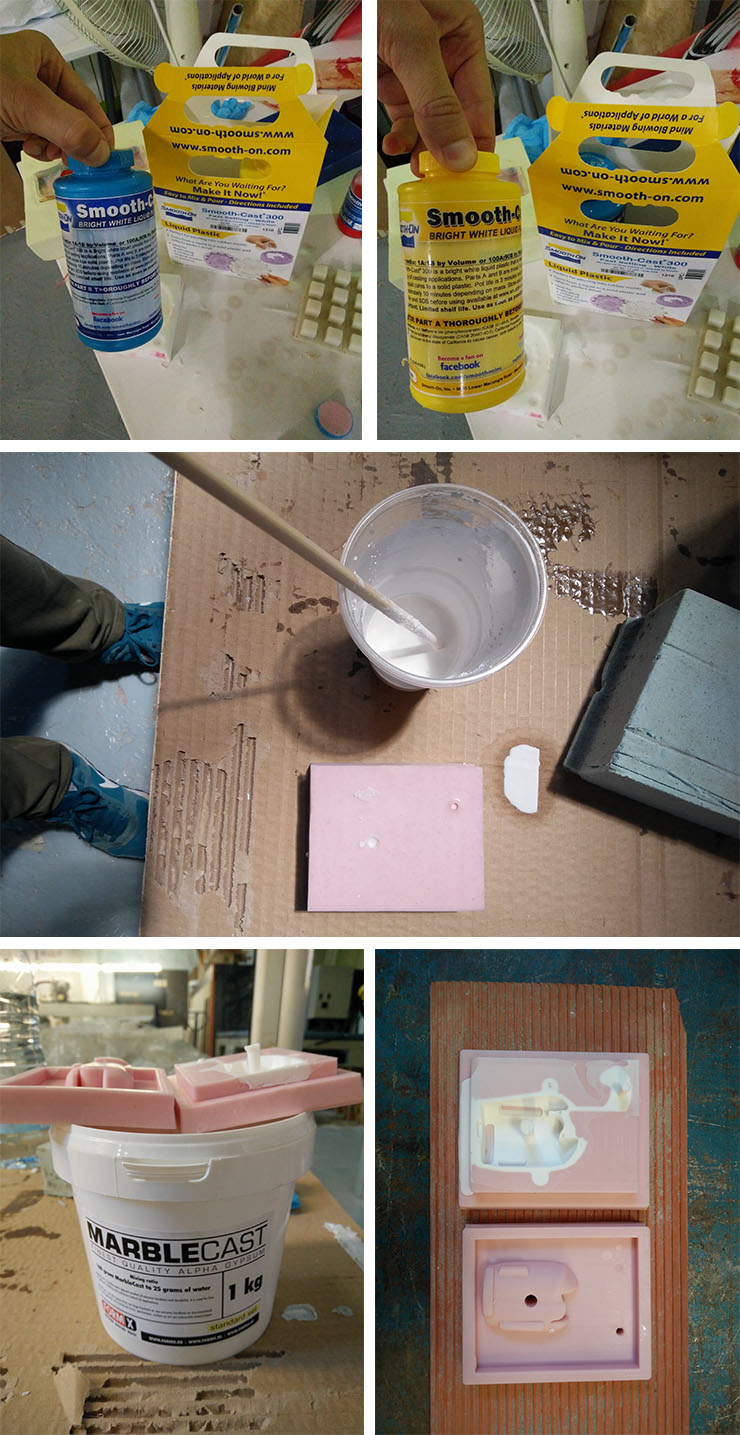
Making clear that there are two different types of materials I used.
One is this first, the Smooth Cast - 400, a very cool liquid plastic, it's transparent when you cast it and becomes white when dries, besides, it's strong.
The other is the Marble Cast - Alpha Gypsum (A very strong plaster)
-Download my files::-STL File Jalapino Shell - for milling
-OBJ File Jalapino Shell - for milling