hola soy un mensaje secreto wiwiwi wawawa
WEEK 12: MOLDING AND CASTING
Assignment:
| | | | | | | | | | | | | | | | | | | | | | | | | | | | | | | | | | | | | | | | | | | | | | | | | | | | | | | | | | | | | | | | | | | | | | | | | | | | | | | | | | | | | | | | | | | | | | | | | | | | | | | | | | | | | | | | | | | | | | | | | | | | | | | | |
// INFORMATION & CONSIDERATIONS
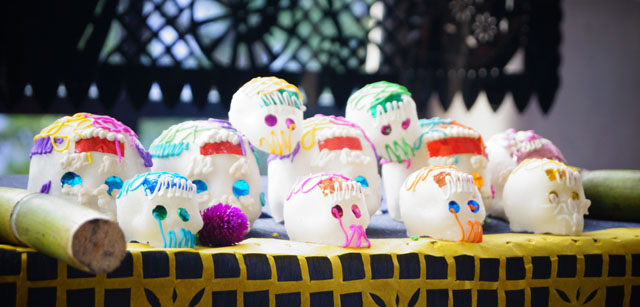
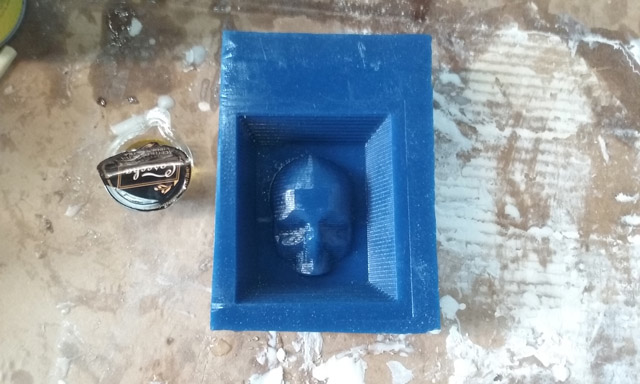
I decided to make a mold for creating chocolate or sugar skulls that are typically given as gifts during "Día de los muertos" (Day of the death) celebration in México.
Some inspiration:
During this week's assignment I went to the hospital for several days because of a problem in my kidney. :( When I came back to the lab, I milled the mold bery quickly thanks to Caro who told me everything about the Modela Player. THANKS CARO!
| | | | | | | | | | | | | | | | | | | | | | | | | | | | | | | | | | | | | | | | | | | | | | | | | | | | | | | | | | | | | | | | | | | | | | | | | | | | | | | | | | | | | | | | | | | | | | | | | | | | | | | | | | | | | | | | | | | | | | | | | | | | | | | | |
// 3D MODELING
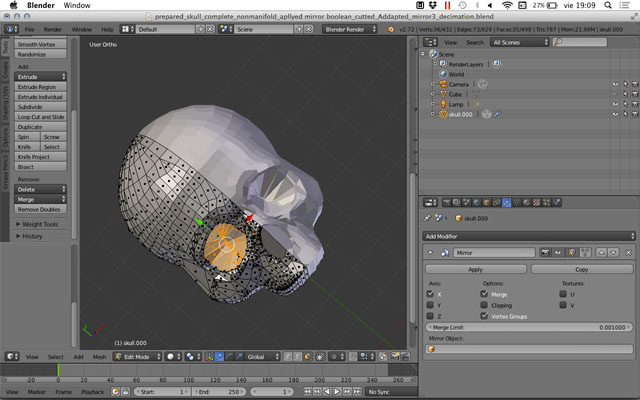
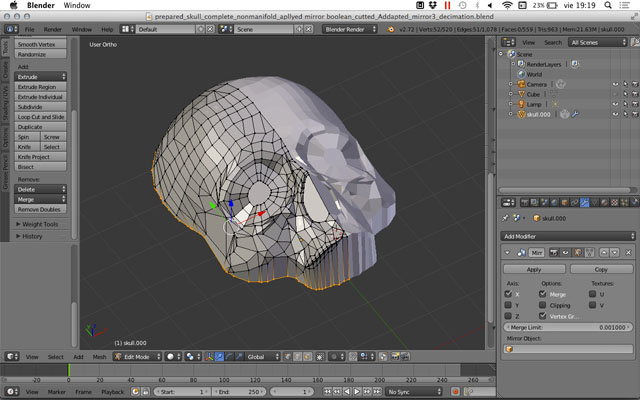
- I downloaded a 3d model of a skull from this site.
- I edited it in Blender, simplified the mesh and made a cut in order to make a one part mold.
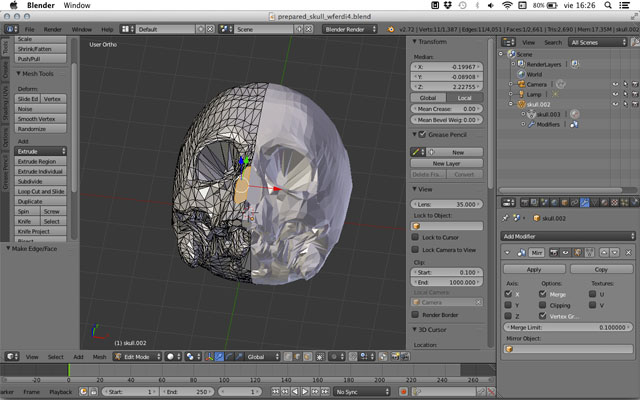
- Applied "tris to quads" command to create bigger polygons.
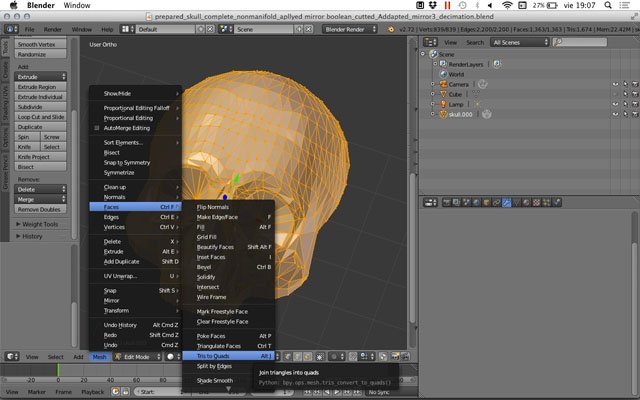
- Removed faces that created negative angles and that could create problems while milling and making the molds.
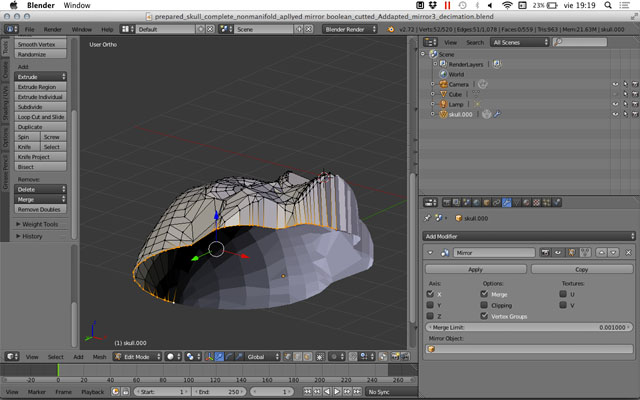
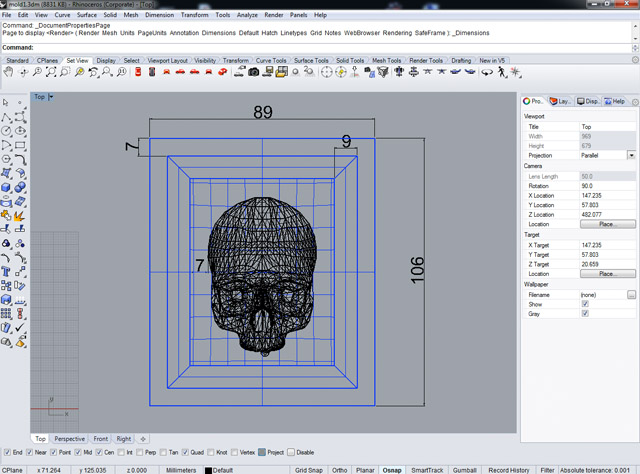
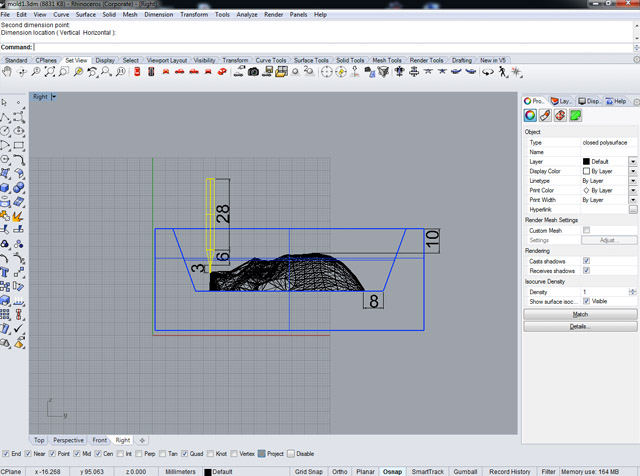
- Then I exported the skull and modeled the mold in Rhinoceros.
- Measure the wax cube that you are going to use.
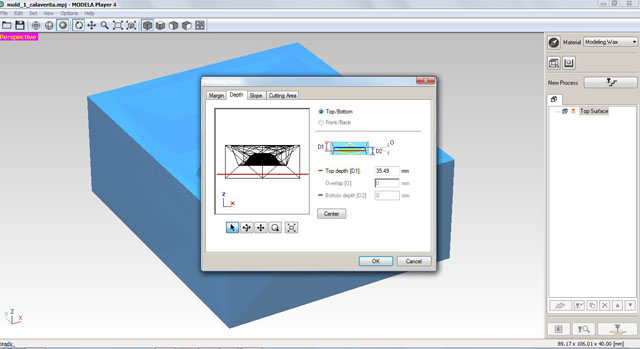
- I followed Ferdi's recommendations and left 1cm between the highest part of the skull and the top surface of the mold.
- I also left 6 mm between the skull and all of the angled sides of the mold.
- It's important to model the milling bits to use and look if they are going to reach all of the little parts of your model. This is why it's very important to avoid negative angles.
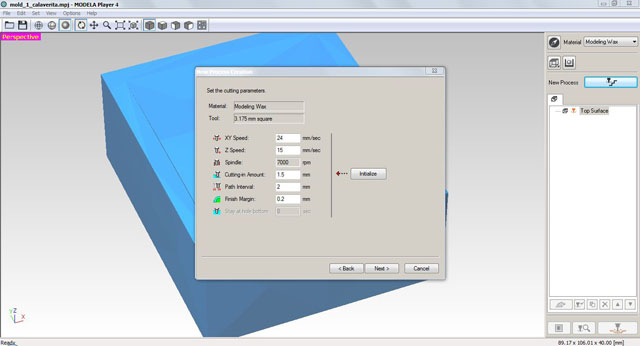
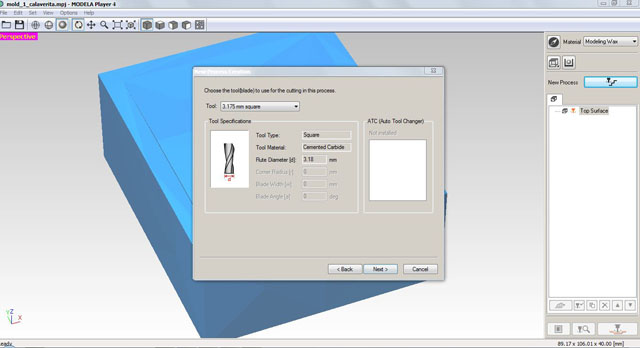
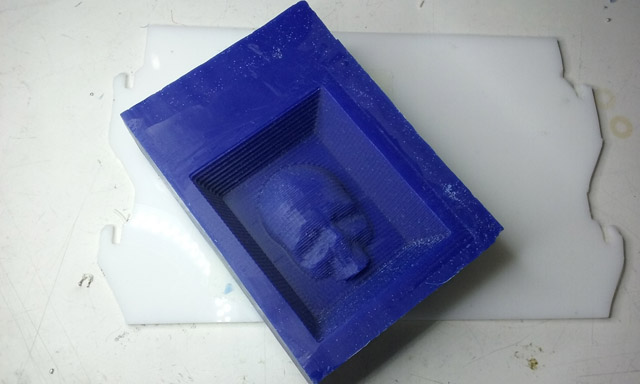
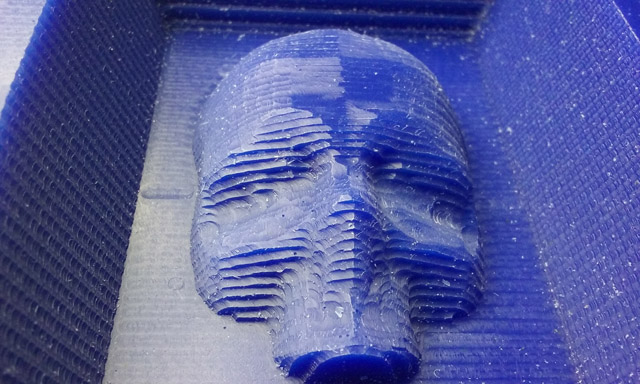
- Roughing process: 1/8 inch drill bit, which means 3.175mm.
- Finishing process: 1/32 drill bit, which means 0.7938mm.
3d real time viewer of my mold:
Mold for Mexican Skulls by turbulente on Sketchfab
| | | | | | | | | | | | | | | | | | | | | | | | | | | | | | | | | | | | | | | | | | | | | | | | | | | | | | | | | | | | | | | | | | | | | | | | | | | | | | | | | | | | | | | | | | | | | | | | | | | | | | | | | | | | | | | | | | | | | | | | | | | | | | | | |
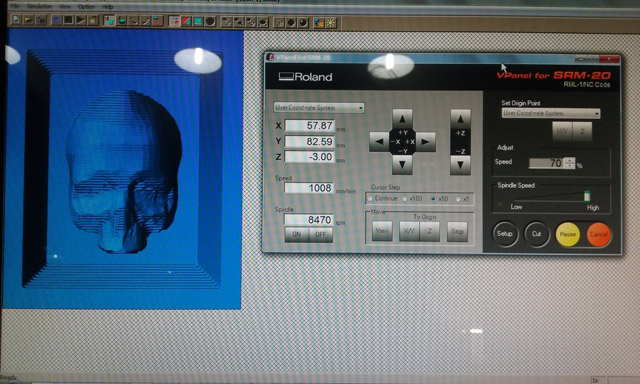
// MODELA PLAYER & MILLING Roland SMR-20
We used the Modela Player software which was easy to understand.


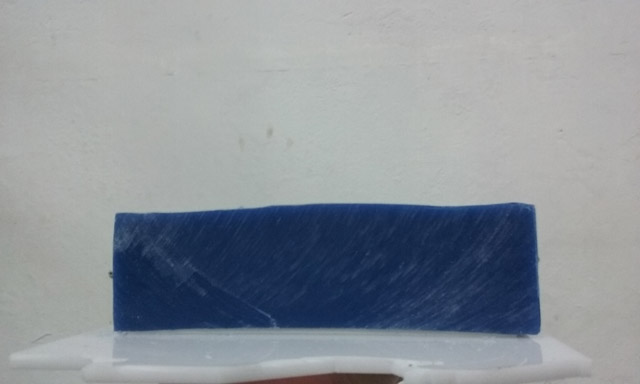
I used onlye the roughing process because I just liked how it looked. Somehow I feel attracted on making evident machinning processes.
| | | | | | | | | | | | | | | | | | | | | | | | | | | | | | | | | | | | | | | | | | | | | | | | | | | | | | | | | | | | | | | | | | | | | | | | | | | | | | | | | | | | | | | | | | | | | | | | | | | | | | | | | | | | | | | | | | | | | | | | | | | | | | | | |
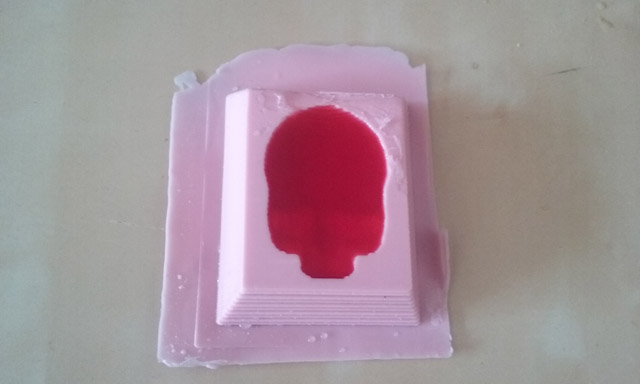
// SILICONE NEGATIVE MOLDING
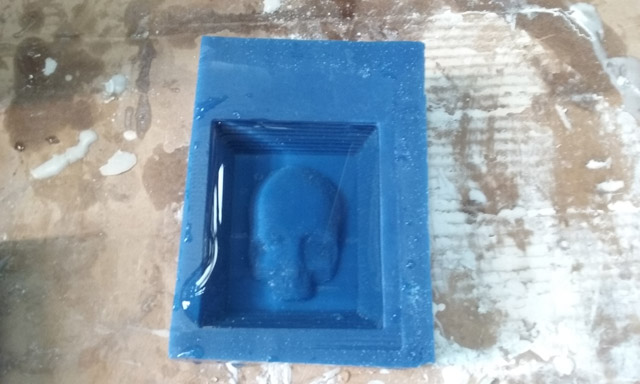
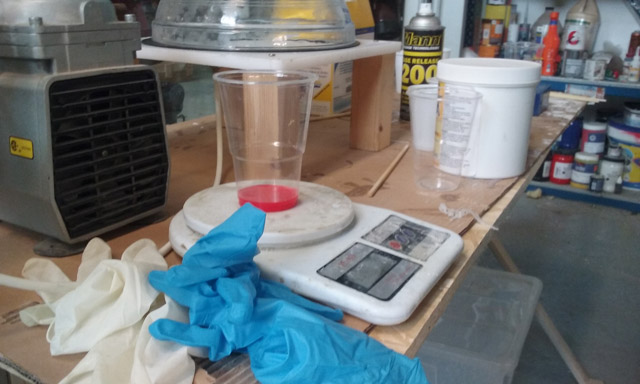
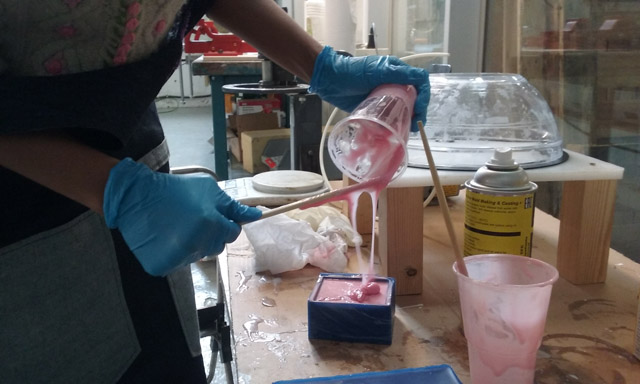
After moving your hands and mixing part A+part B during 5 minutes, fill your mold slowly. You have to see a fine homogeneous line comng out the plastic cup.
Use de vaccum to remove bubbles.
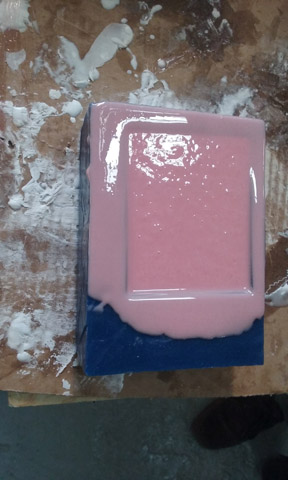
It's good to leave silicone in the outter part of the mold. This will help you to take the silicon out from the wax mold.
| | | | | | | | | | | | | | | | | | | | | | | | | | | | | | | | | | | | | | | | | | | | | | | | | | | | | | | | | | | | | | | | | | | | | | | | | | | | | | | | | | | | | | | | | | | | | | | | | | | | | | | | | | | | | | | | | | | | | | | | | | | | | | | | |
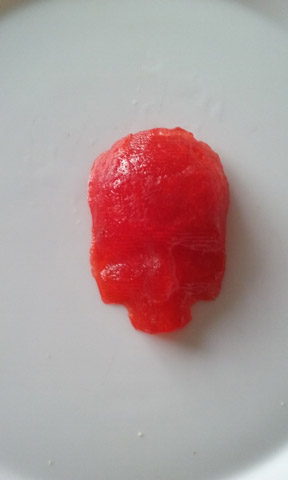
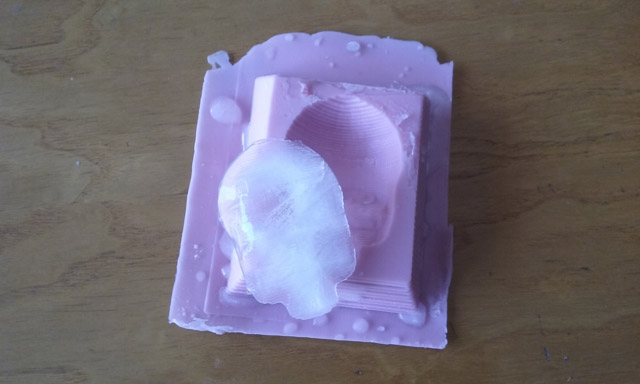
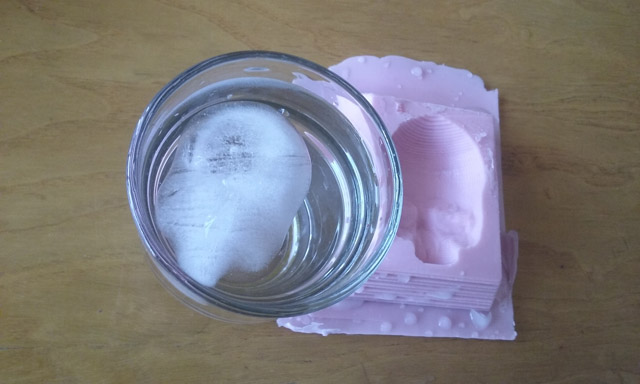
//"CASTING" USING JELLY & ICE
Although the riginal idea is to create chocolate skulls, I haven't had time to buy the proper one. I did some tests with jelly and ice but to be truth I didn't like the result.
What I need to do is to remake the mold but this time adding the finishing process.
Anyway, it was fun!
| | | | | | | | | | | | | | | | | | | | | | | | | | | | | | | | | | | | | | | | | | | | | | | | | | | | | | | | | | | | | | | | | | | | | | | | | | | | | | | | | | | | | | | | | | | | | | | | | | | | | | | | | | | | | | | | | | | | | | | | | | | | | | |
>>FILES:༼ つ ◕_◕ ༽つ
Citlali Hernández - Fab Academy - 2016