hola soy un mensaje secreto wiwiwi wawawa
WEEK 11: INPUT DEVICES
Assignment:
| | | | | | | | | | | | | | | | | | | | | | | | | | | | | | | | | | | | | | | | | | | | | | | | | | | | | | | | | | | | | | | | | | | | | | | | | | | | | | | | | | | | | | | | | | | | | | | | | | | | | | | | | | | | | | | | | | | | | | | | | | | | | | | | |
| | | | | | | | | | | | | | | | | | | | | | | | | | | | | | | | | | | | | | | | | | | | | | | | | | | | | | | | | | | | | | | | | | | | | | | | | | | | | | | | | | | | | | | | | | | | | | | | | | | | | | | | | | | | | | | | | | | | | | | | | | | | | | | | |
| | | | | | | | | | | | | | | | | | | | | | | | | | | | | | | | | | | | | | | | | | | | | | | | | | | | | | | | | | | | | | | | | | | | | | | | | | | | | | | | | | | | | | | | | | | | | | | | | | | | | | | | | | | | | | | | | | | | | | | | | | | | | | | | |
// GOALS
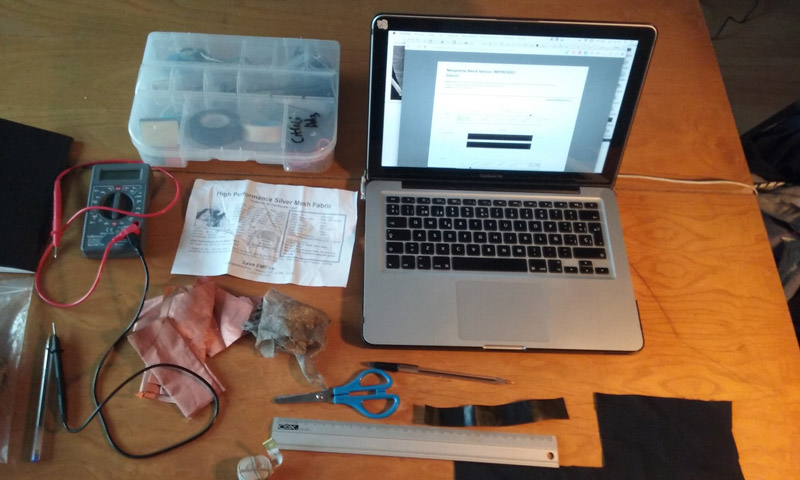
For this assignment I decided to experiment with conductive fabrics to create sensors, this is research is part of what will be part of my final project.
| | | | | | | | | | | | | | | | | | | | | | | | | | | | | | | | | | | | | | | | | | | | | | | | | | | | | | | | | | | | | | | | | | | | | | | | | | | | | | | | | | | | | | | | | | | | | | | | | | | | | | | | | | | | | | | | | | | | | | | | | | | | | | | | |
| | | | | | | | | | | | | | | | | | | | | | | | | | | | | | | | | | | | | | | | | | | | | | | | | | | | | | | | | | | | | | | | | | | | | | | | | | | | | | | | | | | | | | | | | | | | | | | | | | | | | | | | | | | | | | | | | | | | | | | | | | | | | | | | |
| | | | | | | | | | | | | | | | | | | | | | | | | | | | | | | | | | | | | | | | | | | | | | | | | | | | | | | | | | | | | | | | | | | | | | | | | | | | | | | | | | | | | | | | | | | | | | | | | | | | | | | | | | | | | | | | | | | | | | | | | | | | | | | | |
// USEFUL INFORMATION AND REFERENCES
- Velostat: a piezorestive material made of polymeric foil impregnated with carbon to make it electrically conductive. Apparently it was designed for the protection of items or devices that are susceptible to get damage from electrostatic discharges. It was developed by 3M. It has the property of decreasing it's electrical resistance when being bent or pressured (when receiving mechanical stress). When sandwiched between two conductive layers,it has a range of making pressure and bend sensors (depending on the support fabric that you use).
-Conductive fabric: There's a lot of different types of conductive fabrics, with a variety of densities, yarns, etc. For this test what I actually used was High Performance Silver Mesh Fabric made by Less EMF Inc. For this sensor what you only need is a nice conductive surface so it does not have to be exactly the same that I used.
-Conductive thread: Conductive threads can carry current as wires sou you can make flexible circuits. I used Sparkfun's stainless steel thread, but there's also silver made ones. Some information about threads and sewing recommendations learn.sparkfun.com.
| | | | | | | | | | | | | | | | | | | | | | | | | | | | | | | | | | | | | | | | | | | | | | | | | | | | | | | | | | | | | | | | | | | | | | | | | | | | | | | | | | | | | | | | | | | | | | | | | | | | | | | | | | | | | | | | | | | | | | | | | | | | | | | | |
| | | | | | | | | | | | | | | | | | | | | | | | | | | | | | | | | | | | | | | | | | | | | | | | | | | | | | | | | | | | | | | | | | | | | | | | | | | | | | | | | | | | | | | | | | | | | | | | | | | | | | | | | | | | | | | | | | | | | | | | | | | | | | | | |
| | | | | | | | | | | | | | | | | | | | | | | | | | | | | | | | | | | | | | | | | | | | | | | | | | | | | | | | | | | | | | | | | | | | | | | | | | | | | | | | | | | | | | | | | | | | | | | | | | | | | | | | | | | | | | | | | | | | | | | | | | | | | | | | |
// MAKING A BEND SENSOR
I followed Plusea's (Adafruit) bend sensor tutorial that you can read ---> here . She uses stretch conductive fabric and neoprene, these materials weren't available for me at the time so I replaced them with conductive fabric and 1mm thick lycra.
>> BILL OF MATERIALS :
Process:
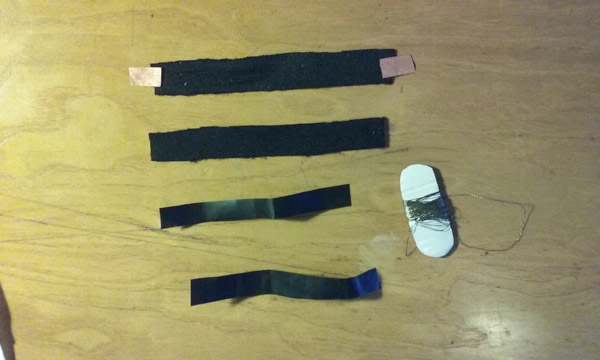
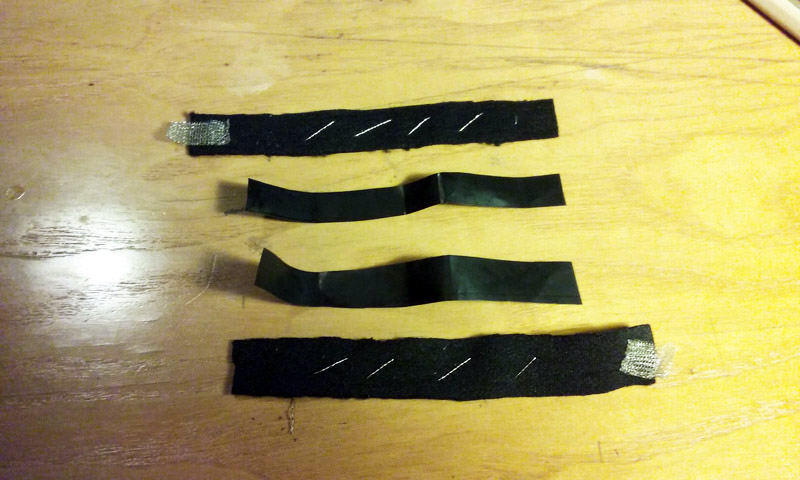
Then I put the velostat stripes between the 2 lycra pieces and sewed everything with a normal green thread.
IMPORTANT: Make sure you sew the conductive thread measuring equal distances.
To test the functionality of the sensor I used a multimeter and measure resistance changes in Ohms.
Bend sensor test + multimeter from Citlali Limonada on Vimeo.
| | | | | | | | | | | | | | | | | | | | | | | | | | | | | | | | | | | | | | | | | | | | | | | | | | | | | | | | | | | | | | | | | | | | | | | | | | | | | | | | | | | | | | | | | | | | | | | | | | | | | | | | | | | | | | | | | | | | | | | | | | | | | | | | |
| | | | | | | | | | | | | | | | | | | | | | | | | | | | | | | | | | | | | | | | | | | | | | | | | | | | | | | | | | | | | | | | | | | | | | | | | | | | | | | | | | | | | | | | | | | | | | | | | | | | | | | | | | | | | | | | | | | | | | | | | | | | | | | | |
| | | | | | | | | | | | | | | | | | | | | | | | | | | | | | | | | | | | | | | | | | | | | | | | | | | | | | | | | | | | | | | | | | | | | | | | | | | | | | | | | | | | | | | | | | | | | | | | | | | | | | | | | | | | | | | | | | | | | | | | | | | | | | | | |
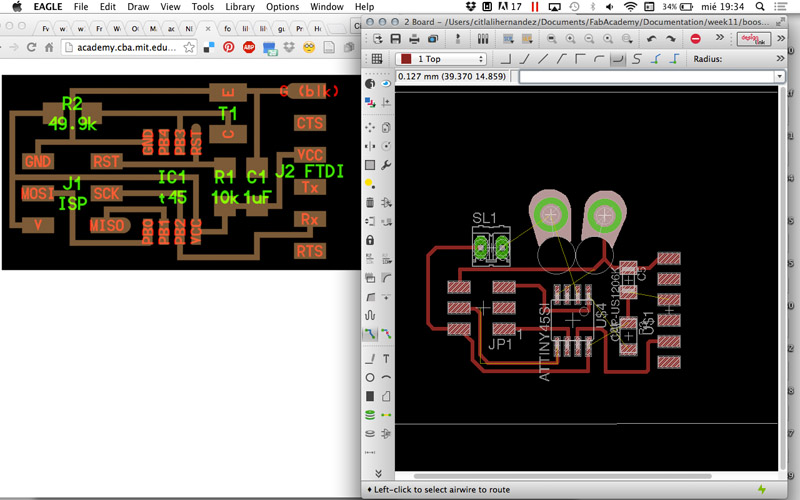
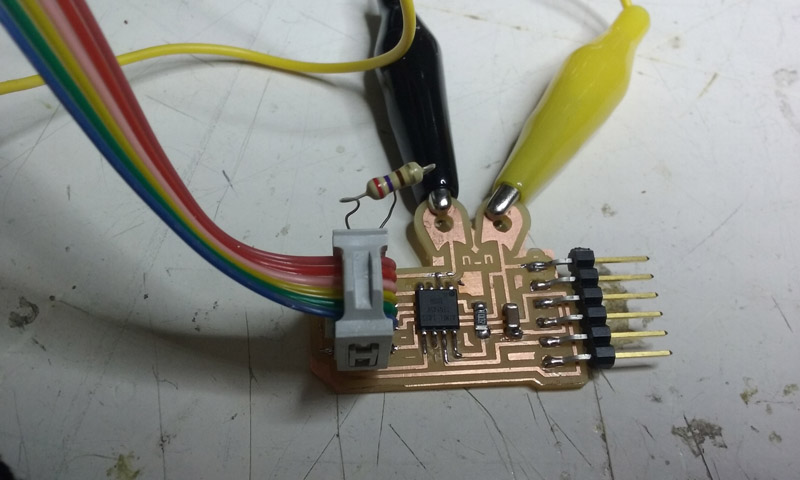
// MAKING PCB FOR THE SENSOR
I followed Niel's photoresistor / light sensor PCB design.
BOM
| Part | Value | Device | Package | Description |
|---|---|---|---|---|
| C5 | 1uF | CAP-US1206K | C1206K | |
| JP1 | / | PINHD-2X3-SMD | 2X03SMD | PIN HEADER |
| R3 | 10k | RES-US1206FAB | R1206FAB | Resistor (US Symbol) |
| SL1 | / | M02S | 02P | AMP QUICK CONNECTOR. I used this to test different value resistoris. |
| U$1 | FTDI-SMD-HEADER | FTDI-SMD-HEADER | 1X06SMD | |
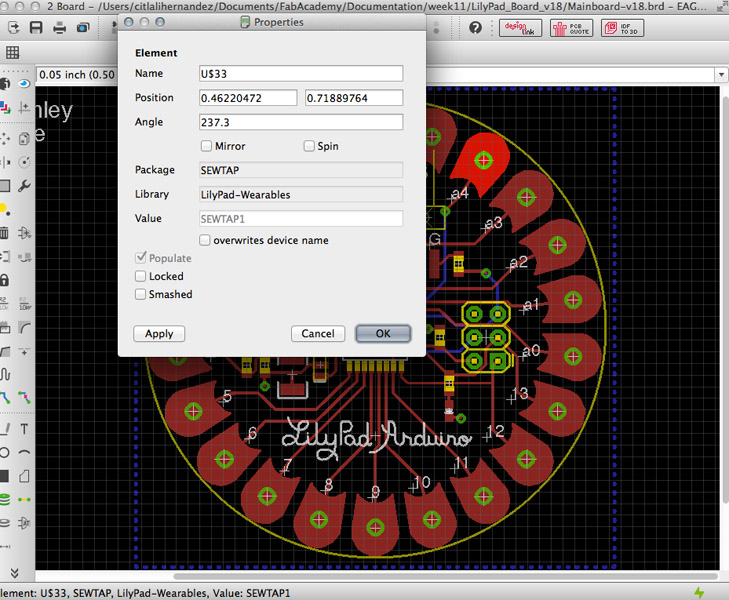
| U$2 | SEWTAP1 | SEWTAP1 | PETAL-LONG-1 | Edited it from originals Lilypad eagle file. |
| U$3 | SEWTAP1 | SEWTAP1 | PETAL-LONG-1 | Edited it from originals Lilypad eagle file. |
| U$4 | ATTINY45SI | ATTINY45SI | SOIC8 |
>> FIRST VERSION
For connecting the sensor I added two sewing tabs that I imported from the LilyPad-Wearables library.
I also tooked a look on the actual Lilypad Eagle file to understand general distribution, dimensions and design. You can get more information here: Arduino Lilypad website.
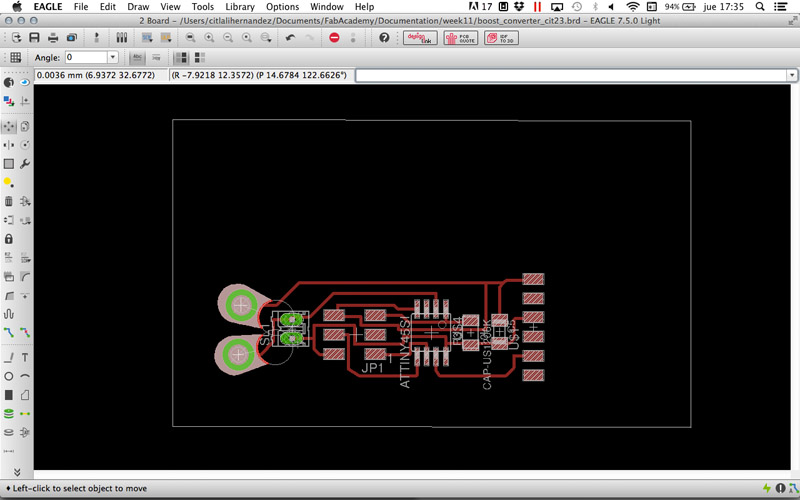
Board view of my design.
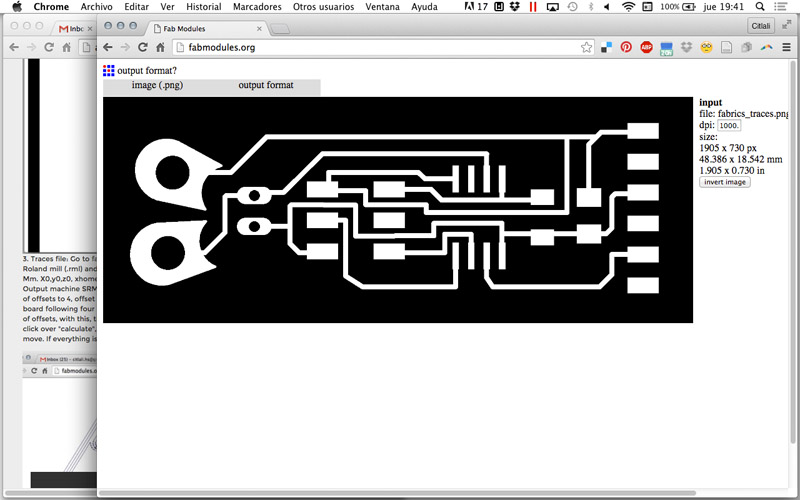
If you haven't milled holes take the following information into consideration:

Milled board, ready to be soldered.
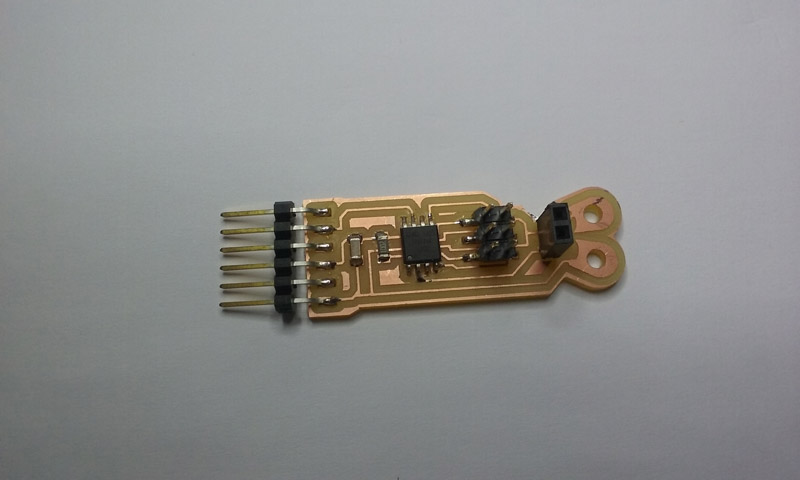
As you can see, I added a female header in order to test different value resistors. Plusea recommends 10K - 20 K.
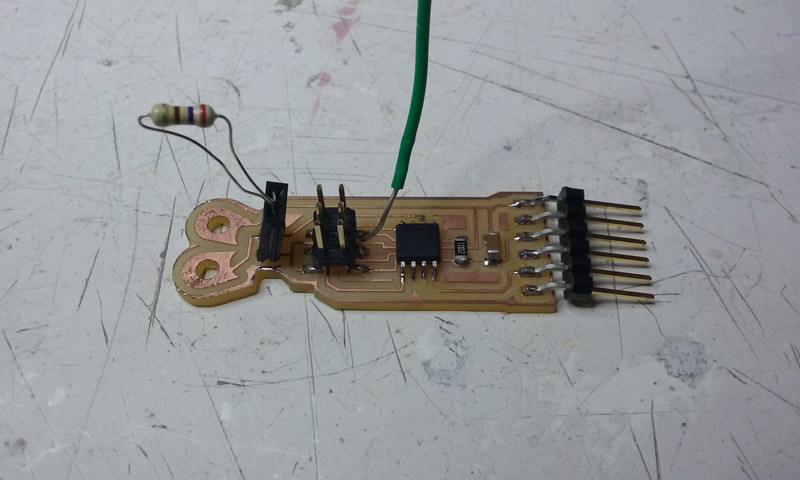
_PROBLEM!
After trying to read the sensor several times, I found out that I had forgotten make the connection between SCK of the ISP to PB2 on the ATtiny45.
Solution 1 : Adding a horrible wire.
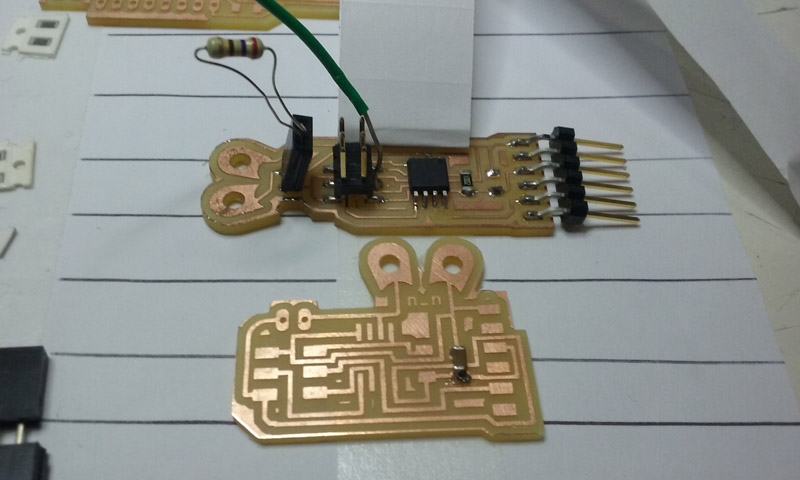
Solution 2: Making a new board.
>> SECOND VERSION
| | | | | | | | | | | | | | | | | | | | | | | | | | | | | | | | | | | | | | | | | | | | | | | | | | | | | | | | | | | | | | | | | | | | | | | | | | | | | | | | | | | | | | | | | | | | | | | | | | | | | | | | | | | | | | | | | | | | | | | | | | | | | | | | |
| | | | | | | | | | | | | | | | | | | | | | | | | | | | | | | | | | | | | | | | | | | | | | | | | | | | | | | | | | | | | | | | | | | | | | | | | | | | | | | | | | | | | | | | | | | | | | | | | | | | | | | | | | | | | | | | | | | | | | | | | | | | | | | | |
| | | | | | | | | | | | | | | | | | | | | | | | | | | | | | | | | | | | | | | | | | | | | | | | | | | | | | | | | | | | | | | | | | | | | | | | | | | | | | | | | | | | | | | | | | | | | | | | | | | | | | | | | | | | | | | | | | | | | | | | | | | | | | | | |
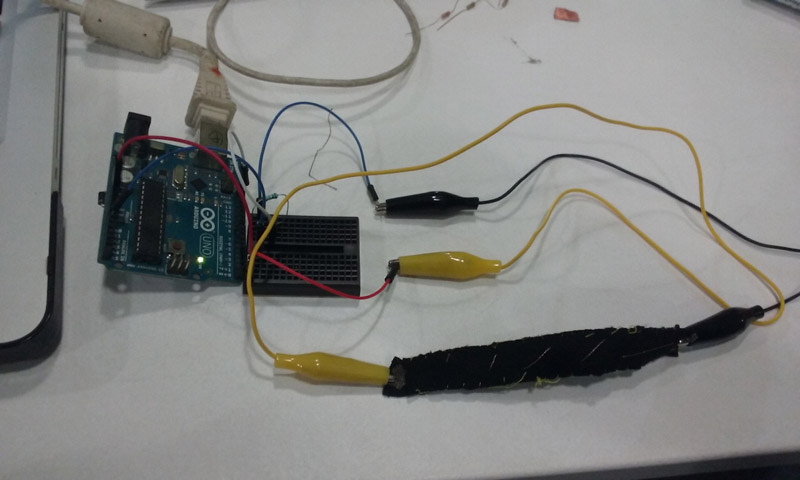
//PROGRAMMING BOARD, READING SENSOR & CODING
For programming the ATtiny45 I did the usual Burn Bootloader from Arduino, connecting my FabISP programmer.
Later on, I used cocodrile clamps to conect the sensor.

Bend sensor + PCB + Arduino Test from Citlali Limonada on Vimeo.
For reading data I based my code using "Analogue In" from Arduino examples.
You will need to use SoftwareSerial library, this is because ATtiny 45 does not have RX, TX pins, so you have to declare and set them. SoftwareSerial library allows this to happen.
Arduino code:
I also did a test without using my board but Arduino UNO to compare results. For this I based my code on the "Anaogue In" example, and added a smoothing process avoiding noise and instability from the sensor.
Note: I also did the .py test, but you will find more information about it on the "Interface and application" week assignment.
| | | | | | | | | | | | | | | | | | | | | | | | | | | | | | | | | | | | | | | | | | | | | | | | | | | | | | | | | | | | | | | | | | | | | | | | | | | | | | | | | | | | | | | | | | | | | | | | | | | | | | | | | | | | | | | | | | | | | | | | | | | | | | | | |
| | | | | | | | | | | | | | | | | | | | | | | | | | | | | | | | | | | | | | | | | | | | | | | | | | | | | | | | | | | | | | | | | | | | | | | | | | | | | | | | | | | | | | | | | | | | | | | | | | | | | | | | | | | | | | | | | | | | | | | | | | | | | | | | |
| | | | | | | | | | | | | | | | | | | | | | | | | | | | | | | | | | | | | | | | | | | | | | | | | | | | | | | | | | | | | | | | | | | | | | | | | | | | | | | | | | | | | | | | | | | | | | | | | | | | | | | | | | | | | | | | | | | | | | | | | | | | | | | | |
//Very useful links & references
| | | | | | | | | | | | | | | | | | | | | | | | | | | | | | | | | | | | | | | | | | | | | | | | | | | | | | | | | | | | | | | | | | | | | | | | | | | | | | | | | | | | | | | | | | | | | | | | | | | | | | | | | | | | | | | | | | | | | | | | | | | | | | | | |
| | | | | | | | | | | | | | | | | | | | | | | | | | | | | | | | | | | | | | | | | | | | | | | | | | | | | | | | | | | | | | | | | | | | | | | | | | | | | | | | | | | | | | | | | | | | | | | | | | | | | | | | | | | | | | | | | | | | | | | | | | | | | | | | |
| | | | | | | | | | | | | | | | | | | | | | | | | | | | | | | | | | | | | | | | | | | | | | | | | | | | | | | | | | | | | | | | | | | | | | | | | | | | | | | | | | | | | | | | | | | | | | | | | | | | | | | | | | | | | | | | | | | | | | | | | | | | | | | | |
>>FILES
Eagle files, RML, and PNG's: \ (•◡•) /
Simple Arduino file: (ʘ‿ʘ)
Citlali Hernández - Fab Academy - 2016