Exercise 9. Mechanical Design
Take Away
- I enjoyed working as a team because of the added contributions from everyone.
- The gestalt supplies did not arrive in time which put us behind.
- Scaling is never simple. If you are not careful everything will increase/decrease in size other than what you want. If you scale your machine bigger, the bolt sizes will become bigger which you may not want.
- Do not use Inkscape to print directly to the laser cutter. This can negatively impact the epilog drivers
Labwork: Work as a group to make a machine.
Homework
I worked with my group on making a machine. My primary focus was setting up the laser cutting and programming.
Workflow
We began once we received our modular machine. David Taylor found a rhino file that we could use to make the carboard portion of the machine. Brian Sossman and David Taylor worked together to change the file into an eps format. We began attmpting to cut out the box, but we realized the box would not fit in our print bed and more worrisome I discovered the epilog laser was not running correctly. Specifically, I would change the color mapping values on the epilog laser, but the printer output would not change. Here is a list of steps I performed to solve the problem. Pictures follow below:
- I shut off and restarted the laser cutter. No change.
- I shut off and restarted both the laser cutter and the computer. No change.
- I ran a different file. No change.
- I reinstalled the printer driver. No change.
- I called Epilog support.
- I repeated all of the above with the help of Epilog tech. No change.
- Epilog helped me install the job manager.
- I ran more prints and looked at the job manager. While I was changing the color setting, the job manager showed me that the printer was only seeing one color.
- I called Epilog back and they said they would research the problem.
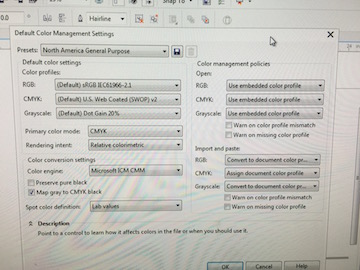
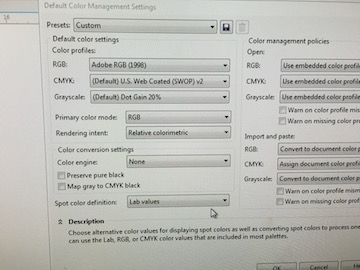
- After searching forums and talking to Epilog (1 and a half days later) I made a change to the Default Color Mapping in the Primary Color Mode. I changed the Primary Color Mode from CMYK to RGB. SUCCESS
While working on the laser cutter, Ian Braunner modified the files to make it fit better. David Taylor came up with the idea to use the bolt diameter as a scale for the bolts in the design. We were able to use this scale ratio for the rest of the model to establish overall dimensions. Ian made the changes. We cut out Ian's pdf file and used razors to finish cutting out the machine. Ian, David and Richard put the machine together using white glue, paper clips and wood clamps. We were now ready to program the machine.
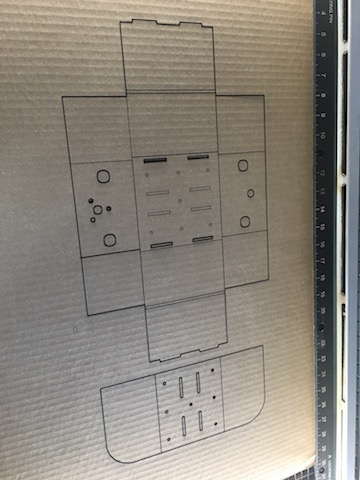
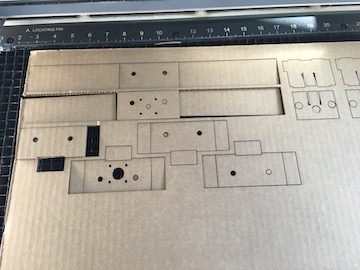
This is a pdf of our file and an early cut.
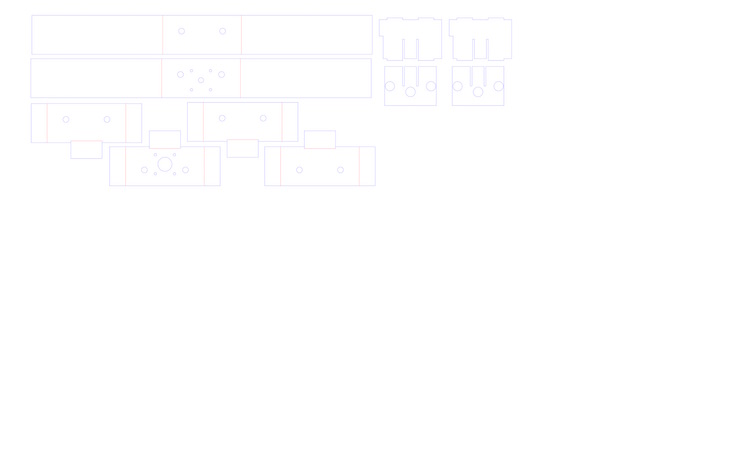
I changed the document color settings. Specifically, I changed the primarily color mode from CMYK to RGB.
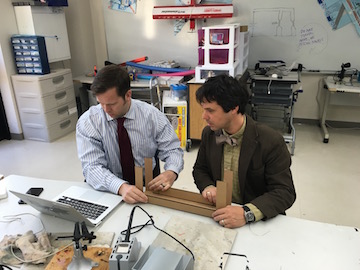
While not perfect, the carboard of the machines is cut, and David and Ian begin to assemble it.
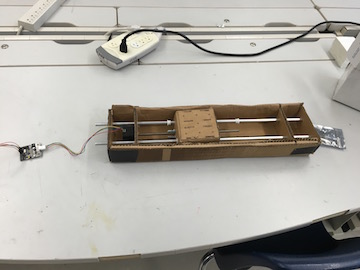
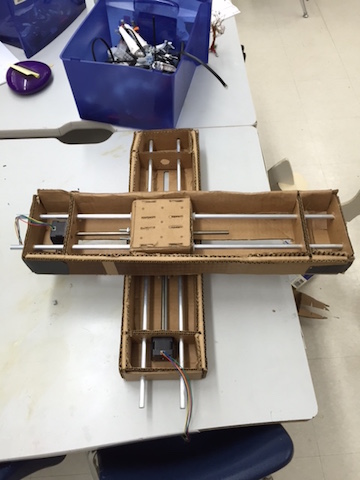
The finished machine designs.
 --
--
Videos:
Please note these video show our Gestal Machines. They are already automated at this point.
Exercise Files