Computer-controlled Machining
Note: My code and files can be found here in the Shopbot Folder. I am only posting low resolution photos on this page. Fab Academy Files, Week 7
Design
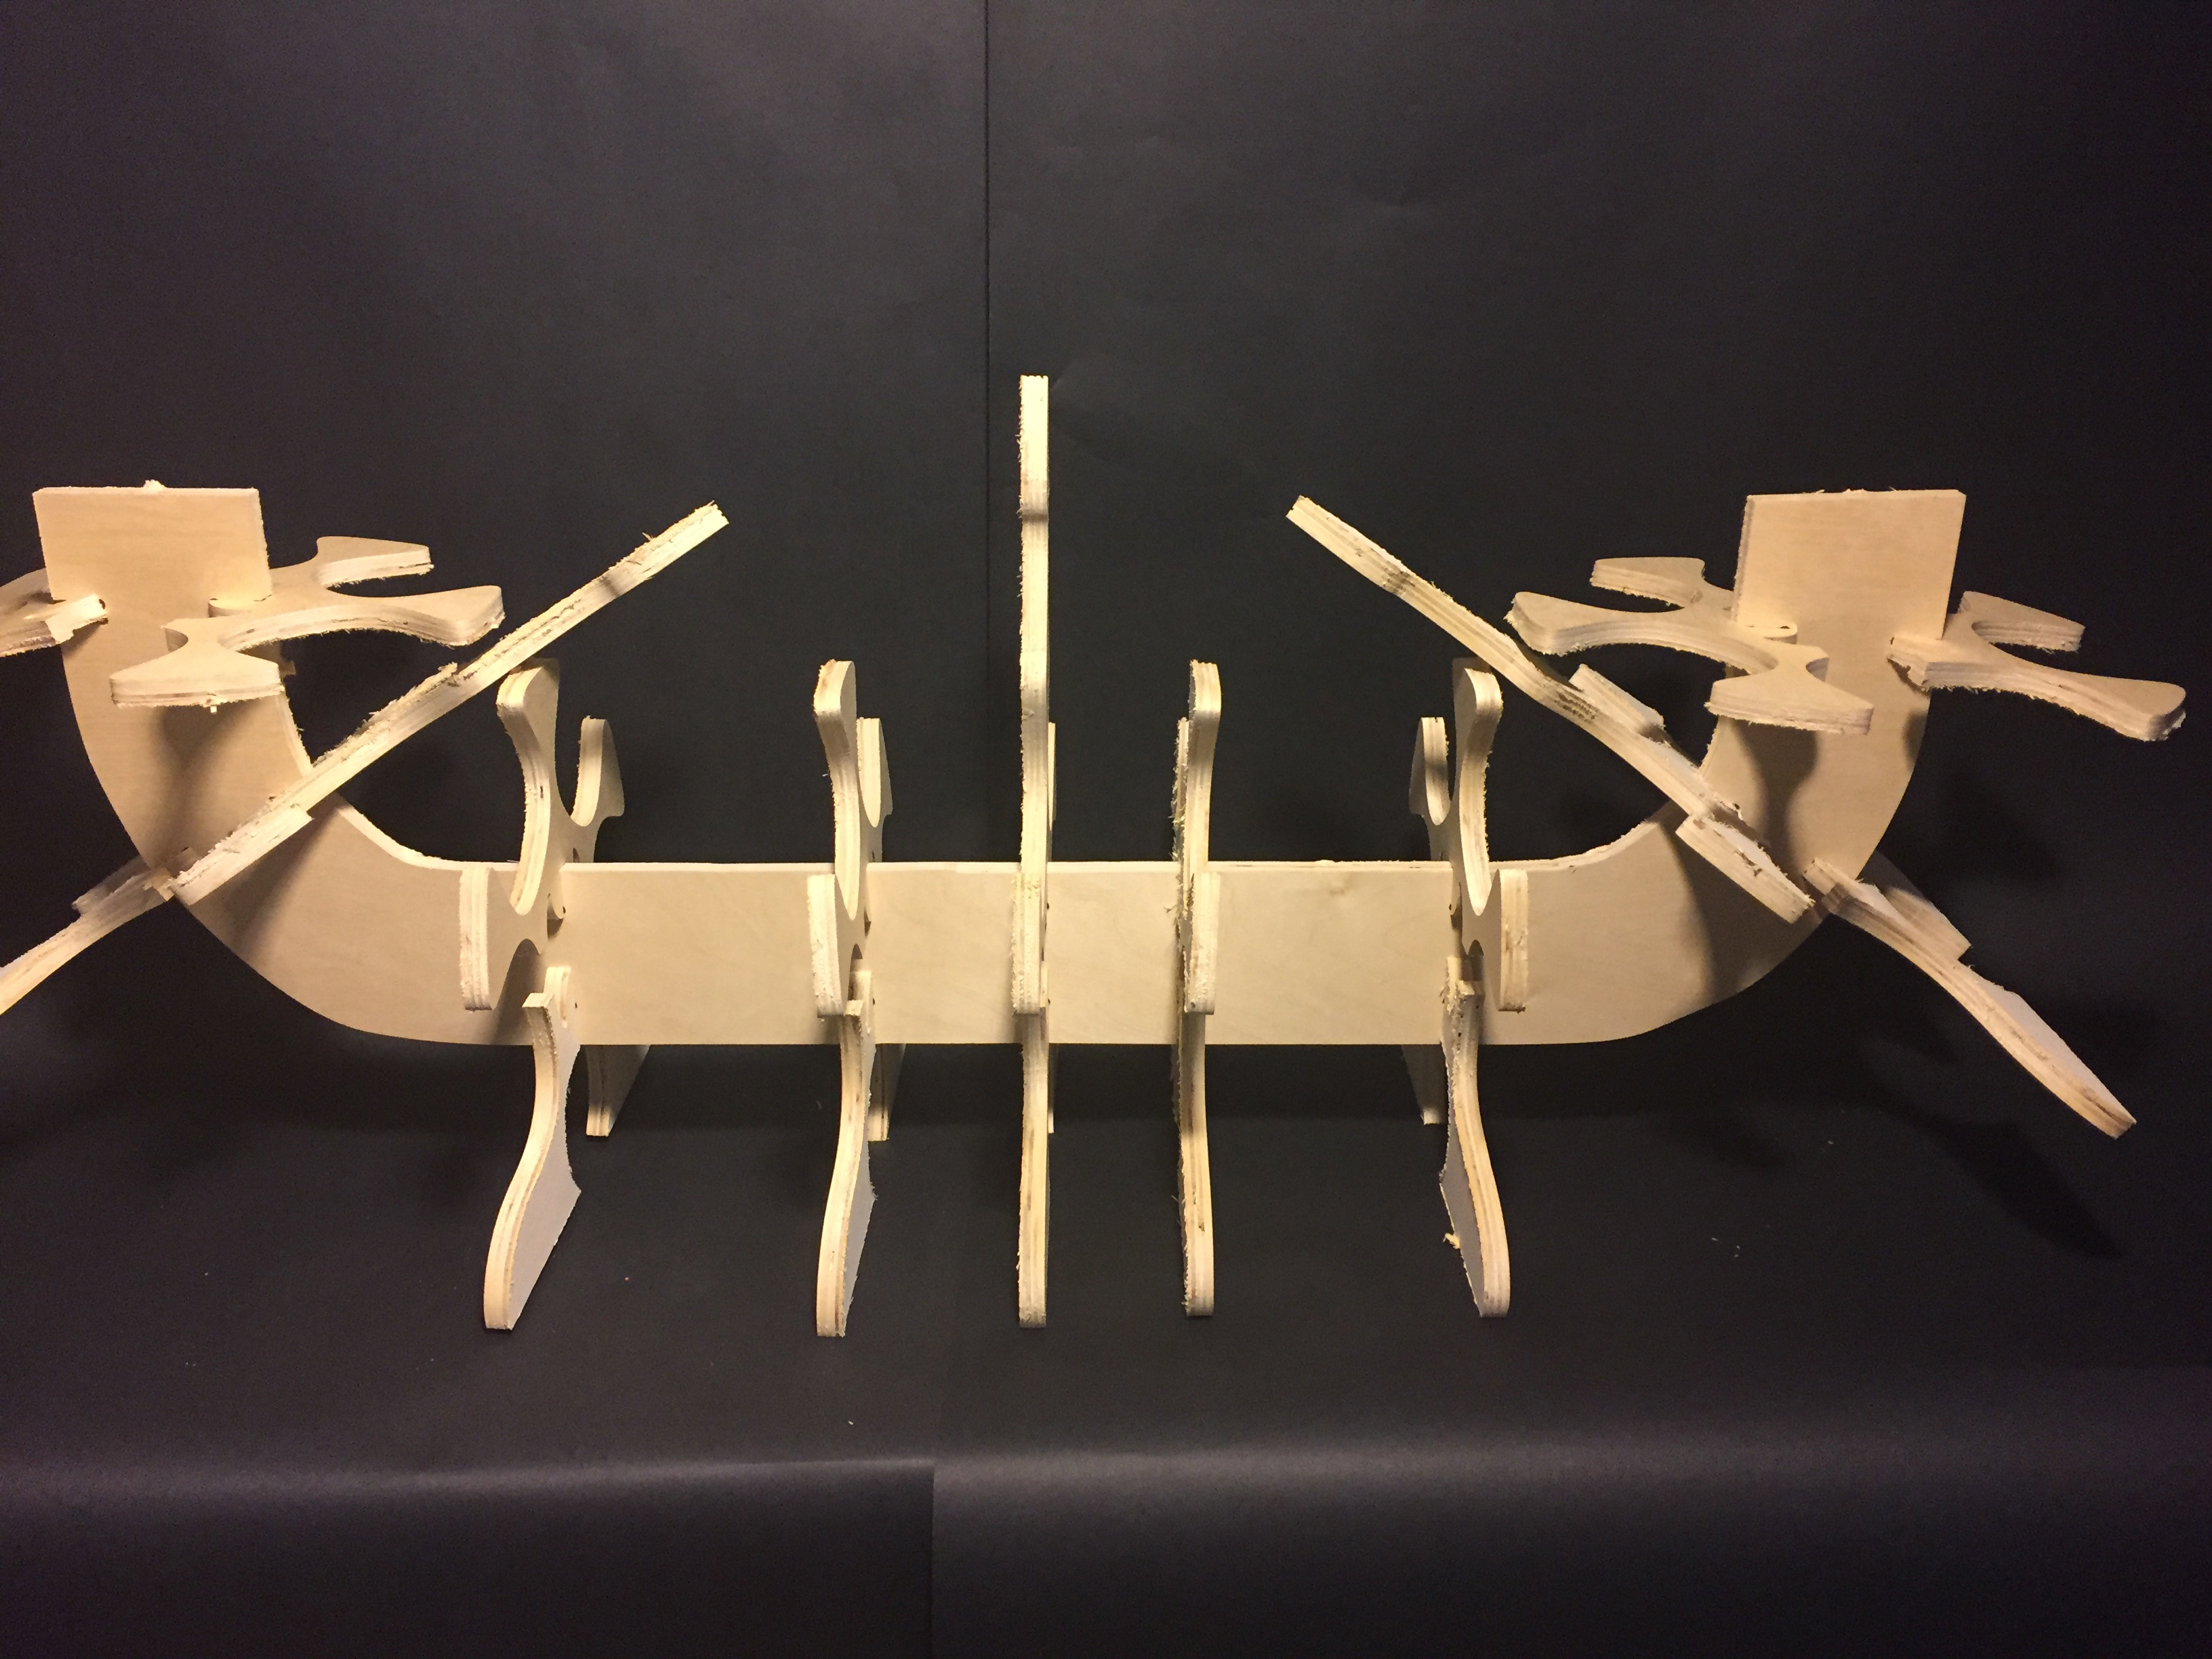
For this week's assignment I went back to my sketch pad and drawings from earlier weeks. I wanted to build and machine something that would be useful for my final project down the road. The goal for my Final Project is to make a big creature sculpture. I decided to workout some of the issues I had on my laser cut design. After meeting with my Guru, we decided that one of my biggest issues was going to be stability on such a tall sculpture.
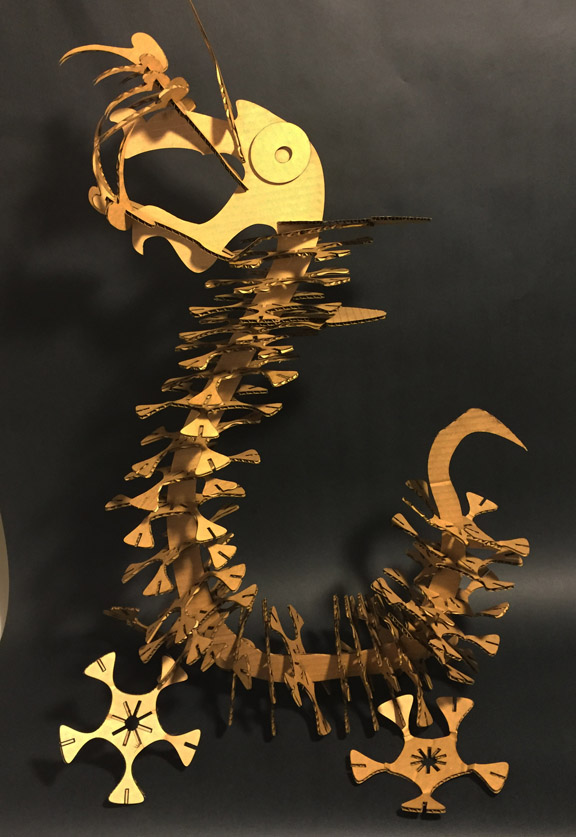
When I cut the cardboard, the sculpture stood up for awhile, but would fall over after a bit of time. The card board would get fatigued and then start to bend over. Most importantly the scales would have to be redesigned to work and be stable in wood.I faced several issues in redesign.
1. The center joint would have to be redesigned to accomodate wood. In cardboard the scales were joined through a middle slot. This would not work for wood. I desided to split the joint along a horizontal axis. This would allow me to push the scales into the body with out having to slide them down the length of the body.
2. The body would have to be redesigned to accomodate the wood and stability with height.
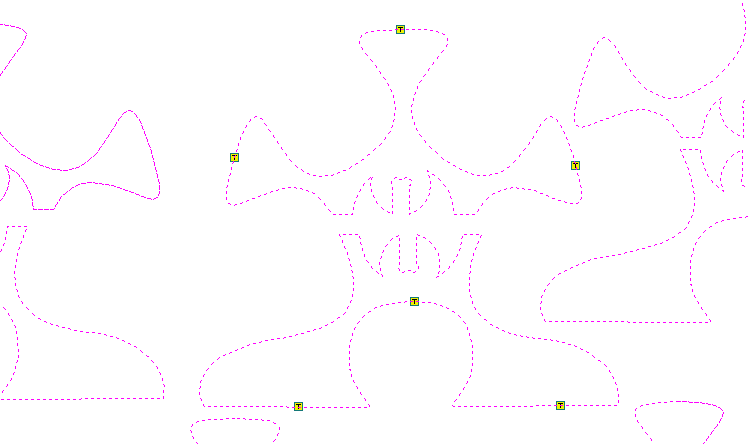
Back to the Inkscape drawing board.
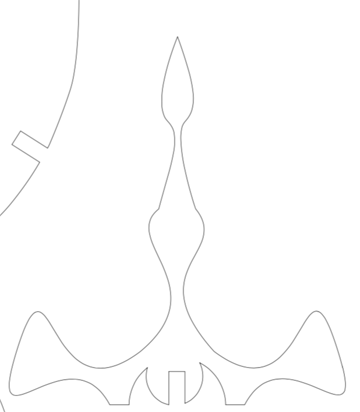
1. I studied the old Scale design for cardboard.
2. The new Scale design for wood.
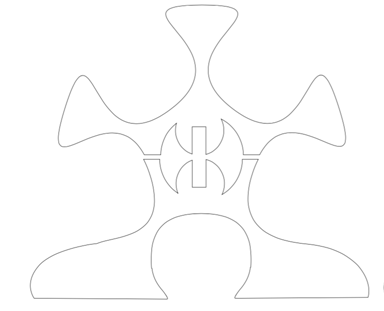
I drew out the bottom flanges and flattened them to rest against the floor. I also bisected the Scale to press into the spine of the creature, instead of fitting the body through the middle of the spine, like I did in the cardboard version.
3. I also added some scale variance to add more visual interest to the sculpture, this included some spiked scales.
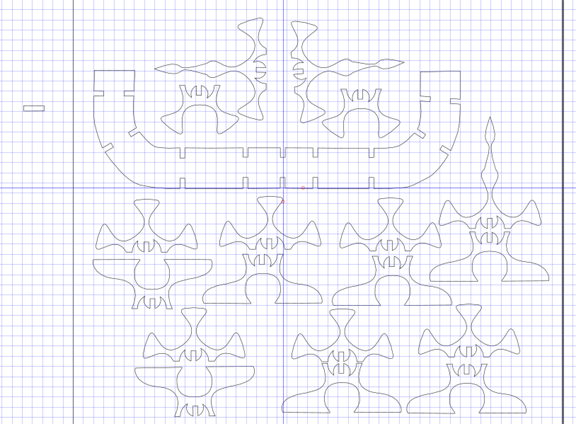
I left some scales with traditional bottom halves from earlier versions that would never touch the floor. Below is the layout I designed for the parts on a 4ftx4ft piece of half inch birch plywood.
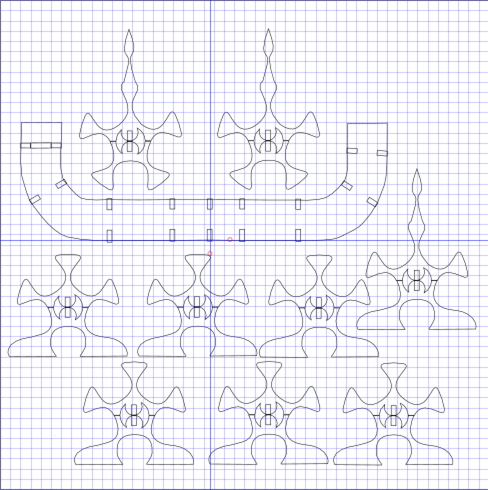
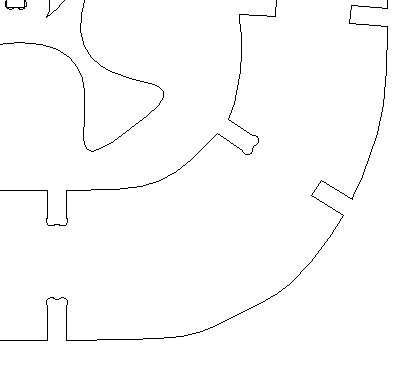
4. In the drawing above you can see that the partial spine has been changed to incorporate slots for joint stability. The space between slots is two inches and the space in the slots of the scales should meet up nicely.
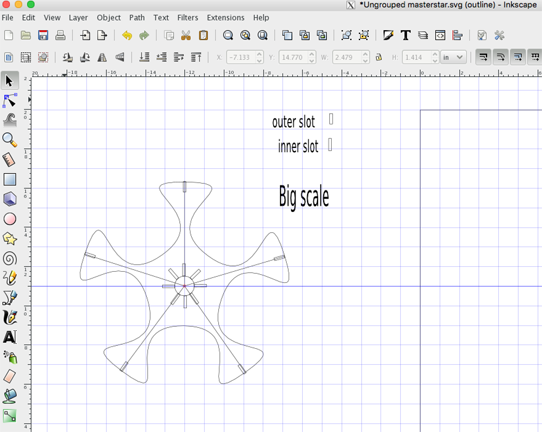
5. Creating the Slots is a rather simple job in Inkscape but there are a few tricks. In the above drawing none of the slots have been removed they are just cloned rectangles waiting for my final measurement of the thickness of the plywood I was using. It seemed about every 1/2 inch board we used was different and I wanted to be exact for a very snug fit.
5a. We made a swatch to gauge 1/2 inch plywood to the ten-thousandths of an inch. Below is the picture of the swatch on inkscape and cut in wood.
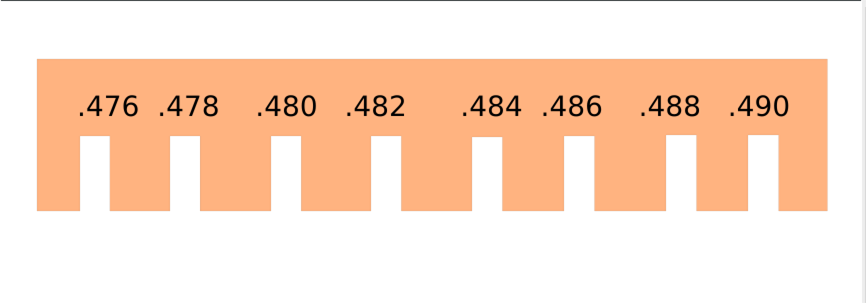
5b. After using the swatch to measure my board I decided to make my gaps at a very snug .480. The scales would be very hard to move around in the pressfit joint.
5c. I went back to my inkscape design and changed the width measurement of my gap rectangle parent to .480. In parametric design this changed all of my slot rectangles.
5d. In inkscape you are not permitted to change clones, when the parent object still exists, so I saved my design as a different name and then deleted the parent rectangle gap place holder.
5e. I then went back and selected PATH and chose the difference function to to create a stock removal method of making pressfit joints in wood .Below is the final layout with the rectangles turned to .480 slots.
6. After double checking my design and layout, I was now ready to bring the inkscape design over to the ShopBot to cut.
From design to ShopBot
1. Convert from inkscape SVG file to PDF.Shopbot uses a program called VCarve to speak to the shopbot and set up toolpaths. It will read a PDF file so I exported my inkscape file over to Vcarve and opened it up.
2. Most of my drawing was used in Inkscape, but I used VCarve to do my dogbone filets. This was necessary to get the correct fit in my slot joints. It is important to use a bigger radius of your dogbone than the size of the radius of the drill bit. Since the drill bit was .25 inches I made my dogbone filet radius .38 inches. This size seemed to work great and was barely noticeable in the final cut when the piece was put together. I was ready to move on the tool path section of VCarve.
3. For health and saftey, I put on eye protection and removed my dangling tie. Our Shopbot teacher was emphatic about safety in this workspace. I was ready to go from the drawing part of VCarve to the tool path section of the program.
4. Because I was really only doing a 2-d profile cut so I had less to worry about than if I was doing a 3-D cut.
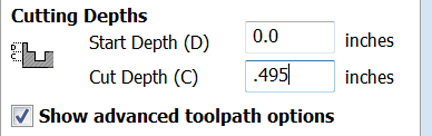
5.I set the cut depth to .495 after measuring my plywood to .48 with the micrometer.
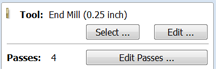
6. I made sure my tool was set to ¼ inch bit, and set my passes to three from four.
7. Next, I set tabs in my pieces to make sure my cut parts got held down while the Shopbot was milling them. I set the tabs for .3 of in inch and tried to get at least 3 tabs on each piece, more if they were larger.
8. I did a 1 inch ramp because I had shorter curved parts. Our instructor suggested 4 inch ramps if we were carving long straights.
9. I checked the drill bit and make sure it is tight in the chuck. If it is too lose or tight it can cause major accidents.
10. Next I checked the z-axis and zeroed it with the metal plate and the alligator clip.
11. We are using a .25-inch drill with two flutes and up spiral. We decided that we would use upward spiral flutes so that if things went wrong we would not ruin the bed of our Shopbot.
12. Let the spindle on the Shopbot warm up. It should take 10 minutes or so.
13. Set the origin of the bit on the bed of the Shopbot. This can be tricky and on several practice runs we had the x and y axis reversed from the file to the bed of the Shopbot..
14. Once you have your origin set on the Shopbot zero the X and Y axis on the control panel.
15. Before we started cutting we were trained to do an air-cut. An Air-cut is where you put the Z-axis offset one inch. This is set on the Shopbot control panel, not in VCarve. Doing this will run the Shopbot above the bed one inch so that the drill never makes contact with the working surface. It will catch a lot of errors but not all of them.
16. My Shapes cut great, but I have to work on my placement. Some were too close and the bit overlapped or did not cut because it could not discern the shapes. Thankfully I was able to finish them in a minute with a small handsaw.