3D scanning
This was a neat opportunity for me because I had never scanned or printed anything in 3-D
Note: My code and files can be found here in the 3-D printing and scanning folder. I am only posting low resolution photos on this page.
Fab Academy Files Week 5, 3-d Scanning and printing.Creating the item to be scanned.
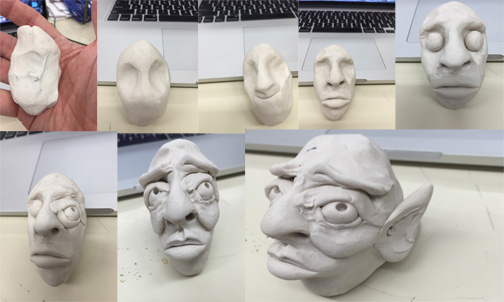
1. I chose to create something in polymer clay, much like my 8th grade students would be doing. I chose to keep with the creature theme and make a quick "troll" head.
That process is documented below.
2. I then took the Troll Head over to the scanner and placed it on the scanner's bed. Our lab uses a Matter and Form 3d scanner.
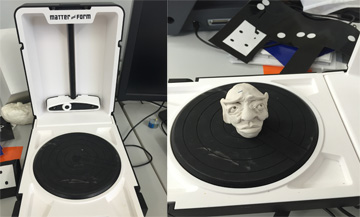
3. I used the Matter and Form software to scan the Troll Head.
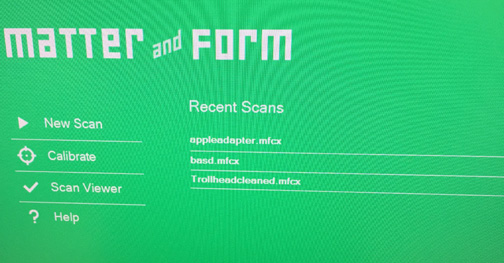
4. It scans to a .mfcx file which I then converted to a .stl file, using the Matter and Form software
I then made an account and uploaded the .stl file to SketchFab
5. In the first upload I used way to few polygons and my image was very crude and lacked details.
6. I increased the Polygons in the next upload and it came out much better.
Trollhead by rfletch on SketchfabTrollhead3 by rfletch on Sketchfab
3D Printing
1. I created my object to be printed in Autodesk123D Design. I started by watching the beginning tutorials that Autodesk provides with the software. It was important to me to keep it simple because this was my first 3D printing experience. I was inspired my teammate's Batman toy and decided to spin off my own version of a small gadget.
Concept
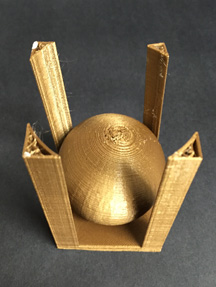
Our assignment was to design an object that could not be rendered by a reductive process. I deside to create a simple sphere inside a rectangle. It was my first time designing in 123D Design, but after the tutorials I was able to sketch up the object in a lttle bit of time.

The Printing Process
1. Once I had my object created in 123D Design I saved it in to a .stl format and uploaded it to SketchFab
2. We use Polar 3D printers. Here is one below.
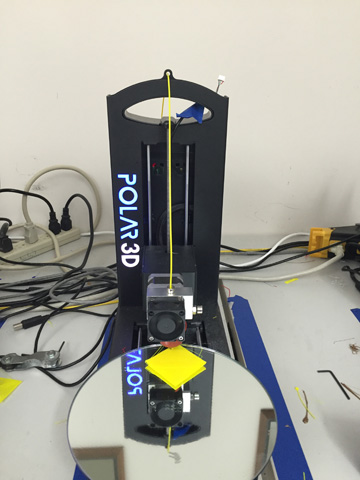
I had to join our Polar 3D club to get access to our Lab. I did that and our club lab administrator gave me access to our printer network. I upladed my .stl file to the printer interface and was ready to start printing.
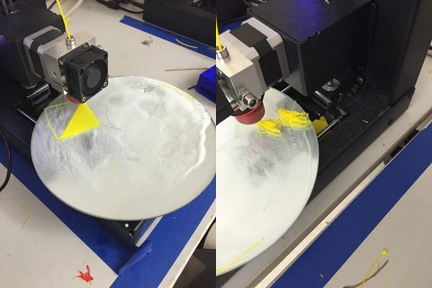
3. My first few trials on the printer were a comedy of errors. On the first four prints the base of my toy kept coming loose from the mirror rest. I finally figured out that I needed to do two things to fix this. Add more hair spray to the mirror to get it to stick and next I reset the positon of my toy so that it was centered on the mirror. The centrifugal force was throwing the toy off the base if it was placed to close to the edge. Here are images of that happening.
3. After all my errors I changed printers to get one that was calibrated more correctly and added hairspray and centered my work. The next print turned out fantastic.
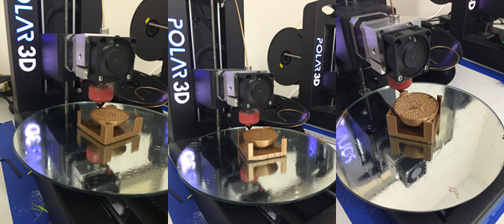
4. Almost perfect.
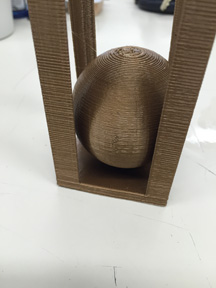
Unfortunatley, during the printing process I pressed "refresh printer" hoping to get the timer to calculate the time to finish more accurately. the button instead cleared the printer and my toy stopped printing just for completion.Because demand for the printer was so intense I have not been able to reprint the toy.