Exercise 12: Molding and Casting
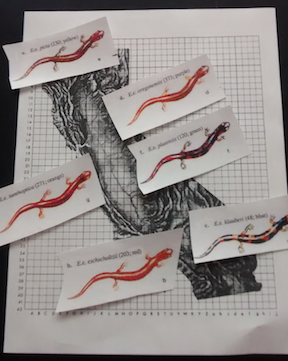
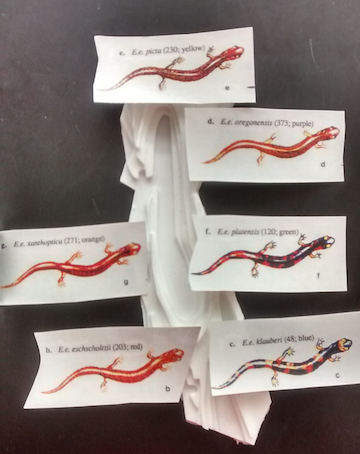
I recently did a lab in my biology class that involves the students examining the data from a seminal species diversity study that looked at the distribution of salamanders in California. click here for link to original lab. The students chart out the location of various sub species of the salamanders on a grid map showing the topography of California. The whole point of the lab is that the students observe how salamanders differently evolved as the population spread around the central valley. The frustration I have long had with the lab was that students often do not have diffuculty understadning and conceptualizing the topgraphy of the map and thus do not aprecaite one of the main points of the lab.
It occurred to me that it would be so much better if the students could put the pictures of salamanders on an actual model of the 3D topography of California. Initially I tried to use actual topographic data to make the model. I found a web site that had directions on how to use Google map data click here . The problem with the directions were to use the GIS data required the use of plug in Google maps that no longer exists. I found some possible ways to use GIS data directly and a spent some time playing around with it but ultimately it would be project to just learn how to use GIS much less how to put the information into Blender, which I had not used before.
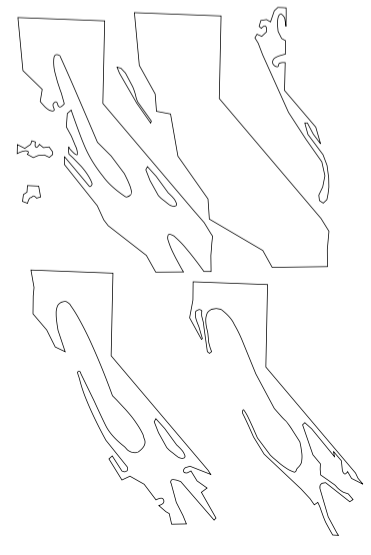
I did also have a 3d model made by a fellow biology teacher with his now college age son when he was in 4th grade as a class project. To use this model I took a picture of the model. I then imported the Jpeg into Inkscape and traced each of the different layers because each layer represents a different elevation level. I traced it in Inkscape, creating a separate drawing for each layer. I then layered them to make sure all the layers did not overlap and also lined up properly. I used the nodes to move the lines around so that all were positioned properly. One thing I learned was that like when I made the stool it is best to have the lines as thin as possible because otherwise thicker lines can make it appear that lines are overlapping when in fact they are not.

I saved my document as a PDF and when I moved it onto the computer that is hooked up to the Epilog laser cutter I put into Corel Draw. This is worth noting because we had problems with our Epilog that were at least in part due to printing from Inkscape rather than Corel draw as recommended by Epilog.
I first cut my layers out on the laser cutter using cardboard. I put it together and it looked great.
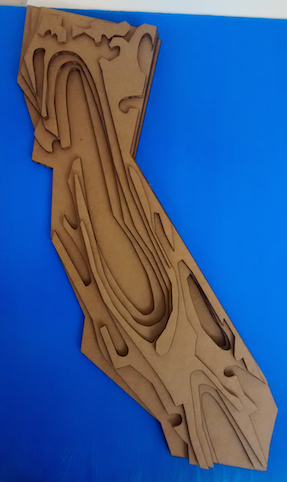
I next decided it was time to cut it out of acrylic. The only thing I changed was to size it down from the original so that I would not use too much material.
Cutting the 1/8” acrylic was very easy. To do so I turned the power and frequency to 100% and turned the speed down to 15%. It took only a couple of minutes to cut all the pieces.
After I cut all the pieces I lined them up and glued them together. I found it effective to use accelerant with the supper glue especially for the tips of pieces, which wanted to not stay down. Holding it down with a toothpick and a little bit of accelerant did the trick.
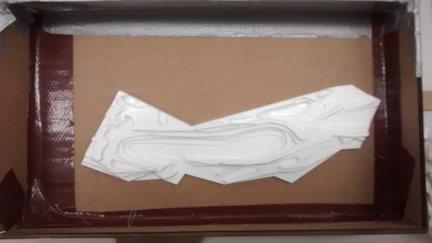
Next my lab partner Richard had the great idea of using the laser cutter to make a box the correct size. It was a brilliant idea except for the part where I told the dimension for the box based canvas for when the laser cutter made the pieces rather than the pieces stacked. Oh well that is what you get when you are trying to do five things all once. Luckily Richard continued come through and made a quick fix by adding a dividing wall. This worked great. In retrospect I used too much glue and it showed up on my mold. In the future I will use less.

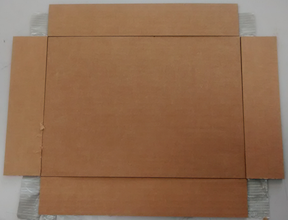
I then glued my California model to the cardboard, getting it around the edges to ensure that it was sealed and none of the silicone would get under.
To down load my file click here.)
We used Smooth On products. For many tutorials from Smooth on click here .
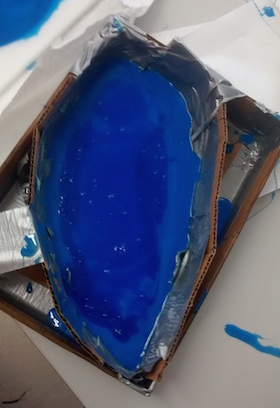
Again Richard came through with the innovation. He fashioned a pencil with staples to make a stir rod that we put into a drill to stir the mixtures. We used large popcorn buckets due to the large volume needed for my mold. We poured approximately 5 cups of the two mold star components into each bucket ensure equal amounts. Next we poured the white component into the blue and mixed until we did not see any more white.
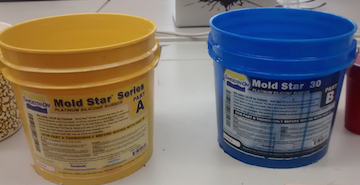
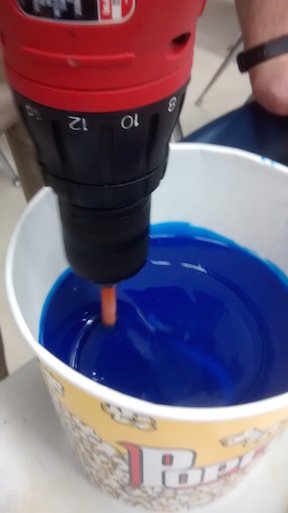
We mixed with the drill for about 10 minuets which was the point at which we could no longer see any of the white streaks in the blue silicone.
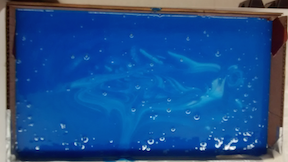
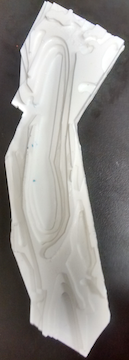
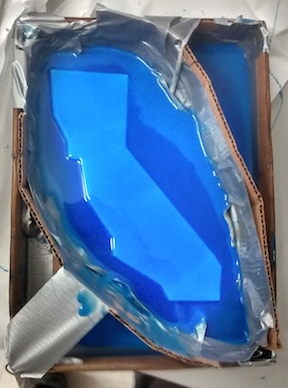
We then poured the silicone over the model of California and let it sit over night. I was a little nervous because I forgot to spray my model but it did not seem to mater. It came out fine.
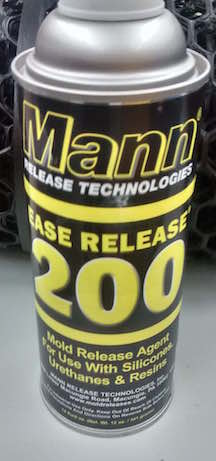
When I went to make the cast I made sure to spray the mold with silicon.
I then got the casting mixture

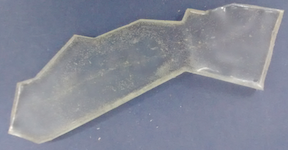
I then mixed equal parts of the casting mixture and poured it into the mold. We let it sit until it was no longer hot.
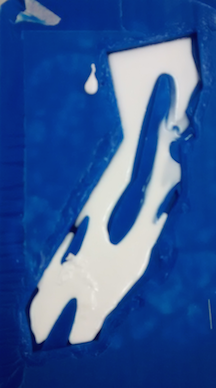
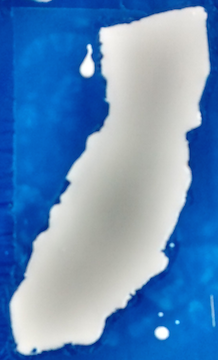
When I pulled it out it looked great. I was both a little bummed and impressed by the detail. I was hoping that it would not pick up the places where the glue spilled between the layers but it did. Overall I was really happy with the cast. When I put down the salamanders I was really happy. I think the students will observe much more clearly the relationship between the subspecies of salamanders.
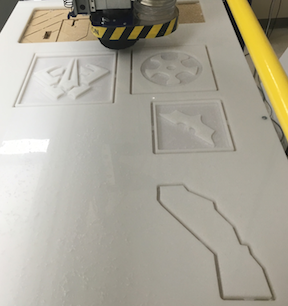
Apparently I needed to machine my object it with the shop bot. I made a negative and positive mold of my California model. I decided to only use the positive mold I took the bottom plate of my model. I will use the base as the design.
The V-carv files for the California cut are here.
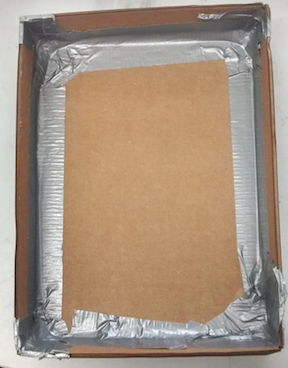
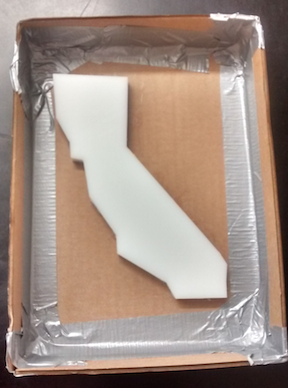
I then used 1/2" acrylic to cut out the California for the mold
After cutting the California I then created a cardboard tray and glued the California cut to the bottom of the cardboard.
After mixing the two components for the molding I next filled my box.
Using the same procedure as before I cast the California made with the Shopbot.
Conclusions
The thing that most surprised me was the level of detail captured by the mold. For example there were a couple spots where the glue spilled. These splotches of glue showed up on the mold. The other thing is that using acrylic works really well with molding and casting because it does not stick to mold.