Exercise 8: Embedded programing
Learning C
I have learned some of the basics of C programing and have made two very simple programs using xcode as a compiler. I have spent a lot of time reading a good book called C programming for the Absolute Beginner by Keith Davenprot and Michael Vine (Amazon Link). I really like this book because it really goes through fundamentals of programming.
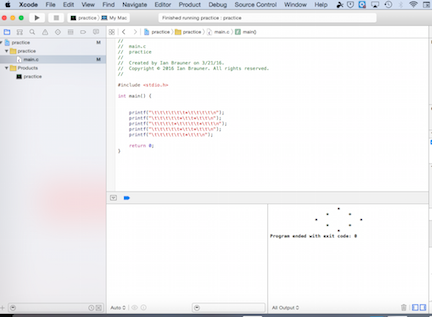
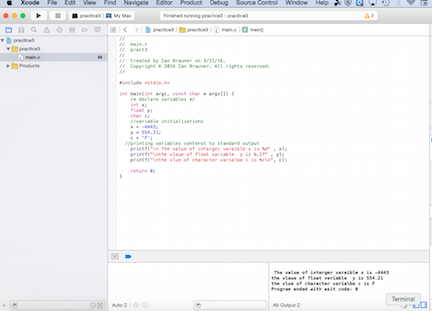
It is important to take into consideration my only experience with programing in C was about an hour of looking through a book on C programing about 15 years ago. What I really gained from reading about C was appreciation for the logic of programming. I now understand that programming is really about creating logic loops based on boolean algebra. Although I can not write my own code sufficient to run a I/O device, I understand now when reading code that its really about telling the device to evaluate outcomes as true or false (i.e boolean algebra) and then loop back and repeat an operation or end it and move on to another operation.
Getting a light to Blink on the hello world board's
Although I spent a lot of time reading about how to program in C, I decided to use the Arduino interface to program my board to get it working. First I downloaded the Arduino software and can be downloaded (here).
Installing Arduino program
After I installed Arduino 1.6.5 I needed to added the ATtiny to the boards so that the Arduino IDE can communicate with the ATtiny microcontrollers. The process is explained in detail (here) and involves going to preferences in the Arduino program and adding "https://raw.githubusercontent.com/damellis/attiny/ide-1.6.x-boards-manager/package_damellis_attiny_index.json" the address to the board manager.
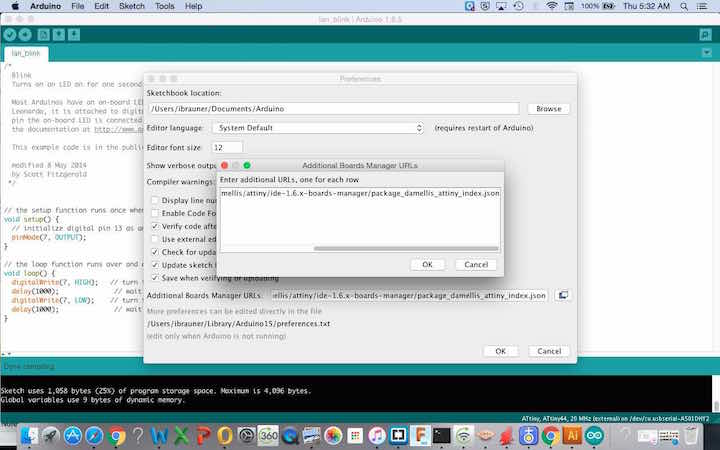
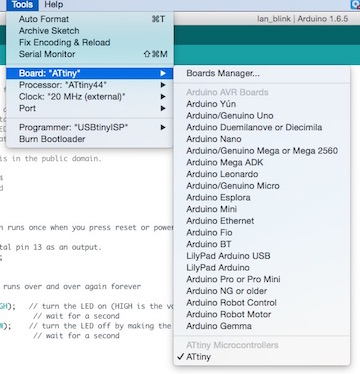
After this when you go to tools the ATtiny boards should apear.
Burning Bootloder
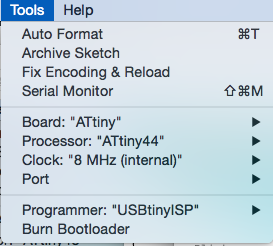
The first thing I needed to do was burn a boot loader to my ATtiny. Generally a boot loader is a program that runs when power is provided to the board and enables the board to be programmed without a programmer. For ATtinys it does not actually burn a boot loader but running a boot loader will set the fuses so that chip to run at the correct clock speed. However because it does not actually burn a boot loader an external programmer such as the FABISP or USBtiny ISP will be needed each time a new sketch is uploaded. A good tutorial on programing ATtinys can be found at (here). As the picture shows below under tools select the ATtiny board and then the correct ATtiny processor is selected, in this case the ATtiny44. It is also important set to the clock. Typically for most functions the internal clock will be set to 8 MHZ.
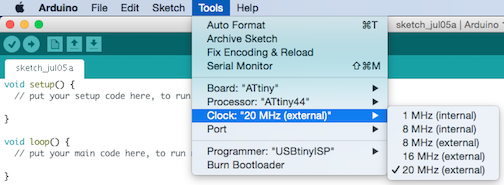
In this particular case we added a 20mhz external crystal so for this board this was selected.
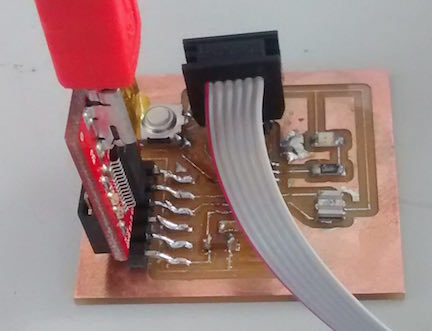
Now that I had the Arduino IDE set up to burn loader I needed to hook up the USBtiny and the FTDI cable. Once I selected these parameters under tools I then selected the correct port for USB. Then I selected under tools Burn boot loader. One thing to note is that for some reason the USBtiny does not supply power even though it has pins for power and ground. It is for that reason that the FTDI cable is added. There was a lot of confusion in my lab about which way the FTDI cable should go. That is the reason for example in the picture that pins are turned up. Because I did not design the board so that the edge of the copper lined up to the edge of the pins of the header for the FTDI it could only plug it in one direction and it needed to go in the other way. That is why the pins are turned up in the picture. The FTDI cable here is only providing power and so the voltage and ground must line up. If you are using a FTDI basic from Sparkfun then USB connector should be facing up for the voltage pin to connect to the correct pin on the board. Likewise there was a lot of confusion about which direction the 6 pin ISP header should go. For most ISP header the red line on the ribbon cable is next to the MISO. So it is just a matter of checking the pin out on your board to making sure redline matches up with the MISO
Programing the Hello world board Using Arduino
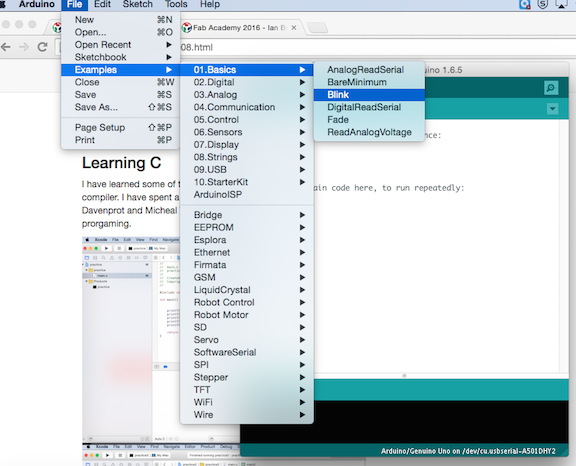
Next to program my Hello world board I found some Arduino code for making a light blink from the examples on the arduino.
or the code can be downloaded (click here)
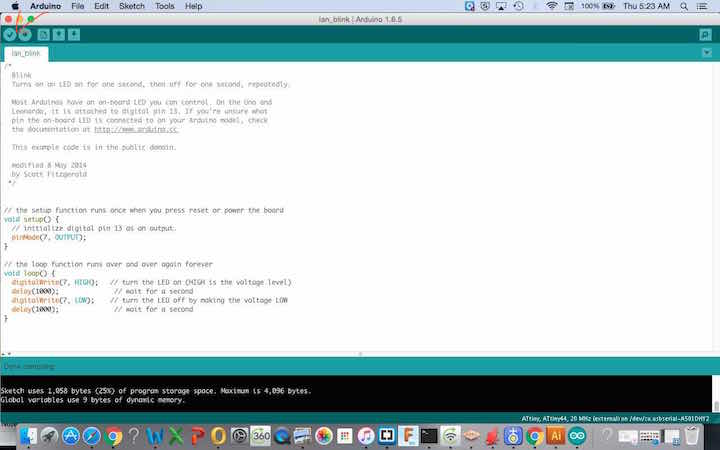
The only thing I had to change was the pin number to correspond to the pin 7 on the ATtiny44. Pin layout is a bit confusing because there is the physical address and the pin identifications for Arduino programming. The pin layouts for all of the ATtiny processors can be found here. When looking at the pin layout you will notice that the pin 7 used in the Arduino code actually has a physical adress of 6 on the ATtiny44. Another thing to note about the code is that it does not define the variable for the led pin and so it has to be changed throughout the code.
My blink code can be downloaded click here.
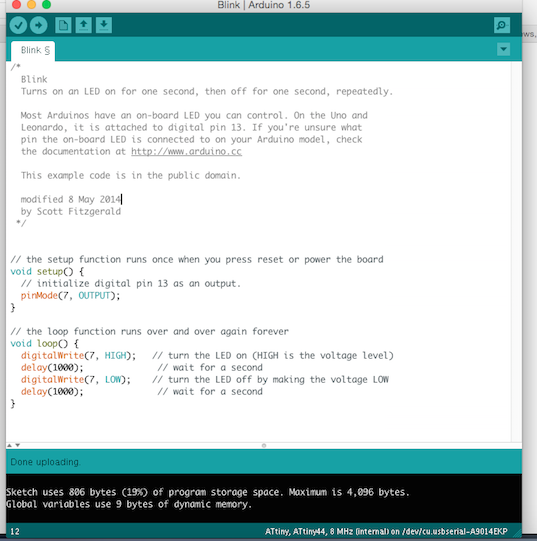
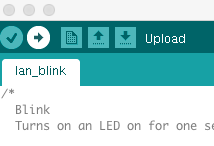
Once the code is changed I compiled the code to make sure there were no problems such as things defined improperly. To compile the code I clicked on the check icon in the upper left corner of the Arduino IDE. In this case the code compiled and it was just a matter of uploading the sketch. To do this click on the arrow next the check used to compile the code. If the sketch does not upload it usually is because you have not selected your setting properly. The most common culprit is making sure you have the correct port selected. In my case the code uploaded with no problem.
To do this click on the arrow next the check used to upload the code. If the sketch does not upload it is usually because you have not selected your setting properly. The most common culprit is making sure you have the correct port selected. In my case the code uploaded with no problem.
To view my blinking board in all of its glory watch the video, but only if you can handle its awesomeness.
Reading the Amtel DATA Sheet
I also read through the Amtel Data sheet on the ATtiny. Most of it I only vaguely understand what it is talking about but I do have a sense of what kind of information there. I thought it was interesting to see what the internal architecture of the chip looked like. Also a lot of the data sheet seems to deal with how to optimize power consumption by the chip. When I get more advanced in using these chips I am sure it will be a useful resource just as Neil referred to it in his recent lecture.