Exercise 2: Computer Aided Design
Understand the meaning of Digital Fabrication
Today we had a lab meeting during which David Taylor reviewed how to draft different shaped objects on a graph. It was very interesting and helpful to learn how to represent different perspectives when making line drawings. Most helpful was how to show an object projecting into the foreground or how to show a cutaway section in an object.
I also downloaded 123 Design, which helped me finally appreciate the meaning of digital fabrication. A FabLab has a lot of tools, which can make an object with the push of a button. The real skill is not making something but designing it. This is in contrast to say woodworking. When I lived in Indiana I built a dining room table out of roughcut Michigan cherry. It took me about 5 minutes to download a plan off the internet and three years to hand craft the pieces into a table, in this case the building is the real process.
As we discussed today in our lab meeting the magic of digital fabrication is the ability to modify an object. So for example an object designed with digital fabrication can be easily scaled using the correct program. For example, with parametric design, if you are using material that is going to be ¼ inch, you would not need to change every parameter if you wanted to make a table half as large.
I also thought about the importance of using the FabLab to make the tools of fabrication. I am reading the 7 Daughters of Eve by Bryan Sykes. He talked about how PCR machine had just been invented and was prohibitively expensive and so he made his first PCR out of washing machine parts. In a FabLab now, my students built the OpenPCR for $600. The Fab Lab is a way to make tools like the PCR and to get them into the hands of people who could not otherwise use them.
Drafting
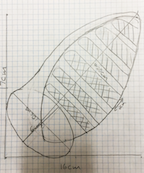
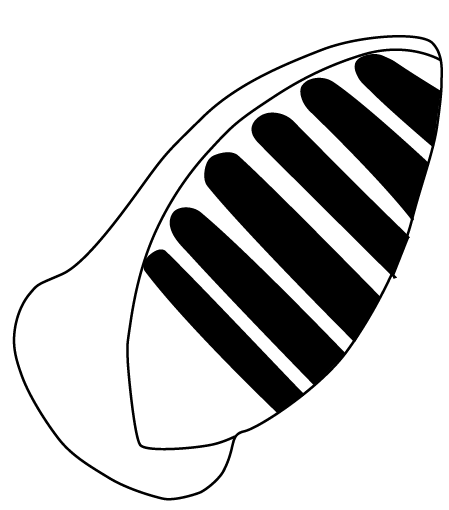
I used graphing paper to draw the bat ears. I started by finding drawings of bat ears on goggle images. I also found a series of directions on how to draw bat ears starting with geometric shapes ( click here. ).
2/4/2016
Using Adobe Illustrator
I had a lot of trouble getting Inkscape to work on my computer. It appears the XQuartz loads and the Inkscape loads fine but it just never loads. The one person who seems to have Inkscape working is using El Capitan, which I cannot load on my work computer for reasons not worth explaining. So I upgraded my old MacBook to El Capitan. While that somewhat extended process was going on I decided to play around with Adobe Illustrator.
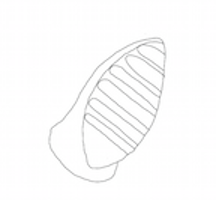
Using Illustrator, the first thing I tried was drawing my bat ear using shapes. This did not work because I realized that you cannot use nodes to manipulate ovals. You can stretch them and squeeze them but not shape them.
I next tried using the pencil tool. It works pretty well but it provides a lot of nodes and results in an uneven line. There is a pencil-smoothing tool but it did not seem to help much. I also may not be using it correctly.
To download the file click here.
Next I tried to use the pen tool. With this tool you click nodes, which then connects them. The one thing I did like about it is that you could add on to a continual line even after you have clicked away from the line. The pen tool worked much better than the pencil.
To download the file click here.
2/9/2016
Inkscape
I finally got Inkscape to work on work on my old computer. It appears that, at least for me, loading Inkscape with El Capitan worked better than using Yosemite.
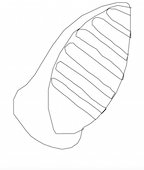
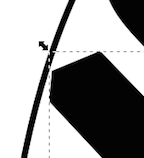
As you can see from the pictures with Inkscape I was able to get much cleaner lines when tracing.
In addition I really liked the rounding tool on Inkscape. By selecting three nodes I could use the rounding button to easily get rounded edges.
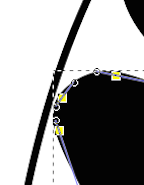
I am sure this can be done in Adobe Illustrator but it was a lot more intuitive in Inkscape. Aside from the problems with loading Inkscape I think it is a much better program because it is less loaded with things I do not need and so it is easier to find the things I do need and it's free. Below is the final drawing I was able to make in Inkscape.
To download the file click here.
3D Design
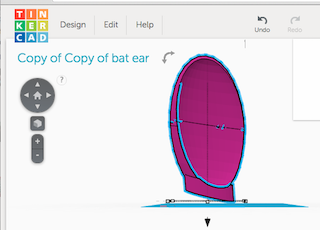
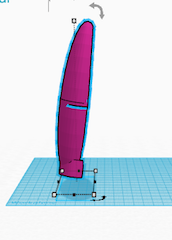
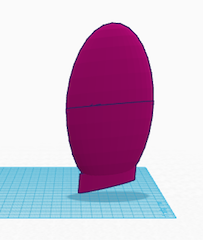
TinkerCAD
I next used Tinkercad to 3-D model a bat ear. I first tried to use a single ball and distorted it. This did not work very well because I could not get the ball into a flat oval. What I found worked best was using two cones and inverting them.
To download my file
click here.Fusion 360
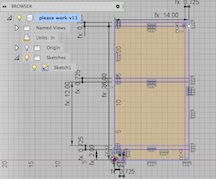
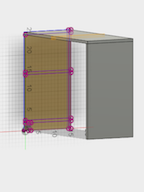
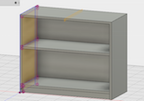
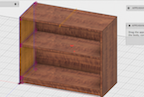
Well that was ridiculously hard. I spent 5 hours trying to build a bookshelf using fusion 360. Spoiler alert: I did eventually build it but not before wanting to bang my head on my desk. To make the bookshelf I followed a tutorial that started with putting in the parameters for each of the pieces . This was a reasonably straightforward process. The only thing that made me mad was the fact I had to do it 15 times before I finished my bookshelf. The really hard part about using Fusion 360 was figuring out how to define the dimensions. It is not actually that hard but doing it is not an intuitive process. What makes Fusion 360 hard is that you can't manipulate as in Tinkercad, which is much more like sculpting. Because you have to set your parameter ahead of time with Fusion 360 you cannot really “mess around” and see what you get. On the flip side when you are done it is really cool. Because you are building with parameters it is incredibly precise. When I was done it was a perfect looking bookshelf.
Antimony
2/10/2016
Antimony is really hard in that it’s basically making shapes through coding. I am sure this is really powerful, especially for modeling the behavior materials and objects but it is not easy to understand when you are just starting out. Having said that I successfully made a handle to a screwdriver (for the tutorial click here ). The tutorial was a Vimeo video and the only thing I found a bit frustrating is that Antimony has changed since many of the tutorial were done. (note: I have found this with many of the CAD programs and is a frustration across the board with menus that constantly change). Now that I see how it works it is really cool.
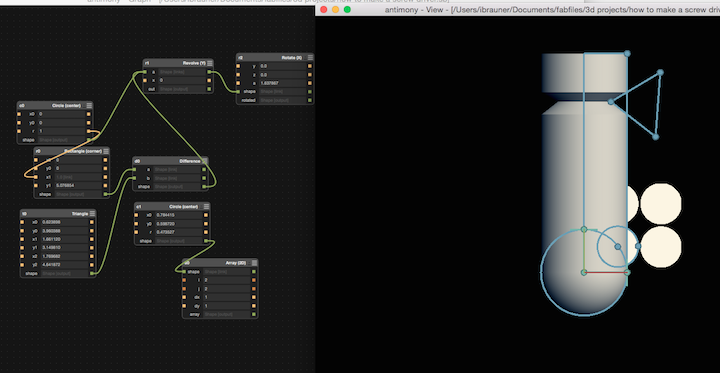
To download my file click here.
Conclusion
I really like digital design. The more things I make, the more I realize that ideas/problems do not come to me until I draw it digitally. When I create something in digital design I immediately start to get ideas, just as if I had made it. Second, the best piece of advice I have had about digital design is to zoom in. I have found that 90% of mistakes can be found by zooming in. I have found that small things like overlap or gaps can be found when you zoom. Finally the two programs for digital design that I found most useful are 123Design and Inkscape. I like fusion 360 as a cad program but honestly it has a very non-trivial learning curve and I feel like 123 Design is probably good enough to design most things especially for 3Dprinting. Now having said that I get that Fusion 360 is really useful when trying to see how pieces that for example must interlock will fit together. I do want to learn Fusion 360 better but no matter what I think 123Design will be my go-to CAD program.